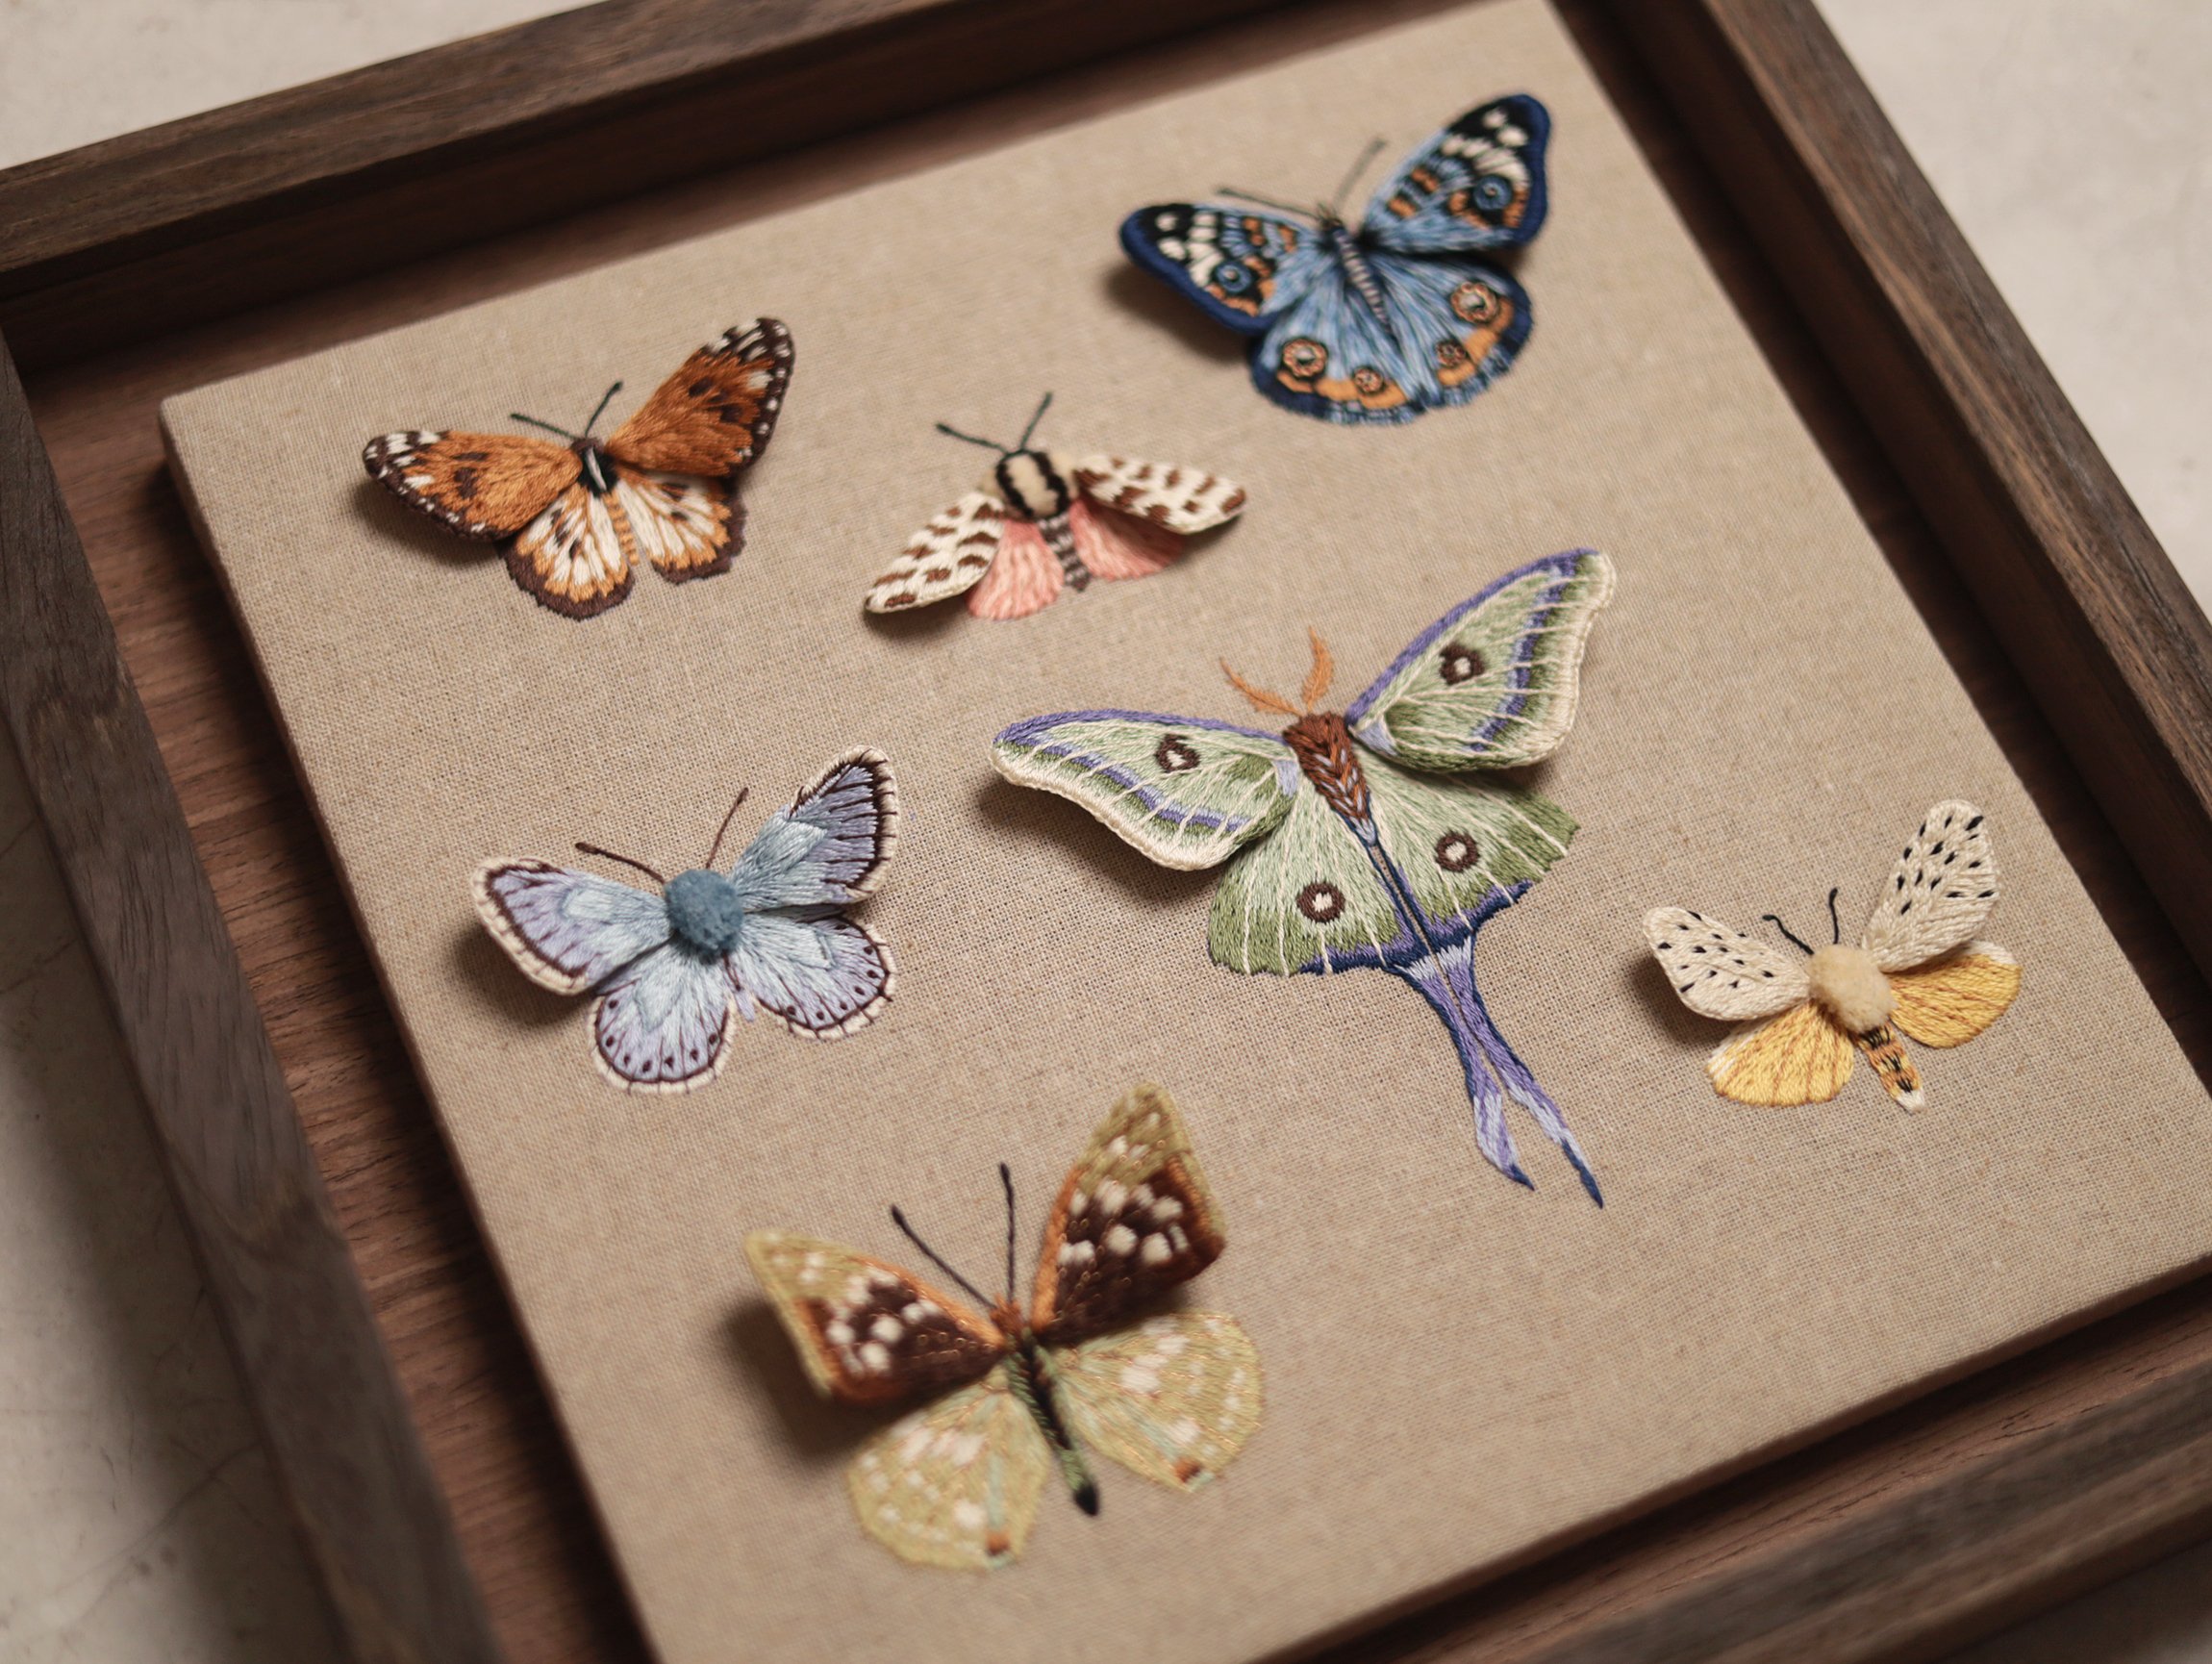
3D Butterfly Collection
Stumpwork Embroidery DIY Kits
Full Embroidery Tutorials
Embroidery Tips for Beginners
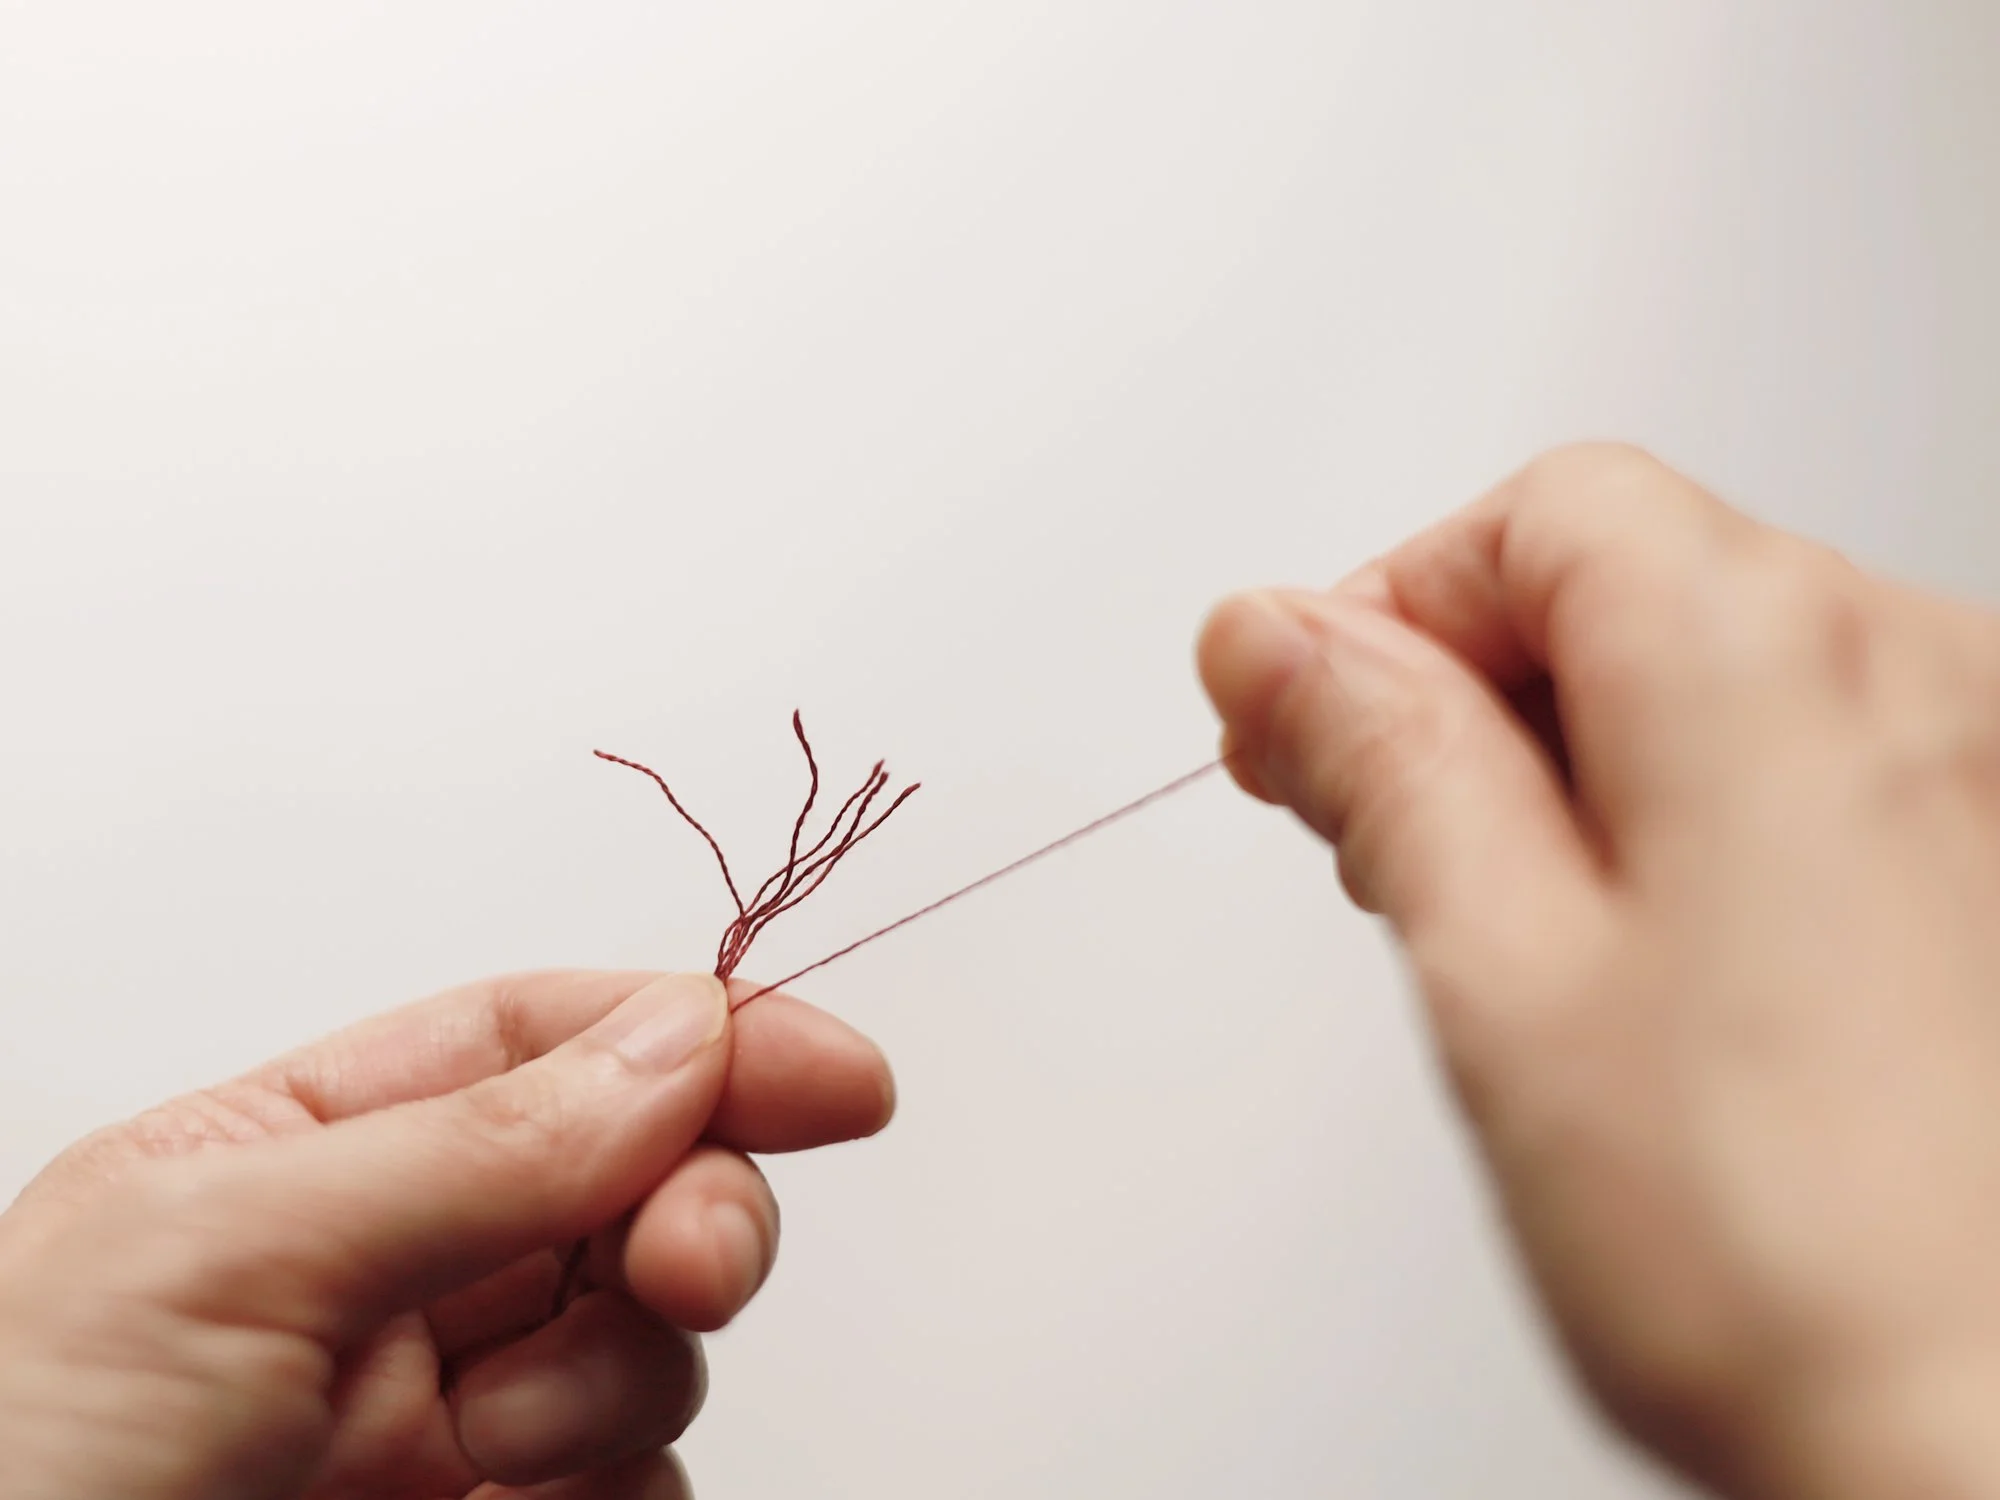
Stranded cotton embroidery thread is made up of 6 strands. Our Embroidery Pattern and video tutorials clearly indicate how many strands to use for each part of the design.
Cut the thread to the desired length, hold it in one hand, and pull the strand out one by one until you have the required number. Gather them into a single bunch for stitching.
Use one of the illustrated methods to thread the needle. Method A can be used for any number of strands, while Method B is suitable only for an even number of strands.

Tutorial Guide
This stunning 3D butterfly collection is available in a range of options: you can either purchase a Frame Kit with the wooden frame and a full set of 7 butterflies with all the materials you need, “stick & stitch” stickers, or just the digital PDF pattern with instructions.
For the Frame Kit (or to make semi-3D butterflies with raised forewings), please follow the Video Tutorial 1.1 for the first butterfly (moth). You can skip Tutorial 1.2 as it demonstrates how to make brooch, and follow the remaining tutorials for other butterflies/moths.
(Note: An extra pair of forewings for the first moth is printed on the felt in the frame kit so you can practice making the 3D wings if this is your first time doing stumpwork.)
To make butterfly brooch (i.e. fully-3D butterflies), please watch the Video Tutorial 1.2 first, which demonstrates how to make the first butterfly (moth) into a brooch. The method is exactly the same for all the other butterflies/moths in the collection, and hence not repeated in the other tutorials. The tutorials for the remaining six butterflies focus mainly on the embroidery process.
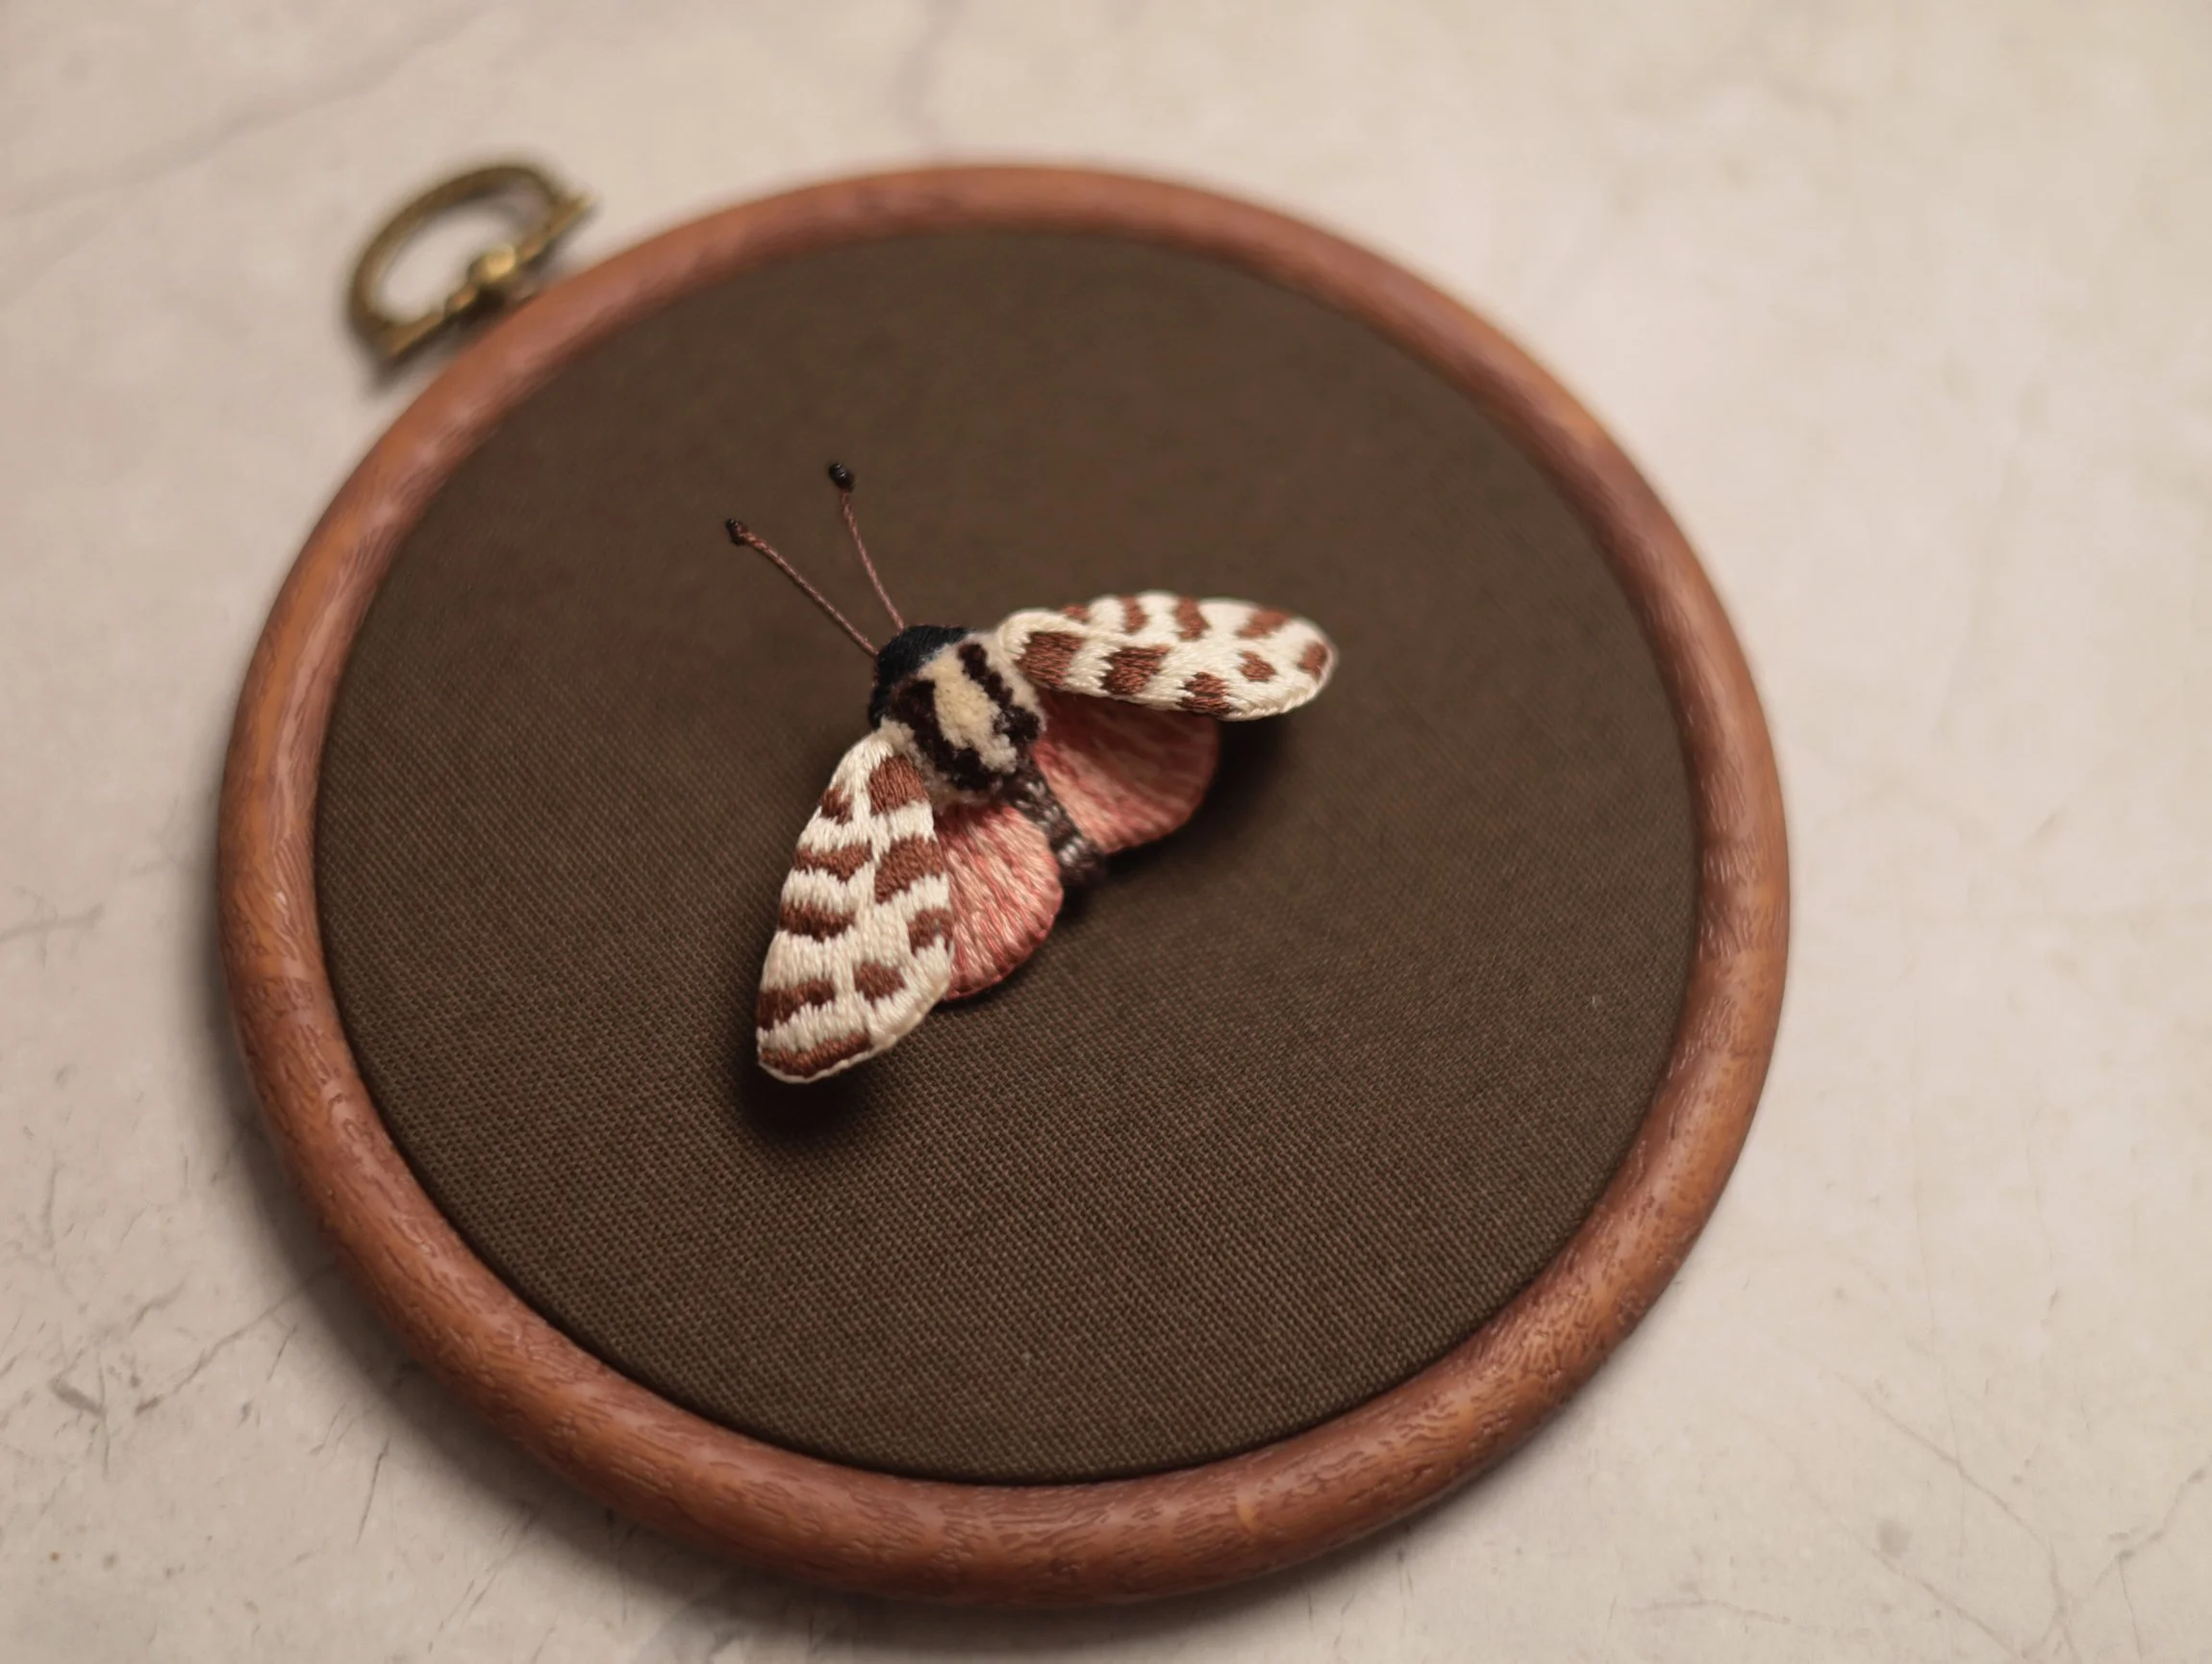
1.1 Apantesis Incorrupta - Frame Version
1.2 Apantesis Incorrupta - Brooch Version
Use this tutorial as a general guide for making all other 3D butterfly brooches.
2 Erebidae Arctiinae
3 Danaus Chrysippus
4 Lysandra Coridon
5 Junonia Coenia
6 Actias Luna
7 Sasakia Charonda
Finishing (Frame Kit ONLY)
1. Once the embroidery is complete: lightly apply a hot iron to the printed areas to erase the pattern.
2.Follow the instructions in the video tutorial below. If you choose not to have the cover for the frame, you can skip the part to install the four strips.
Congratulations! Your embroidery project is now complete!
Visit our website www.montbleu.co.uk for more fun projects. (If you’re also a bread lover, be sure to check out our Bakery Treats embroidery kit too! )
If you spot any mistakes in this tutorial or our video tutorials, have suggestions for improvement, or would like to share your finished projects, please don’t hesitate to contact us.