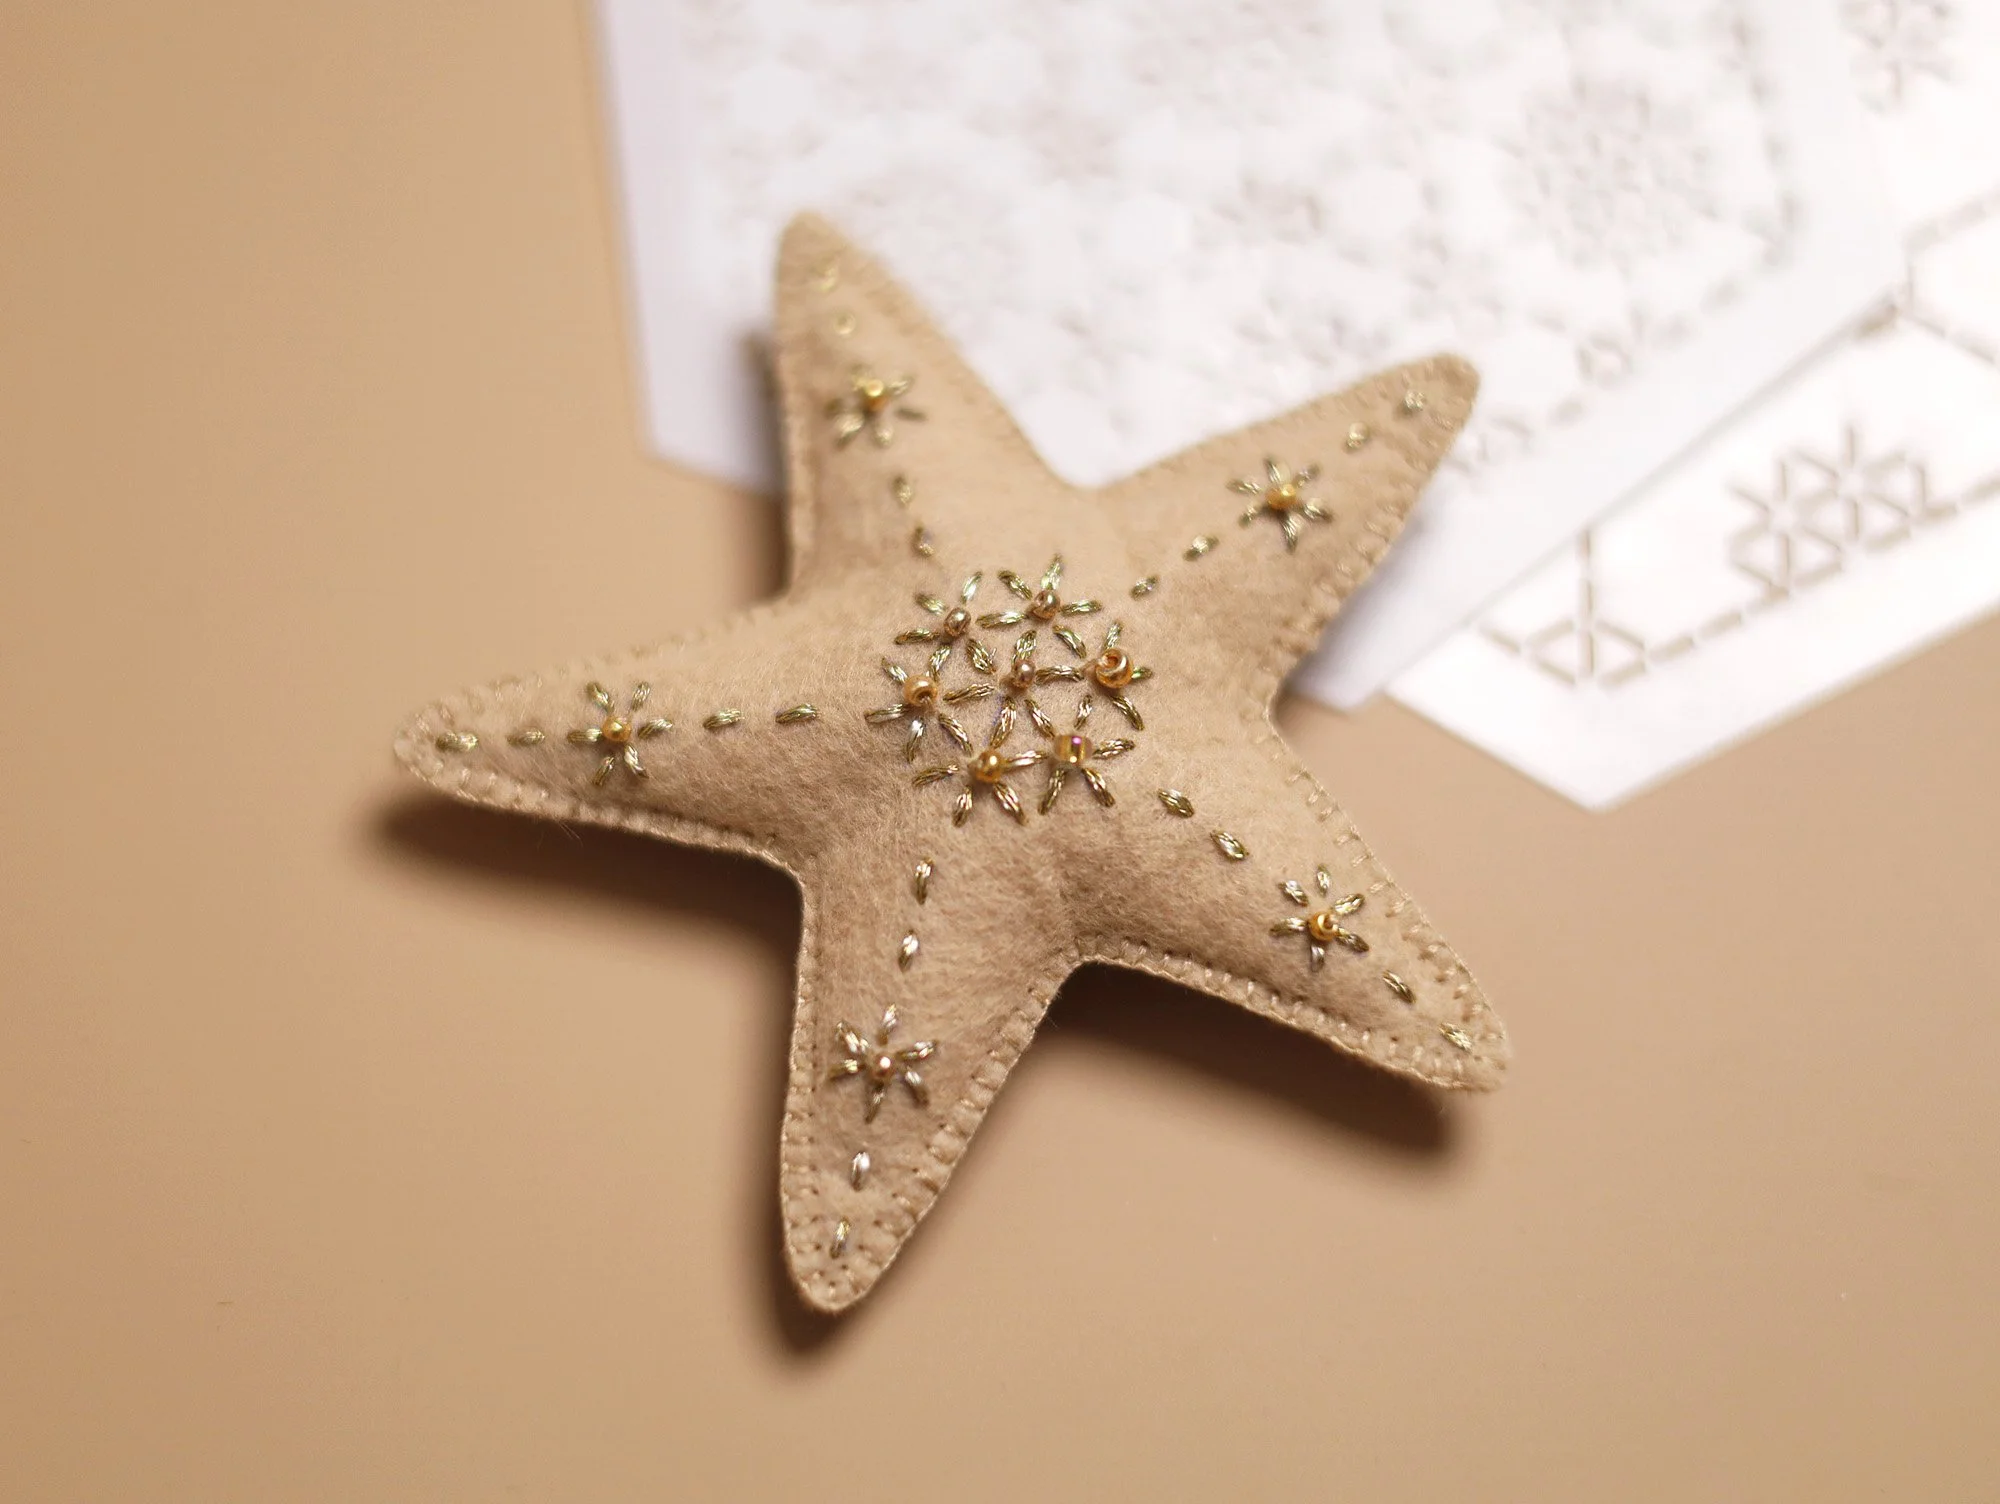
Sashiko Advent Tree Tutorial
This tutorial demonstrates how to make the Sashiko Advent Tree shown in the cover photo. You can customise the size of your tree by increasing or reducing the number of rows or the size of the triangles. You can also use the same method to create a festive garland.
Project Notes
This project is a great scrap buster! Gather your fabric and thread scraps, mix and match colours and patterns, and turn them into a beautiful Christmas tree!
Fabrics and Thread: Woven cotton or linen fabric and Sashiko thread. You will need approximately 3 m of Sashiko thread per triangle, depending on the pattern you choose.
Interfacing: For thick fabrics, interfacing is not necessary. For medium- or lightweight fabrics, you can use any interfacing you have, choosing the thickness and texture to suit your preference. We used lightweight fleece interfacing simply because we had some on hand.
Sewing Method: Machine or hand-sewing for individual triangles; hand-sewing for joining them together.
Embroidery and Sewing Tutorial
1. Prepare fabric pieces:
The paper pattern does not include a seam allowance, as it is not needed for our sewing method.
Since you will be making quite a few triangles, you may find it helpful to make a sturdier template. Simply stick the paper pattern onto a piece of thick card and cut it out. I made my template using transparent plastic, which is useful if you want to see the Sashiko pattern underneath when positioning it.
Place the triangle pattern or template on the right side of your main fabric, leaving enough space around it for the seam allowance. Trace around it using a heat-erasable pen.
Transfer your chosen Sashiko pattern onto the fabric within the triangle. I used our stencils and a heat-erasable pen to trace the patterns directly onto the fabric. (**Check the notes below before tracing.**)
Cut out the fabric if needed, leaving sufficient space around the triangle for the seam allowance. There is no need to cut precisely, as the seam allowance will be trimmed later.
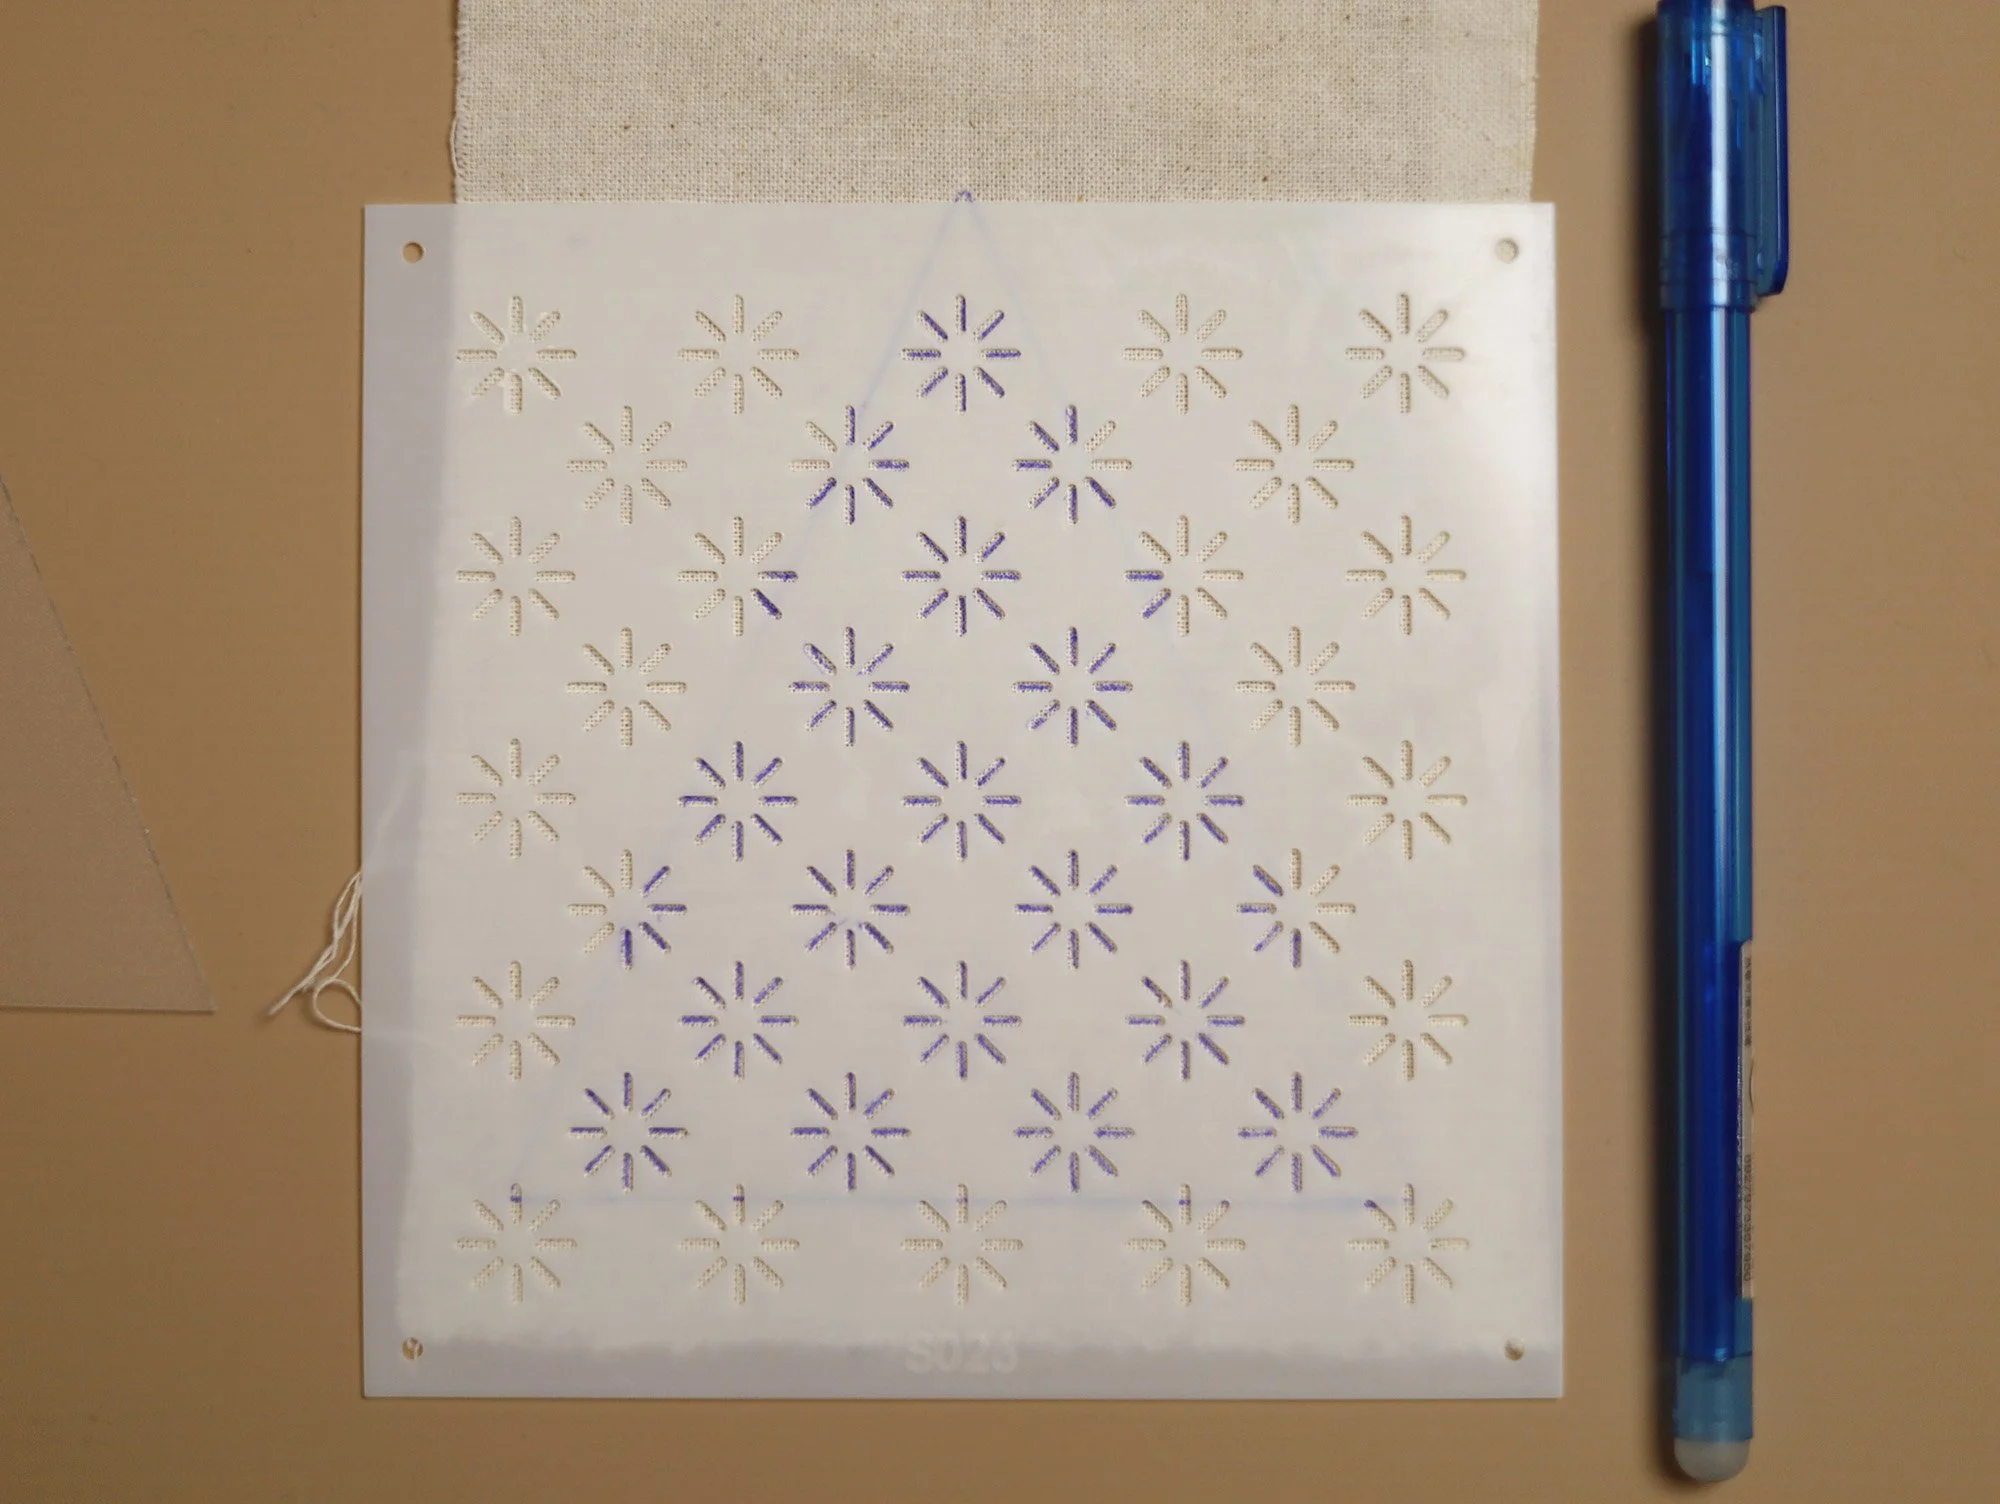
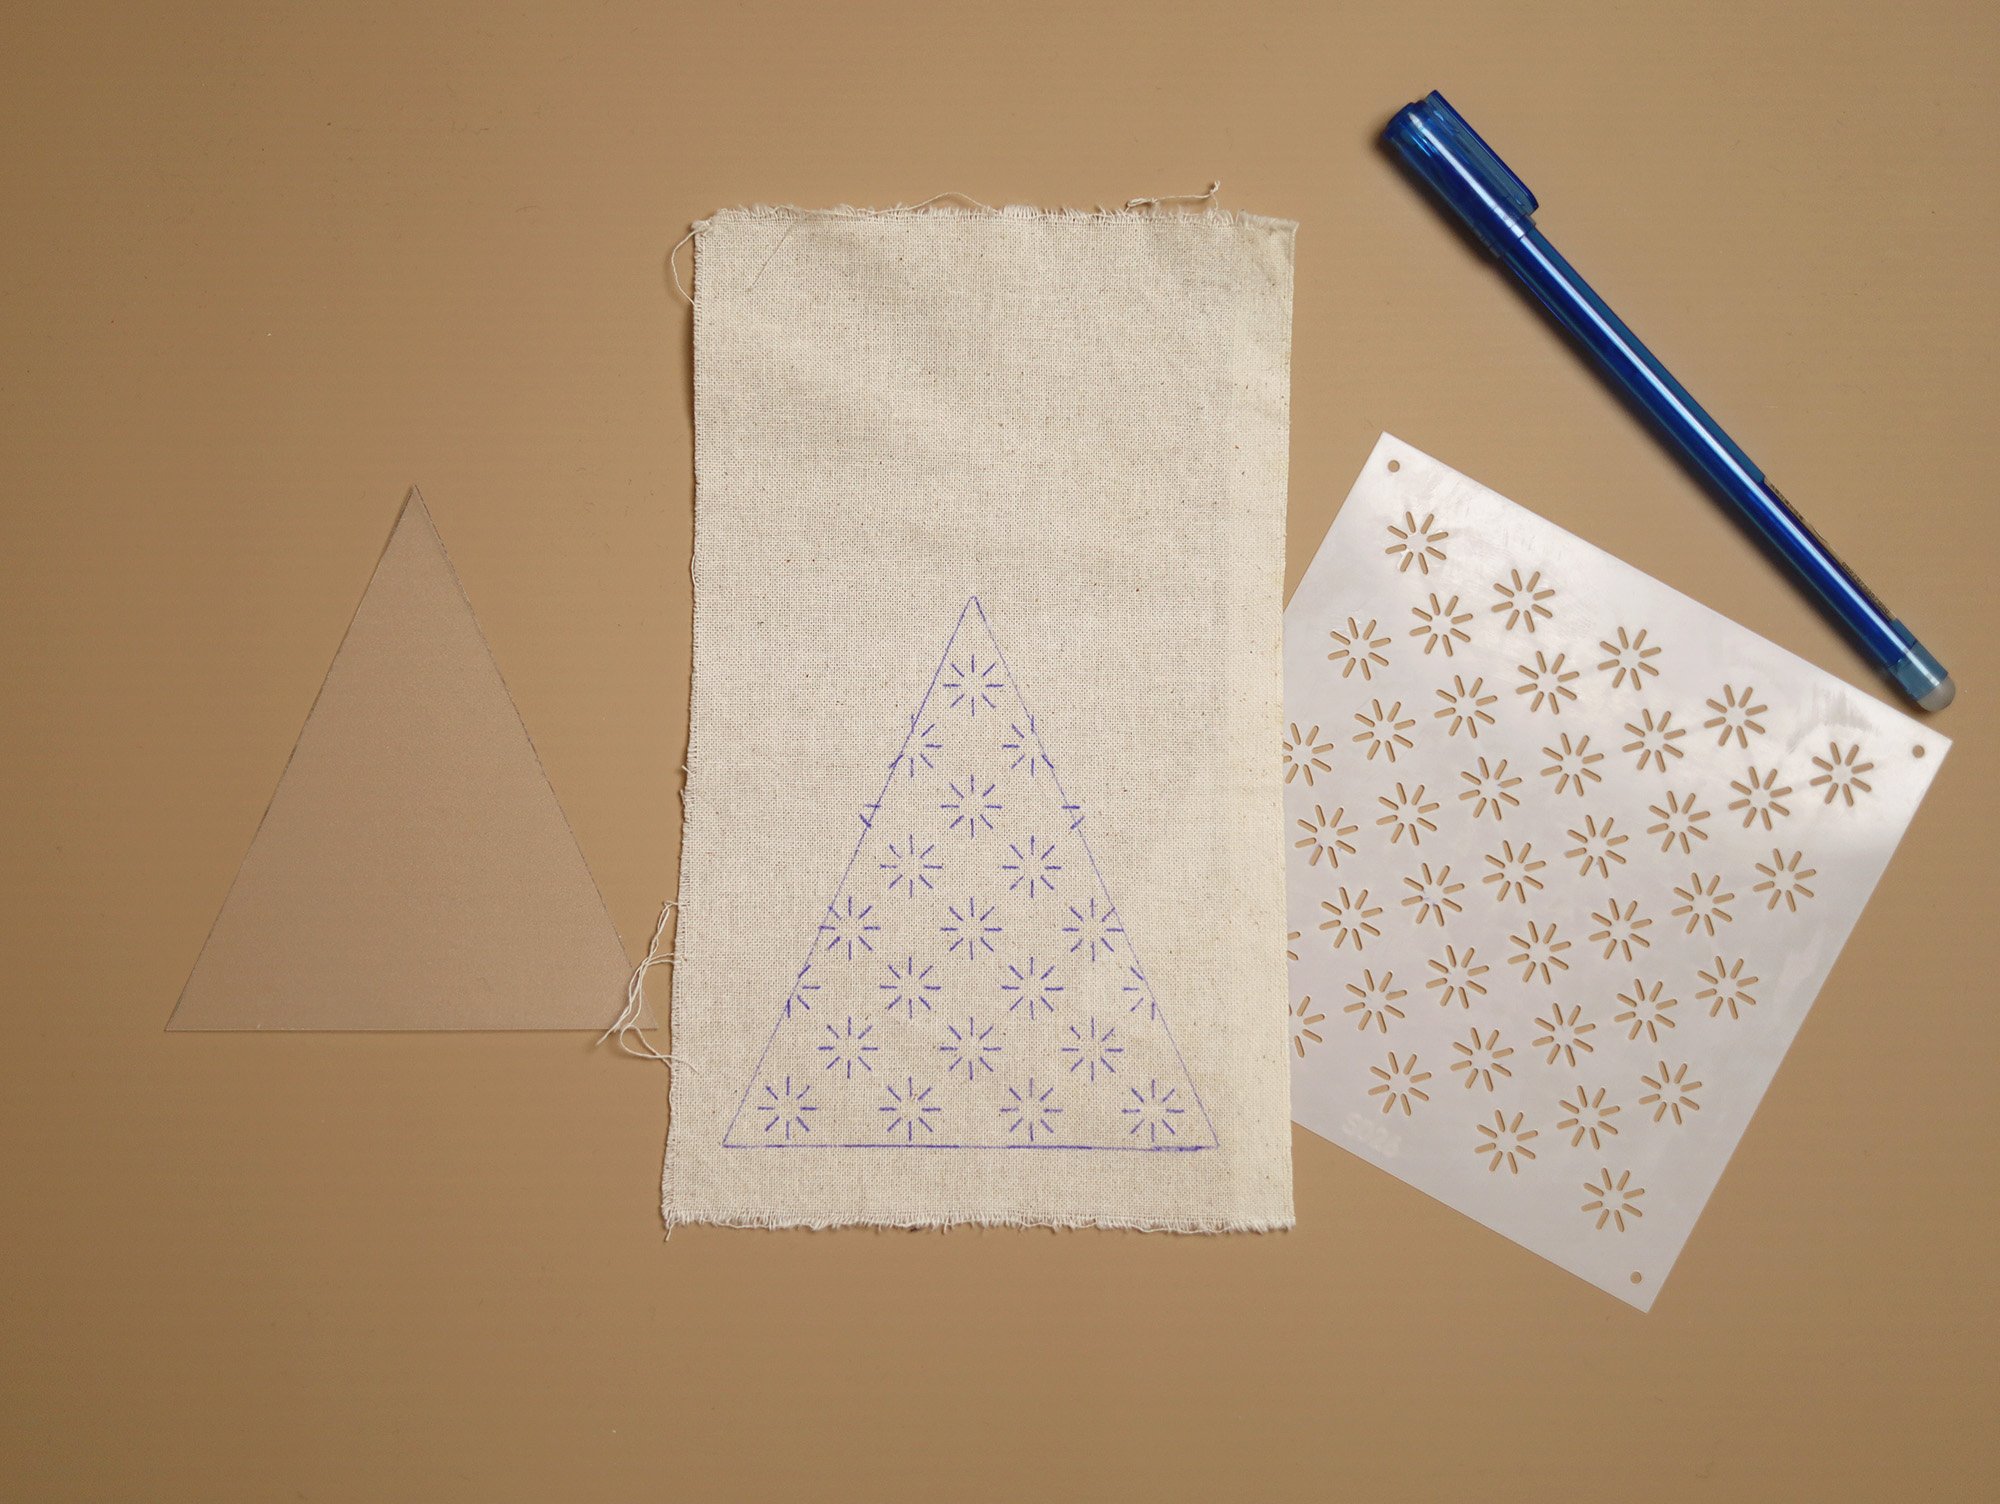
Stitch the Sashiko pattern on the fabric.
Note:
If you are using thick or dark-coloured fabric, it is easier to do the Sashiko stitching directly on the fabric before attaching the interfacing. However, for thin or light-coloured fabrics, like the one shown in my photos, it is better to attach the interfacing first.
To attach the interfacing, follow the next step. If you have already transferred the Sashiko pattern, simply clip, pin or baste the interfacing in place on the wrong side of the fabric, then start stitching.
Sashiko stitching uses simple running stitches throughout the design. It is traditionally worked with a single strand of Sashiko thread, without a hoop. After completing each line of stitching, use your fingers to gently smooth out any gathering along the line. The stitches should lie relaxed on the fabric without pulling or creating tension. Move on to the nearest line and continue stitching until the entire pattern is complete. If there is no nearby line to continue with, secure the thread with a knot at the back, then start stitching the next line.
2. Cut and attach the interfacing:
Use a pin to mark the three corners of the triangle on the wrong side of the main fabric. Align the triangle pattern or template with the three marked points, then trace the outline onto the fabric using a non-heat-erasable fabric marker.
Trace the triangle pattern onto the non-glue side of the interfacing and cut it out.
Tip:
When cutting fusible fleece interfacing, trim it approximately 1–2 mm inside the traced outline. Leaving a small gap between the edge of the interfacing and the stitching line helps reduce bulk and gives a cleaner, neater finish. For fabric interfacing, you do not need to trim it smaller.
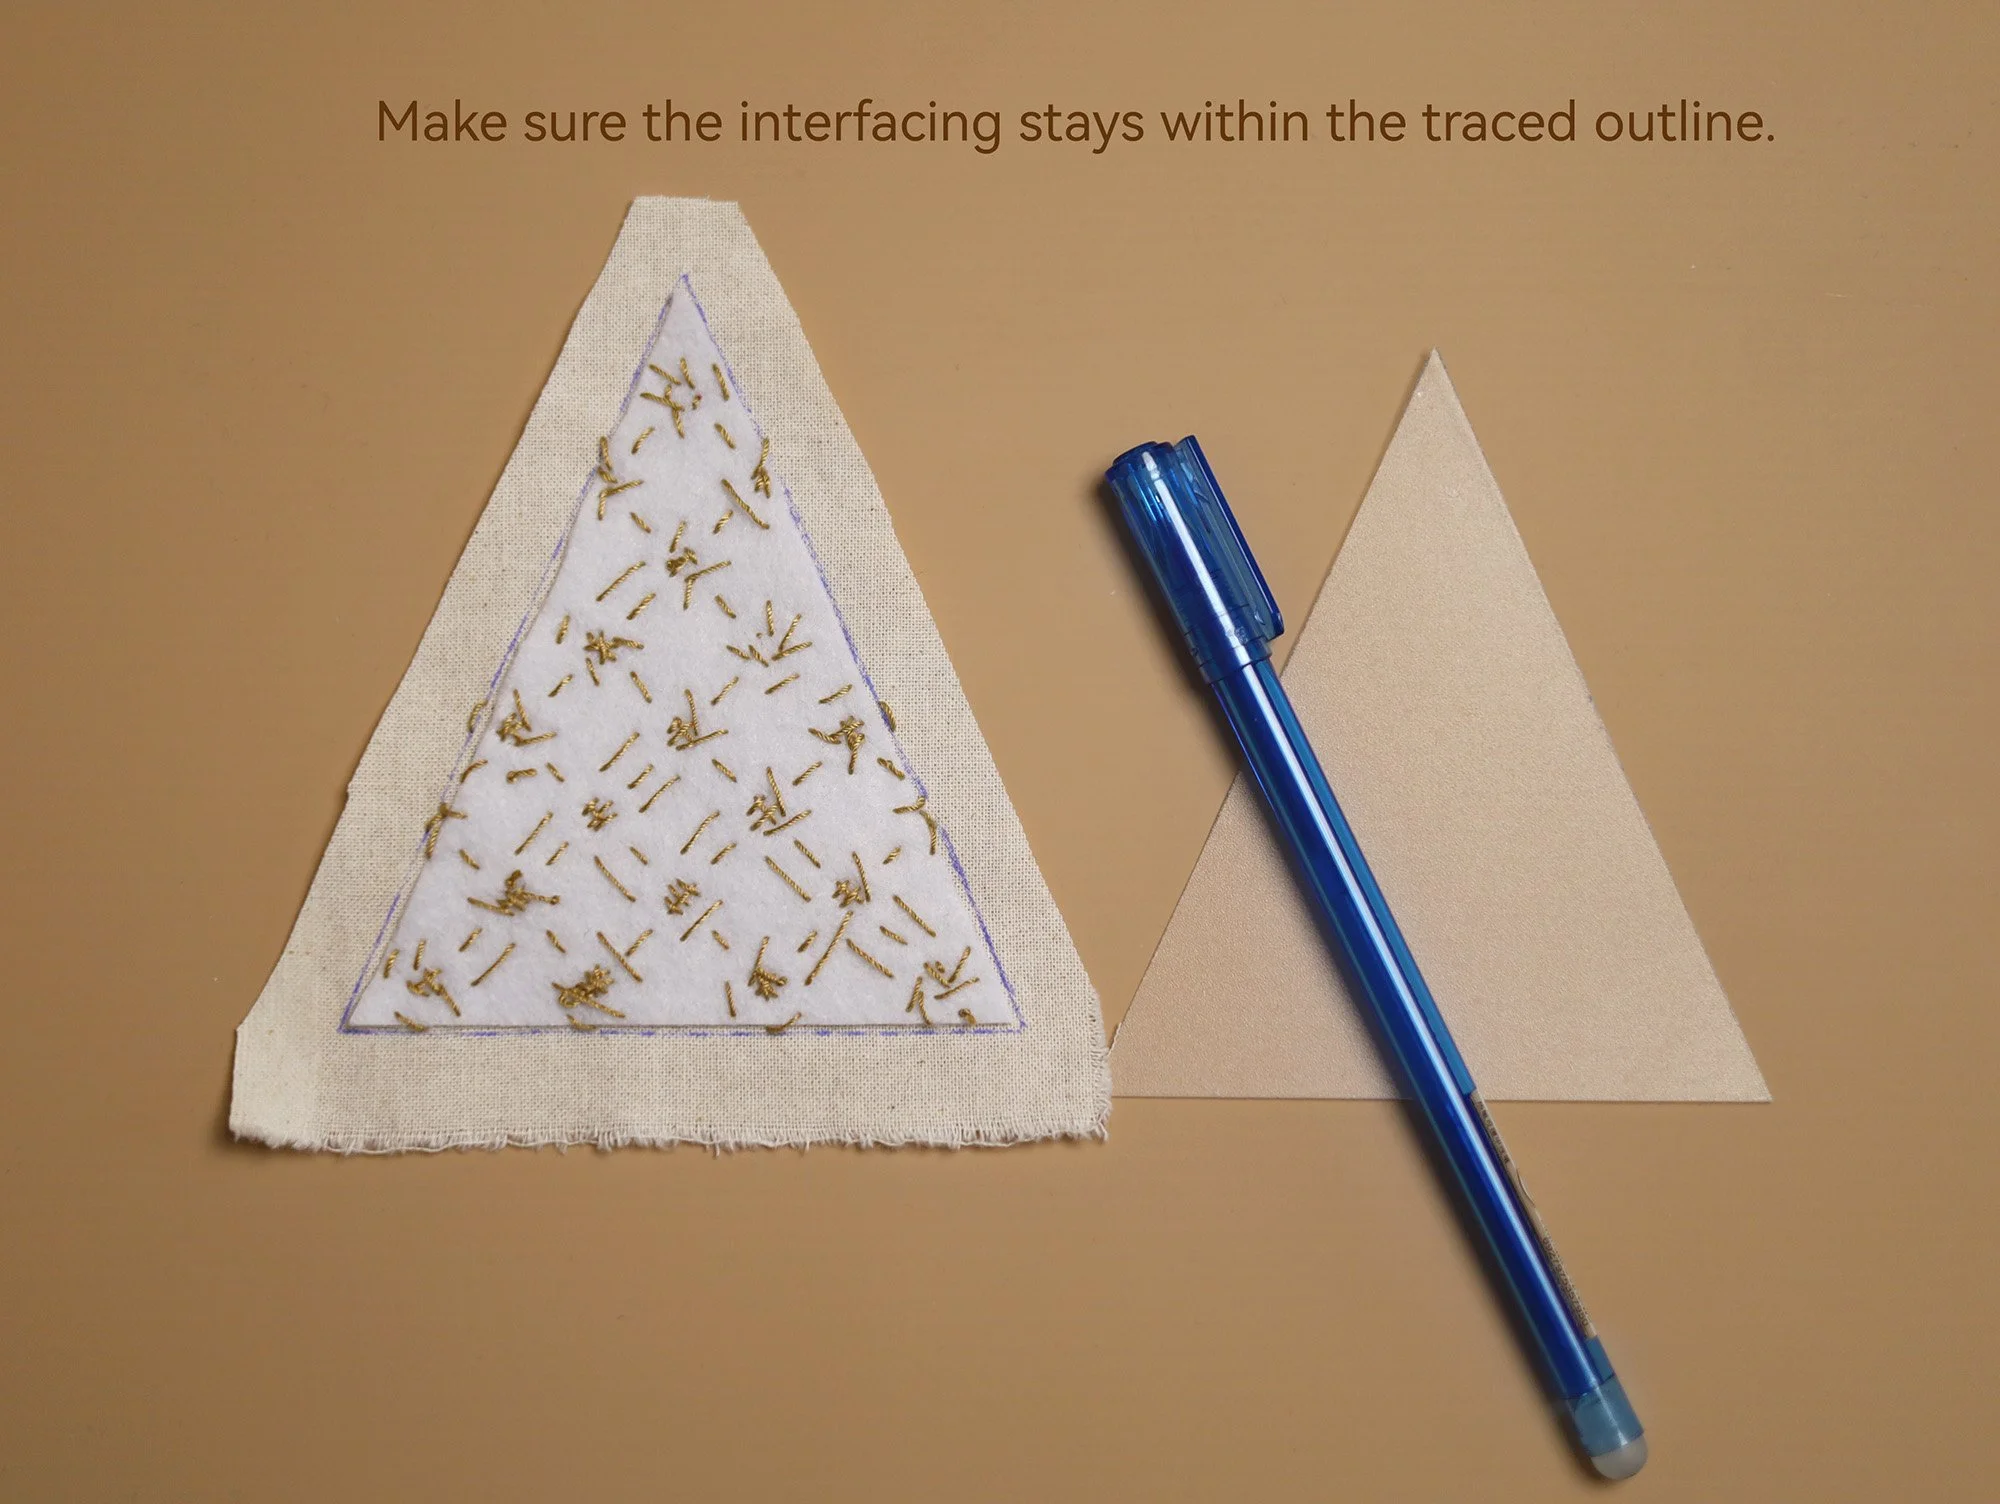
Place the interfacing inside the triangle outline on the wrong side of the main fabric, leaving a gap of approximately 1–2 mm between the interfacing edge and the traced outline.
Press from the right side of the main fabric to fuse the interfacing in place, making sure it stays within the outline and maintains a gap around the edges. Trim the interfacing along any edges where it overlaps the traced outline.
3. Sew the triangle:
Place the main and lining fabrics right sides together. Cut the lining fabric roughly to the same size as, or slightly larger than, the main fabric. There is no need to be precise at this stage.
Sew along the traced outline, leaving an approximately 4 cm opening along the bottom edge for turning.
Trim the seam allowance along the two sides of the triangle to 3–5 mm, and along the bottom edge to 5–8 mm.
Clip the seam allowance at the corners, taking care not to cut into the stitching line.
Separate the main and lining fabrics at the opening and turn the piece right side out. Shape the triangle, gently push out the corners, and carefully tease out the tips using a large needle.
Close the opening using a ladder stitch (hidden stitch), then press with a hot iron.
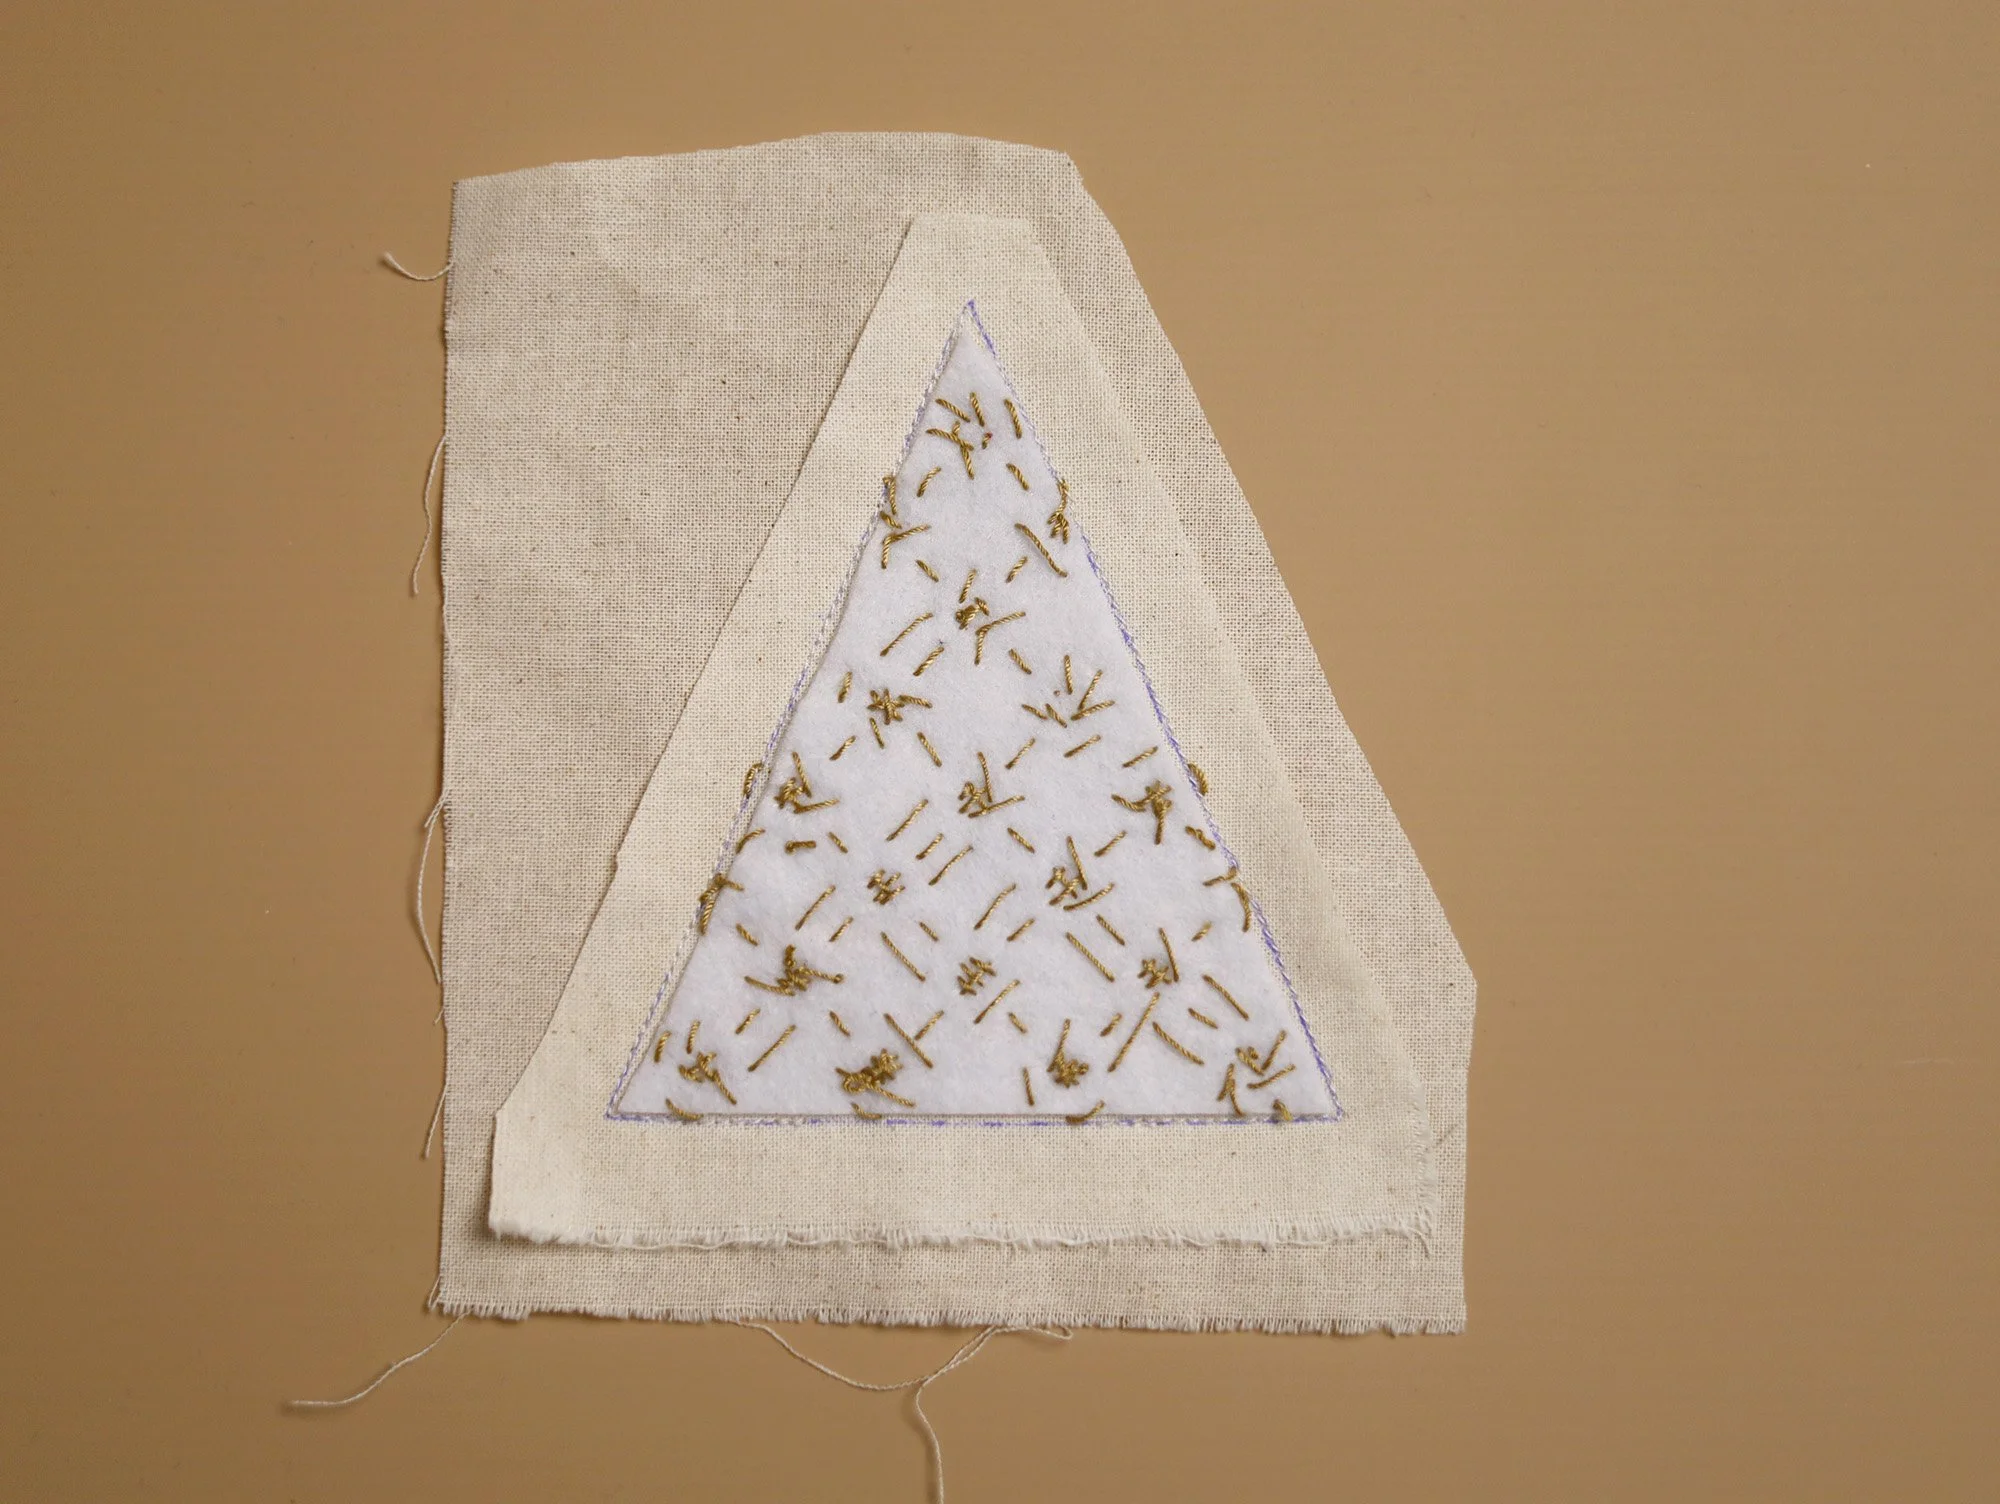
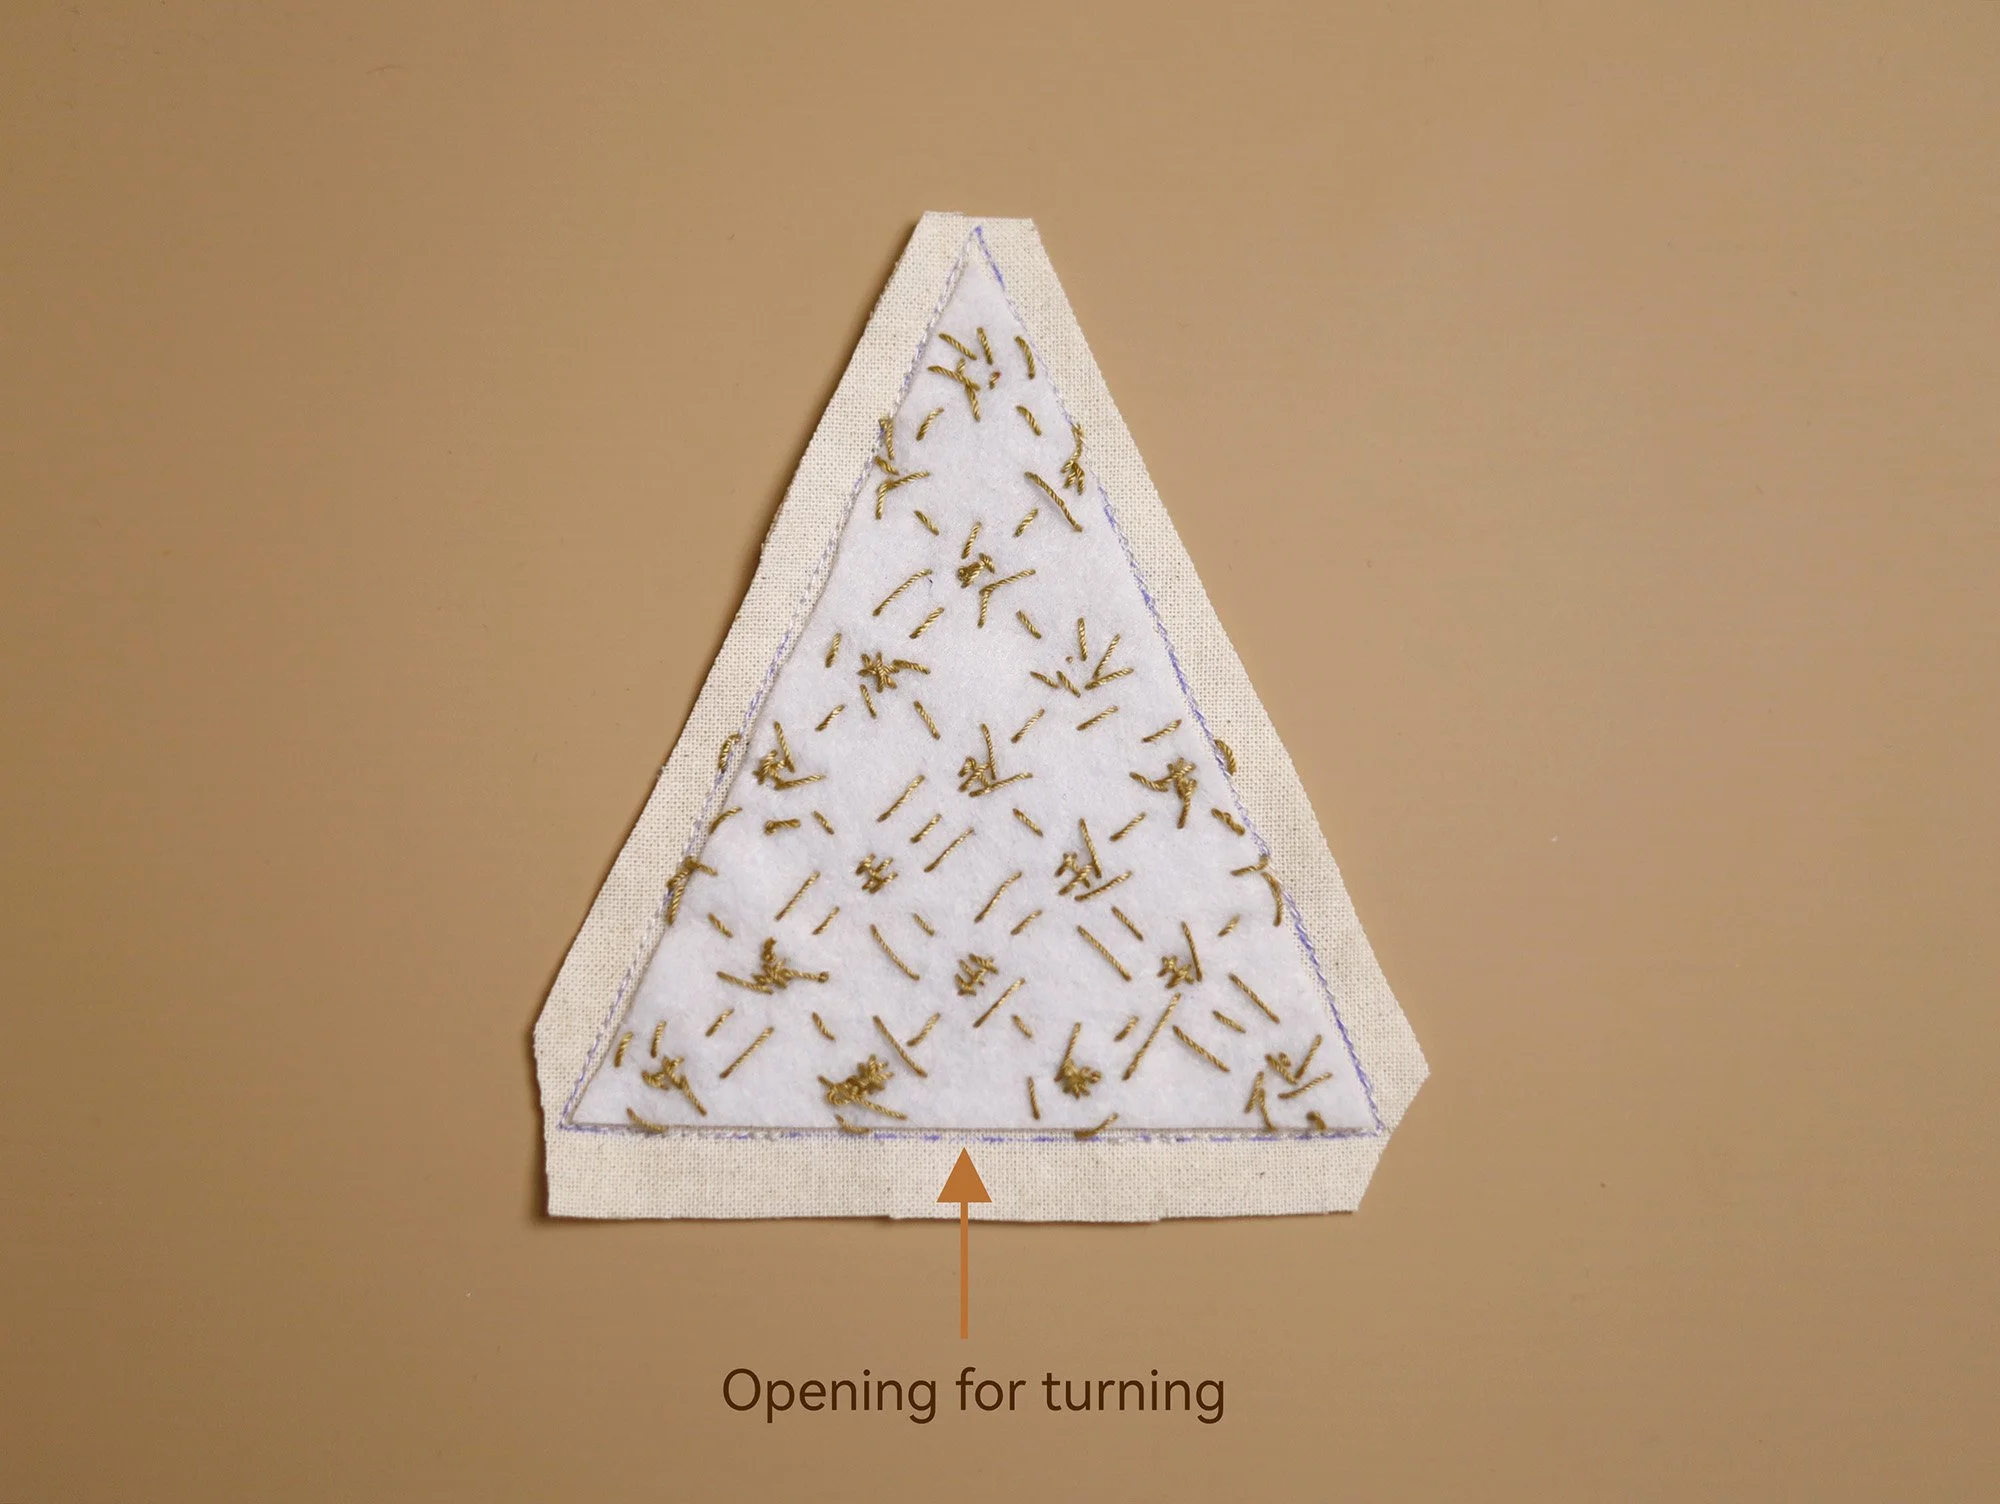
Make the remaining triangle pieces in the same way.
4. Joining the triangles
Arrange the finished triangles into a tree shape, following the Layout Guide below. Feel free to change or swap the colours to create your own design.
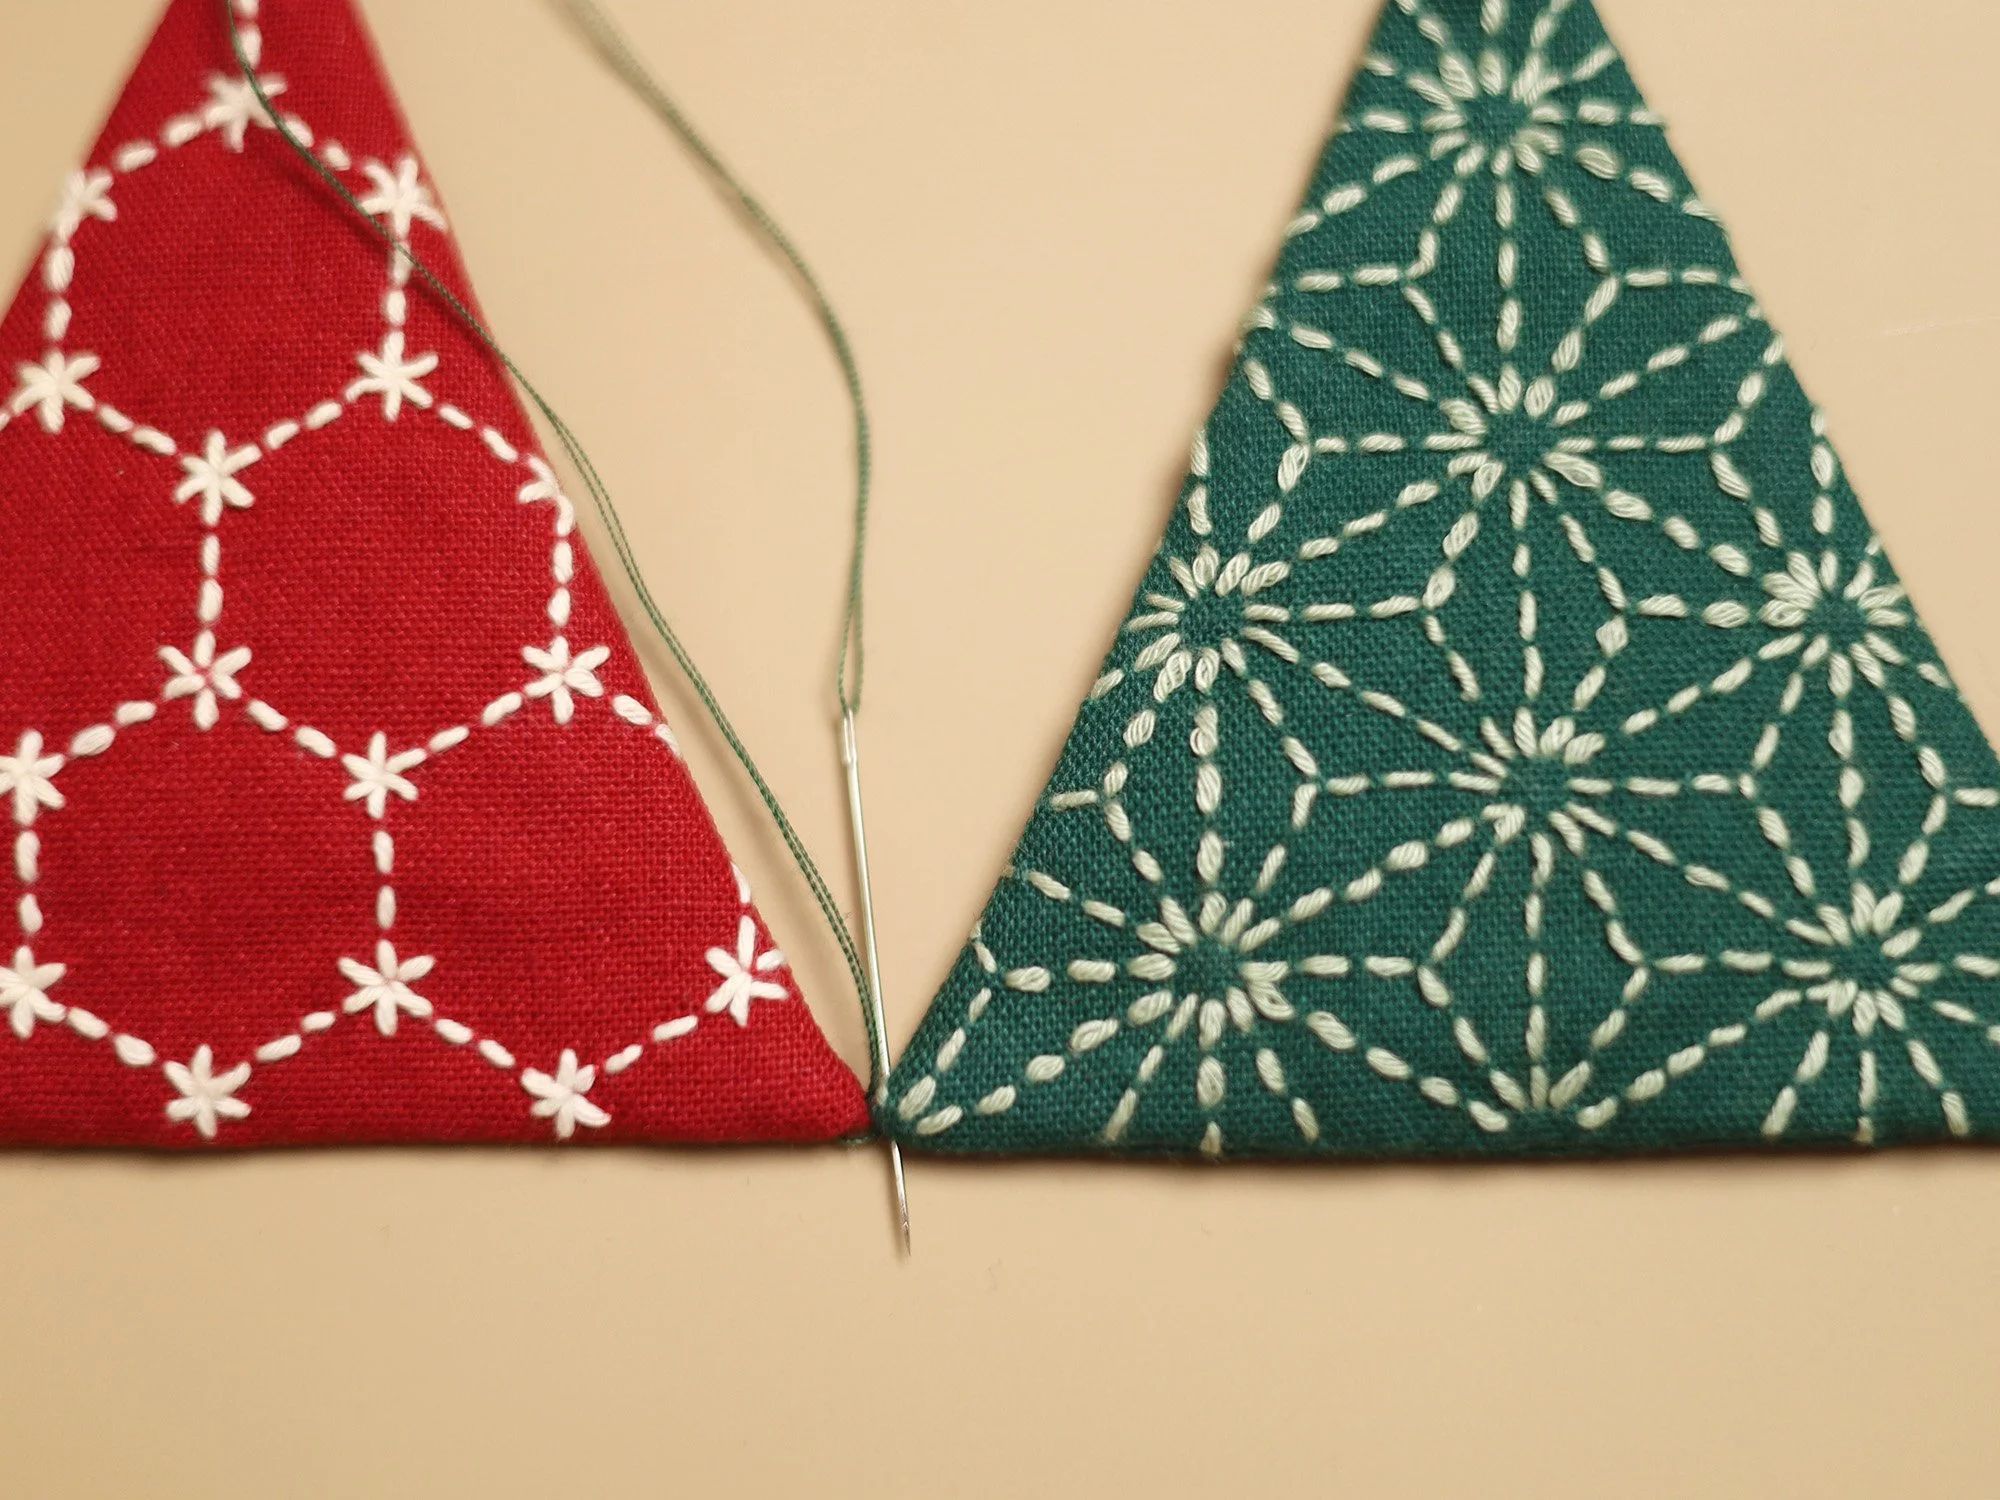
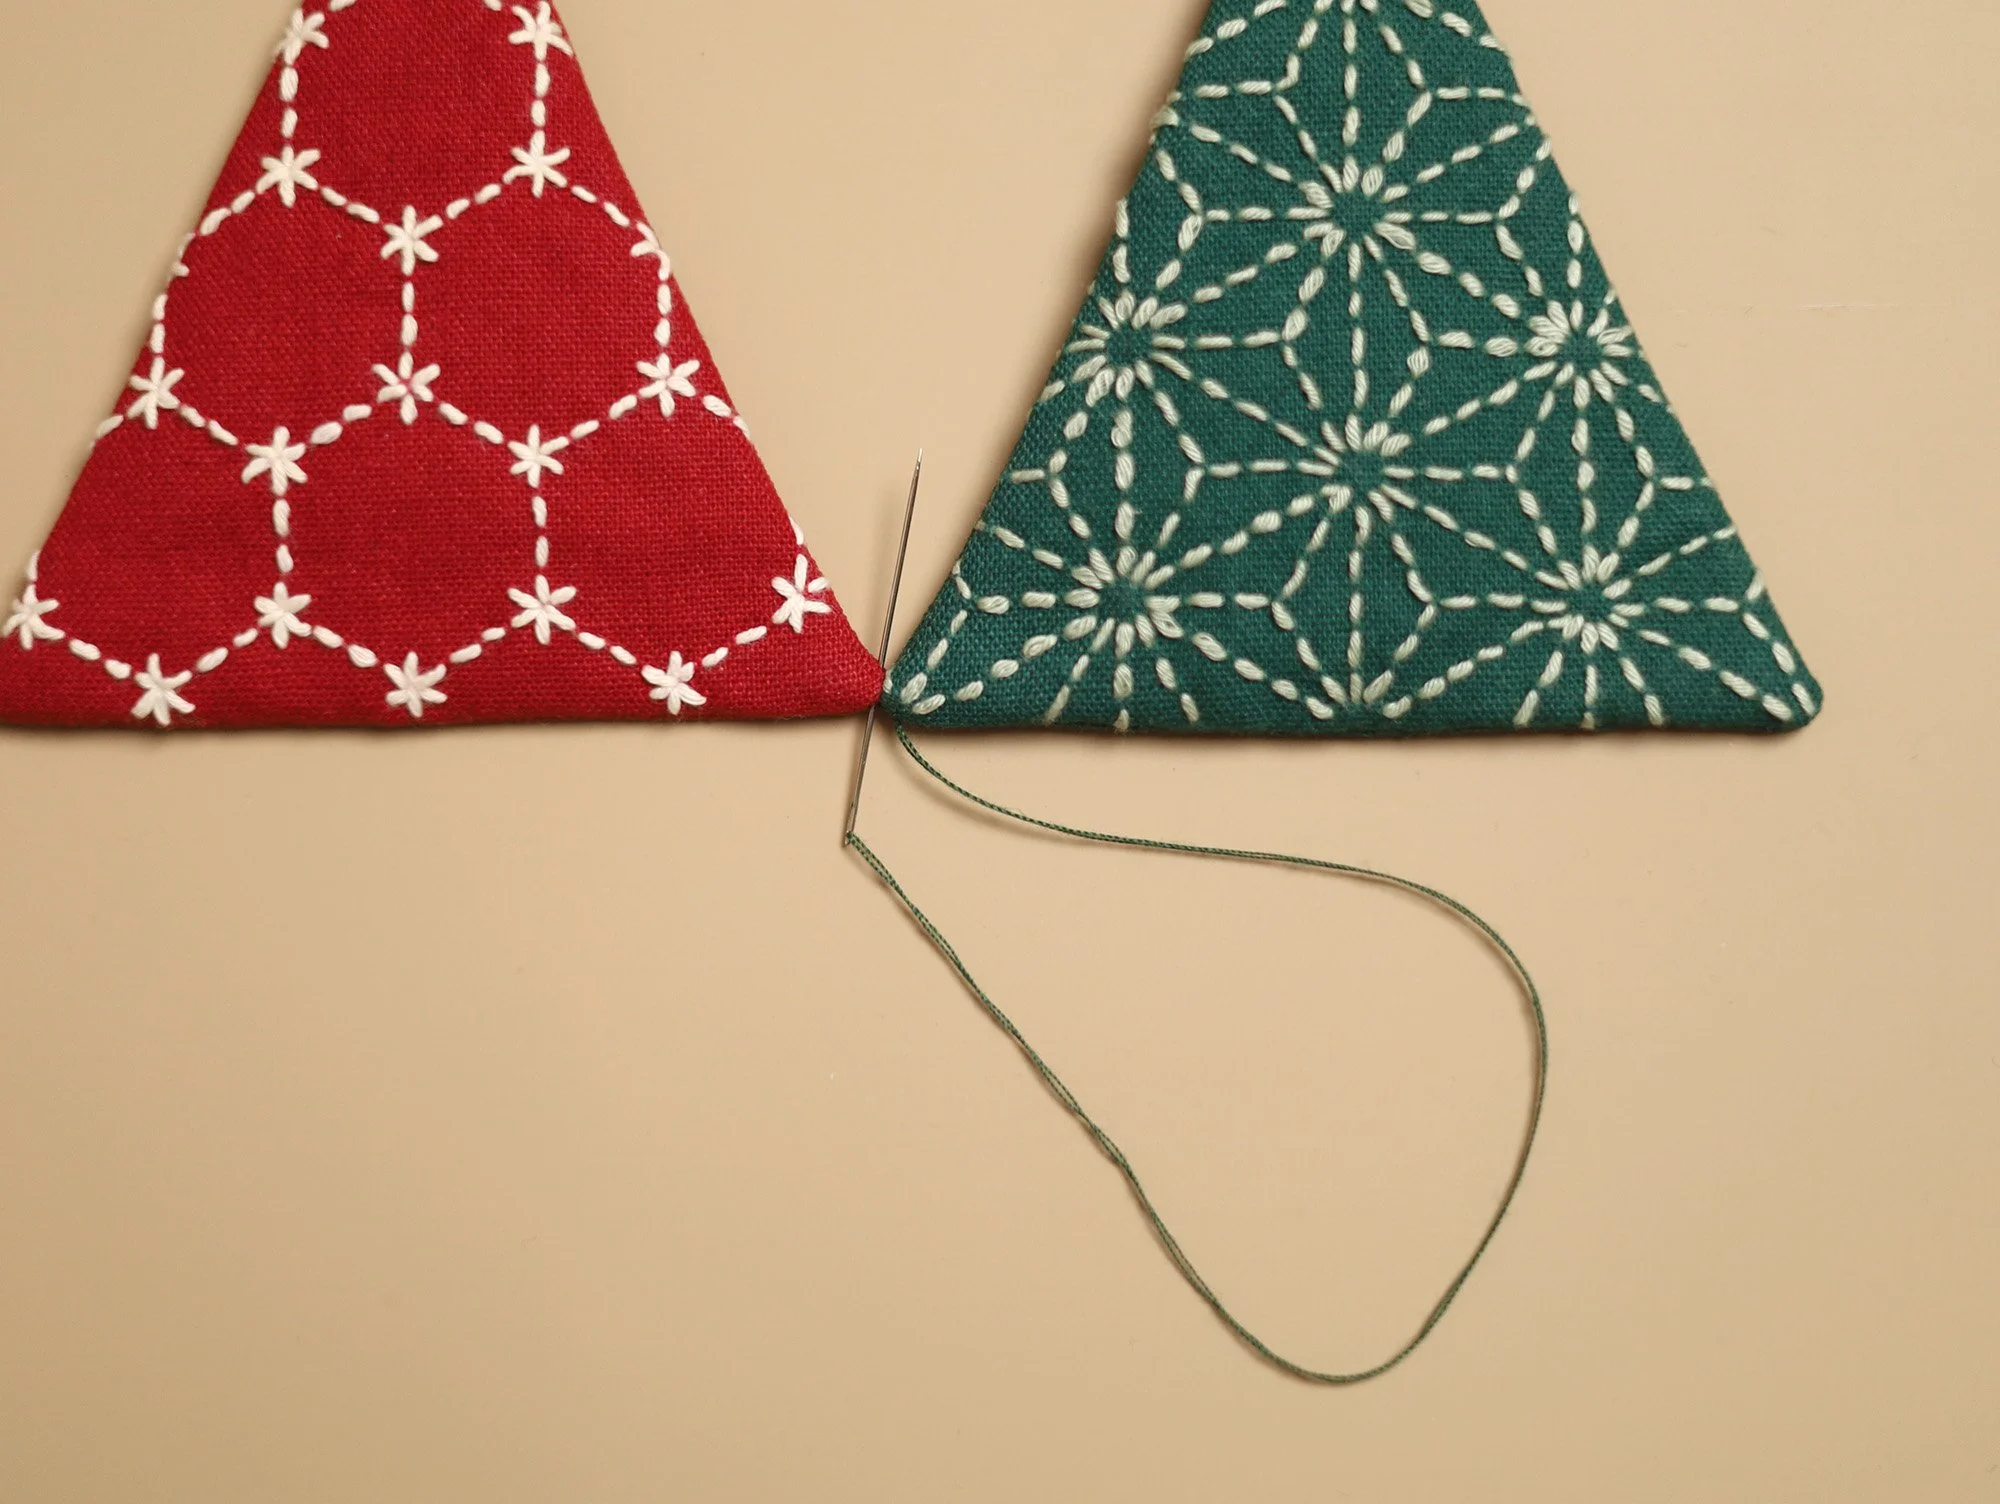
Hand-stitch the adjacent corners together using one or two strands of sewing thread:
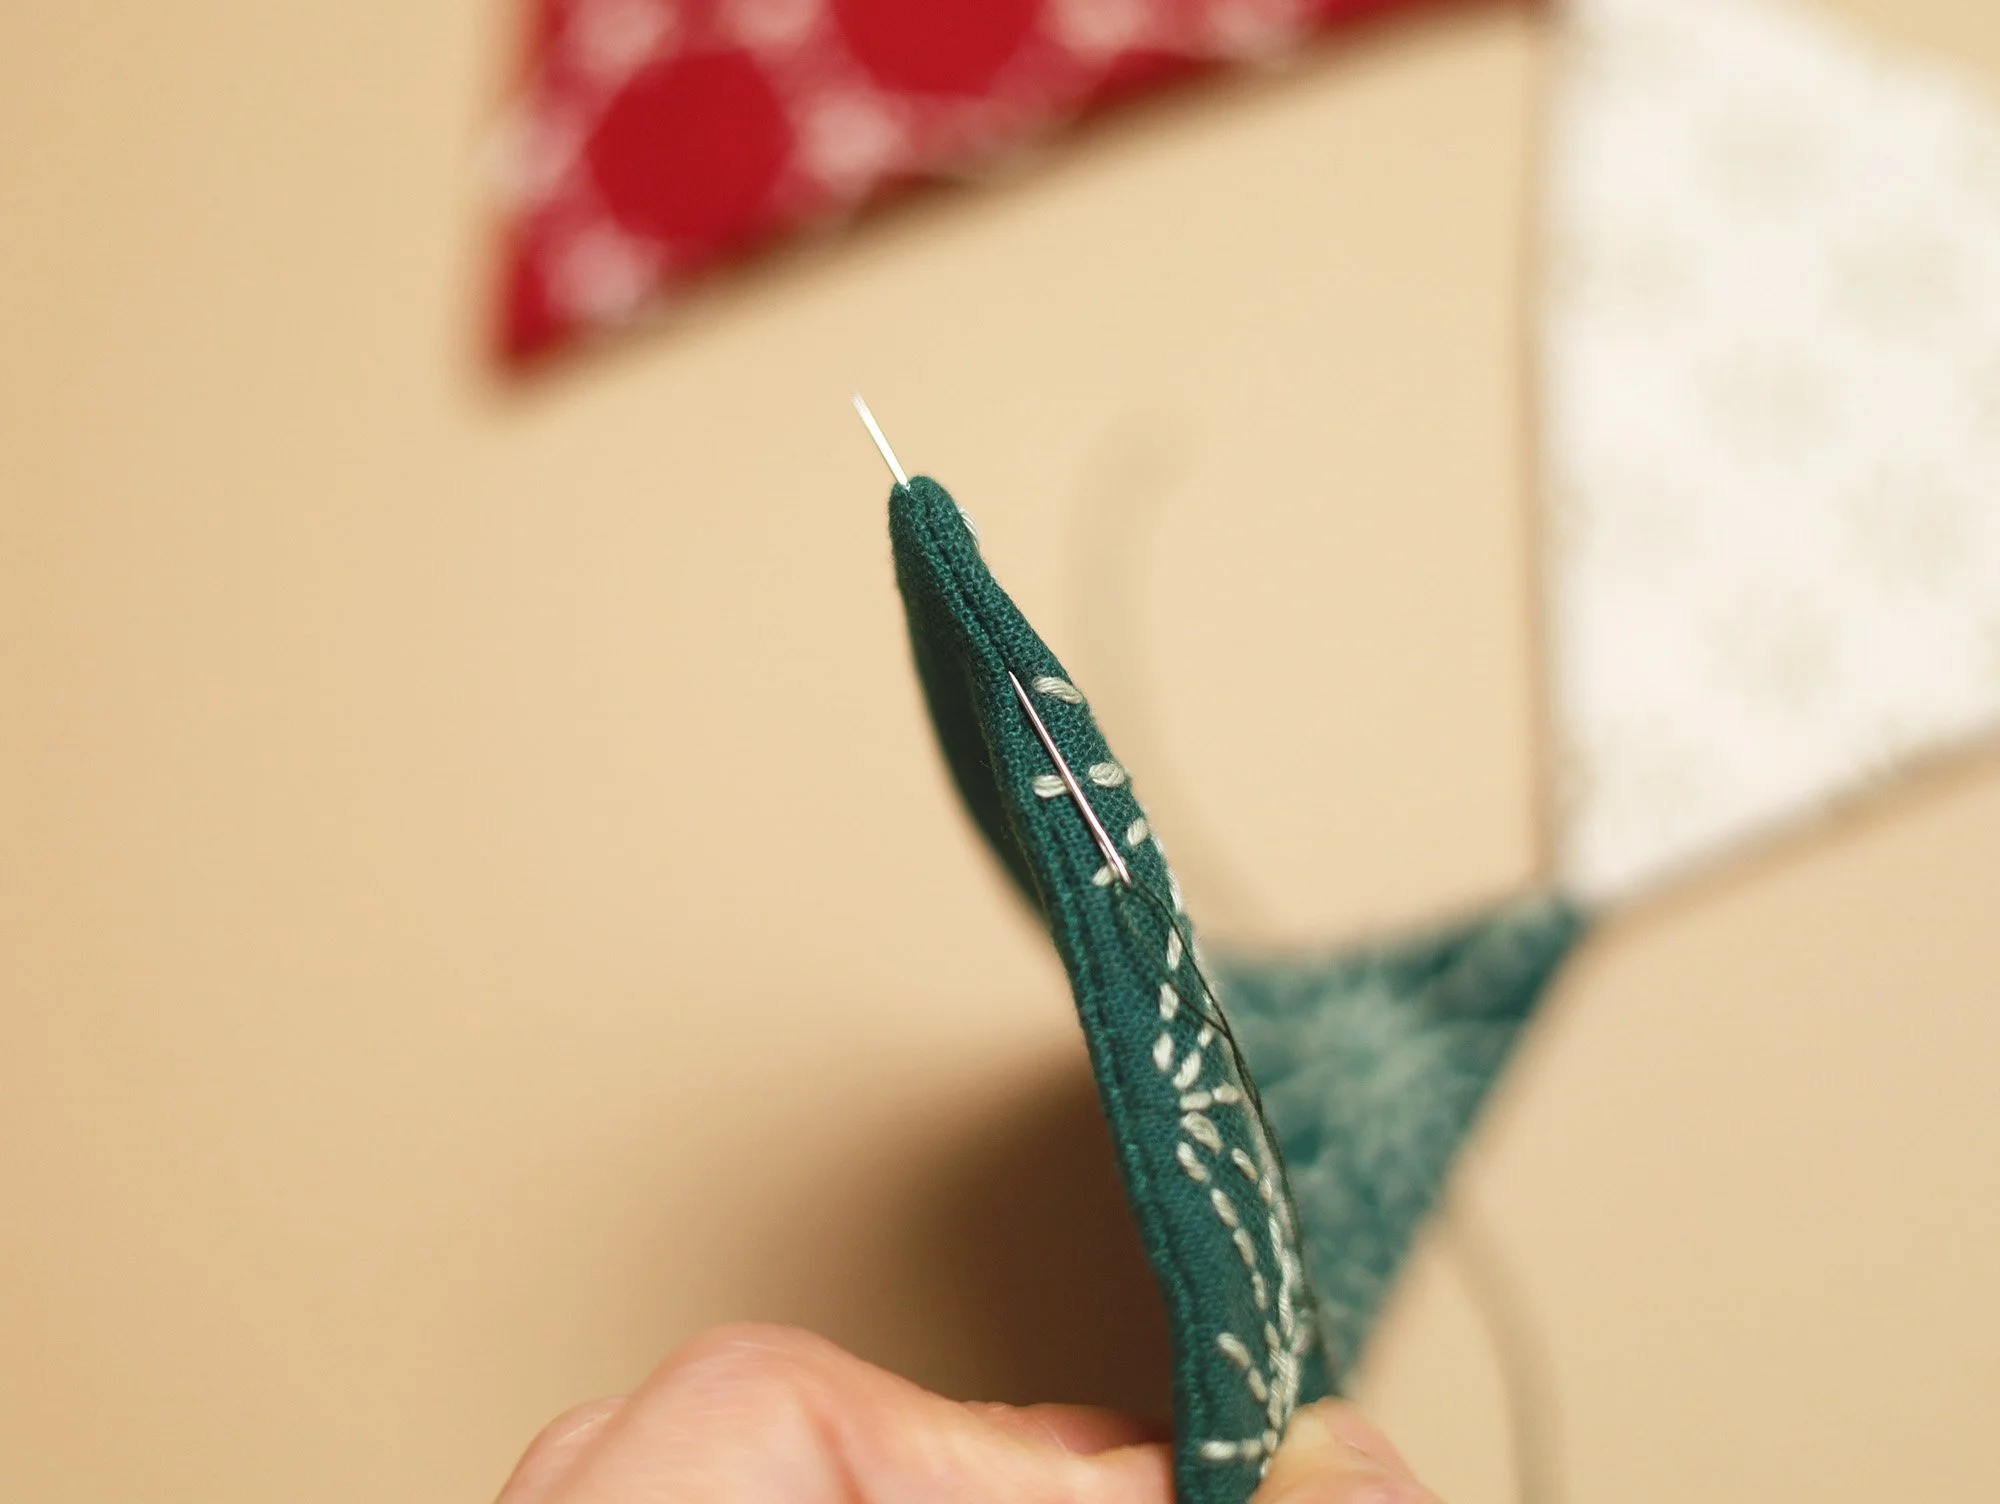
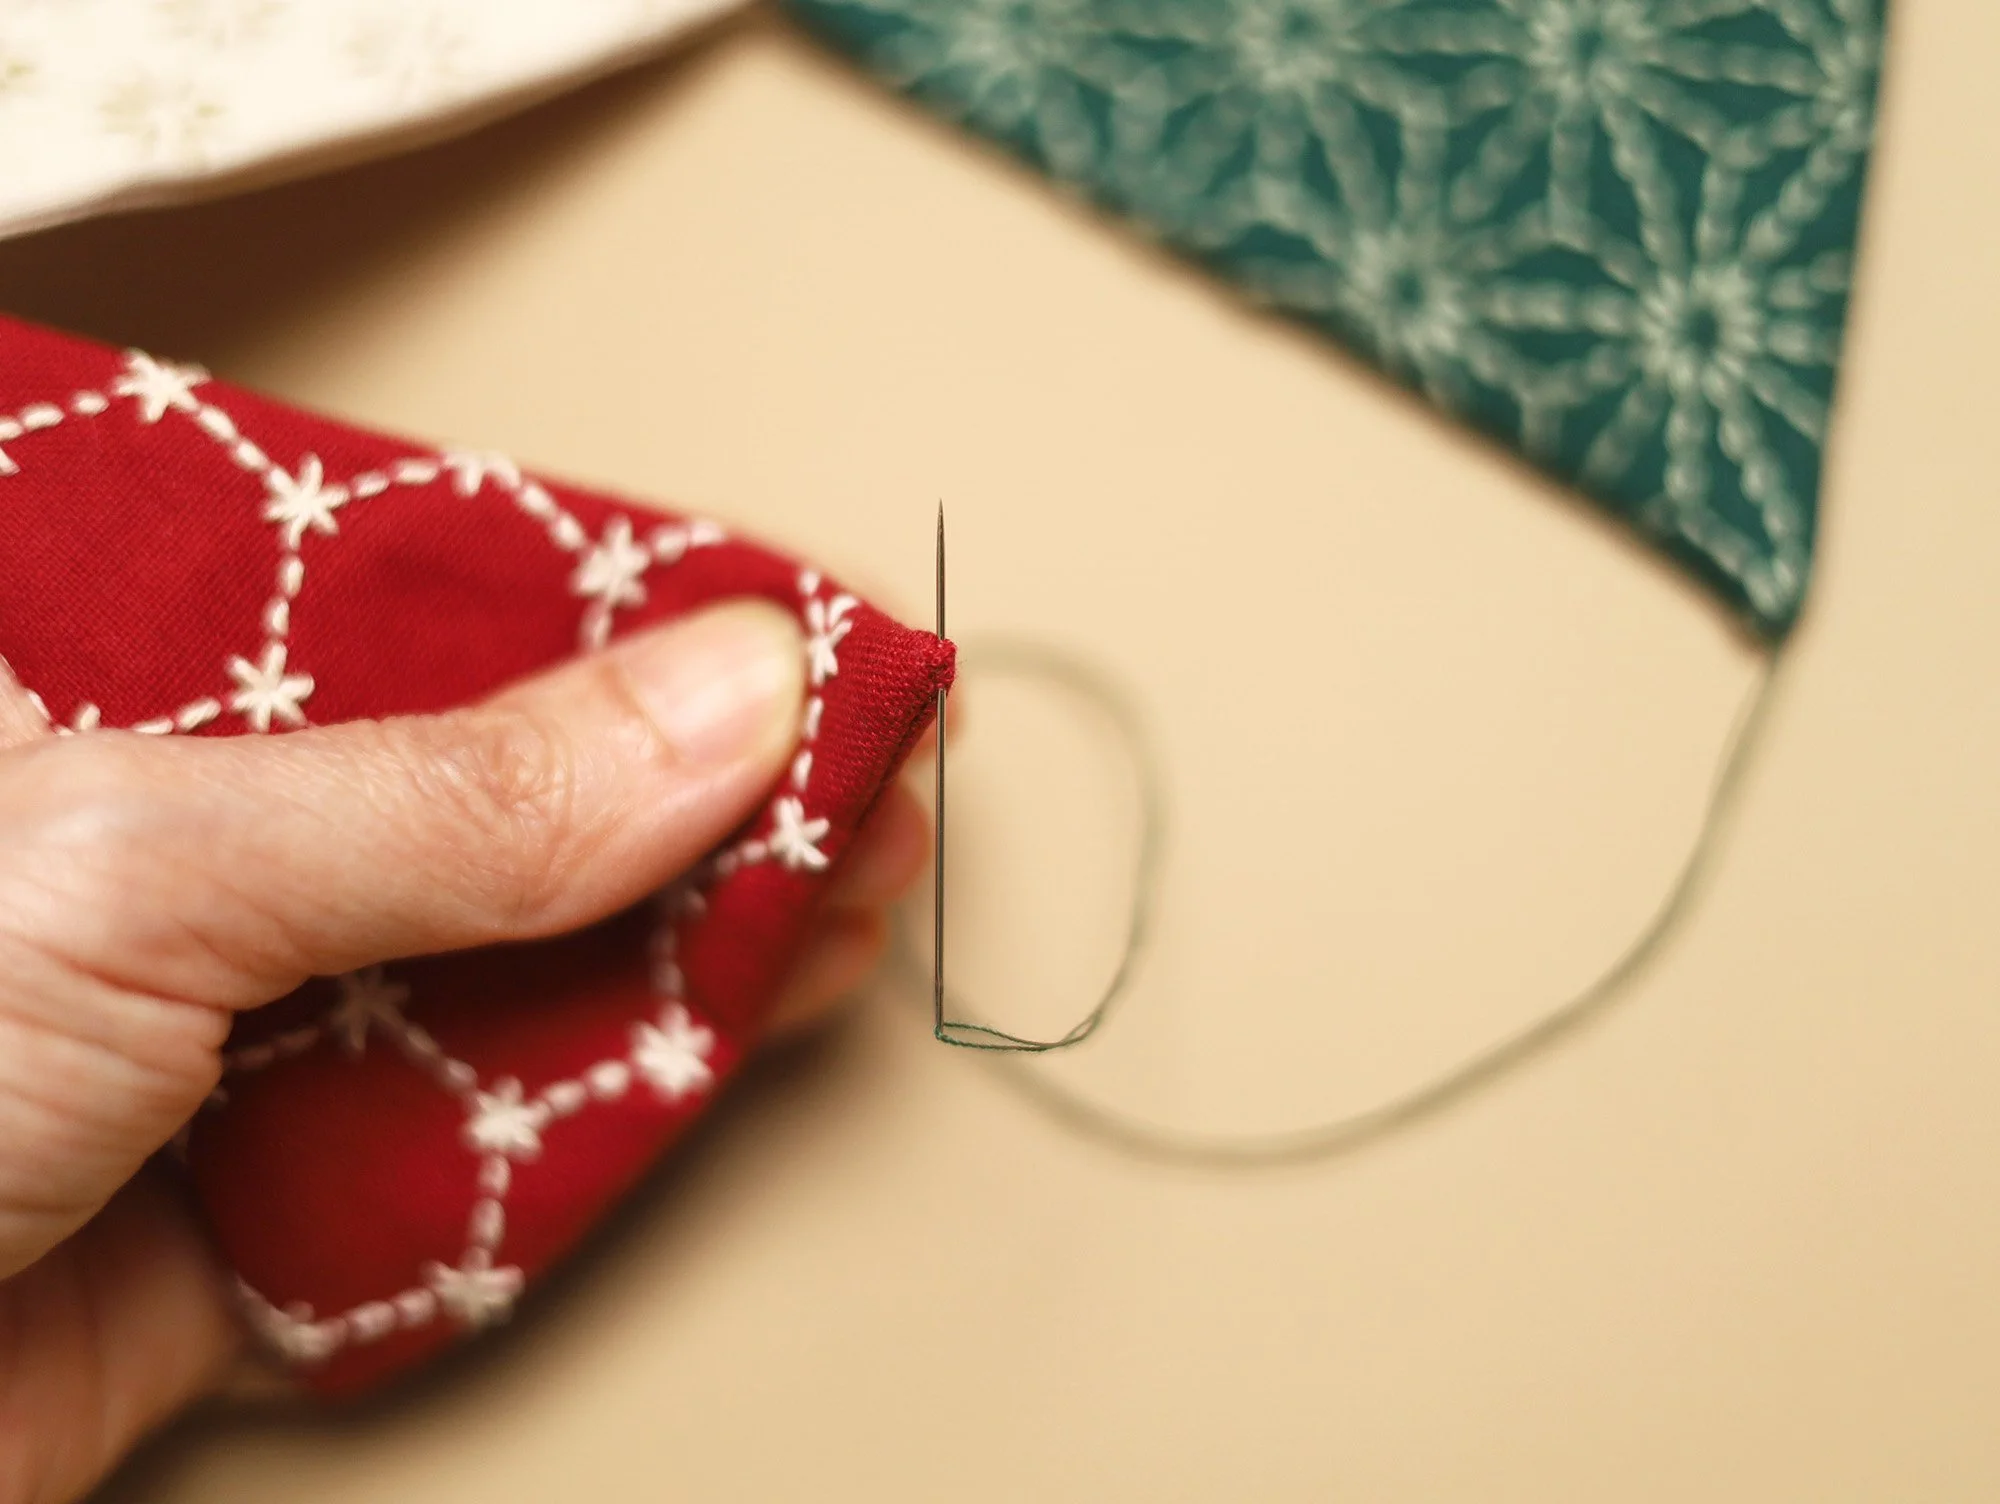
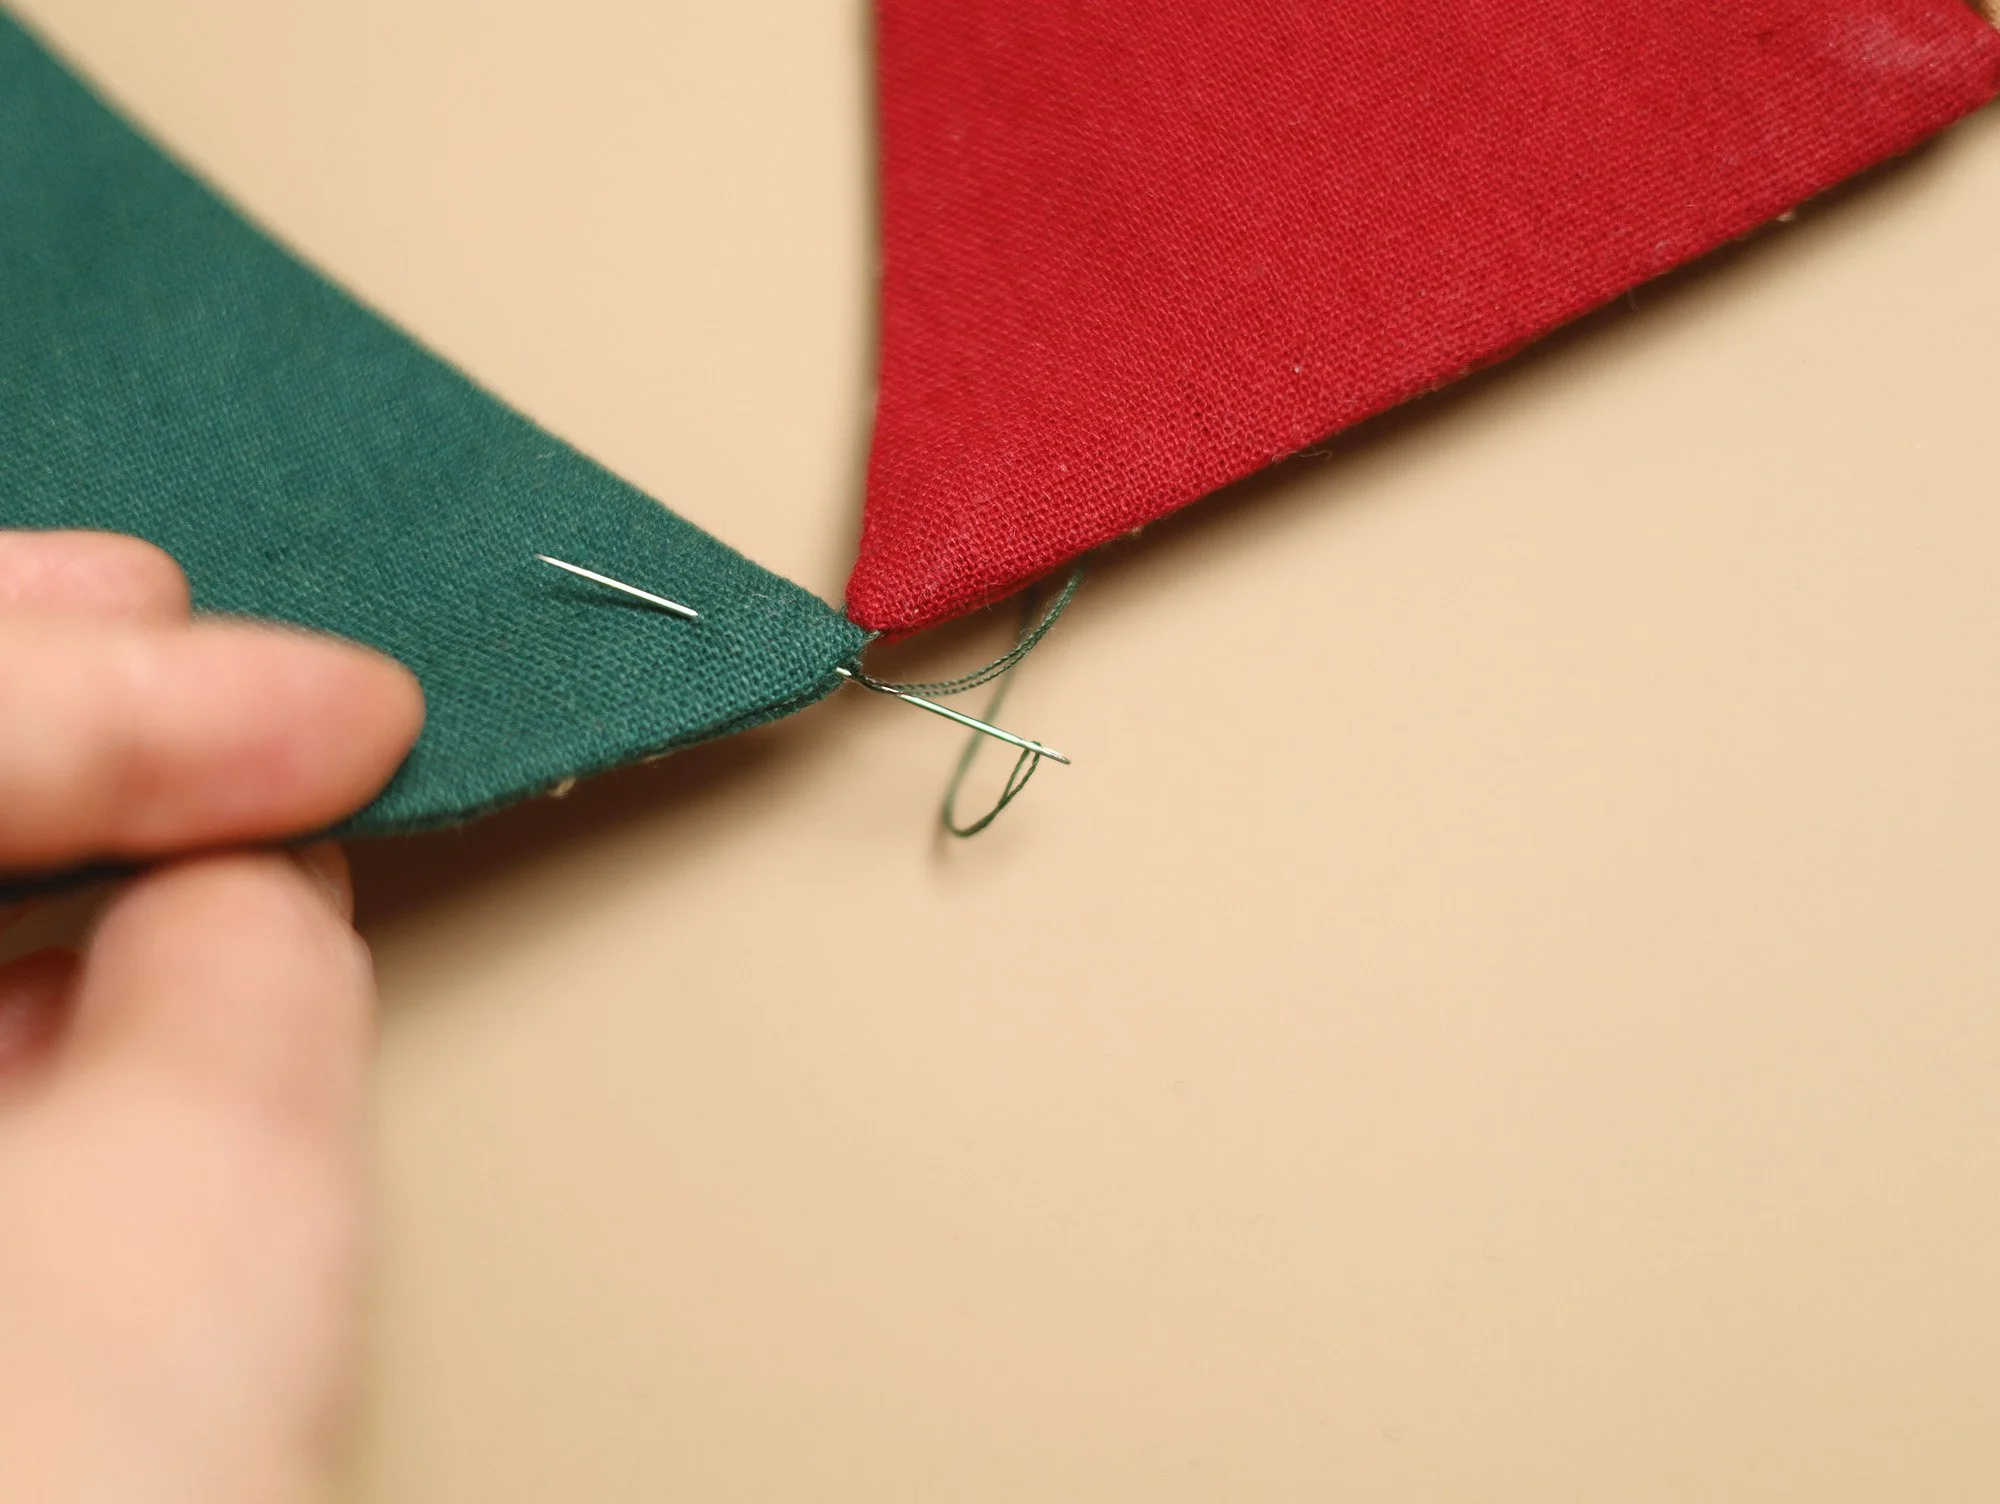
To start, insert the needle through the side seam and bring it out at the corner to be joined. Pull the knot into the seam to hide it (see the second photo below).
Pick up a small amount of the lining fabric at the corner tip of the second triangle, then pull the thread to bring the two corners together. Repeat the process at the other corner. If desired, stitch a few more times to reinforce the join.
To finish, tie a knot close to the seam. Insert the needle into the seam and bring it out a short distance away. Pull the knotinto the seam to hide it, then trim the thread.

5. Making the star
Trace the star pattern onto a piece of felt and cut it out. We used fairly stiff felt, approximately 1-1.2 mm thick. You will need two star-shaped pieces.
Trace your chosen pattern onto one of the felt pieces and embroider it. I used metallic embroidery thread and beads to add a little sparkle to the star.
Once the embroidery is complete, place the two felt pieces together with their wrong sides facing each other. Join them by stitching around the edges using blanket stitch. If desired, add a little toy stuffing as you stitch around the edges.