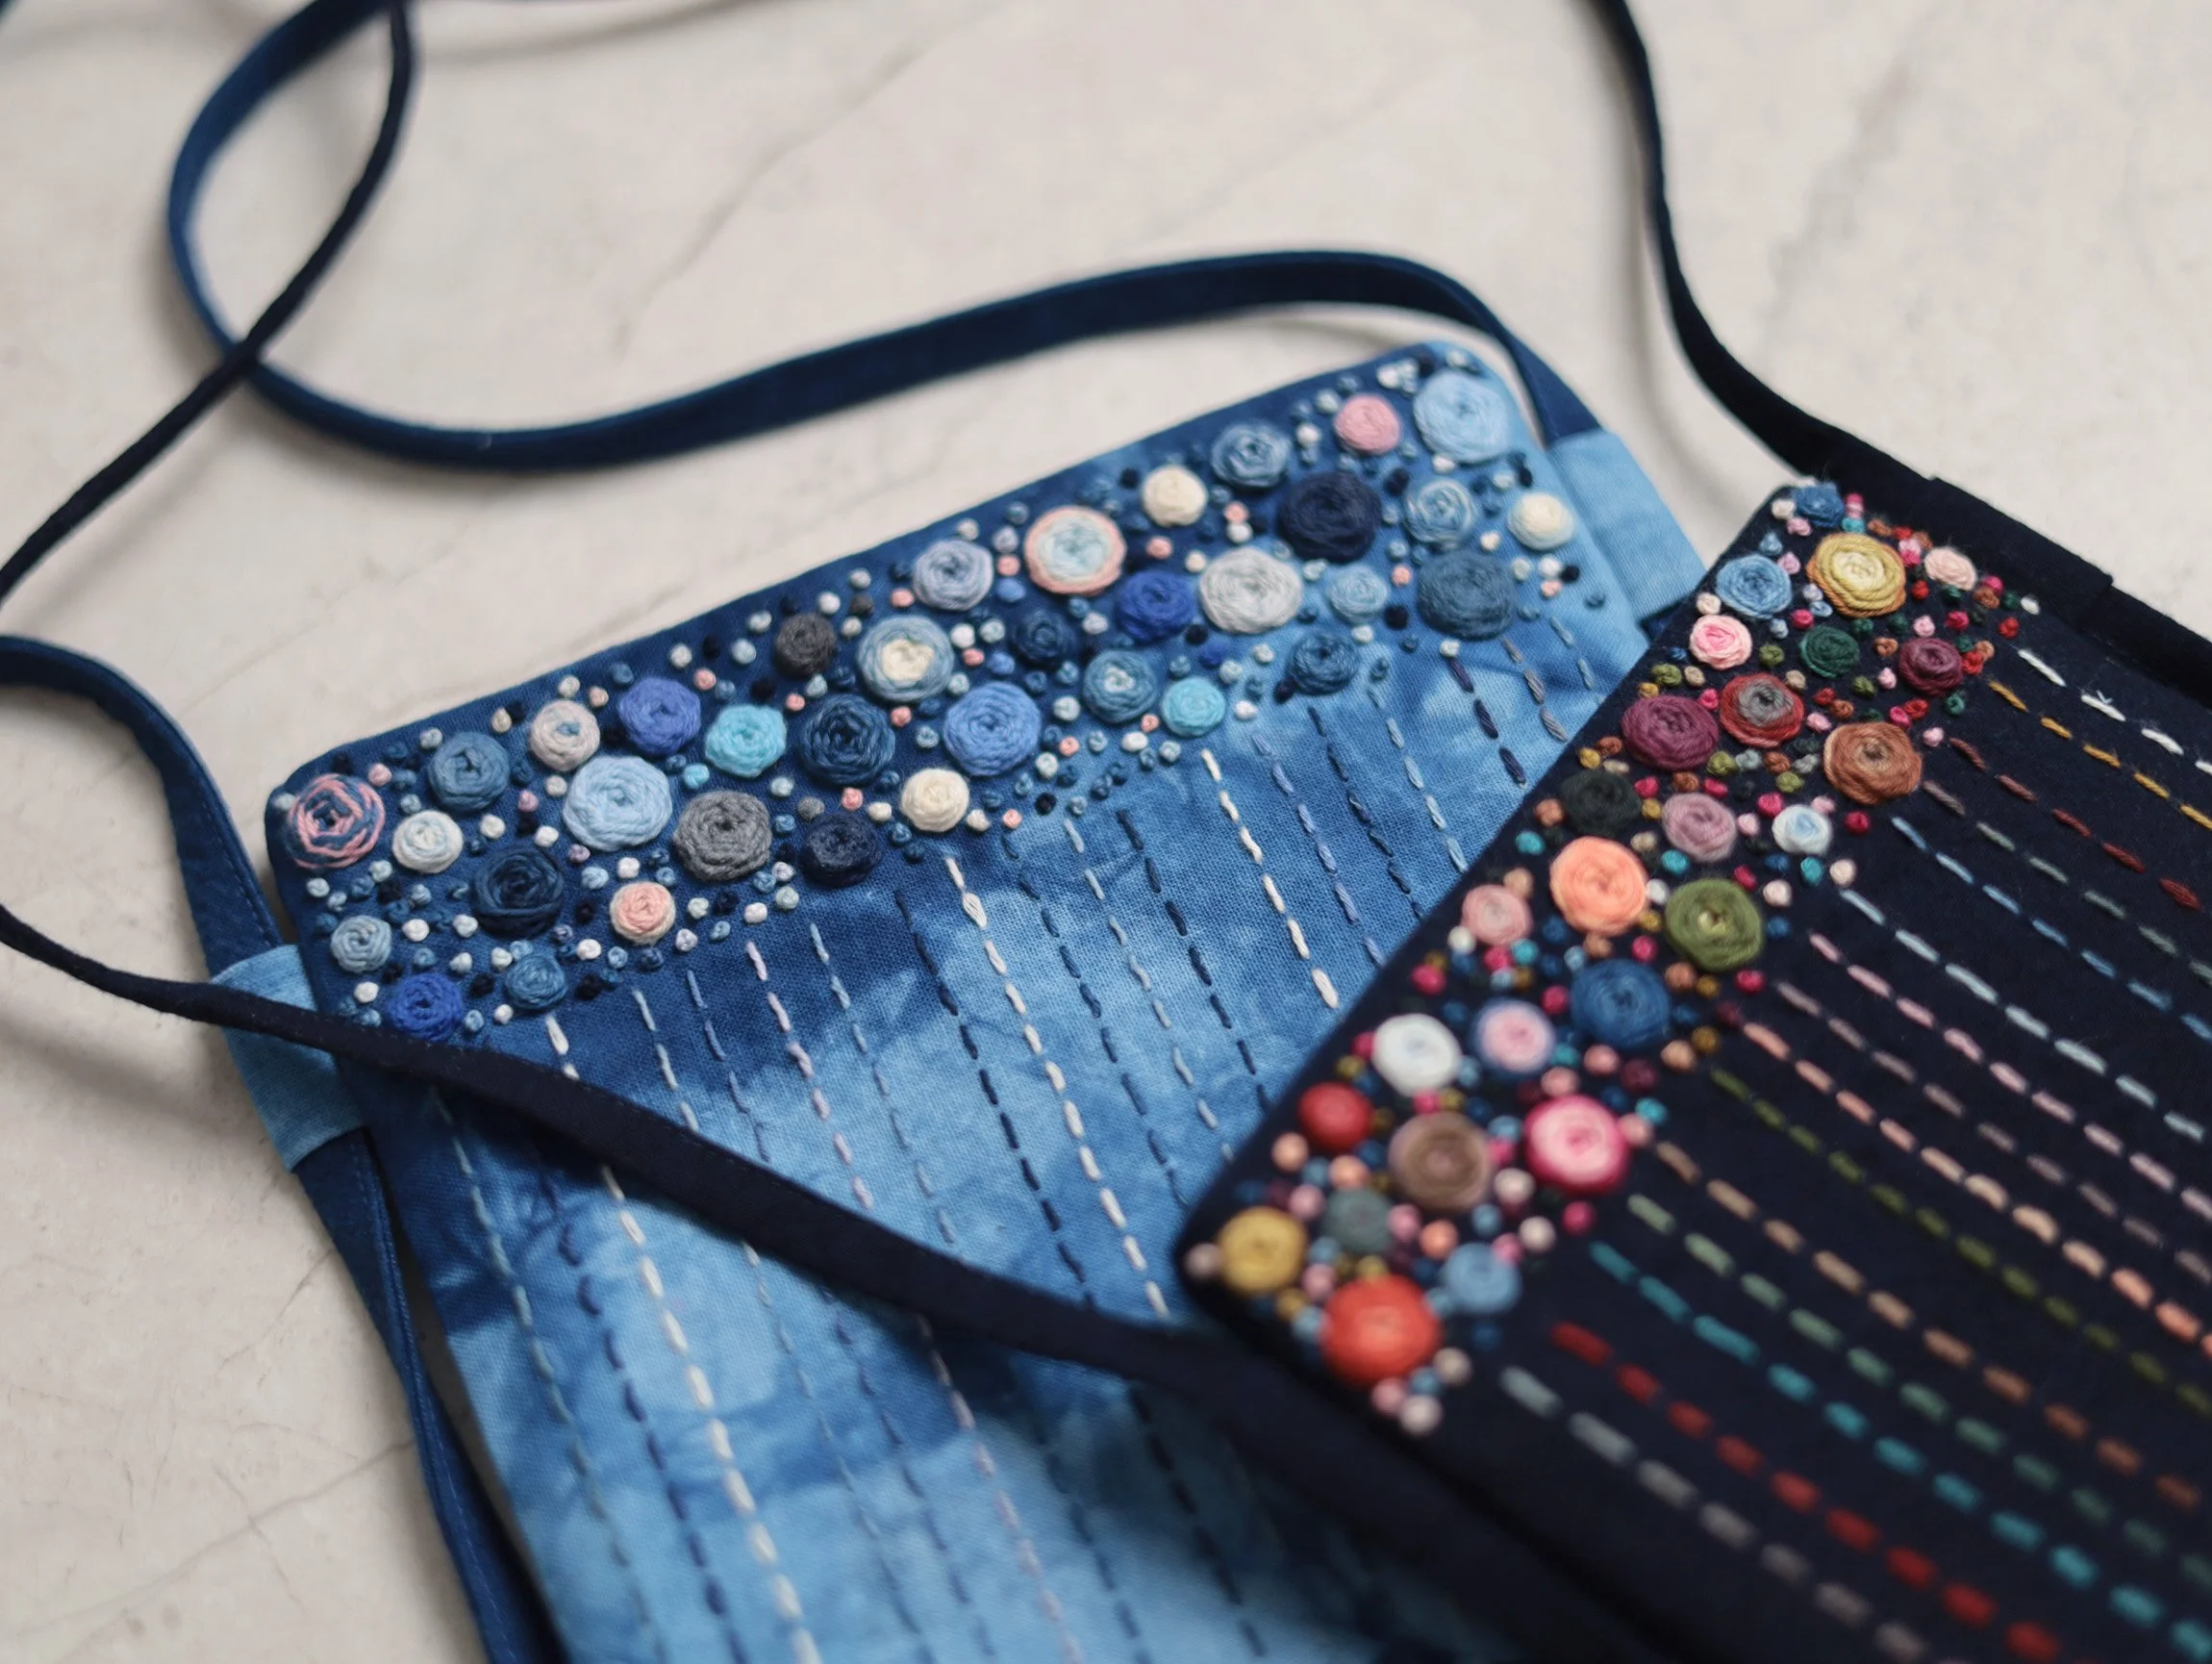
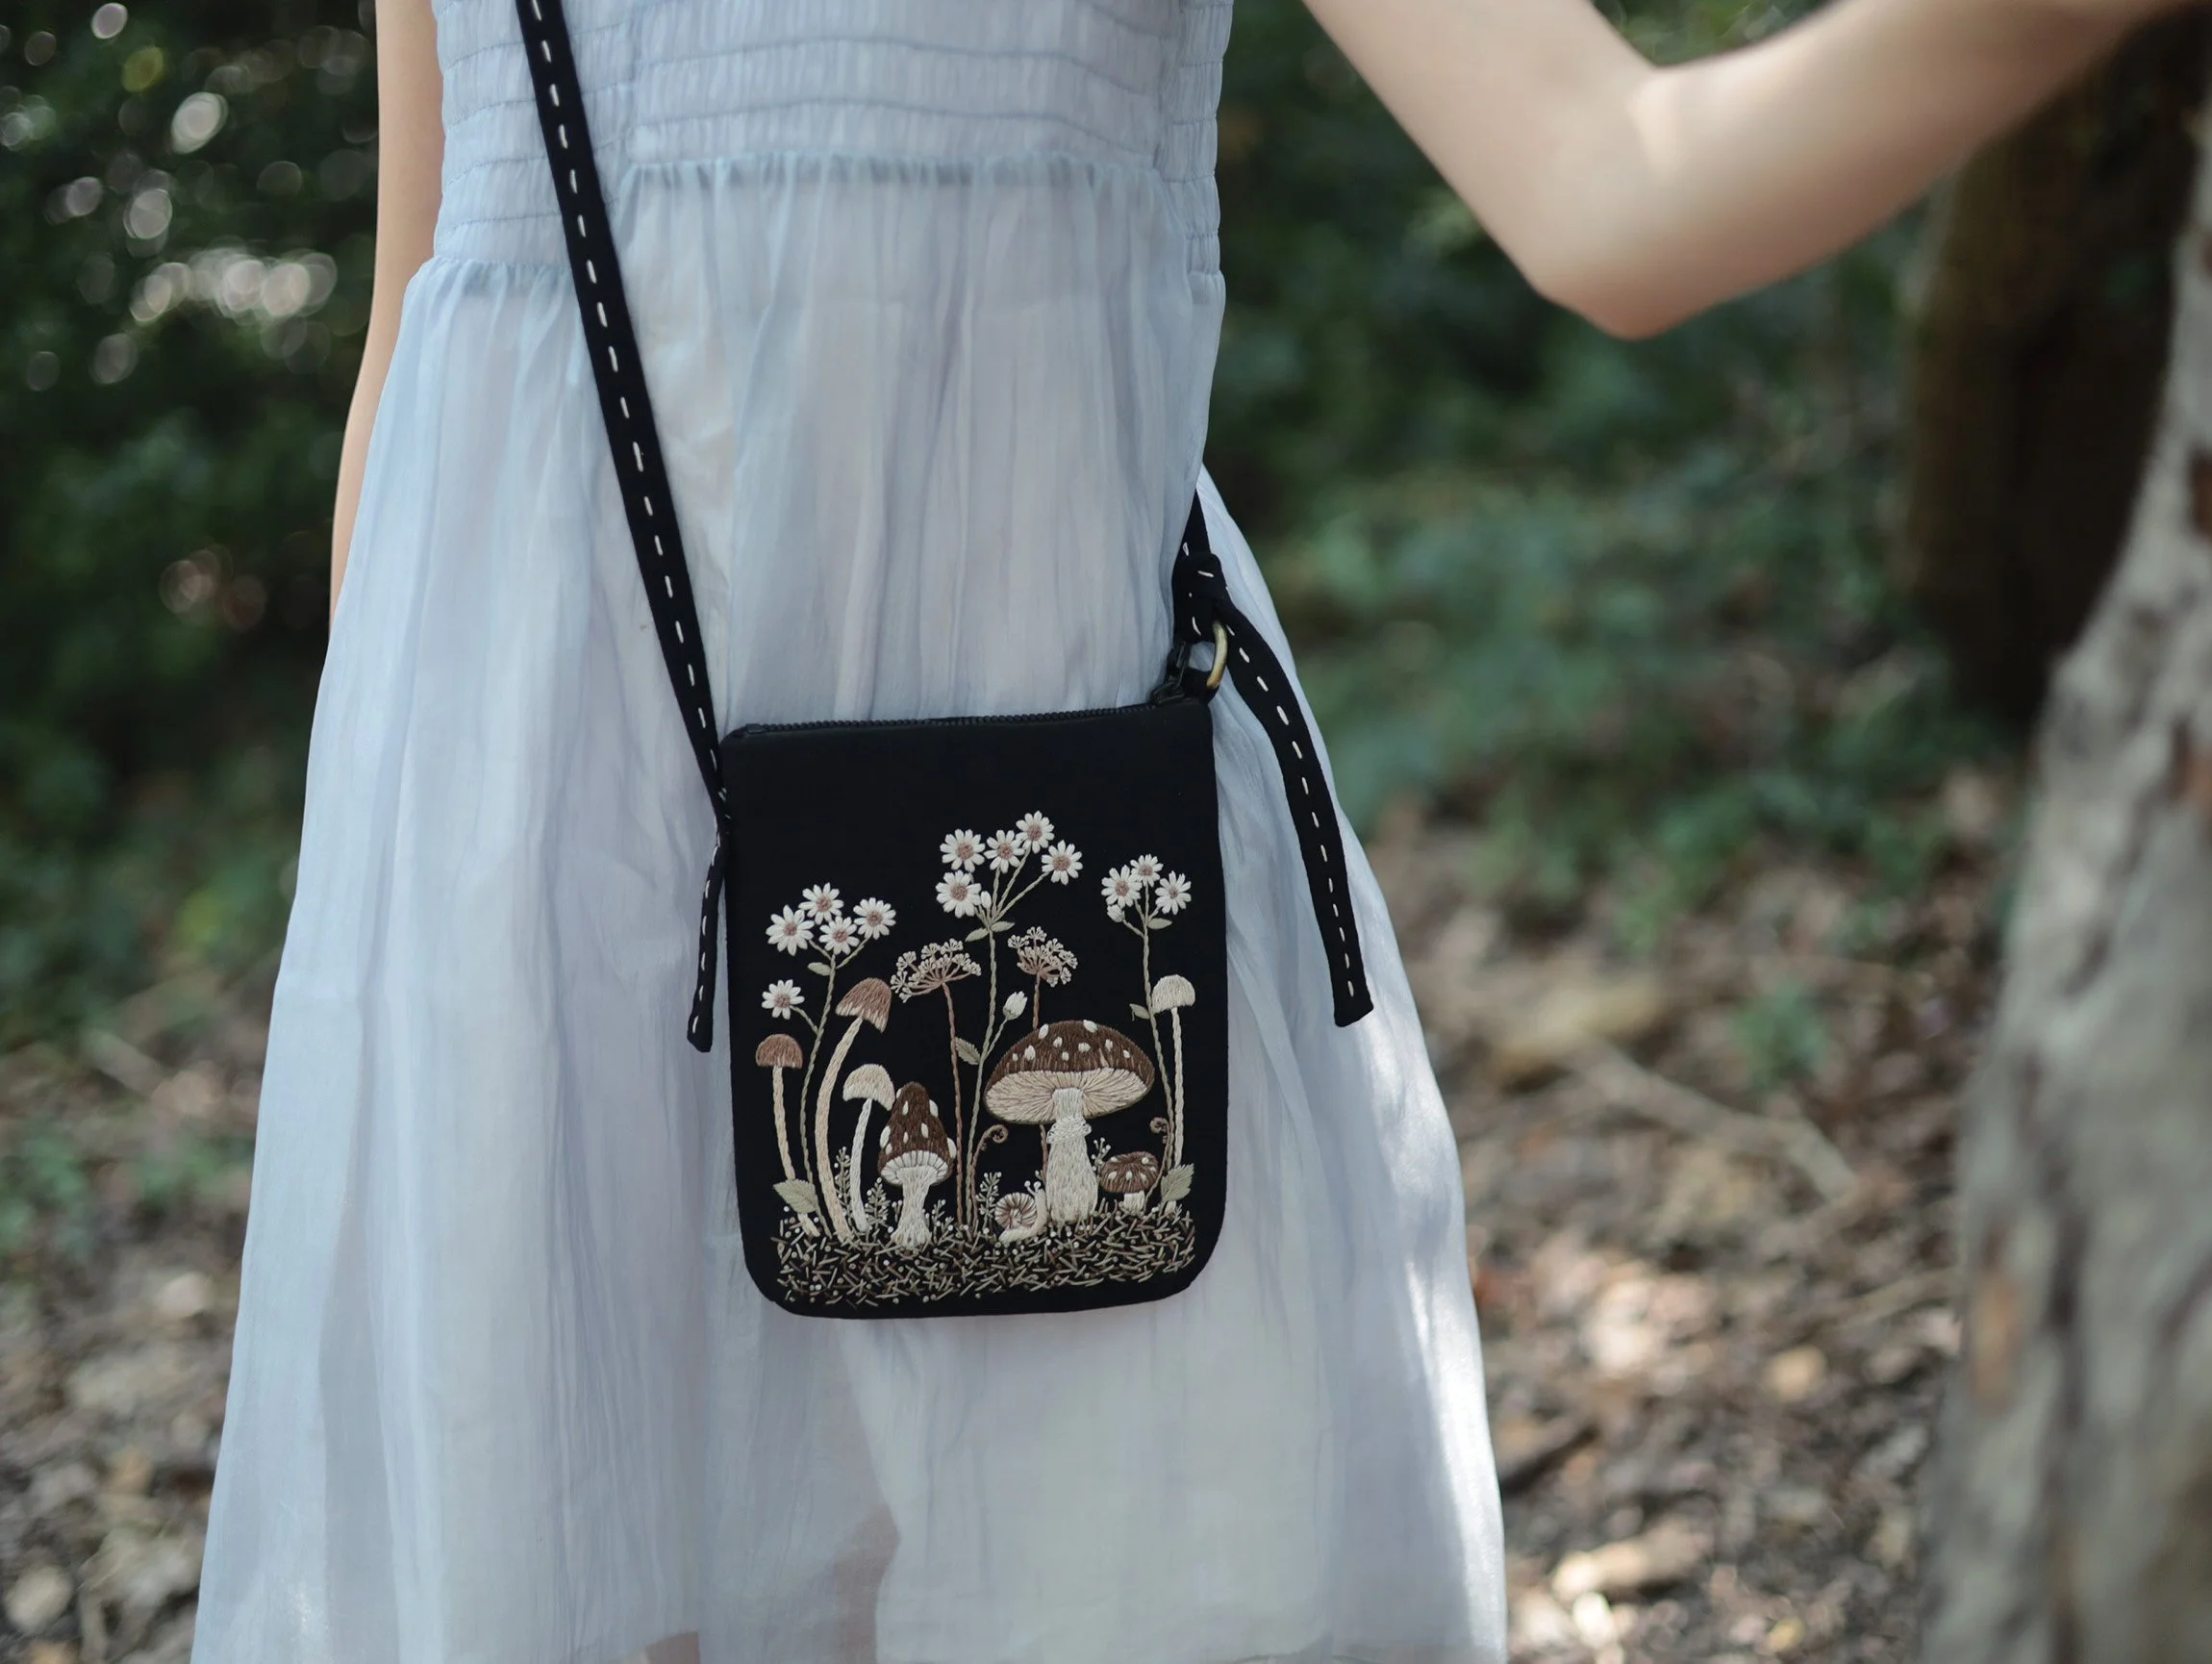
Duelle Embroidery Phone Bag
Crossbody Phone Bag with Dual Design
Step-by-Step Photo Tutorial
Supplies in the Kit or Needed for the Project
Fabric:
Main fabric: 2 pieces, each approximately 17 × 21 cm(size S)or 19 × 24 cm(size M)
Lining fabric: 2 pieces, same size as the main fabric pieces
Main fabric for the bag strap: 1 piece, 3 × 130~150 cm
Main fabric for the strap tabs (optional): 1 piece, 7 × 11 cm
Interfacing: Medium- or heavyweight fleece interfacing: 2 pieces, each approximately 15×19cm (size S)or 17 × 22 cm(size M)
Sashiko threads and needle: Medium- to thick-weight Sashiko thread in your choice of colours, and a Sashiko needle.
Other Useful Tools: Heat erasable fabric marker (refill), sewing thread & needle, clips, fabric scissors and iron.
Sewing & Embroidery Tutorial
Whether sewing by hand or machine, backstitch at the beginning and end of each seam to secure the stitches. To avoid repetition, this will not be mentioned in the following tutorial.
Unless otherwise stated, the seam allowance throughout this tutorial is 1 cm (3/8 inch).
1. Prepare fabric pieces:
Press the embroidered main fabric piece, covering the embroidered area with a clean cotton cloth. Cut it out along the solid outline.
Use the embroidered piece as a template to cut a second main fabric piece. Repeat to cut two lining pieces.
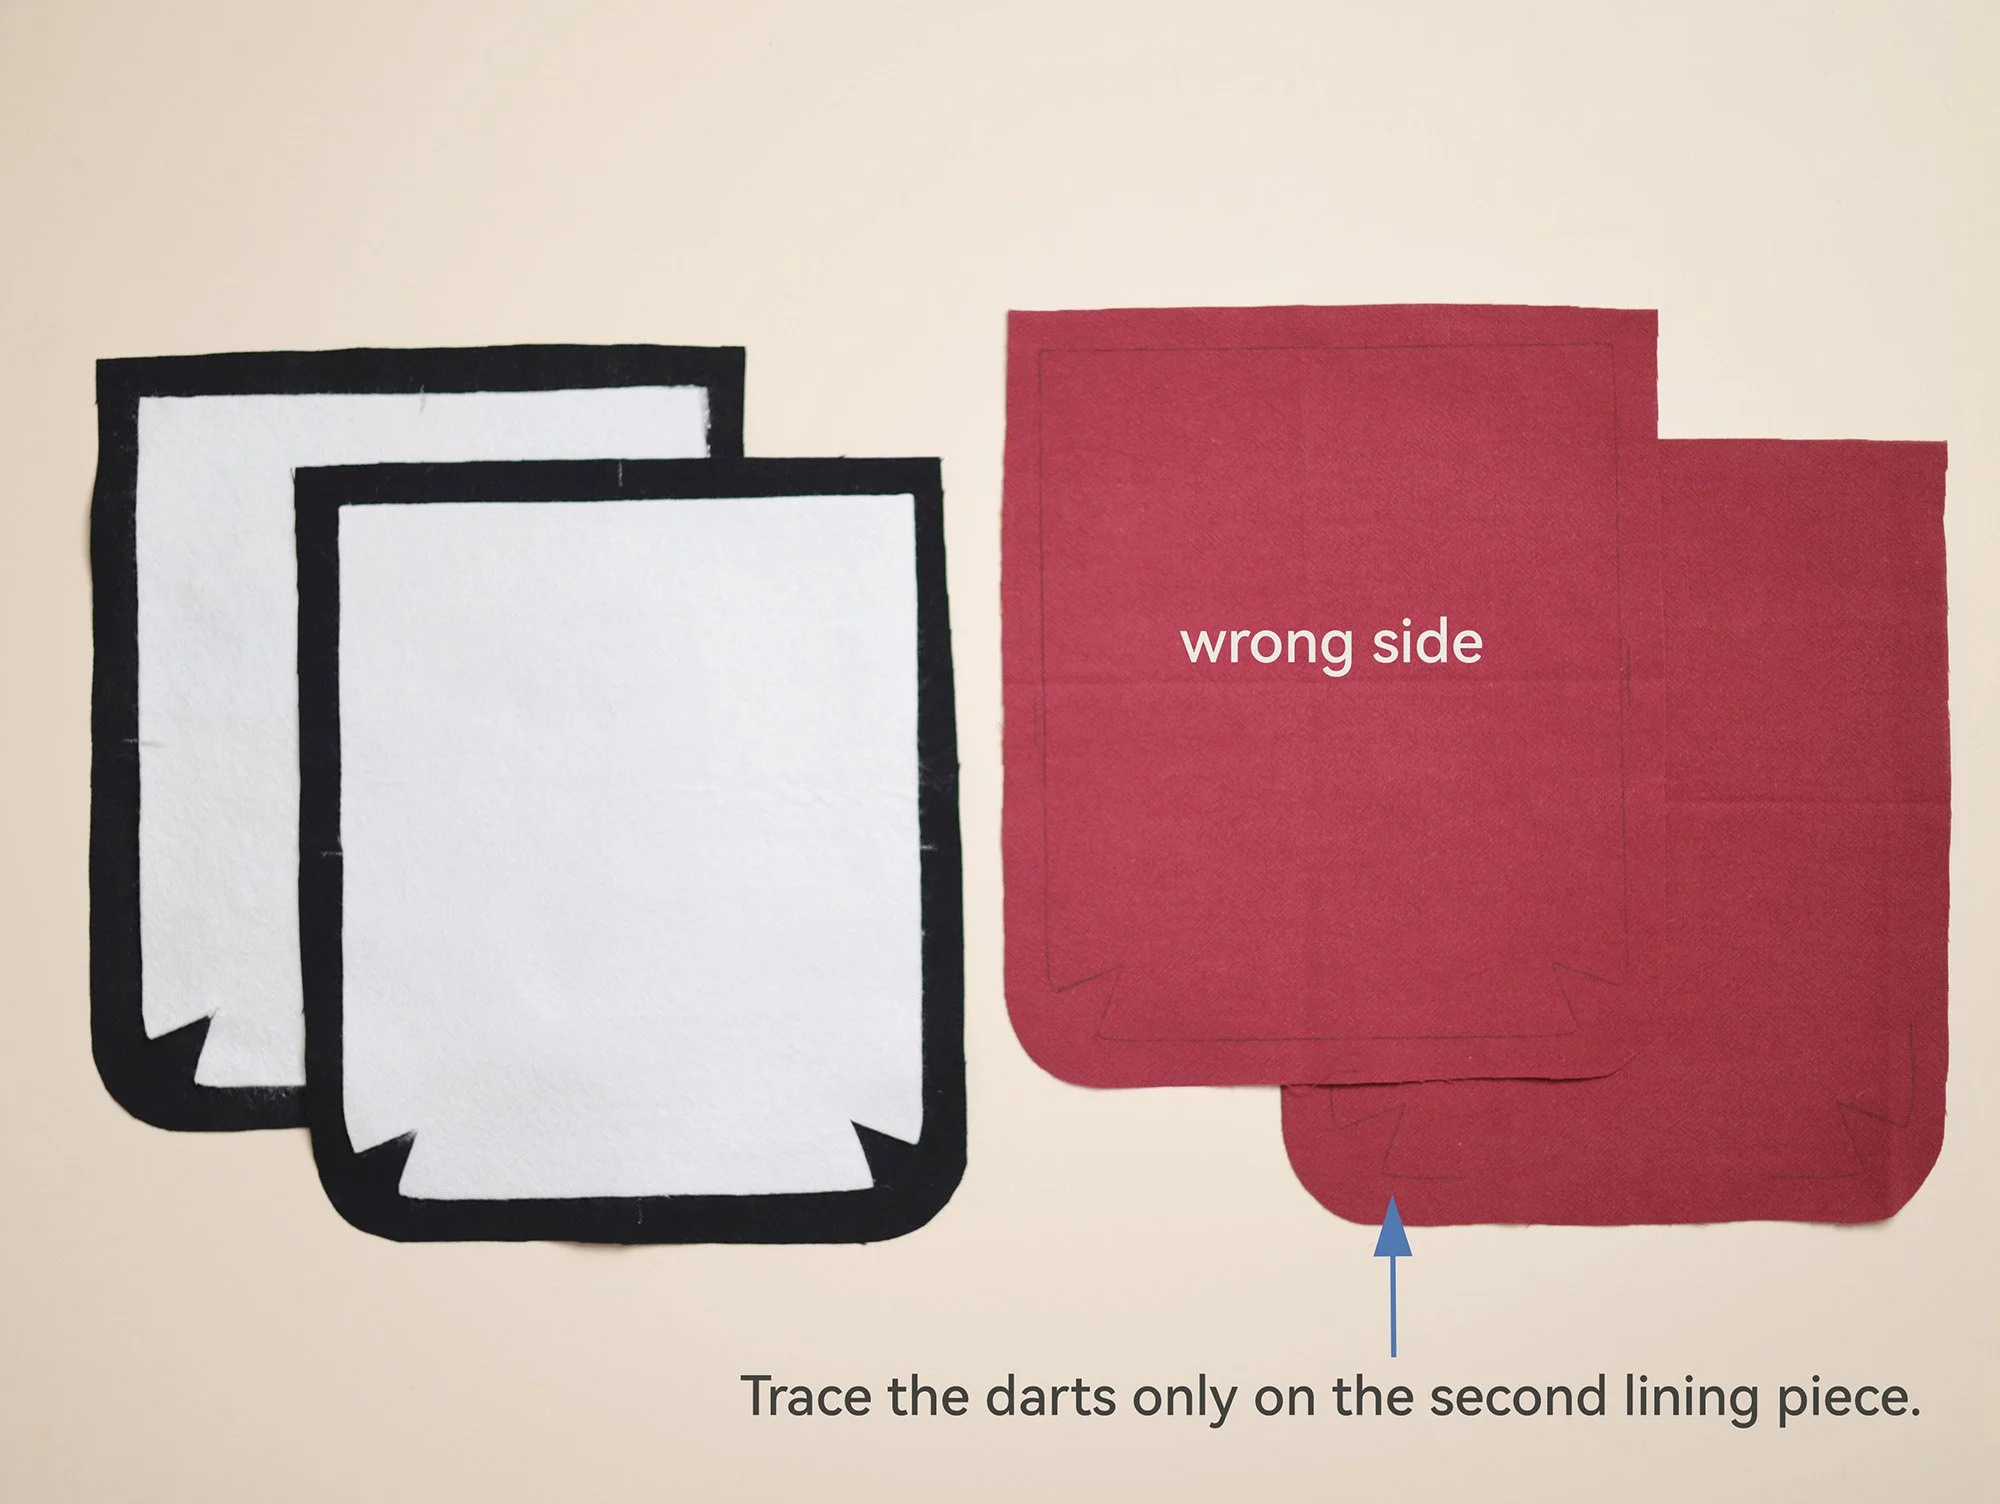
Trace the paper pattern included in the kit onto the felt interfacing, then cut out two pieces.
Centre one interfacing piece on the wrong side of one main fabric piece, with the glue side facing down. Press from the right side of the fabric to fuse it in place. Repeat with the remaining interfacing and main fabric pieces.
On the wrong side of one lining piece, trace the paper pattern in the centre. For the other lining piece, you only need to trace the darts’ outline in place on the wrong side.
2. Sew the base corner darts:
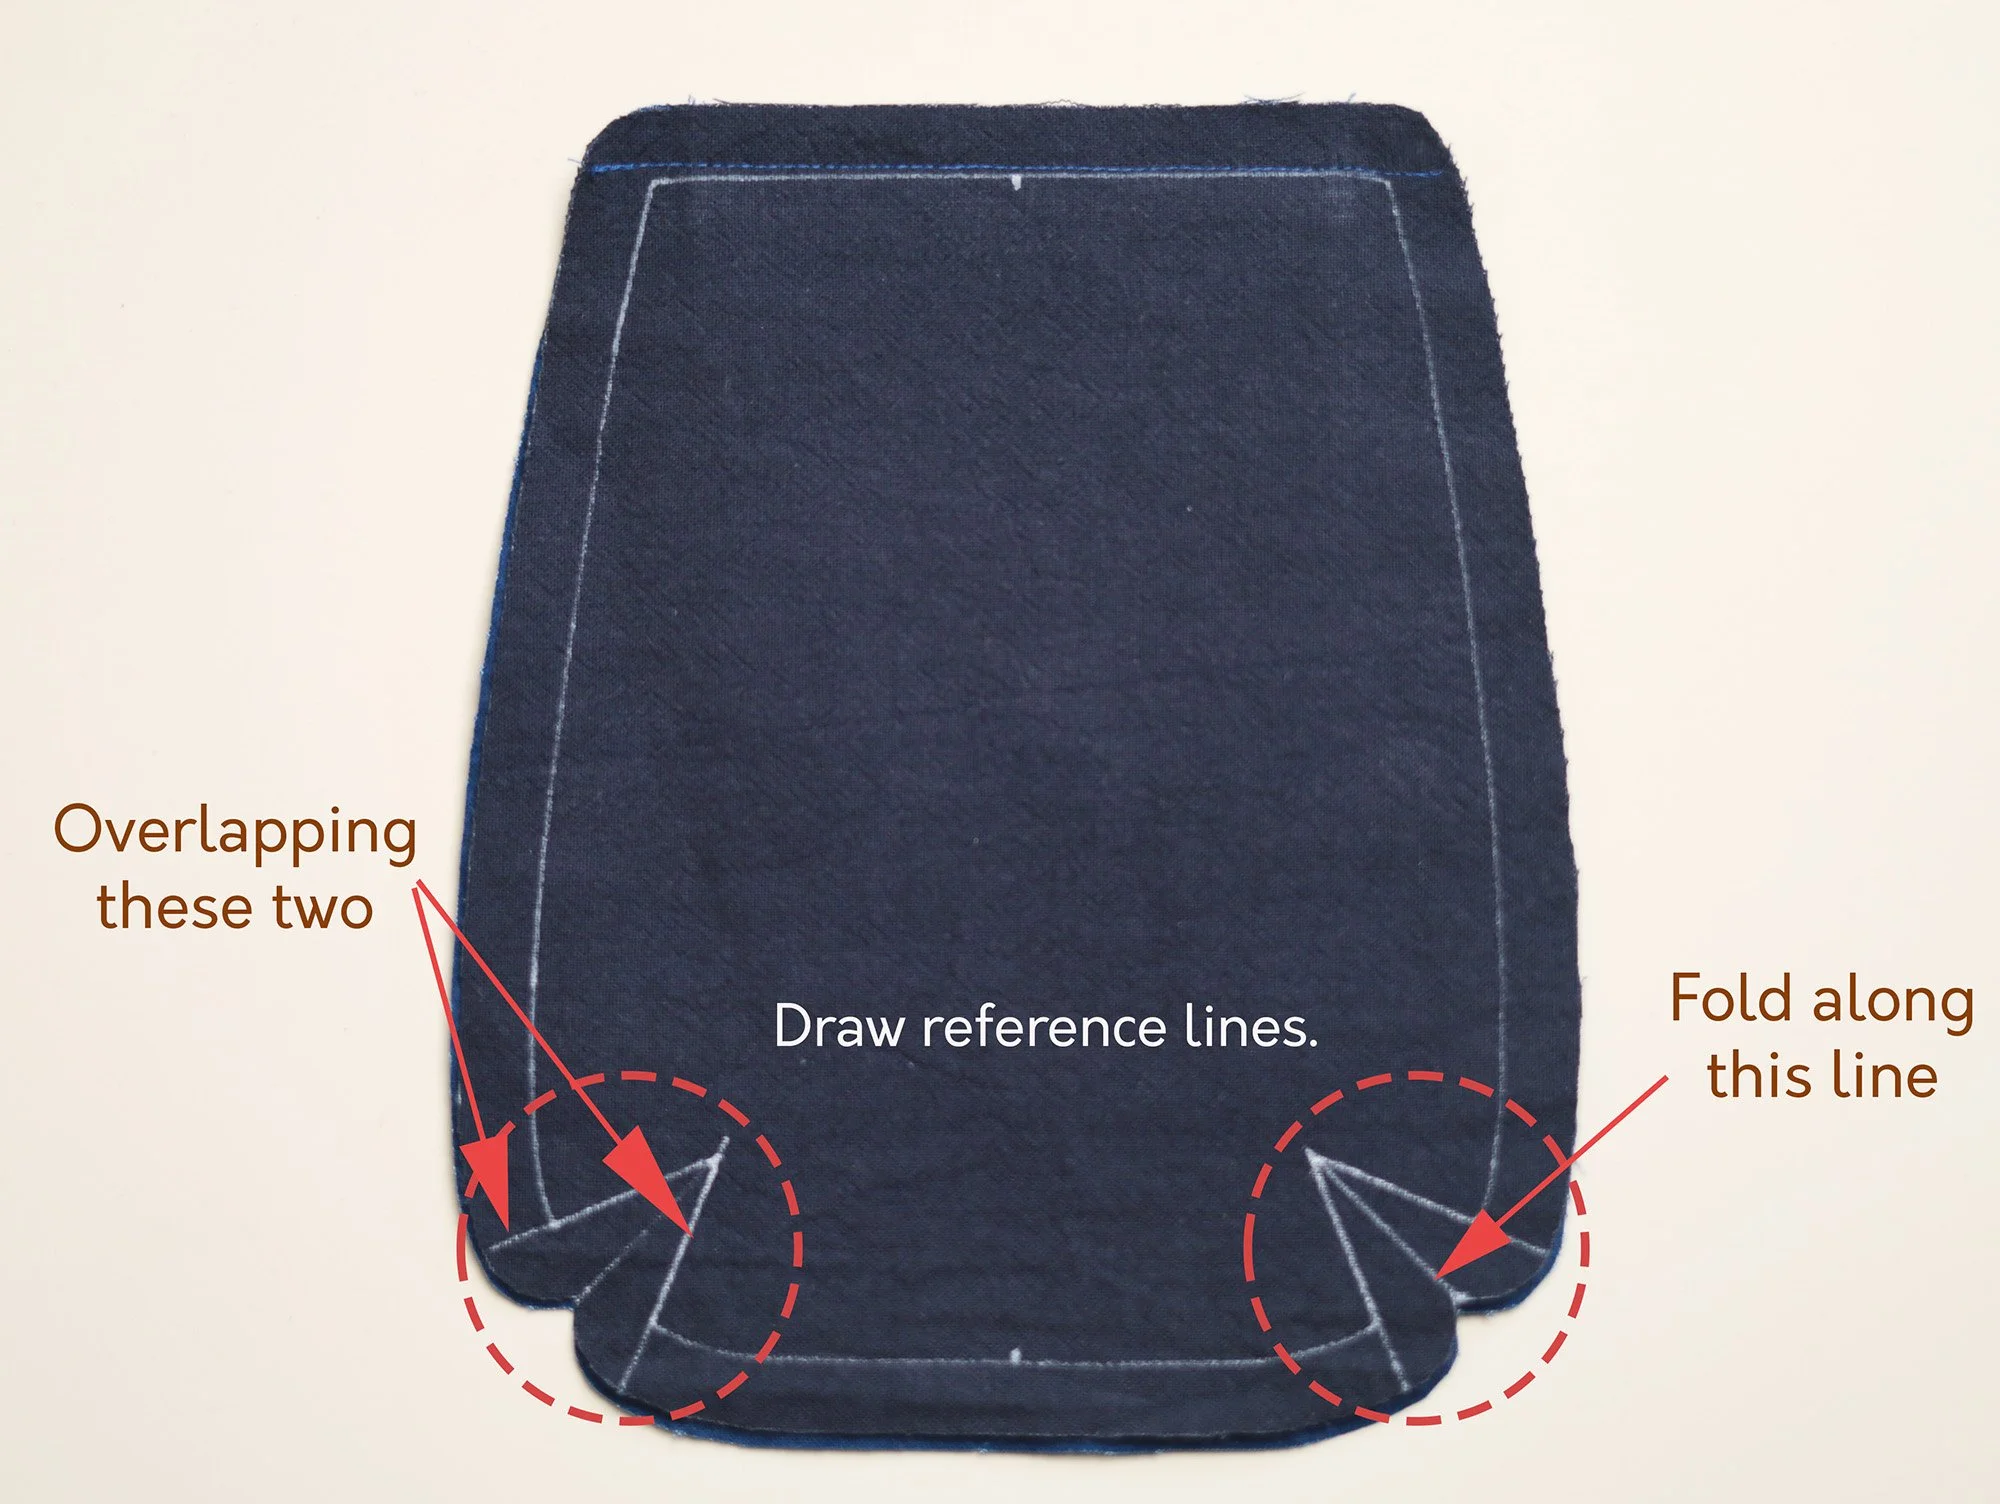
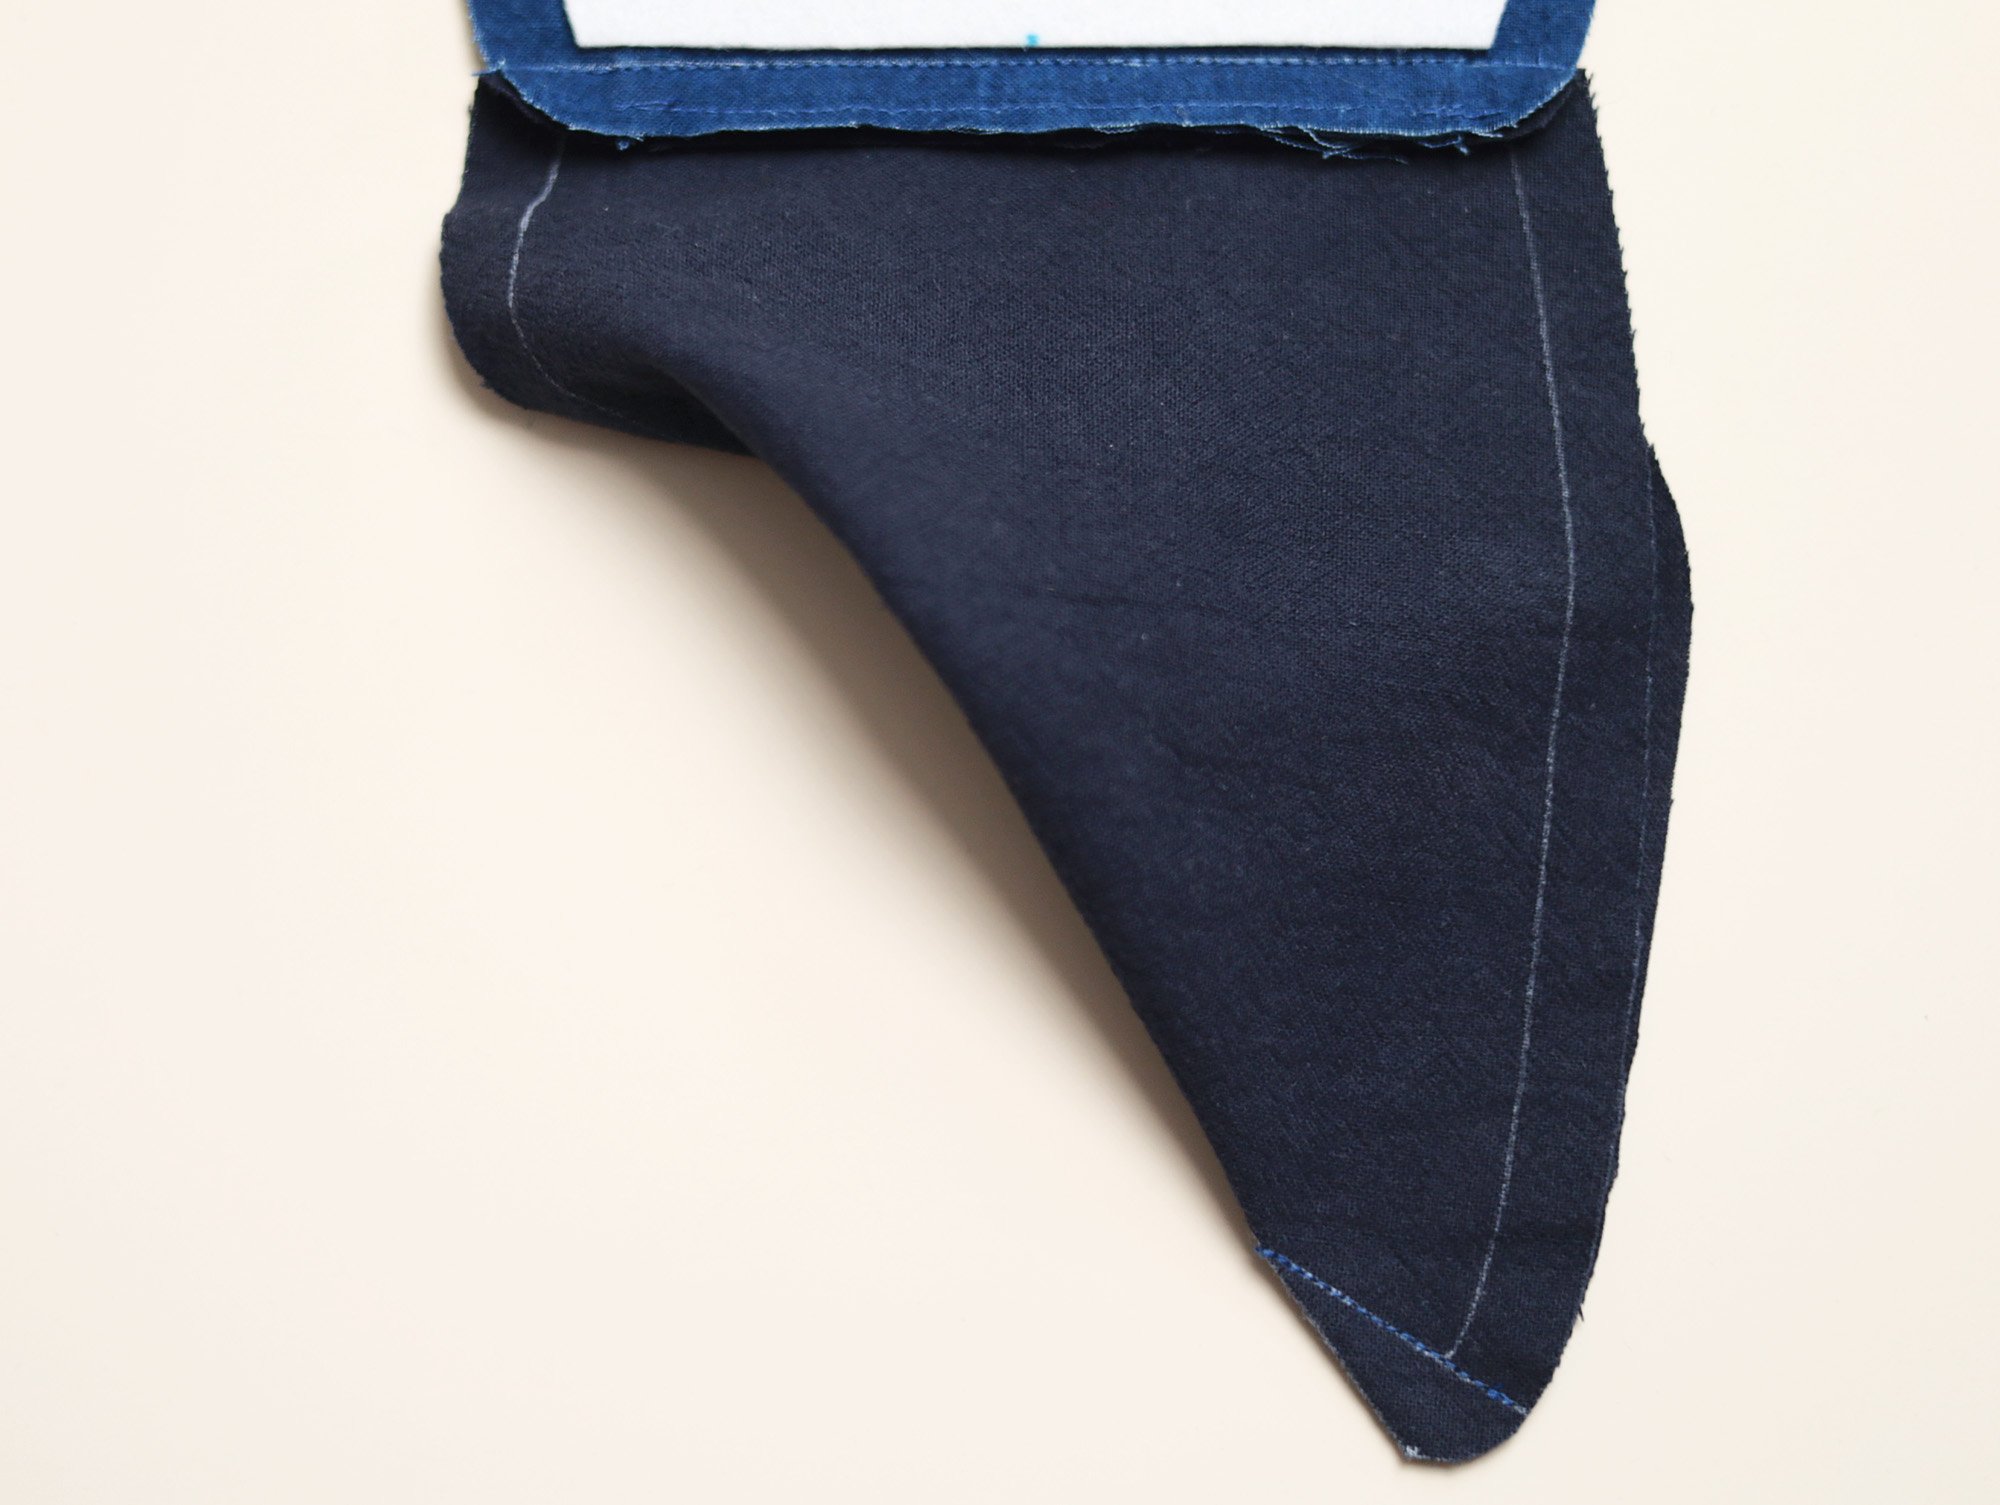
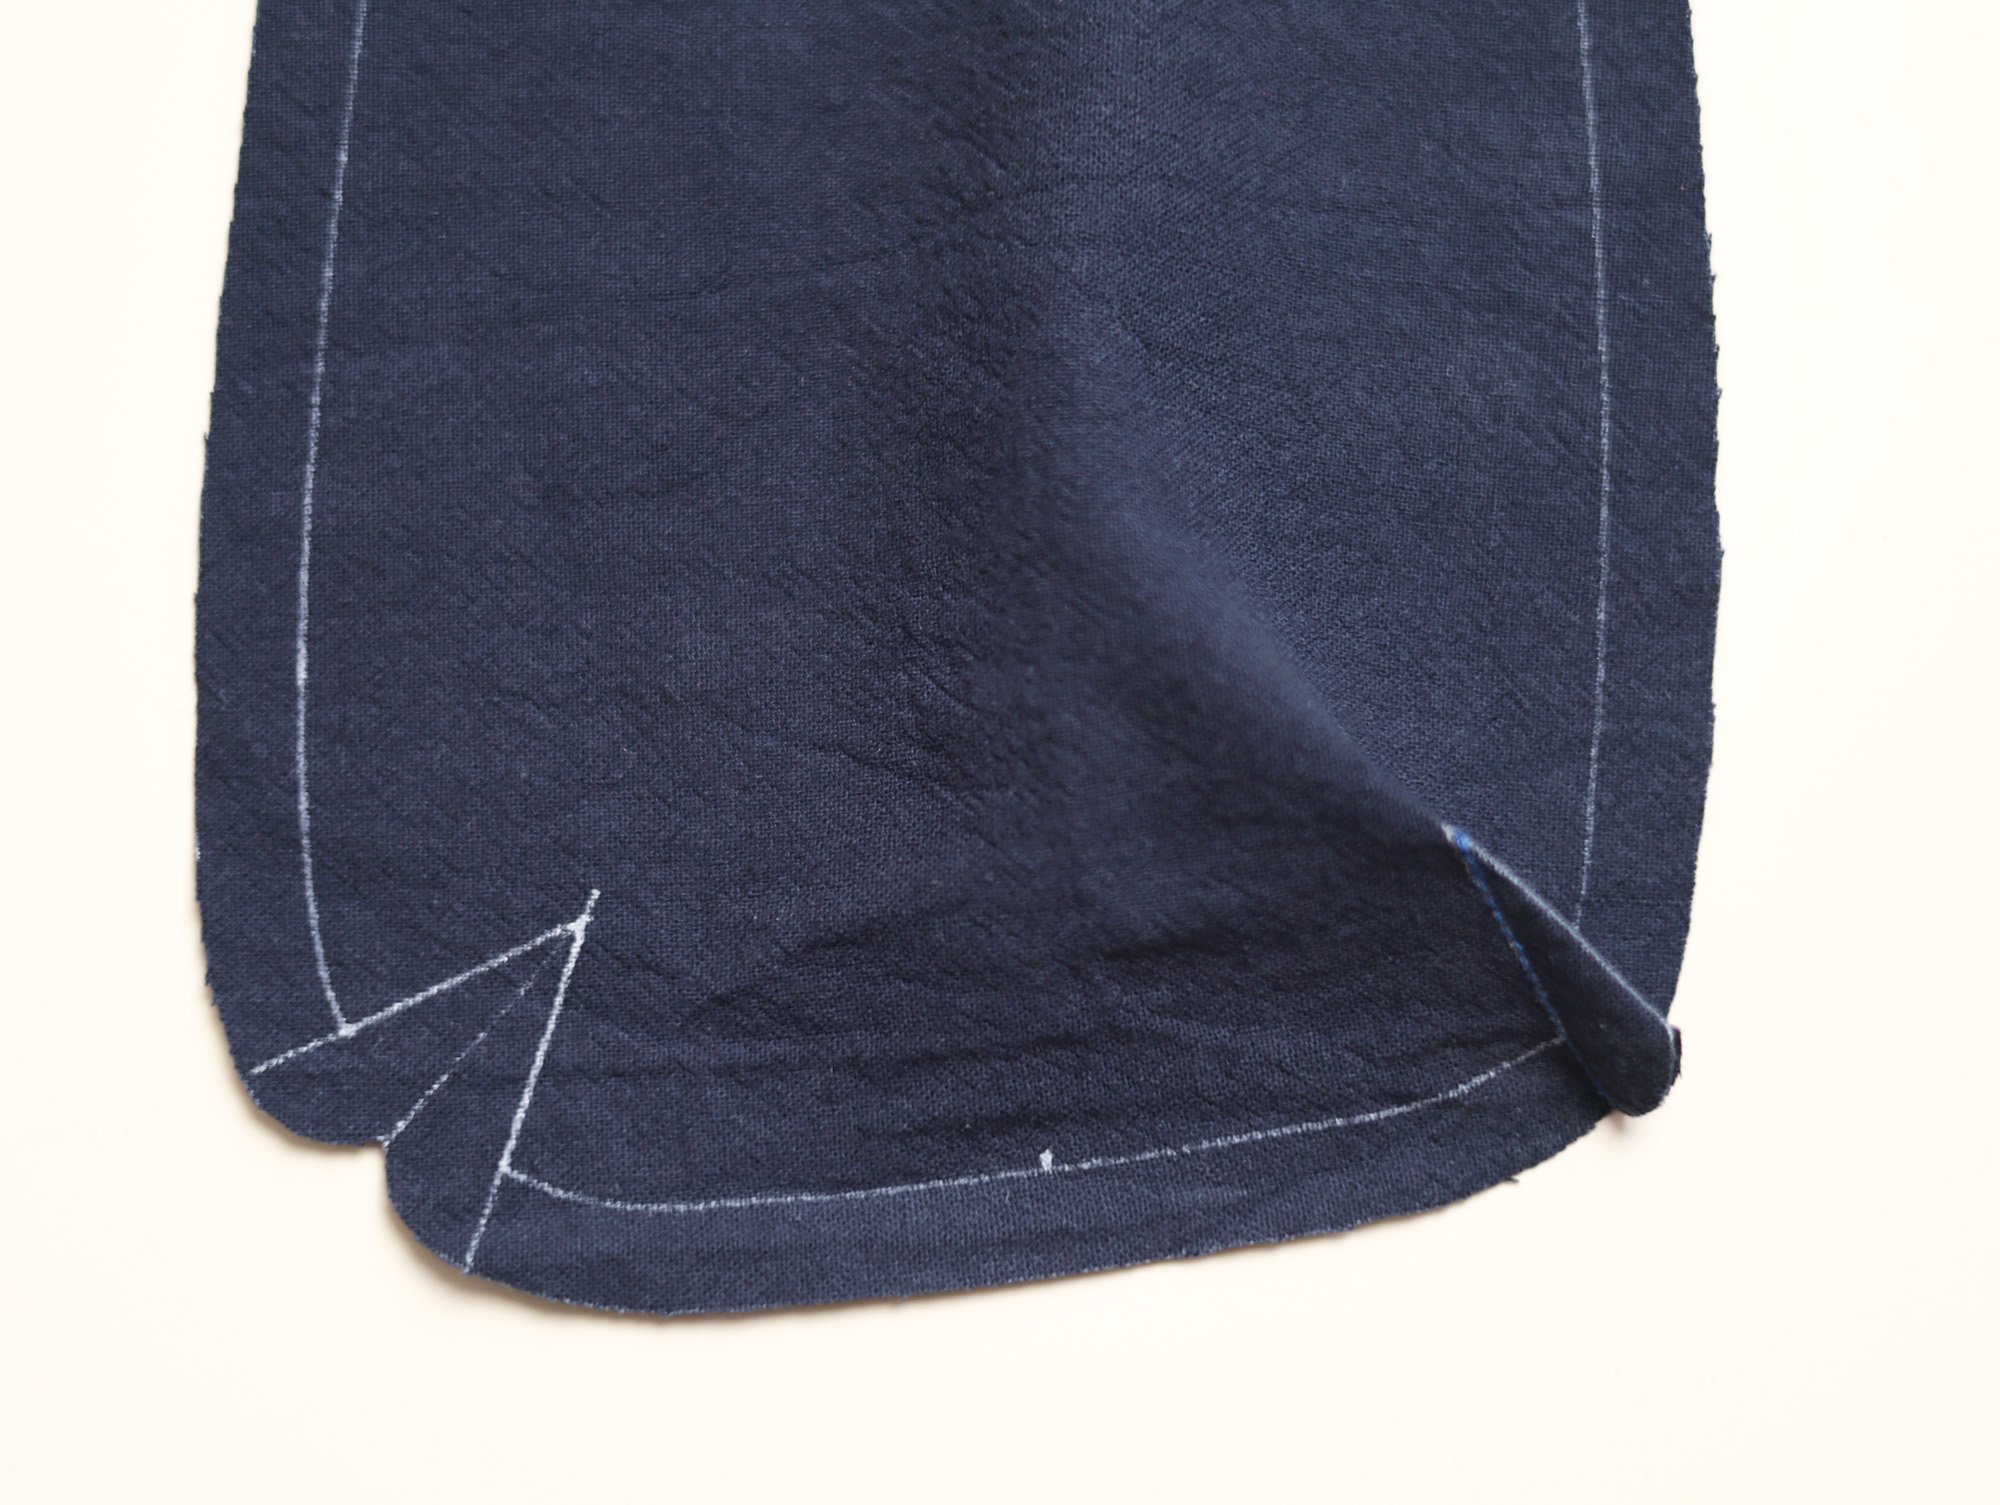
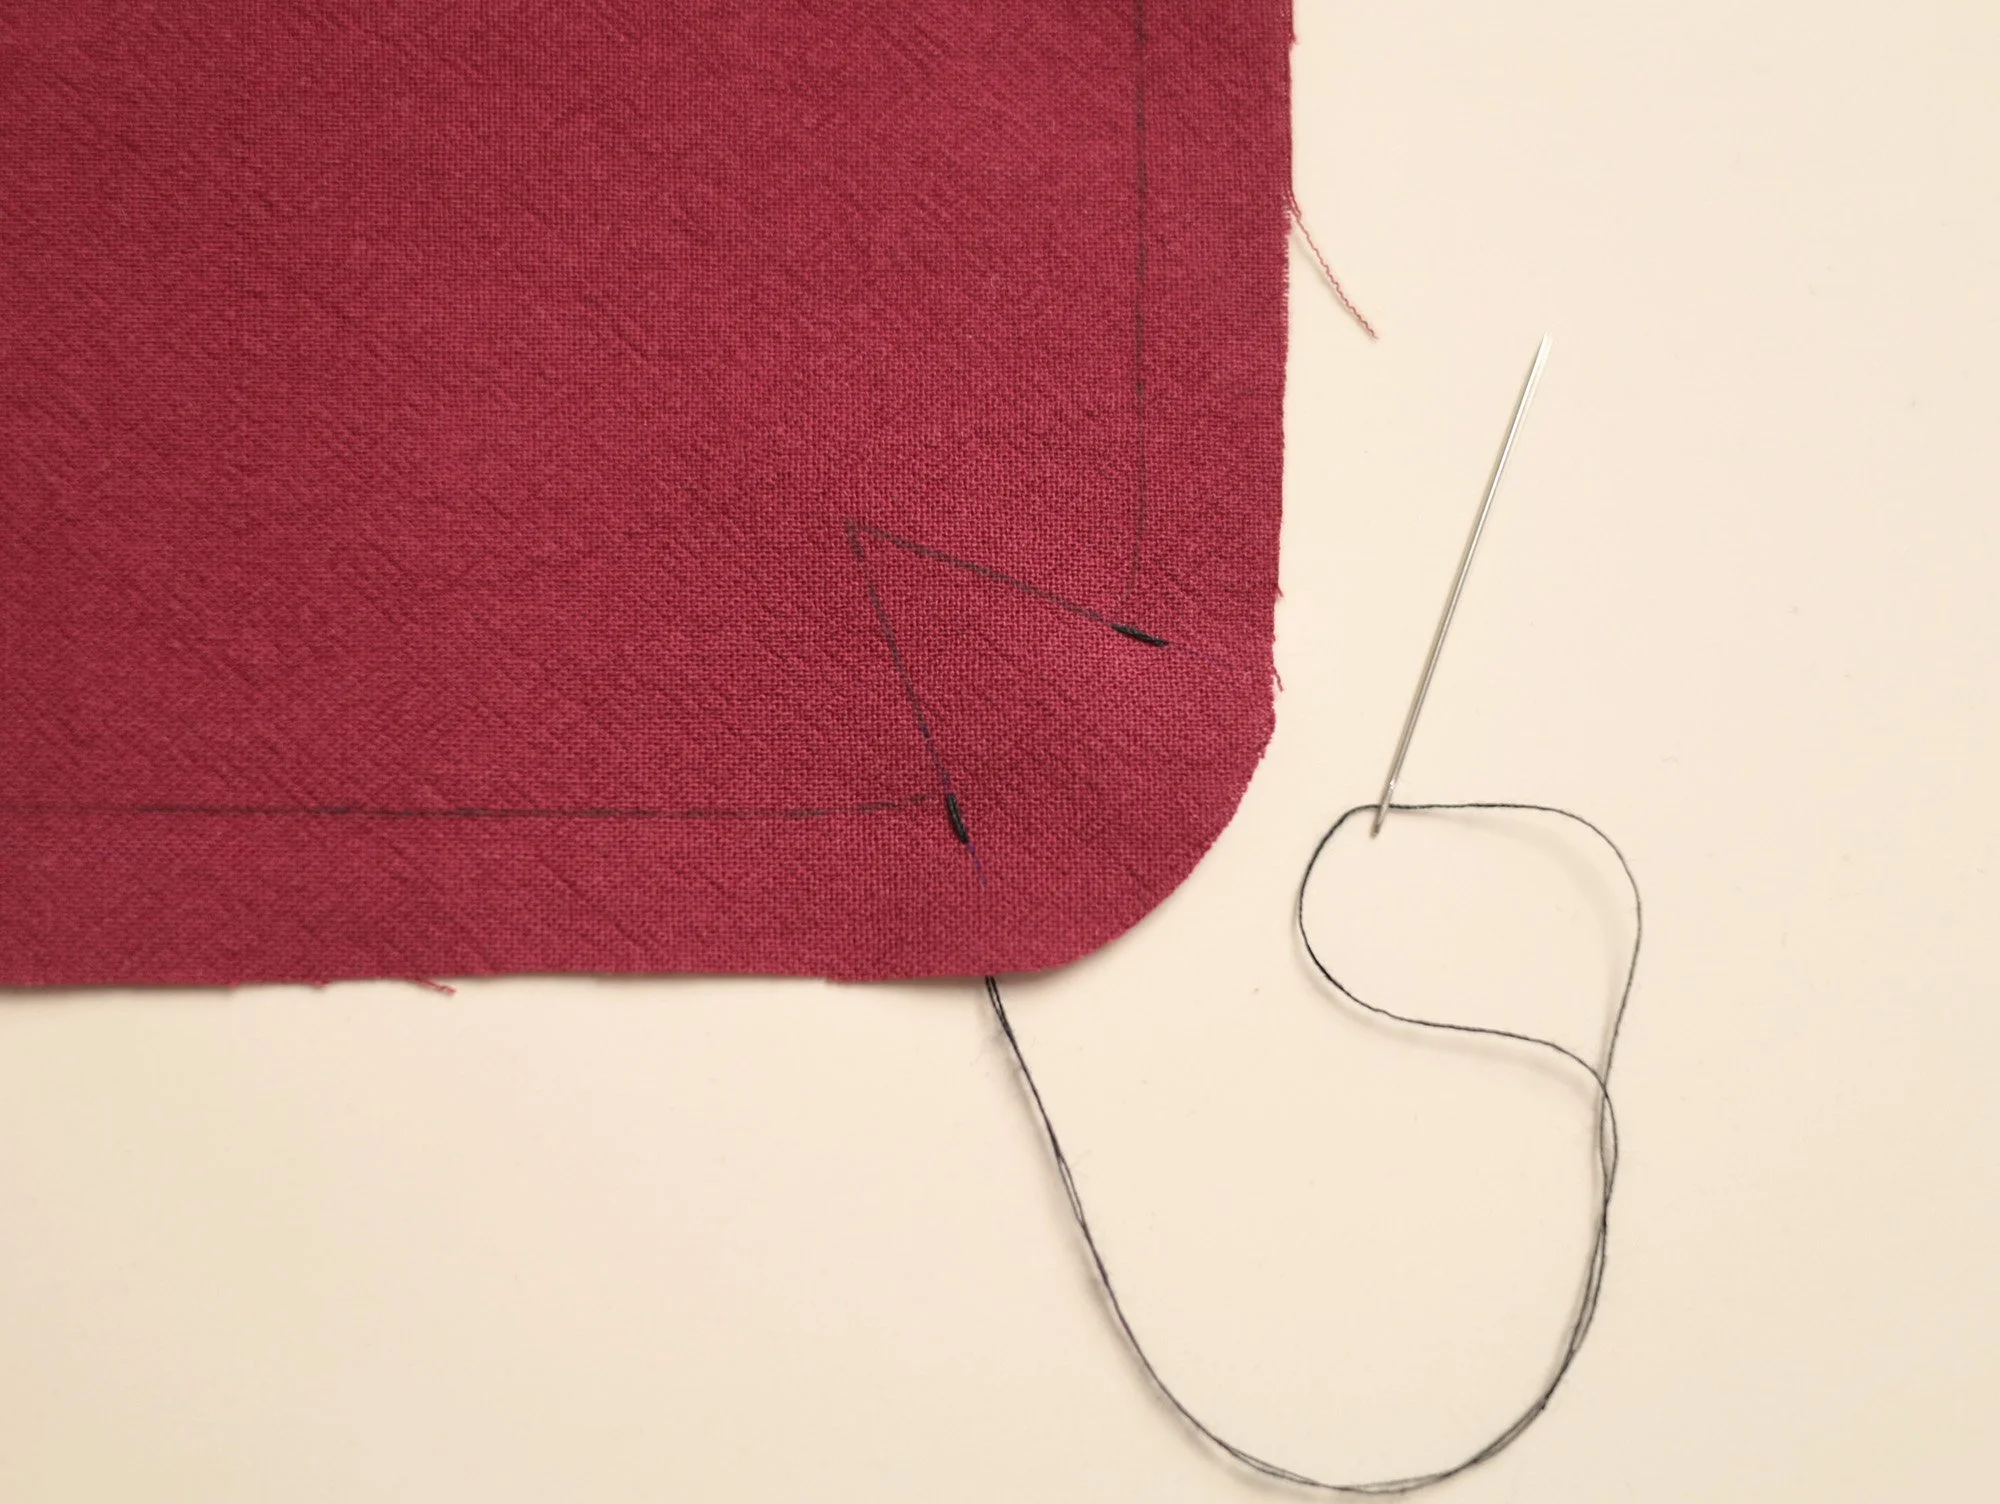
For the four darts on the lining fabric, fold the fabric at the base corner, right sides together, aligning the dart markings and secure with clips or pins. Stitch along the marked dart line. (Backstitch at both ends to secure.)
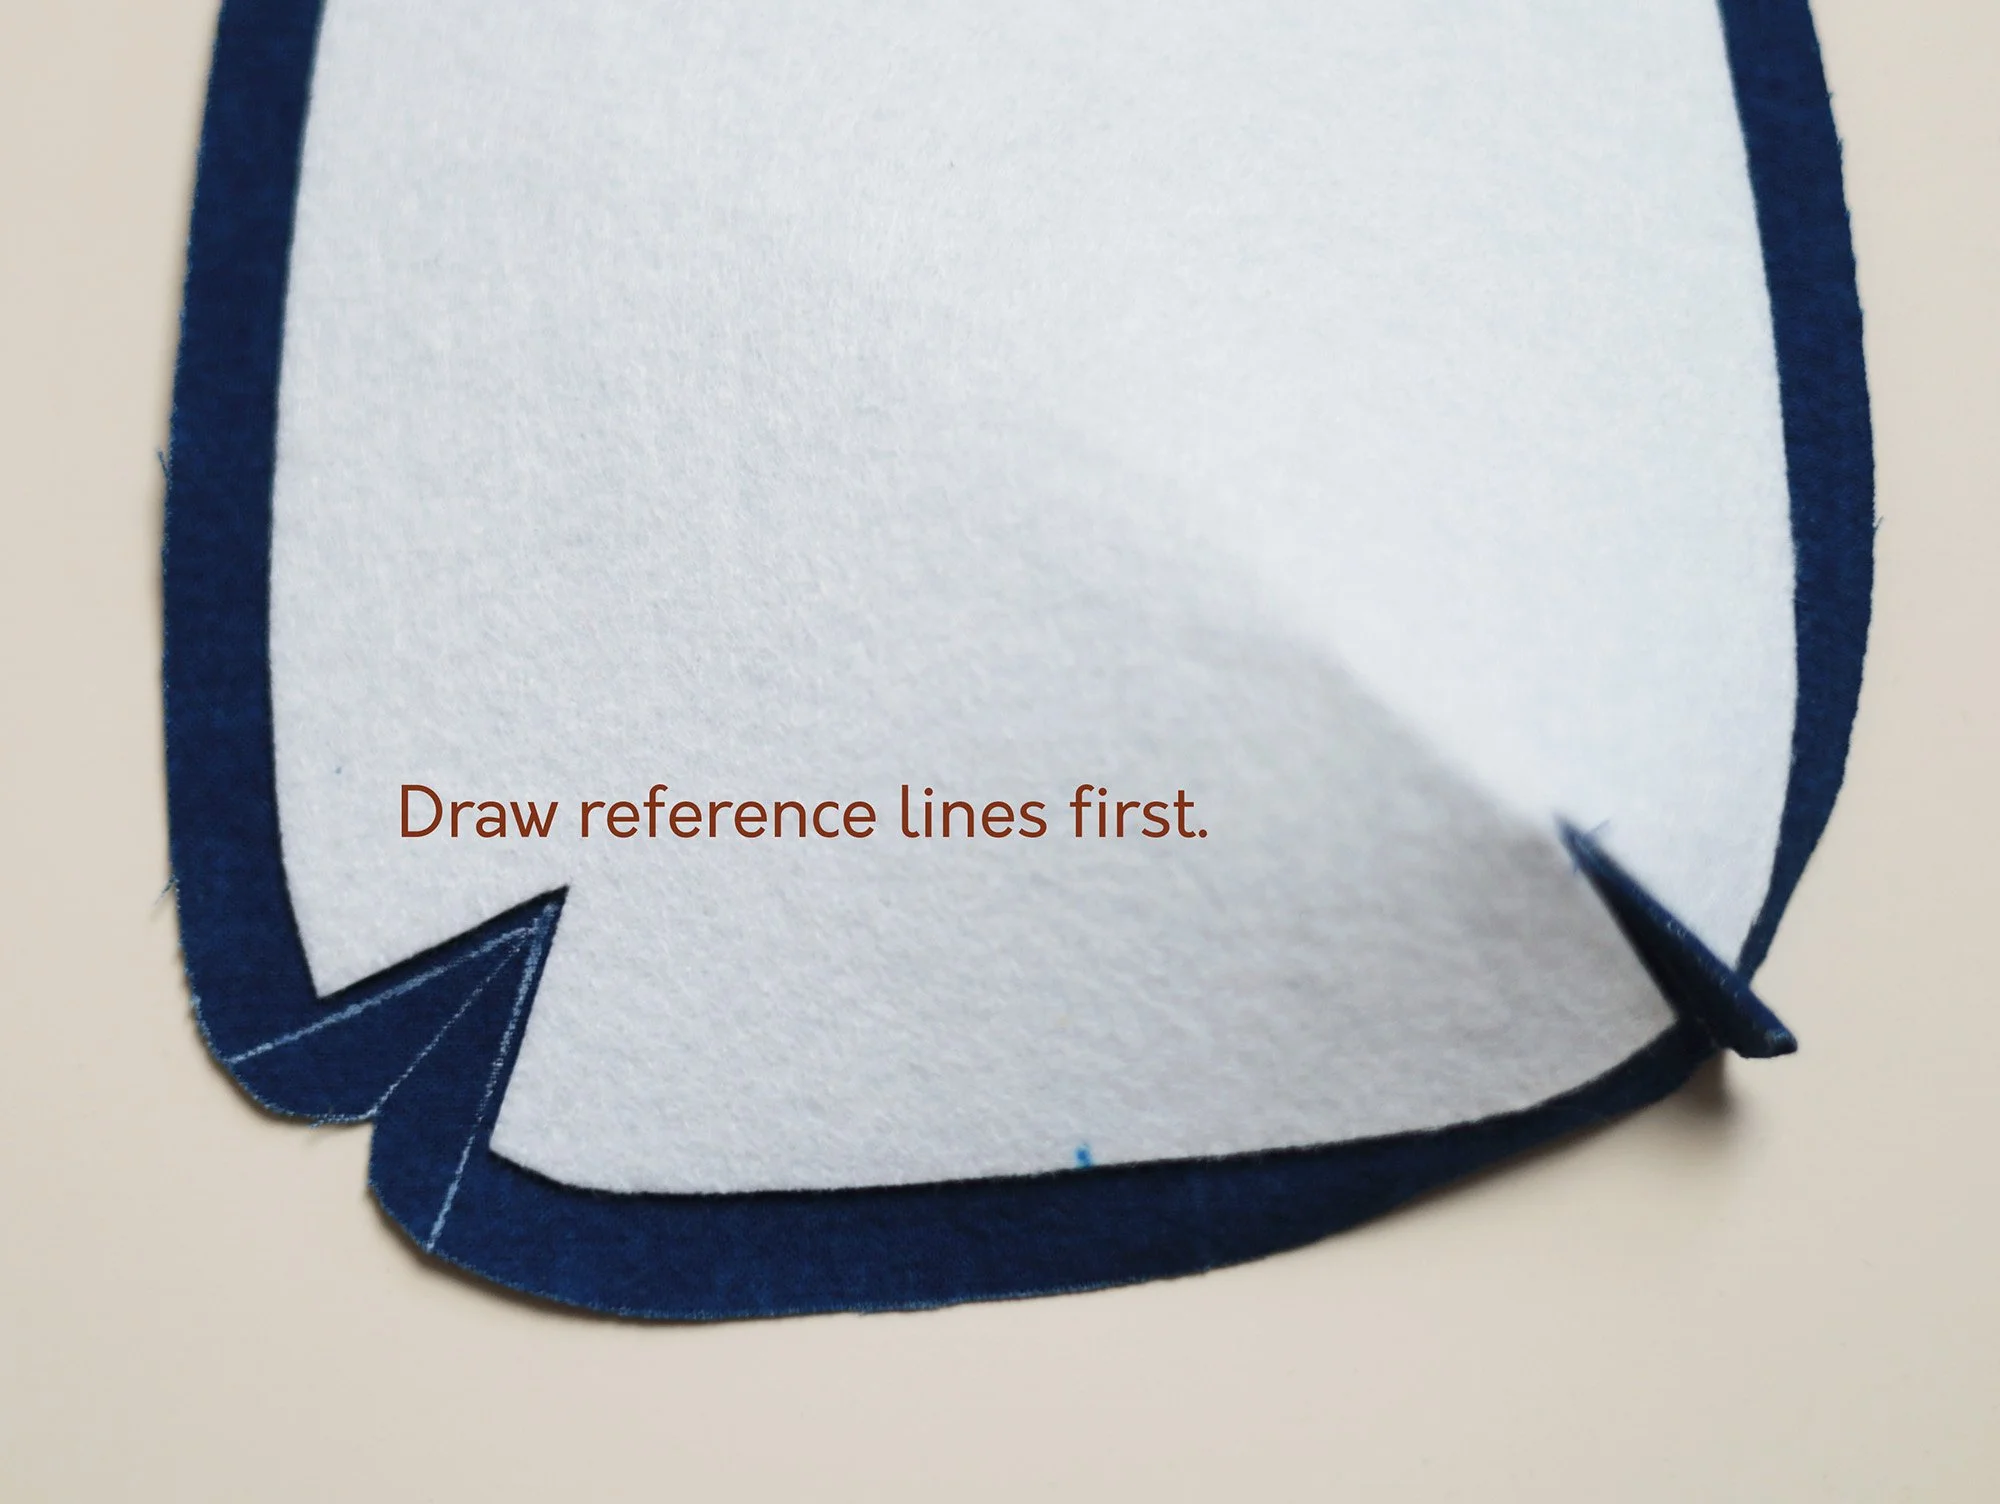
For the four darts on the man fabric, it’s best to draw the reference lines 1mm from the interfacing edges first, and use those lines as the new dart lines for stitching.
(If needed, additional photos demonstrating how to sew the corner dart can be found at the bottom of this page.)
Tips:
If sewing by hand, make one stitch on each side of the dart, as shown in the photo below, then pull the thread to bring the two sides together with the right sides facing. Stitch along the sides of the dart to form the corner. (We actually find it easier to sew the darts by hand, and the results are often better than using a sewing machine.)
If the stitching line is too close to the interfacing, trim the interfacing so that its edge sits approximately 1–2 mm inside the sewing line. This applies to all sewing steps that involve interfacing.
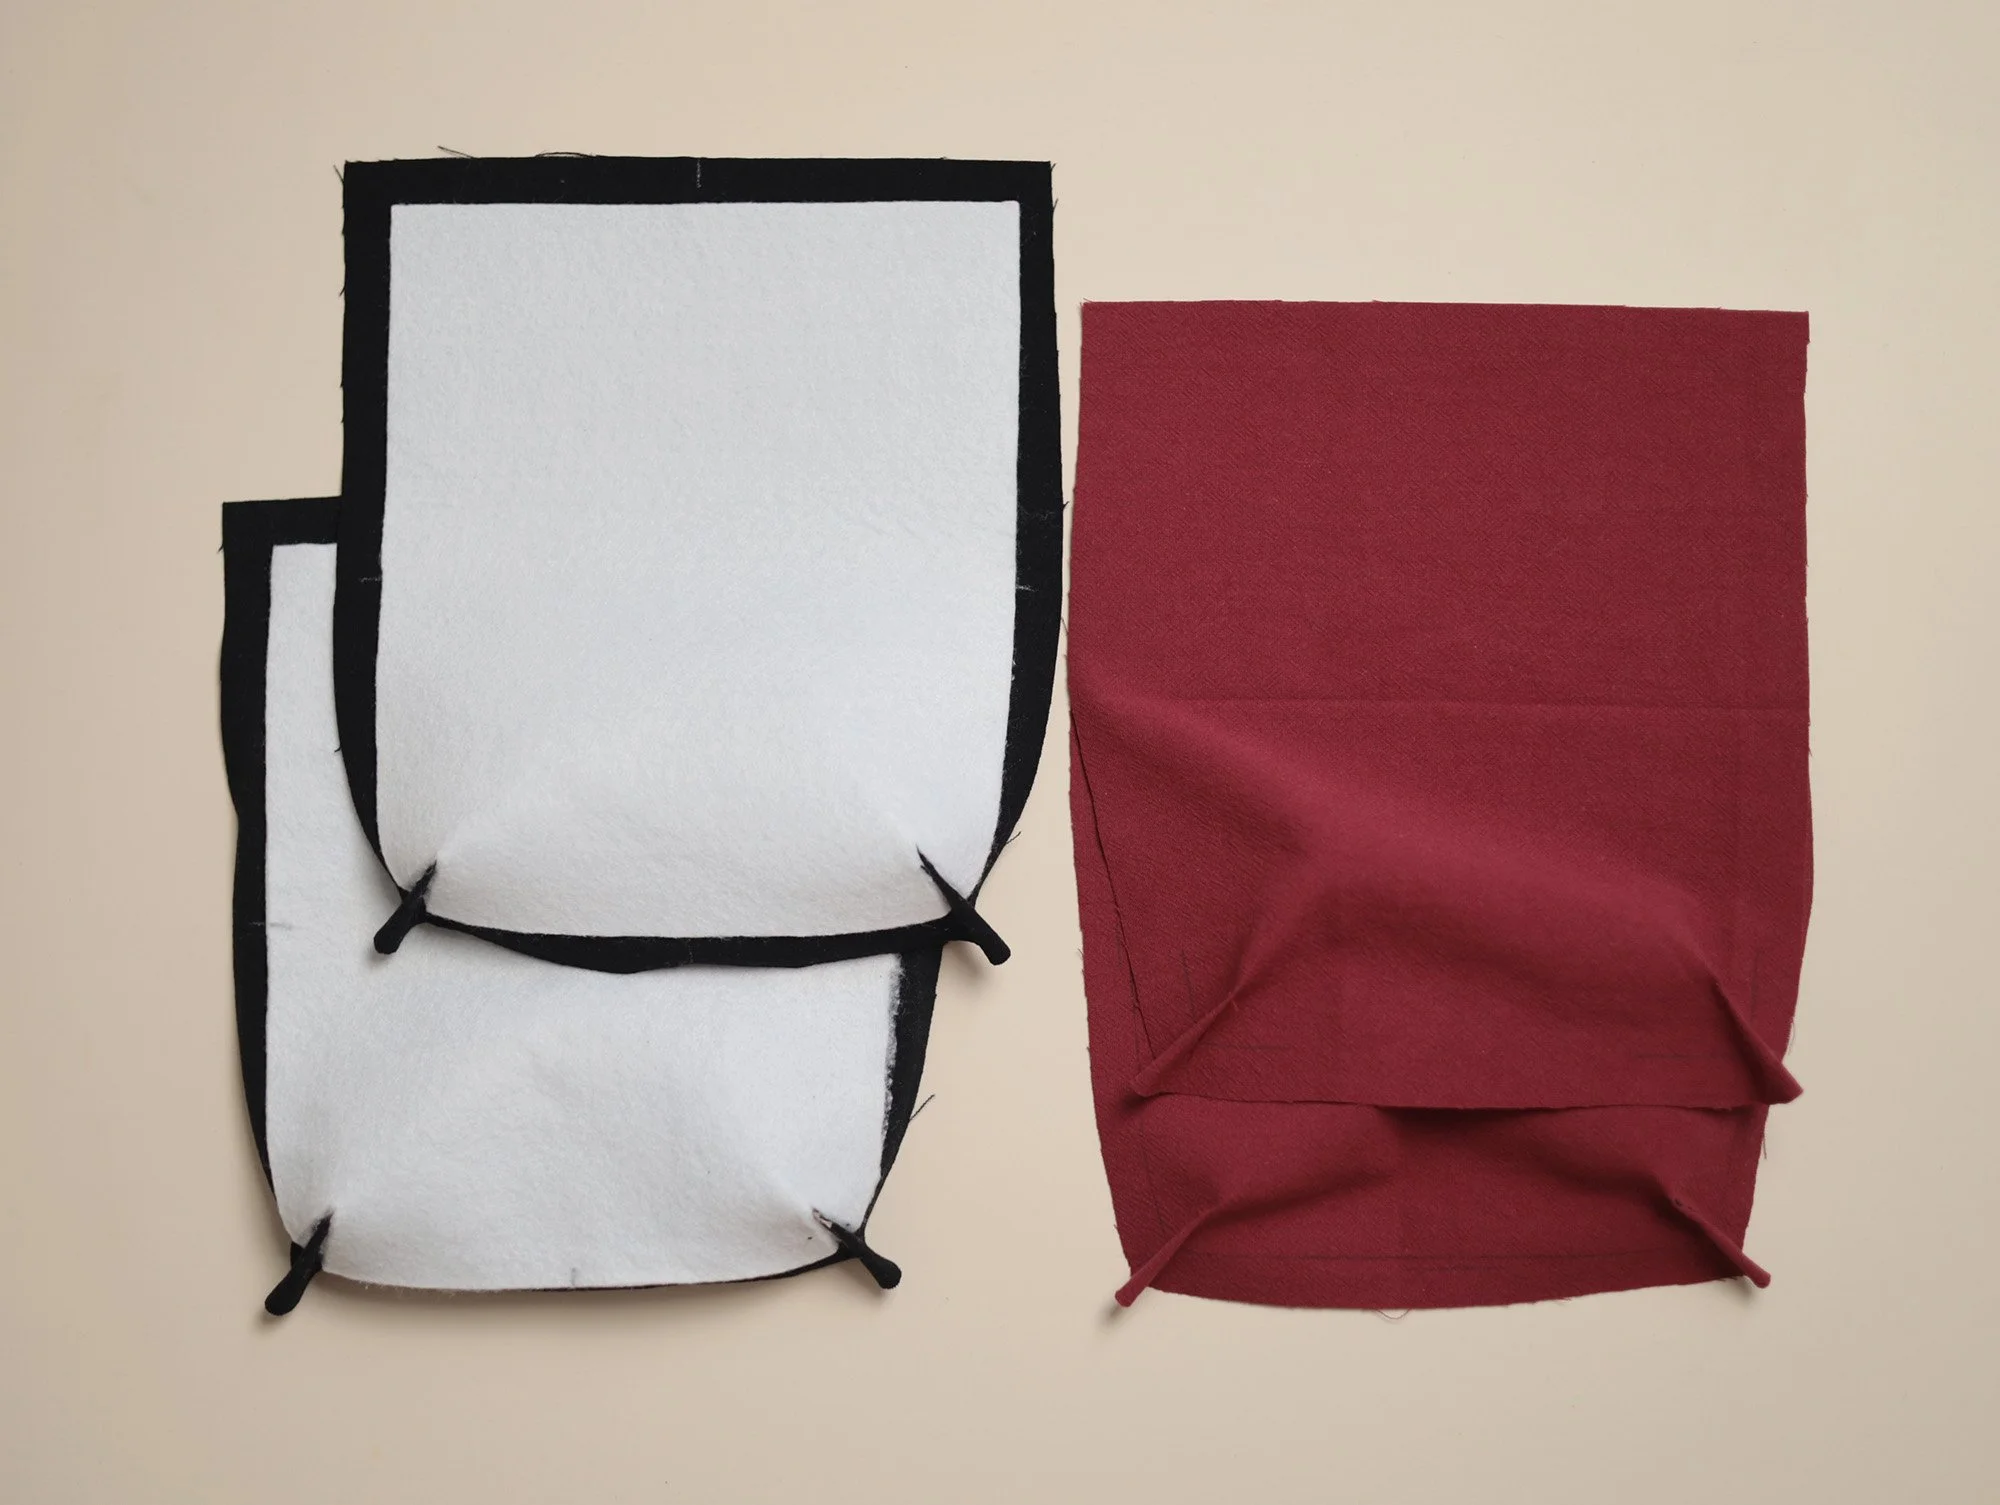
3. Attach the zipper & Assemble the Bag
Mark the centre point on the right side of each zipper tape. Then mark the centre point along the top edge of each main fabric piece (on the wrong side) and each lining piece (on the right side).
Prepare the zipper by folding the four ends of the zipper tapes towards the wrong side at a 45-degree angle. Baste each fold in place with a few stitches to secure.
For machine sewing, change to the zipper foot first. Place one lining piece with its right side facing up. Position the zipper on top with its right side facing up, aligning the centre points of the lining and zipper. Baste in place approximately 3–5 mm from the edge.
Place one main fabric piece on top of the lining piece, with their right sides facing each other and the zipper sandwiched between them. Sew along the top edge using 1cm SA.
Sewing Tip:
To ensure the centre points are perfectly aligned, move the zipper pull to the left end and start sewing half of the top edge from approximately 1 cm to the left of the centre point. Check that the centre points are aligned after sewing. Once you are happy with the alignment, move the zipper to the right end and sew the other half of the top edge.
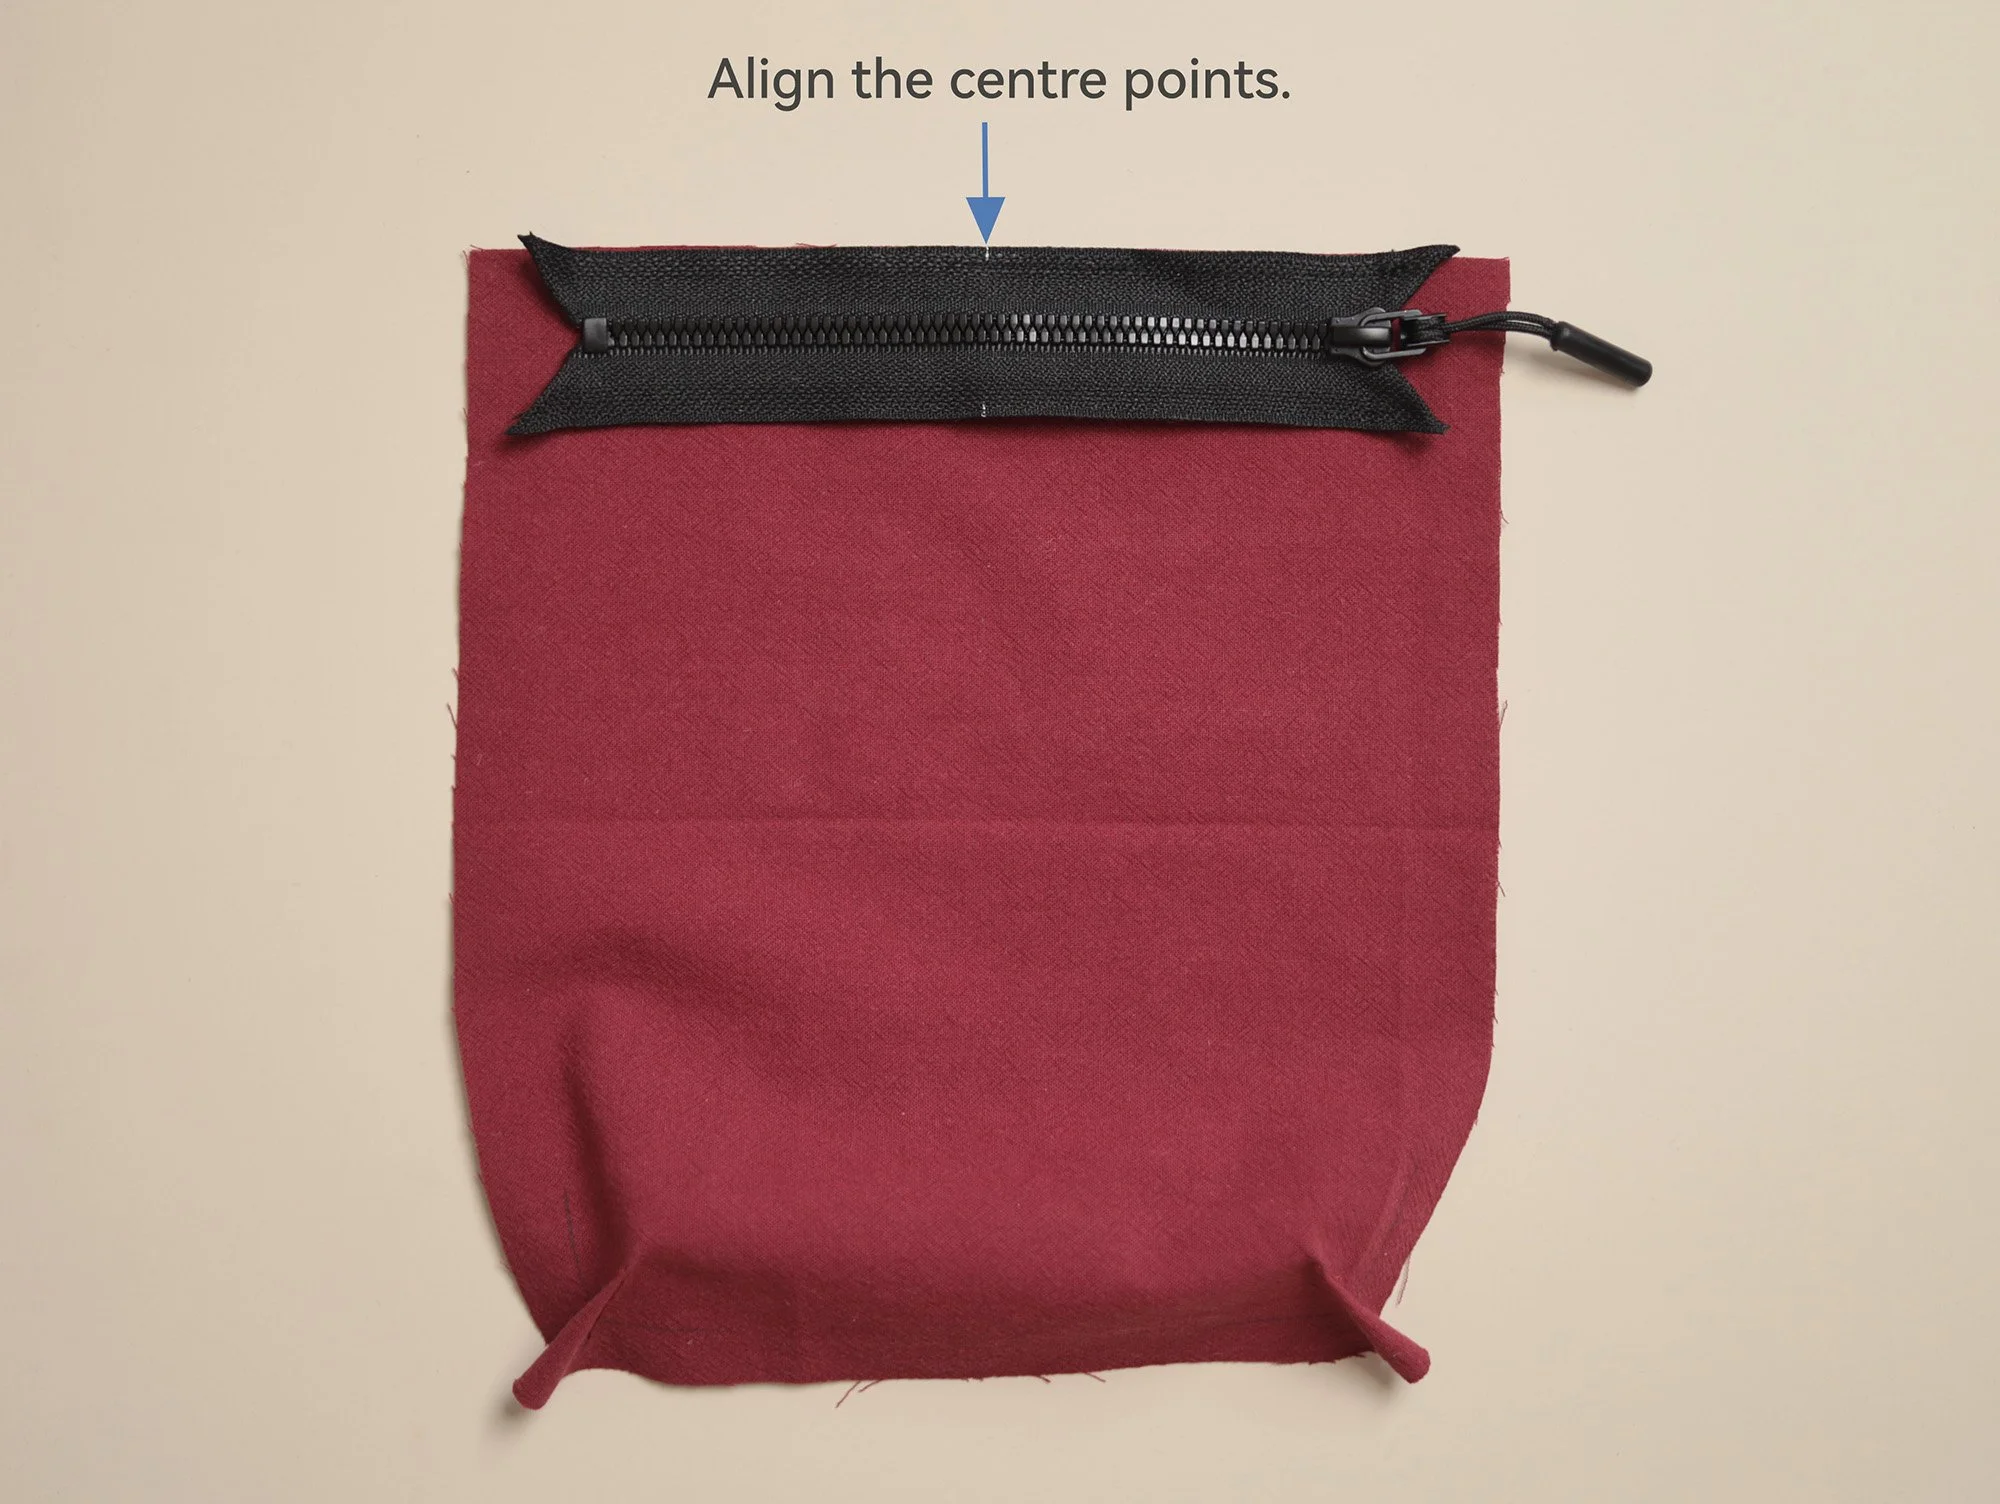
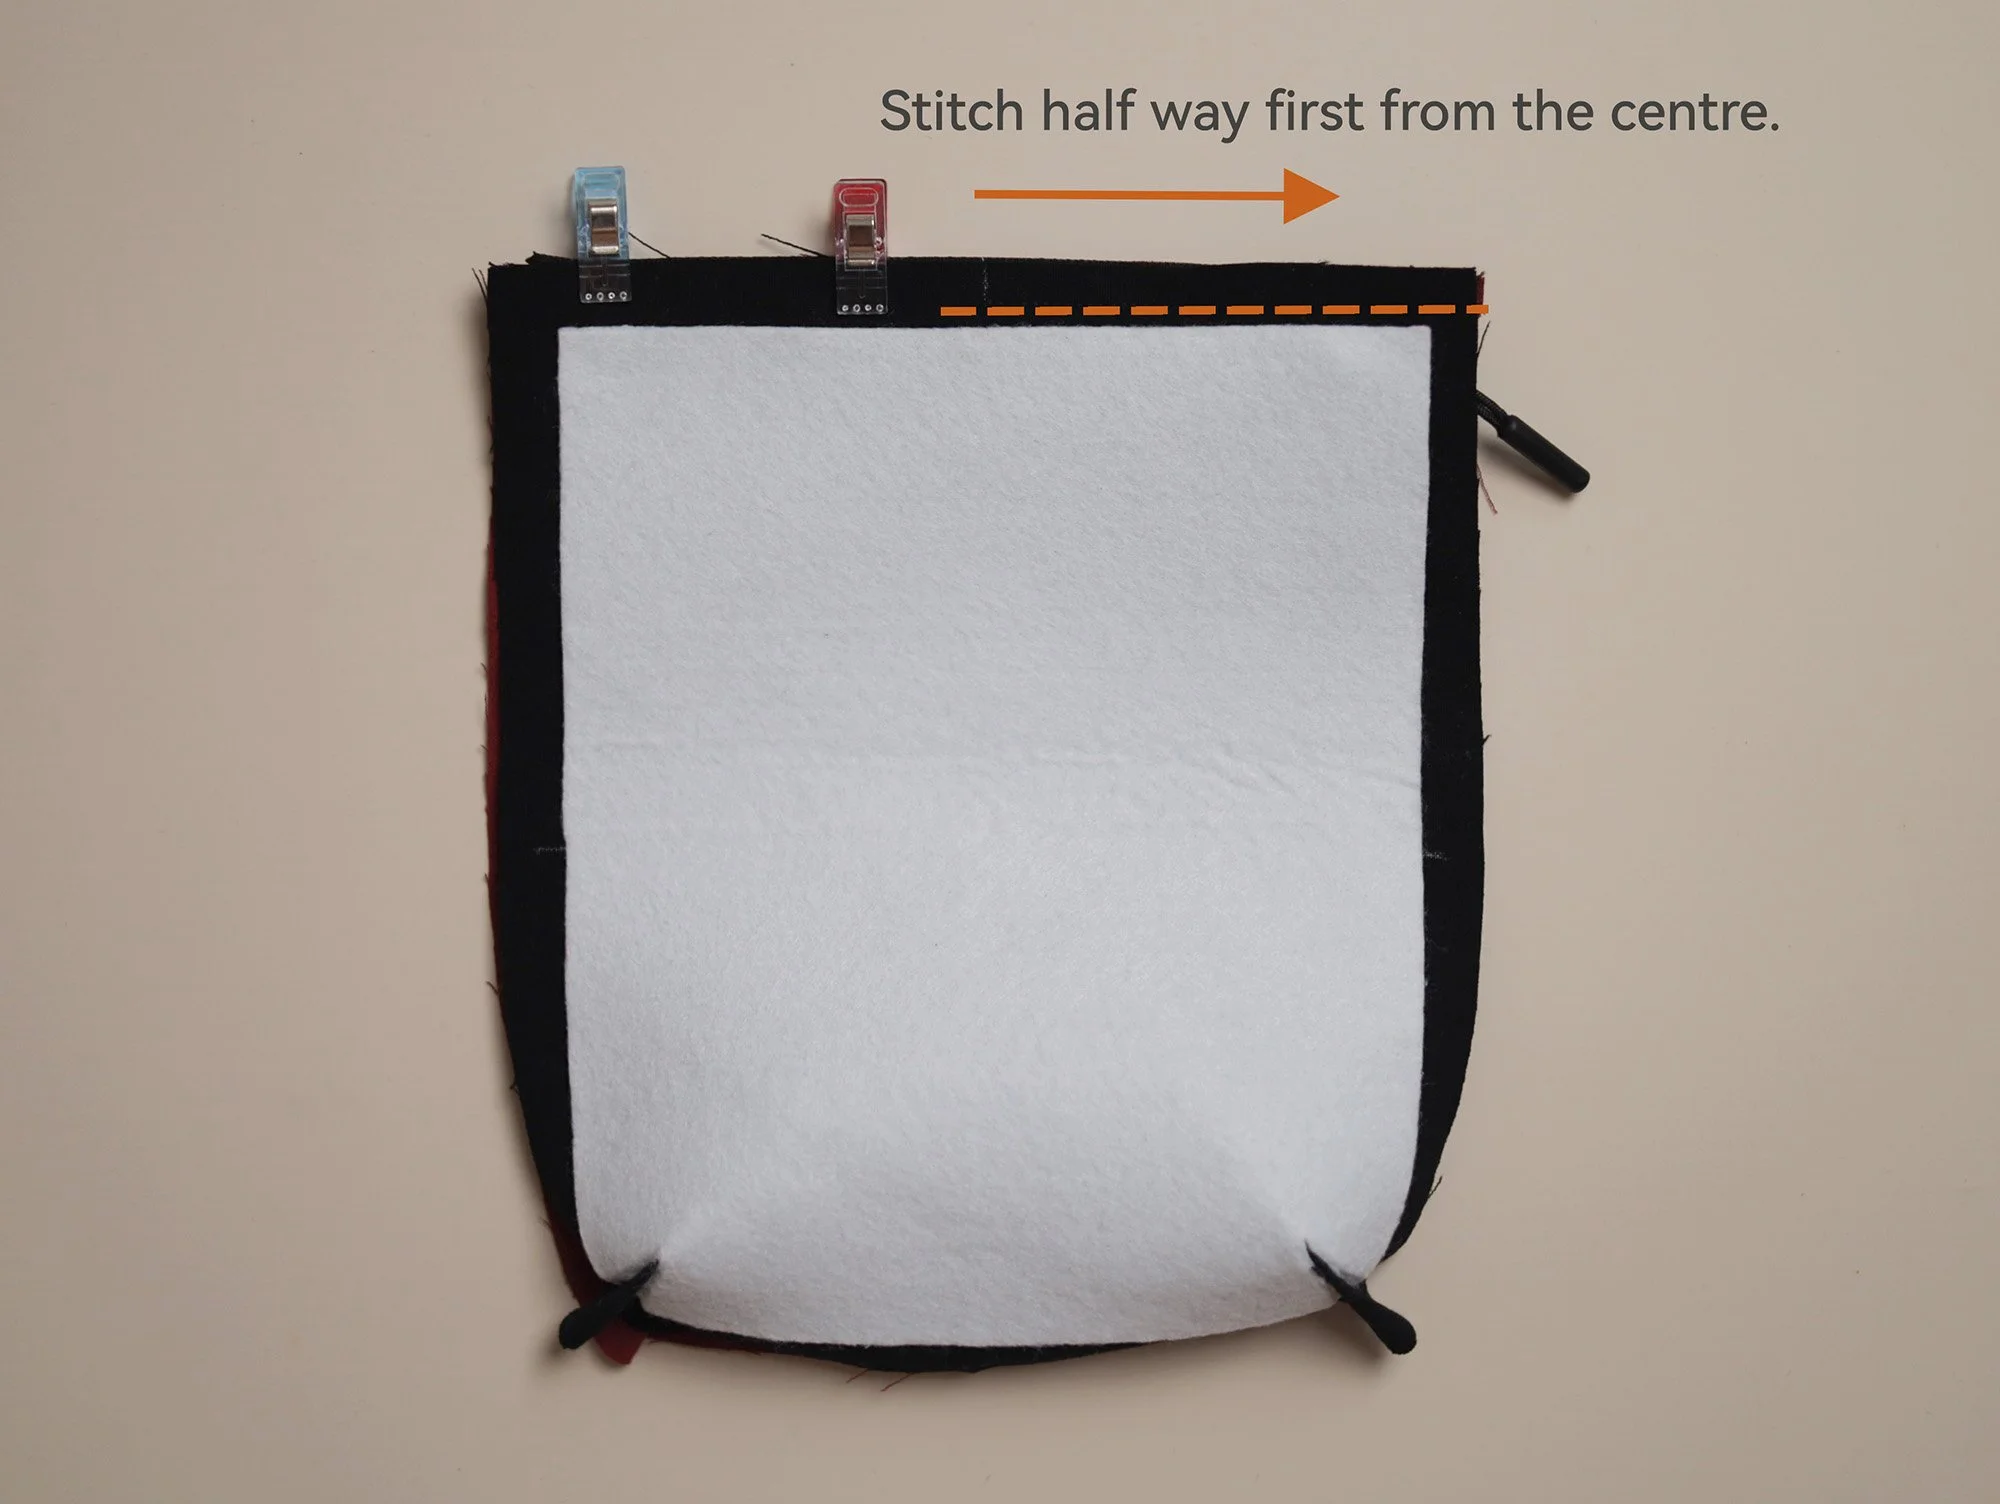
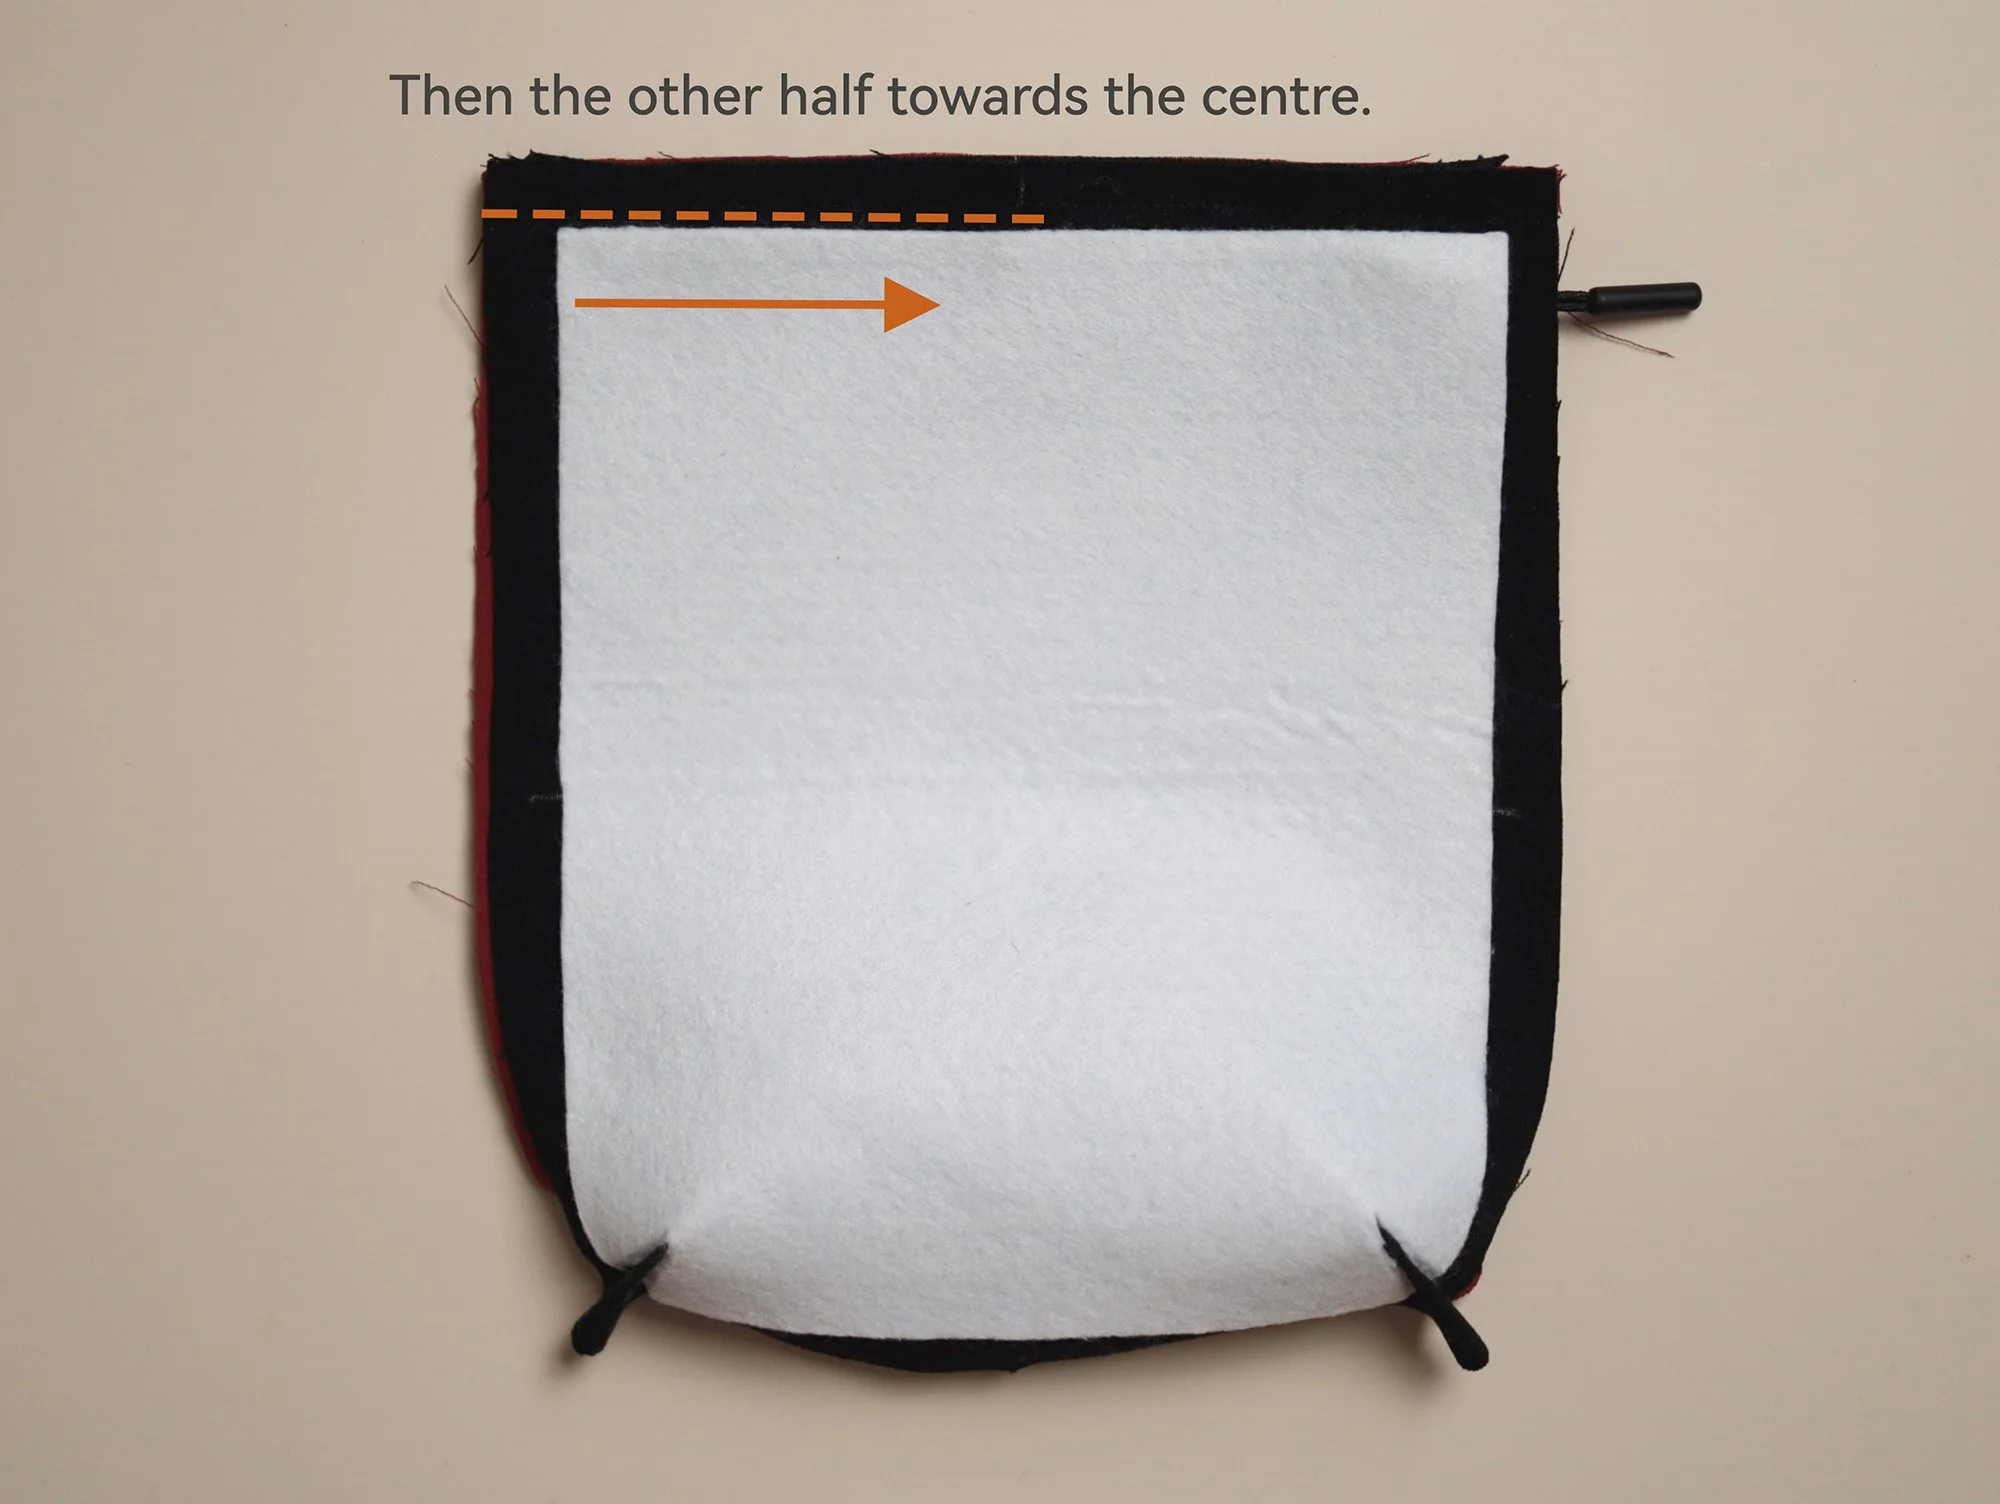
Flip the main and lining pieces over to one side, with their wrong sides facing each other, leaving the zipper on the opposite side. Repeat the previous step with the remaining zipper tape and the remaining main and lining pieces.
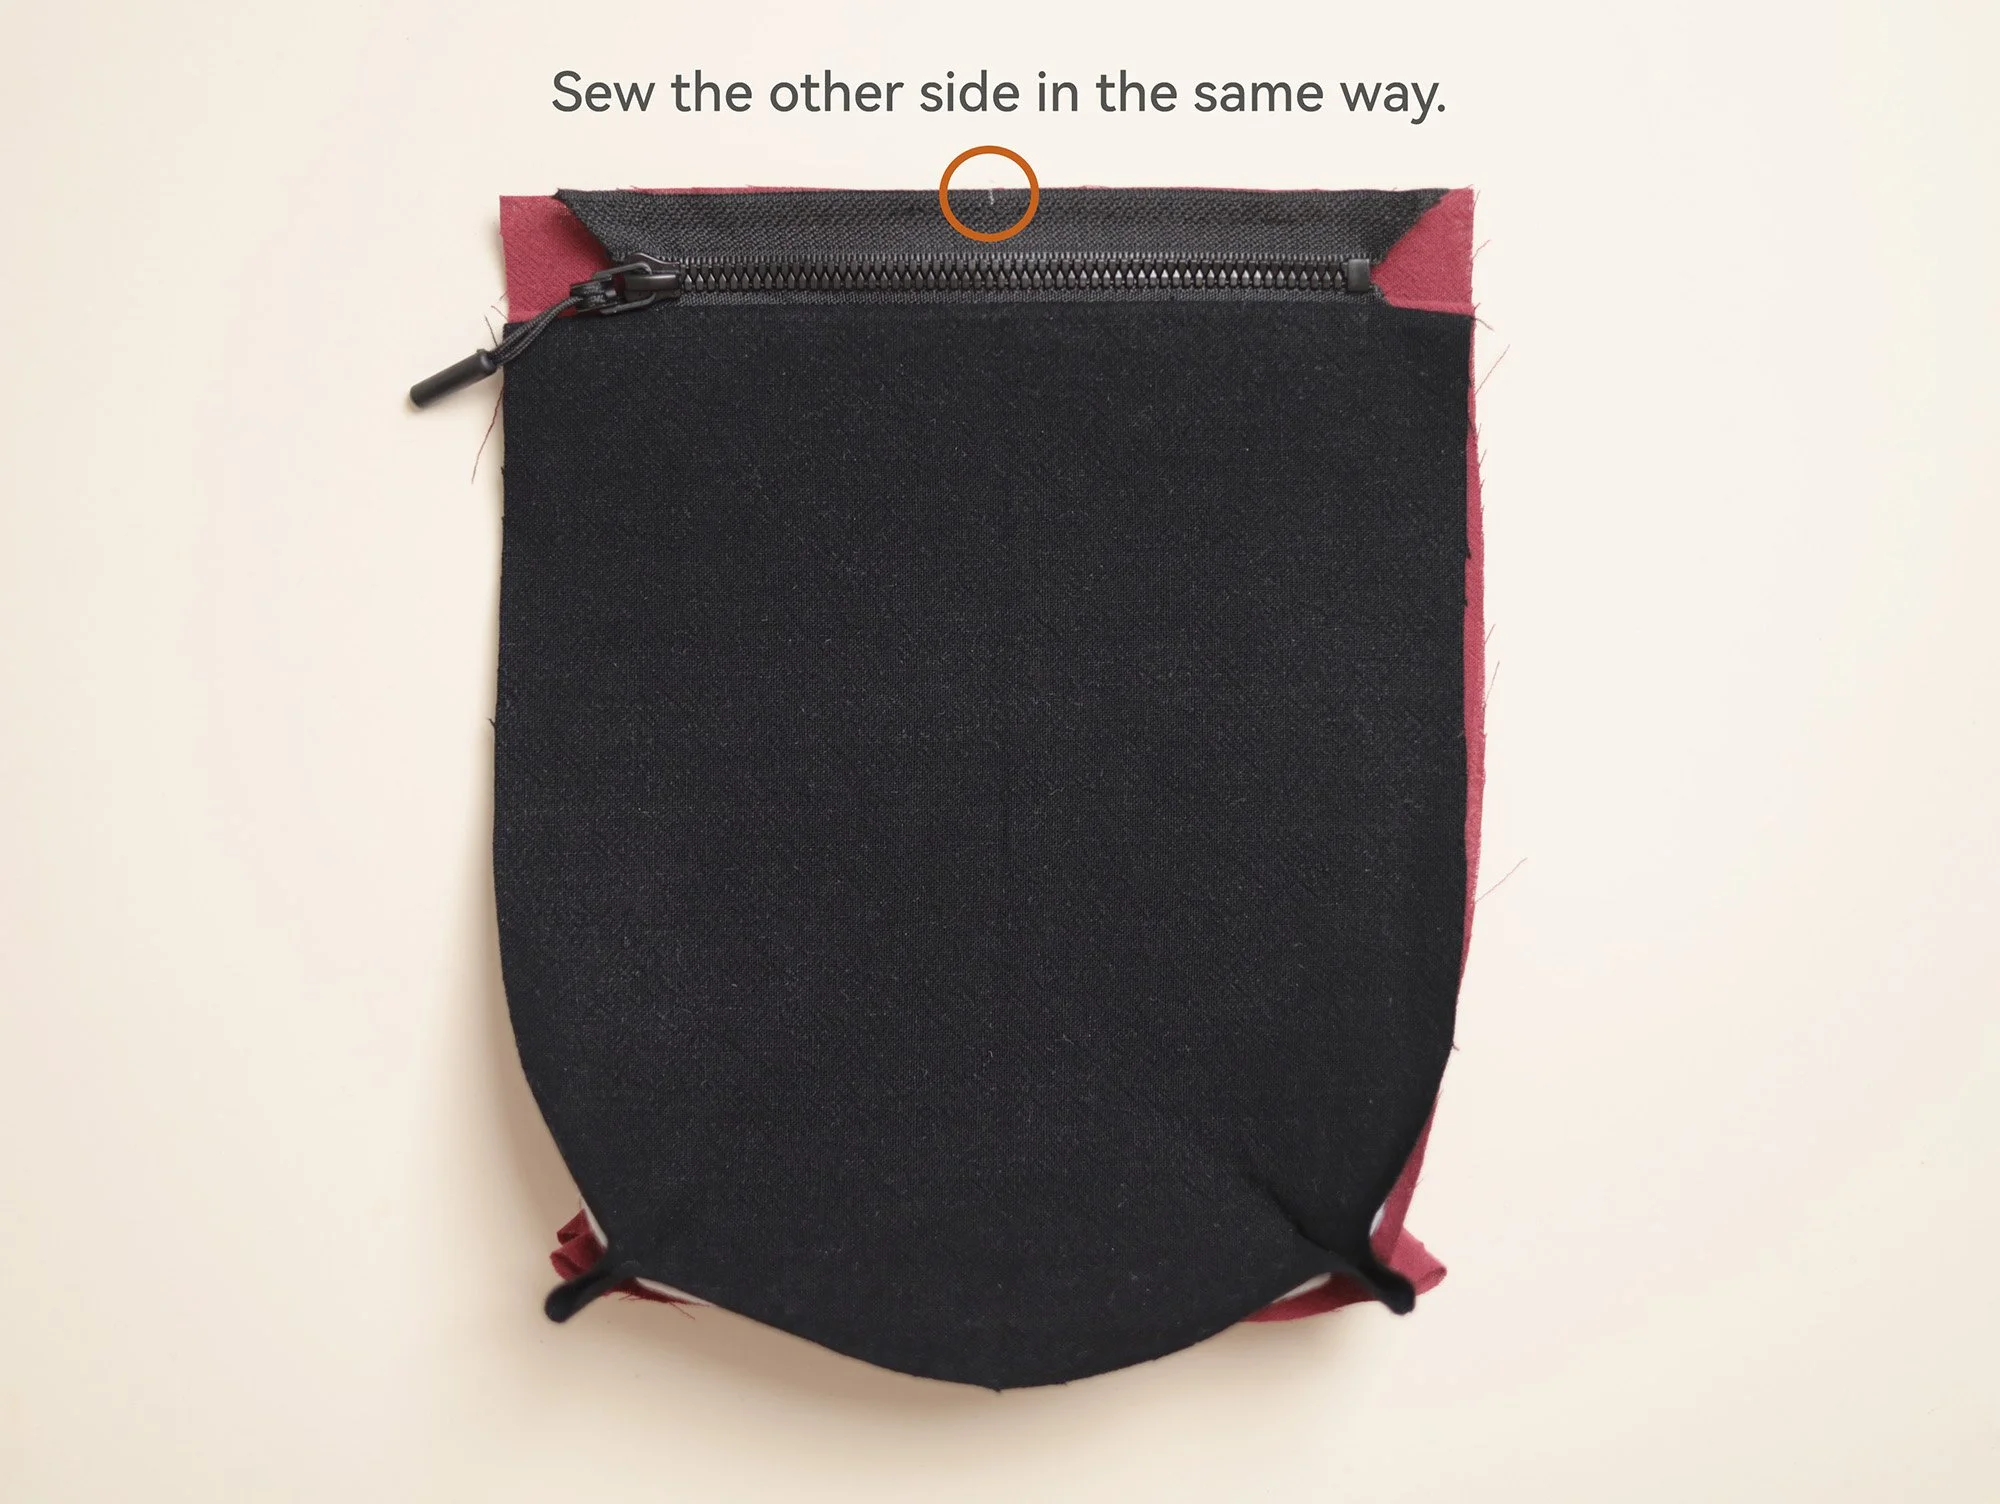
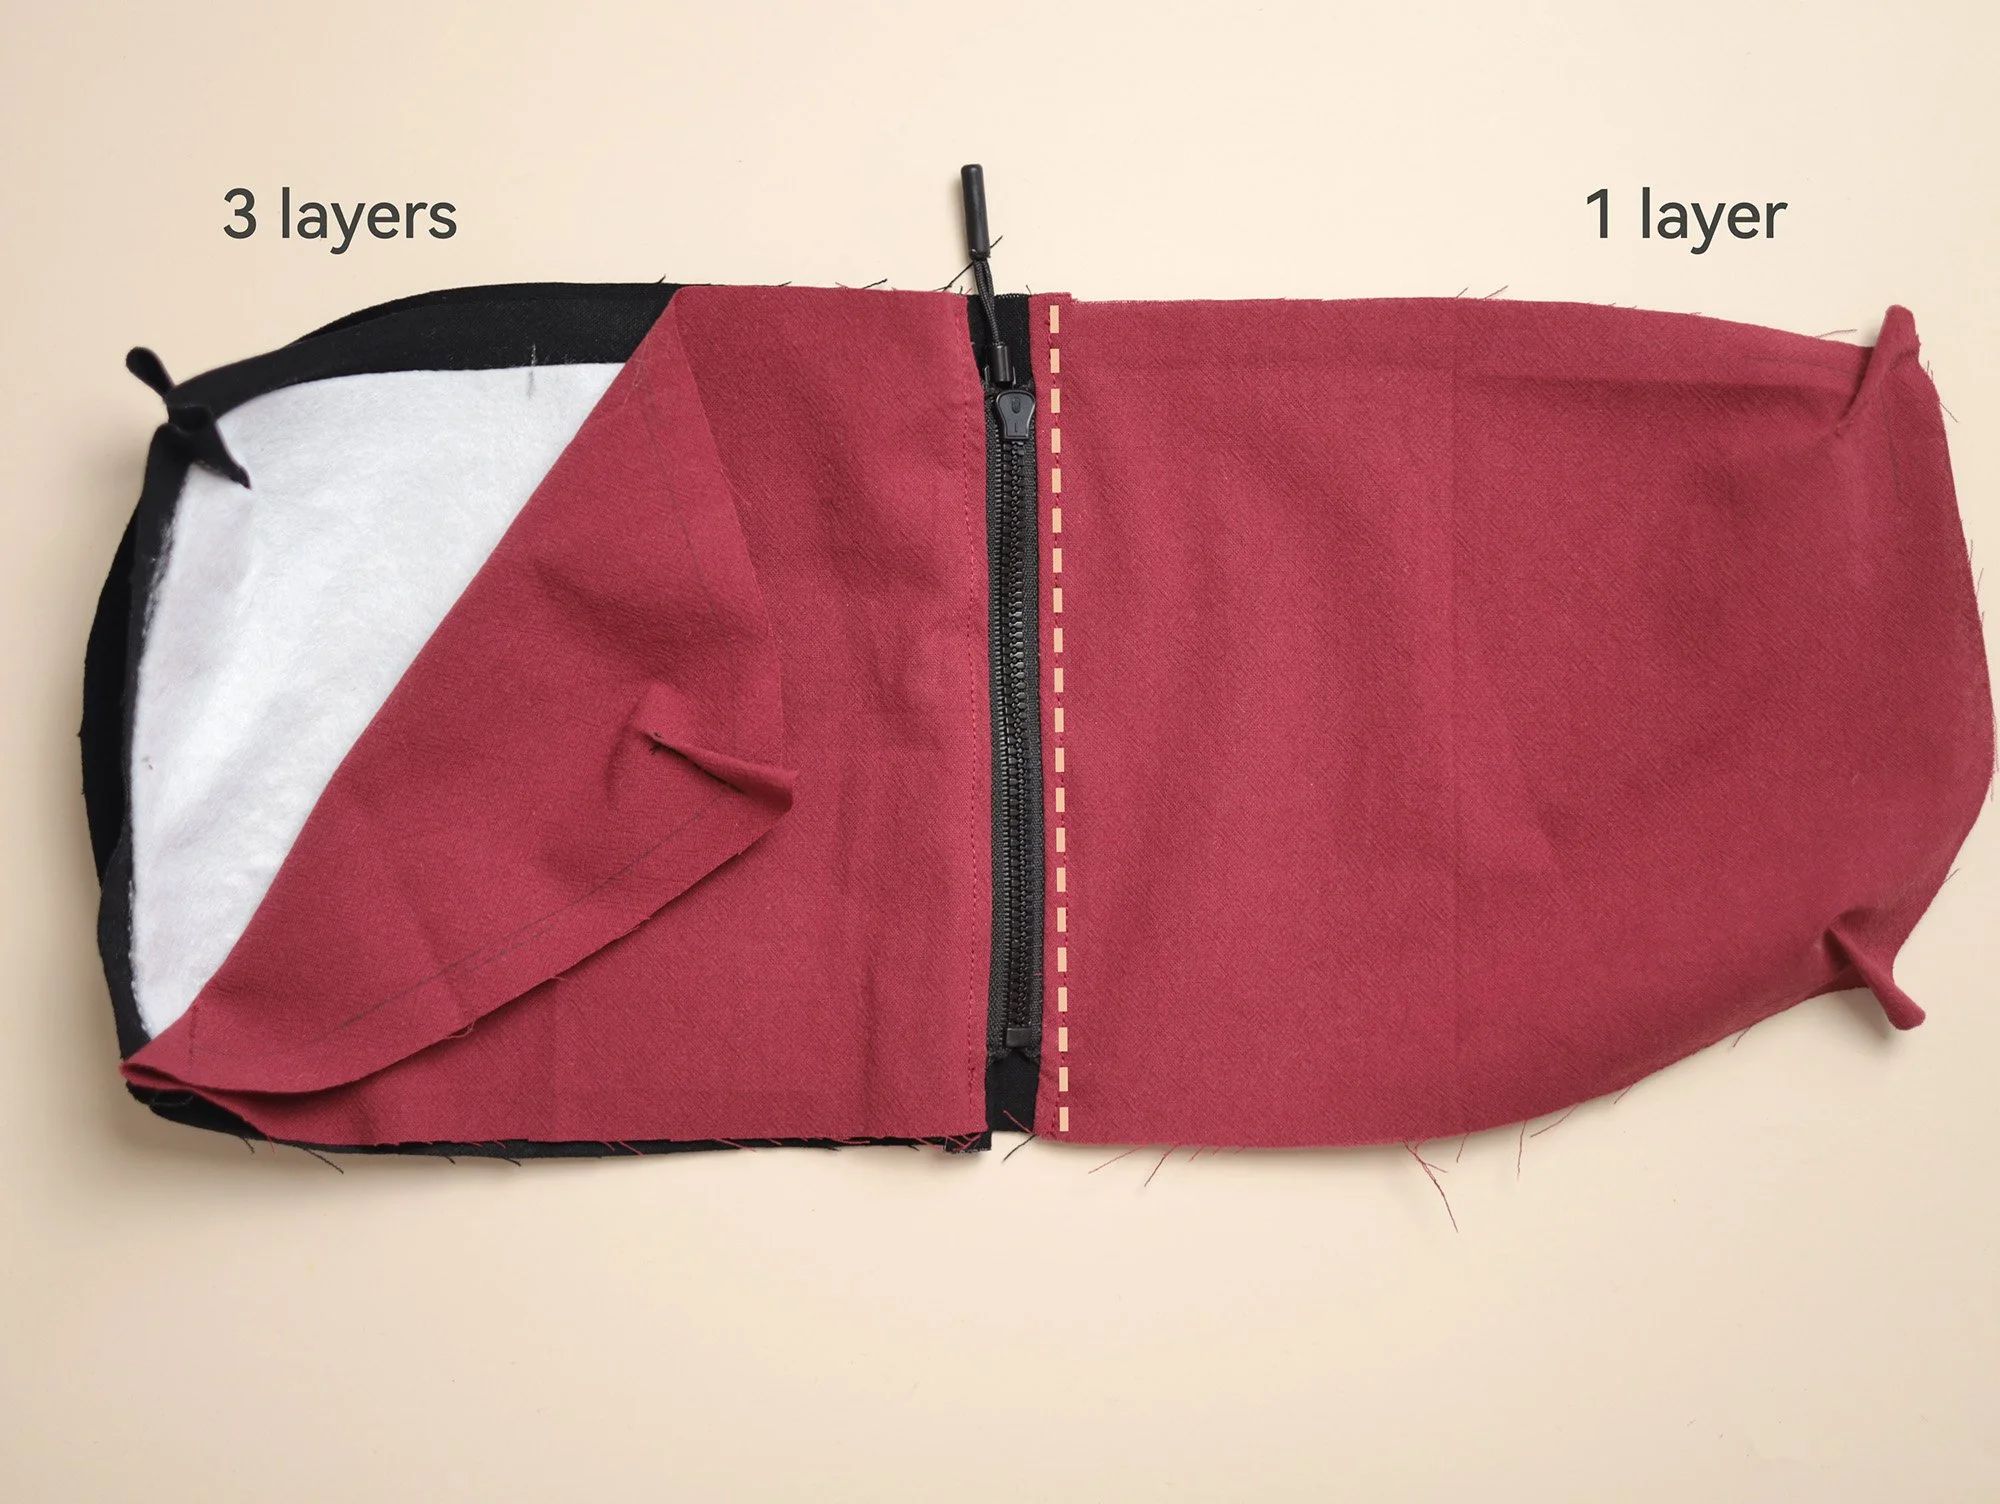
With the zipper in the centre, place one lining piece on one side of the zipper and the remaining three pieces on the other side. Topstitch 1–2 mm from the top edge. Repeat for the other lining piece.
(Please note: There’s a small mistake in the second photo below—the lining piece on the right-hand side should have its right side facing up. Rather than redoing the zipper, I simply unpicked and re-stitched the darts to correct it.)
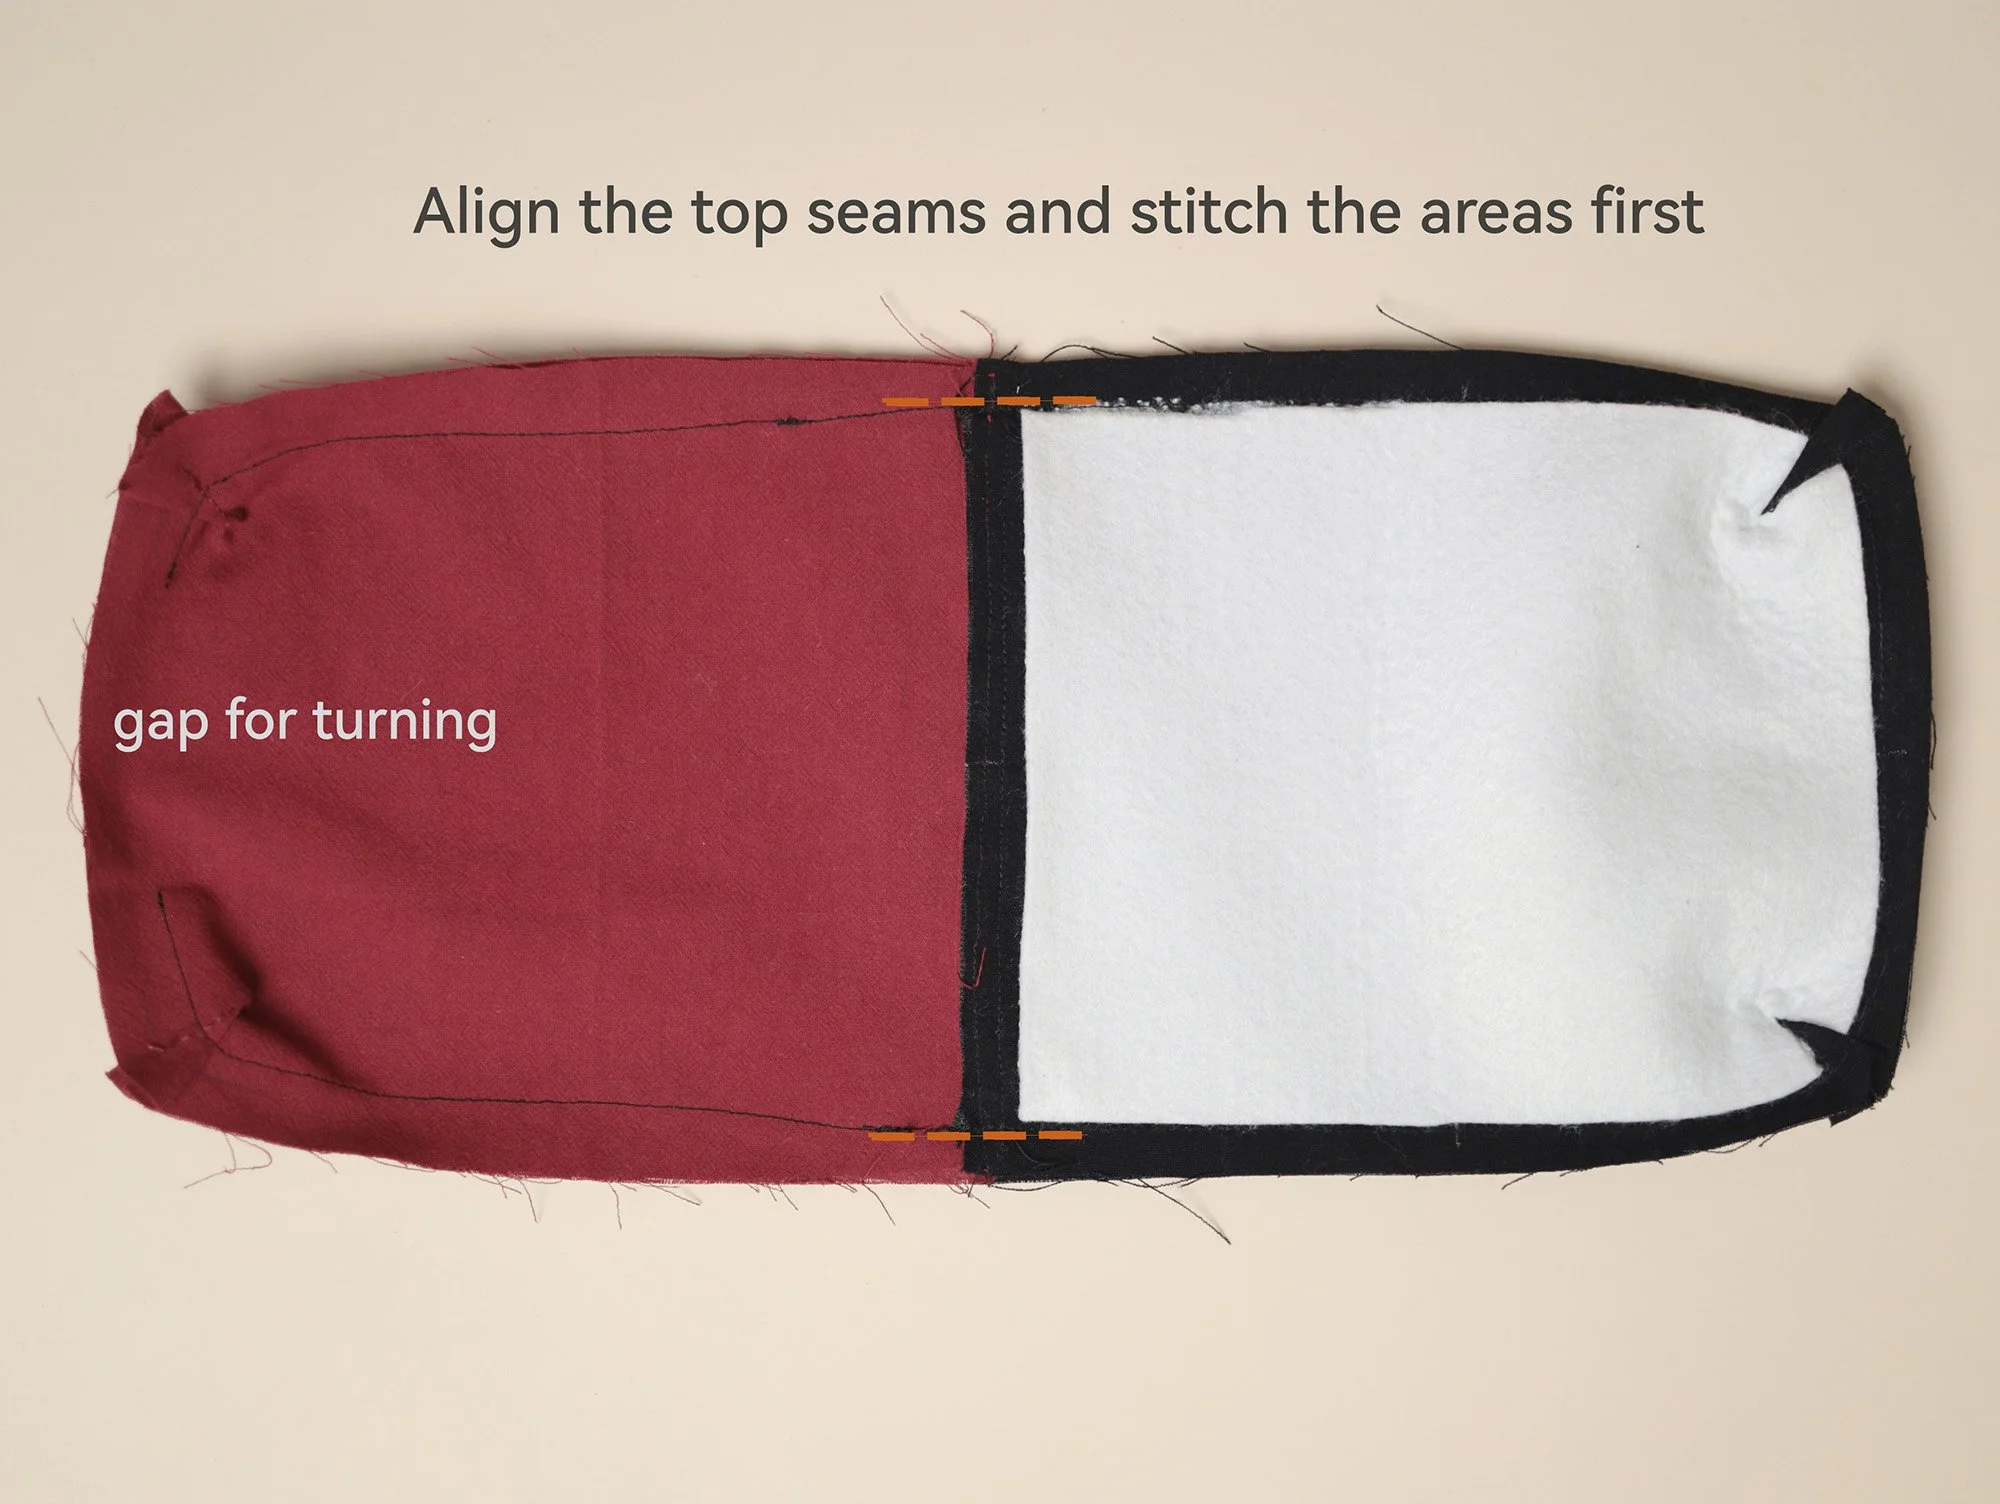
Place the two lining pieces together on one side and the two main pieces together on the other, matching the top seams at the centre. Stitch around the raw edges, leaving a gap in the bottom edge of the lining for turning.
Sewing tips:
To ensure the bag is assembled correctly, stitch a short section on both sides of the opening first and check the top seams are aligned . Once satisfied, sew the rest.
Make sure the darts on both layers are aligned. Press each pair of darts in opposite directions to reduce bulk.
On the main fabric side, transfer a small section of the stitching line from the right side to the wrong side using a pin or fabric marker. Use a slightly wider seam allowance to ensure the marked lines will not be visible on the finished piece. Trim the interfacing to 1-2mm inside the sewing line if needed.
On the lining side, except for the two small sections near the bag opening, stitch 2–3 mm inside the pattern line to slightly reduce the lining size for a better fit.
4. Finishing
Trim the seam allowance by half using pinking shears, or clip the corners carefully to reduce bulk and help the corners turn out neatly.
Turn the bag right side out by gently pushing the main fabric through into the lining.
Close the opening by topstitching 1 mm from the edge or by hand stitching with a hidden stitch.
Stitch Guide
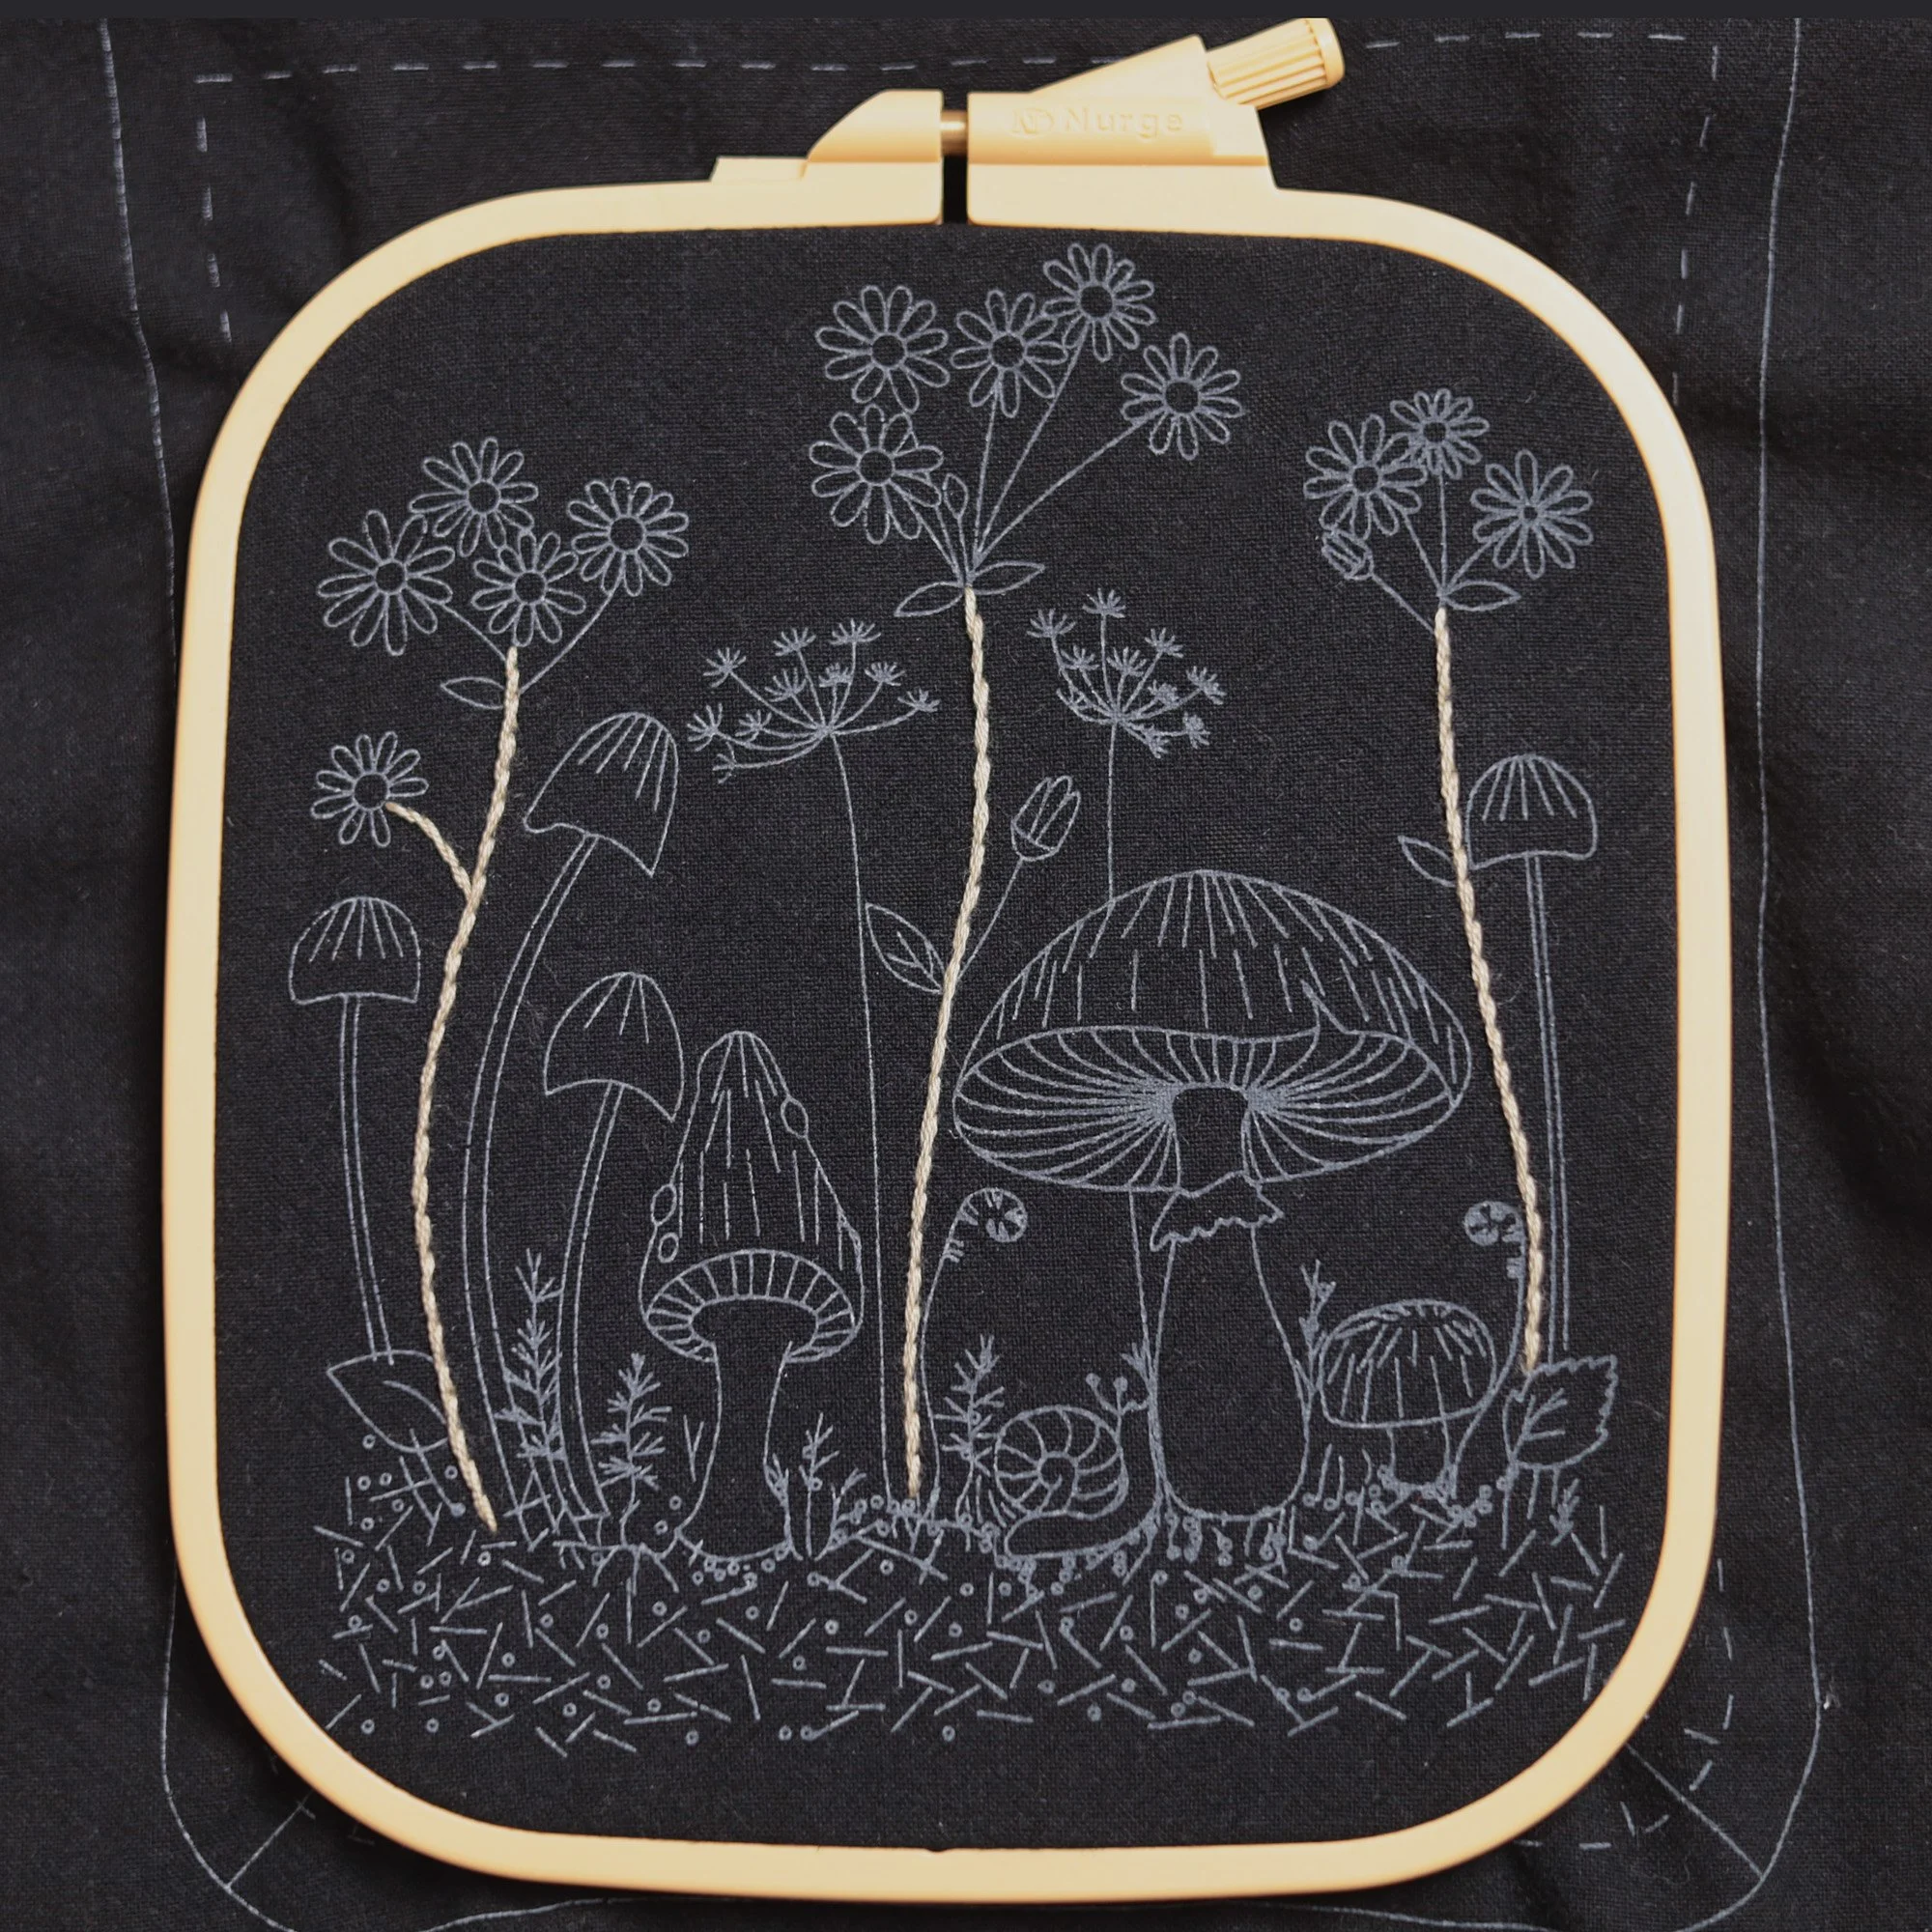
Secure the main fabric in the embroidery hoop, ensuring the section to be stitched is centred.
The printed pattern on the fabric cannot be erased. During embroidery, make sure to stitch over the printed lines so that they are completely covered.
The stitch guide indicates the recommended stitch for each section of the pattern, along with the thread colour (e.g. #1) and the number of strands to use (e.g. 3s means stitching with three strands of thread). For beginners who need to learn the stitches, please visit the Embroidery Basics page, where the basic stitches are clearly demonstrated and explained. If you need additional guidance, simply search for the stitch name on YouTube to find a wide range of helpful video tutorials.
1. Daisy
Main Stems: Outline or Stem Stitch (#1, 3s)
2. Daisy
Side Stems: Outline or Stem Stitch (#1, 2s)
Small Leaves: (angled) Satin Stitch (#1, 2s)
Large Leaves: Satin Leaf Stitch (#1, 2s)
(Please visit the Embroidery Basics page for the video tutorial for Satin Leaf Stitch.)
Small Plants
Main Stems: Backstitch (#1, 2s)
Side Stems: Straight Stitch (#1, 2s)
Embroidery Tips:
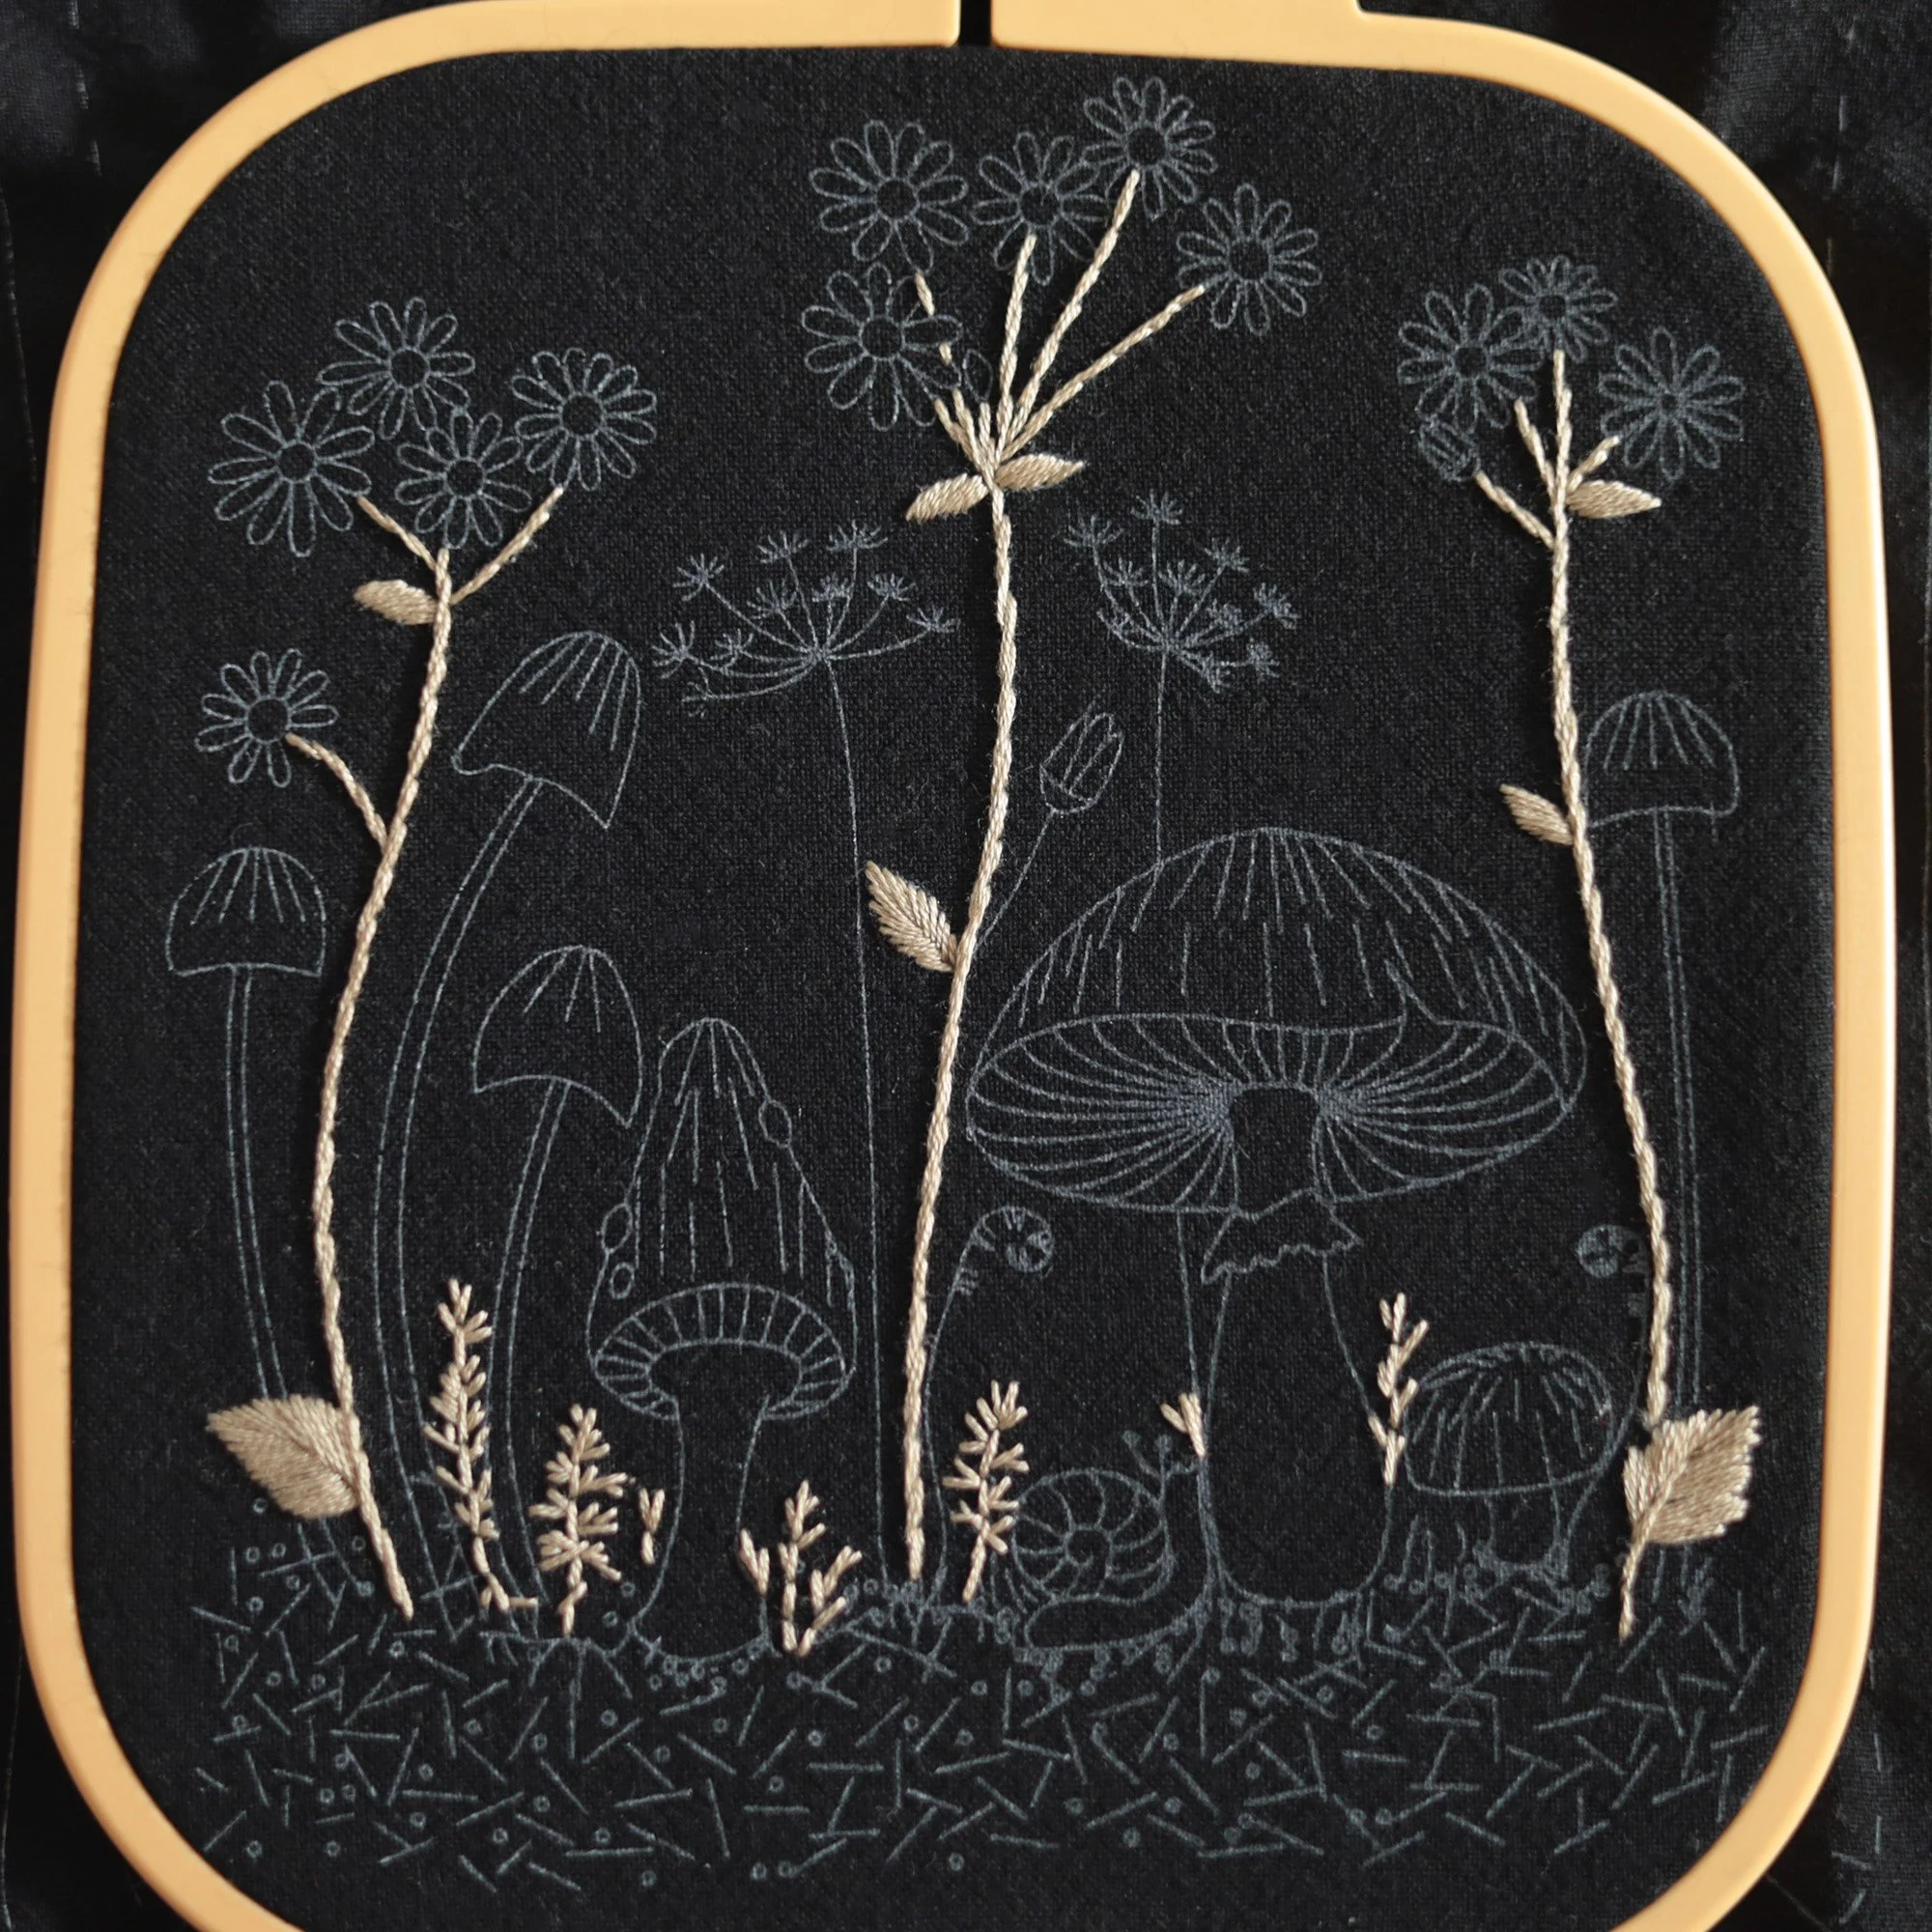
For beginners who find it challenging to stitch a smooth mushroom cap outline using Long & Short Stitch, try stitching the outline with Outline Stitch first, then fill in the cap with Long & Short Stitches (see Mushroom A in the photo above). For experienced stitchers, stitch the entire cap using Long & Short Stitch. For better results, I find it easier to start from the top centre of the cap and work the stitches from the outline towards the centre.
It’s okay to leave some gaps with the main colour thread around the bottom of the cap, as they will be filled with the blending colour later.
For the mushroom stems, stitch the outline first, and fill the area with Outline/Stem Stitch. Use straight stitches to fill any small gaps as needed.
5. Bag strap (optional)
For a crossbody bag, the strap length is typically around 110–120 cm. The fabric strip included in the kit is approximately 130 cm long, giving you plenty of room to adjust the length to your preference.
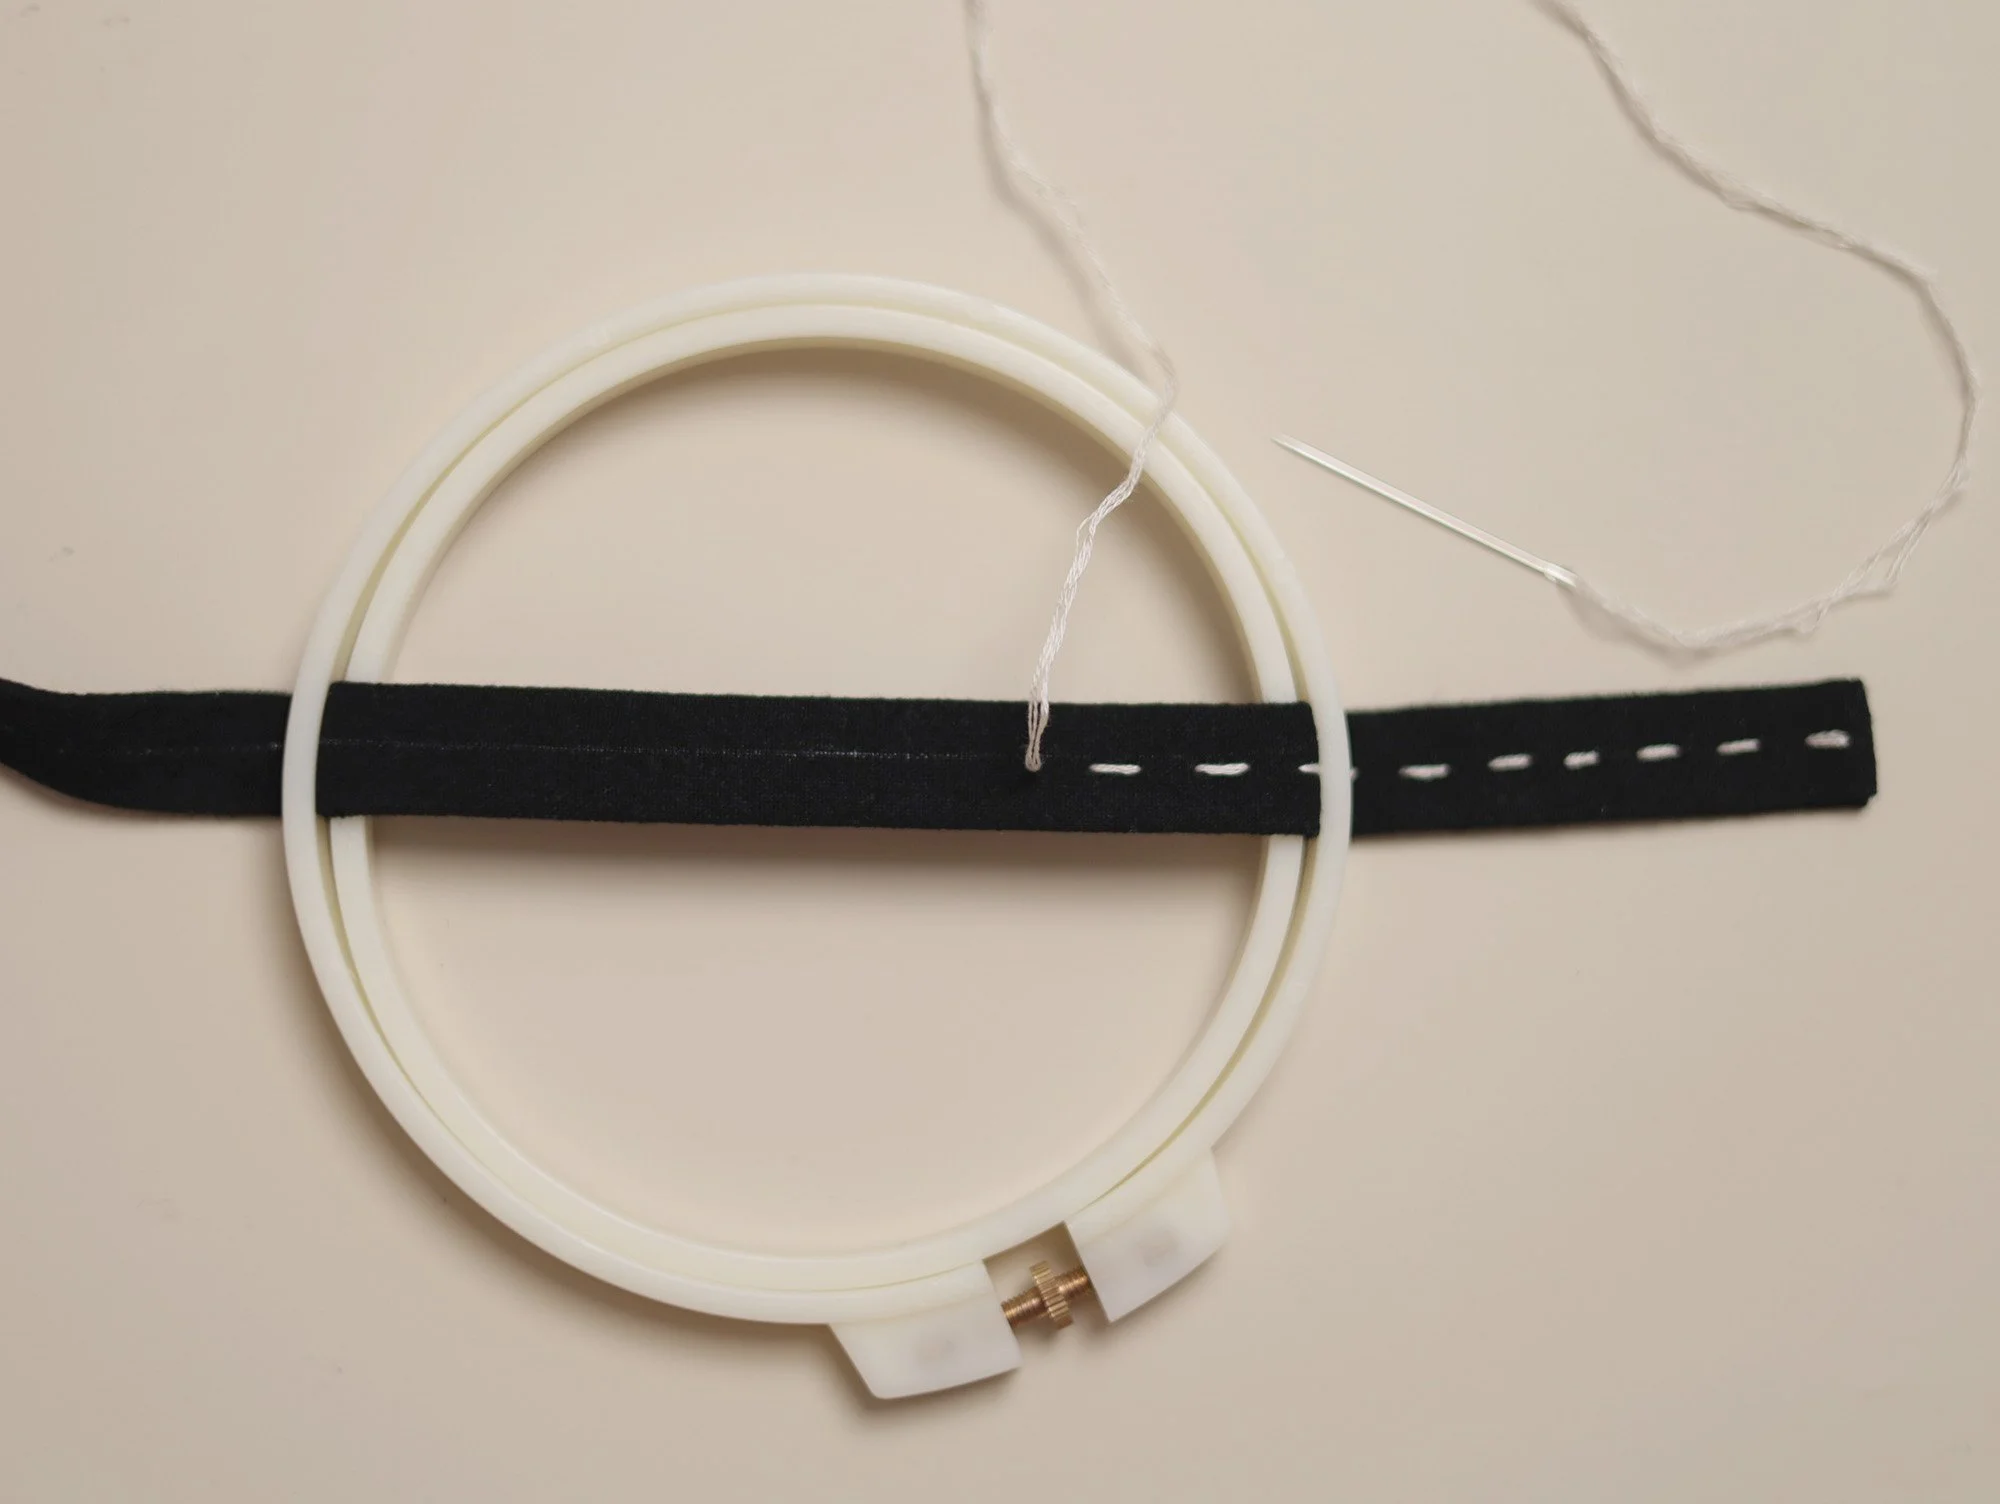
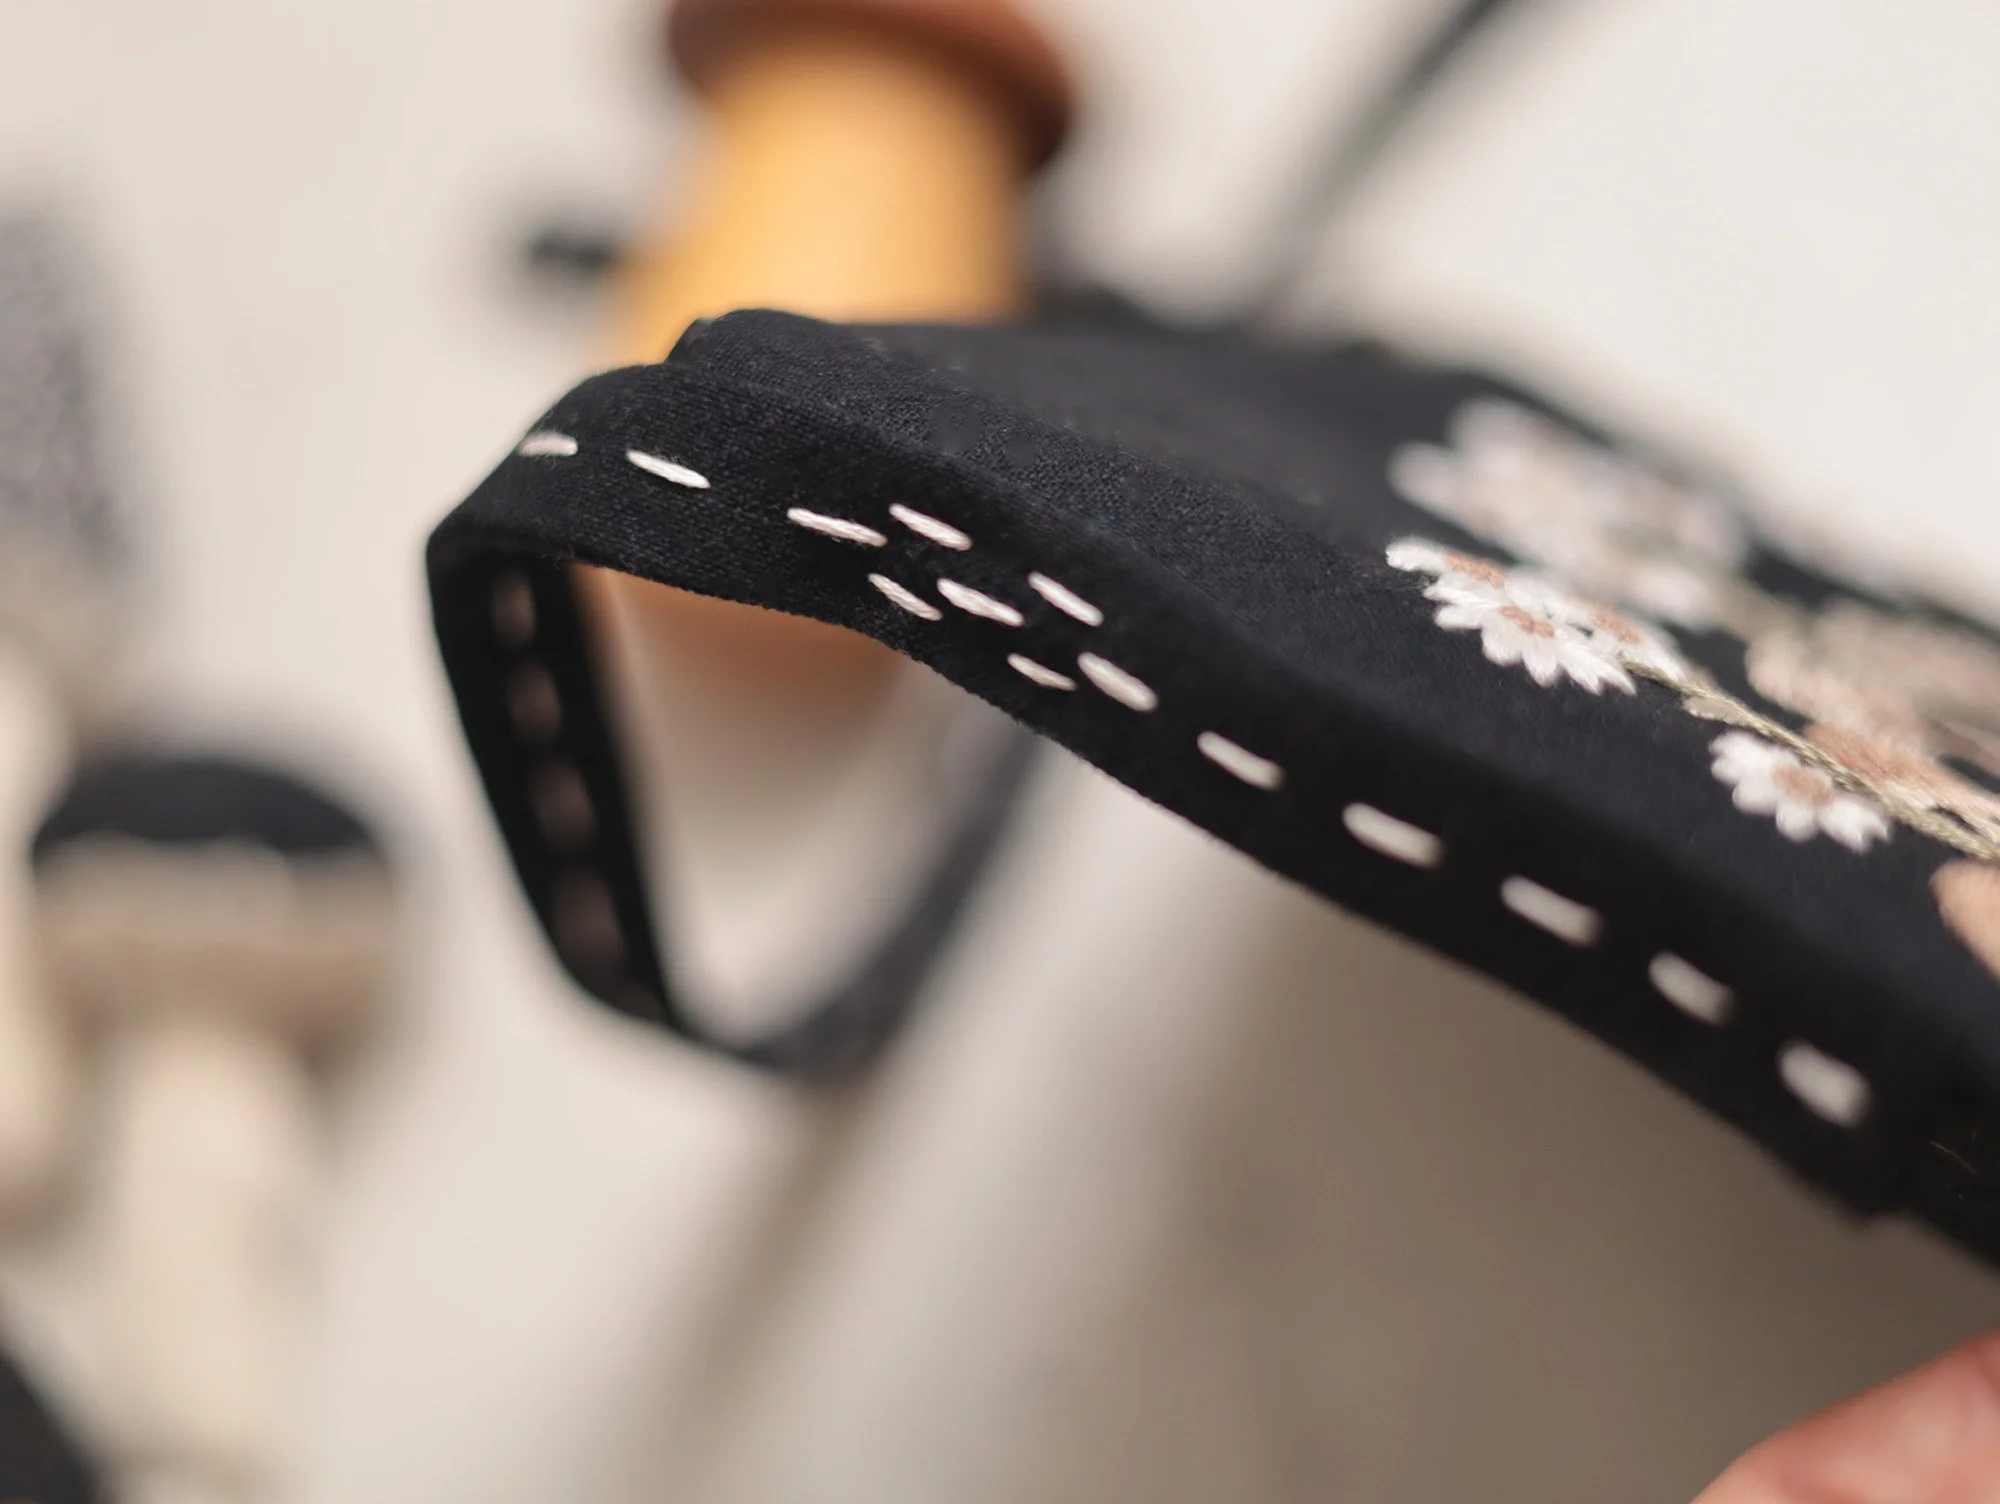
You can use a ready-made leather strap or make your own fabric strap (free tutorial available here)—both are good options. For a decorative touch, add a line of Sashiko stitching (i.e. running stitch) along the centre of the fabric strap using 4 strands of #4 thread.
Note:
Instead of topstitching on the edge of the fabric strap, we stitched along one long side of the fabric strap using hidden stitch by hand.
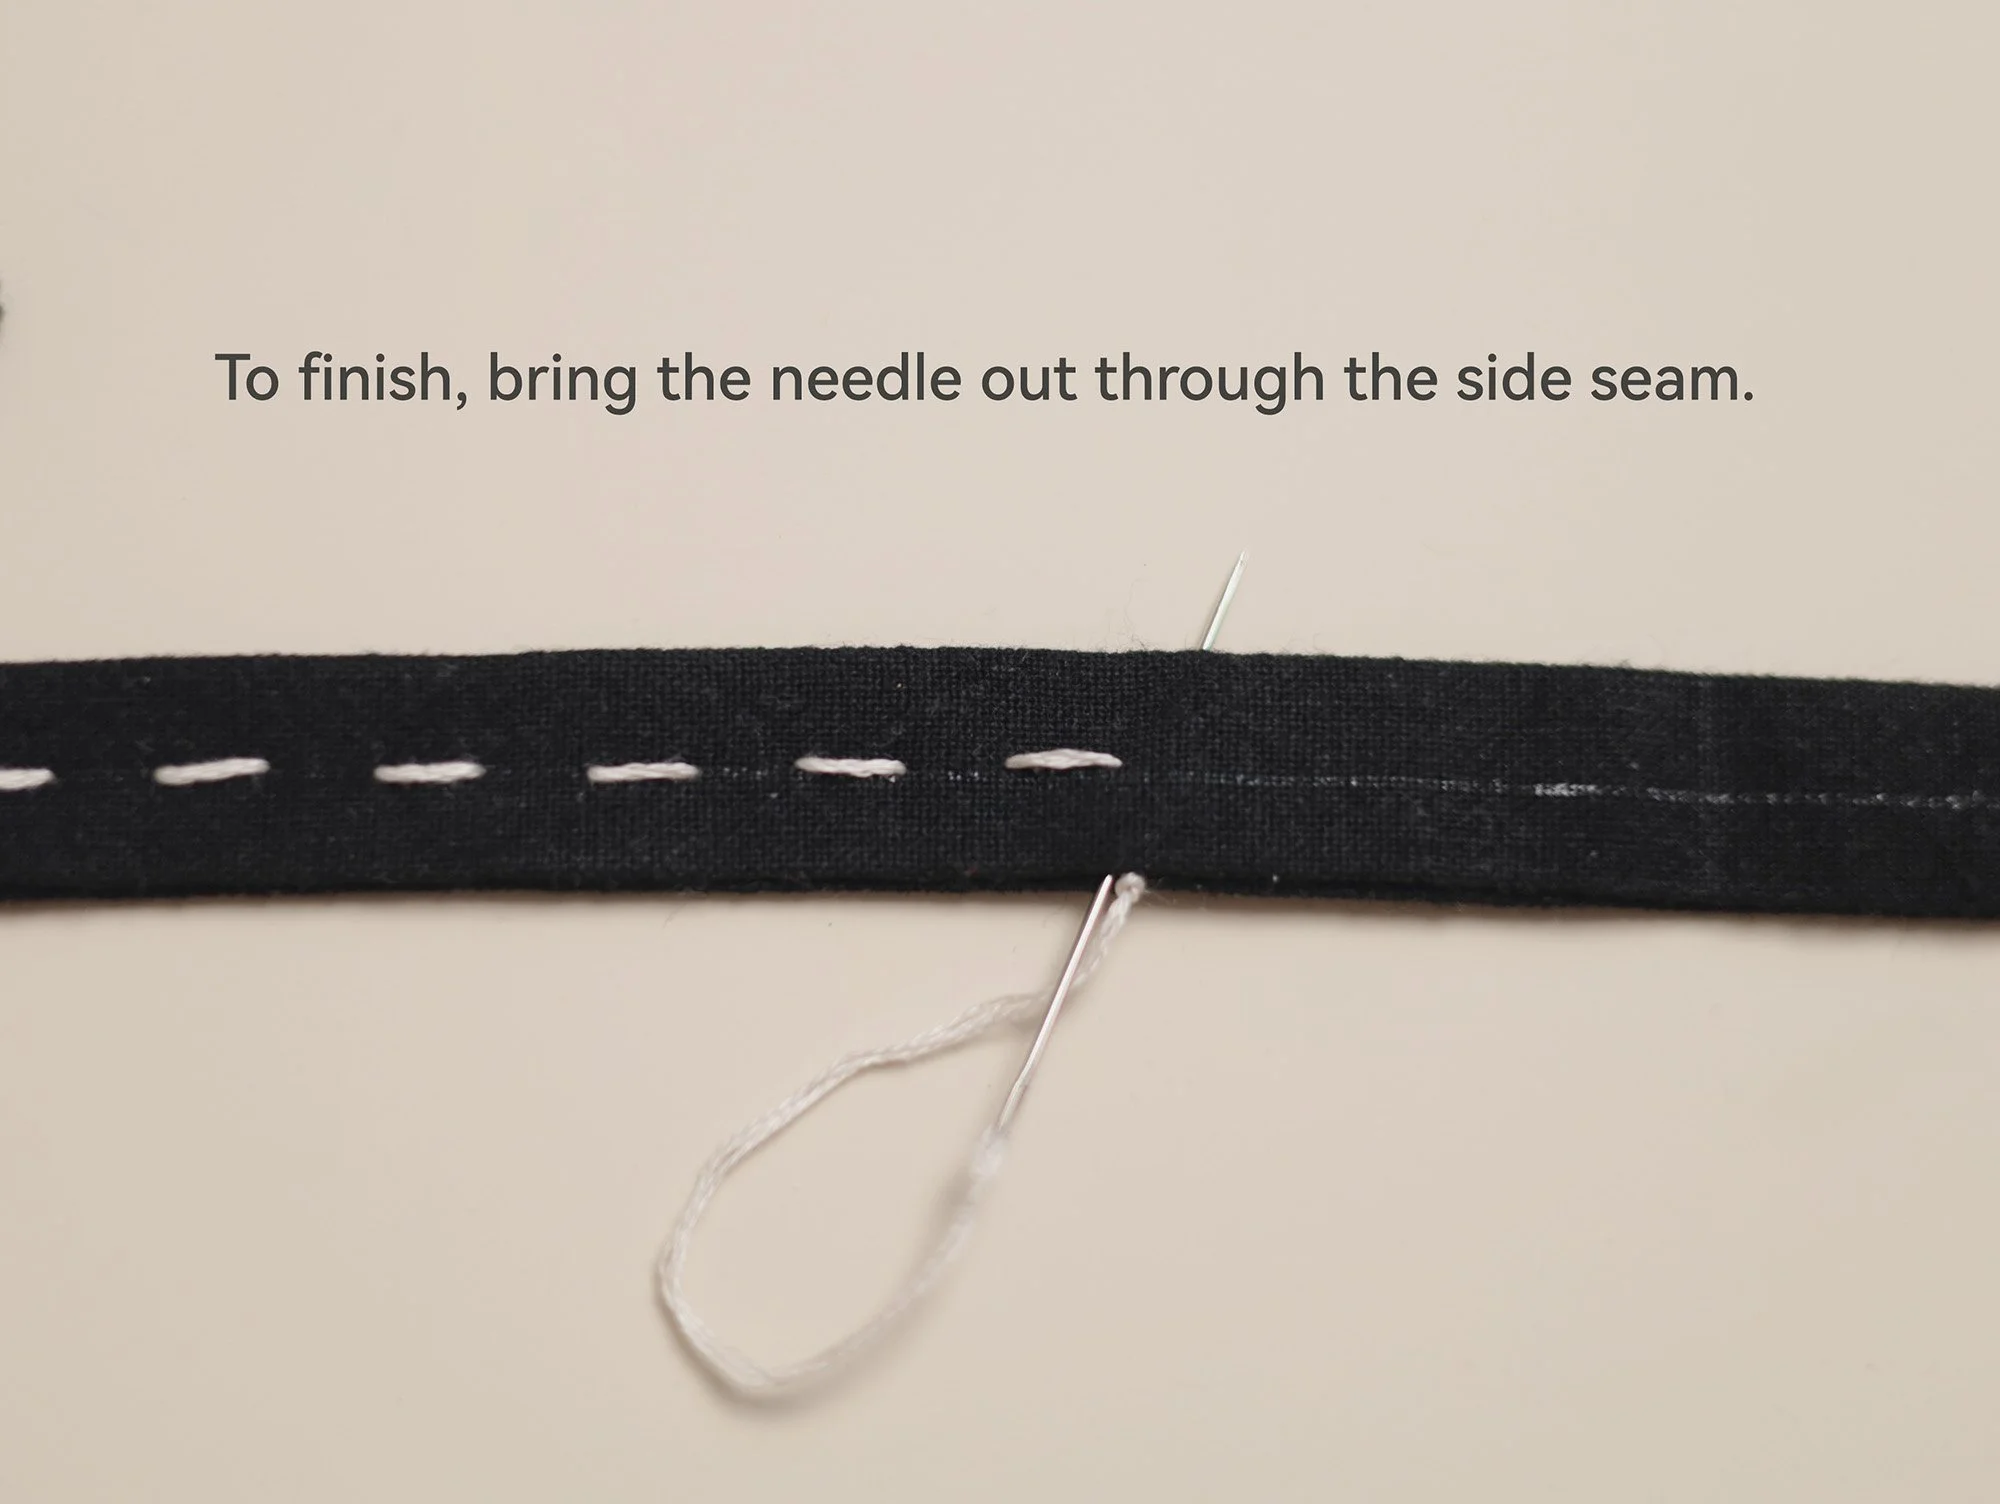
To start, finish, or change the thread while doing the Sashiko stitching, pull the knot through the nearby side seam to hide it whenever possible. If you have topstitched the fabric strap and this is not possible, simply hide the thread by inserting or bringing the needle out through the side seam from a short distance away, leaving the thread tail concealed inside the strap.
5. D-ring Tab (Optional)
Cut one 3 × 10 cm piece for the strap tab from the main scrap fabric. Fold both long edges to the centre and press. Topstitch along the long edges to secure.
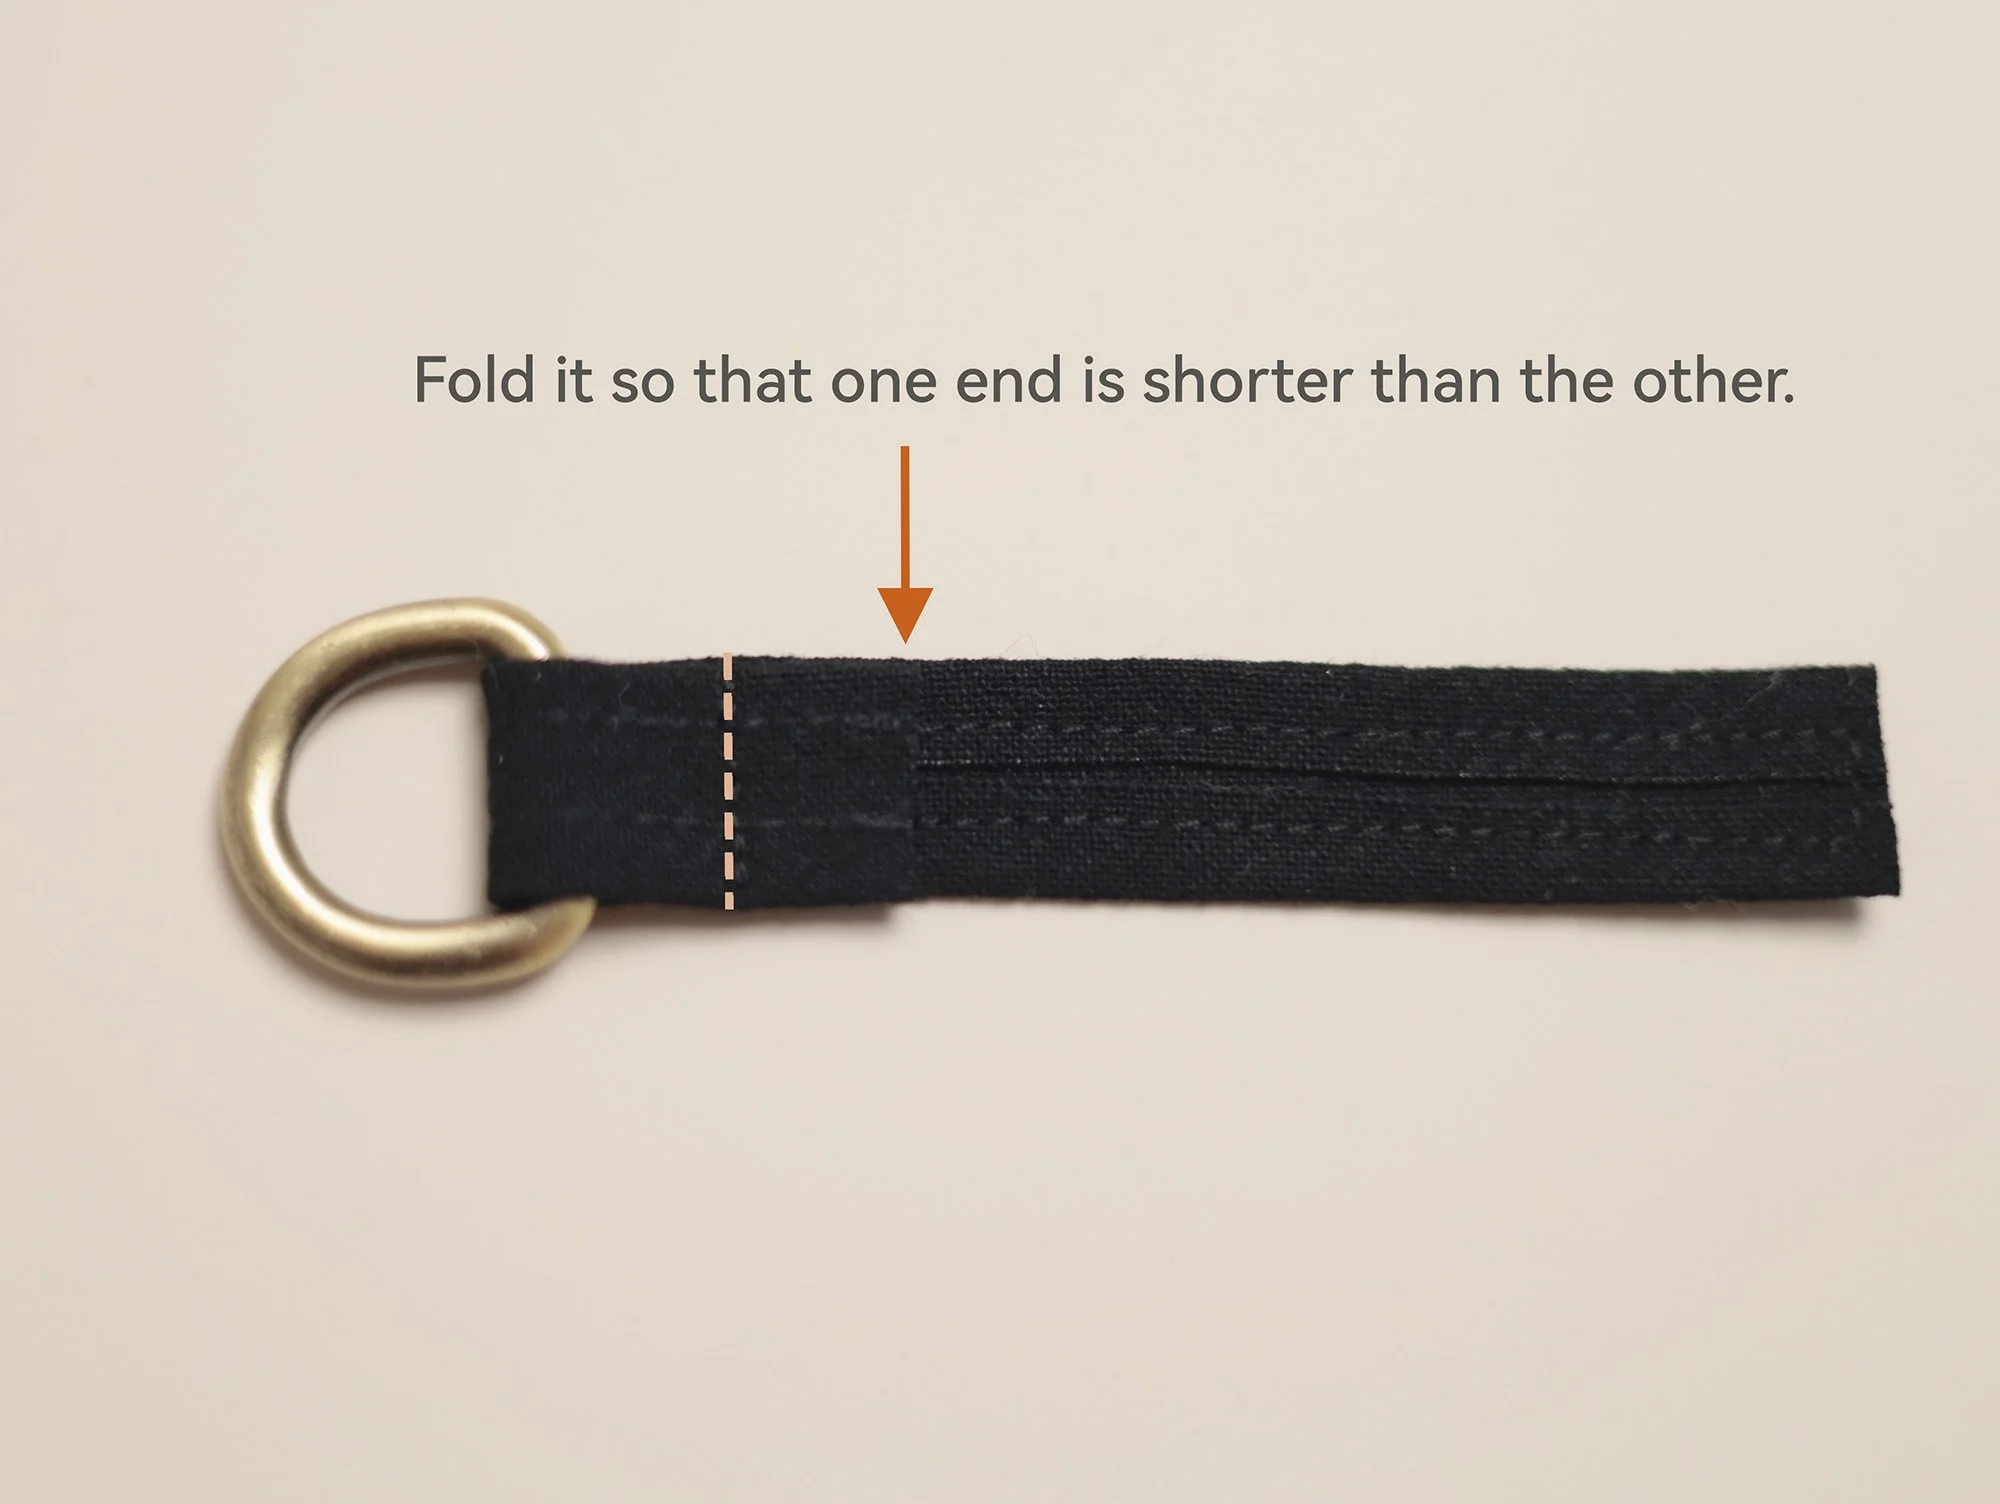
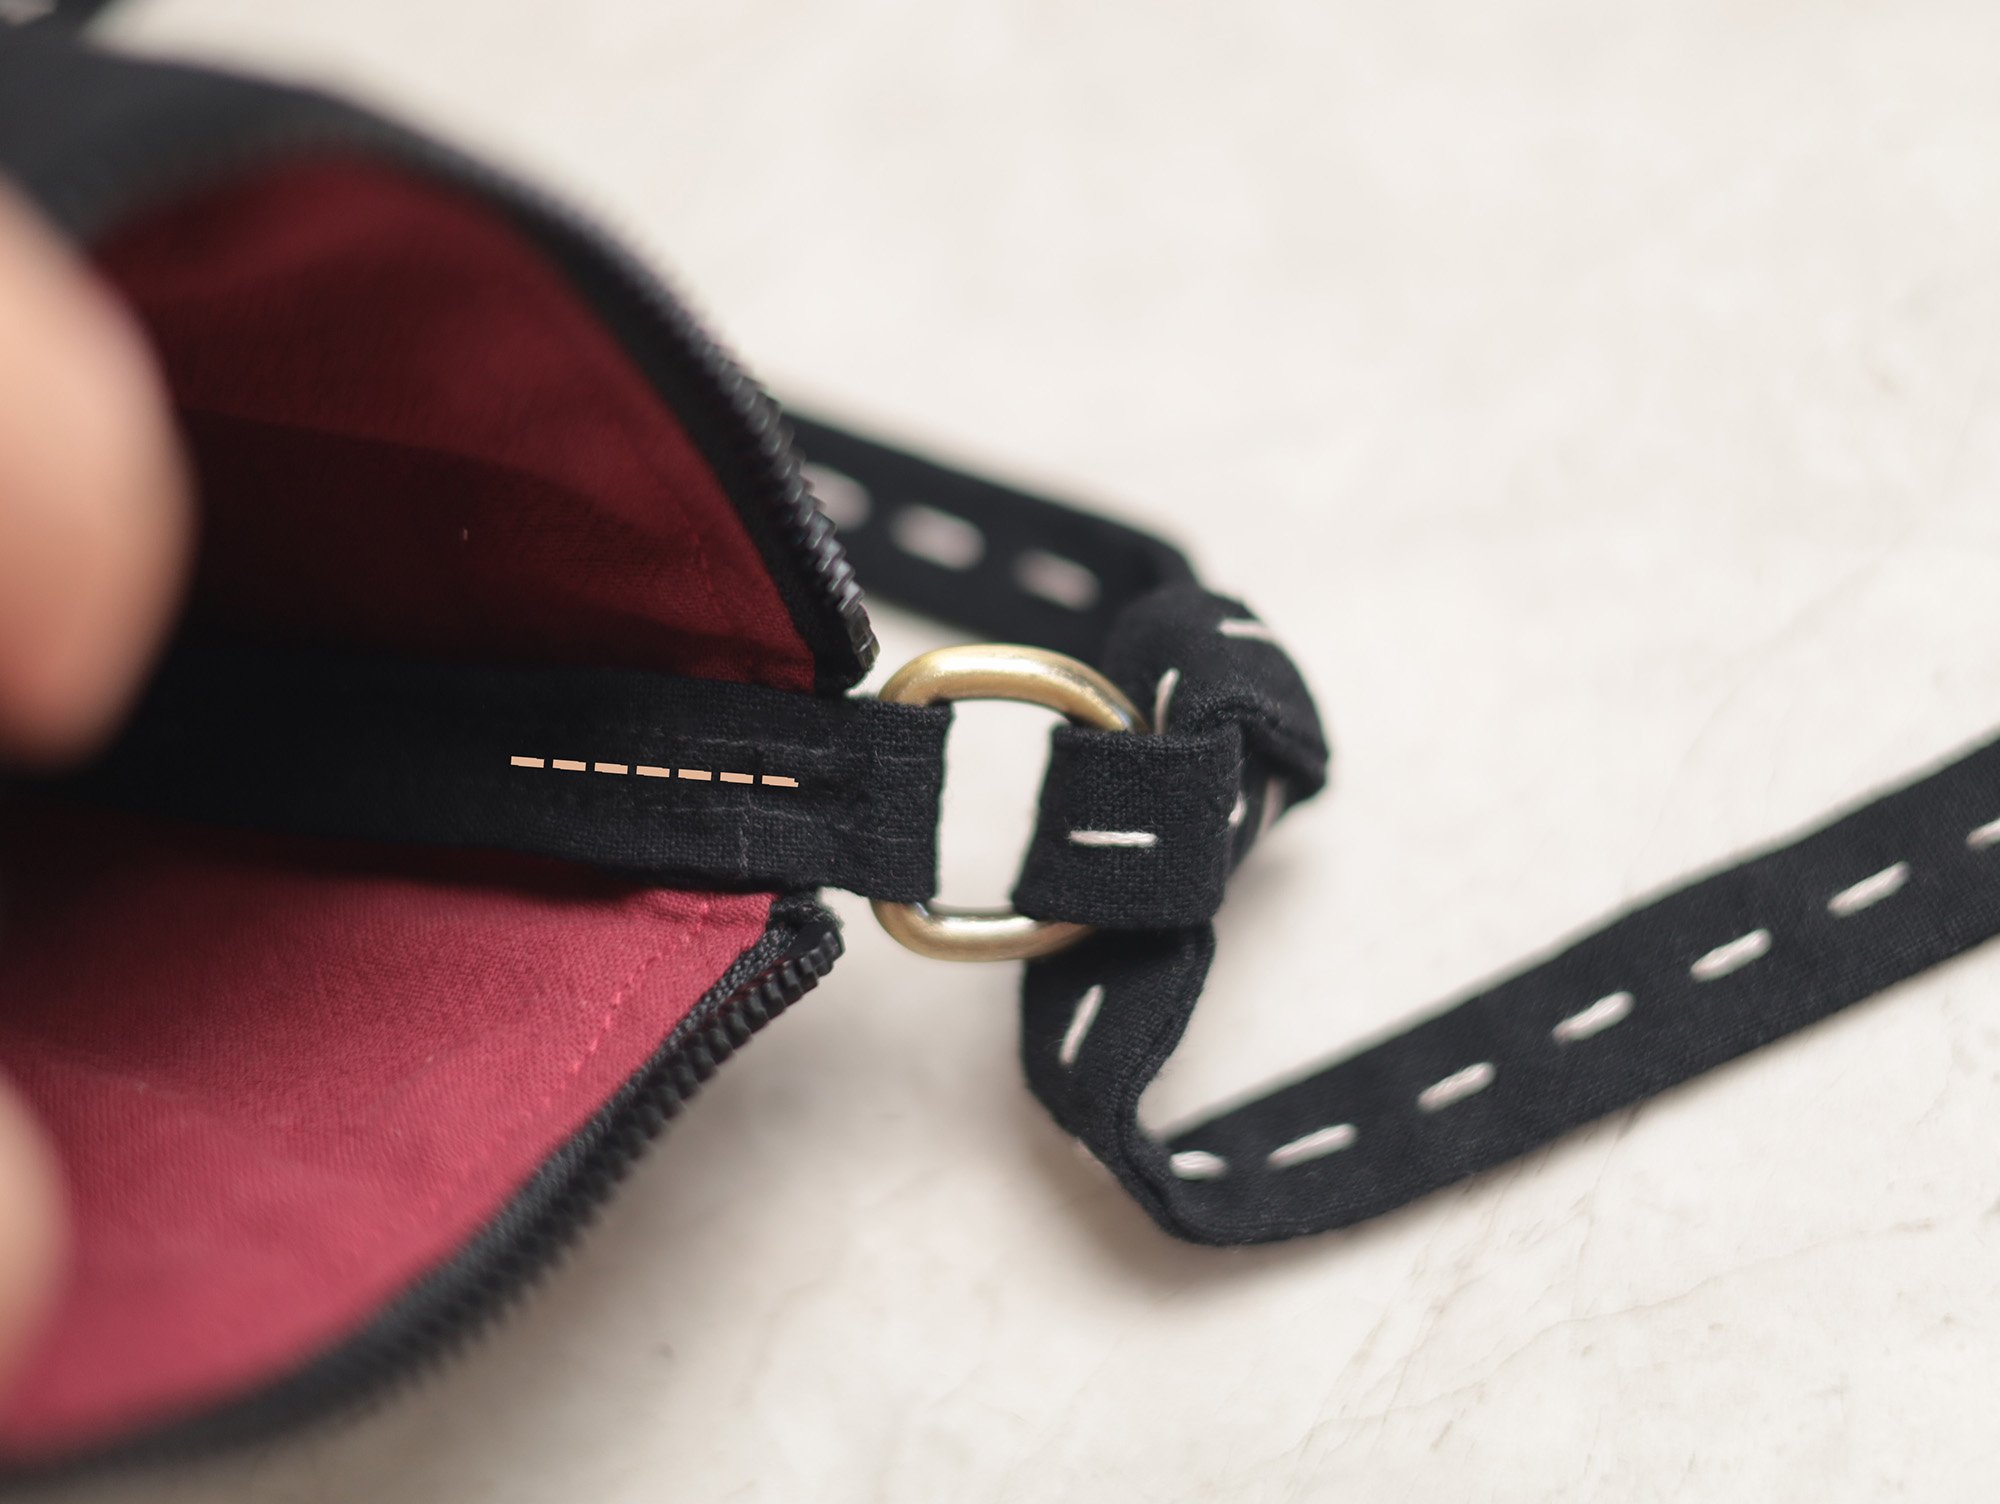
Pass the strip through the D-ring and fold it so that one end is shorter than the other. Secure it by stitching across somewhere near the D-ring (see photo).
To attach the fabric strap, I secured one end to one side of the bag with a few straight stitches (#4, 4s).
Place the D-ring tab inside the bag, with the shorter end facing the lining side seam and the D-ring positioned outside the bag at the desired location. Stitch along the side seam to secure the tab in place.
Additional Photos for Sewing the Corner Darts (first 3 photos for darts on lining pieces, and the last one for darts on main pieces):