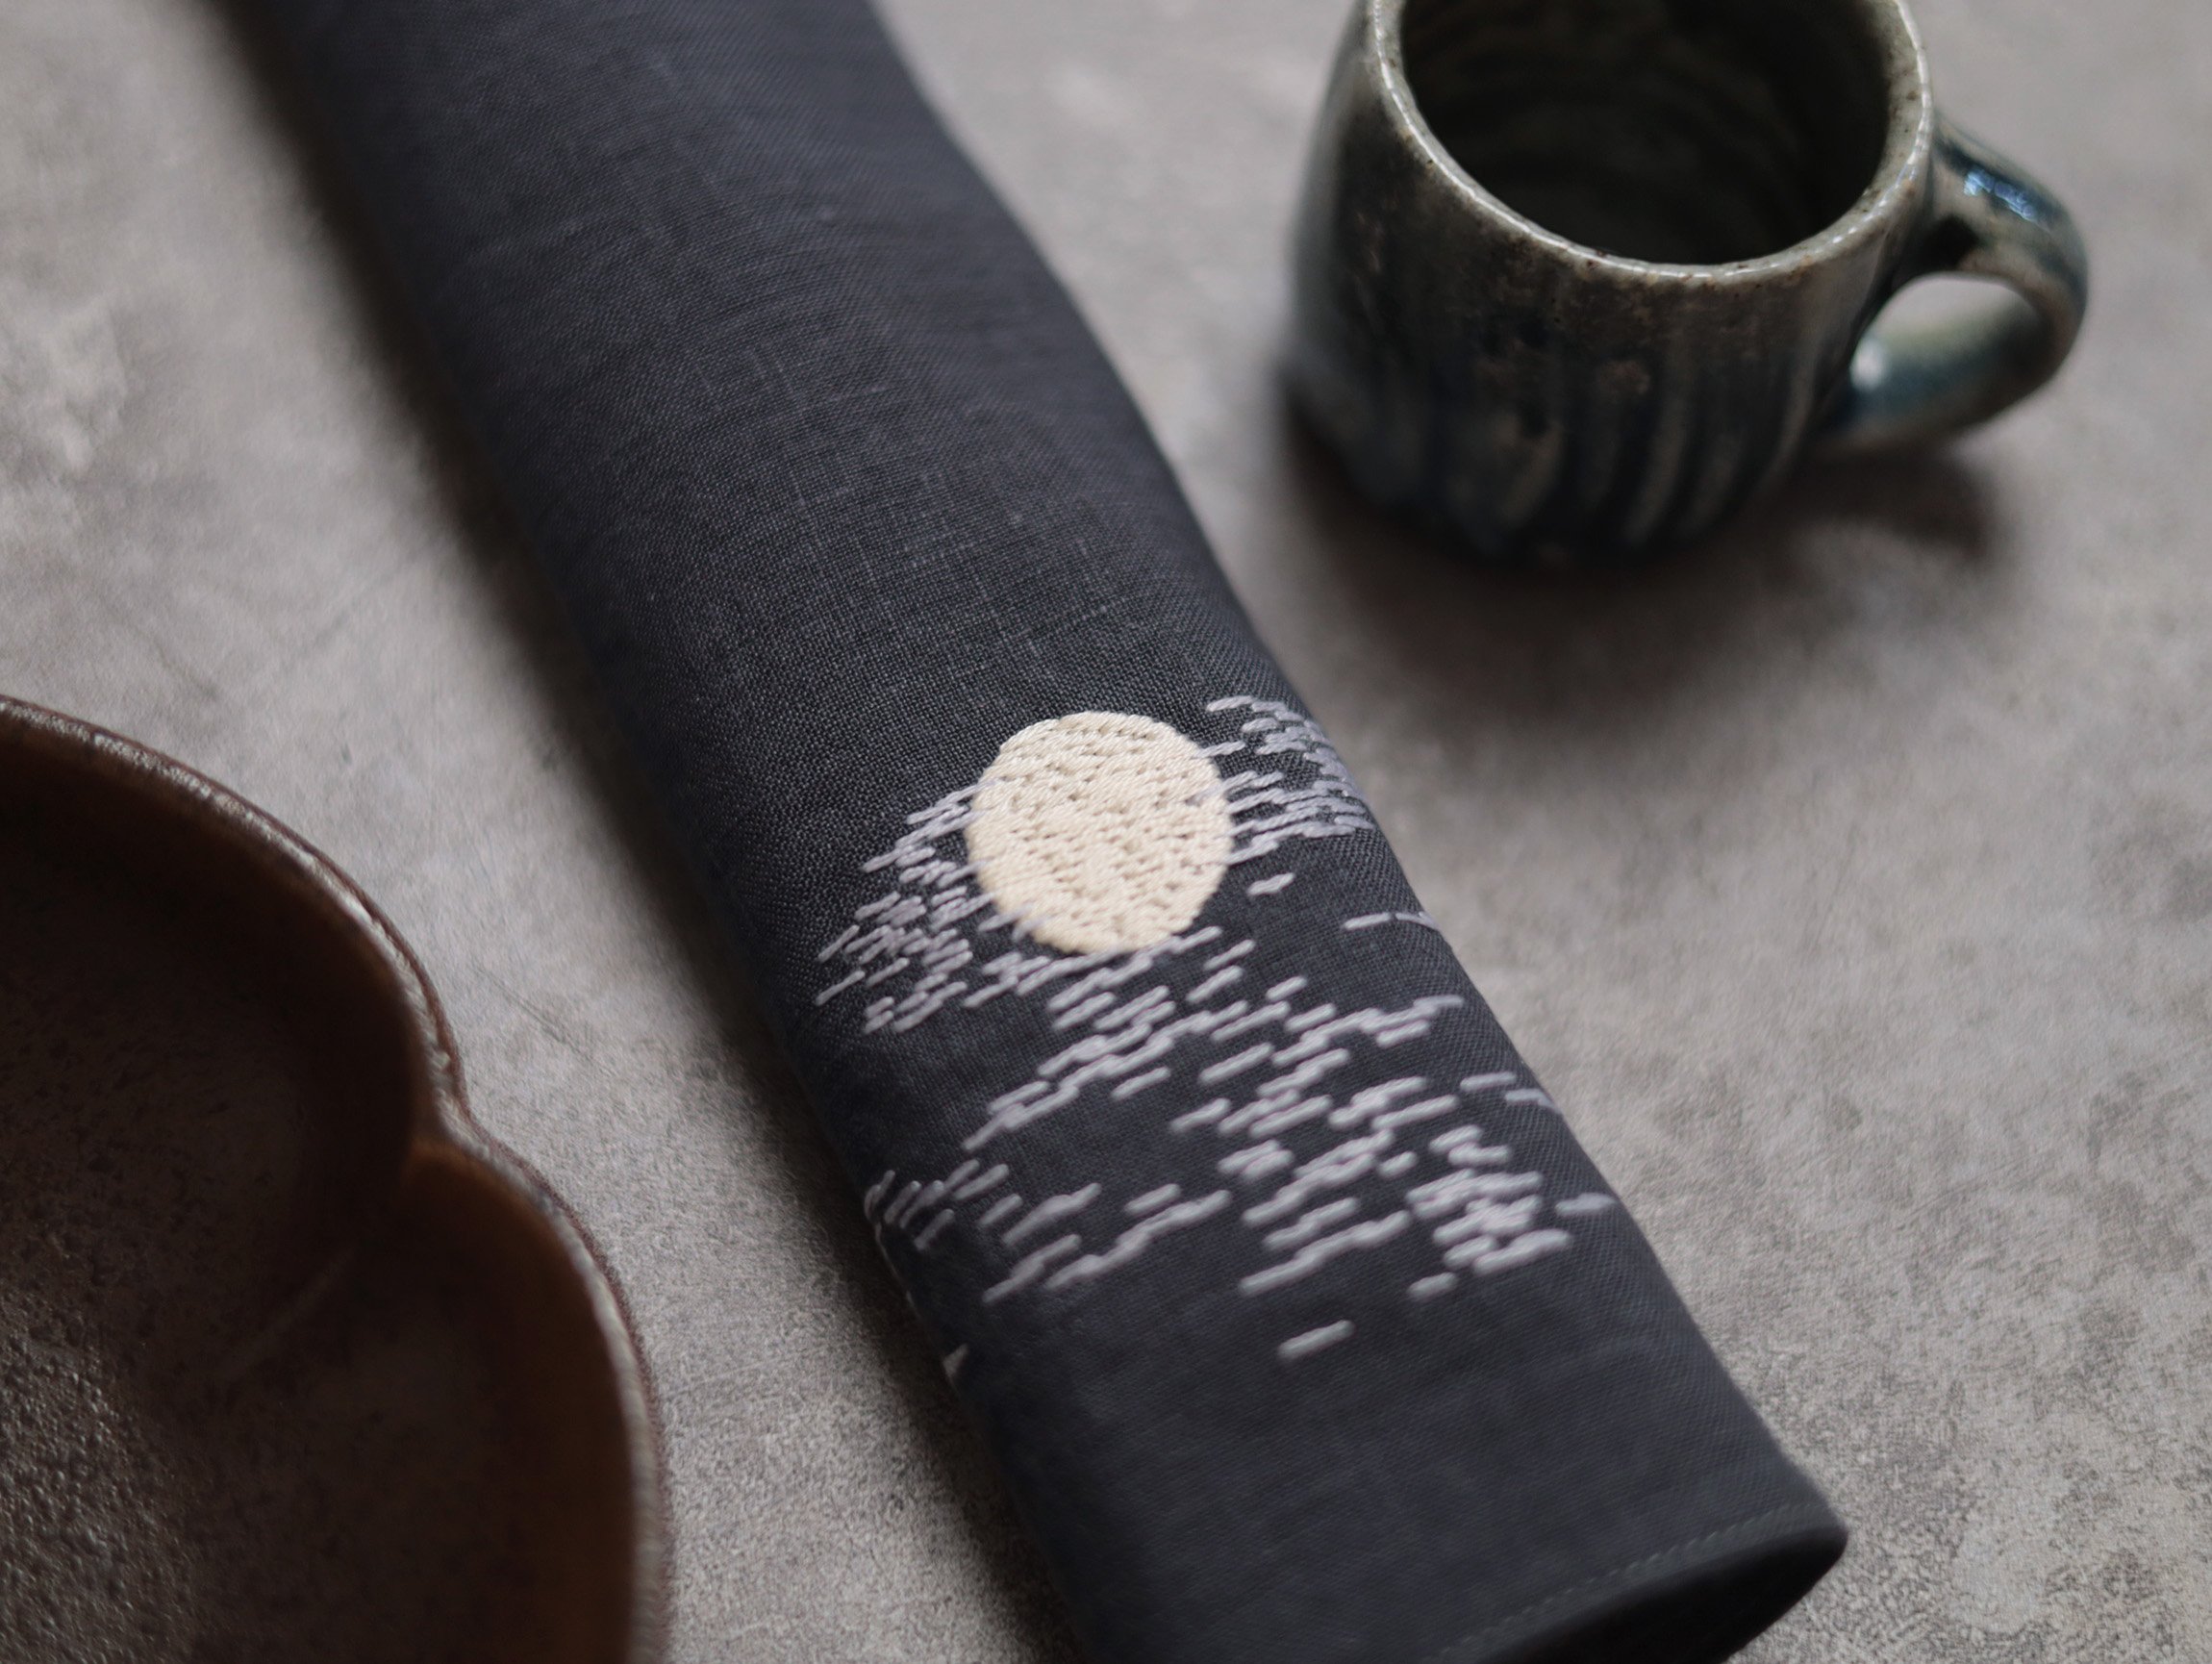
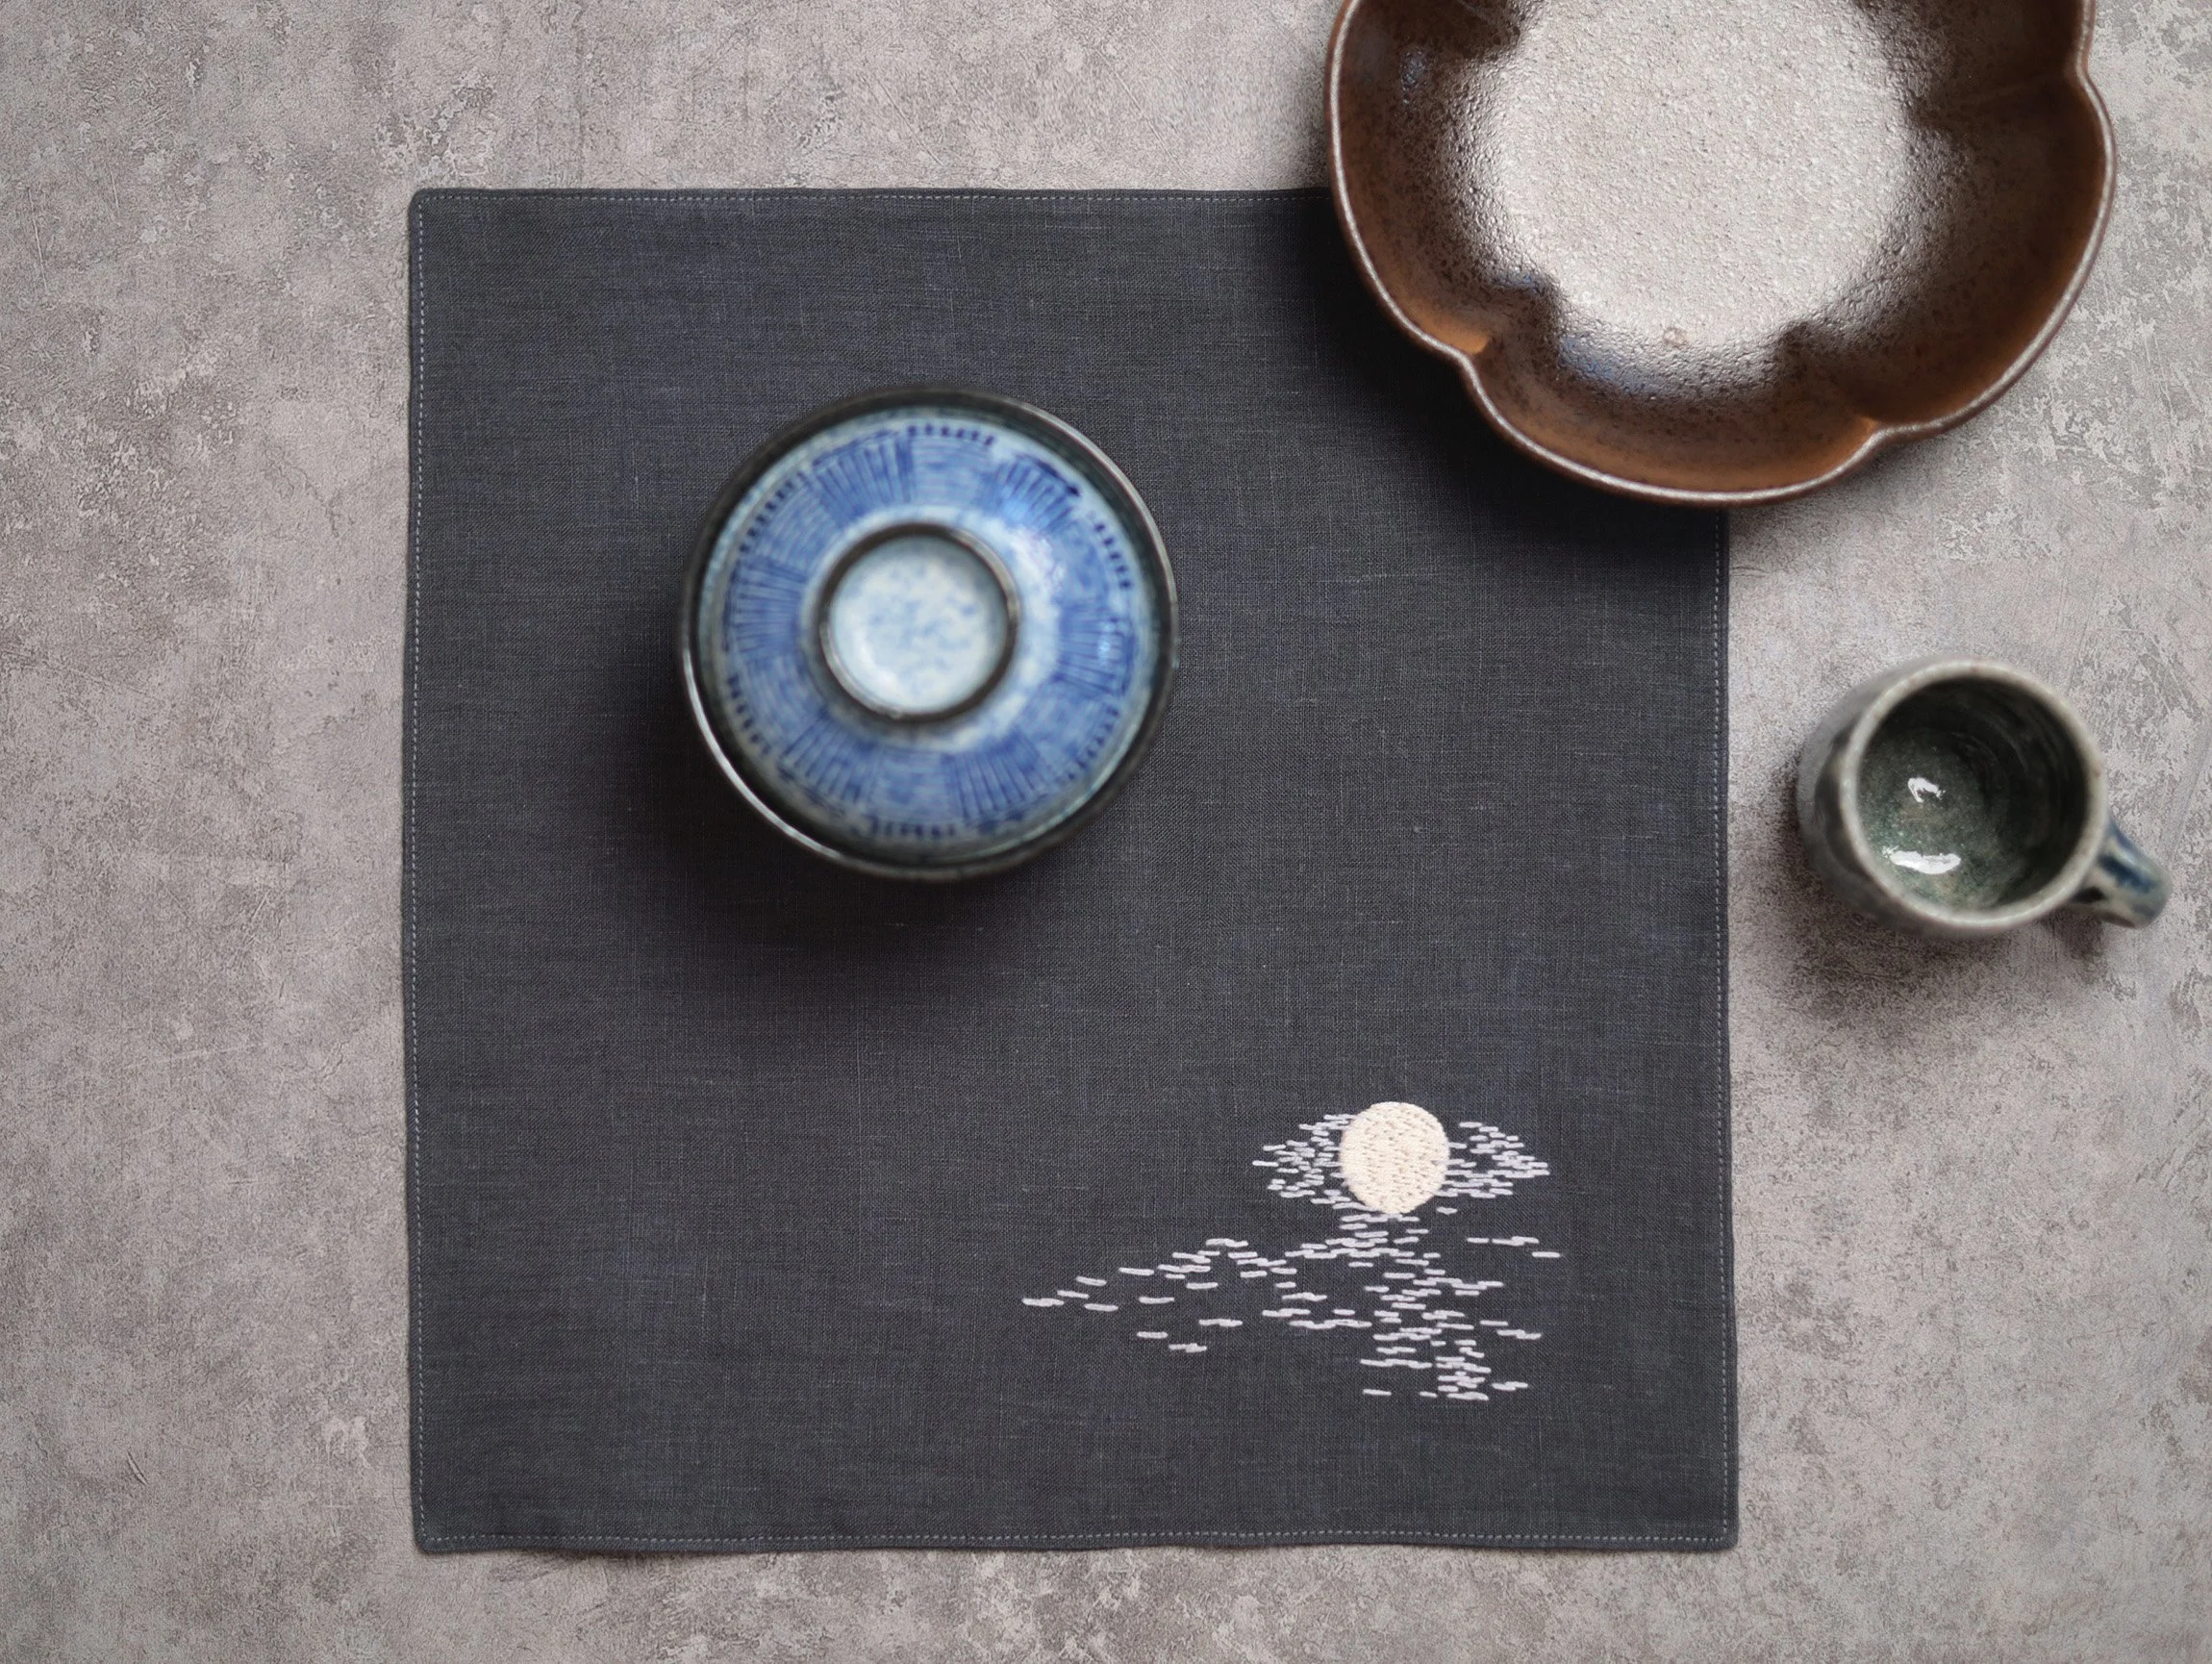
Moon Veil Embroidery Napkin
- Full Embroidery & Assembly Tutorials
Embroidery Tips for Beginners
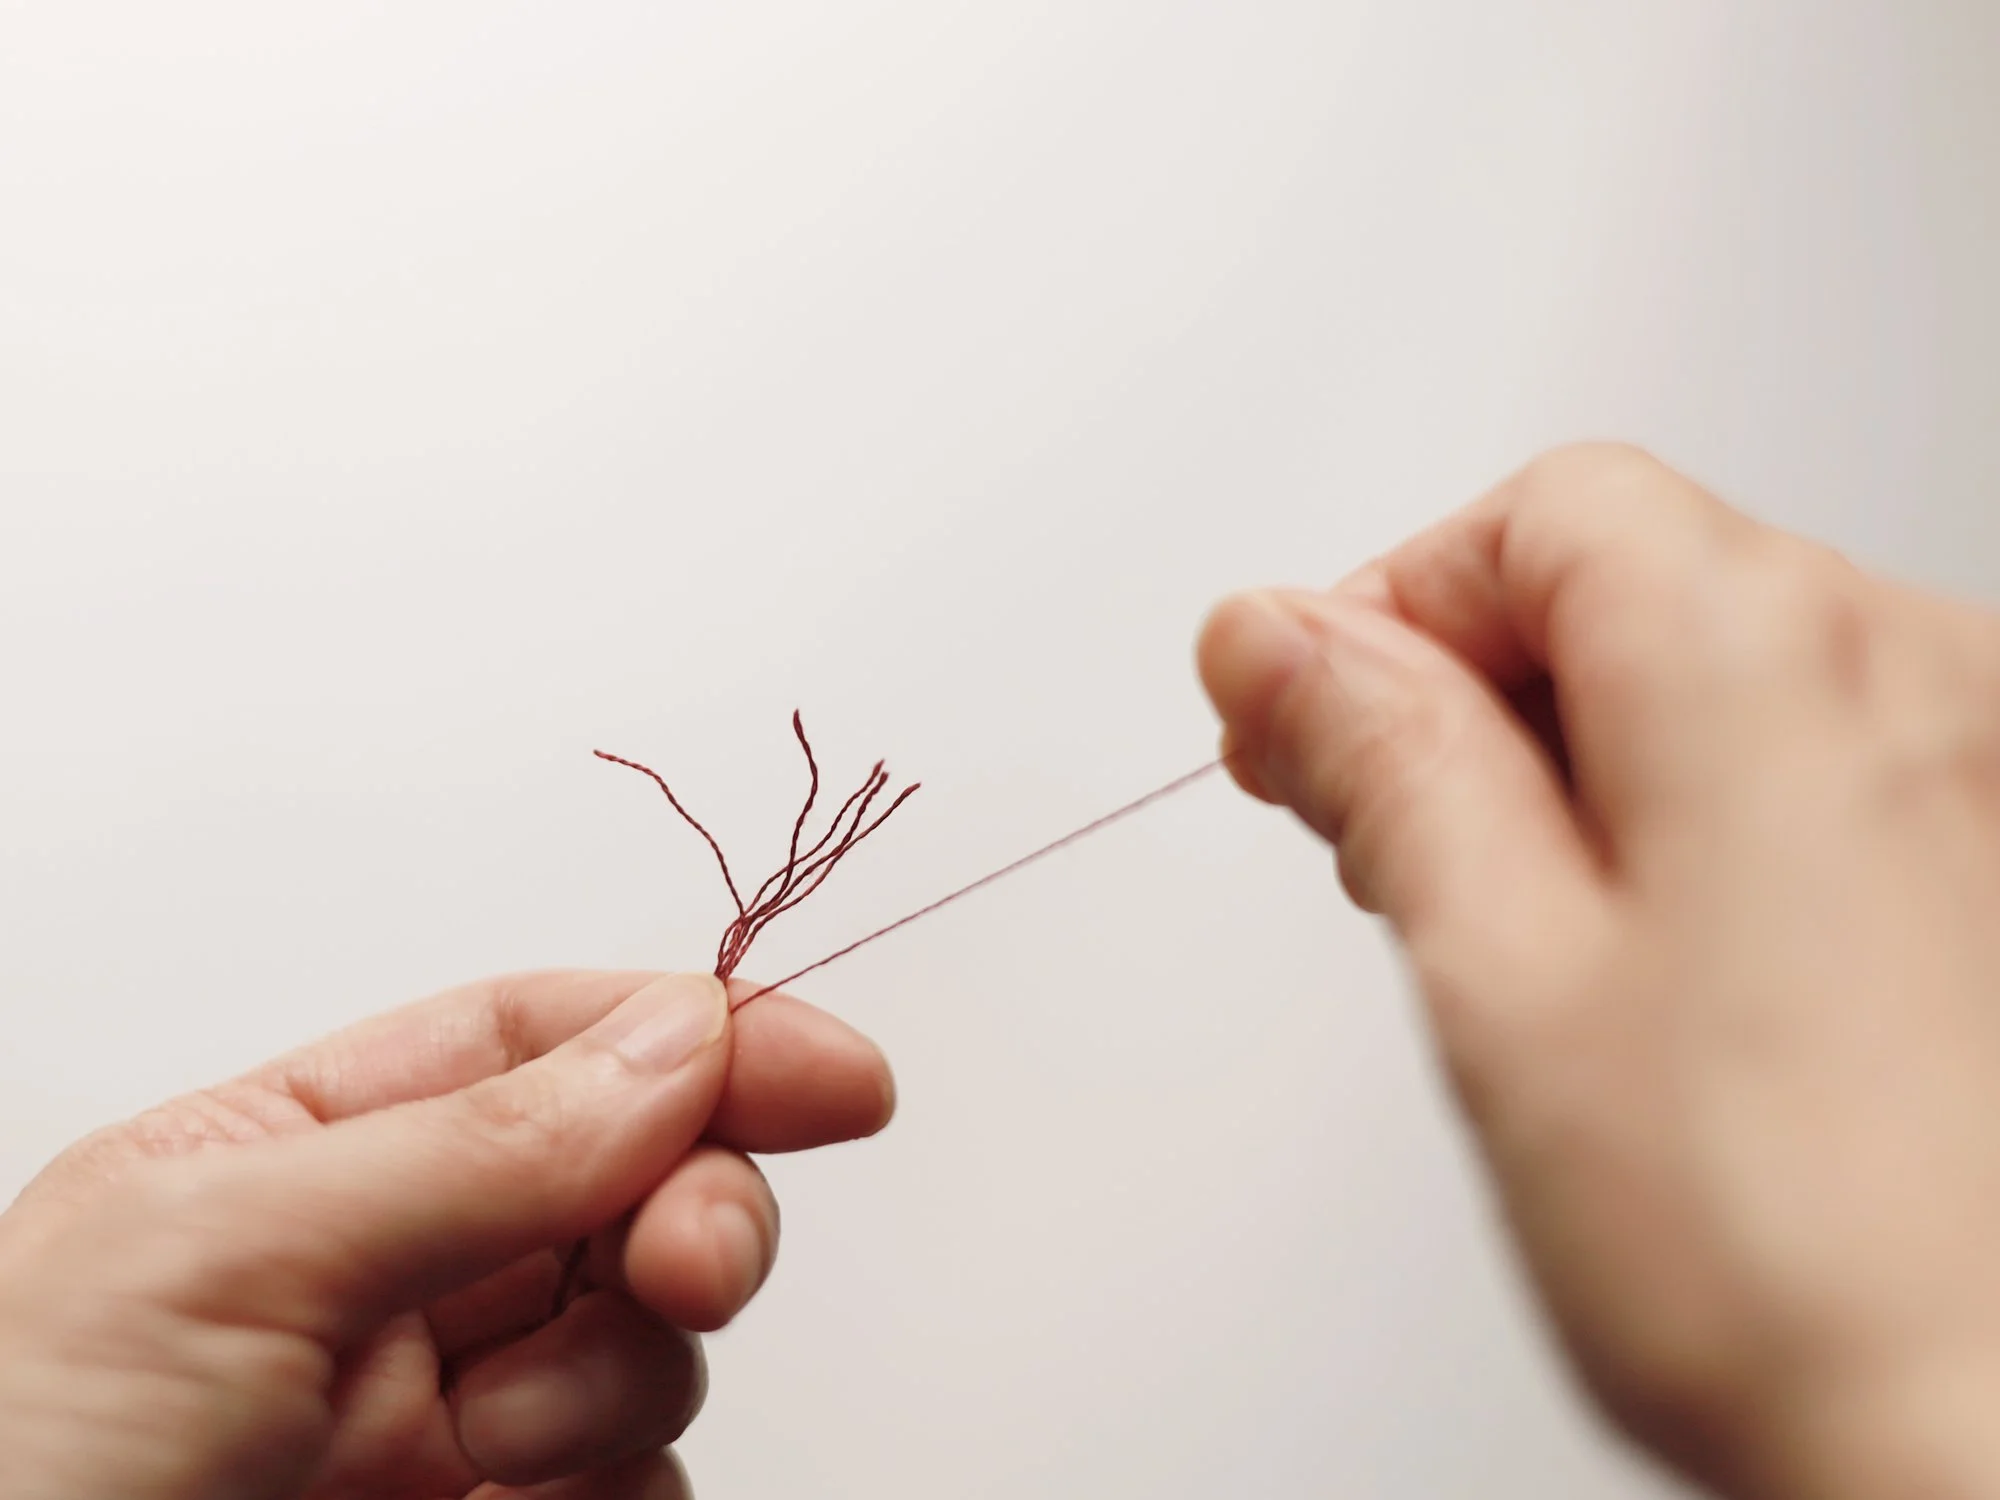
The standard stranded cotton embroidery thread has six strands of fine threads twisted together into a big one (main thread). The instructions in our DIY kits and patterns will clearly indicate how many strands you will need to use for each part of the embroidery.
No matter how many strands you use, you will always need to separate each strand from the main thread first. Cut the thread to the desired length, hold it in one hand, and pull the strand out one by one until you have the required number. Gather them into a single bunch for stitching.
Use one of the illustrated methods to thread the needle. Method A can be used for any number of strands, while Method B is suitable only for an even number of strands.

Get the Density & Tension Right (SUPER IMPORTANT)
One common mistake beginners make when embroidering is stitching too densely or pulling the thread too tightly after each stitch. This might not be noticeable while the fabric is still in the hoop, but it will be too late once the embroidery is complete and the fabric is distorted and puckered. This, unfortunately, cannot be fixed.
That’s why getting the stitch density and thread tension right is so important — especially when working with long and short stitch or satin stitch to fill a space, as these are the hardest to keep even! Aim for the stitches to lie flat and sit neatly next to each other, rather than piling up or overlapping excessively. To achieve the correct tension, avoid pulling the thread too tightly after each stitch. The thread should lie flat against the fabric without causing puckering or distortion (hard to see but you can feel the tension if paying close attention). After making a stitch, gently tug the thread until it is secure but not overly tight.
It also helps with stabiliser (interfacing) and hoop. Keep the fabric taut in the hoop at all times, like the skin of a drum.
Embroidery Tutorial
A lightweight stabiliser has been attached to the back of the printed pattern on the main fabric. Place the fabric in the embroidery hoop with the pattern centred, tighten the hoop, and begin stitching.
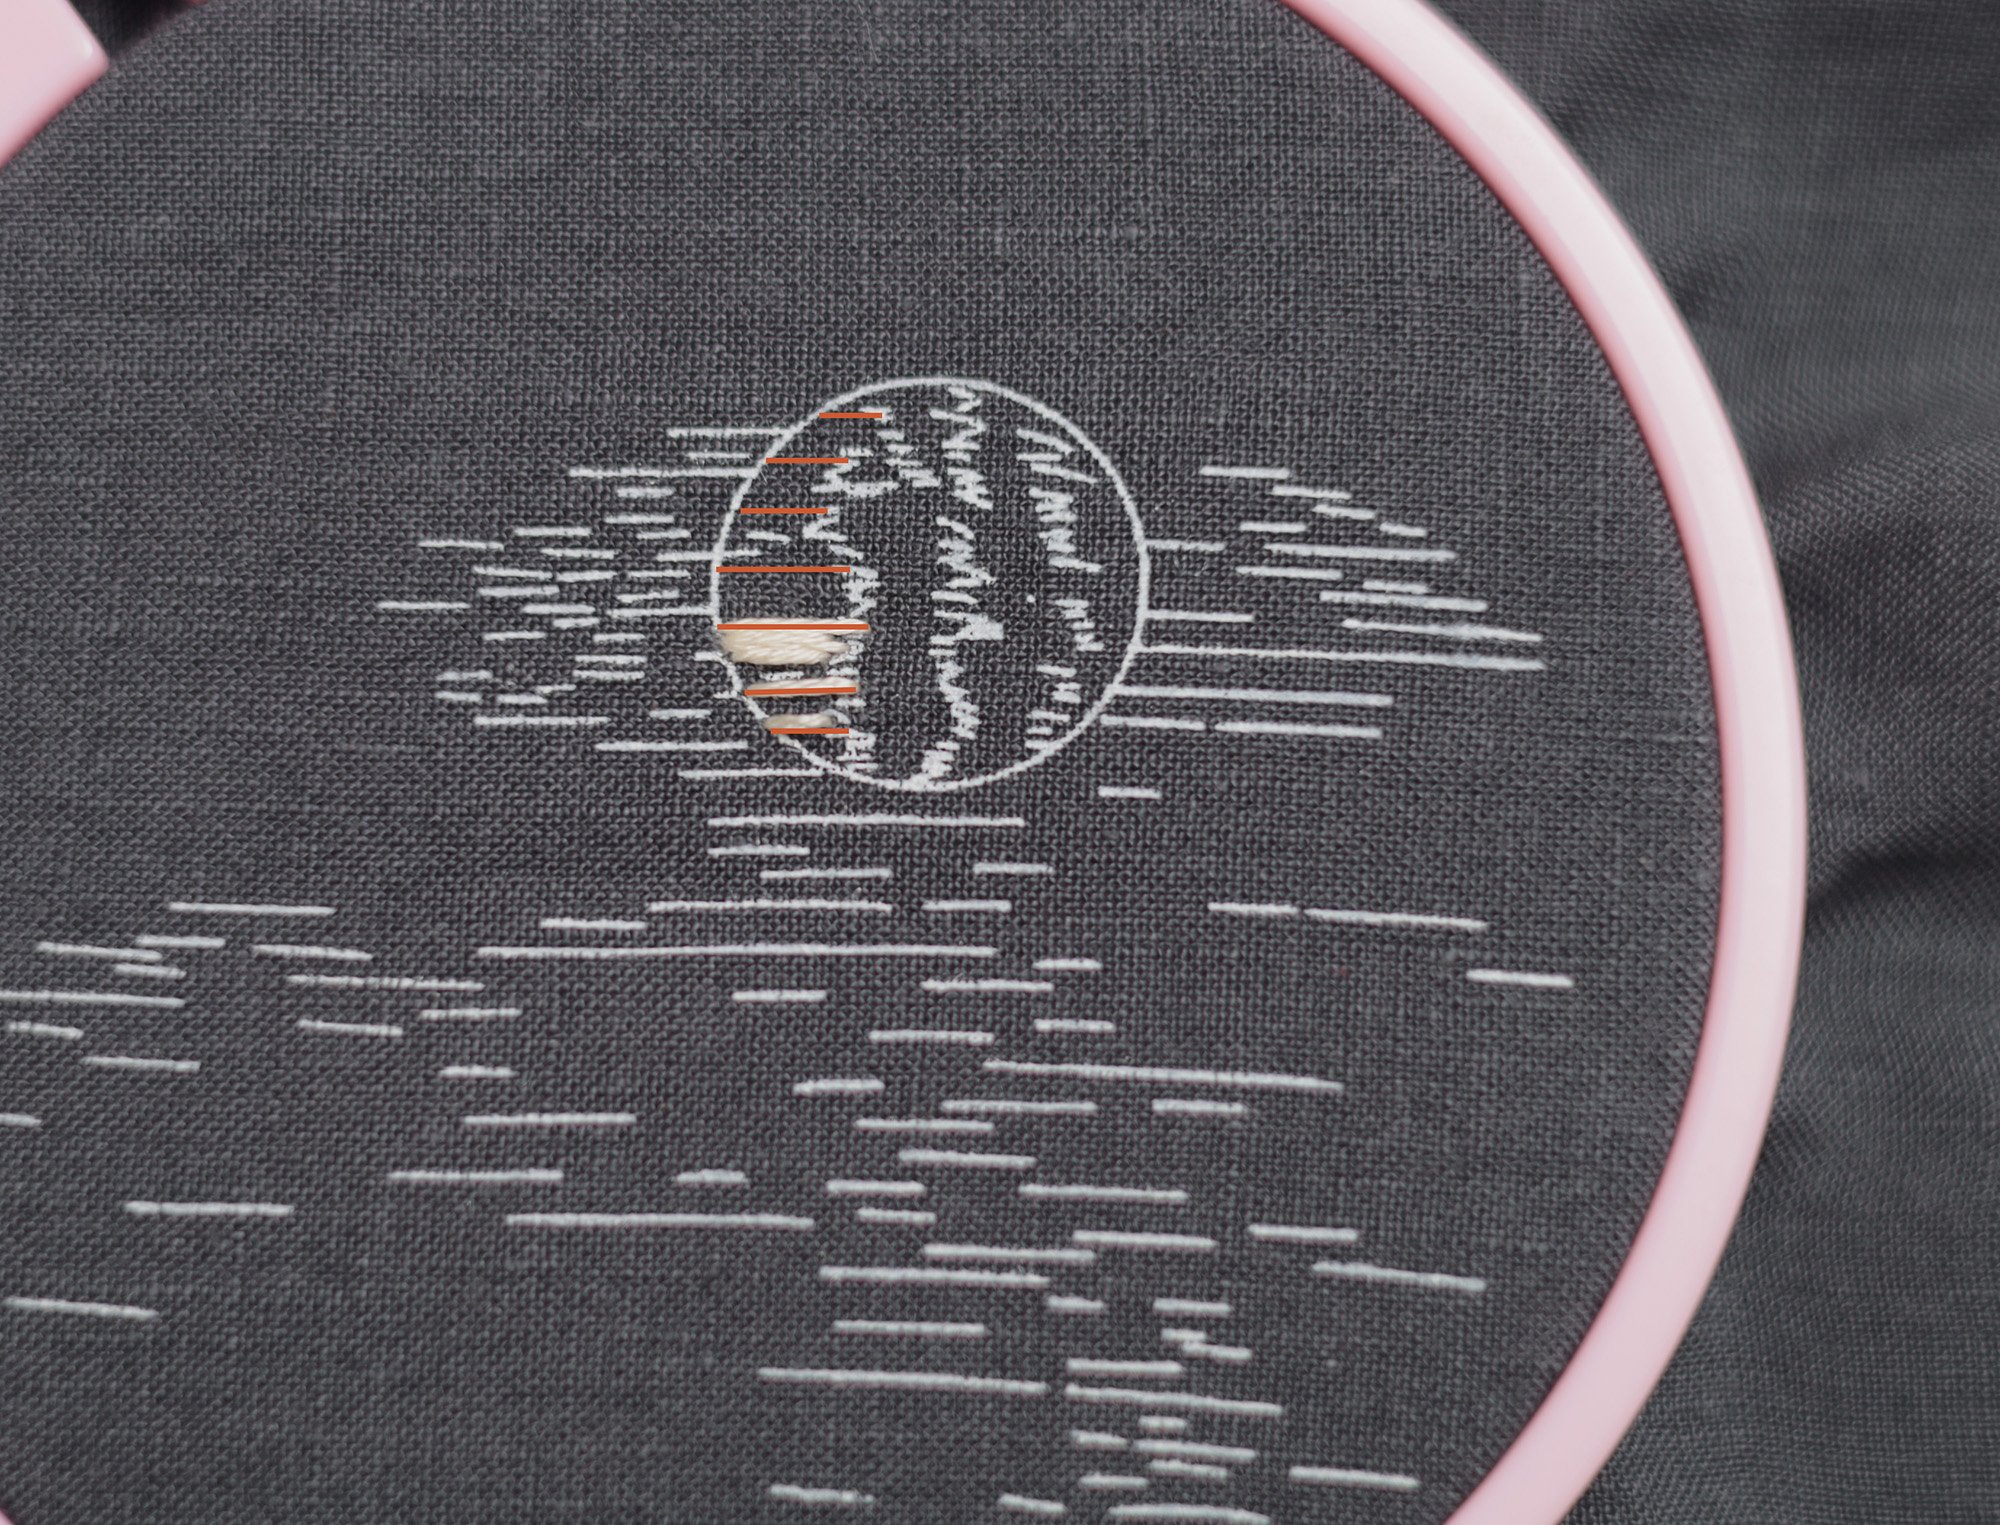
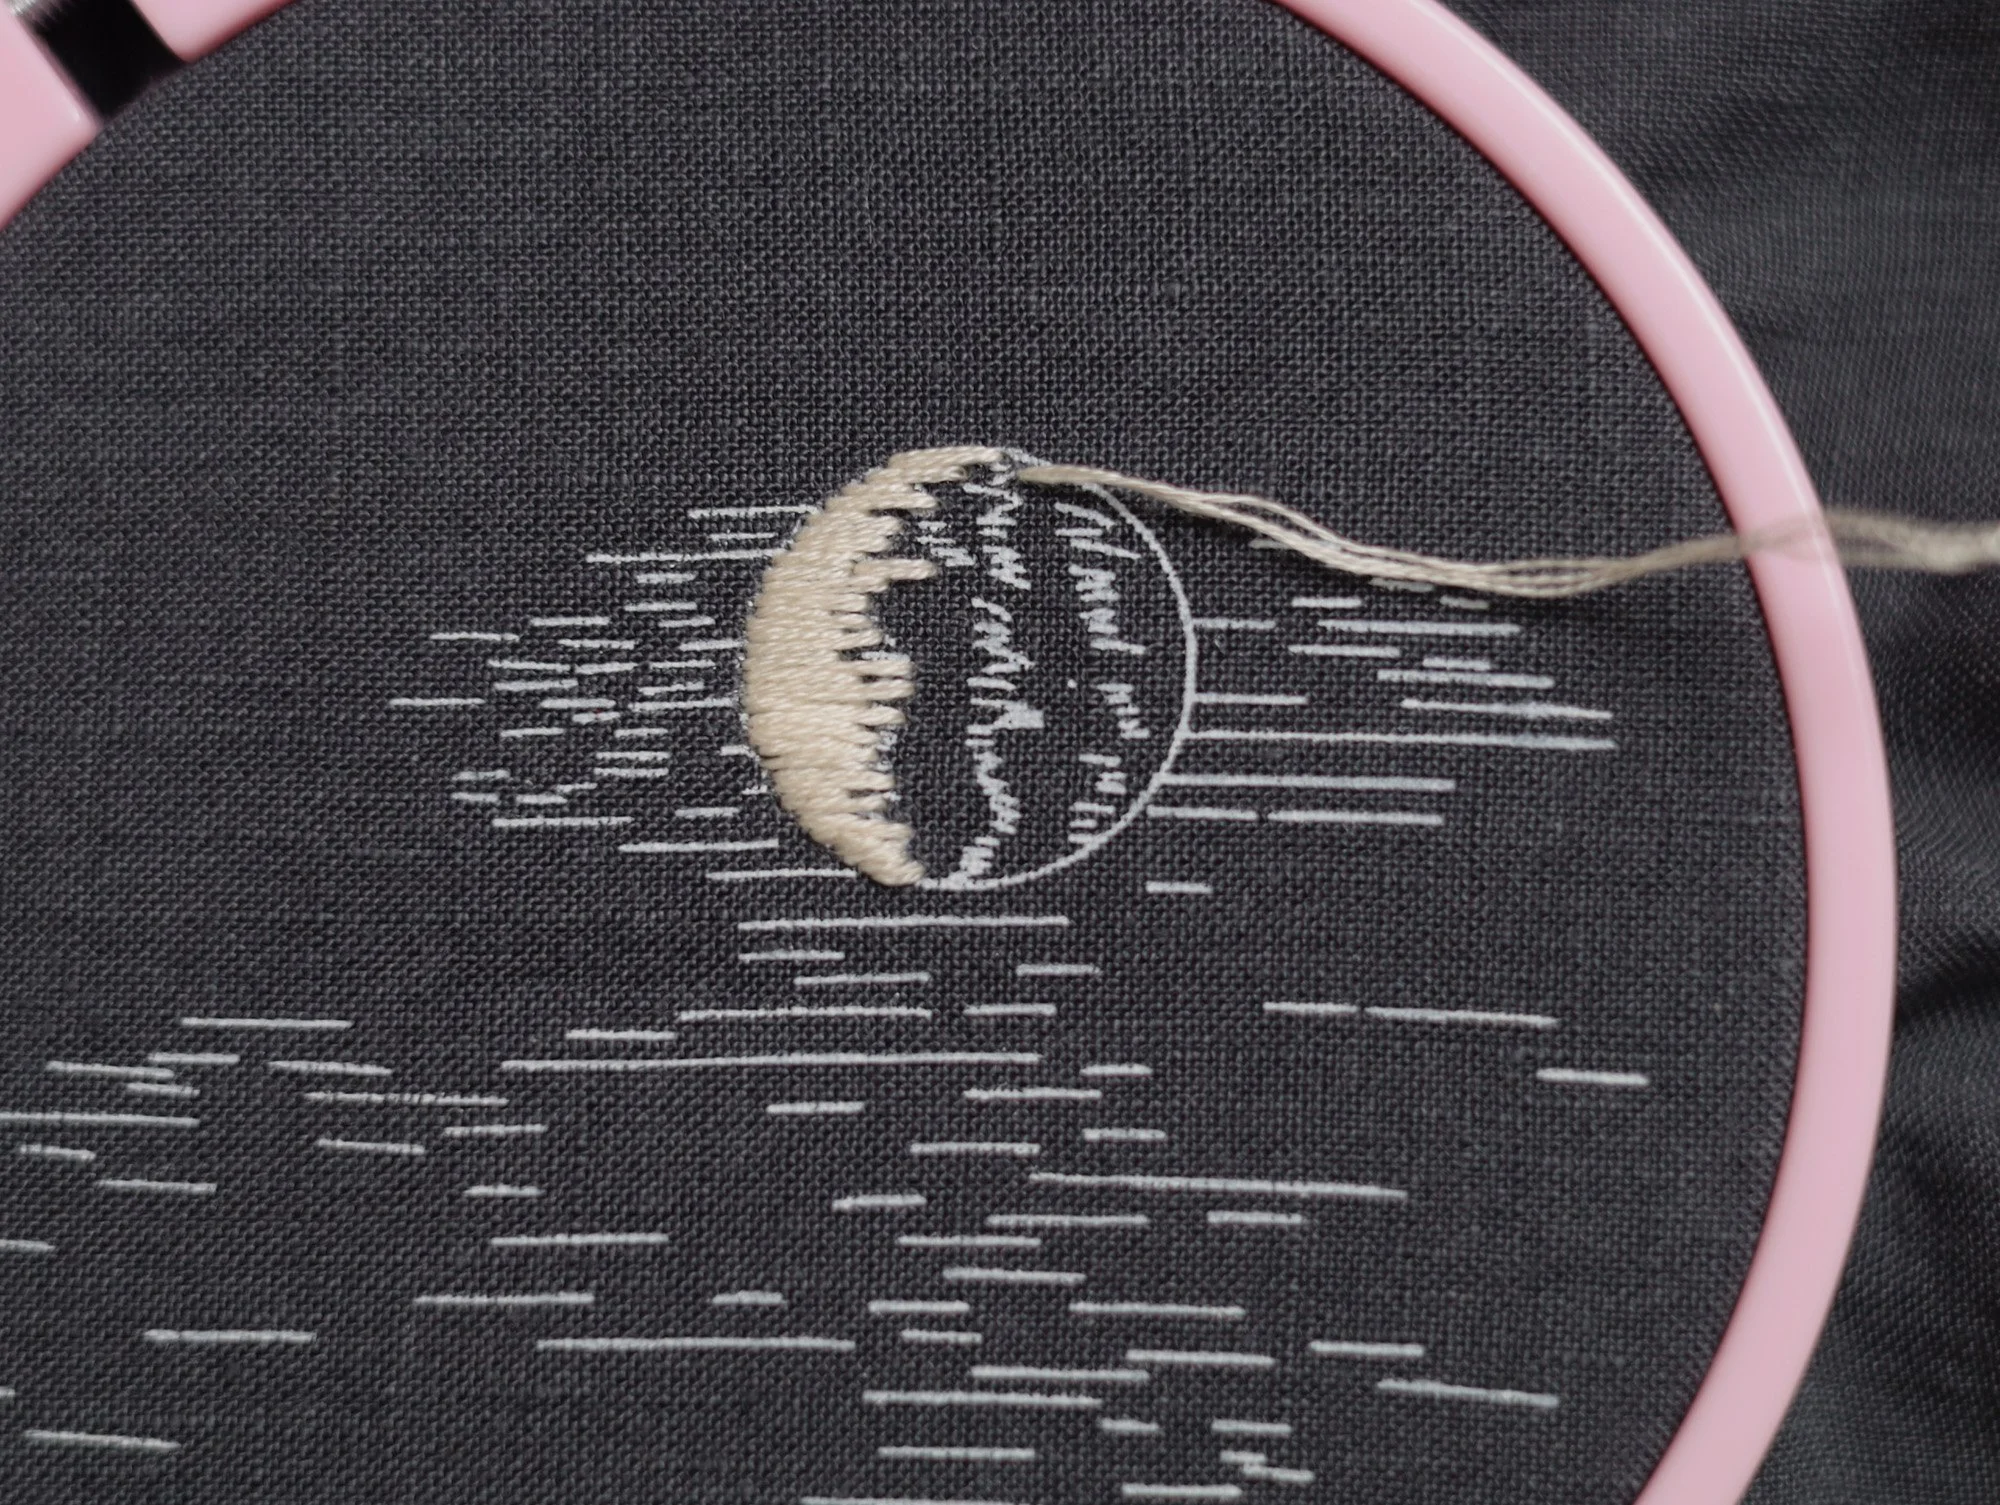
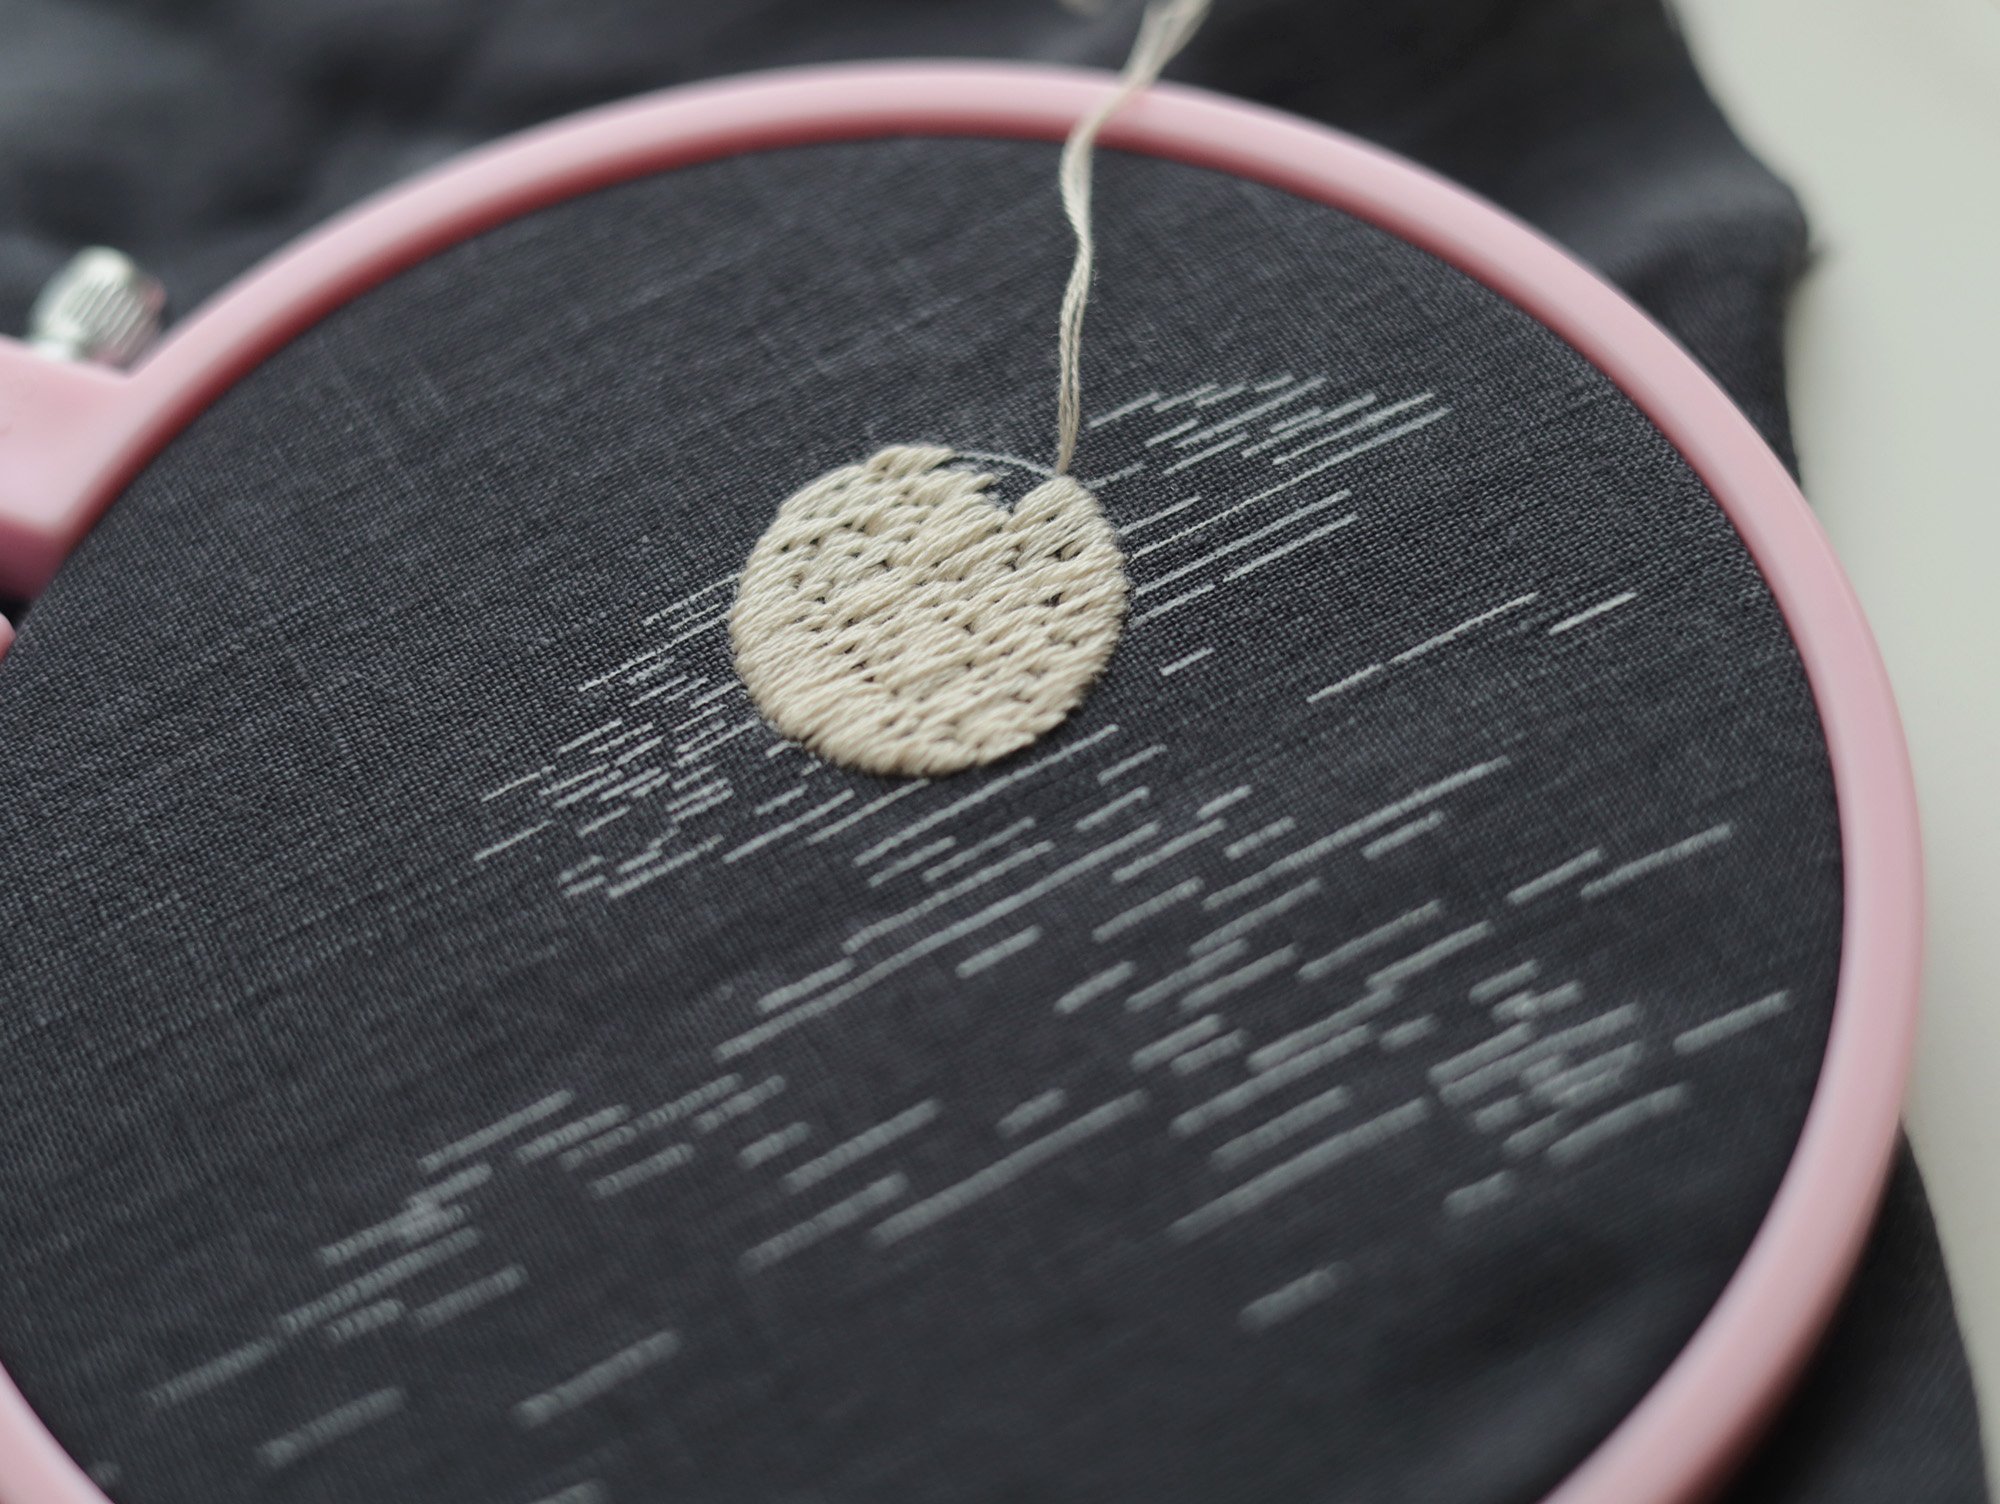
The moon:The moon is divided into roughly four sections. Using three strands of the off-white thread, stitch each section one at a time with long and short stitches. Keep all the stitches horizontal. End each stitch roughly along the division lines between the sections.
Tips:
If you’re a beginner, stitch a few evenly spaced reference lines across the section first (see the red lines in the first photo below). Then, fill the spaces between the reference lines one at a time. This will help keep all your stitches horizontal.
I started with the first section on the left, working all the stitches from left to right. For the remaining sections of the moon, I worked all the stitches from right to left. I find it easier to create a smooth outline by starting each stitch from the outline (see the third photo below).
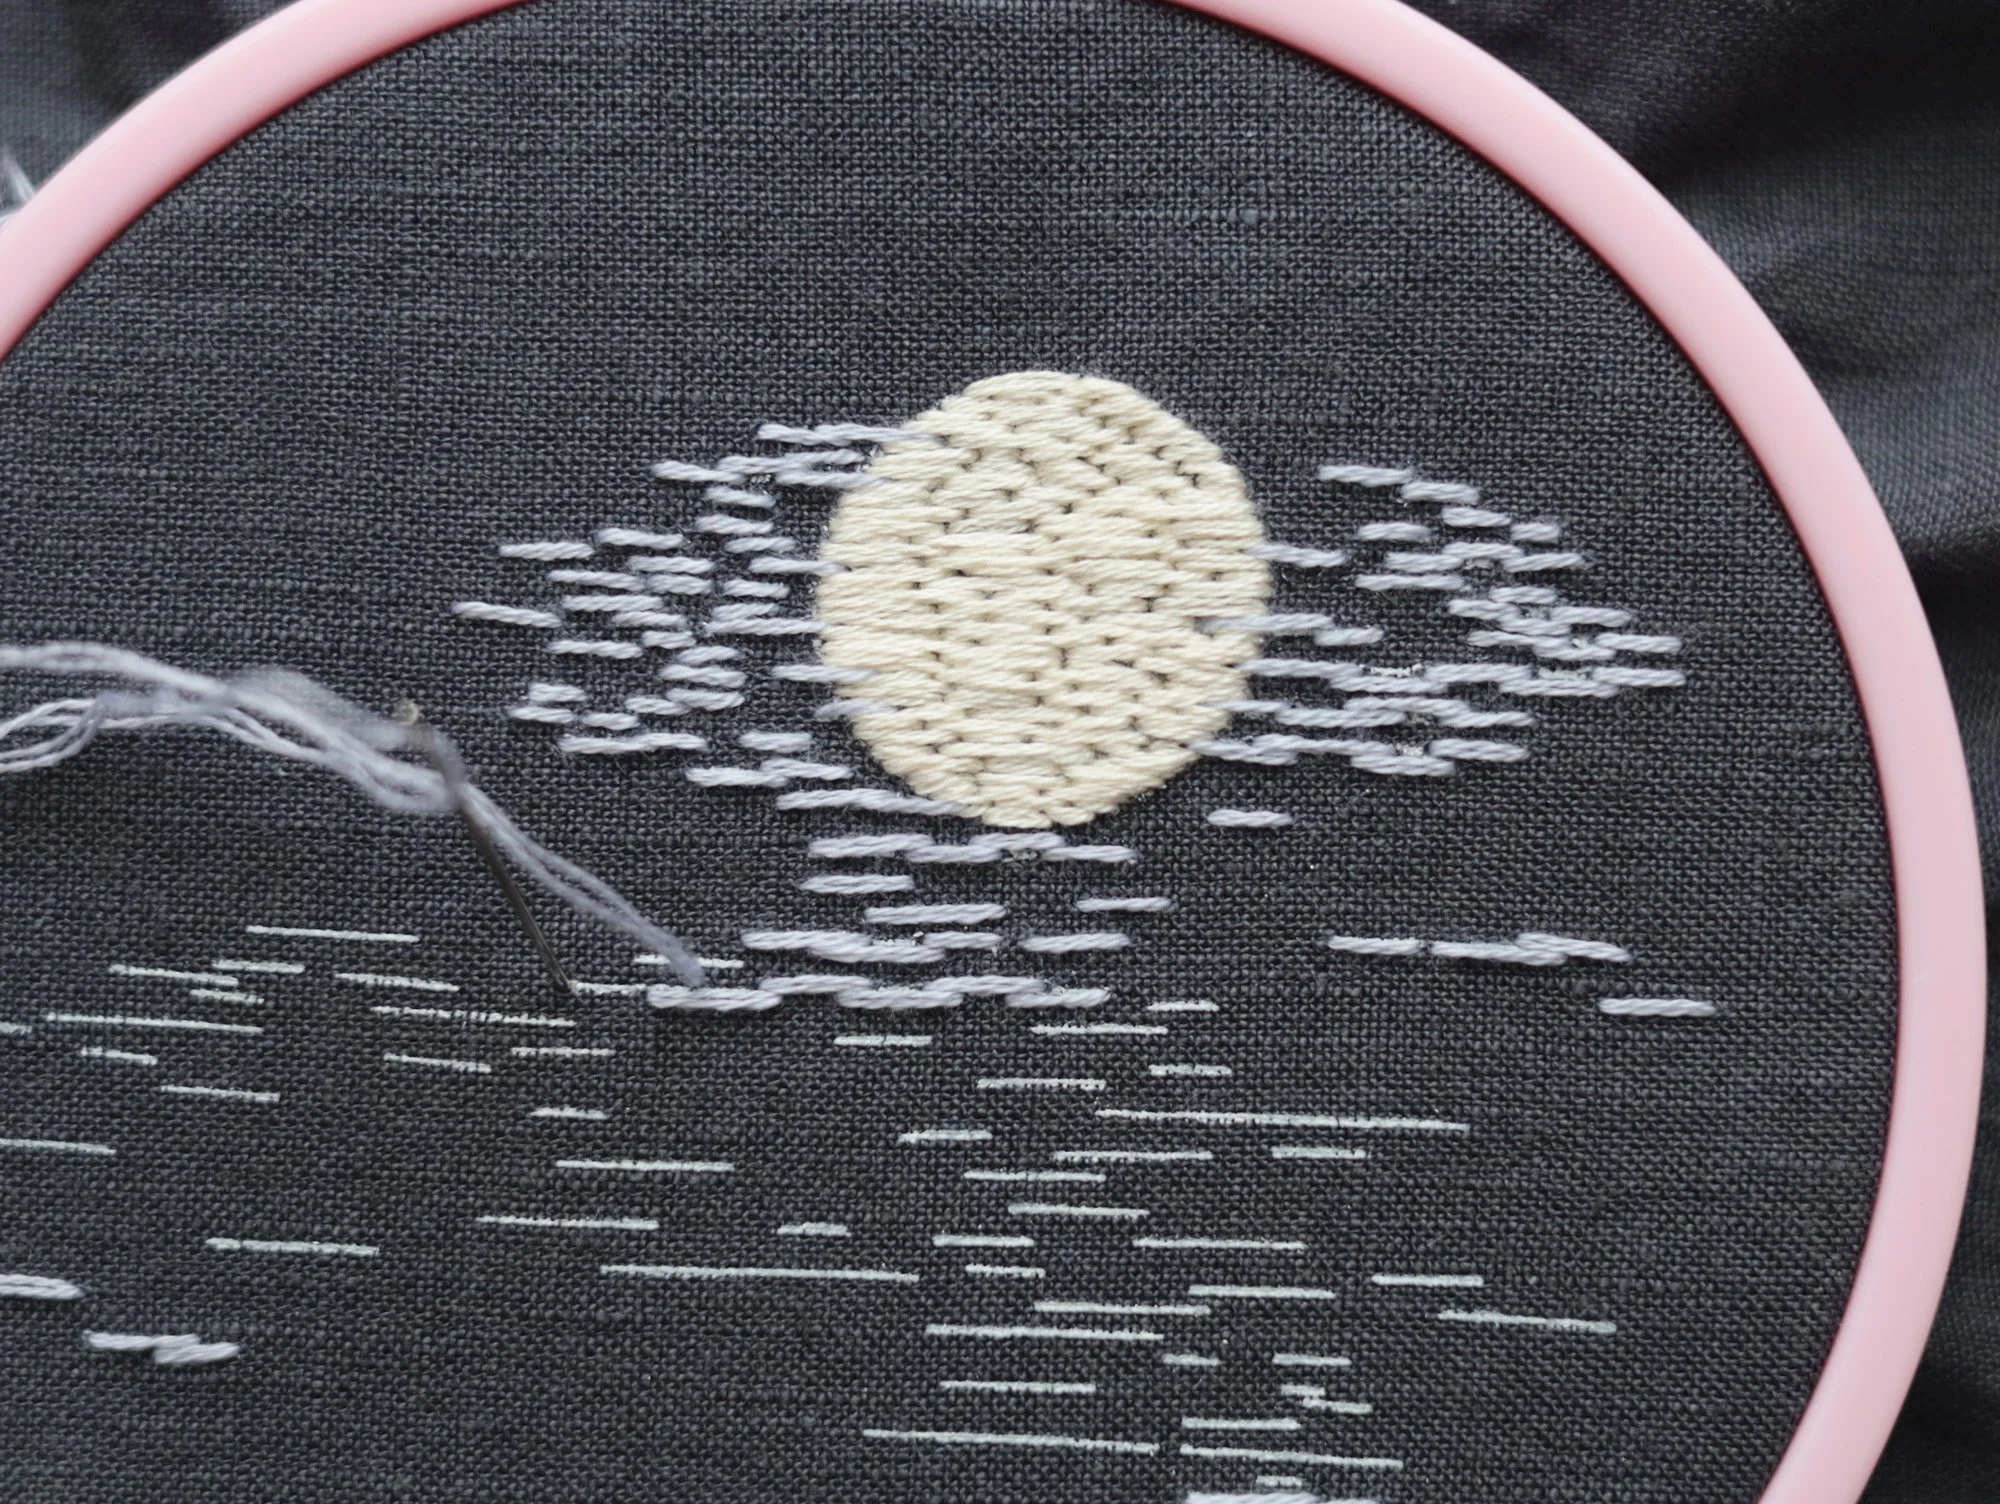
The clouds: Using two strands of light grey thread, stitch the clouds with horizontal straight stitches.
Tips:
For short lines, use a single straight stitch.
For longer lines, make several shorter straight stitches, connecting them with slightly overlapping ends. Alternate the direction of the overlap — for example, if the second stitch sits slightly above the first stitch at one end, place the third stitch slightly below the second stitch at the opposite end.
Sewing Tutorial
Peel and trim off any excess stabiliser from the back of the embroidered fabric. Cover the embroidered area with a clean cloth and press it flat with an iron on the wrong side of the fabric. Iron the lining piece as well.
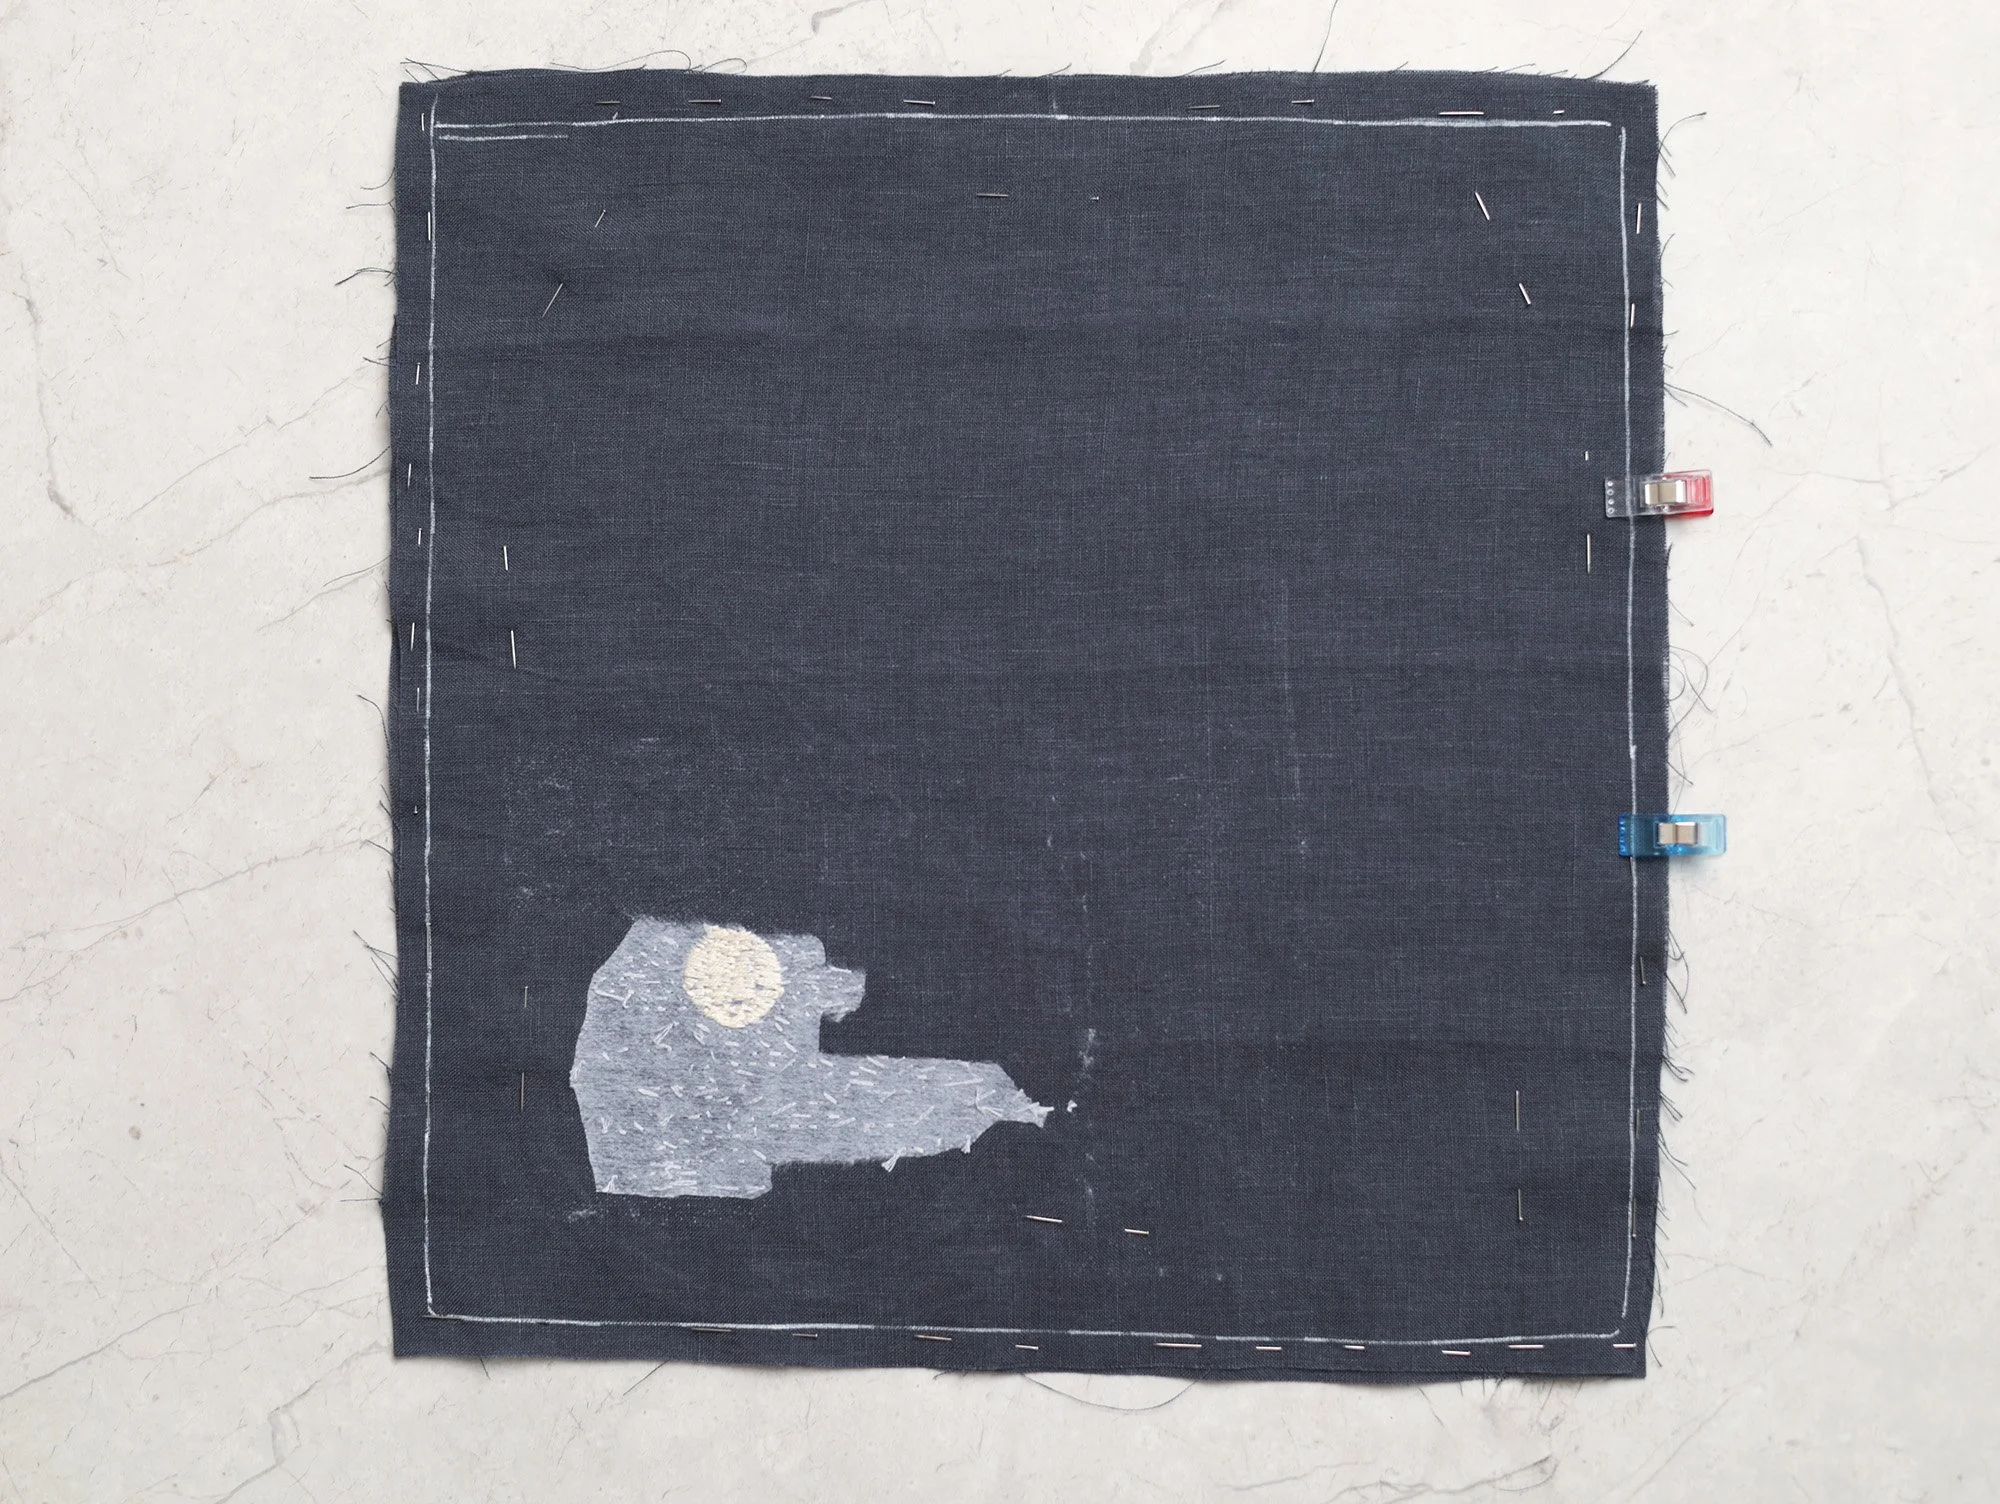
Place the main and lining fabrics together with their right sides facing each other. On the wrong side of the main fabric, draw the sewing lines along the edges using a fabric marker.
Note: The fabric edges may not be perfectly straight. Make sure to draw a square in your desired finished size for the napkin/handkerchief. Leave enough seam allowance around the square for sewing.
Secure the two layers together with pins or clips. Linen fabric is less structured than cotton, so use plenty of pins to keep the layers in place and maintain the shape.
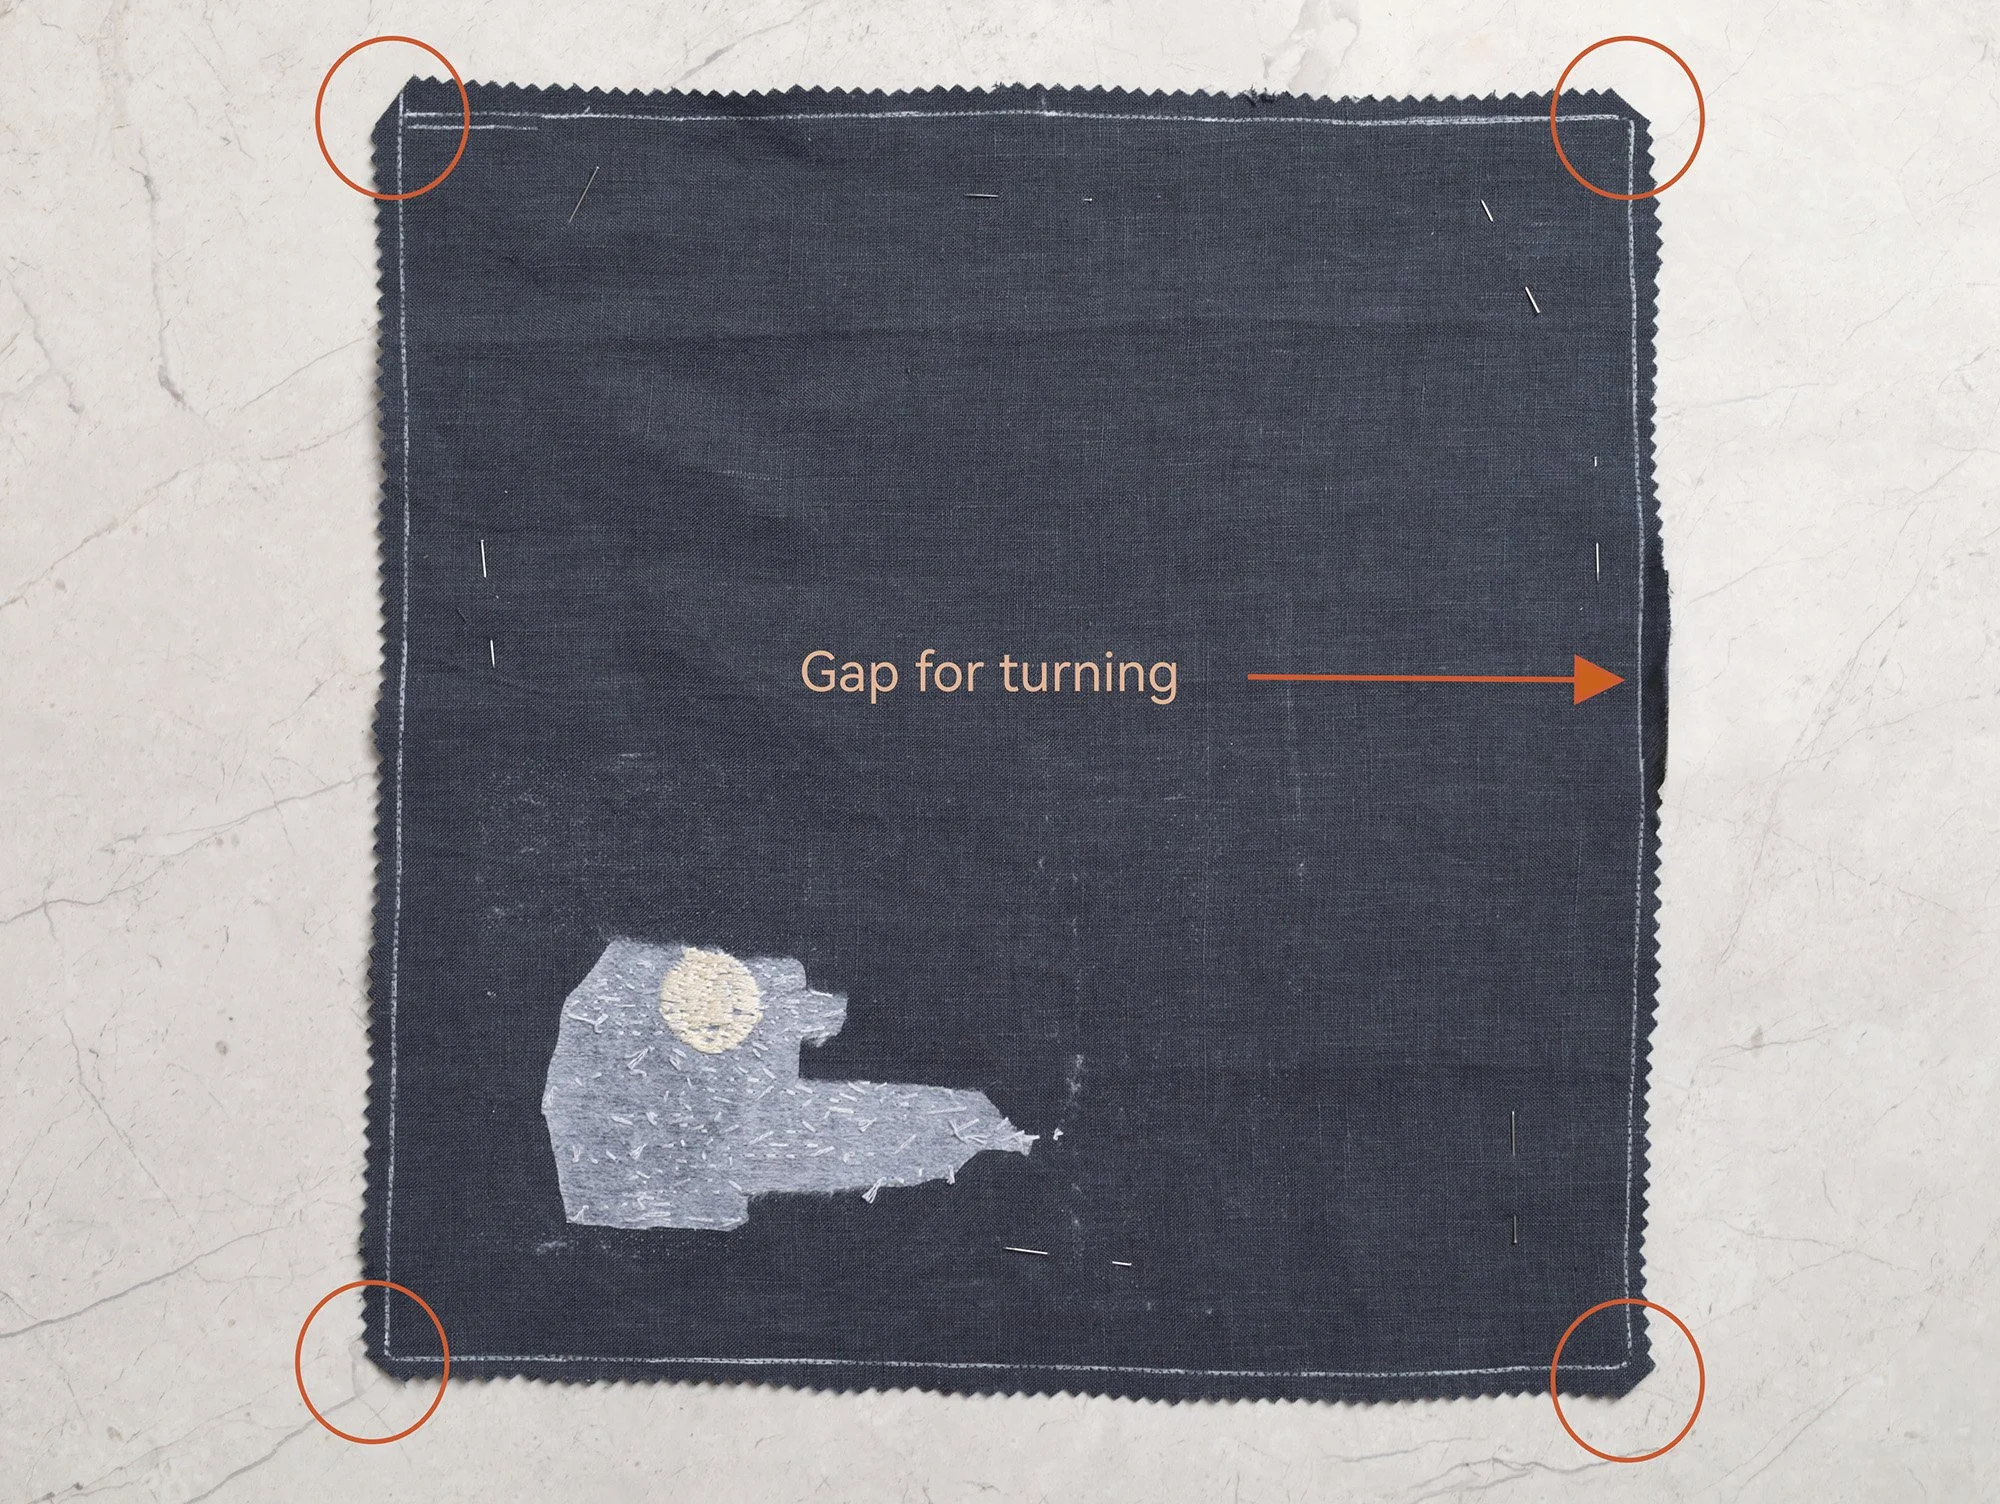
Stitch along the sewing lines, leaving a gap of at least 5 cm on one side for turning. Trim the seam allowance (except around the gap) and clip the corners, taking care not to cut into the stitching line.
Turn the fabric right side out through the gap. Adjust the shape, then gently pick out the corners with a large needle. Press flat.
Fold in the seam allowance around the gap and close the opening with an invisible (ladder) stitch. Topstitch around the edge with a 1–2 mm seam allowance.
Congratulations. Your embroidered napkin/handkerchief is now complete!
Thank you for stopping by and exploring our tutorials.
If you spot any mistakes in our tutorials, have questions, or have suggestions for improvement, we’d love to hear from you. We’re also always happy to chat about new project ideas and share more fun creations. Please feel free to get in touch with us through the contact section on our website.