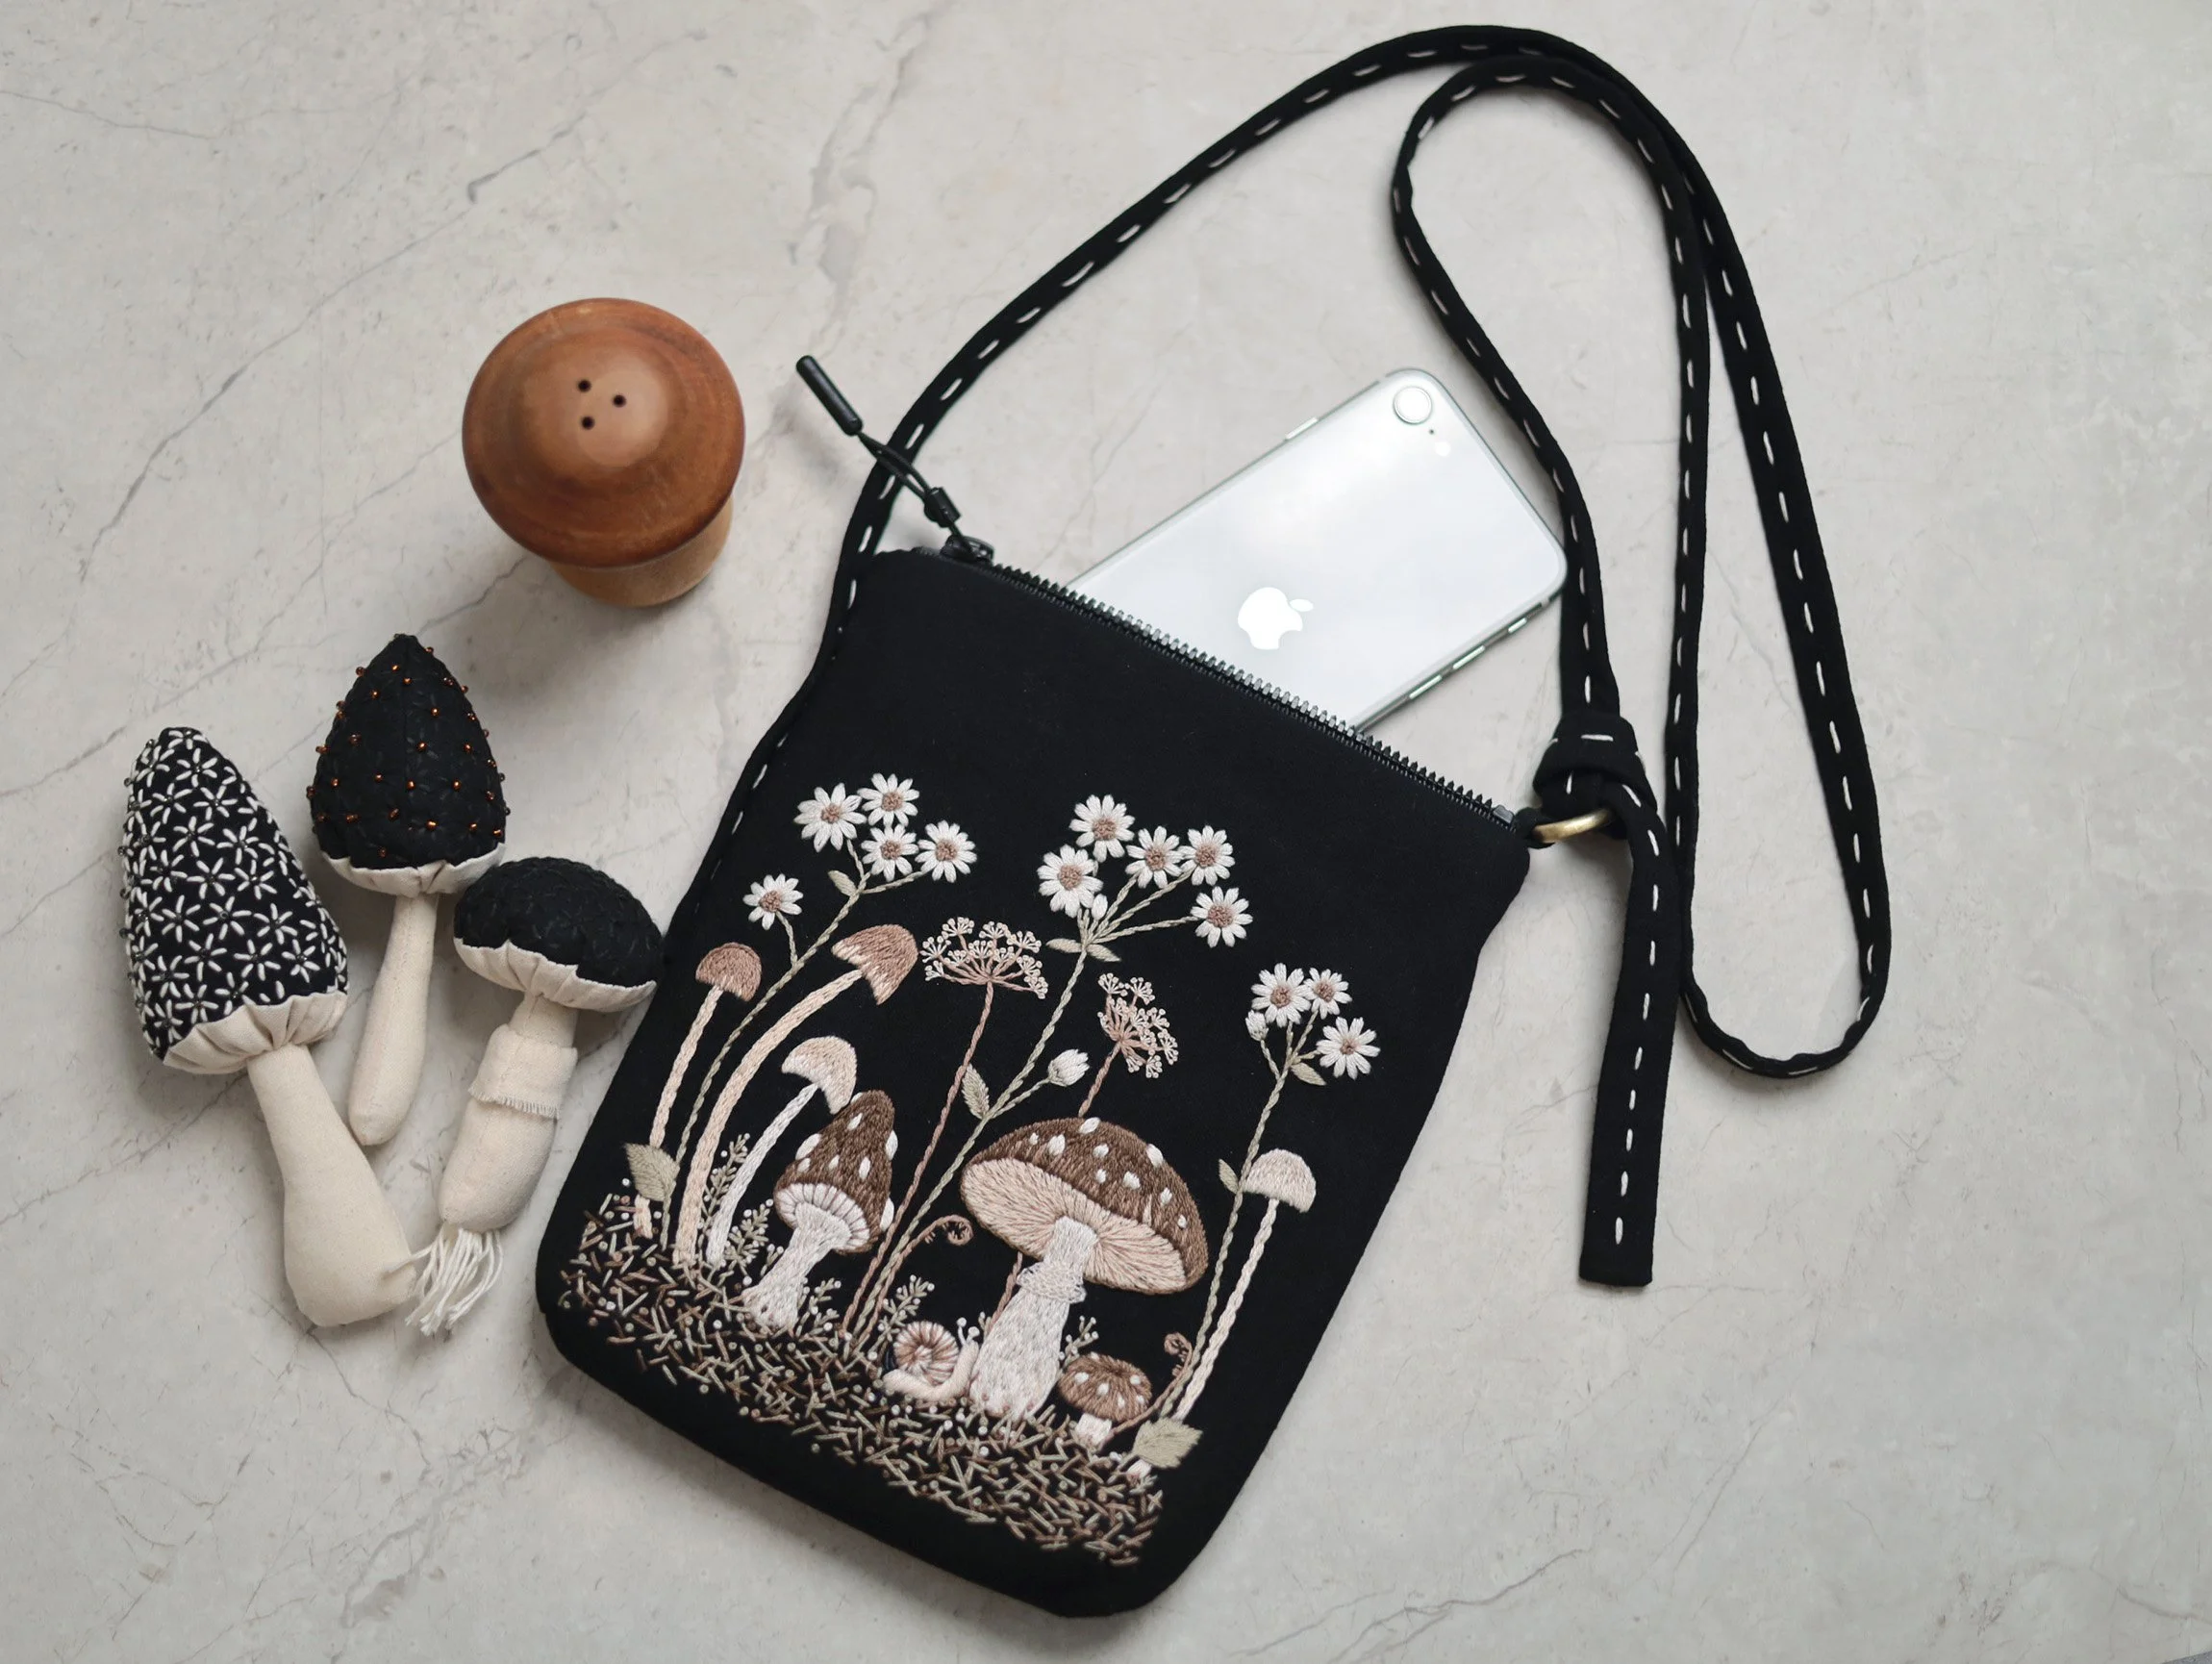
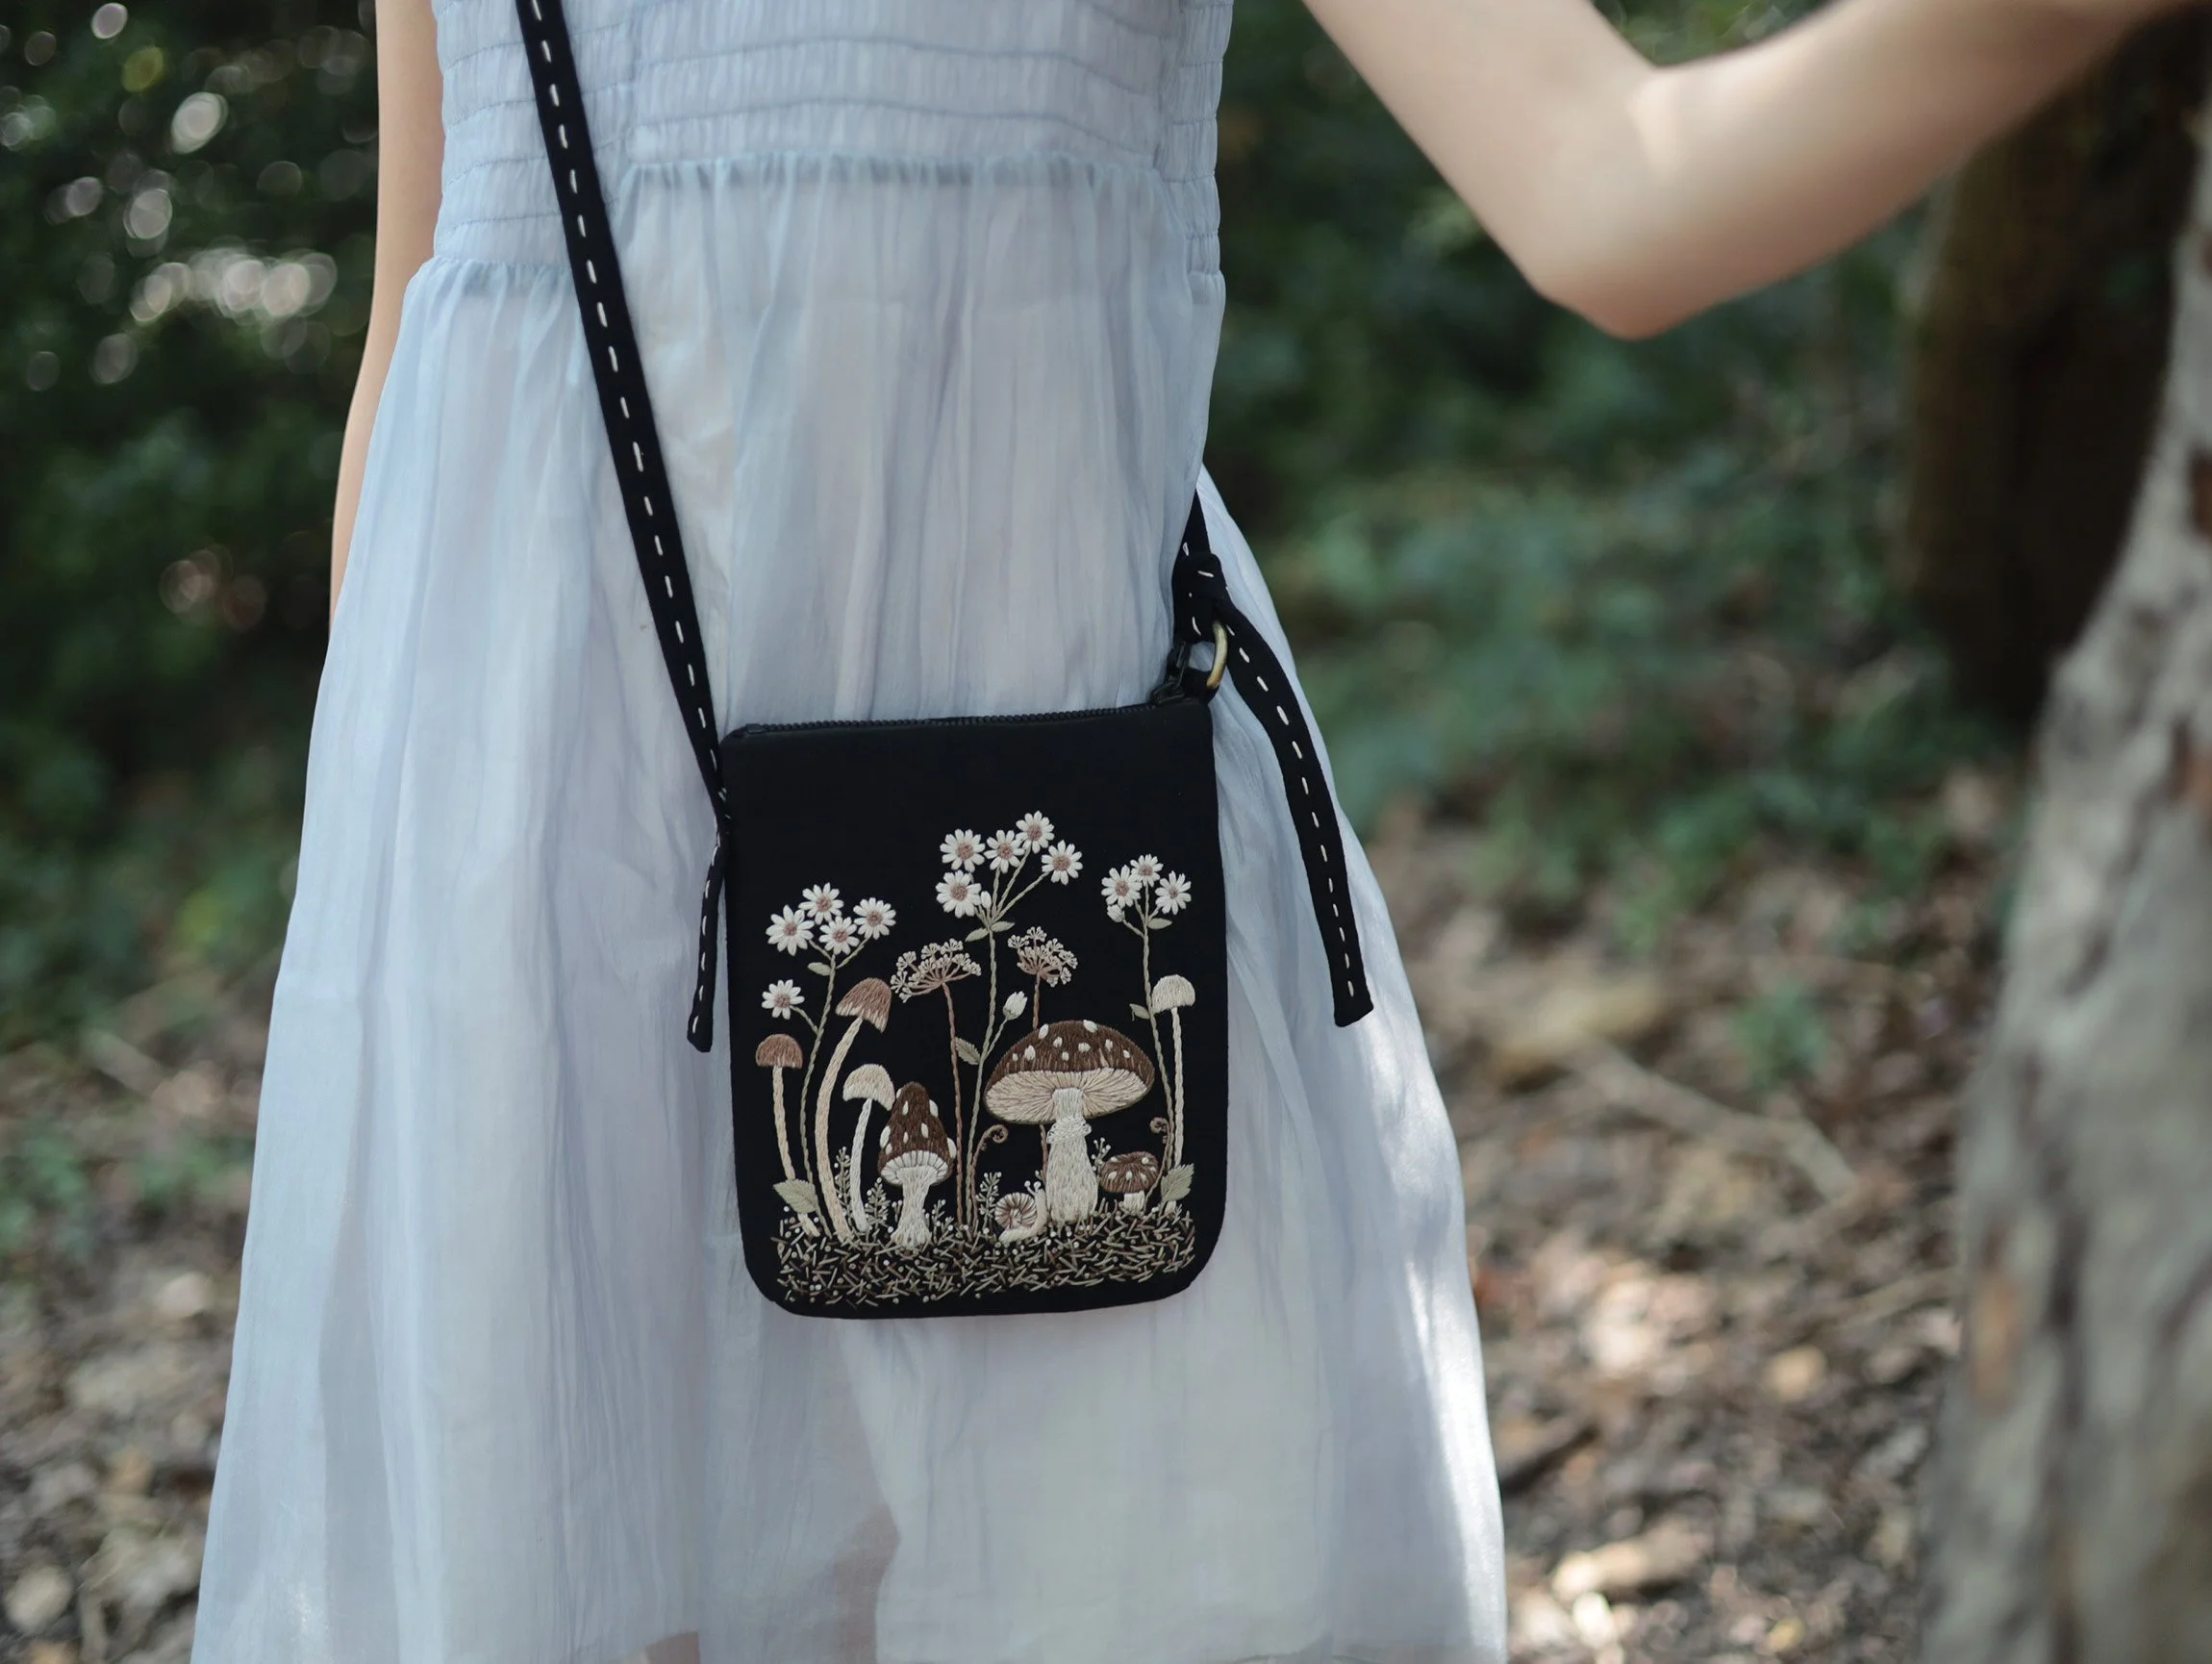
Mushroom Meadow
Crossbody Phone Bag with Zipper Closure
Step-by-Step Photo Tutorial (Beginner-Friendly)
Supplies in the Kit or Needed for the Project
Fabric:
Black (main) fabric: 2 pieces, each approximately 22 × 26 cm
Red (lining) fabric: 2 pieces, each approximately 22 × 26 cm
Black (main) fabric for the bag strap: 1 piece, 6.2 × 128 cm
Interfacing: Medium- or heavyweight fleece interfacing: 2 pieces, each approximately 18×22cm
Embroidery Hoop: At least 12 cm in diameter
Bag accessories: 15 cm #5 black resin zipper with pull & one D-ring (2cm wide)
Embroidery Needles & Threads: standard embroidery & sewing needles (#7 - #9), stranded cotton embroidery threads (colour codes provided below).
Other tools: Fabric marker (refill), clips, fabric scissors and iron.
Embroidery Thread Colour Code:
#31
#1 - 642
#2 - 840
#3 - 842
#4 - 3866
#5 - 3781
Note: The kit includes two skeins of Colour #4 (3866) and one skein of each of the remaining colours. A skein of black thread (310) is also included for sewing.
Embroidery Tips for Beginners
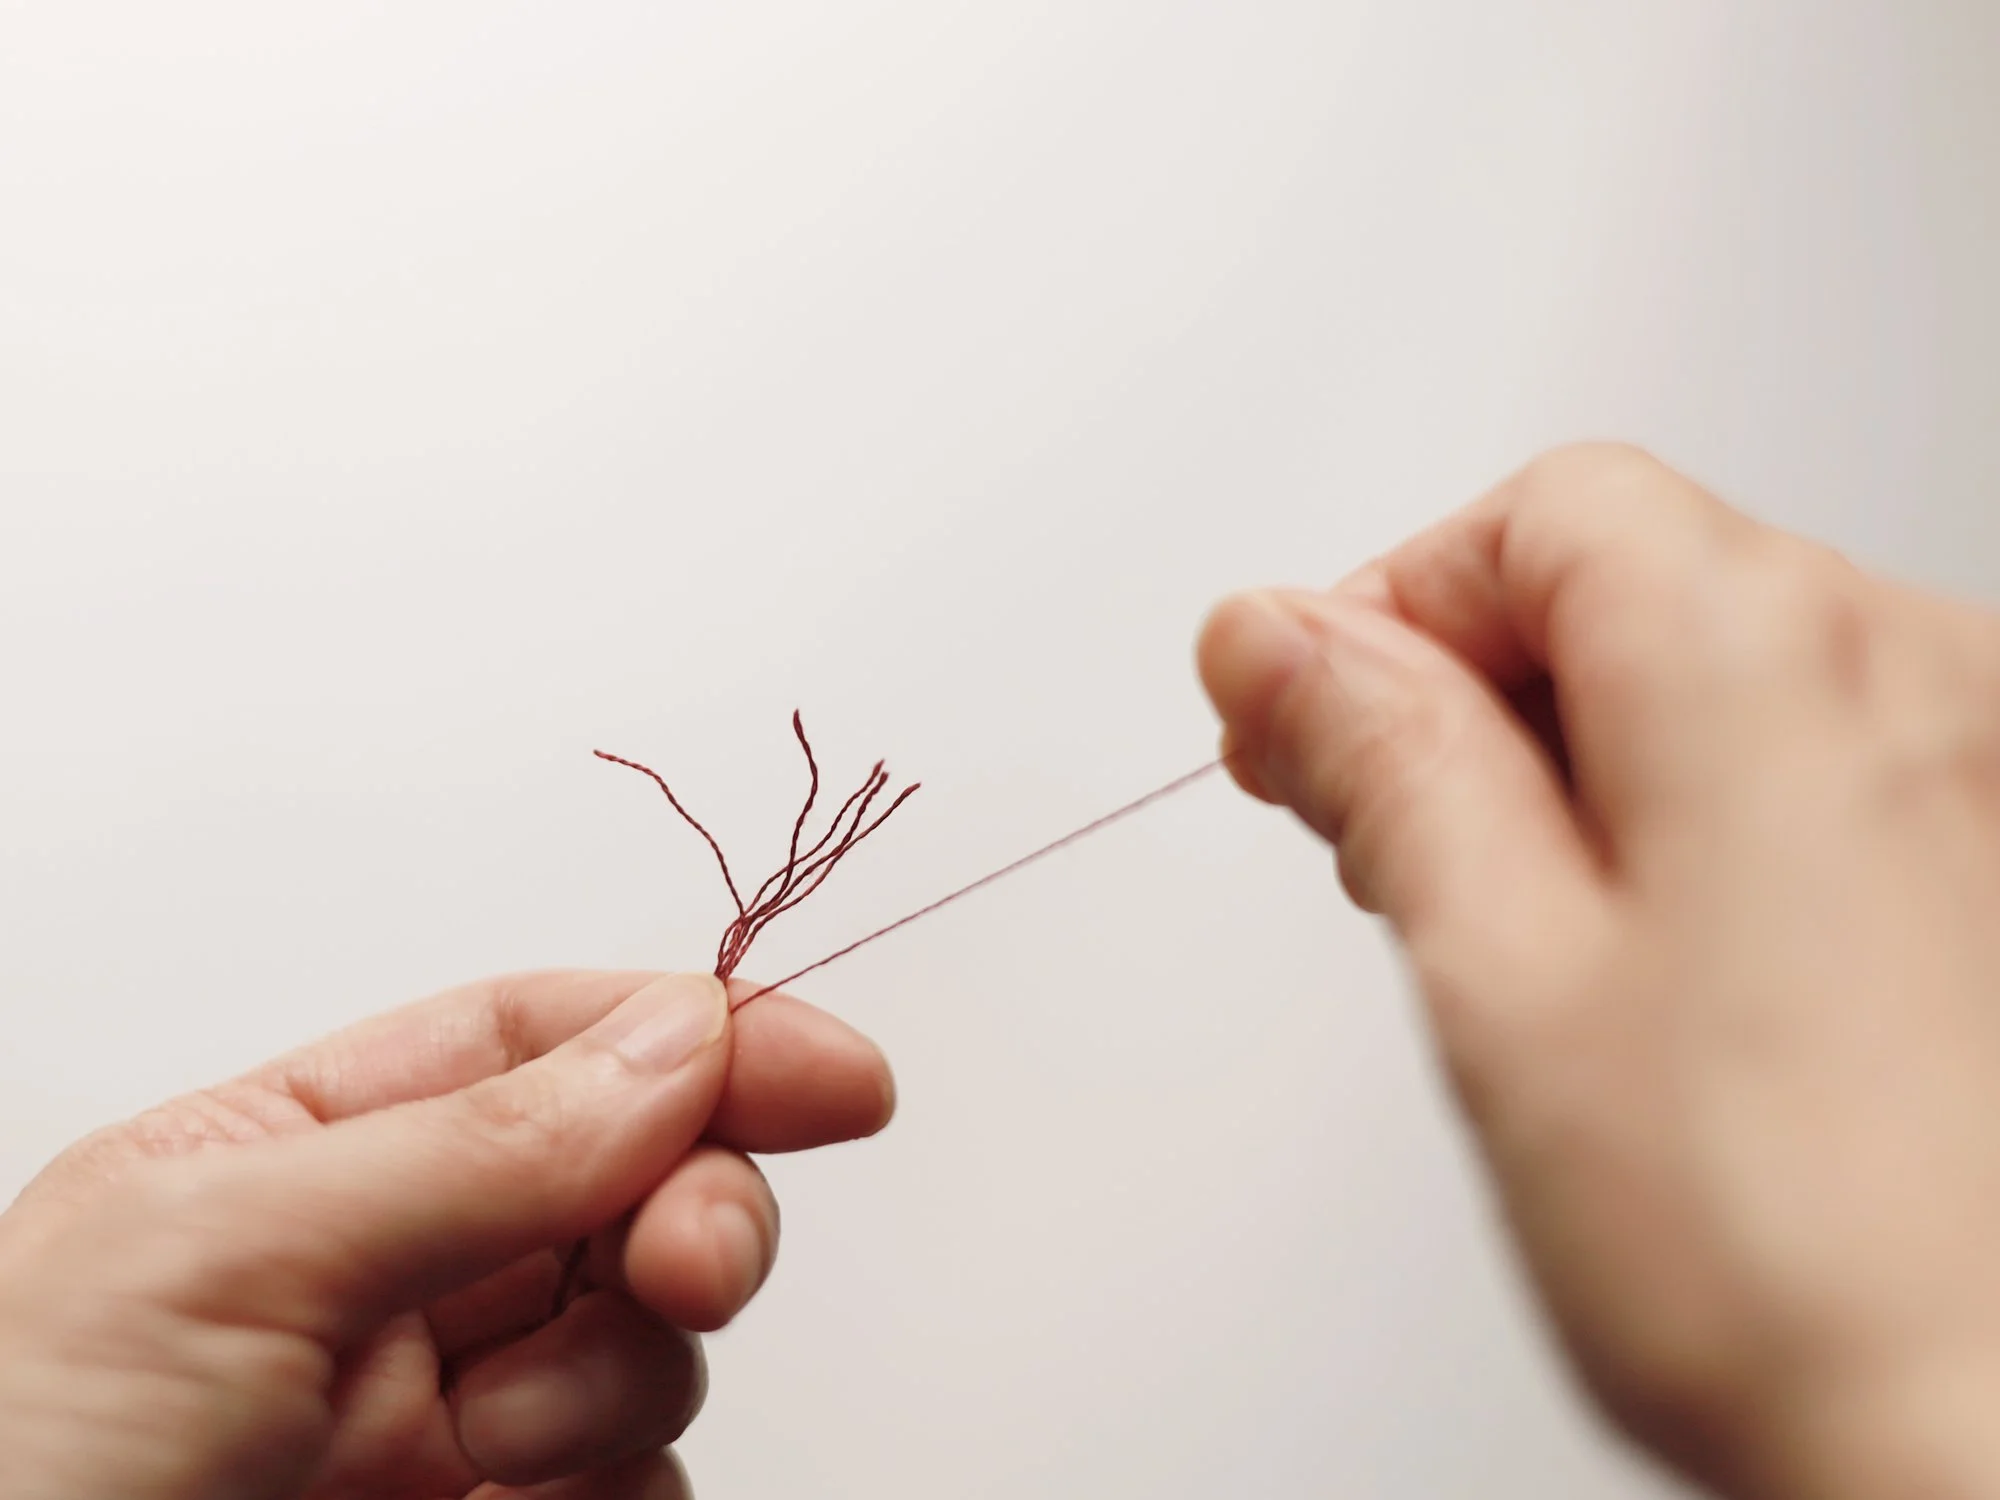
The standard stranded cotton embroidery thread has six strands of fine threads twisted together into a big one (main thread). The instructions in our DIY kits and patterns will clearly indicate how many strands you will need to use for each part of the embroidery.
No matter how many strands you use, you will always need to separate each strand from the main thread first. Cut the thread to the desired length, hold it in one hand, and pull the strand out one by one until you have the required number. Gather them into a single bunch for stitching.
Use one of the illustrated methods to thread the needle. Method A can be used for any number of strands, while Method B is suitable only for an even number of strands.

Get the Density & Tension Right (SUPER IMPORTANT)
One common mistake beginners make when embroidering is stitching too densely or pulling the thread too tightly after each stitch. This might not be noticeable while the fabric is still in the hoop, but it will be too late once the embroidery is complete and the fabric is distorted and puckered. This, unfortunately, cannot be fixed.
That’s why getting the stitch density and thread tension right is so important — especially when working with long and short stitch or satin stitch to fill a space, as these are the hardest to keep even! Aim for the stitches to lie flat and sit neatly next to each other, rather than piling up or overlapping excessively. To achieve the correct tension, avoid pulling the thread too tightly after each stitch. The thread should lie flat against the fabric without causing puckering or distortion (hard to see but you can feel the tension if paying close attention). After making a stitch, gently tug the thread until it is secure but not overly tight.
It also helps with stabiliser (interfacing) and hoop. Keep the fabric taut in the hoop at all times, like the skin of a drum.
Stitch Guide
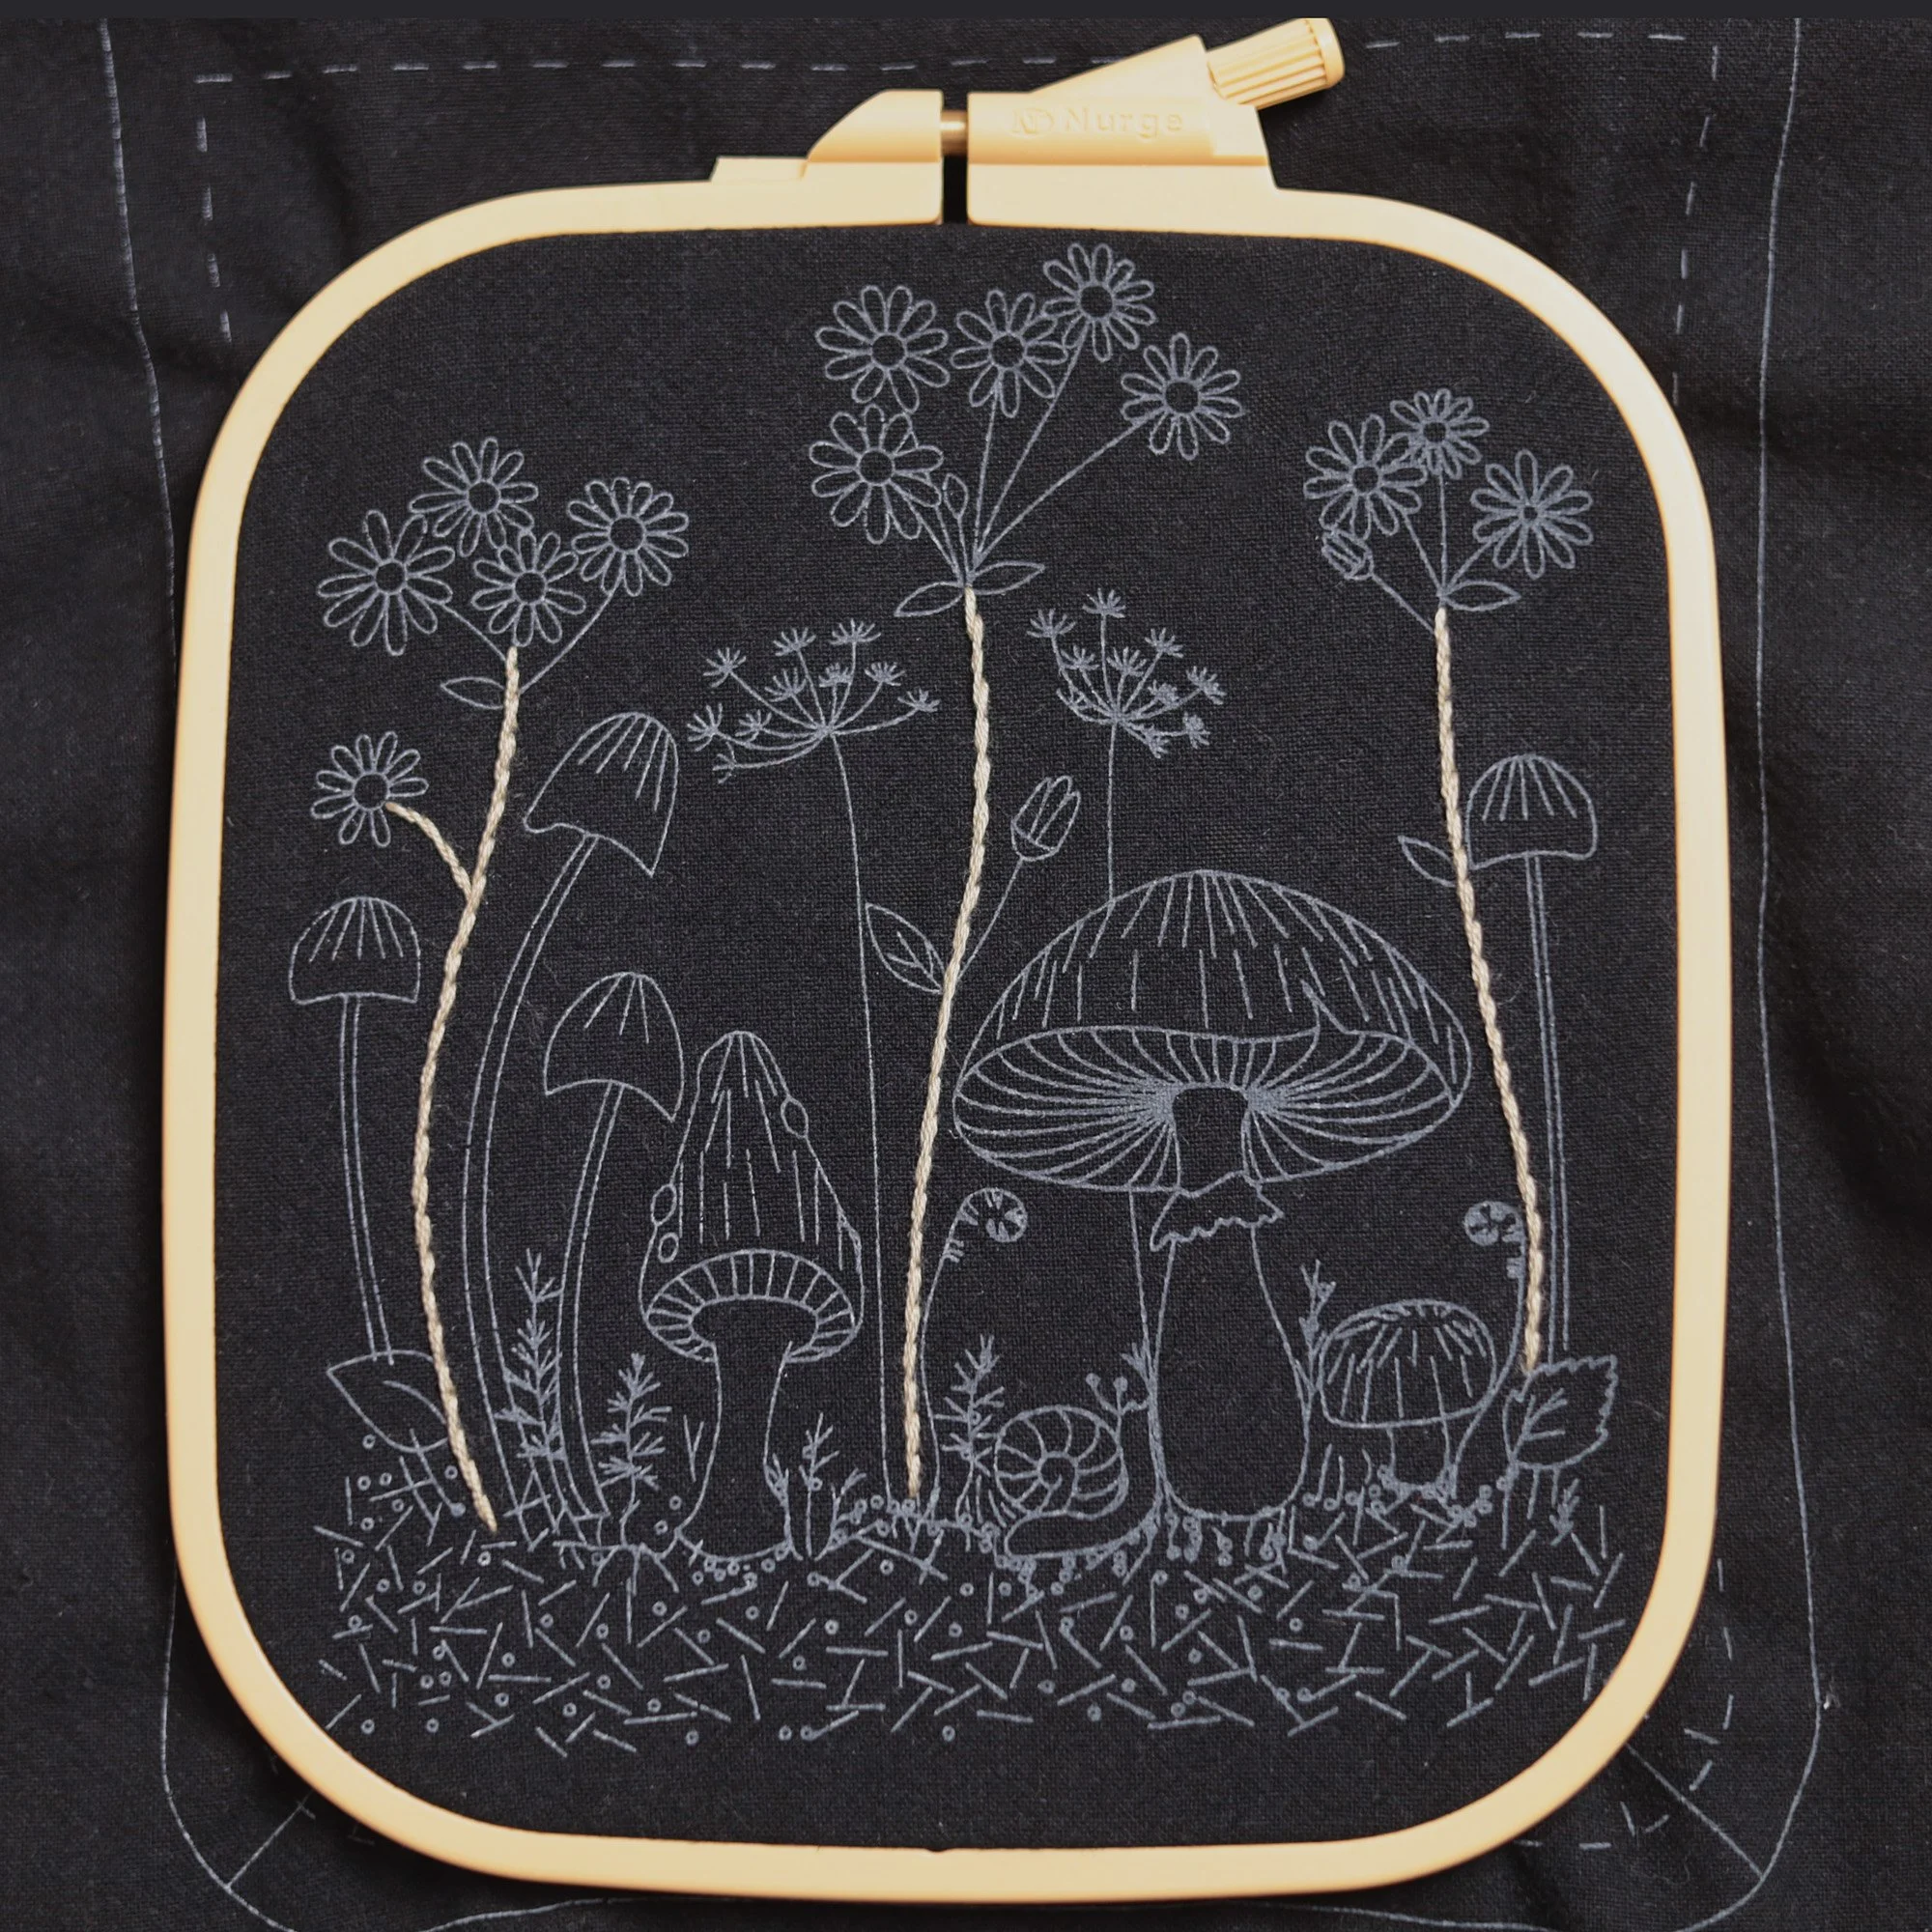
Secure the main fabric in the embroidery hoop, ensuring the section to be stitched is centred.
The printed pattern on the fabric cannot be erased. During embroidery, make sure to stitch over the printed lines so that they are completely covered.
The stitch guide indicates the recommended stitch for each section of the pattern, along with the thread colour (e.g. #1) and the number of strands to use (e.g. 3s means stitching with three strands of thread). For beginners who need to learn the stitches, please visit the Embroidery Basics page, where the basic stitches are clearly demonstrated and explained. If you need additional guidance, simply search for the stitch name on YouTube to find a wide range of helpful video tutorials.
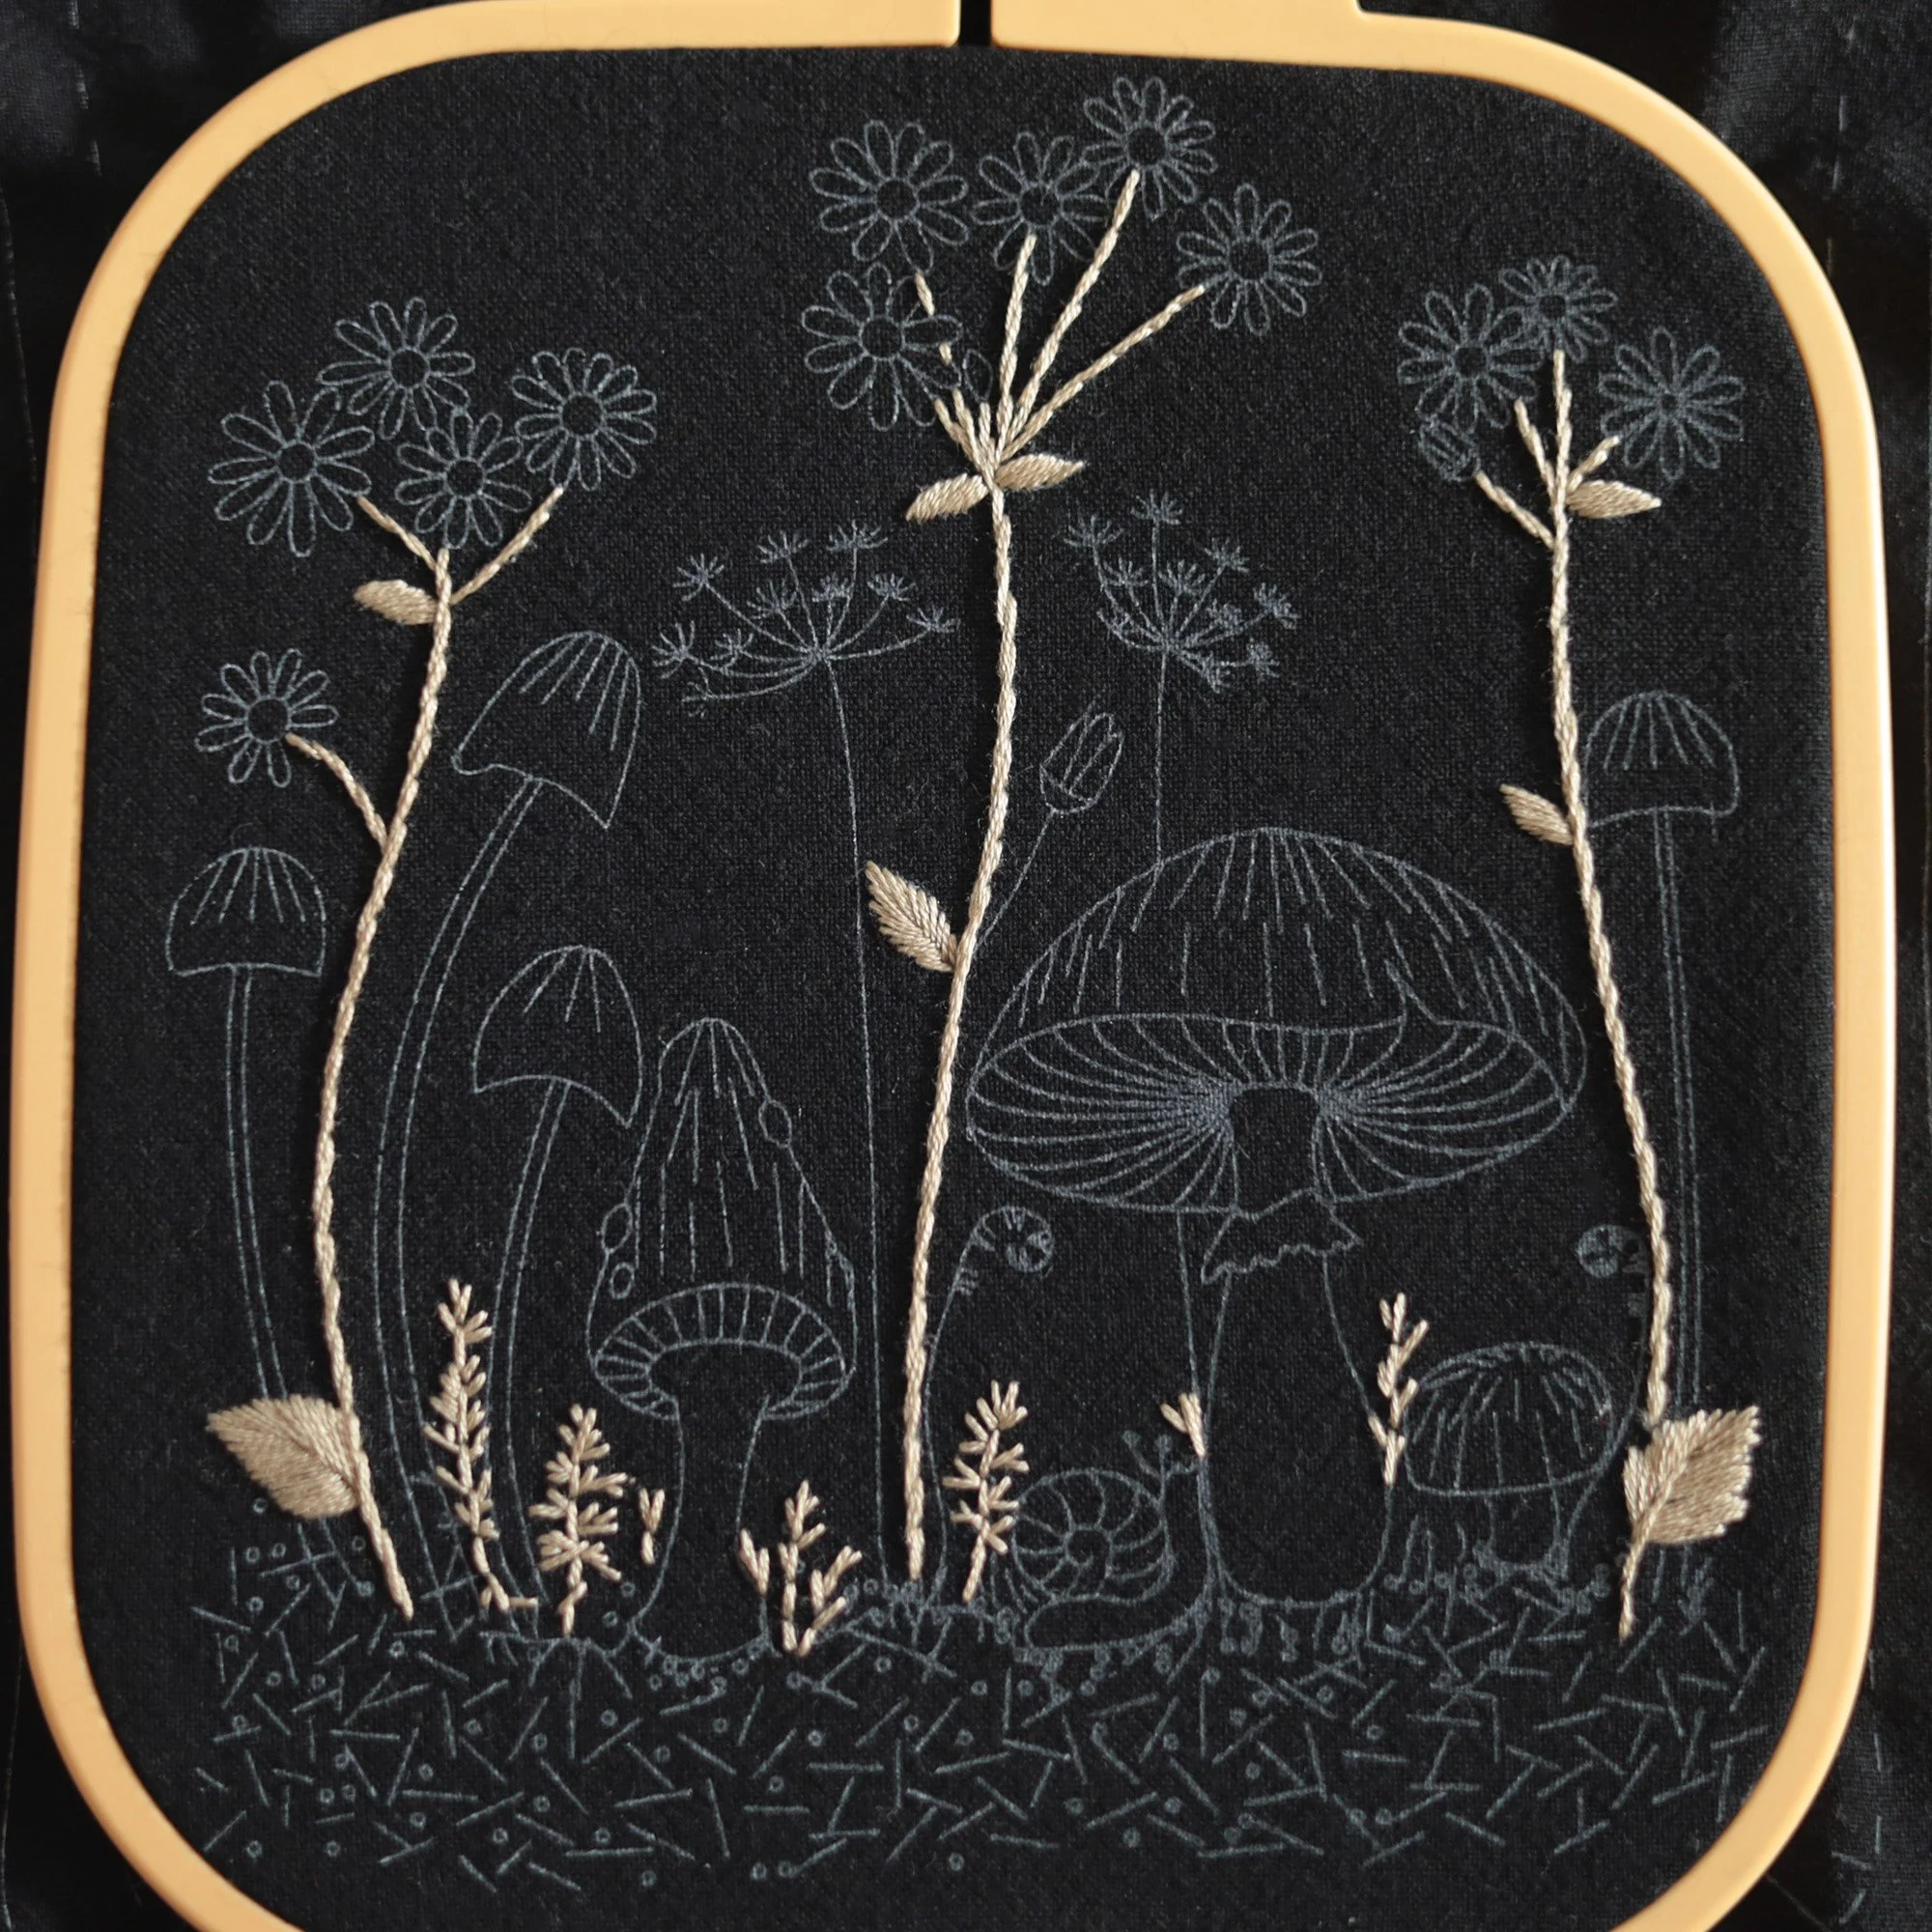
1. Daisy
Main Stems: Outline or Stem Stitch (#1, 3s)
2. Daisy
Side Stems: Outline or Stem Stitch (#1, 2s)
Small Leaves: (angled) Satin Stitch (#1, 2s)
Large Leaves: Satin Leaf Stitch (#1, 2s)
(Please visit the Embroidery Basics page for the video tutorial for Satin Leaf Stitch.)
Small Plants
Main Stems: Backstitch (#1, 2s)
Side Stems: Straight Stitch (#1, 2s)
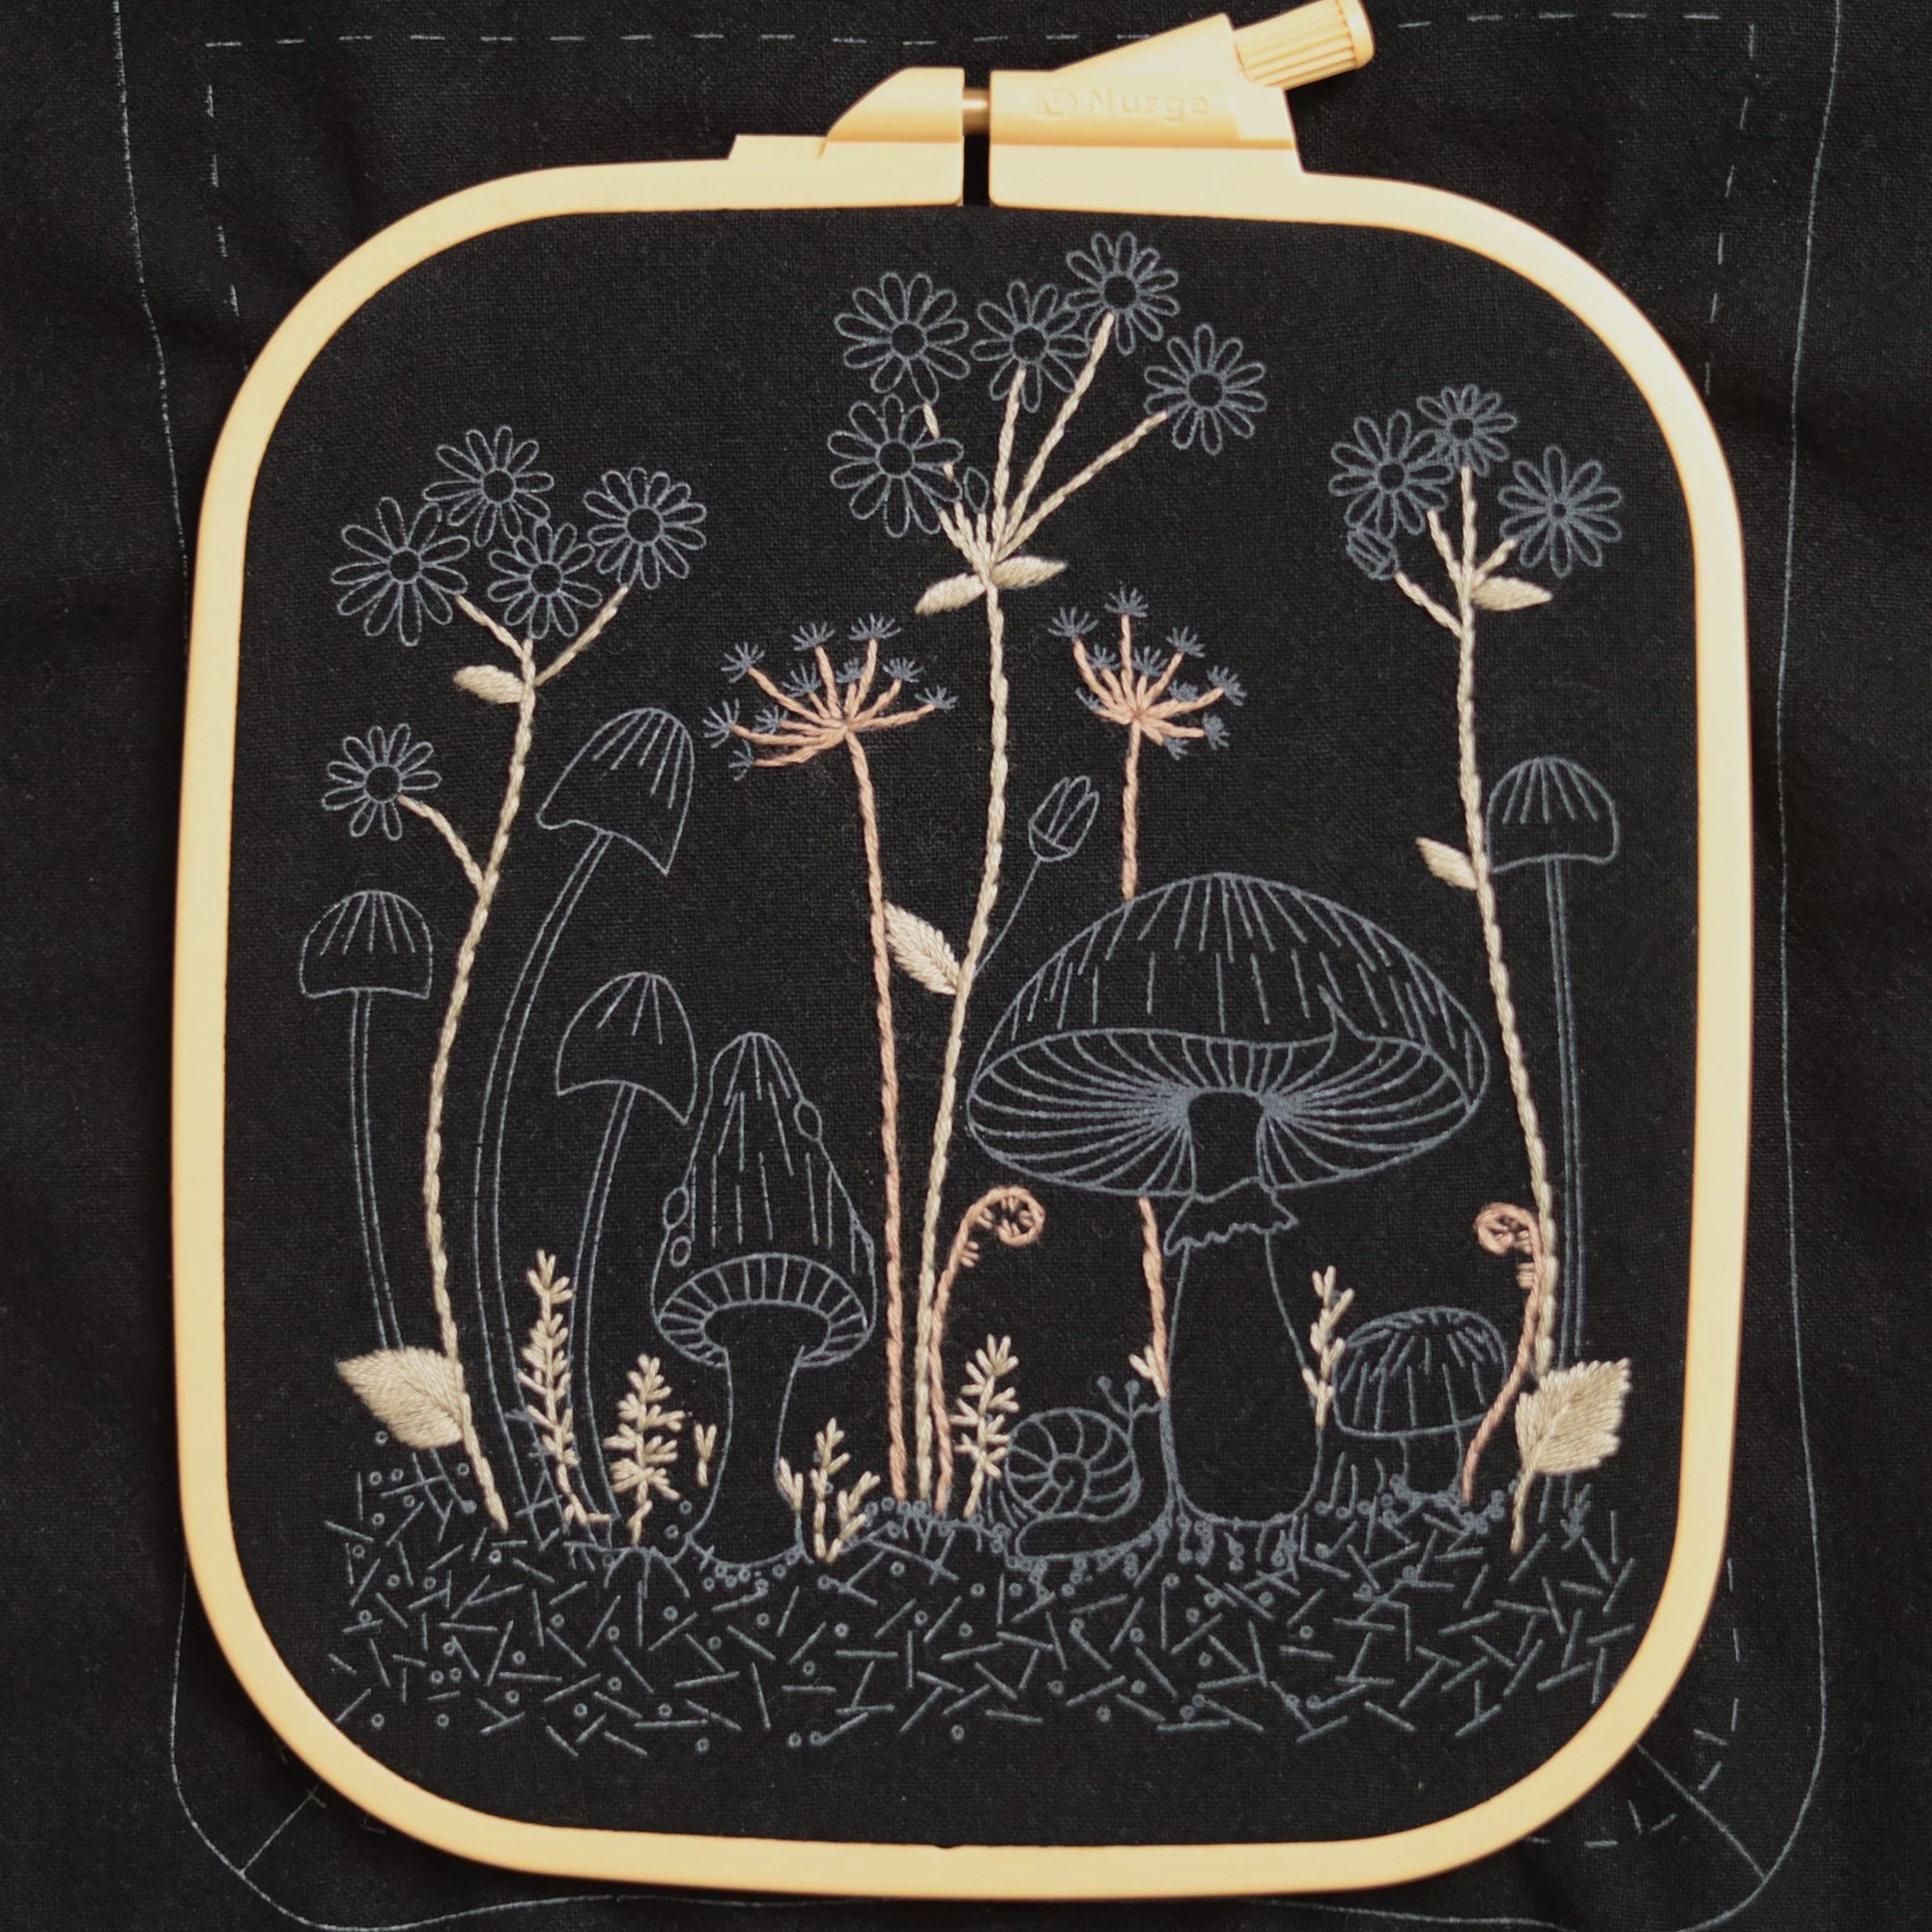
3. Cow Parsley
Main Stems: Outline or Stem Stitch (#2, 3s)
Side Stems: Outline or Stem Stitch (#2, 2s)
Ferns
Main Stems: Outline or Stem Stitch (#2, 2s)
Side Stems: Straight Stitch (#2, 1s)
4. Cow Parsley
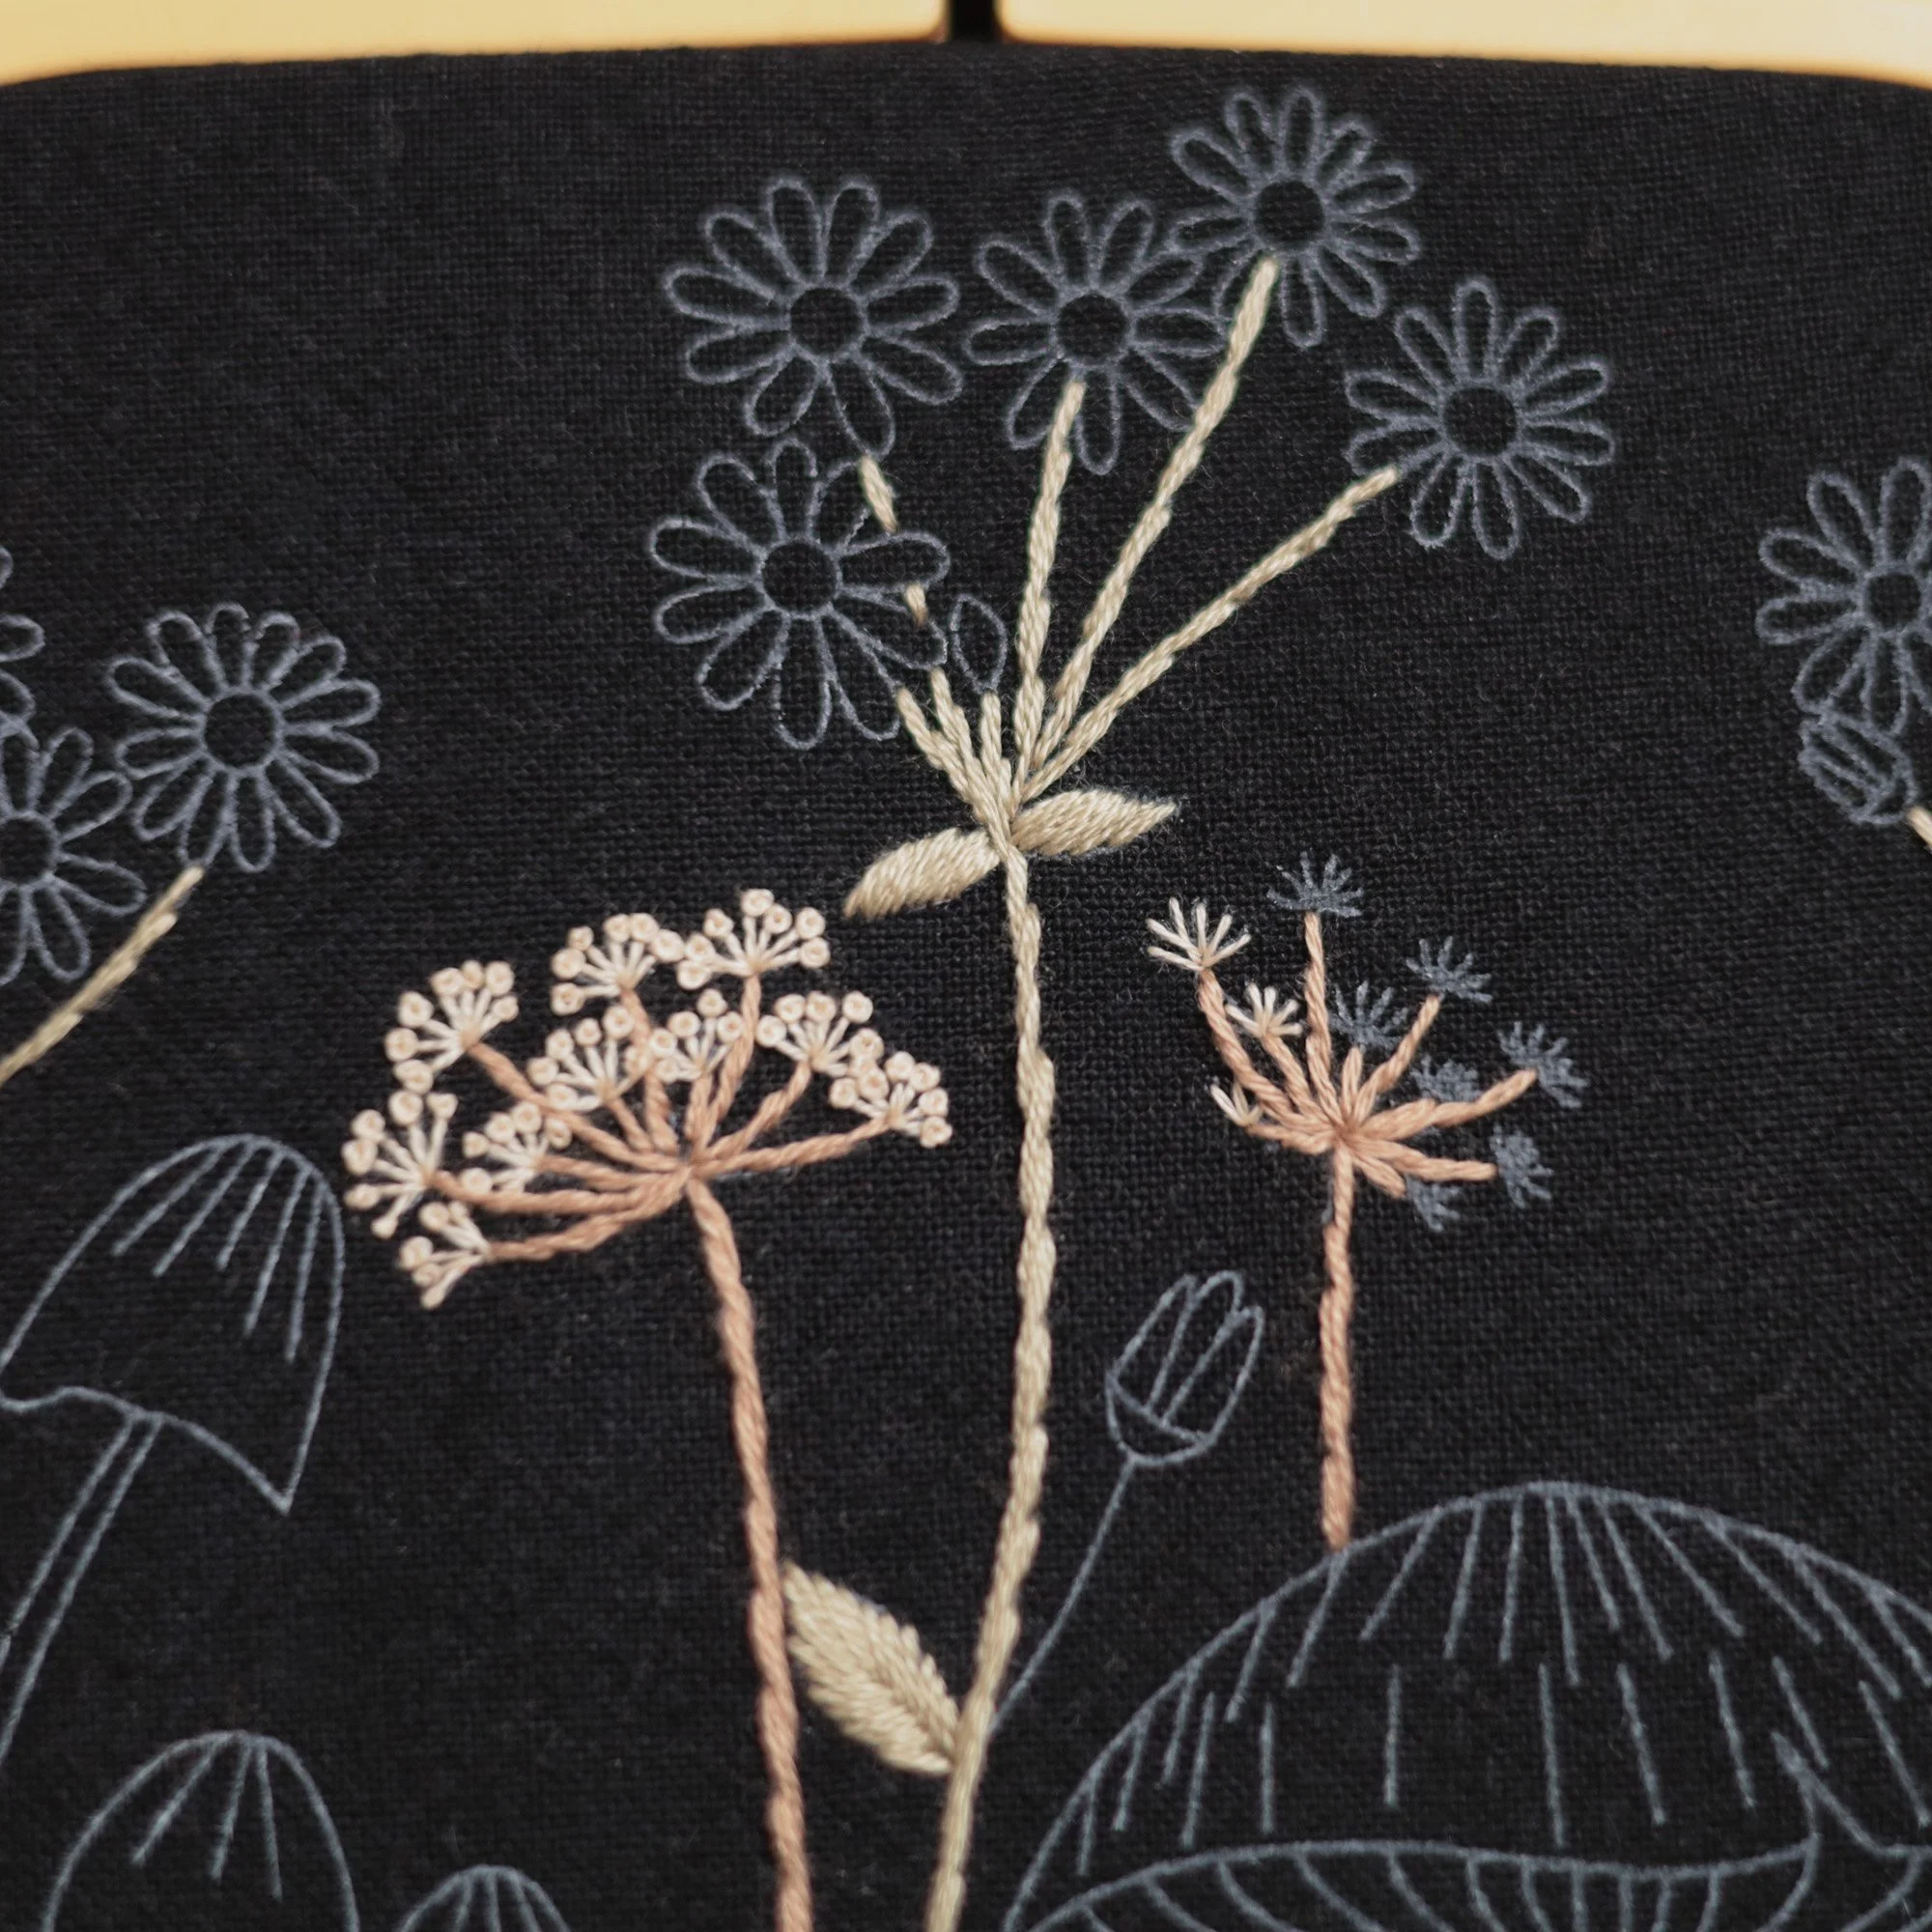
Flower stems: Straight Stitch (#3, 1s)
Flowers: French Knot Stitch* (#3, 1s)
(* Wrap twice for the French Knot.)
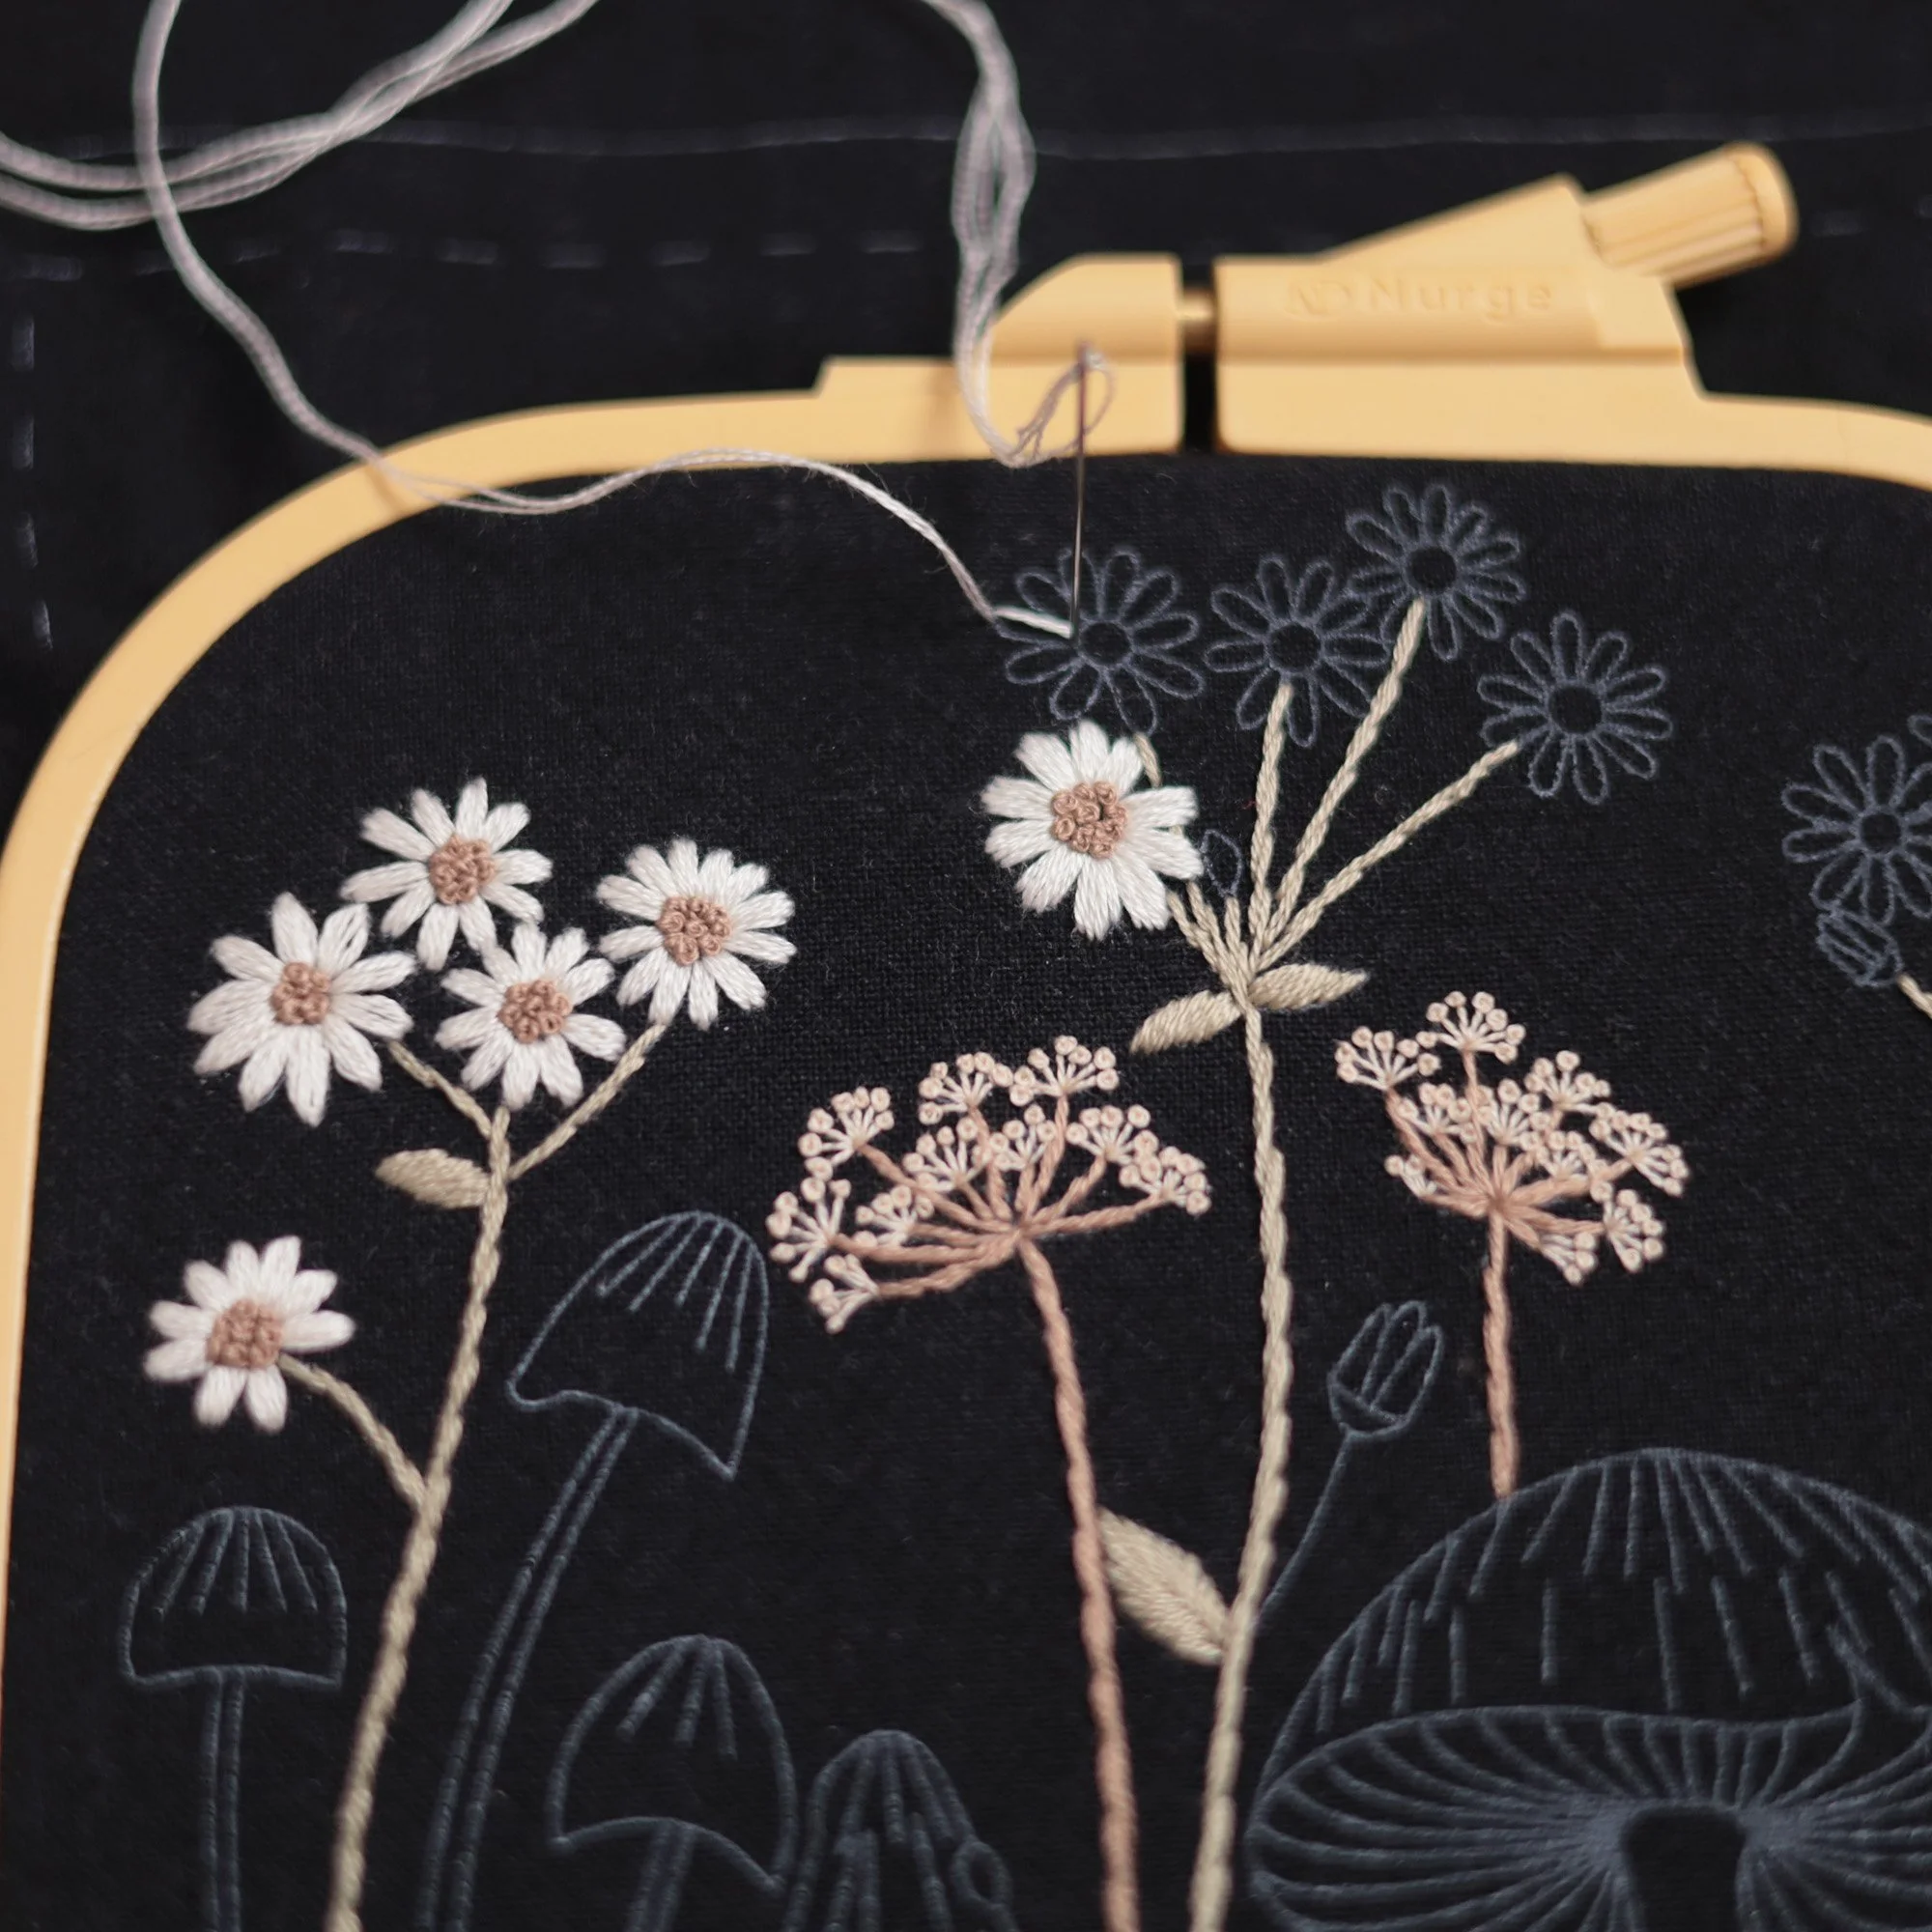
5. Daisy Flowers
Petals: Satin Stitch (#4, 2s)
(Use around 4 straight stitches per petal. For a better result, start each stitch from the tip of the petal and end it towards the centre of the flower.)
Flower Centre: French Knot (#2, 2s), wrap twice
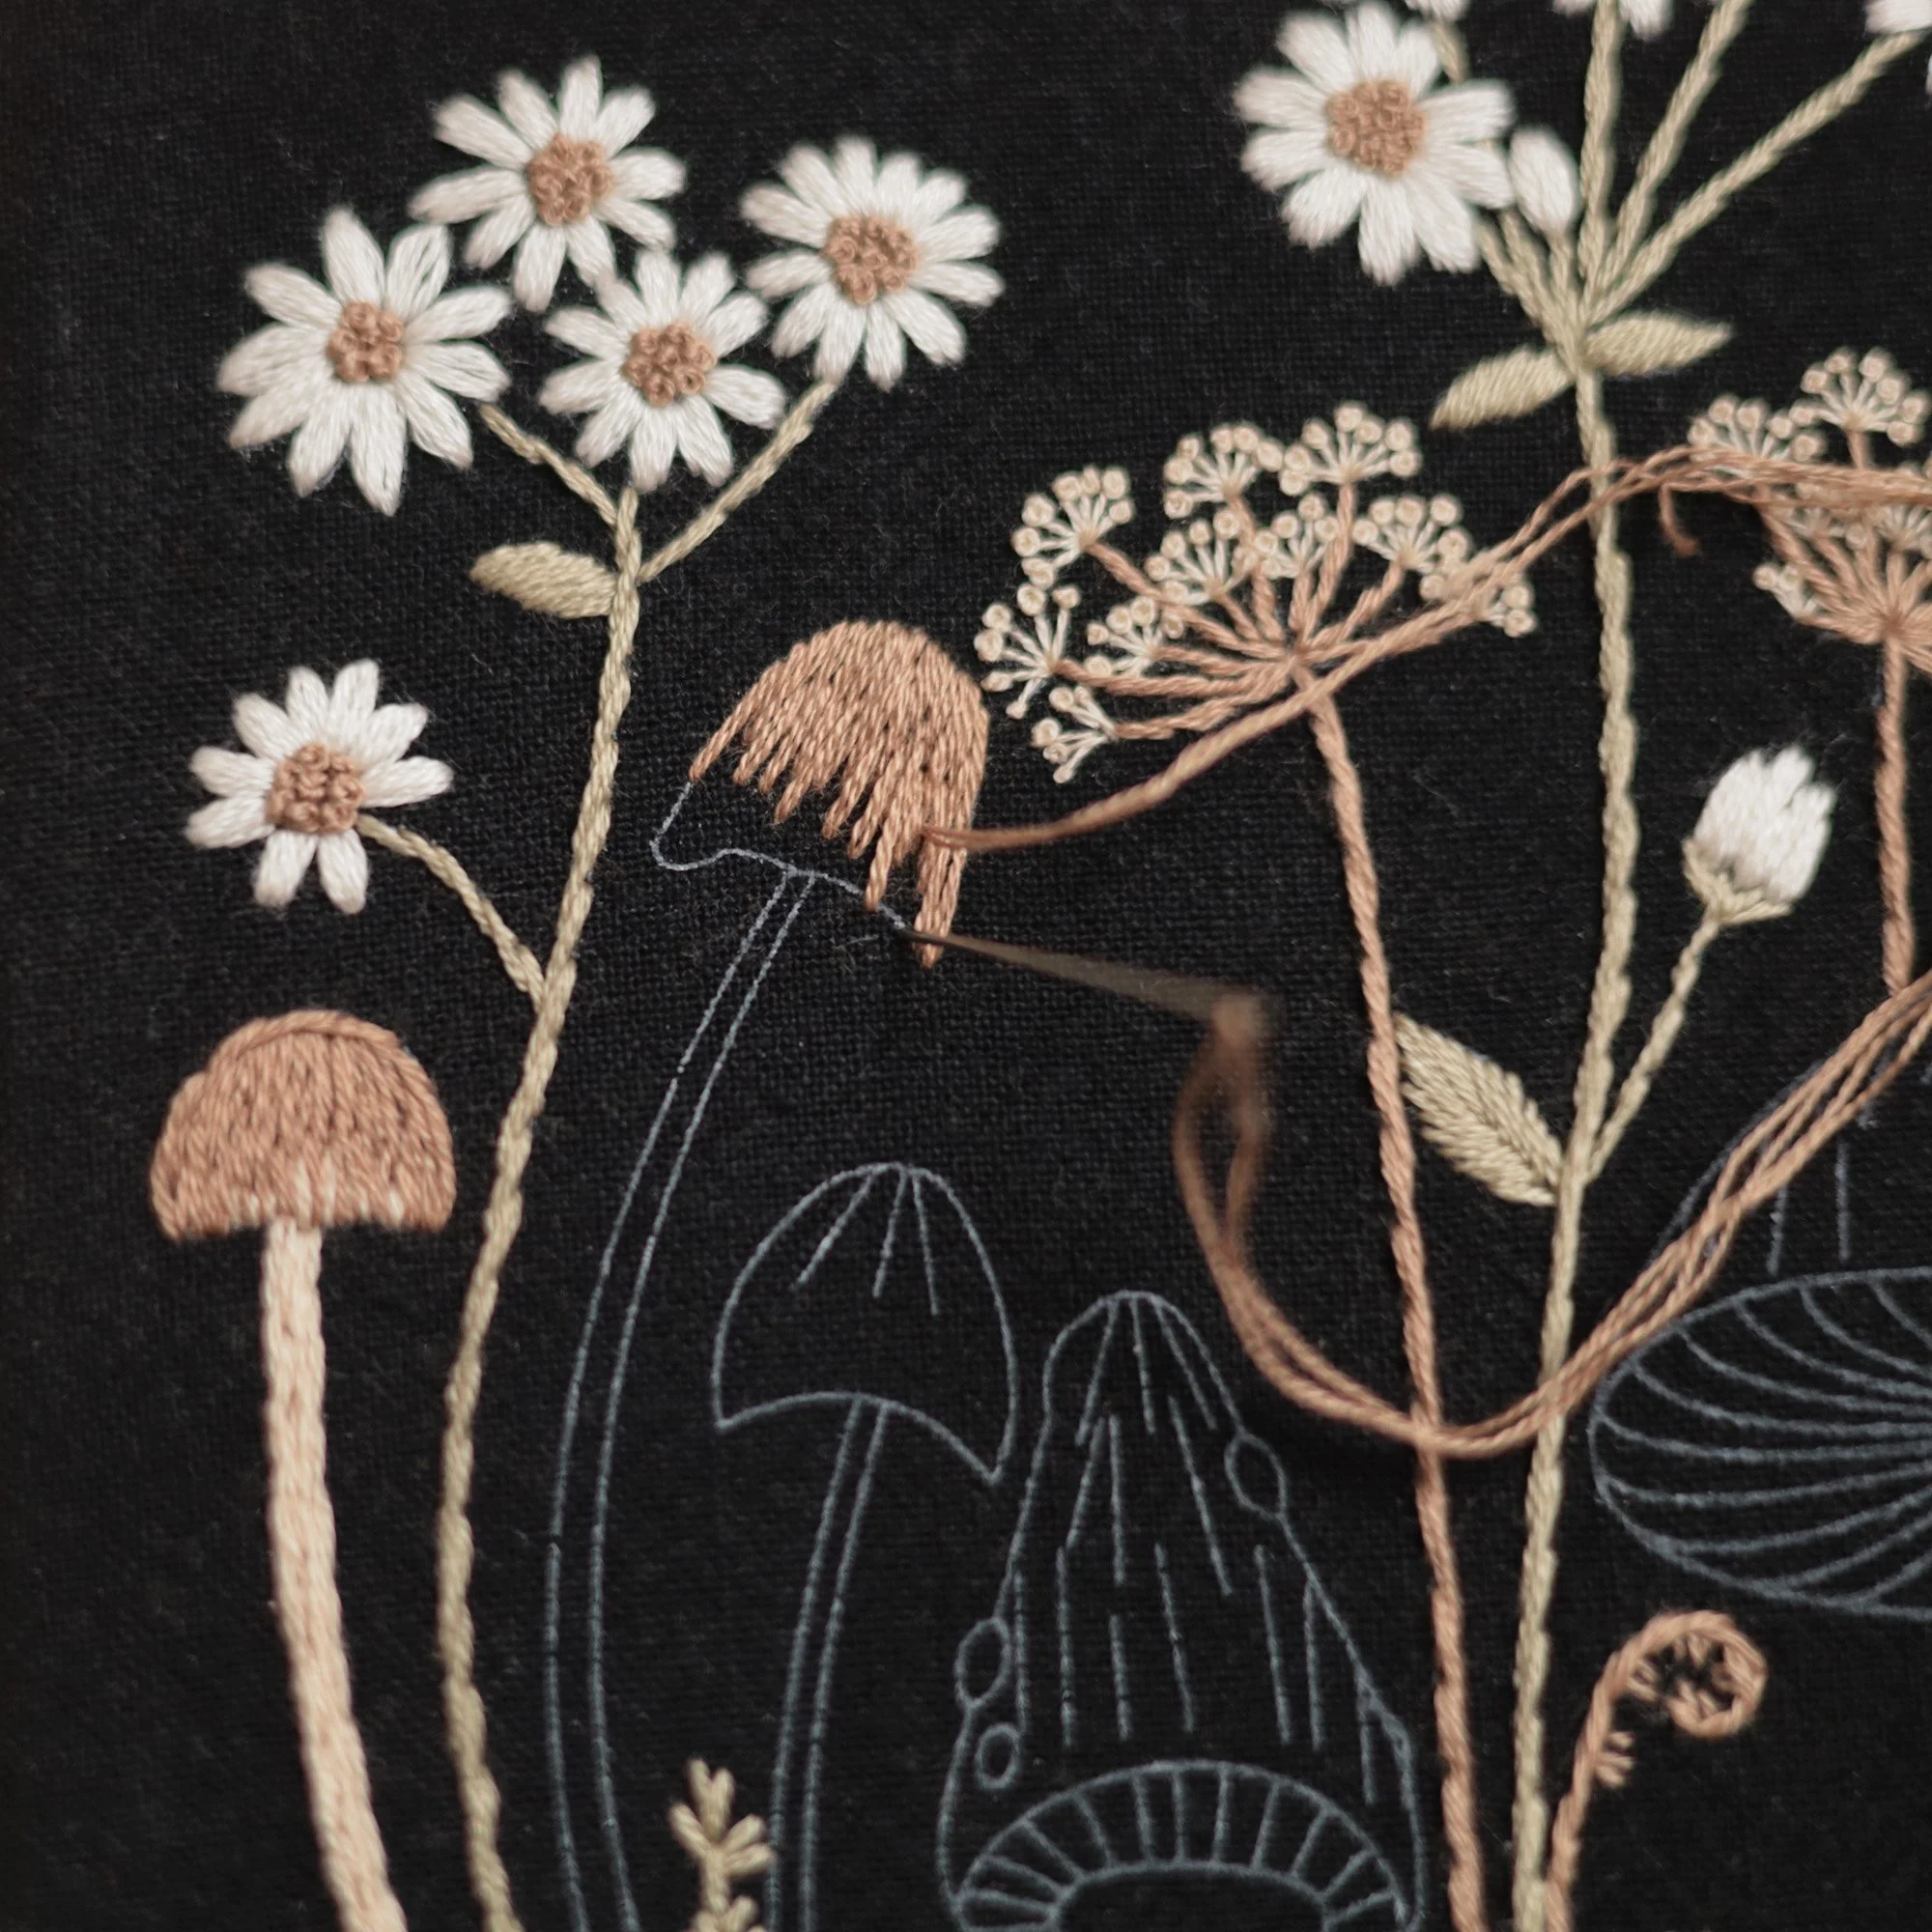
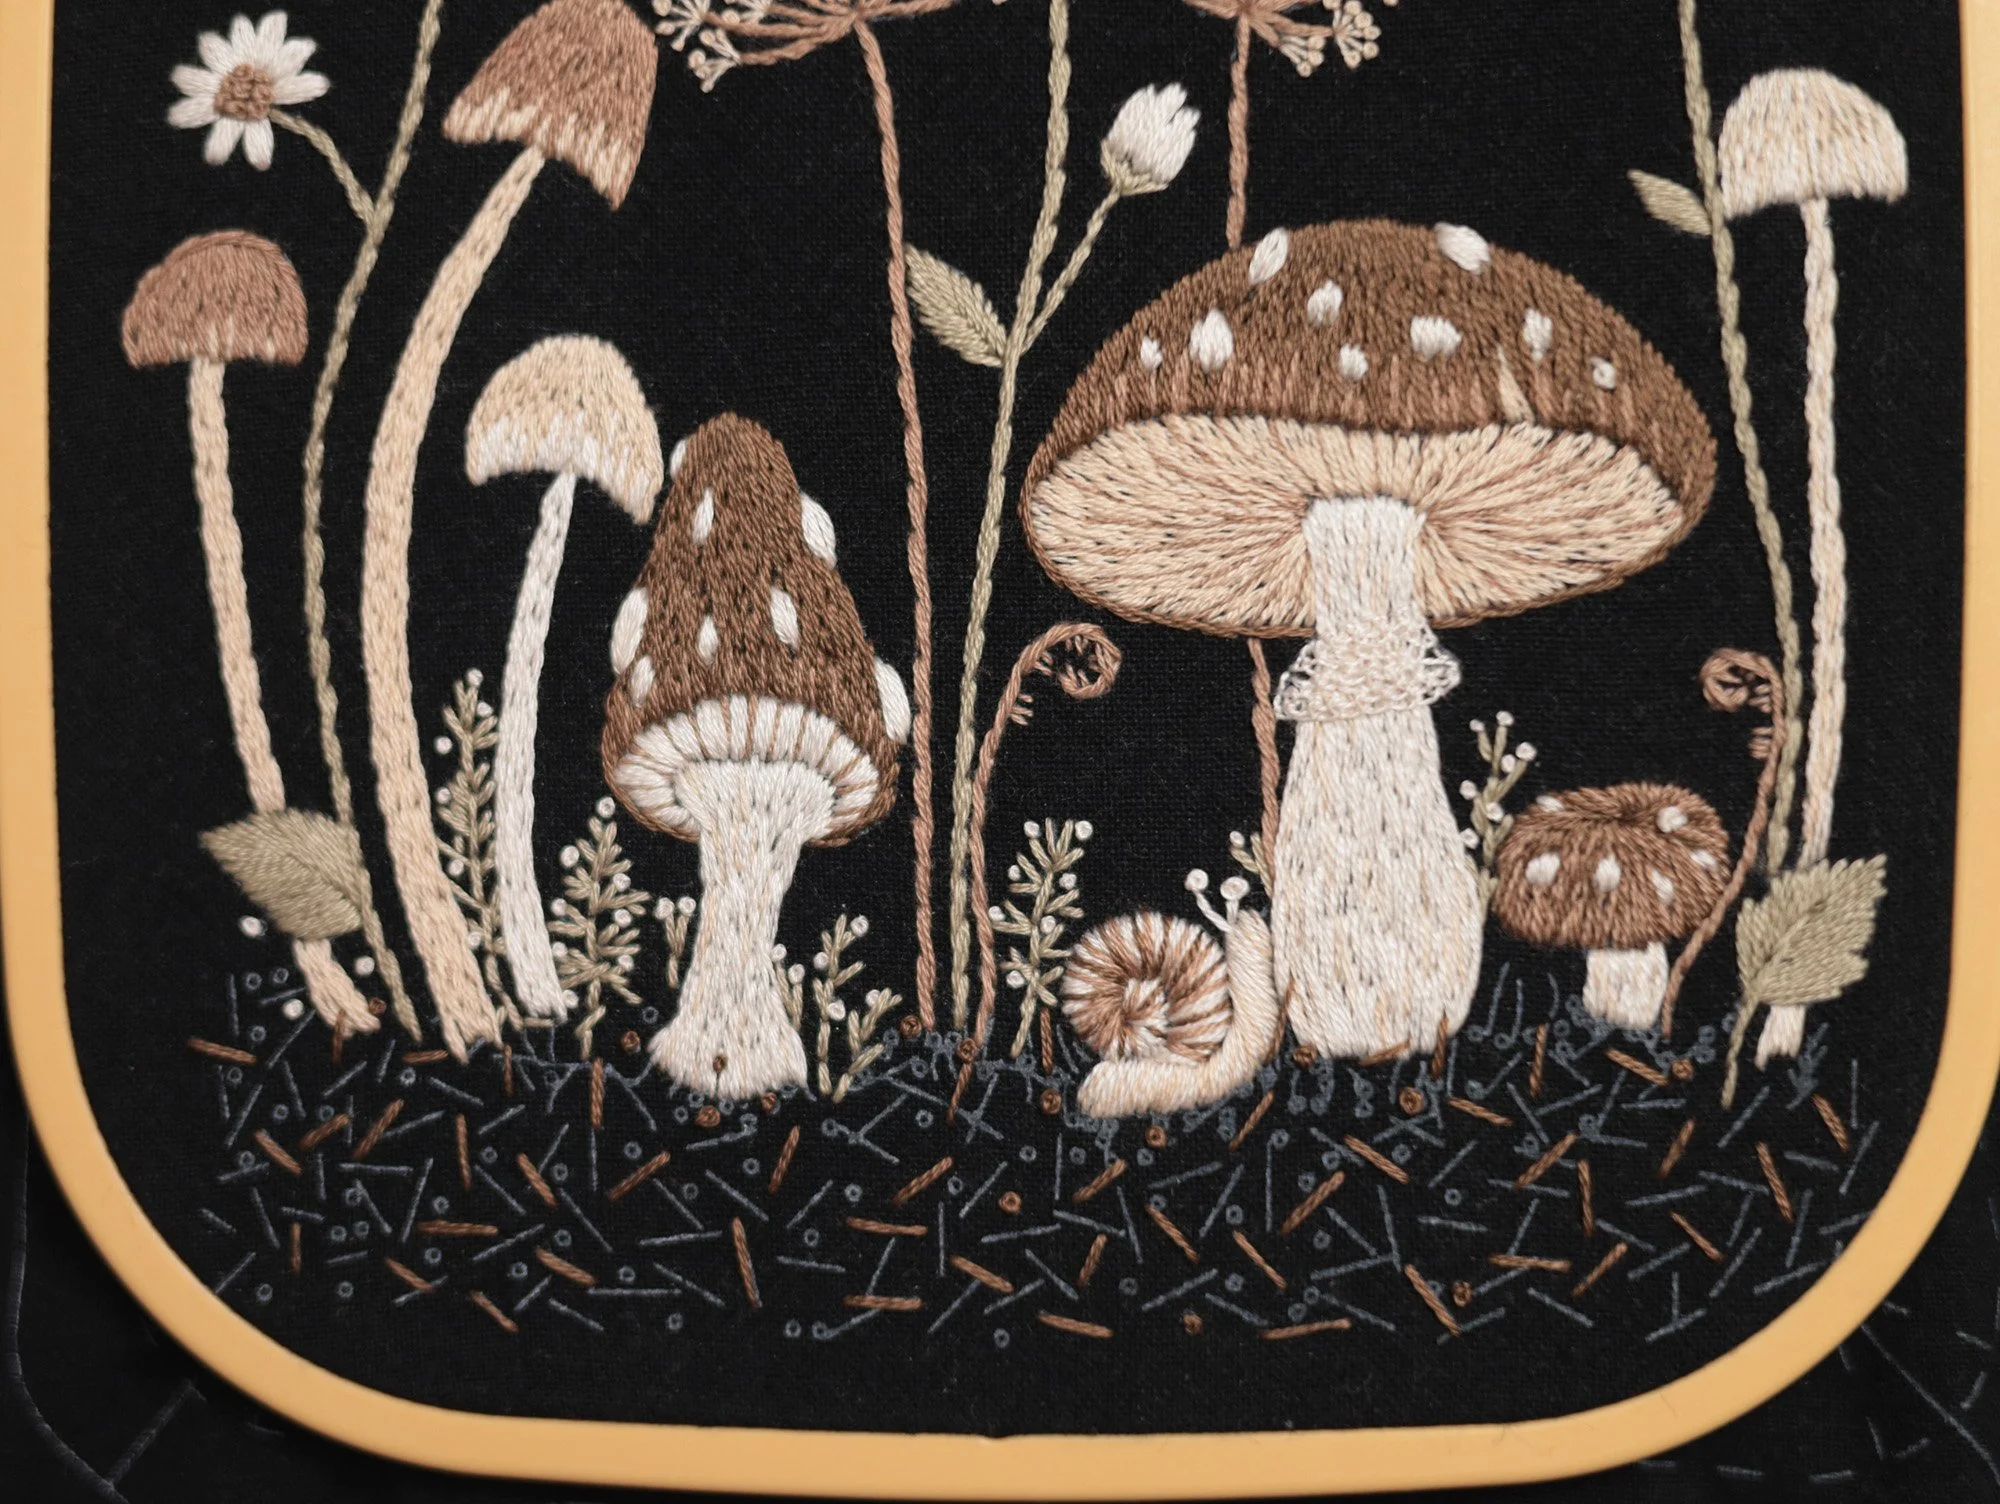
6. Four Slim Tall Mushrooms (left to right: A,B,C,D)
Cap: Long & Short Stitch (2s)
The lines inside the cap are reference lines, indicating the stitch directions.
Mushroom A & B - #2 (main body) + #3 (blending)
Mushroom C - #3 (main body) + #4 (blending)
Mushroom D - combine one strand of #3 and one strand of #4 for stitching
Stem: Outline or Stem Stitch (2s)
Mushroom A & B - #3; Mushroom C - #4
Mushroom D - combine one strand of #3 and one strand of #4 for stitching
Embroidery Tips:
For beginners who find it challenging to stitch a smooth mushroom cap outline using Long & Short Stitch, try stitching the outline with Outline Stitch first, then fill in the cap with Long & Short Stitches (see Mushroom A in the photo above). For experienced stitchers, stitch the entire cap using Long & Short Stitch. For better results, I find it easier to start from the top centre of the cap and work the stitches from the outline towards the centre.
It’s okay to leave some gaps with the main colour thread around the bottom of the cap, as they will be filled with the blending colour later.
For the mushroom stems, stitch the outline first, and fill the area with Outline/Stem Stitch. Use straight stitches to fill any small gaps as needed.
7. Large Pointed Mushroom
Cap: Fill the section using Long & Short Stitch (#5, 2s) first, then blend the colour with Straight Stitch (#2, 1s) along the bottom edge of the cap.
Spots on the Cap: Lazy Daisy + Straight Stitch (#4, 2s)
Randomly add some spots on the cap. For large spots, make a lazy daisy stitch and cover it with one or two straight stitches. For small spots, simply use a few straight stitches.
Gills (underside of the cap): Use Straight Stitch (#2, 2s) to stitch the “spokes” first, then fill the sections between them using Satin Stitch (#4, 2s).
Stem: Stitch the main body using Long & Short Stitch (#4, 2s) first, then blend with Straight Stitch (#3, 1s) across the stem at the end.
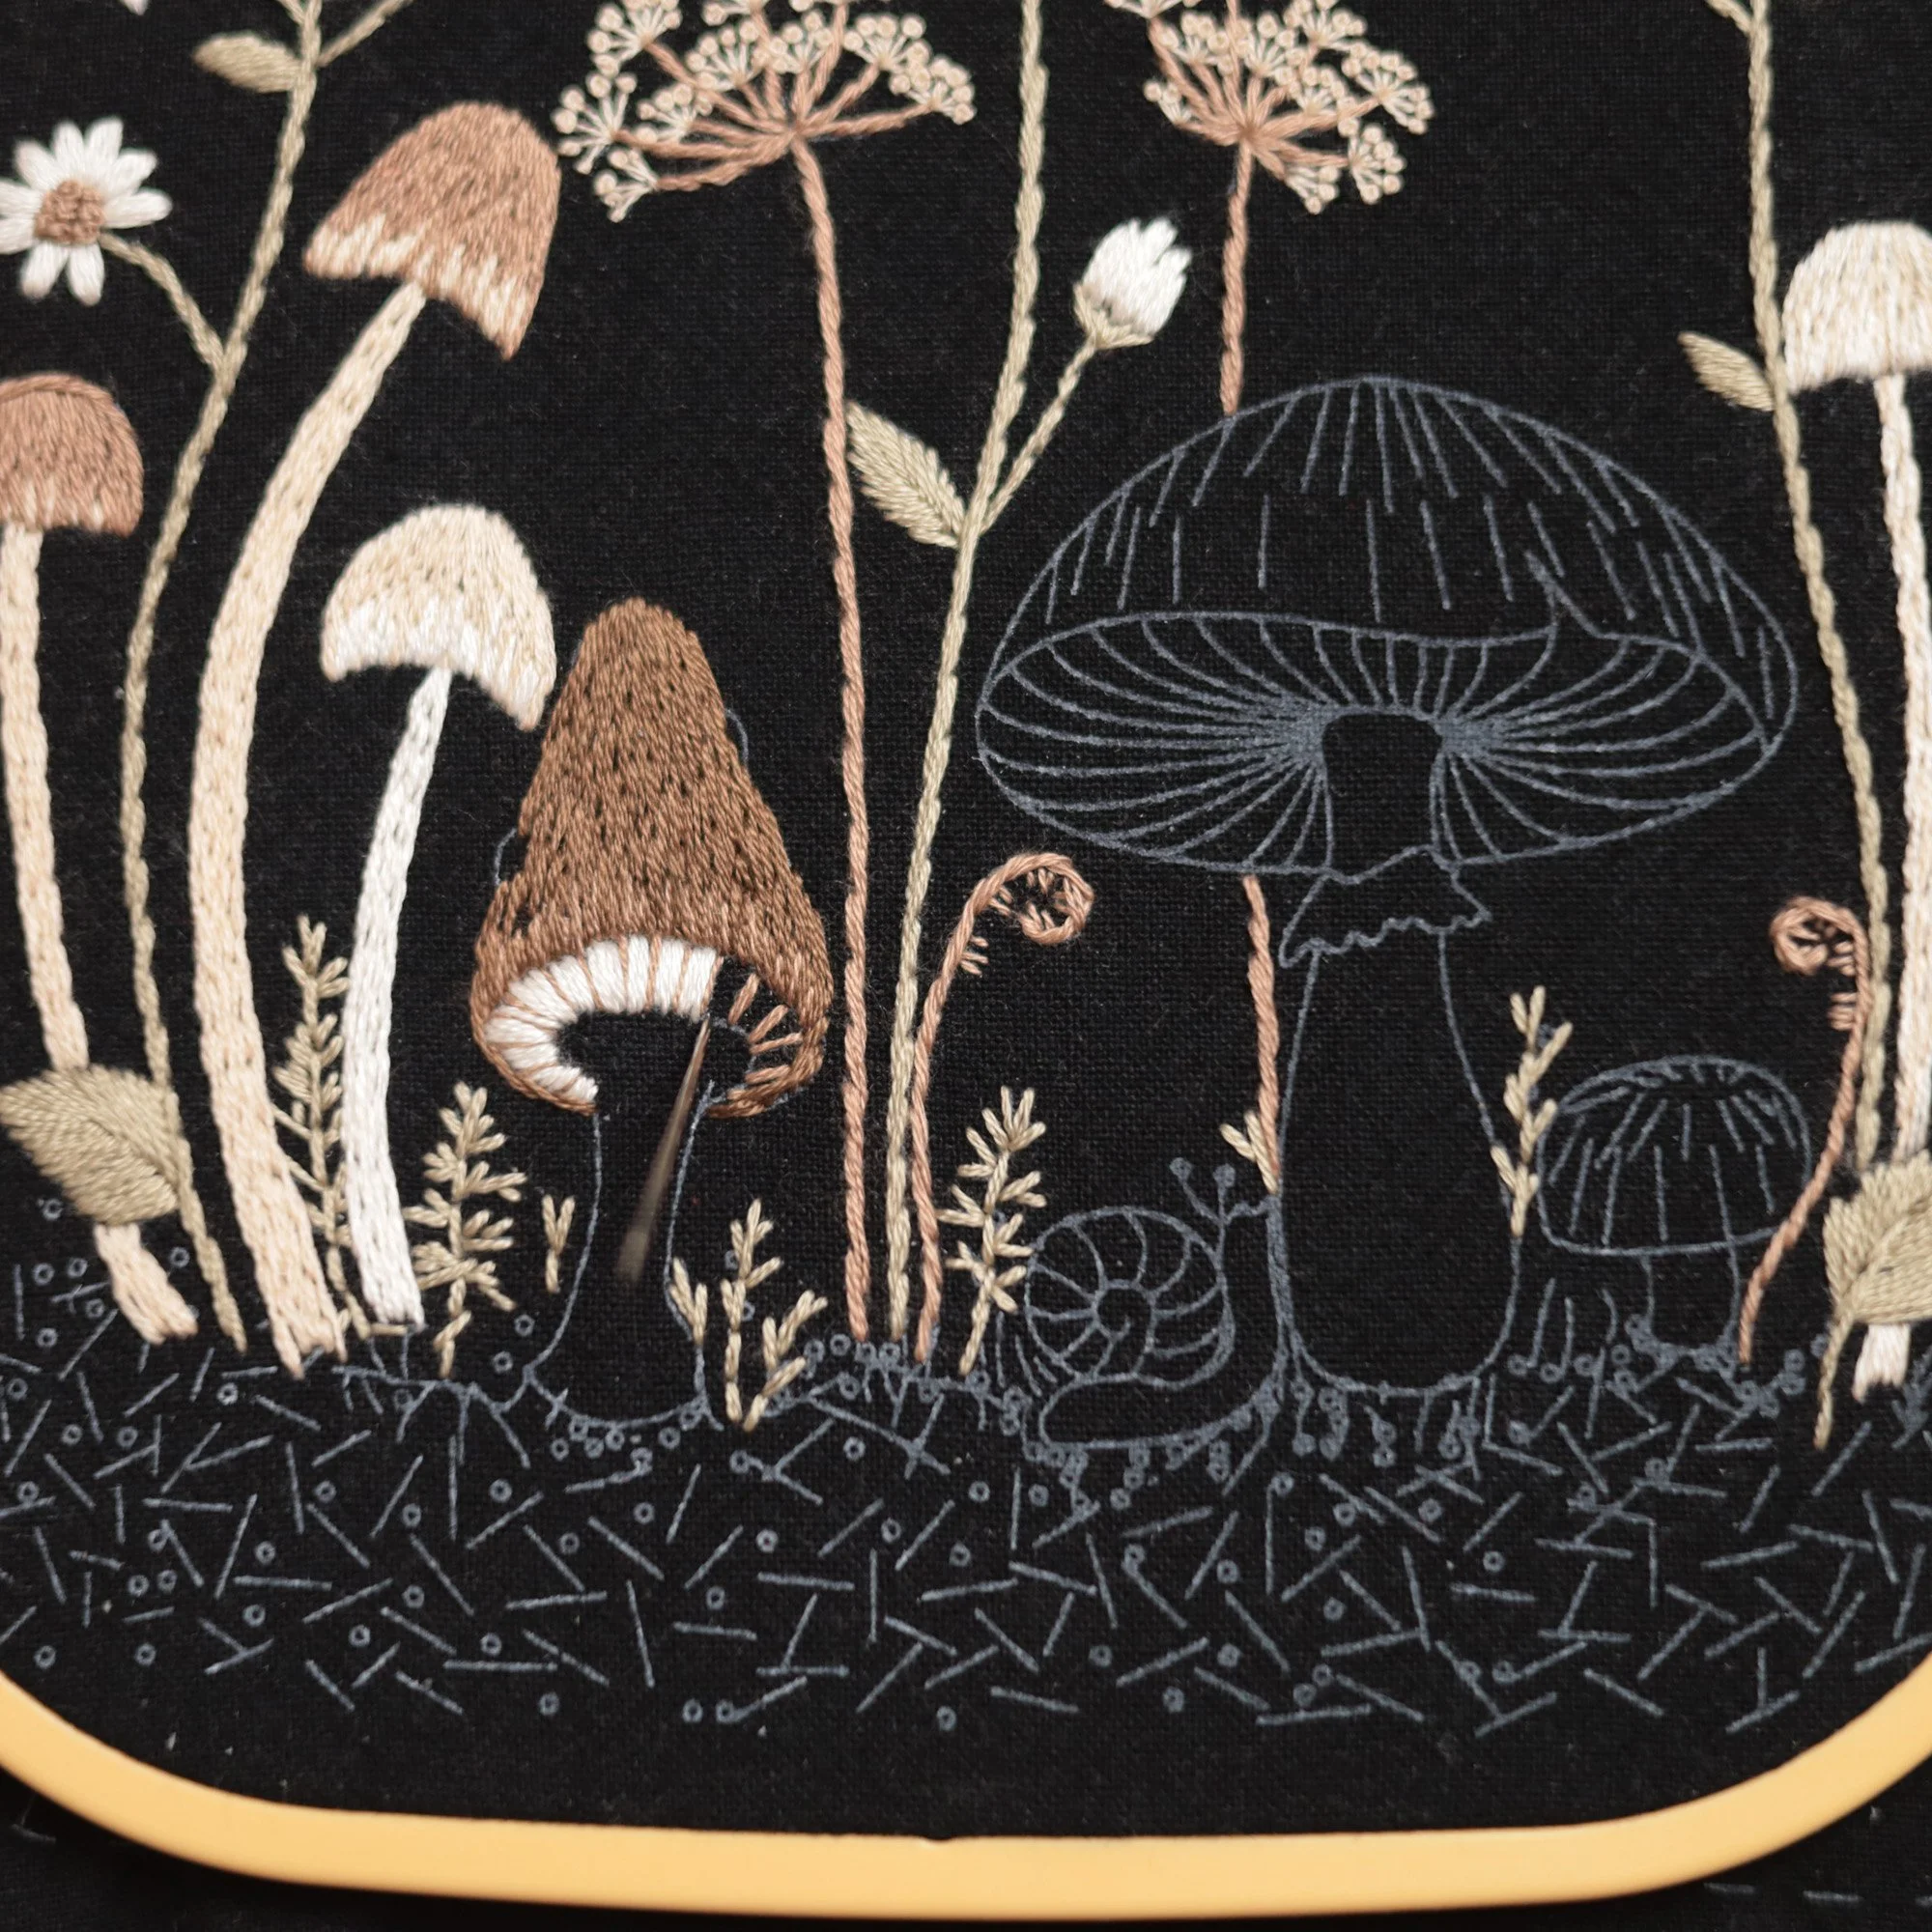
8. Large & Small Round Mushrooms
Cap & Spots on the Cap: same as step 7 (the pointed mushroom)
Gills (underside of the cap): Use Outline or Stem Stitch(#2, 1s) to stitch the “spokes” first, then fill the sections between them using Split Stitch(#3, 2s). (please watch the video tutorial in step 9)
Stem: same as step 7 (the pointed mushroom)
Ring on Stem: Detached Buttonhole Stitch (#4, 1s) (please watch the video tutorial in step 9)
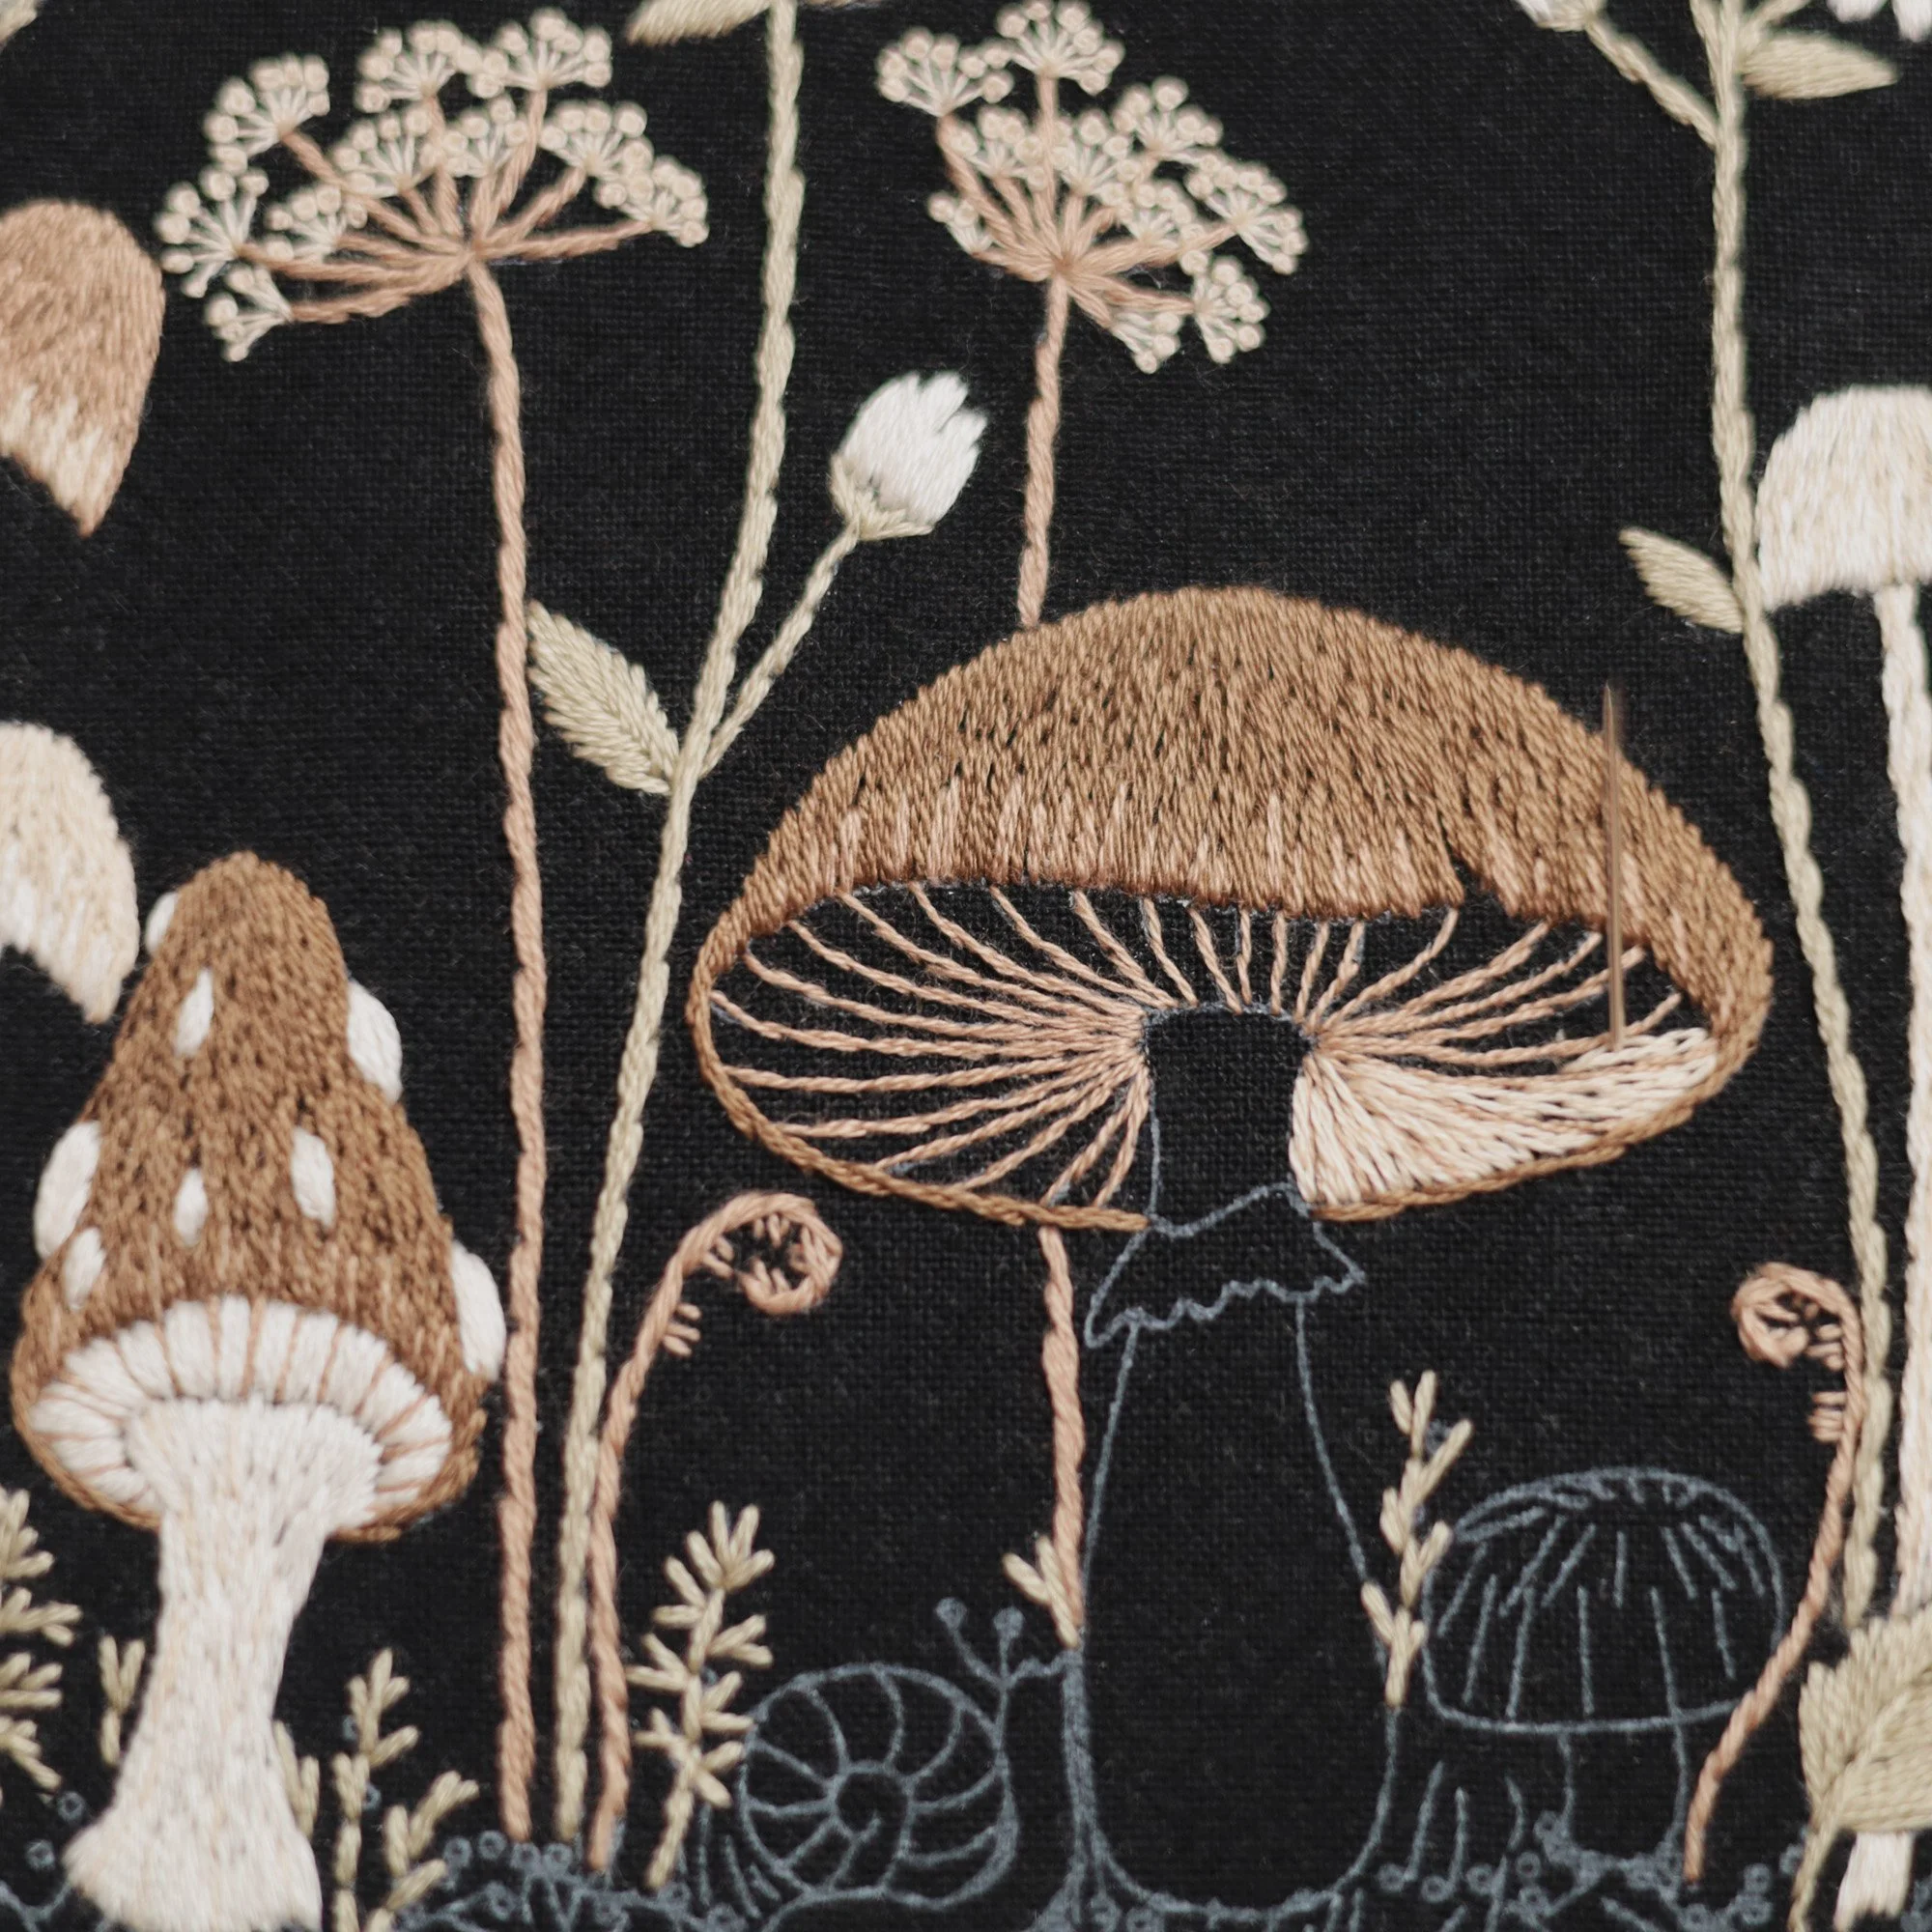
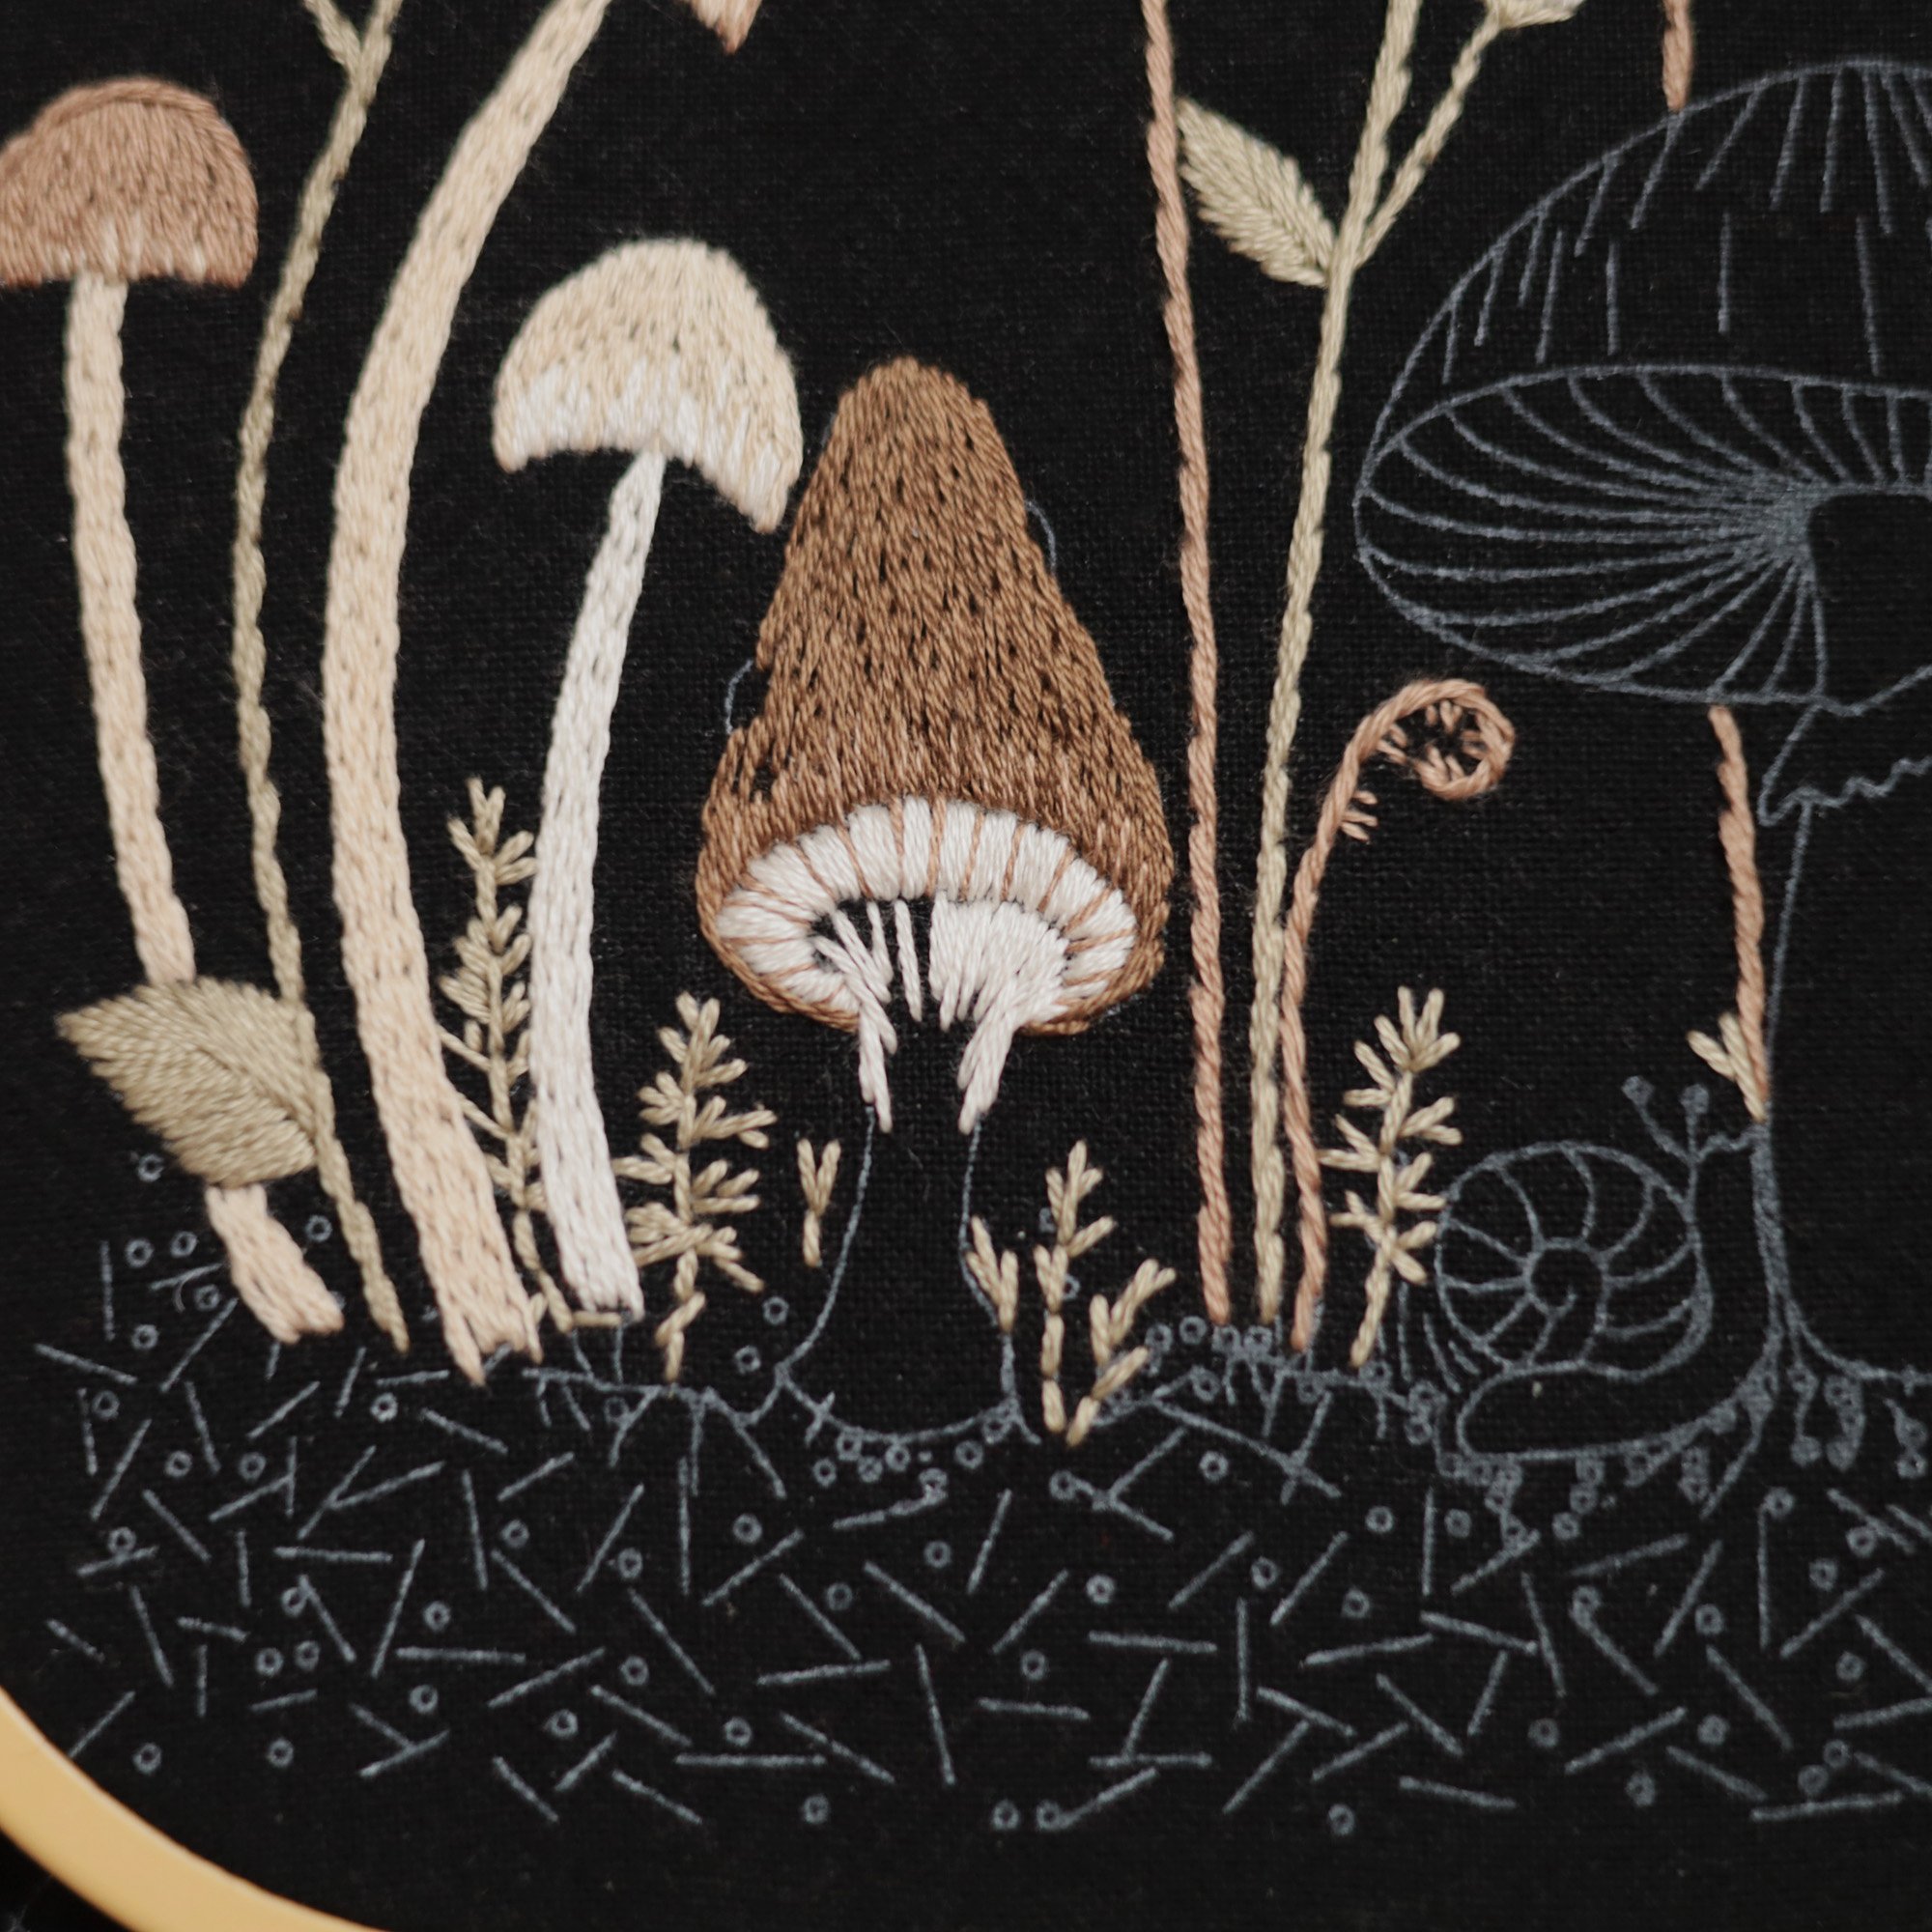
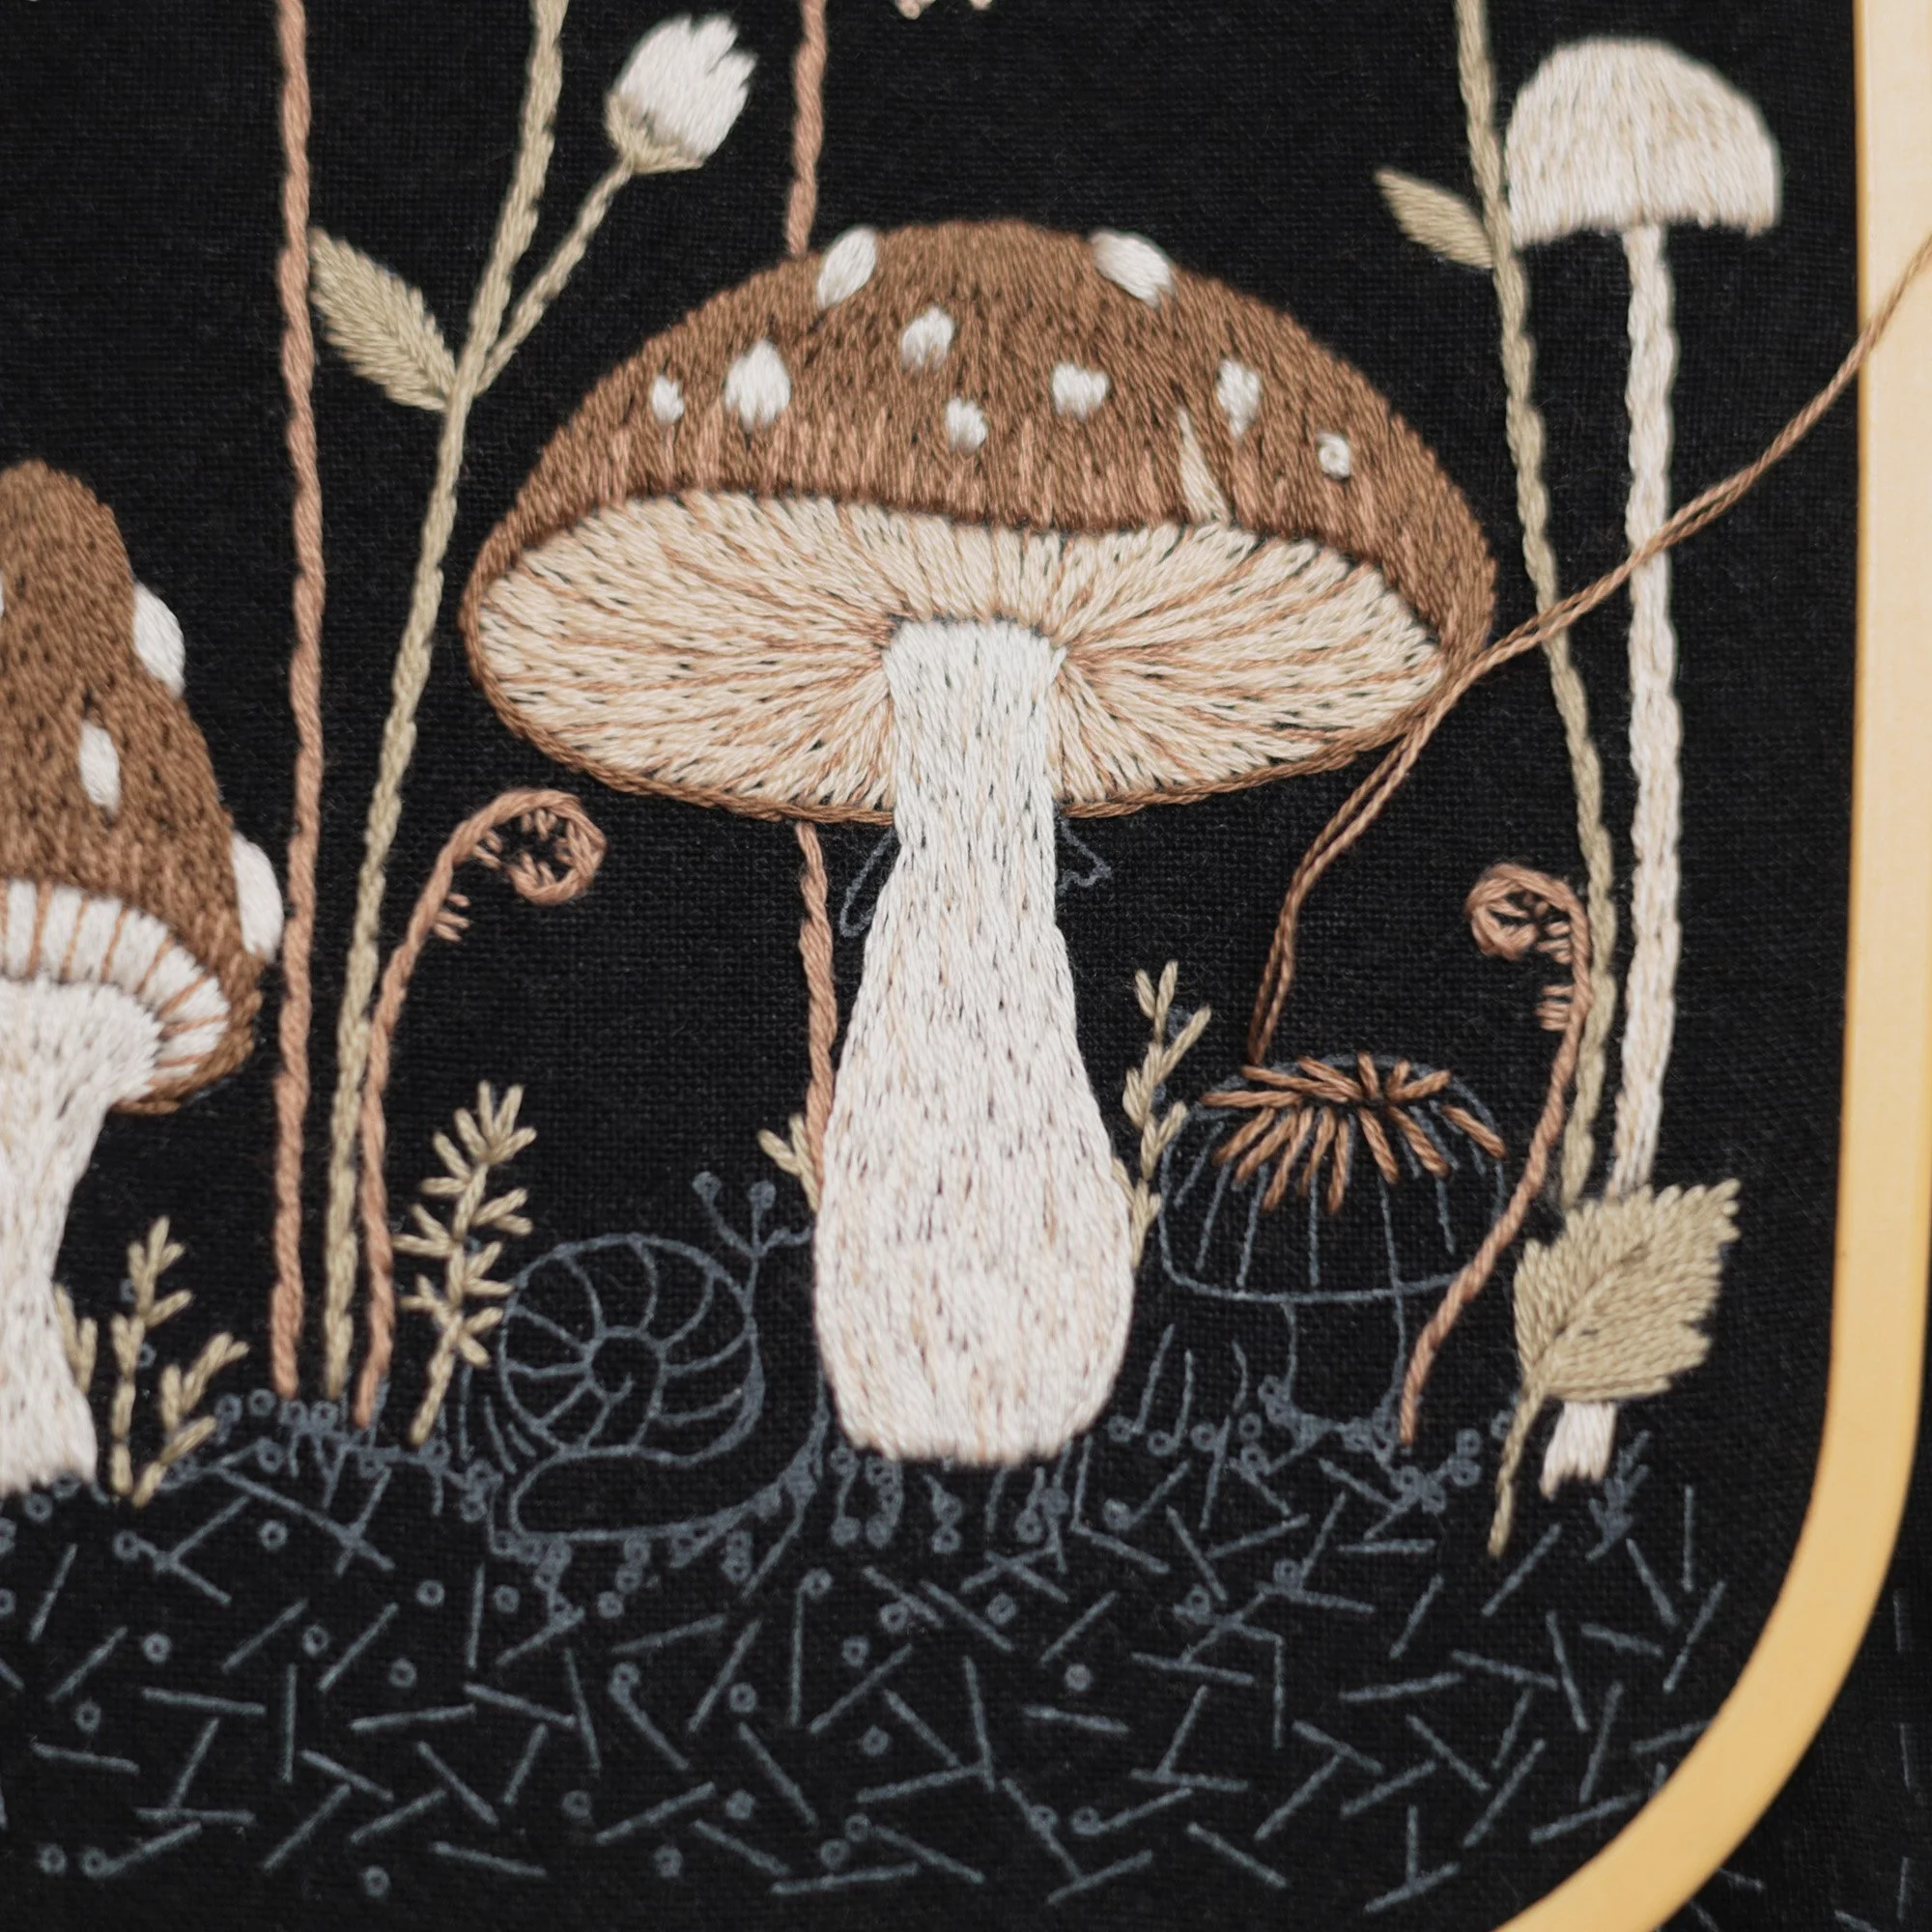
9. Snail (Please watch the video tutorial below)
Padding: raise the body and shell sections using Straight Stitch (#4, 2s)
Body: Use angled Satin Stitch(#3+#4, 2s) - combine one strand of #3 and one strand of #4 for stitching
Antennae: Straight Stitch + French Knot ((#3+#4, 2s)
Shell: Long & Short Stitch (#4, 2s) first, blending with Straight Stitch (#5, 2s) and (#2, 2s)
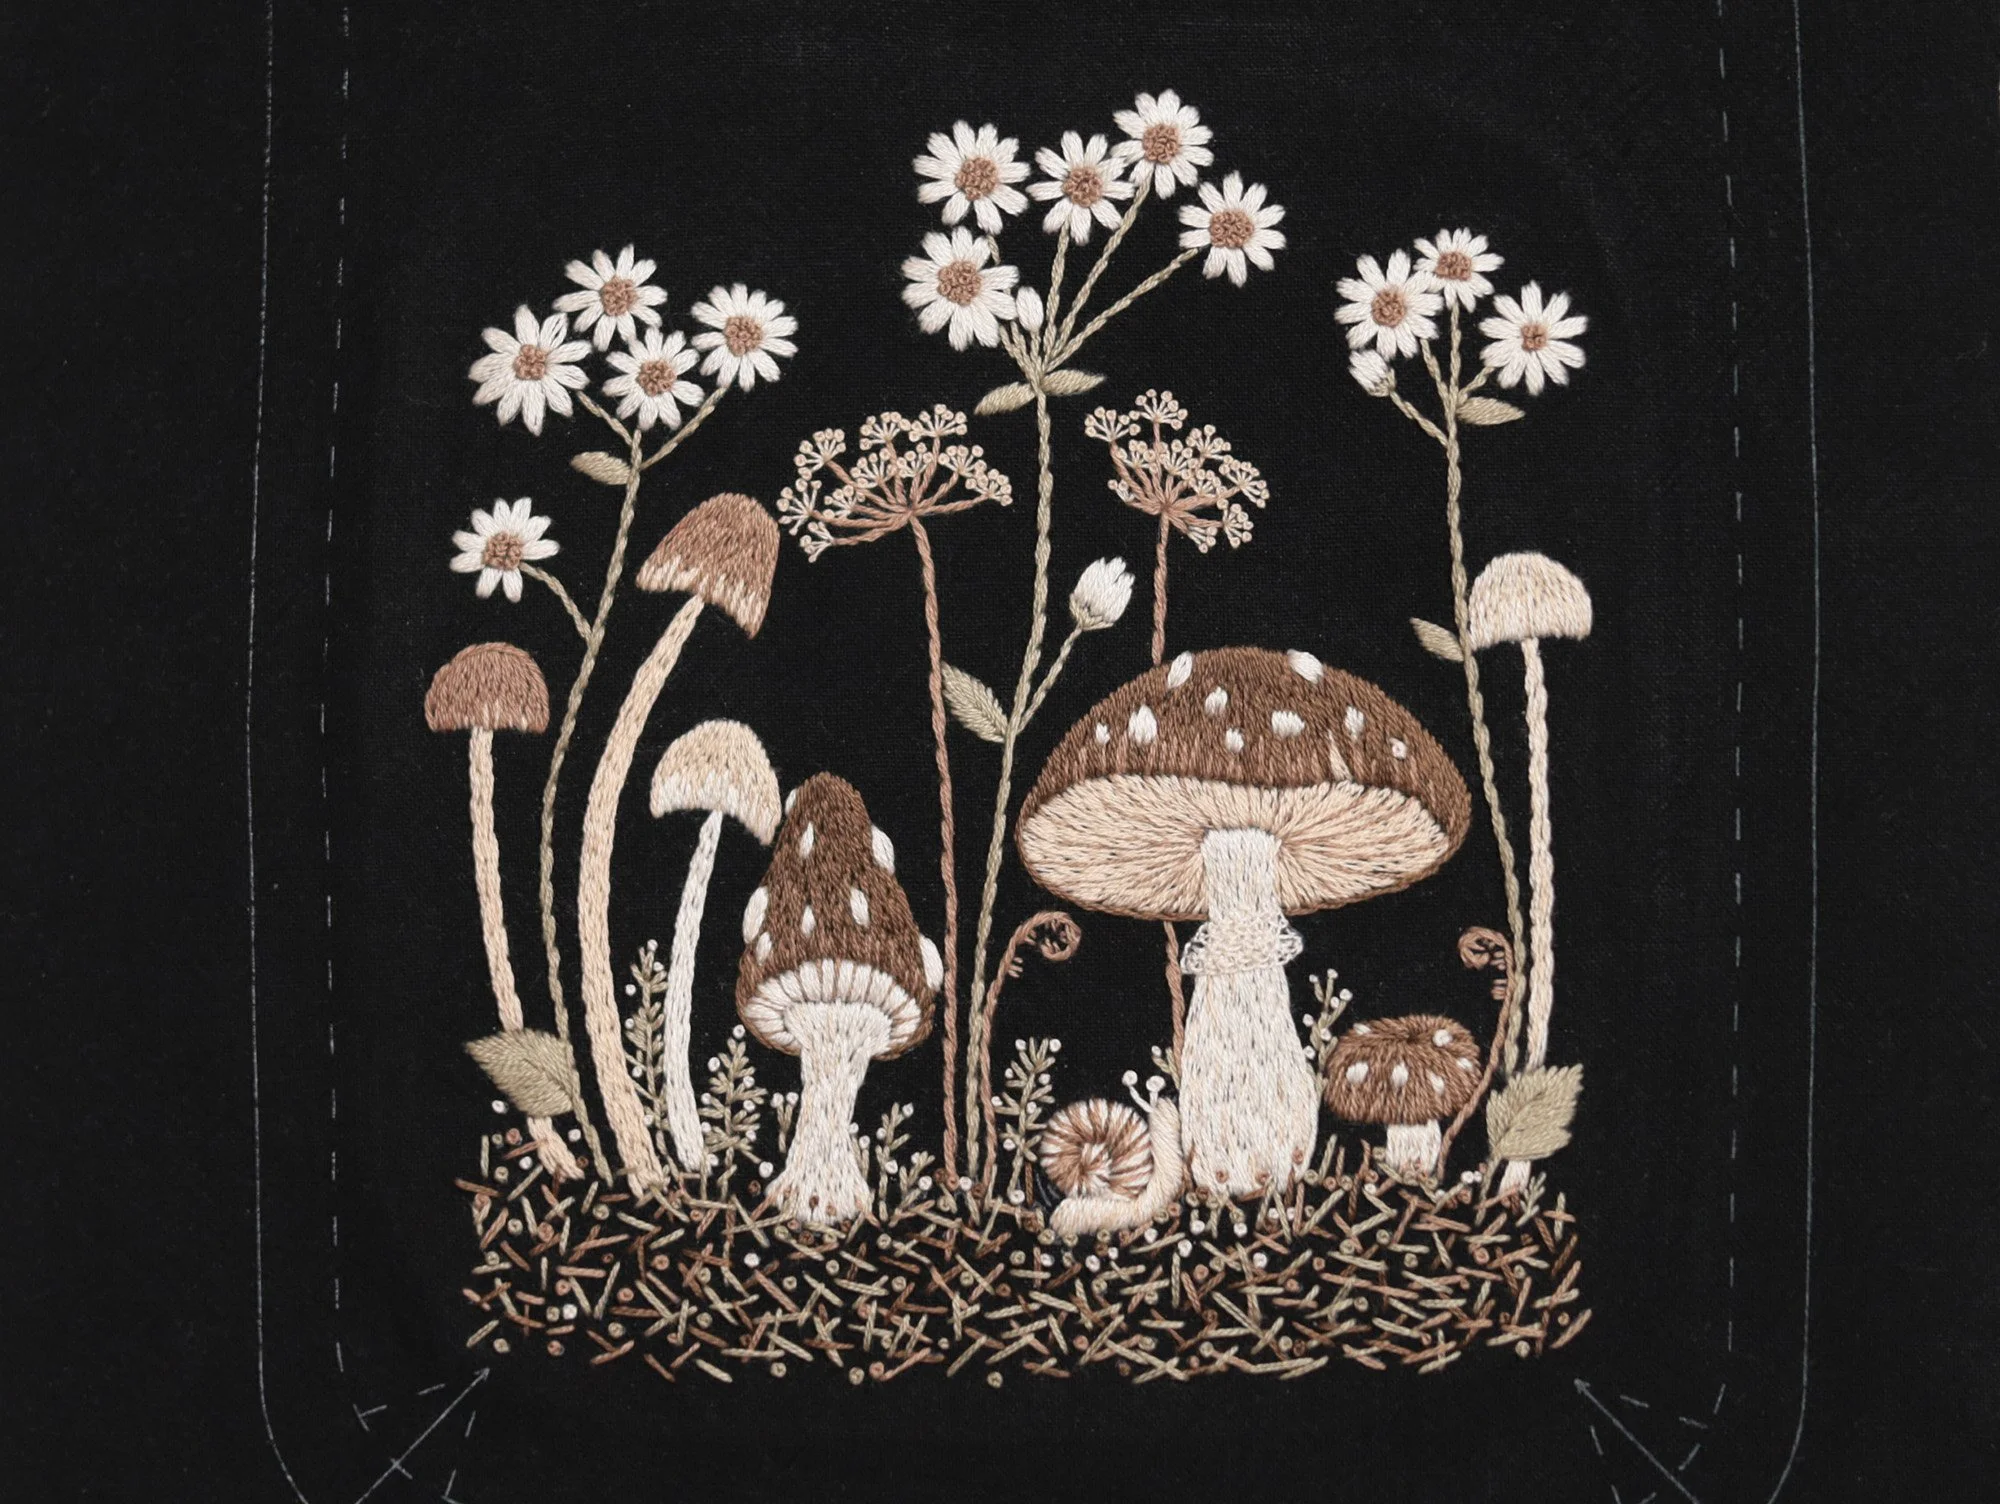
10. Meadow
Use Straight Stitch for the lines and French Knot (one or two wraps) for the dots with two strands of threads (colour provided below).
First Layer: Randomly stitch some lines and dots across the section using #5 (see the photo above).
Second Layer: #2
Third Layer: #1. You can also add some dots on the small grass/plant.
Sewing Tutorial
Whether sewing by hand or machine, backstitch at the beginning and end of each seam to secure the stitches. To avoid repetition, this will not be mentioned in the following tutorial.
Unless otherwise stated, the seam allowance throughout this tutorial is 1 cm (3/8 inch).
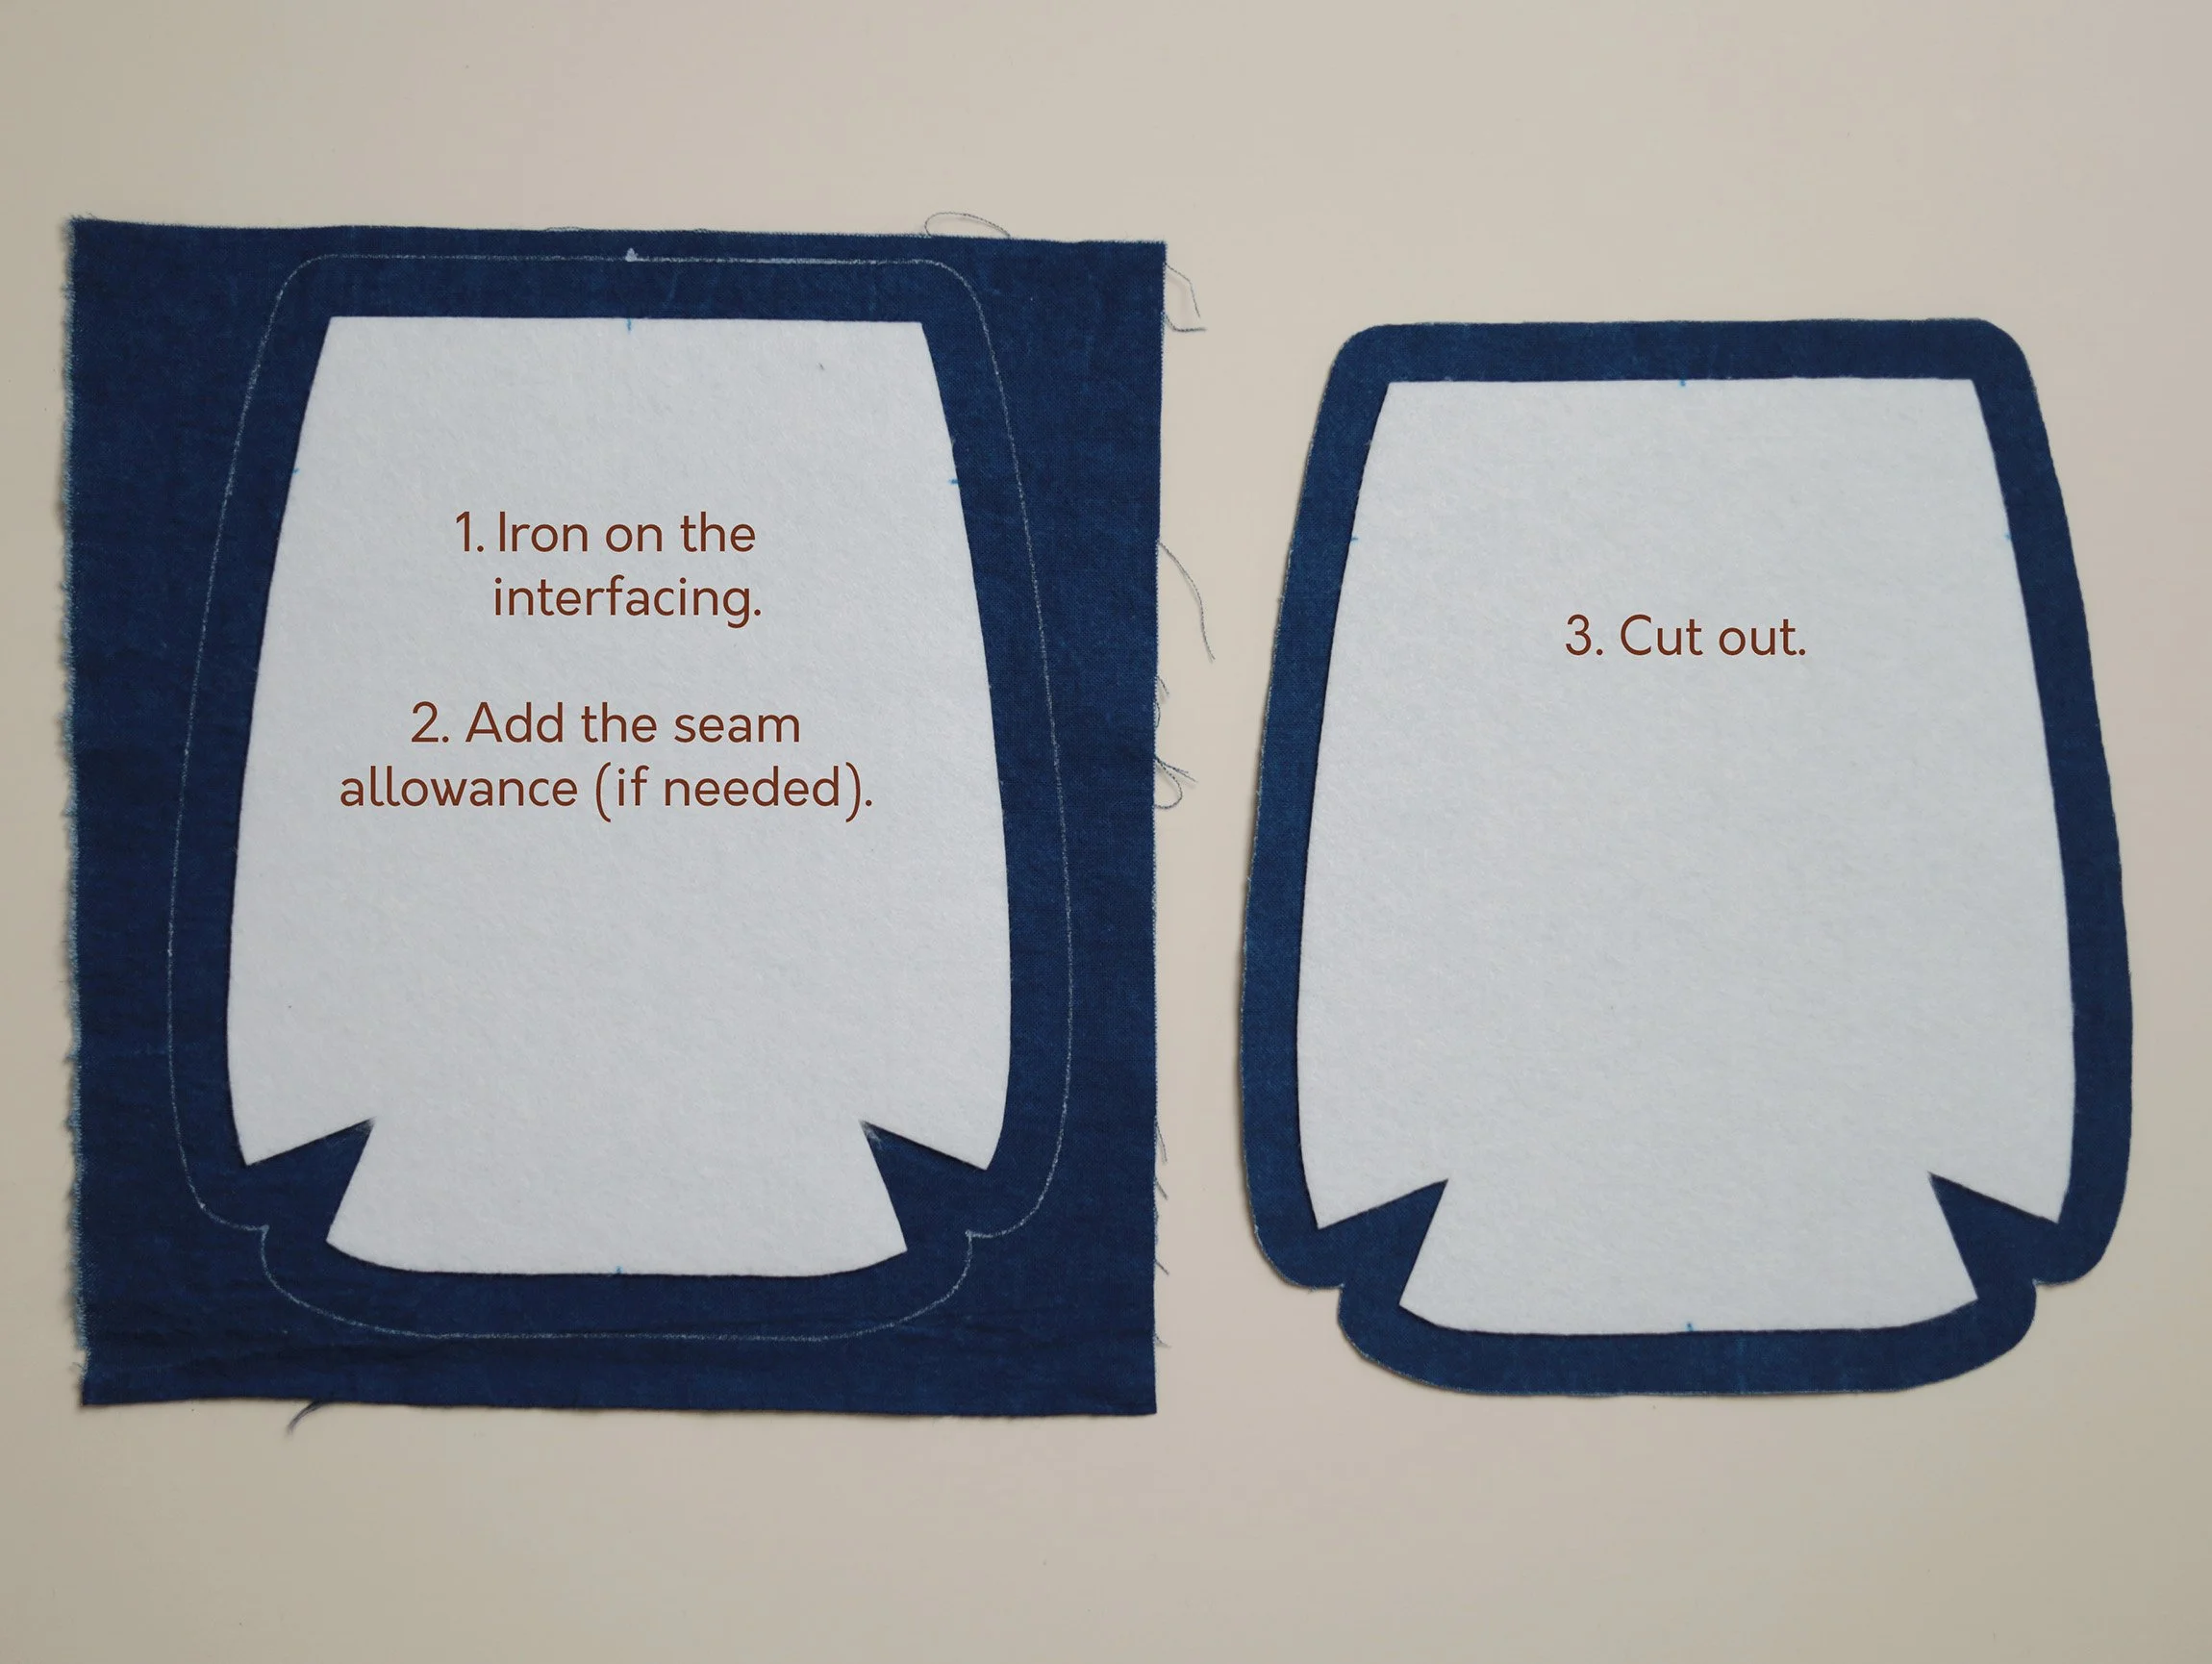
1. Prepare fabric pieces:
Press the embroidered main fabric piece, covering the embroidered area with a clean cotton cloth. Cut it out along the solid outline.
Use the embroidered piece as a template to cut a second main fabric piece. Repeat to cut two lining pieces.
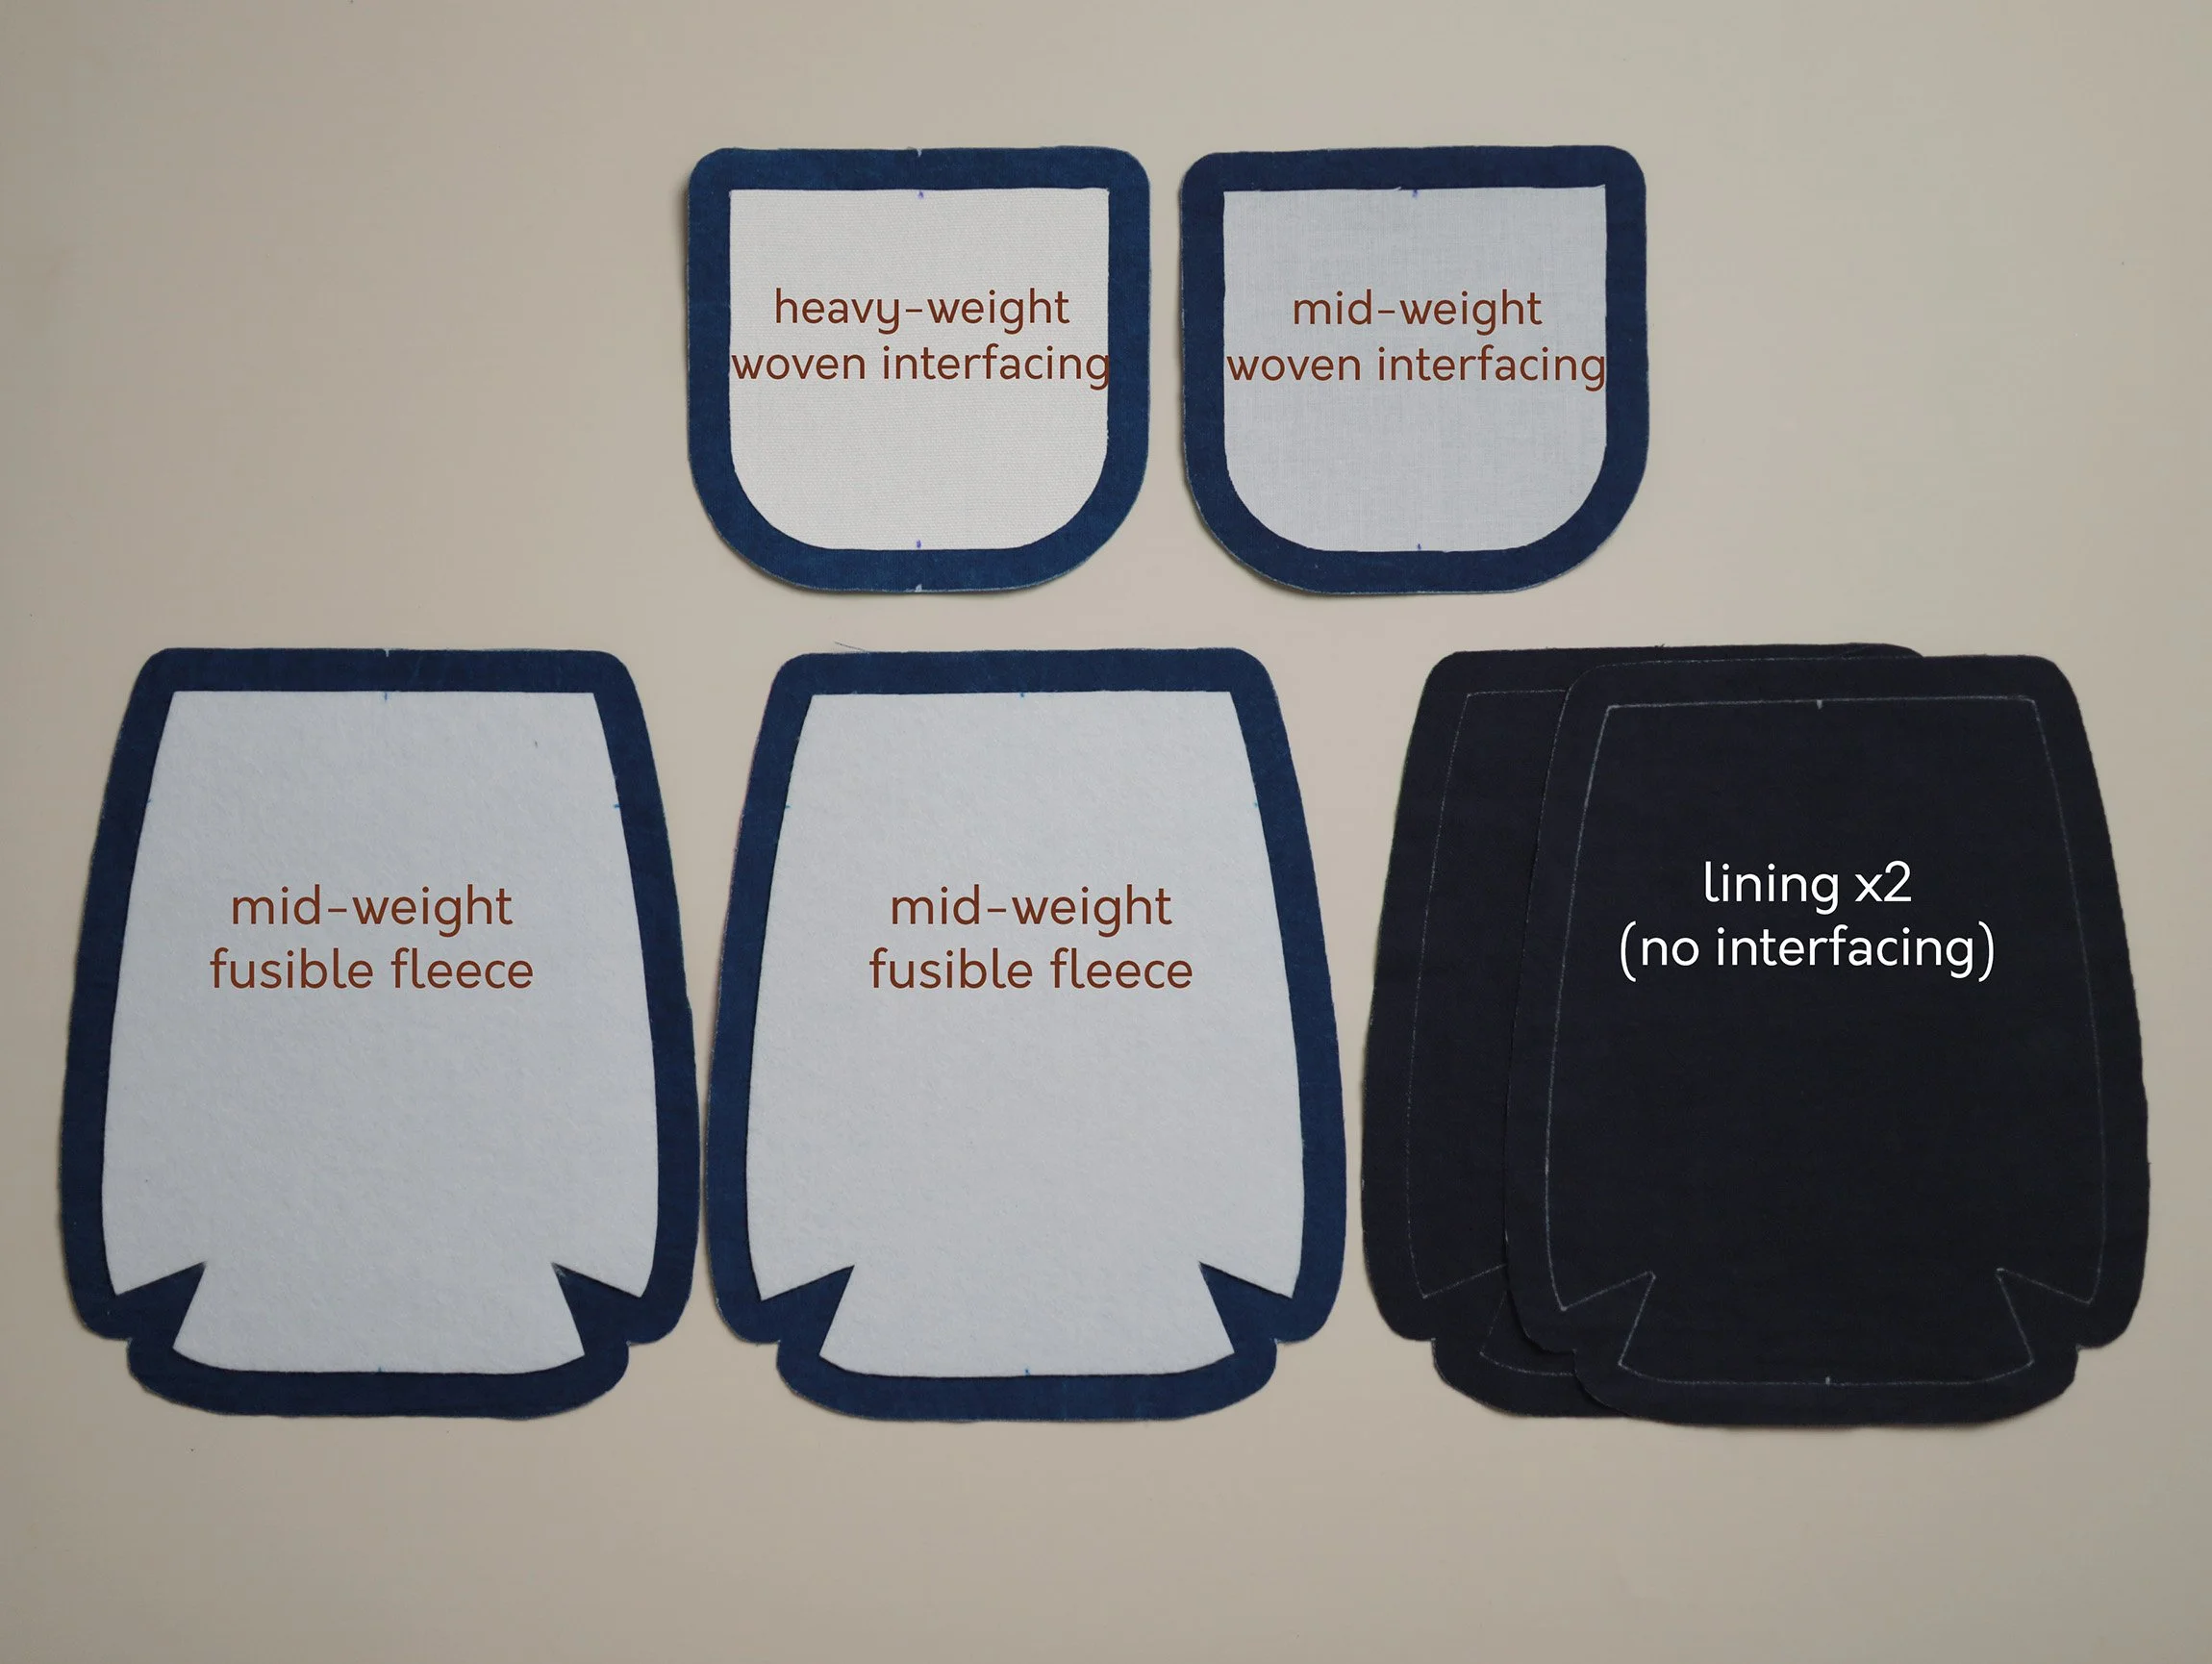
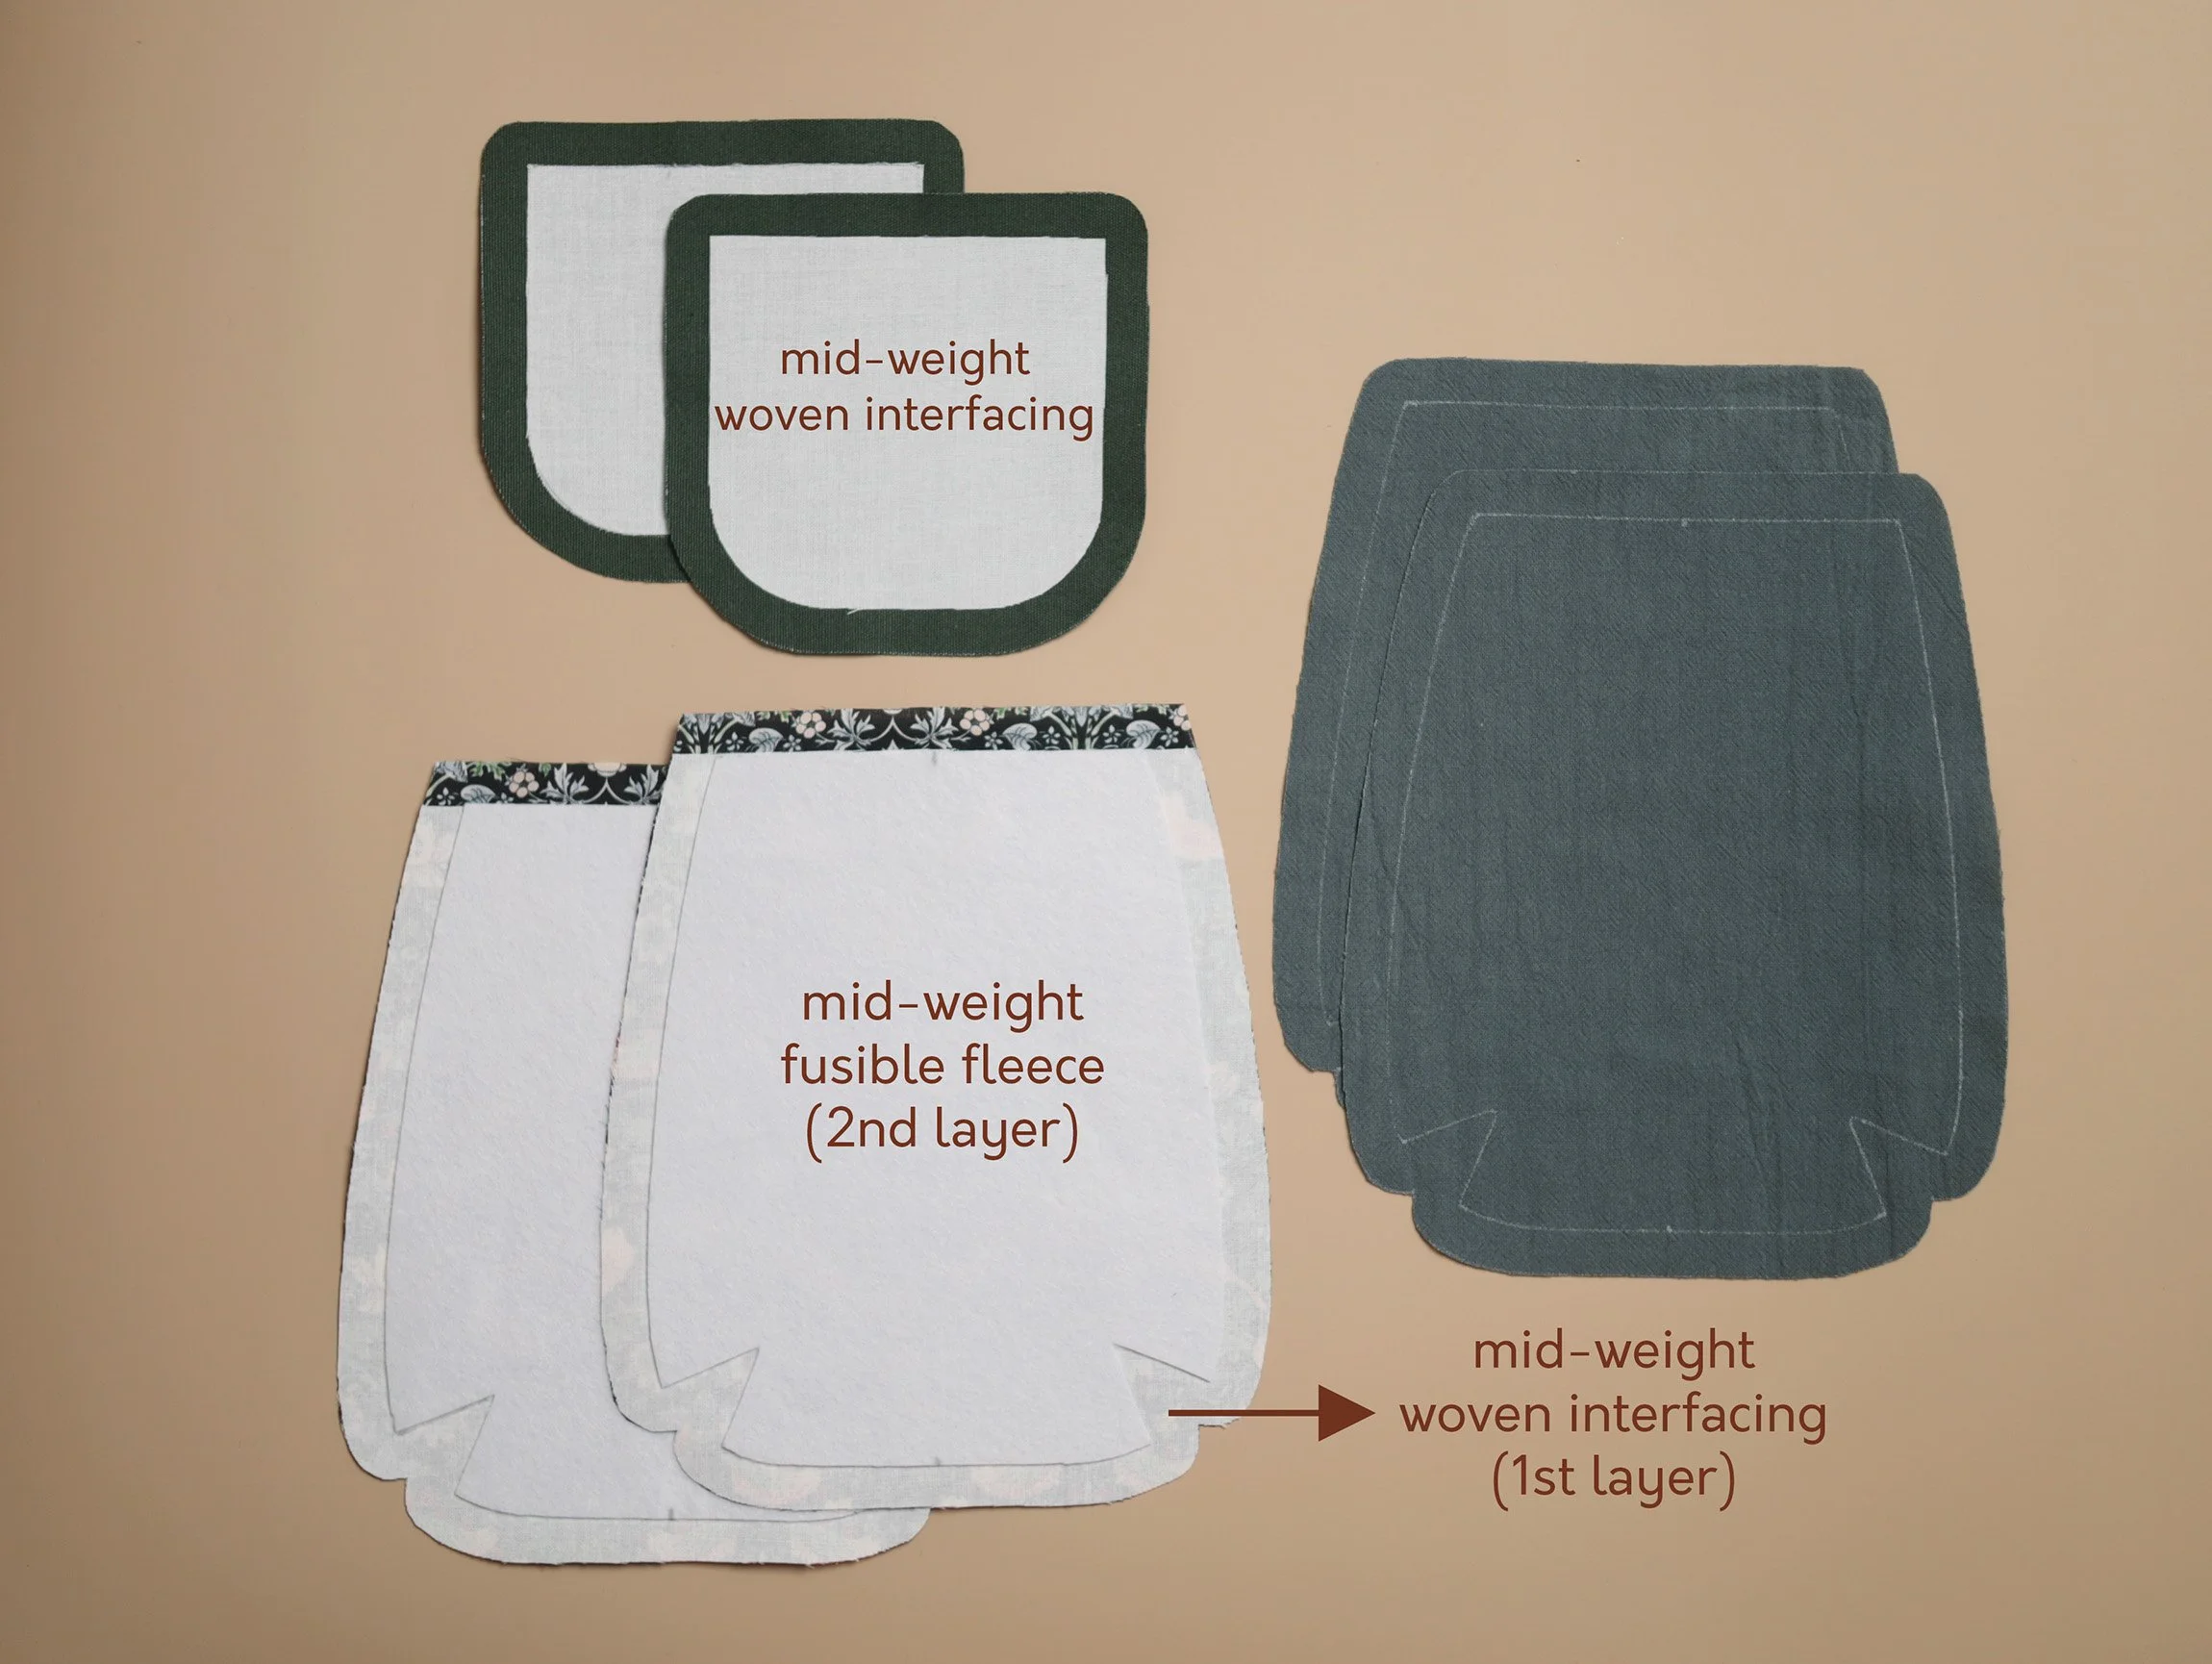
Trace the paper pattern included in the kit onto the felt interfacing, then cut out two pieces.
Centre one interfacing piece on the wrong side of one main fabric piece, with the glue side facing down. Press from the right side of the fabric to fuse it in place. Repeat with the remaining interfacing and main fabric pieces.
3. Make the bag flap.
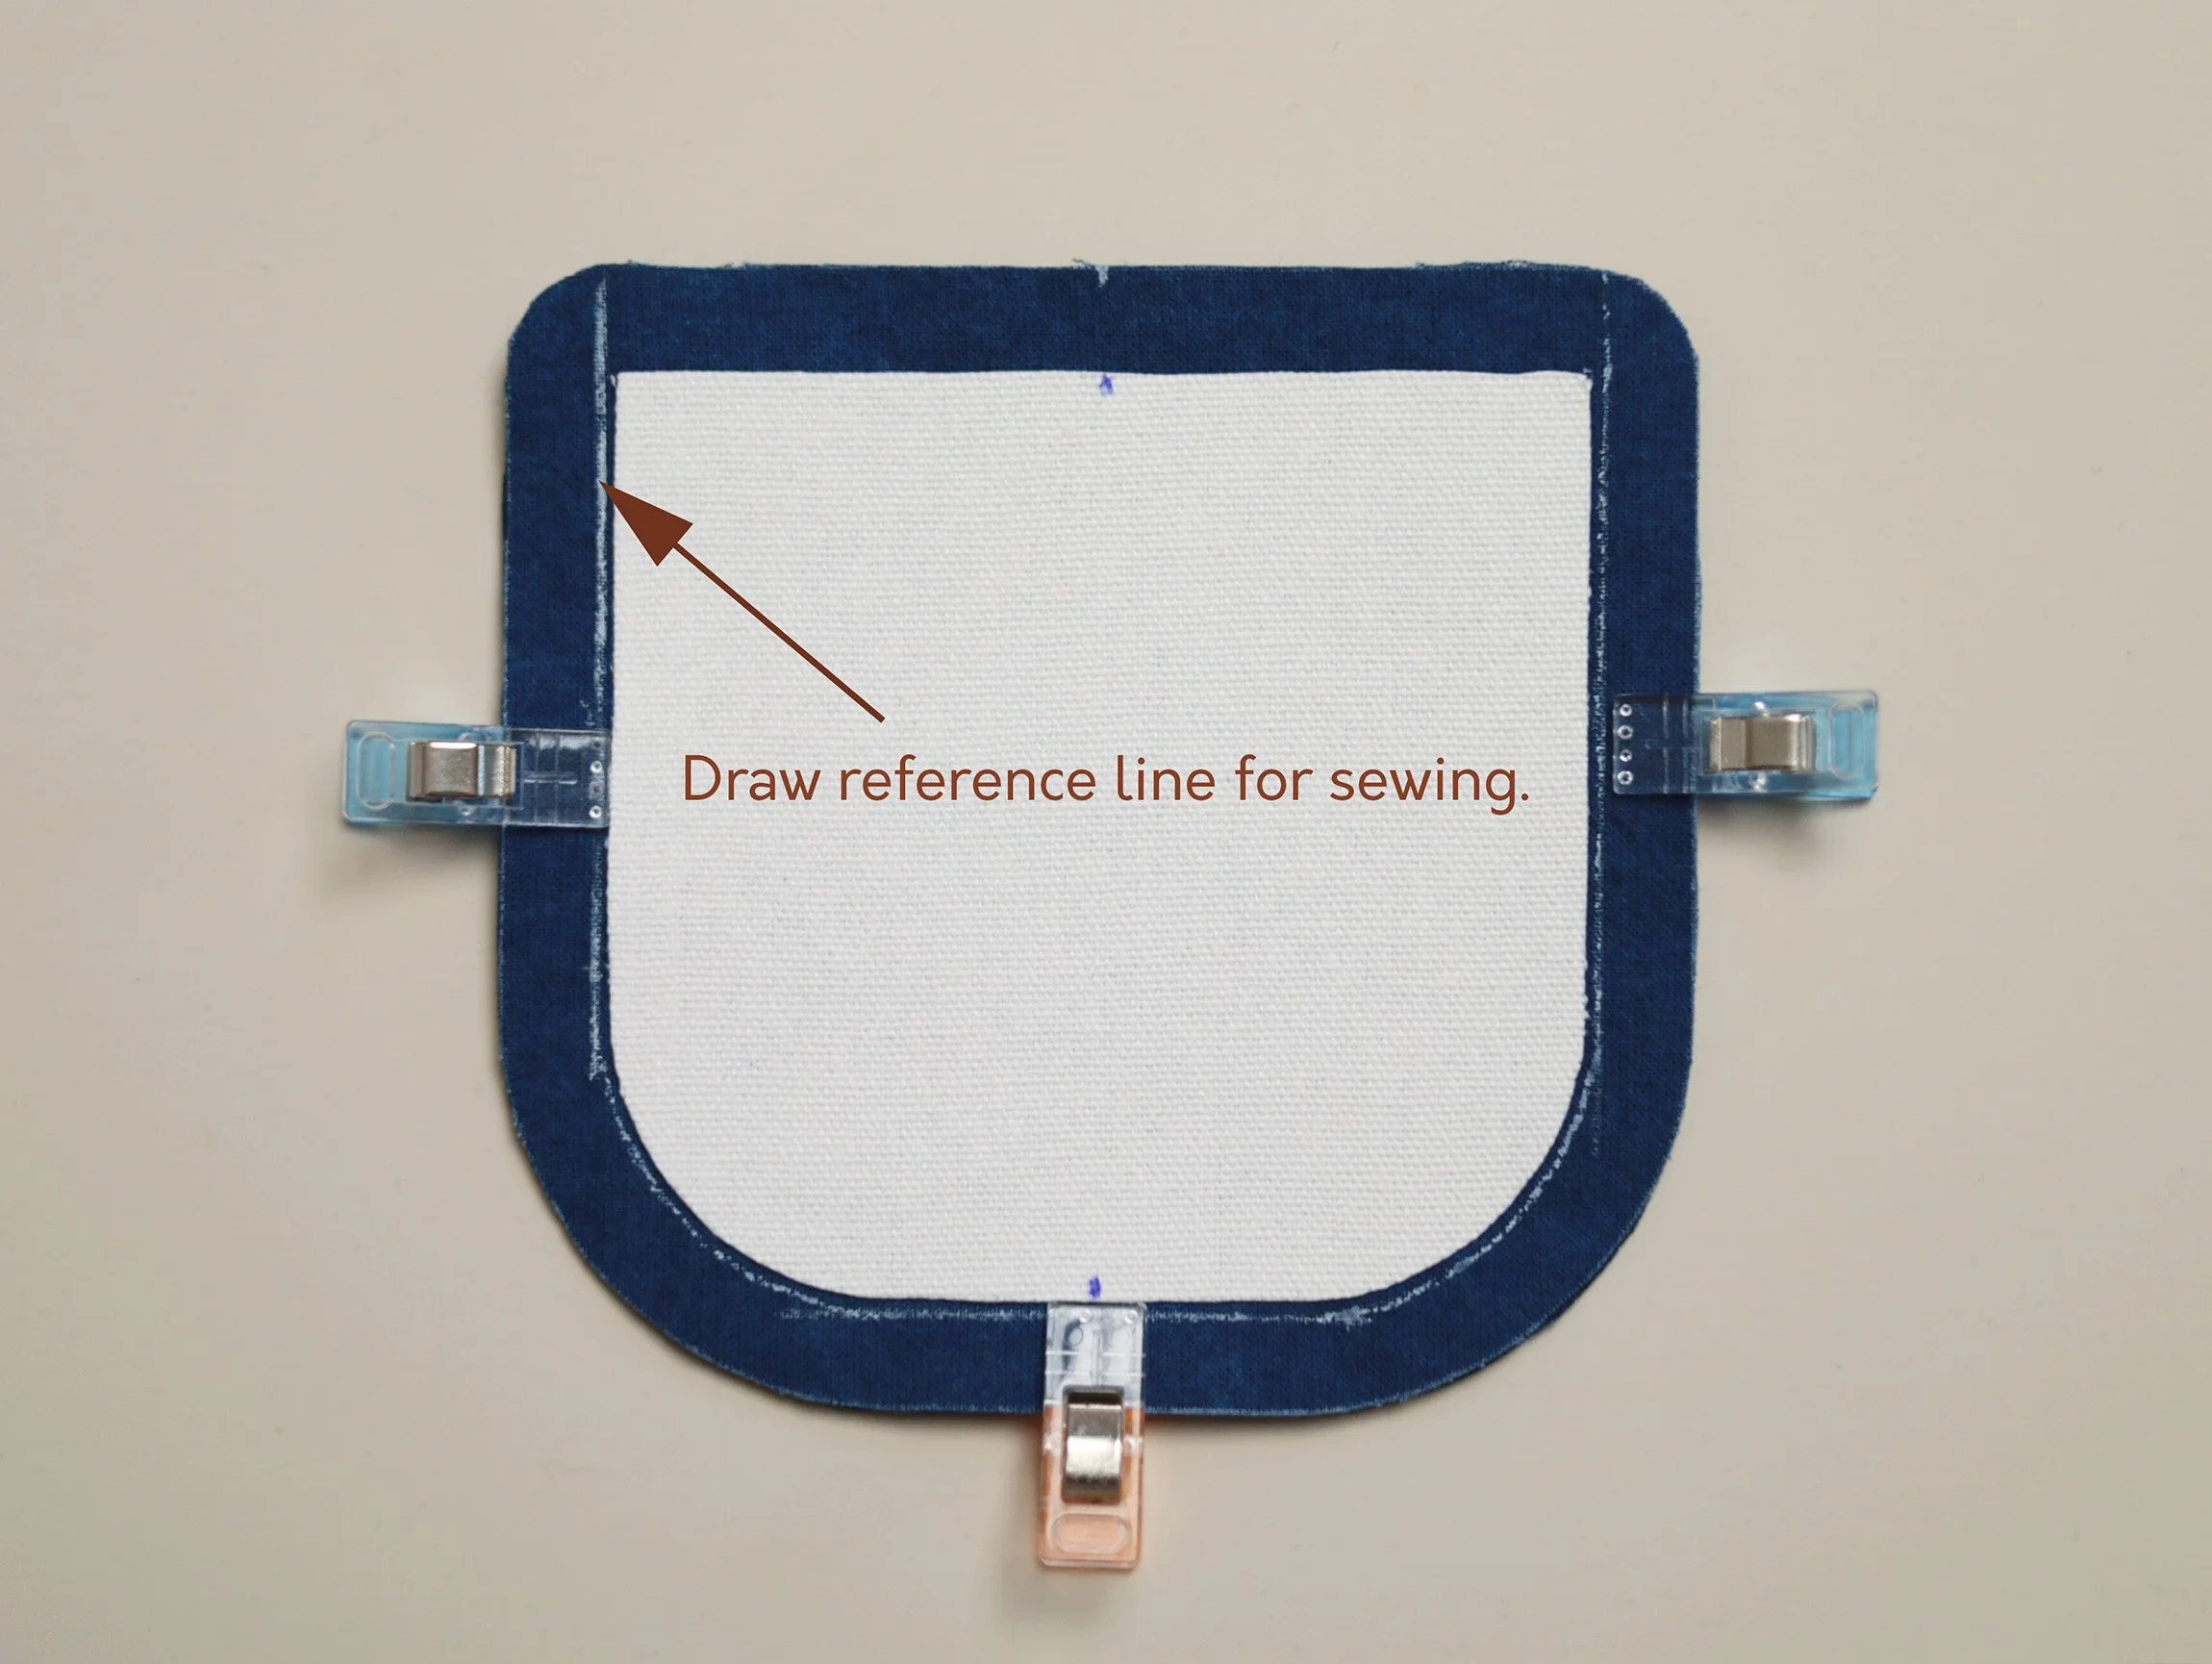
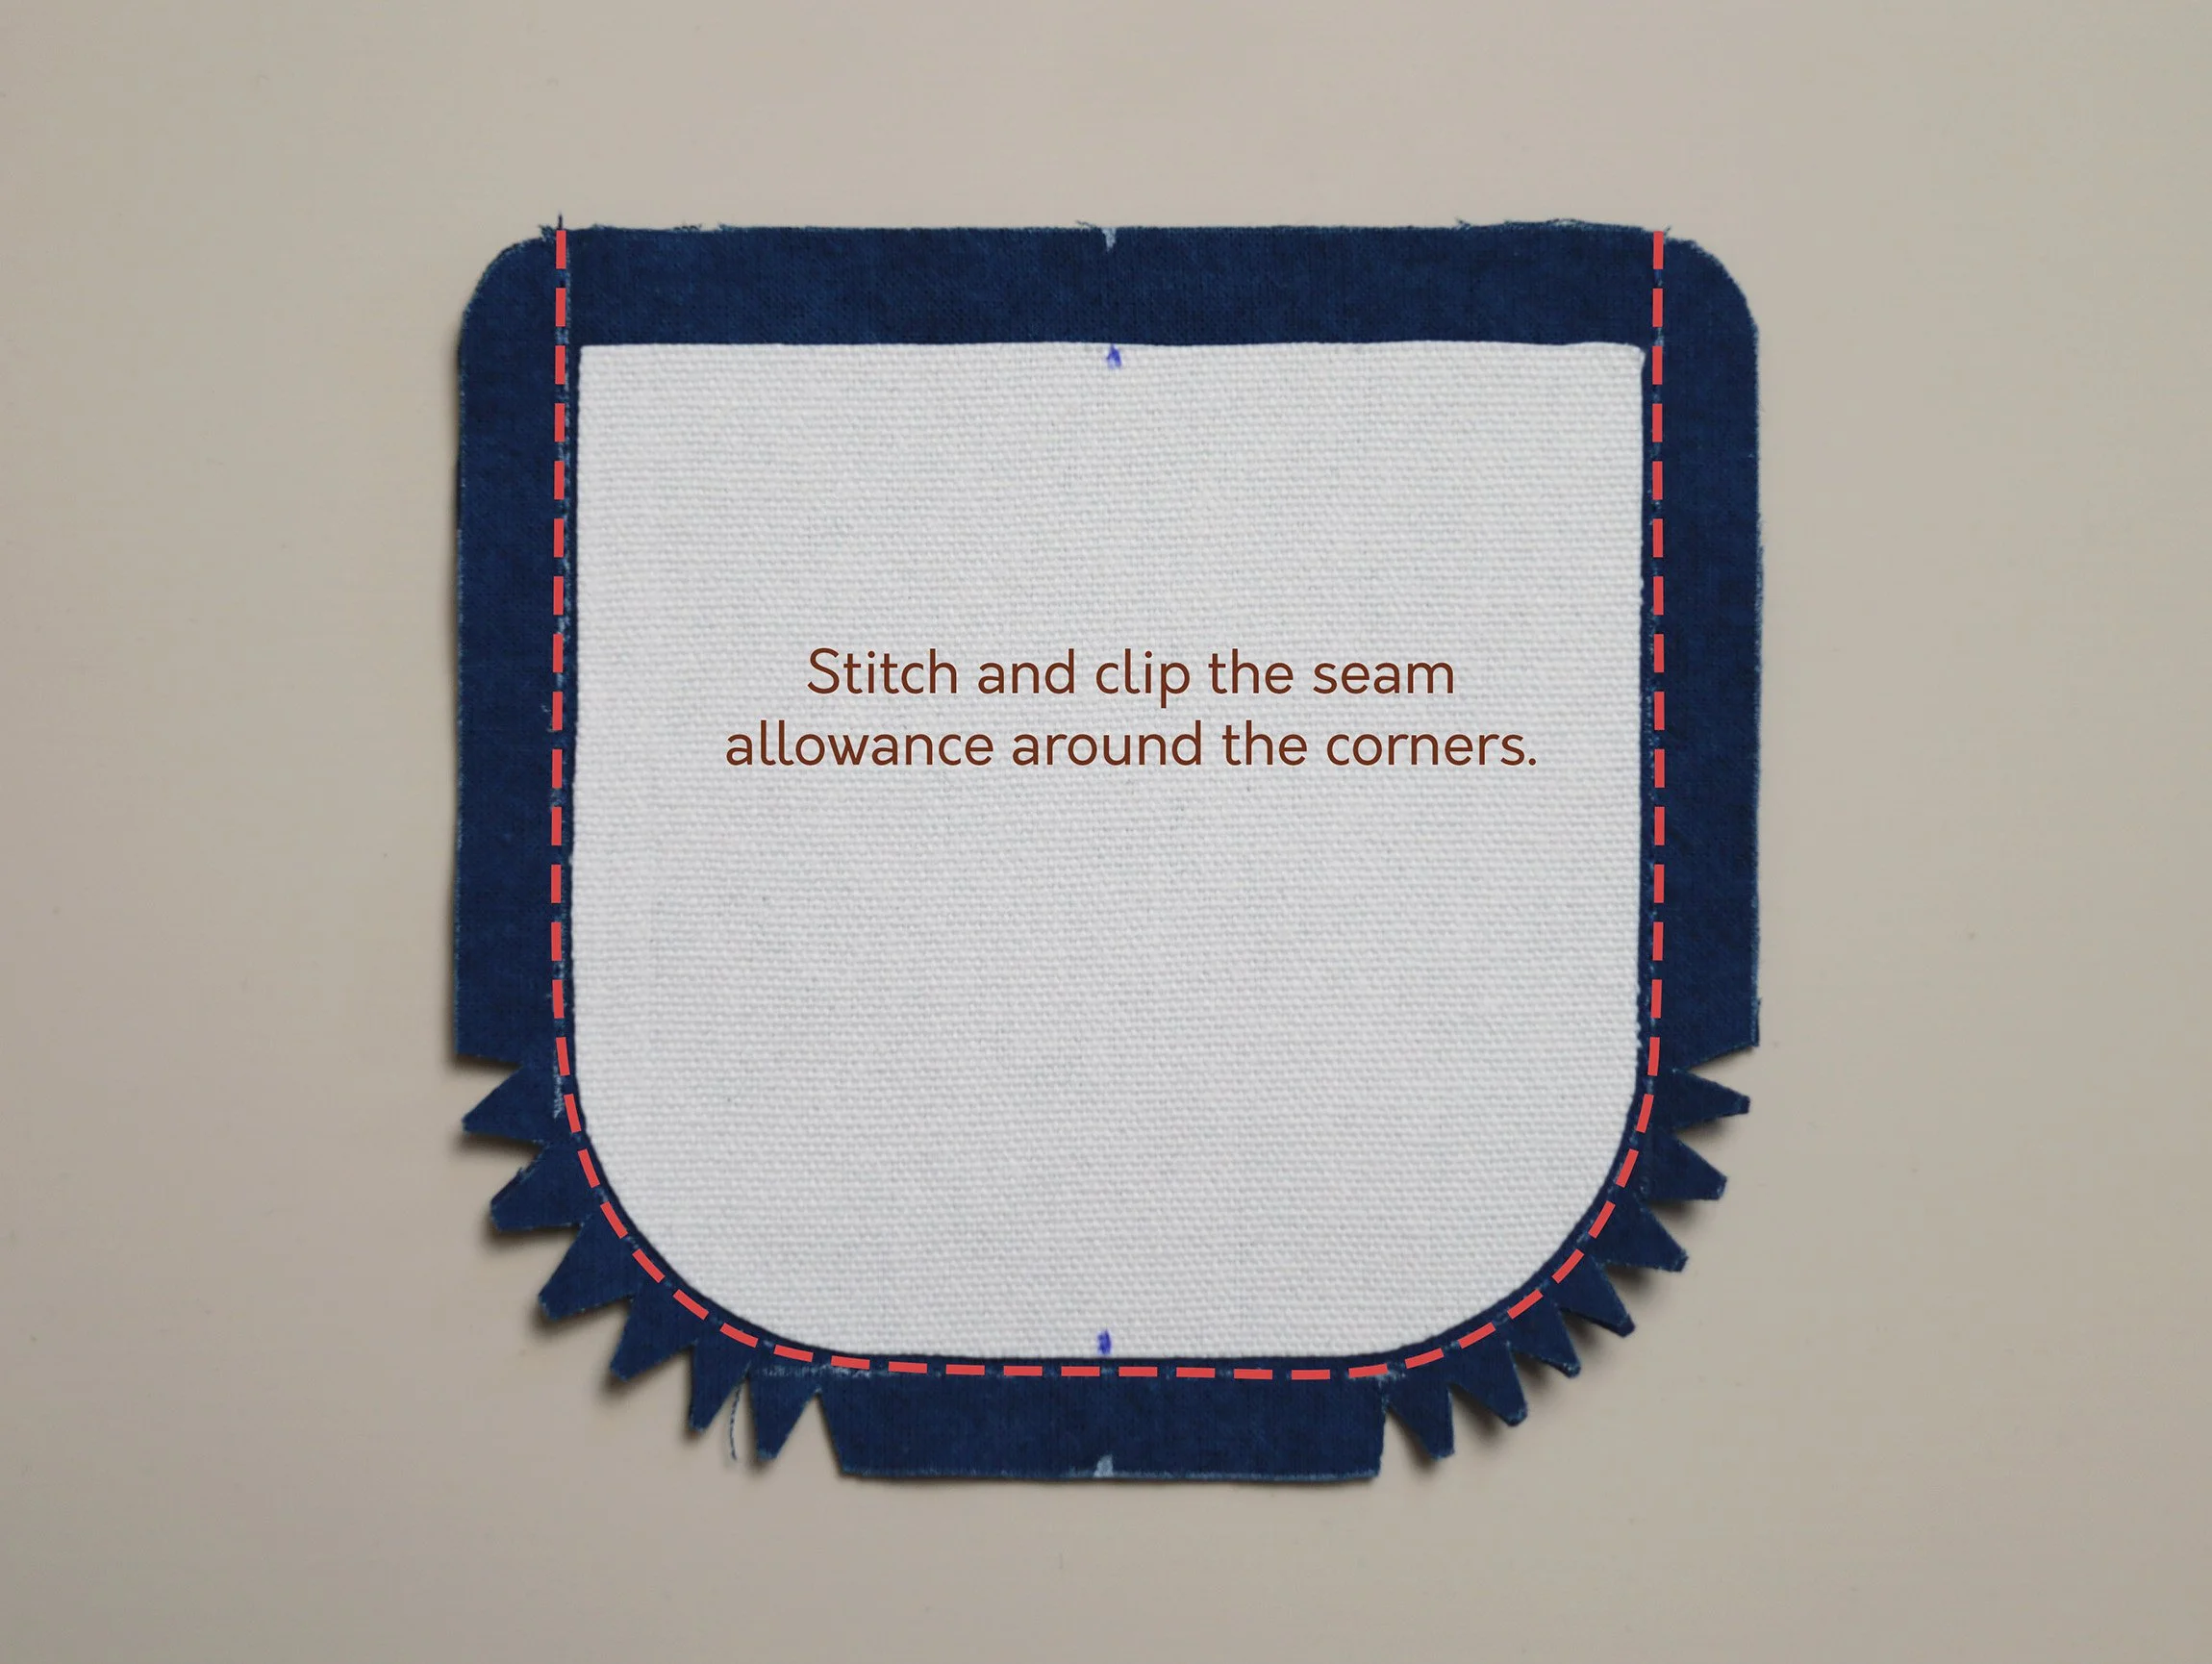
Place the bag flap main and lining pieces together with right sides facing and raw edges aligned. Secure them with clips. Stitch a U-shape around the interfacing, about 1mm away from its edge. (see photo).
Tips:
When sewing with interfacing, stitch 1–2 mm away from the edge of the interfacing, depending on its thickness (1 mm for thin, 2 mm for thick). This helps prevent overstretched seams and exposed stitches on the finished bag.
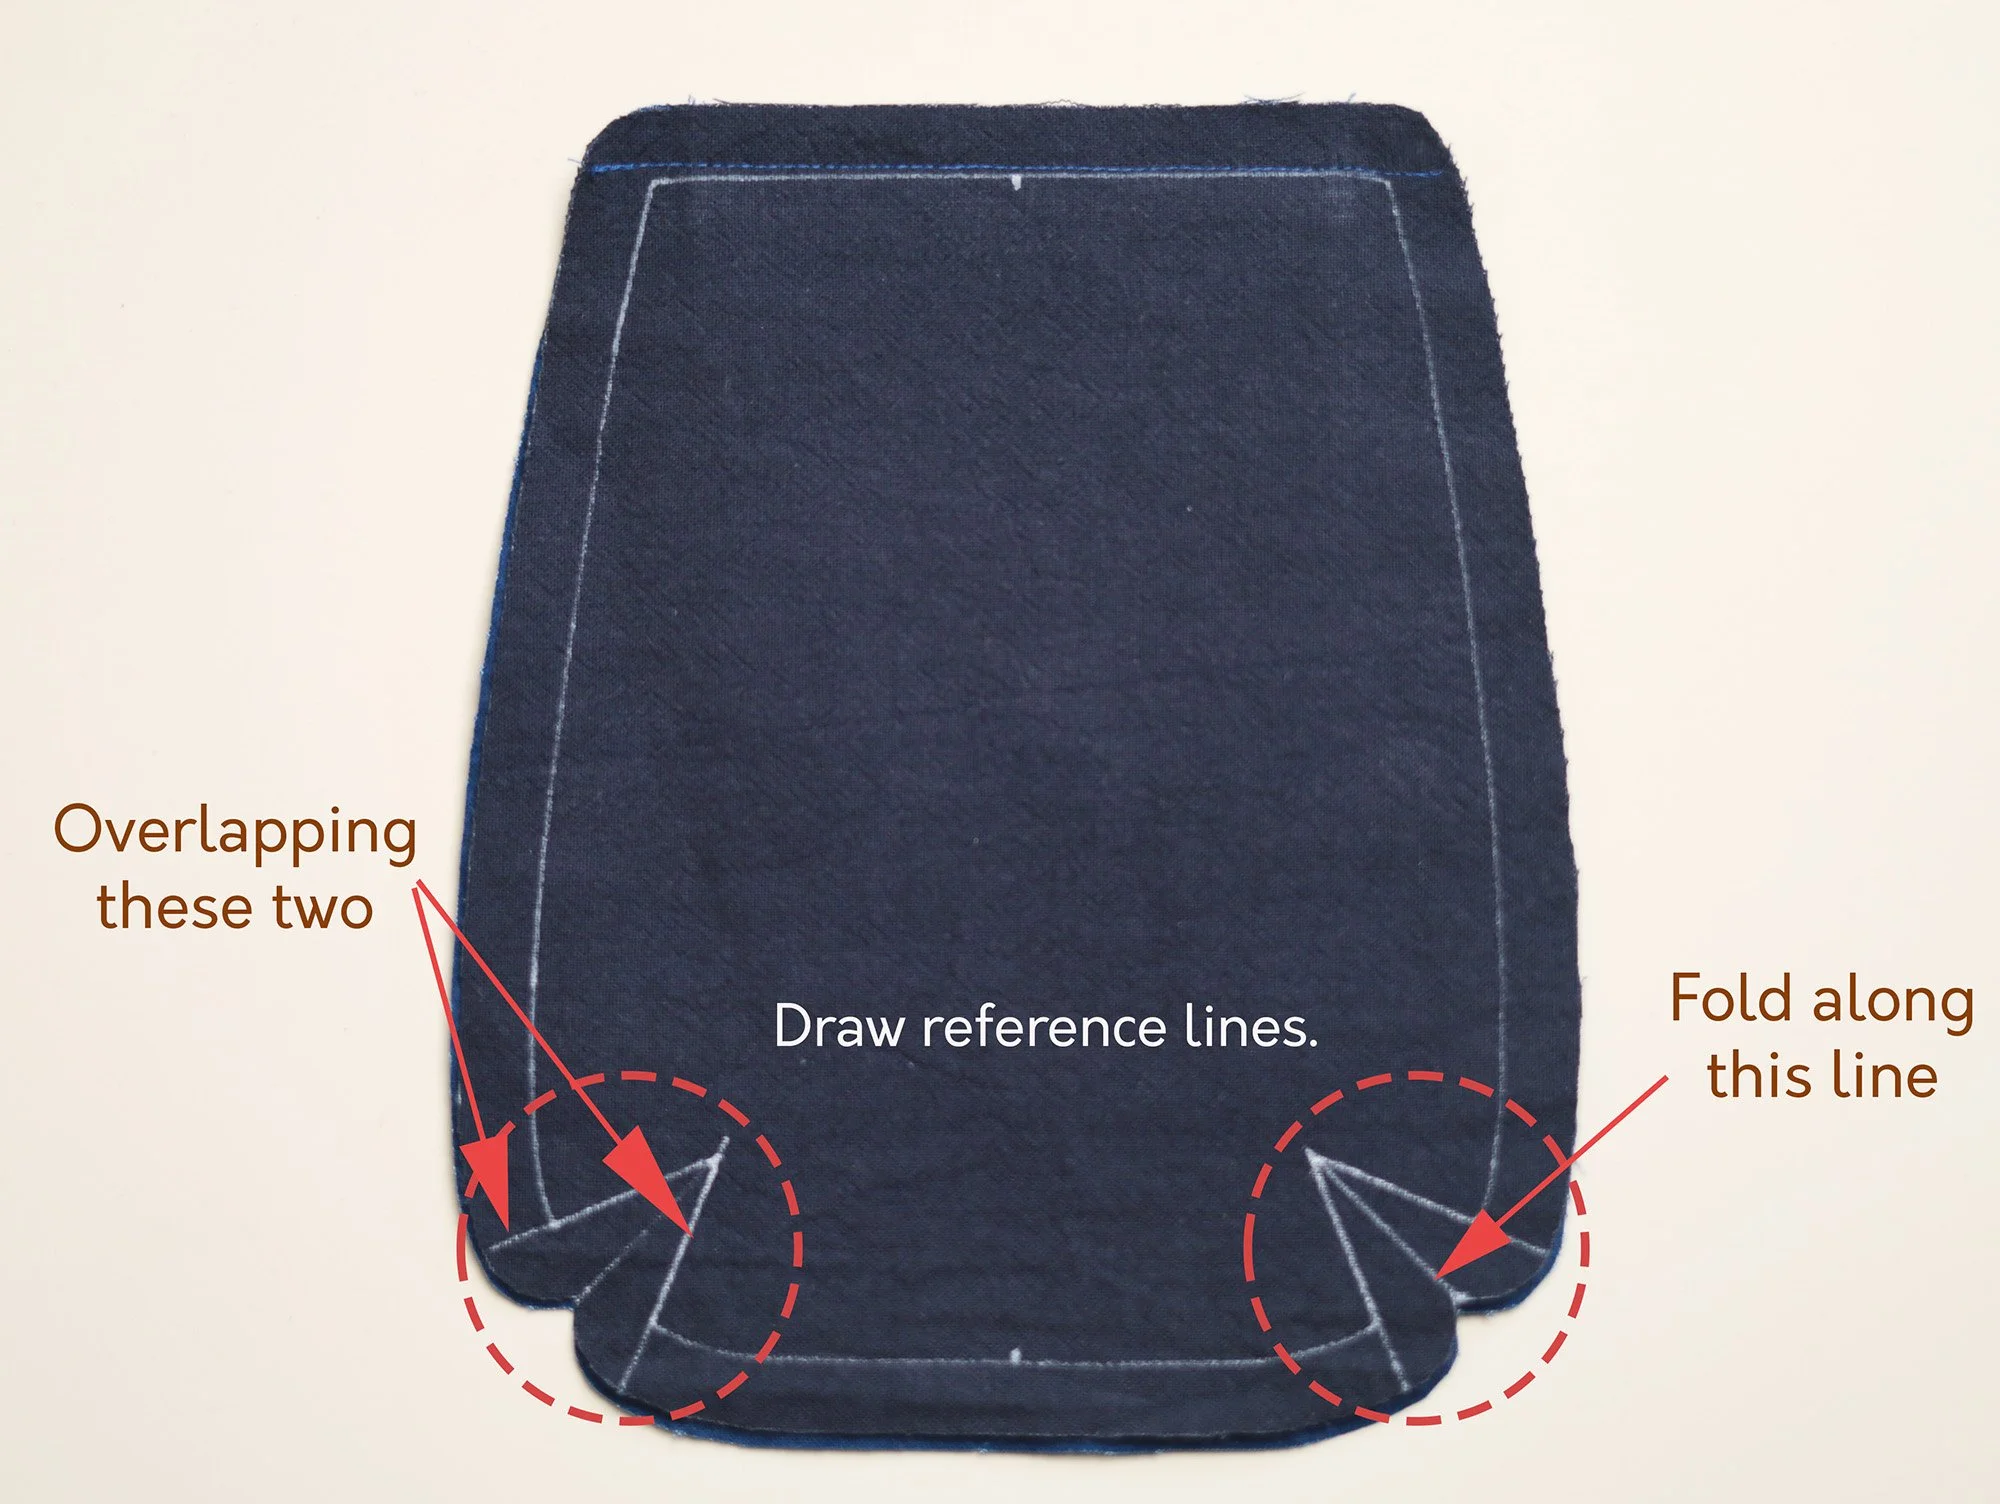
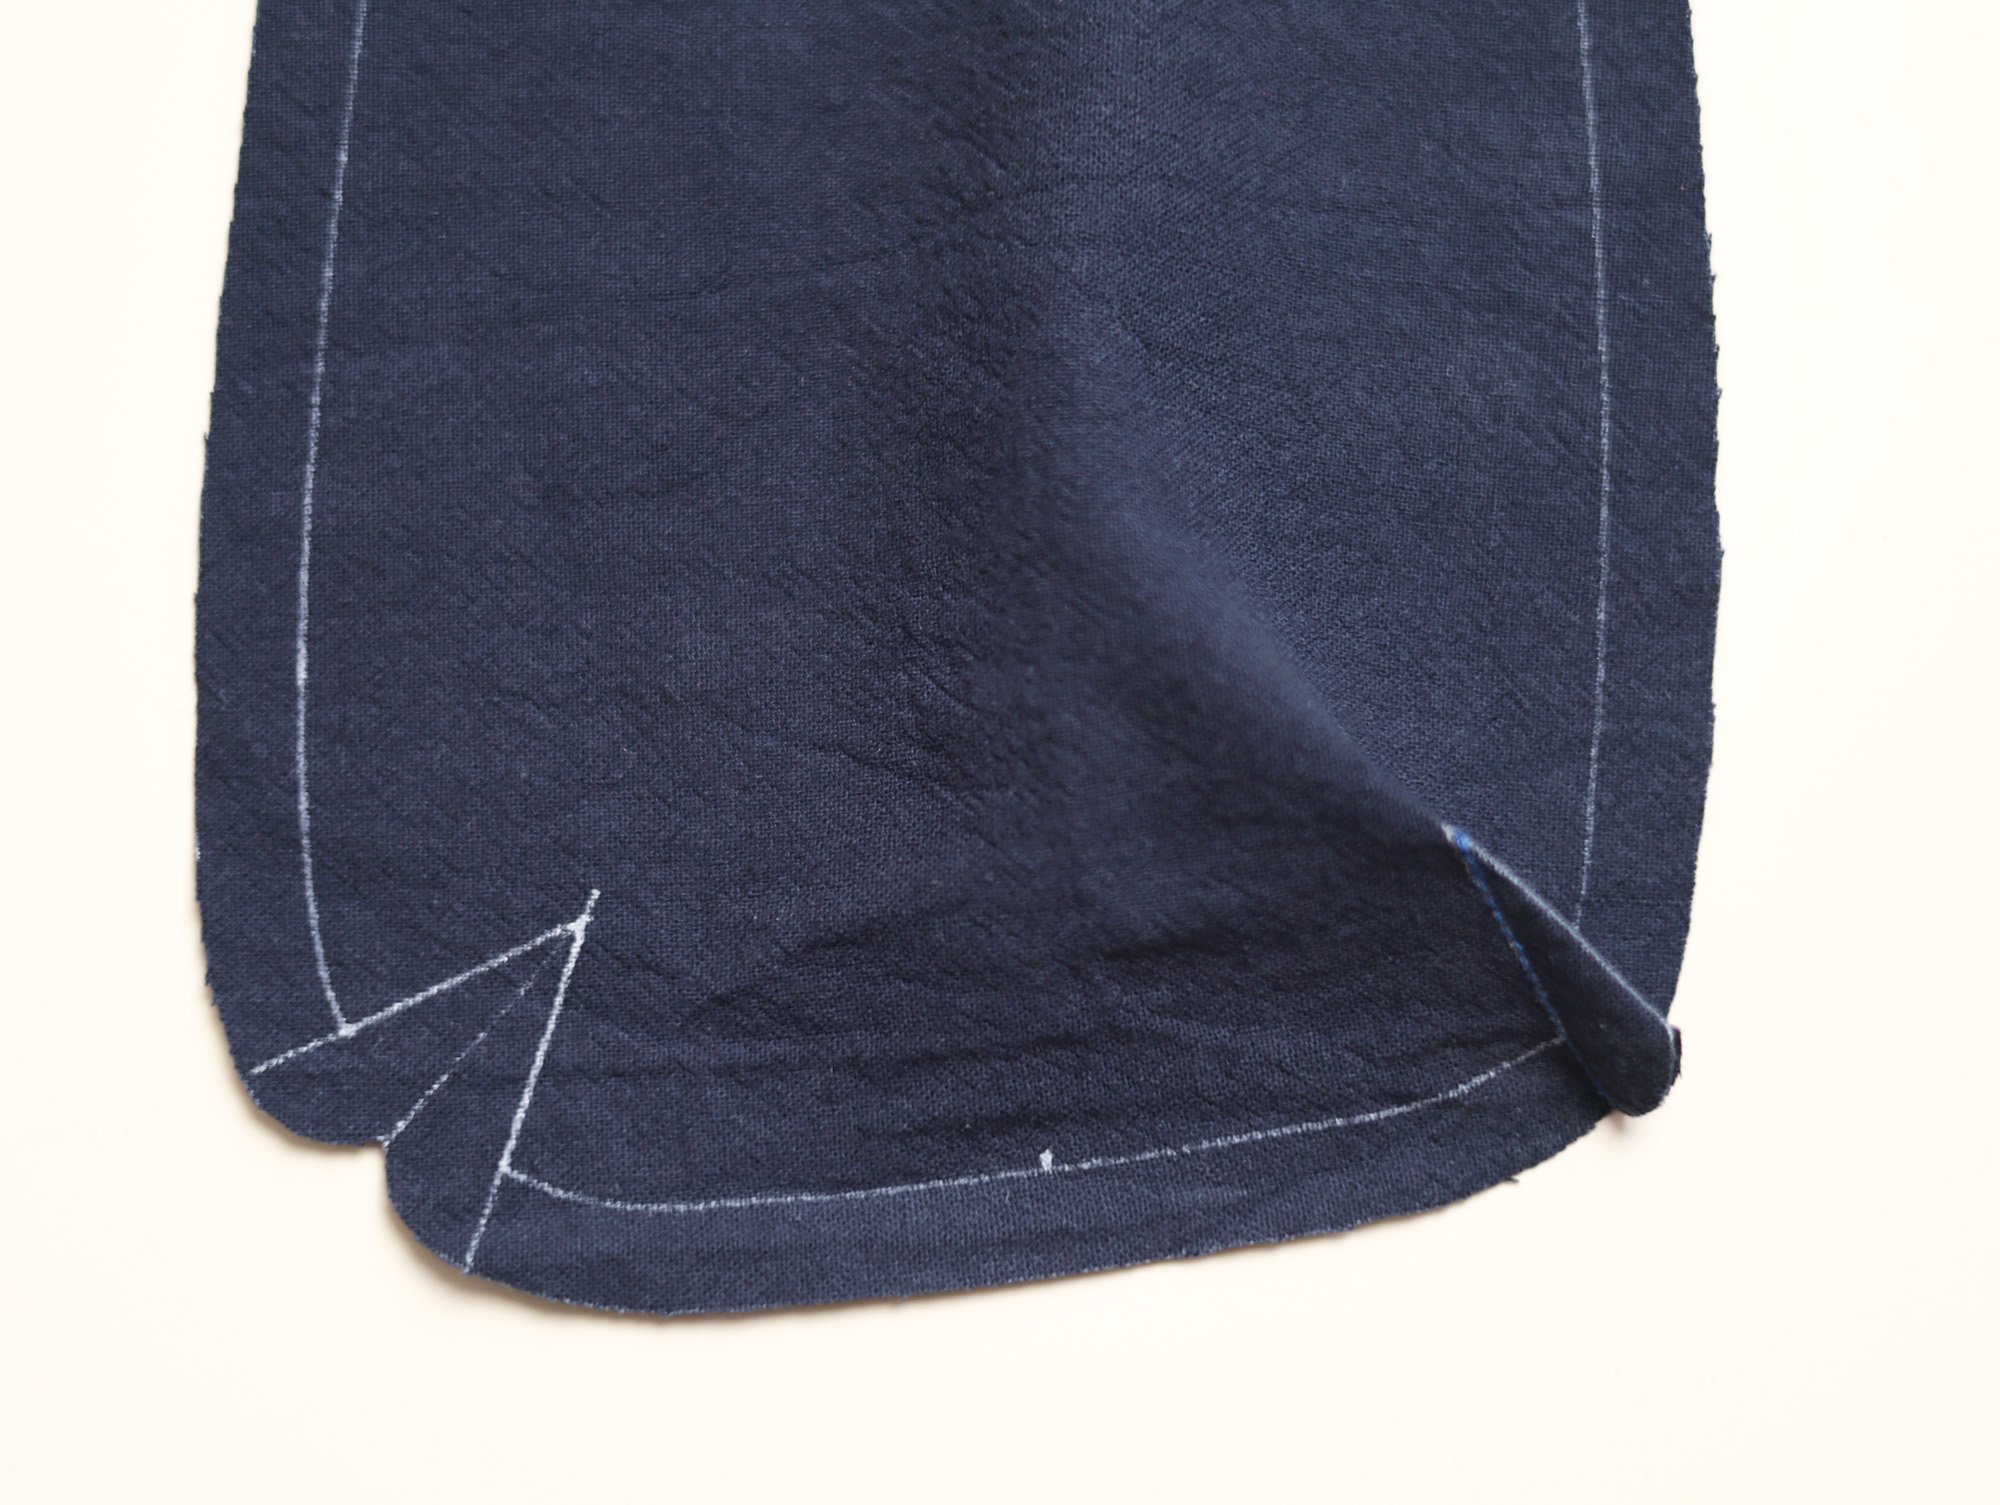
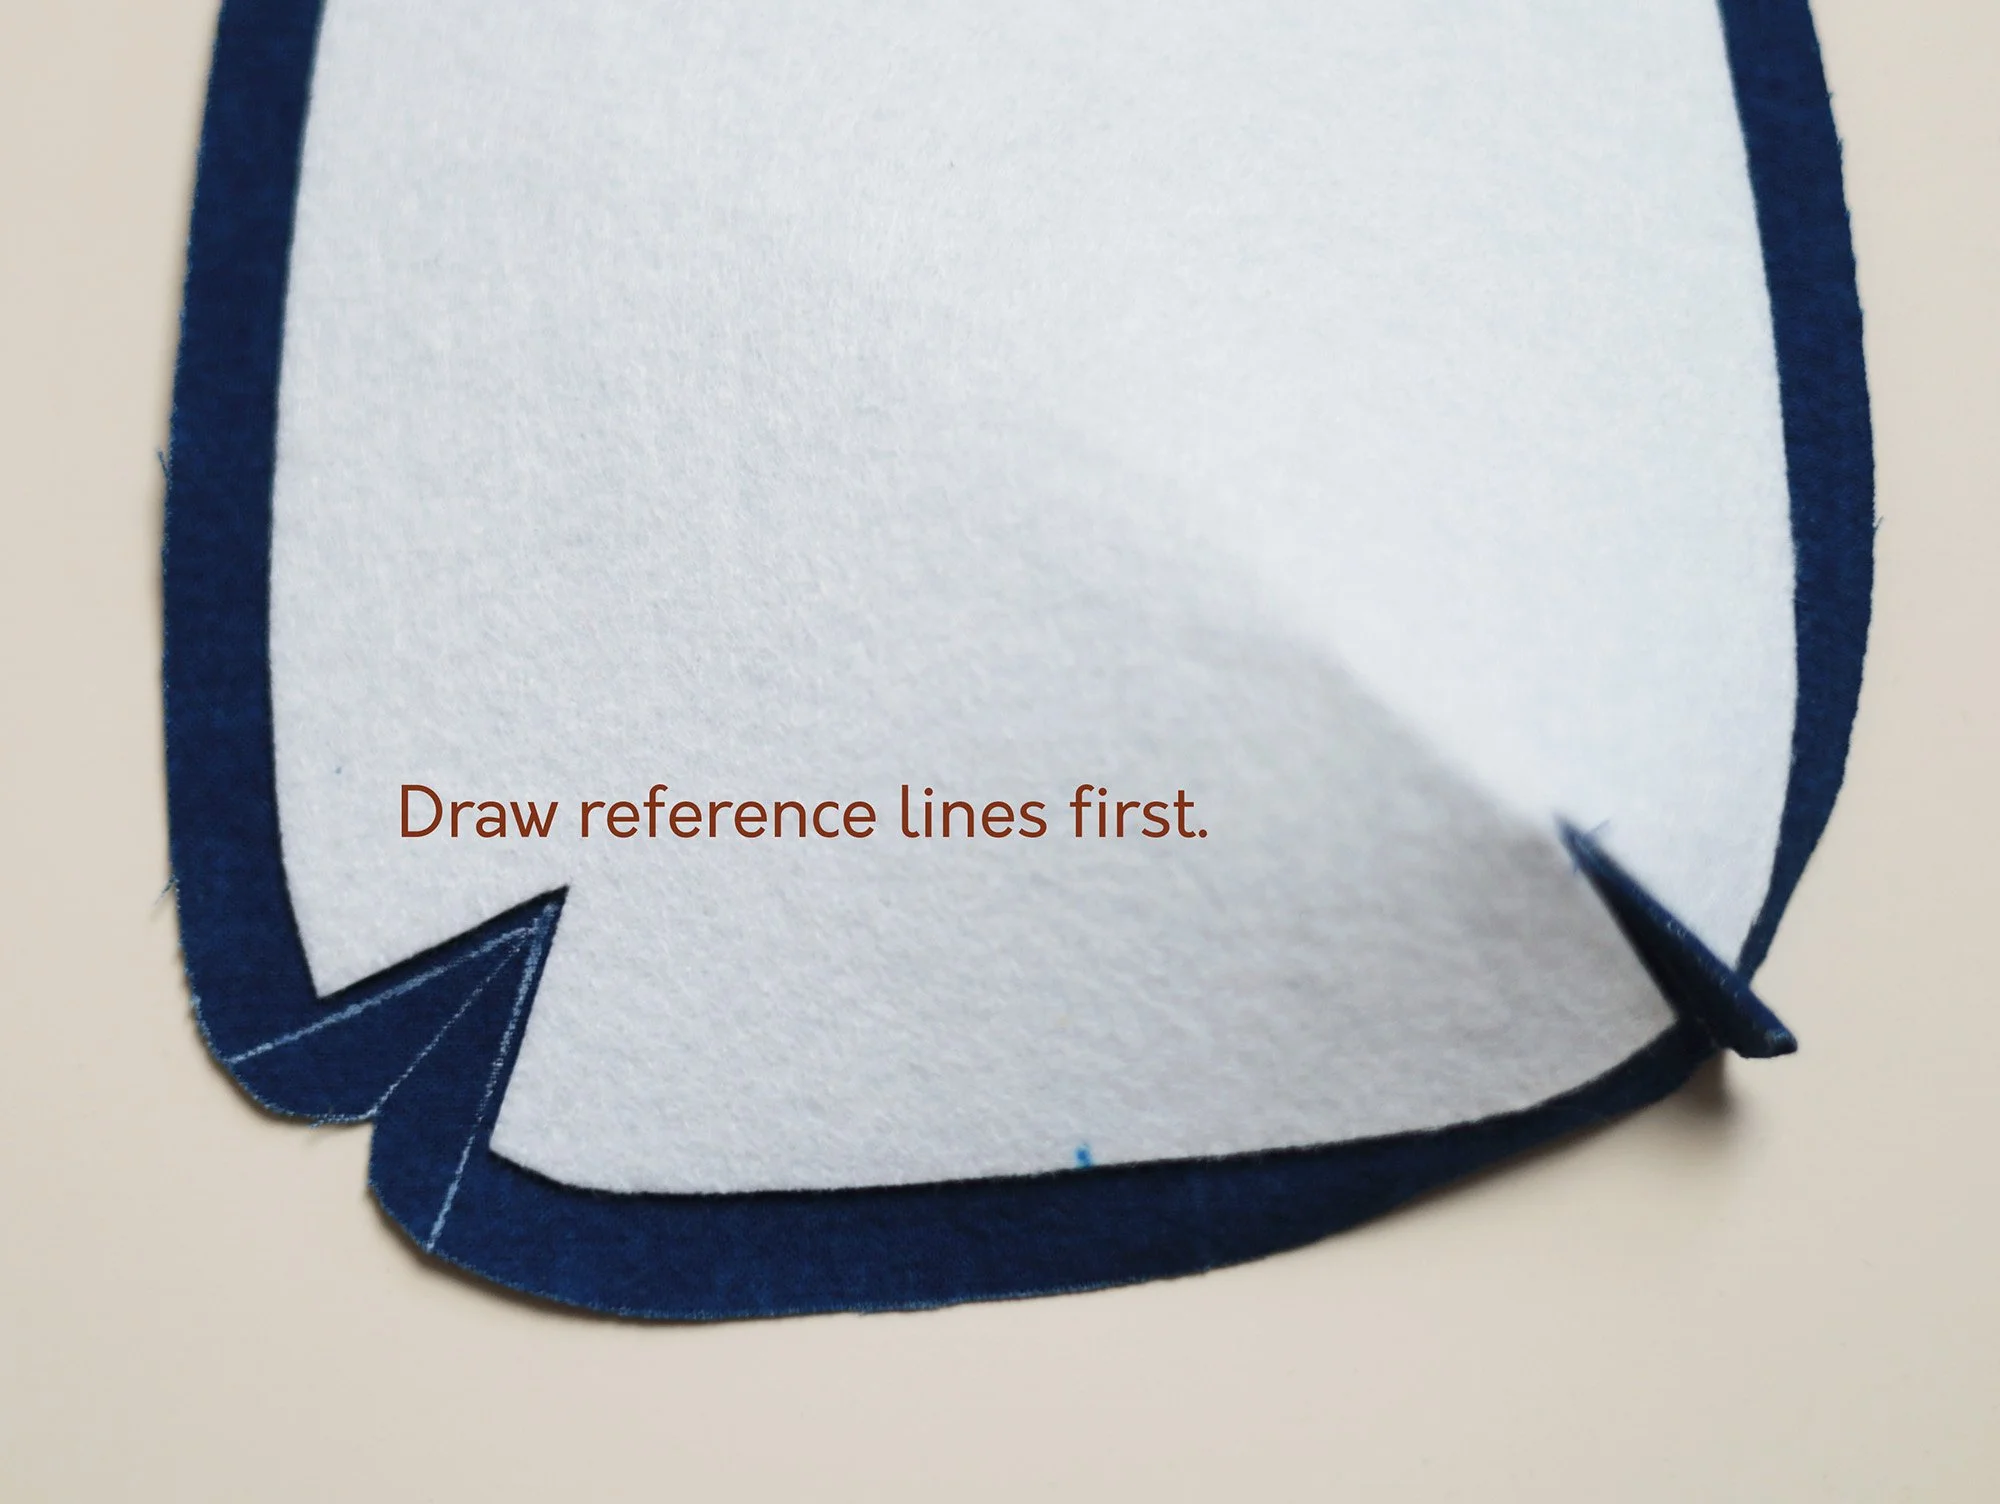
For beginners, draw reference lines before stitching to help guide your sewing, especially around curved corners. This applies to all following steps. No ruler is needed—eyeballing is sufficient.
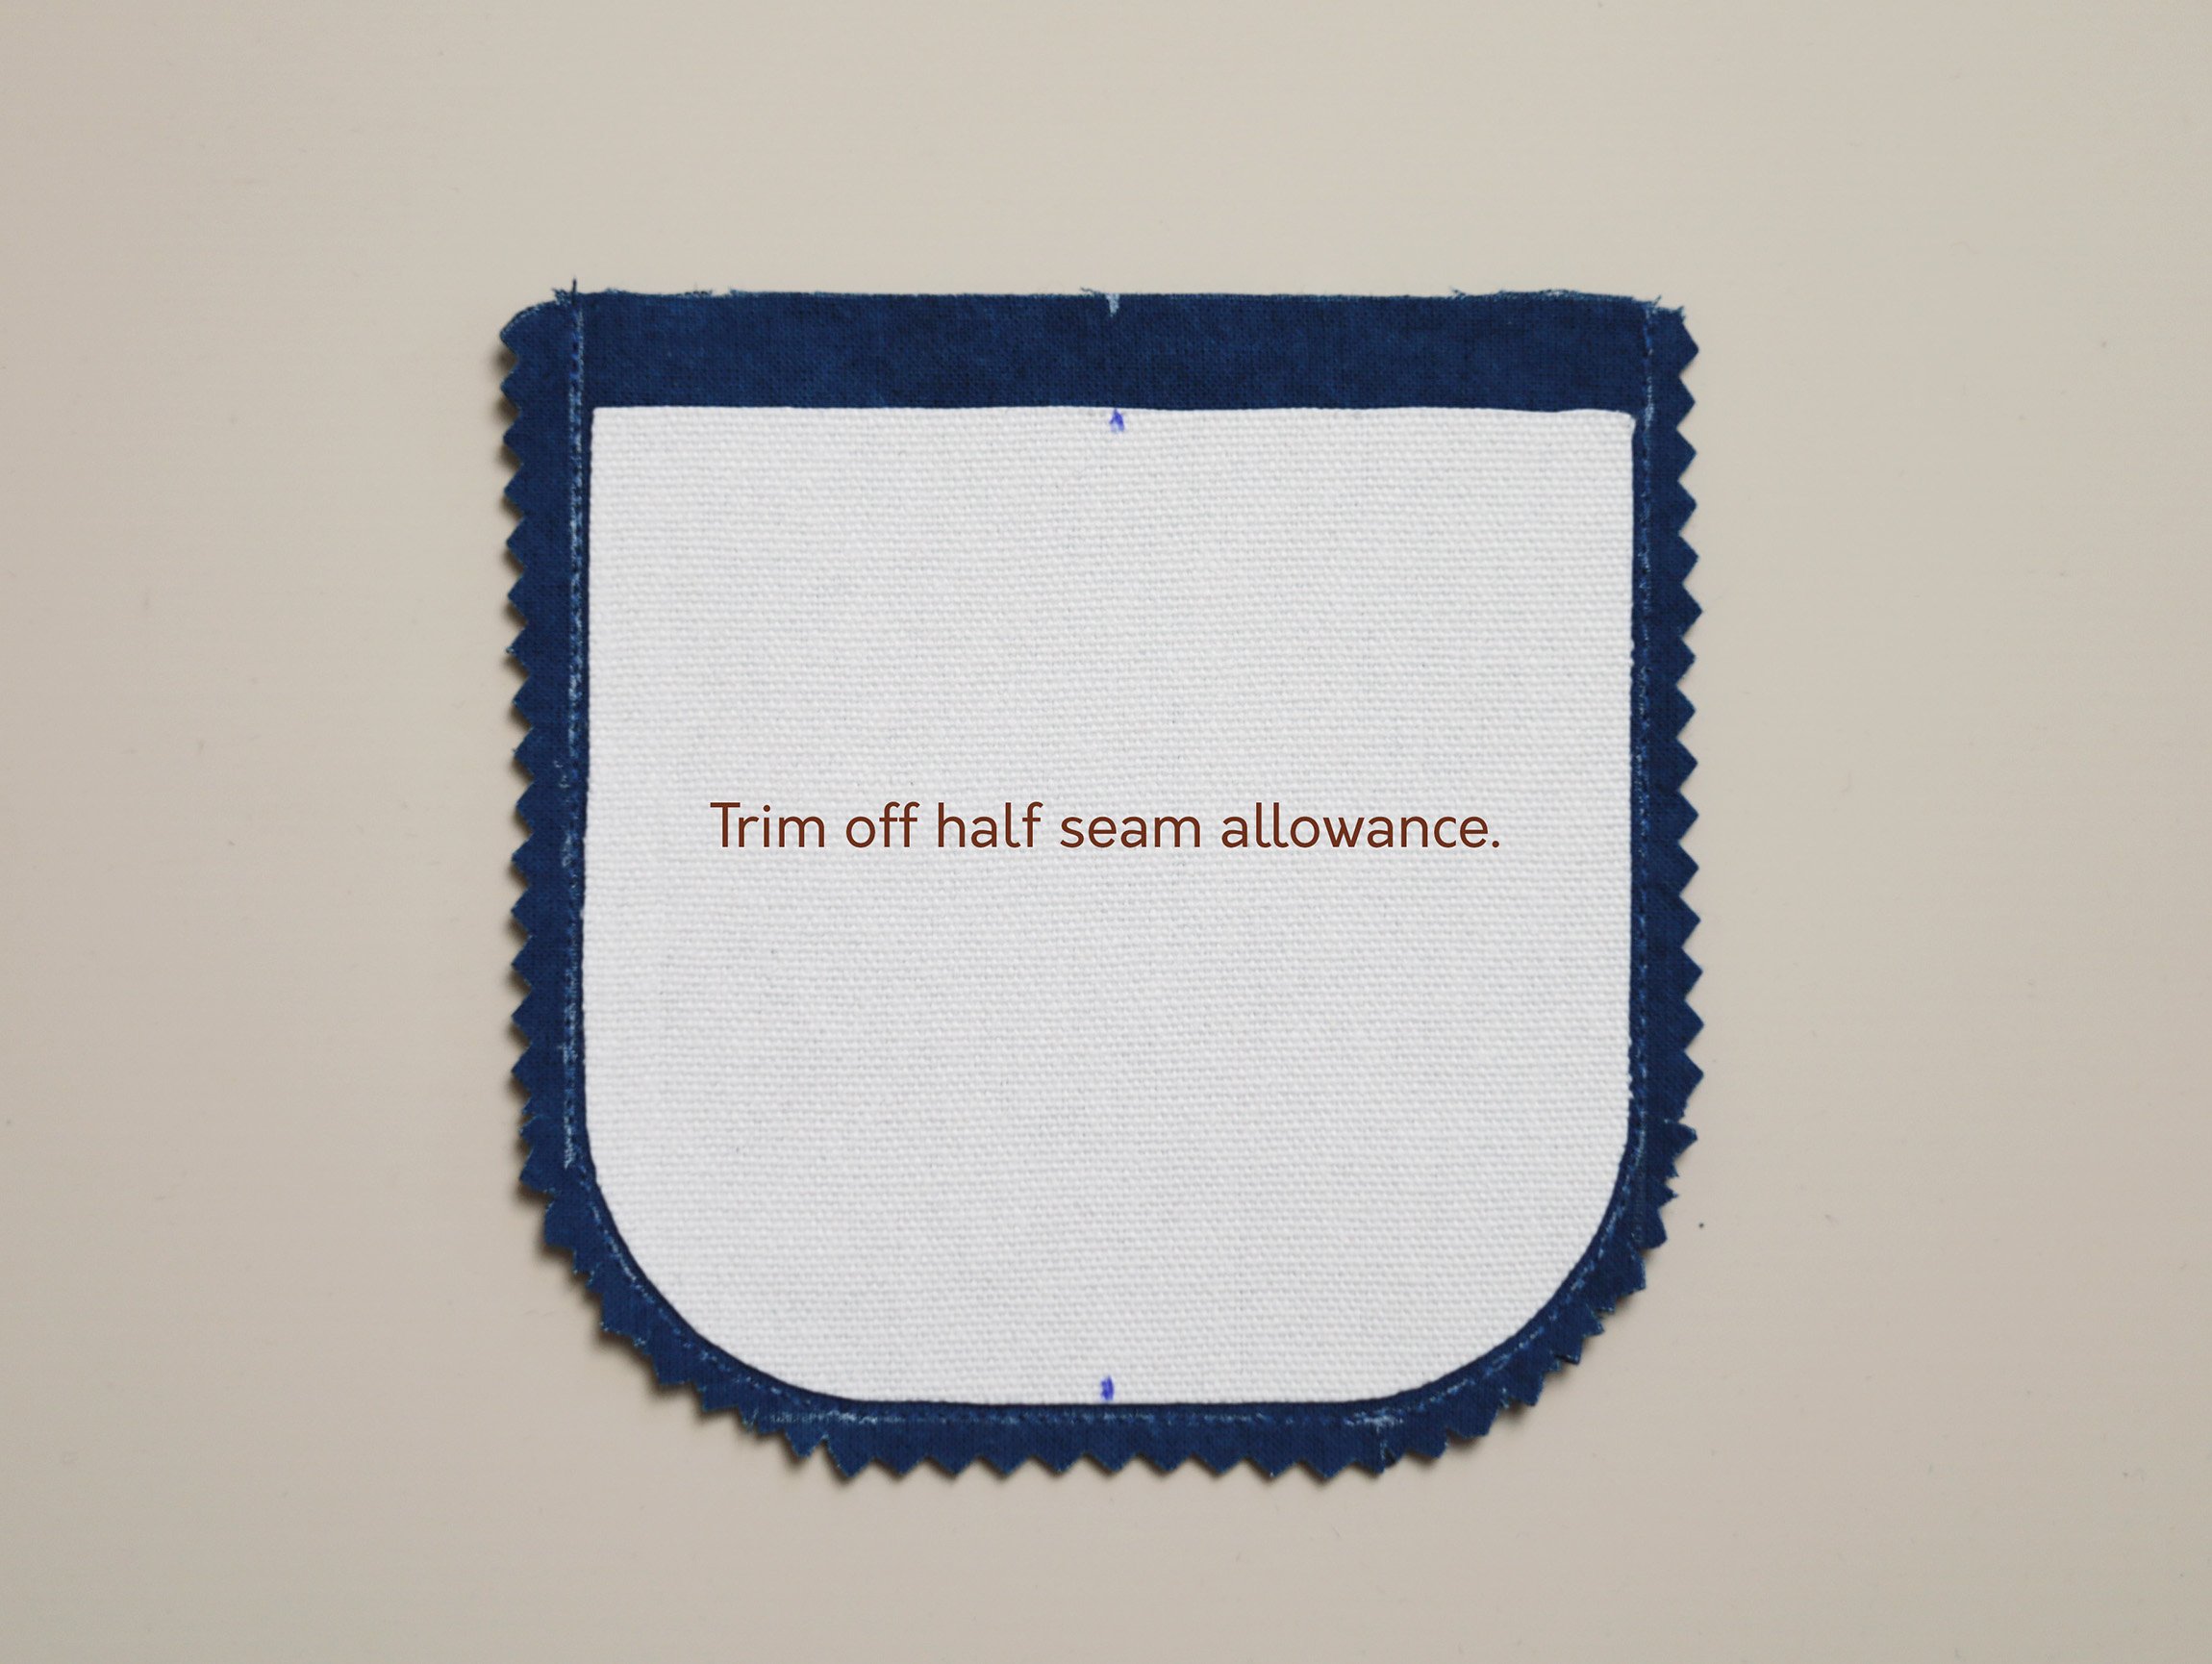
Clip the seam allowance at the corners. Trim away half of the seam allowance using pinking shears or regular fabric scissors.
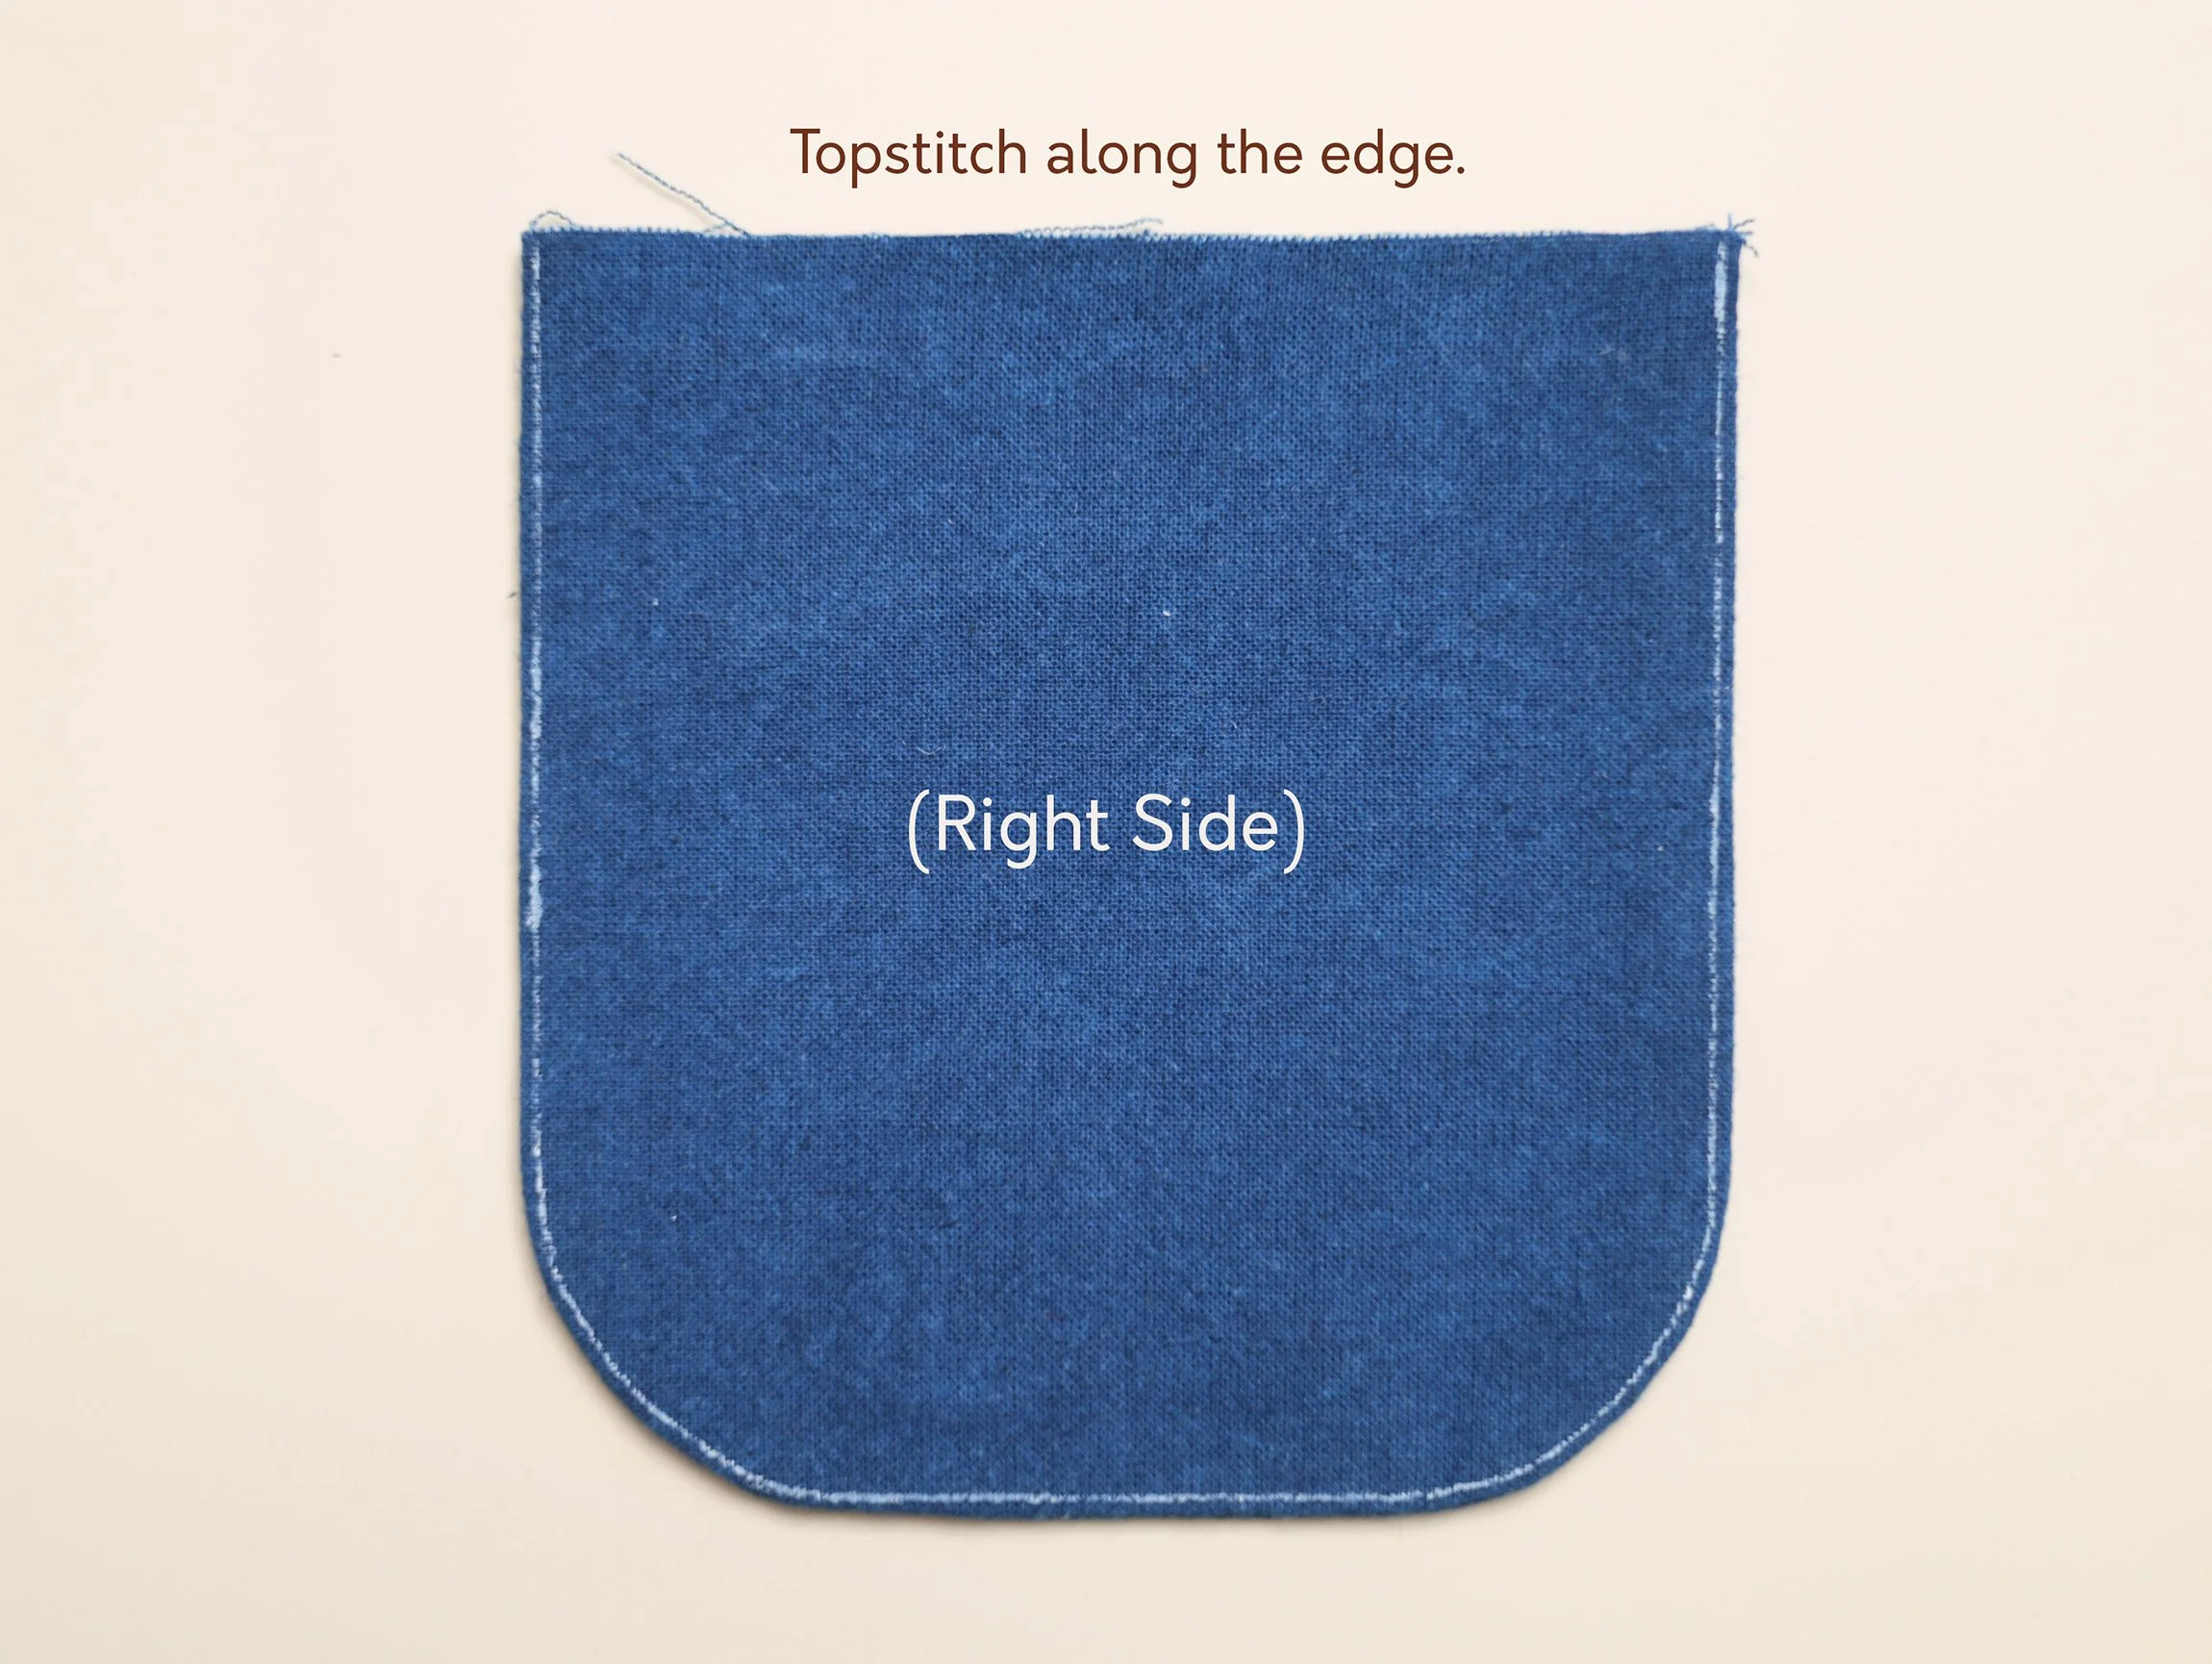
Turn to the right side, shape neatly, and press flat. Draw reference line (optional, recommended for beginners) 1~2mm from the edge with a heat-erasable (or other) fabric marker, and stitch.
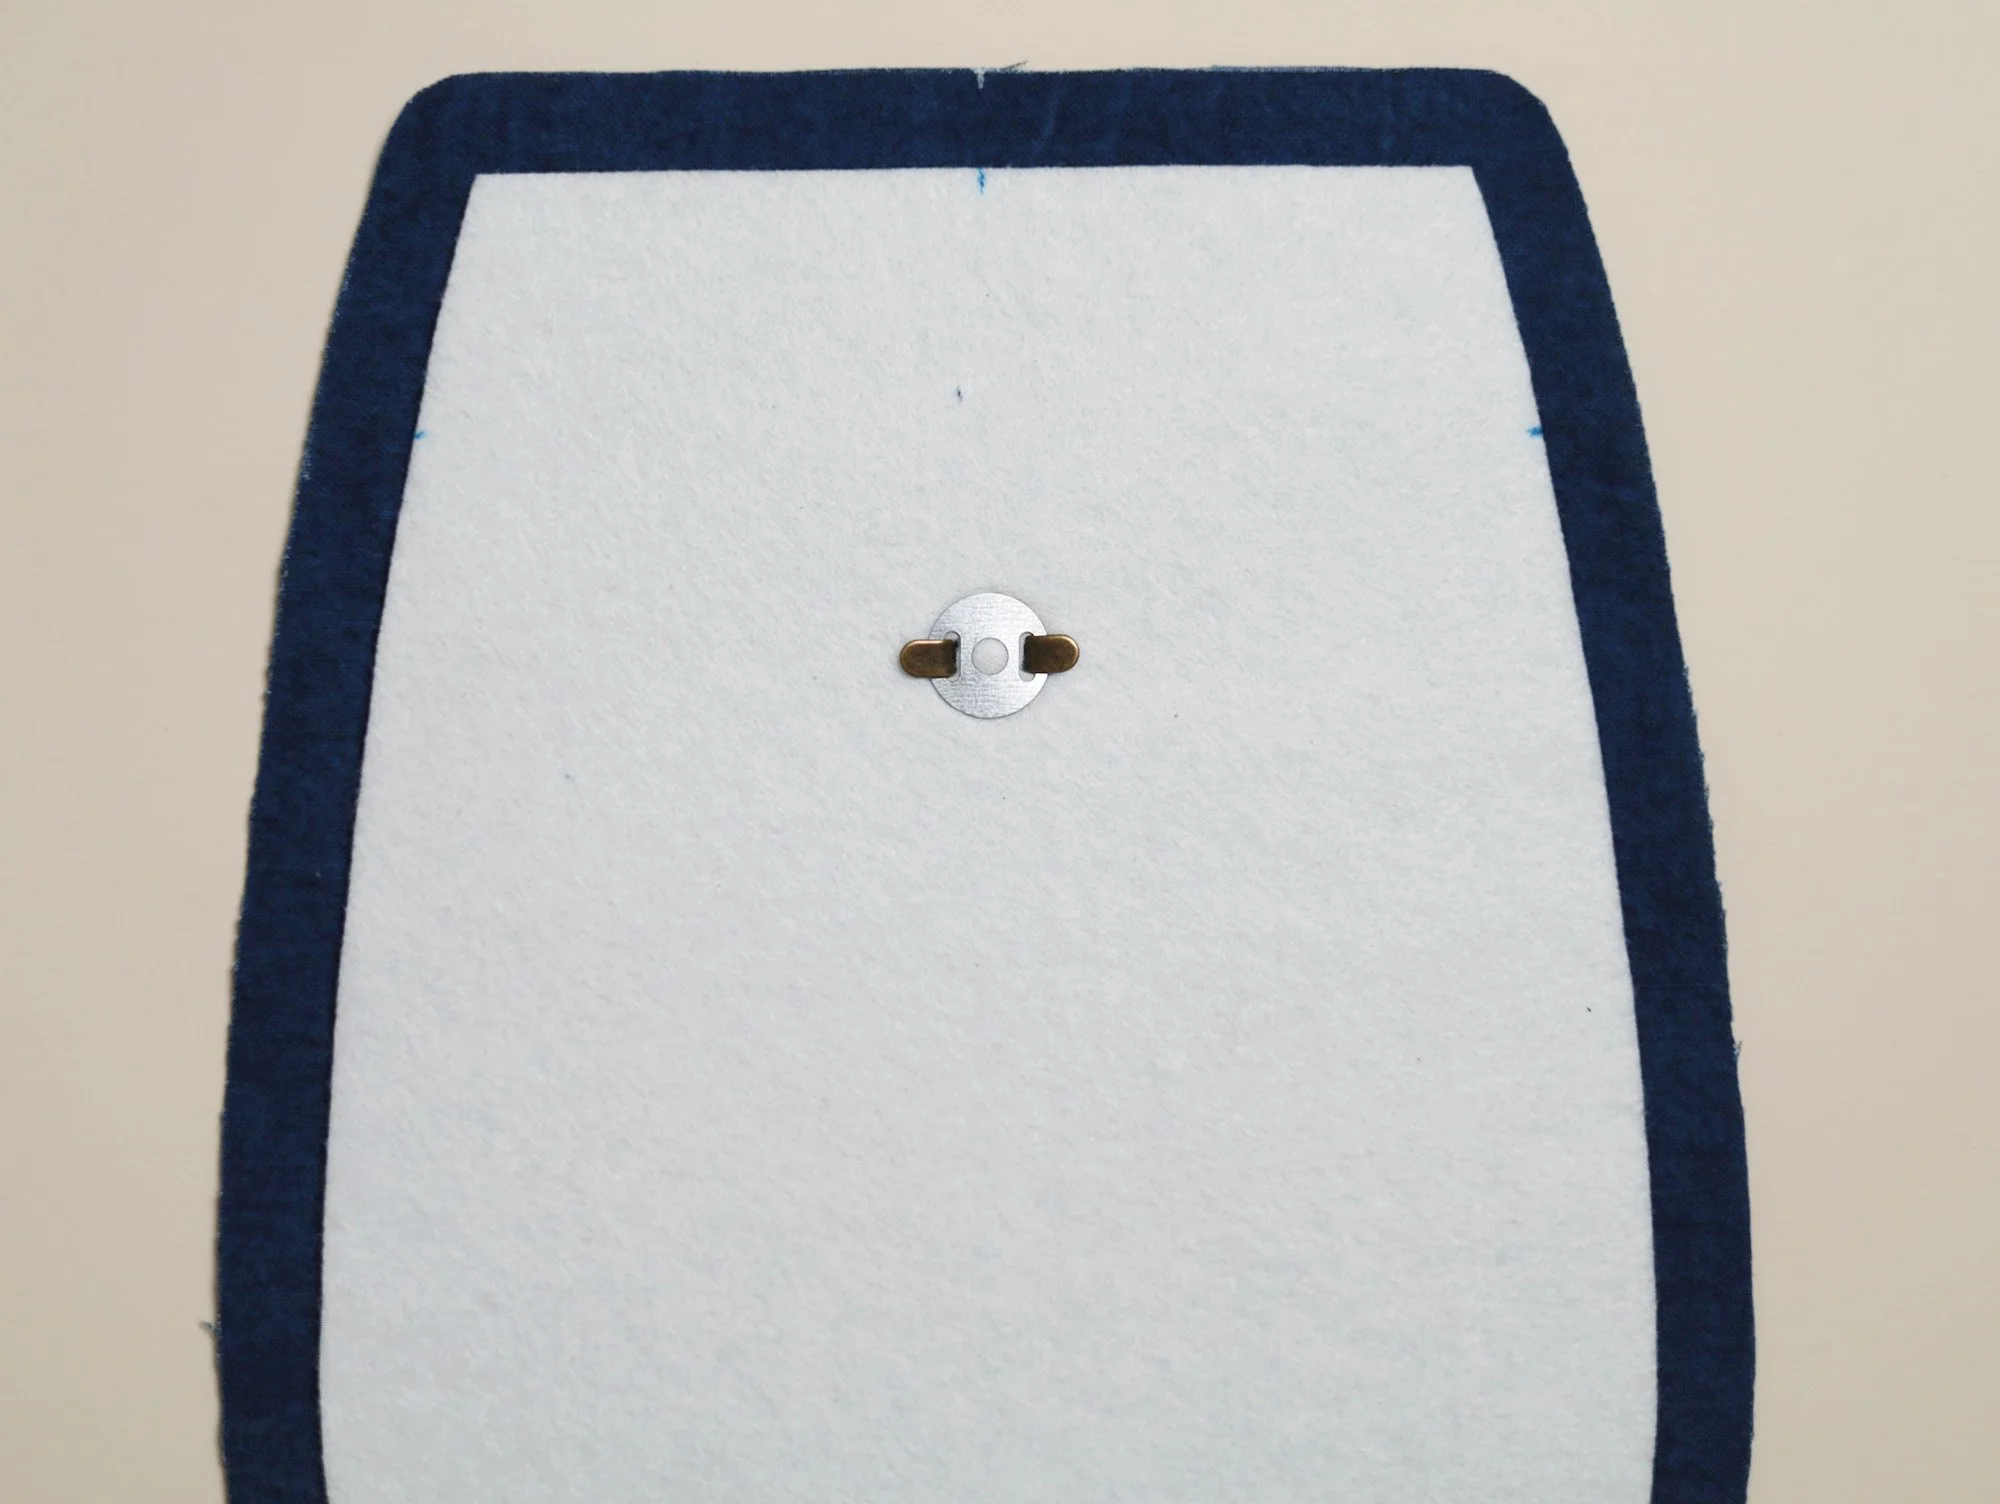
Using a heat-erasable (or other) fabric marker, mark the position of the snap button on the wrong side of the flap according to the pattern. Place a washer with its centre aligned to the mark, then mark the two slit positions of the washer on the fabric. Poke through the slits on the wrong side (lining fabric and its interfacing only) of the bag flap using a seam ripper or small scissors.
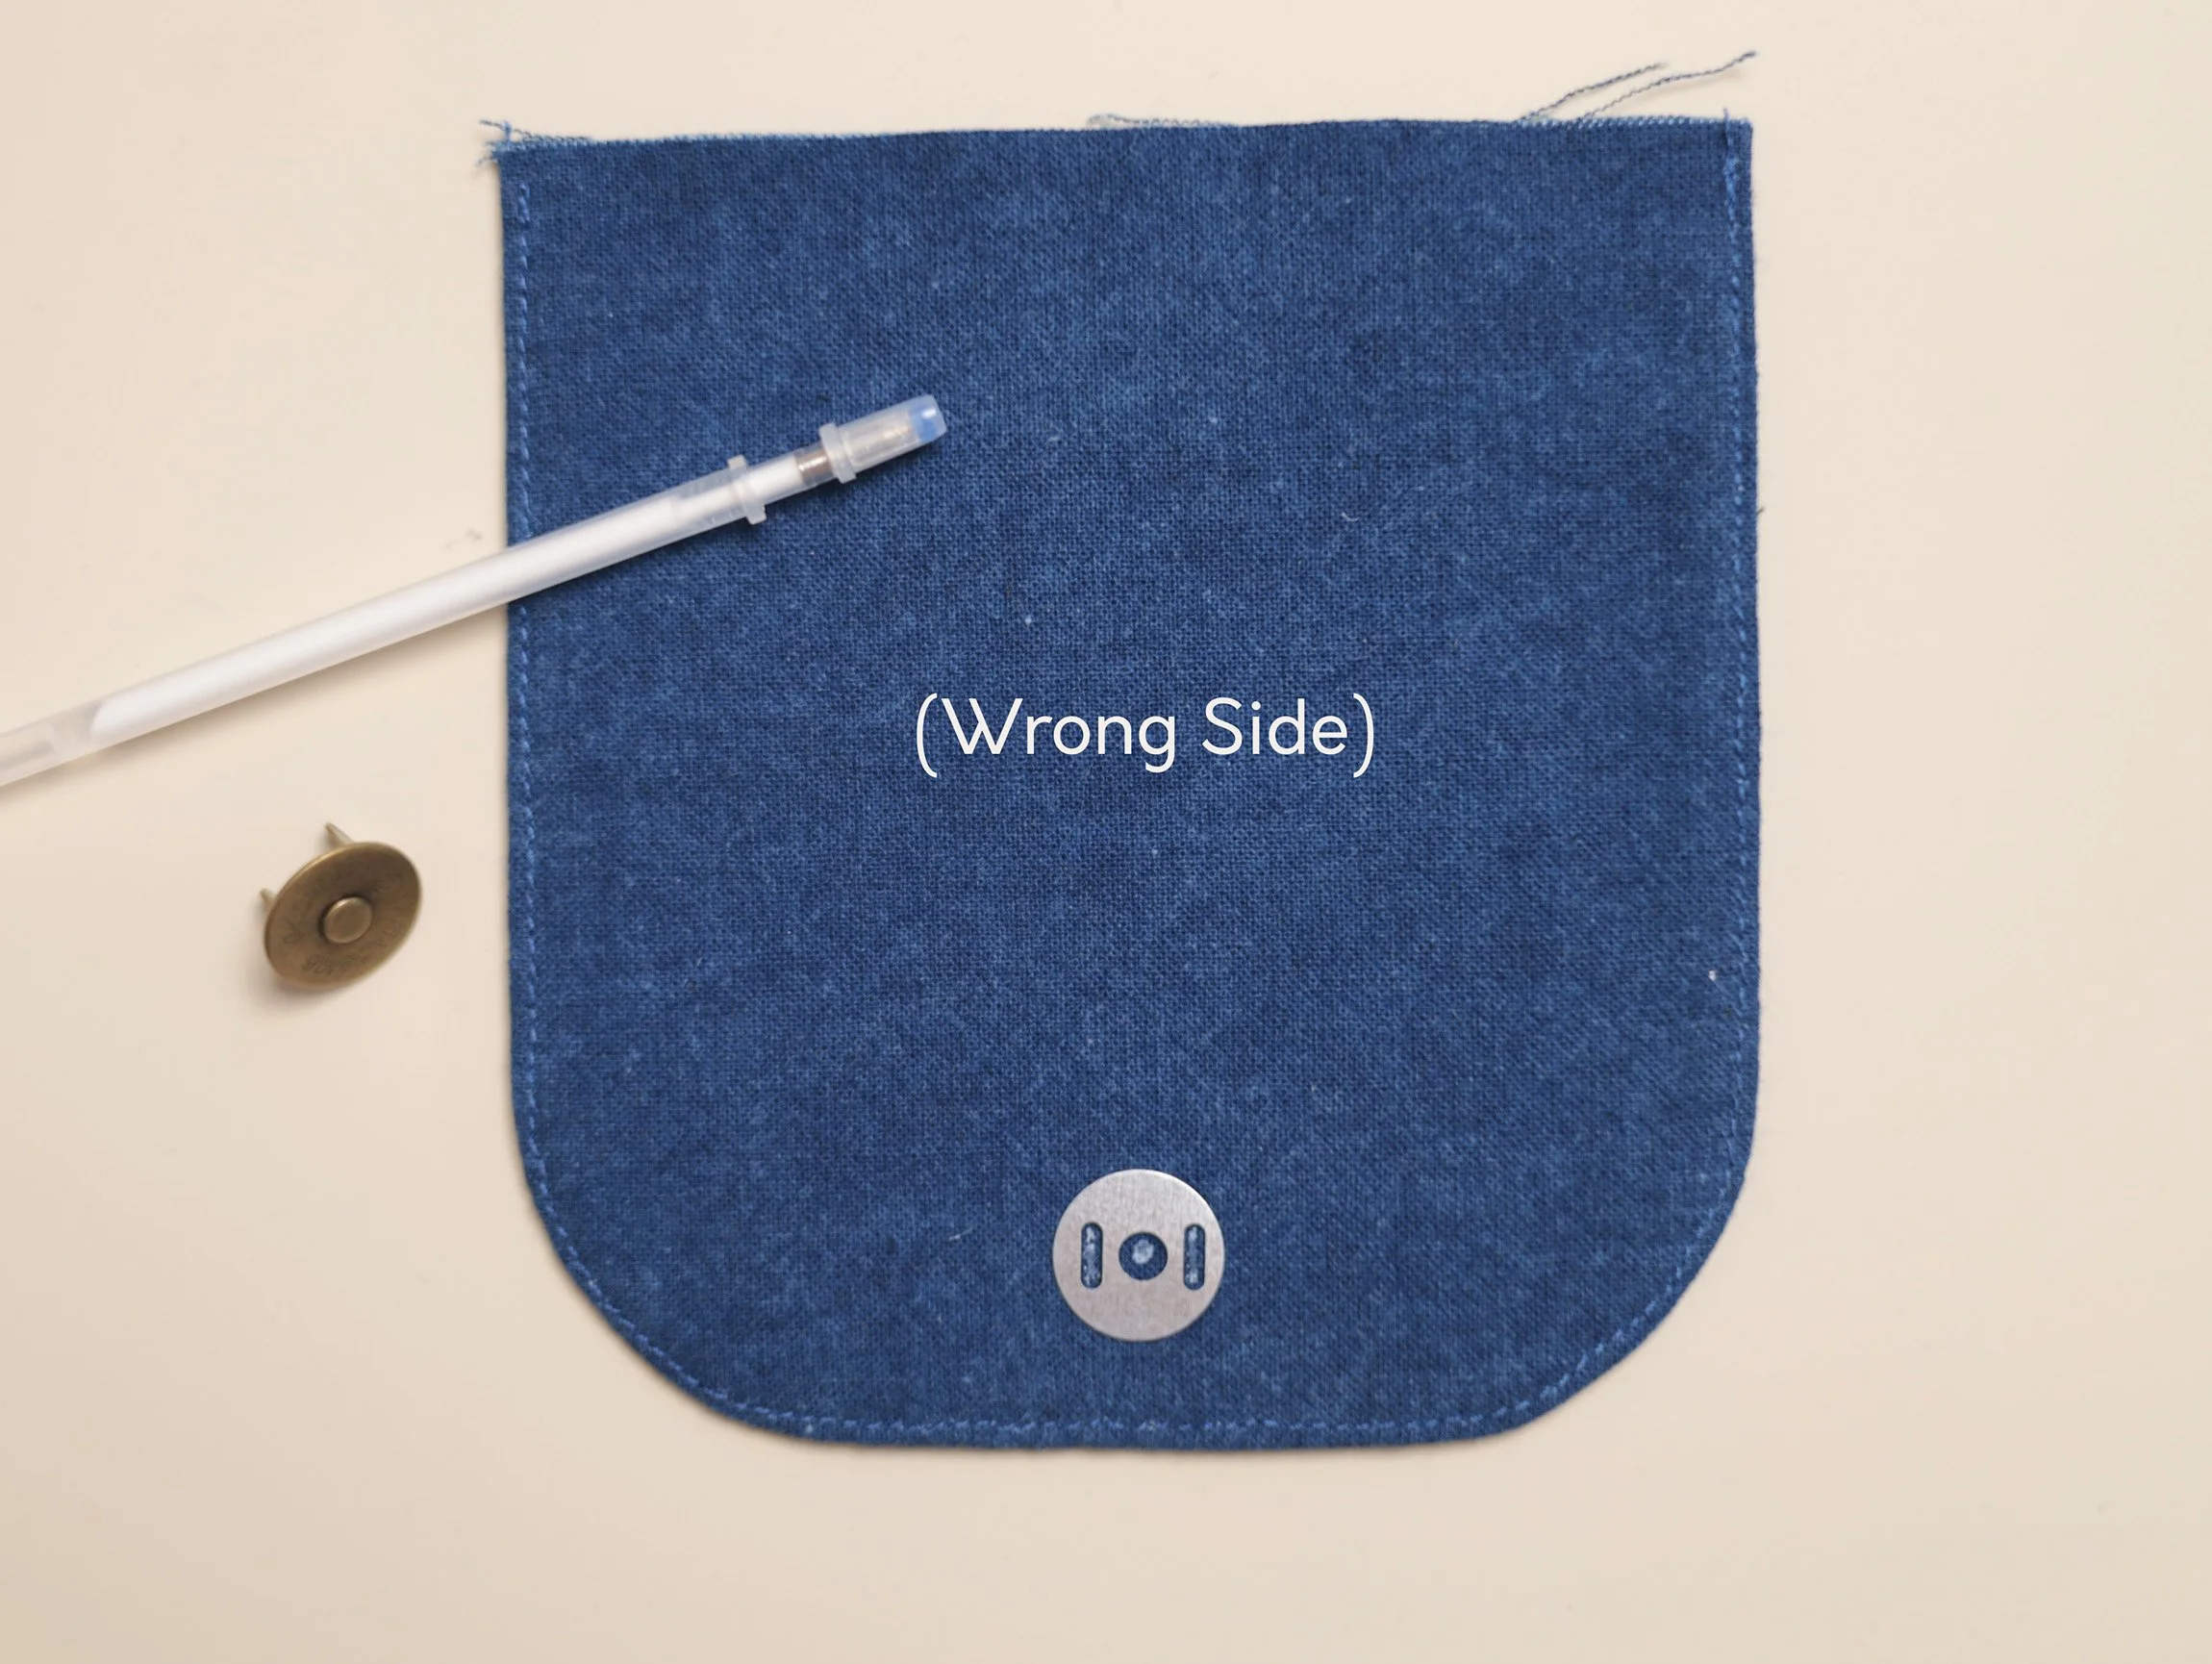
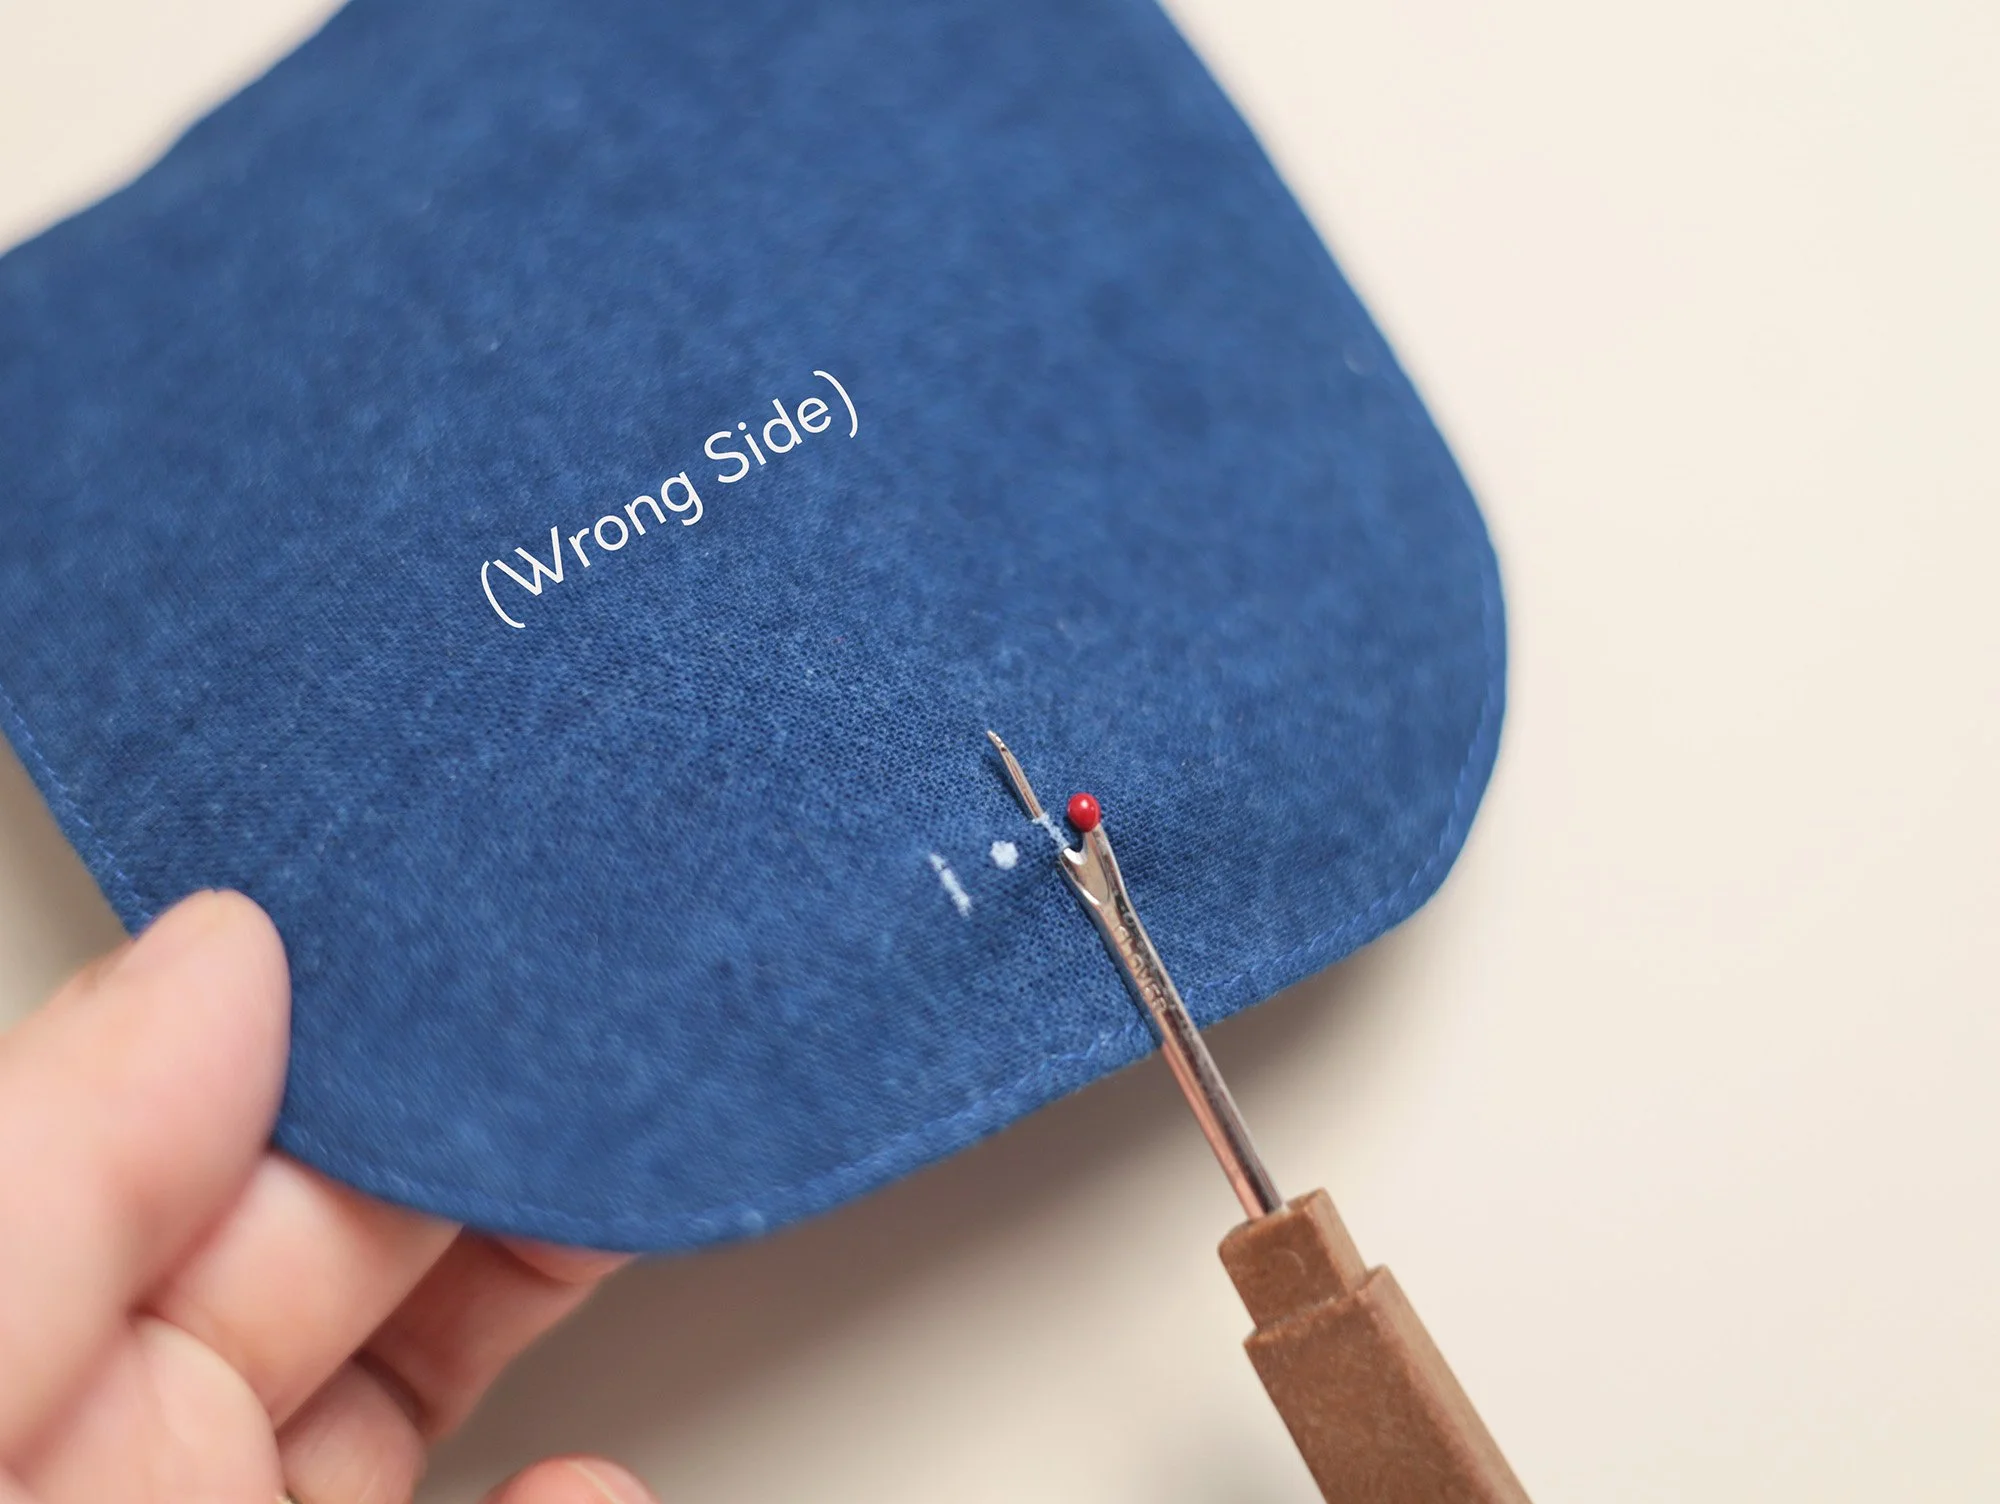
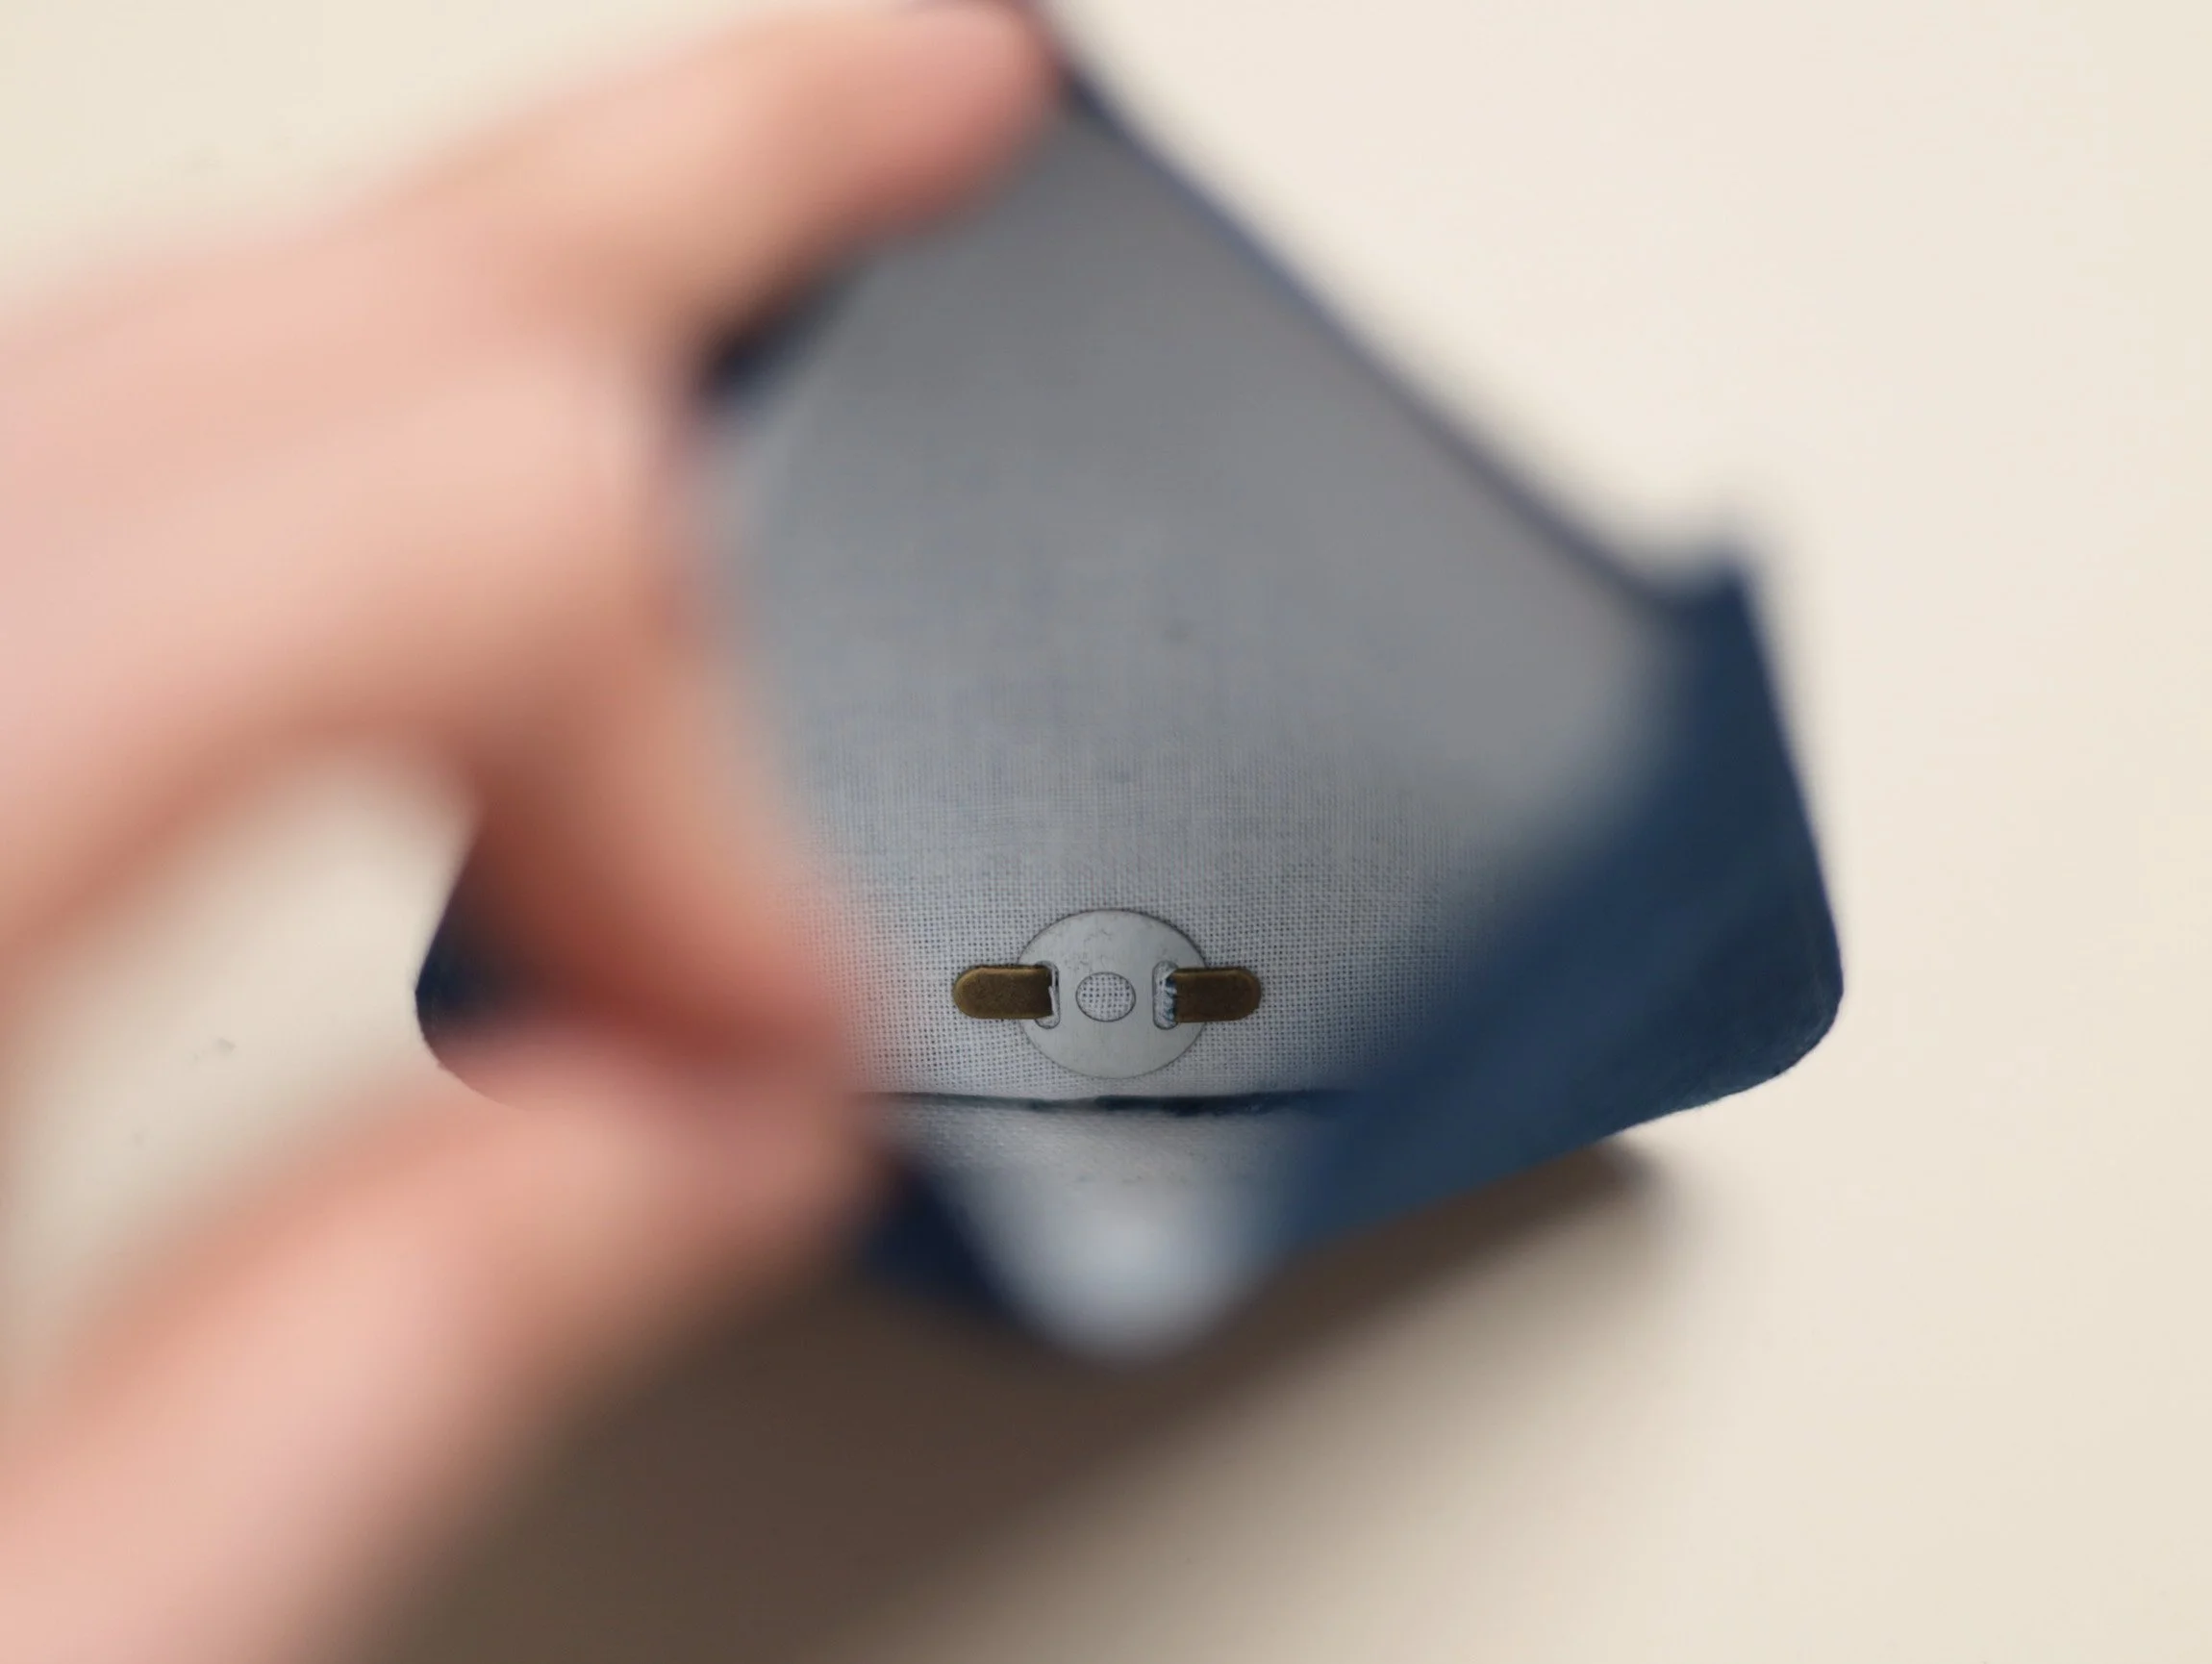
Insert the legs of the male snap through the slits from the outside, place the washer on the wrong side, and bend the legs outward to secure.
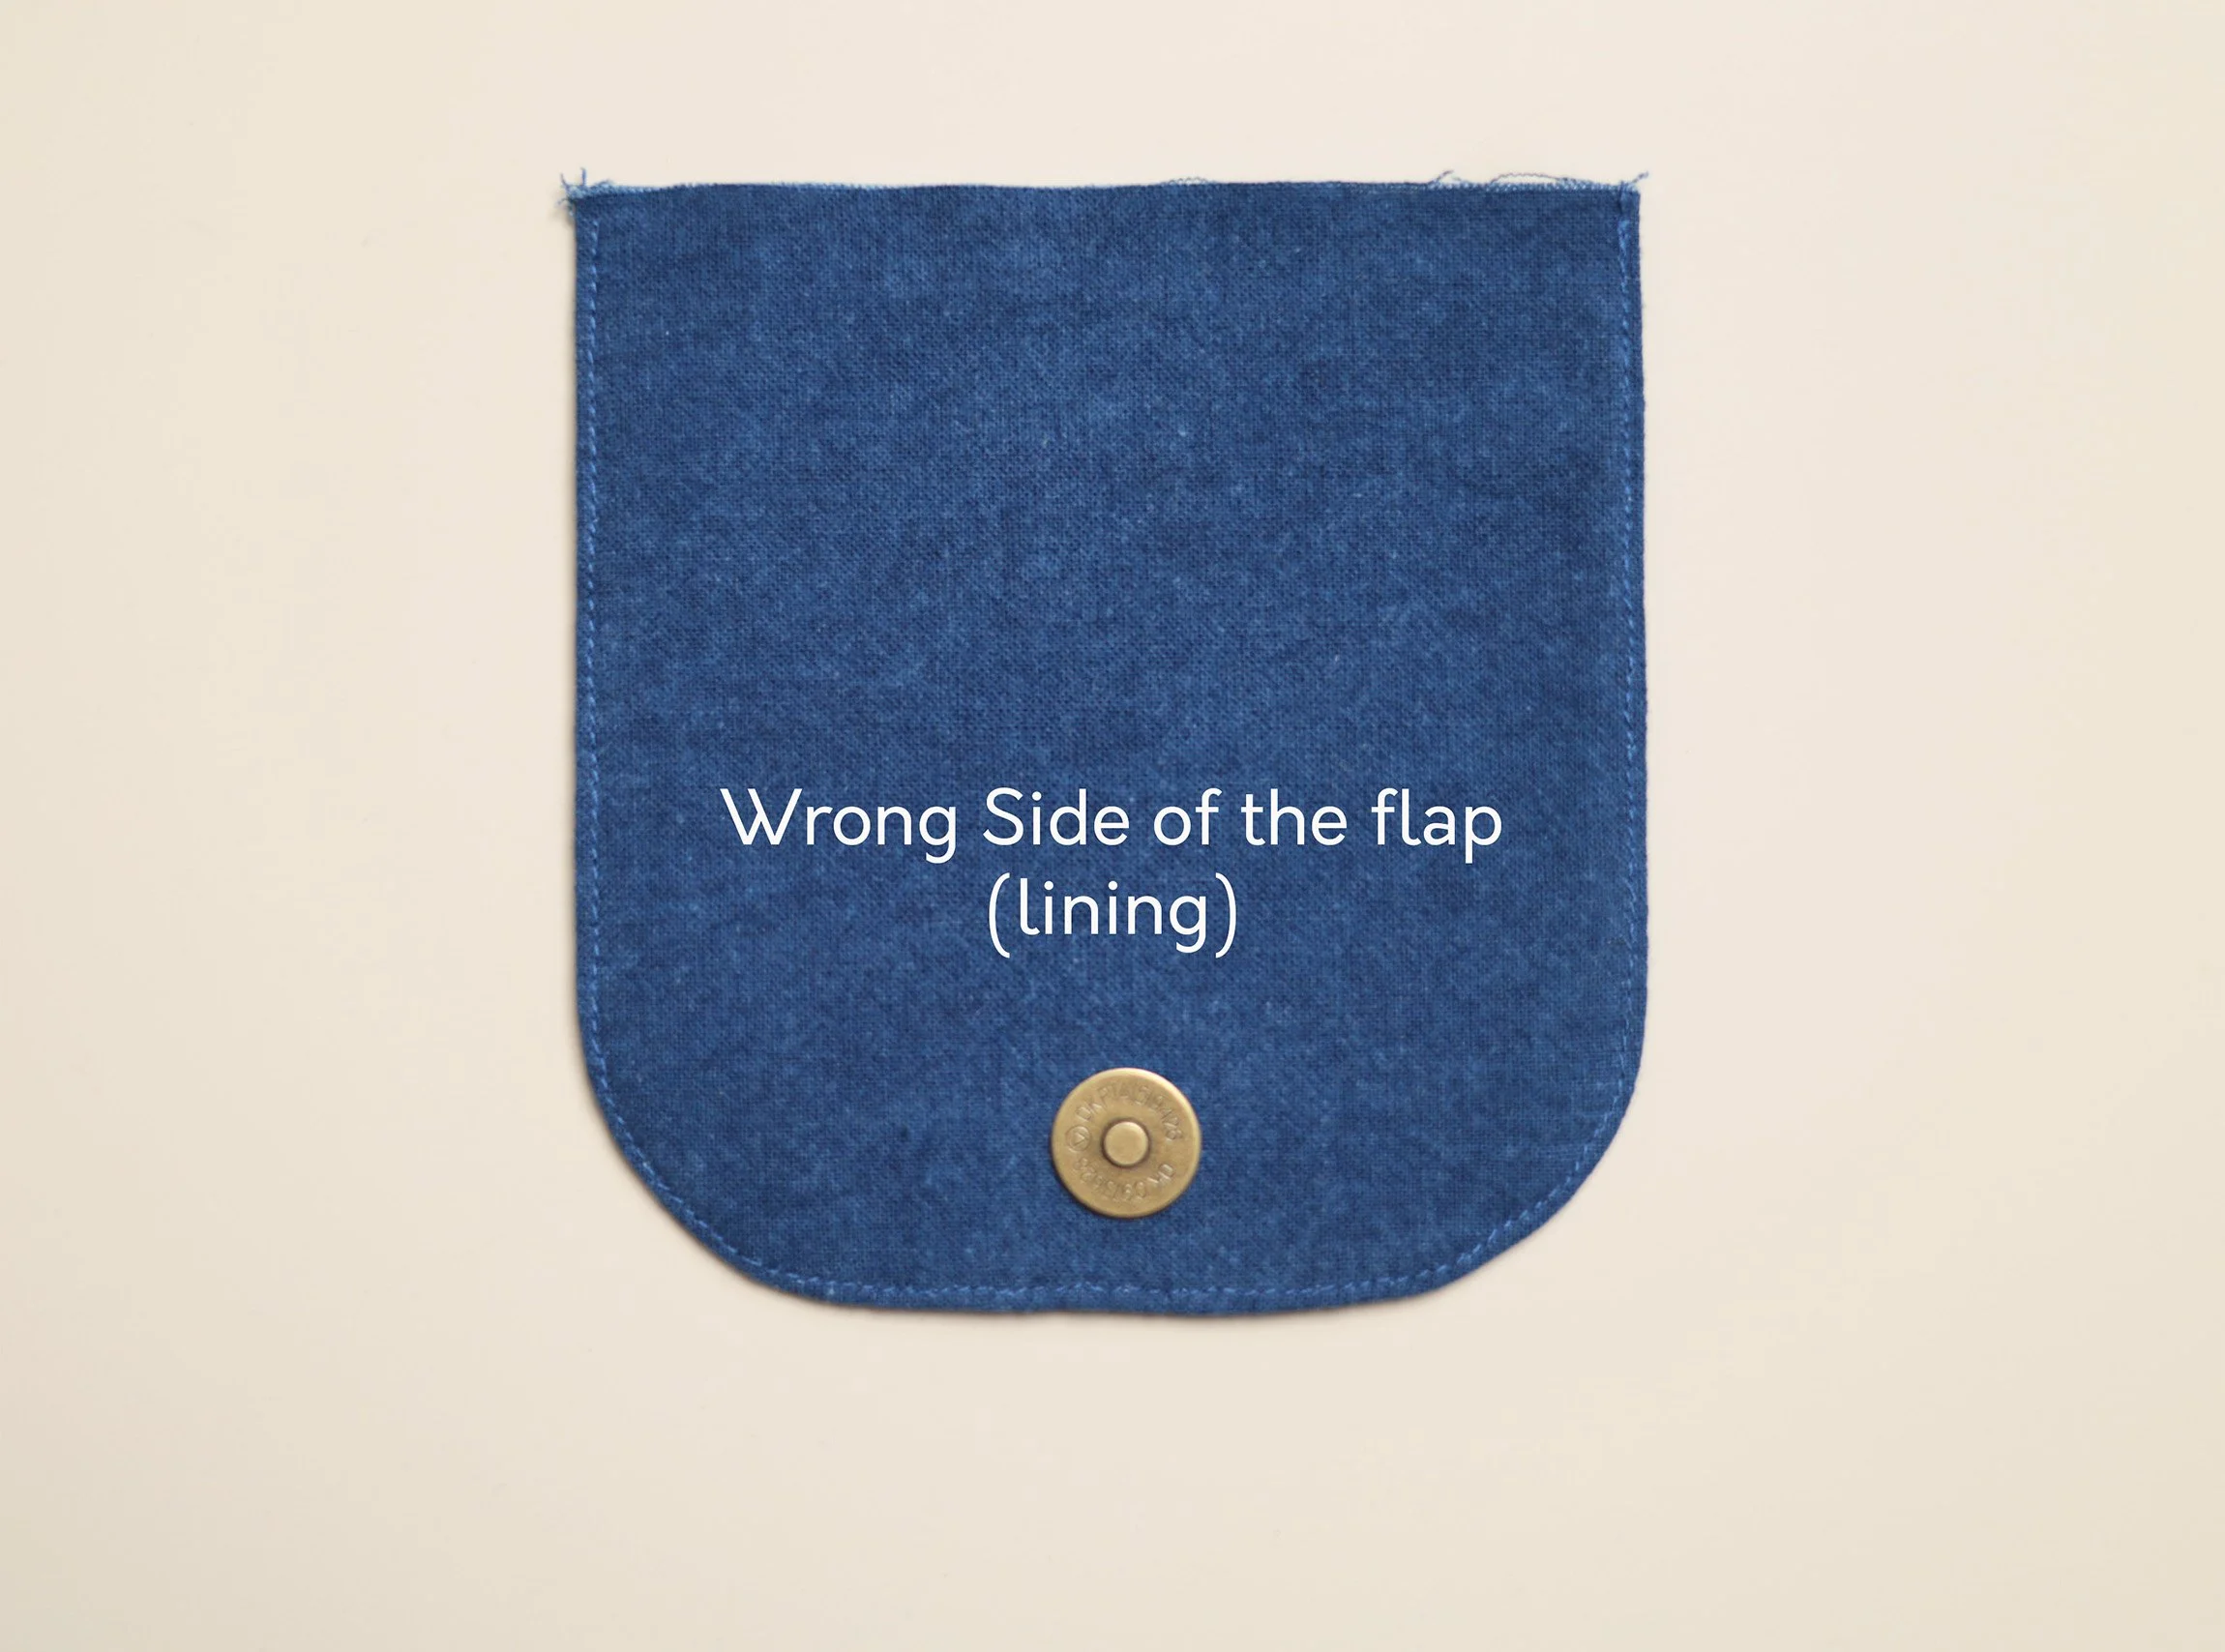
4. Front Piece - snap button & embroidery (Optional).
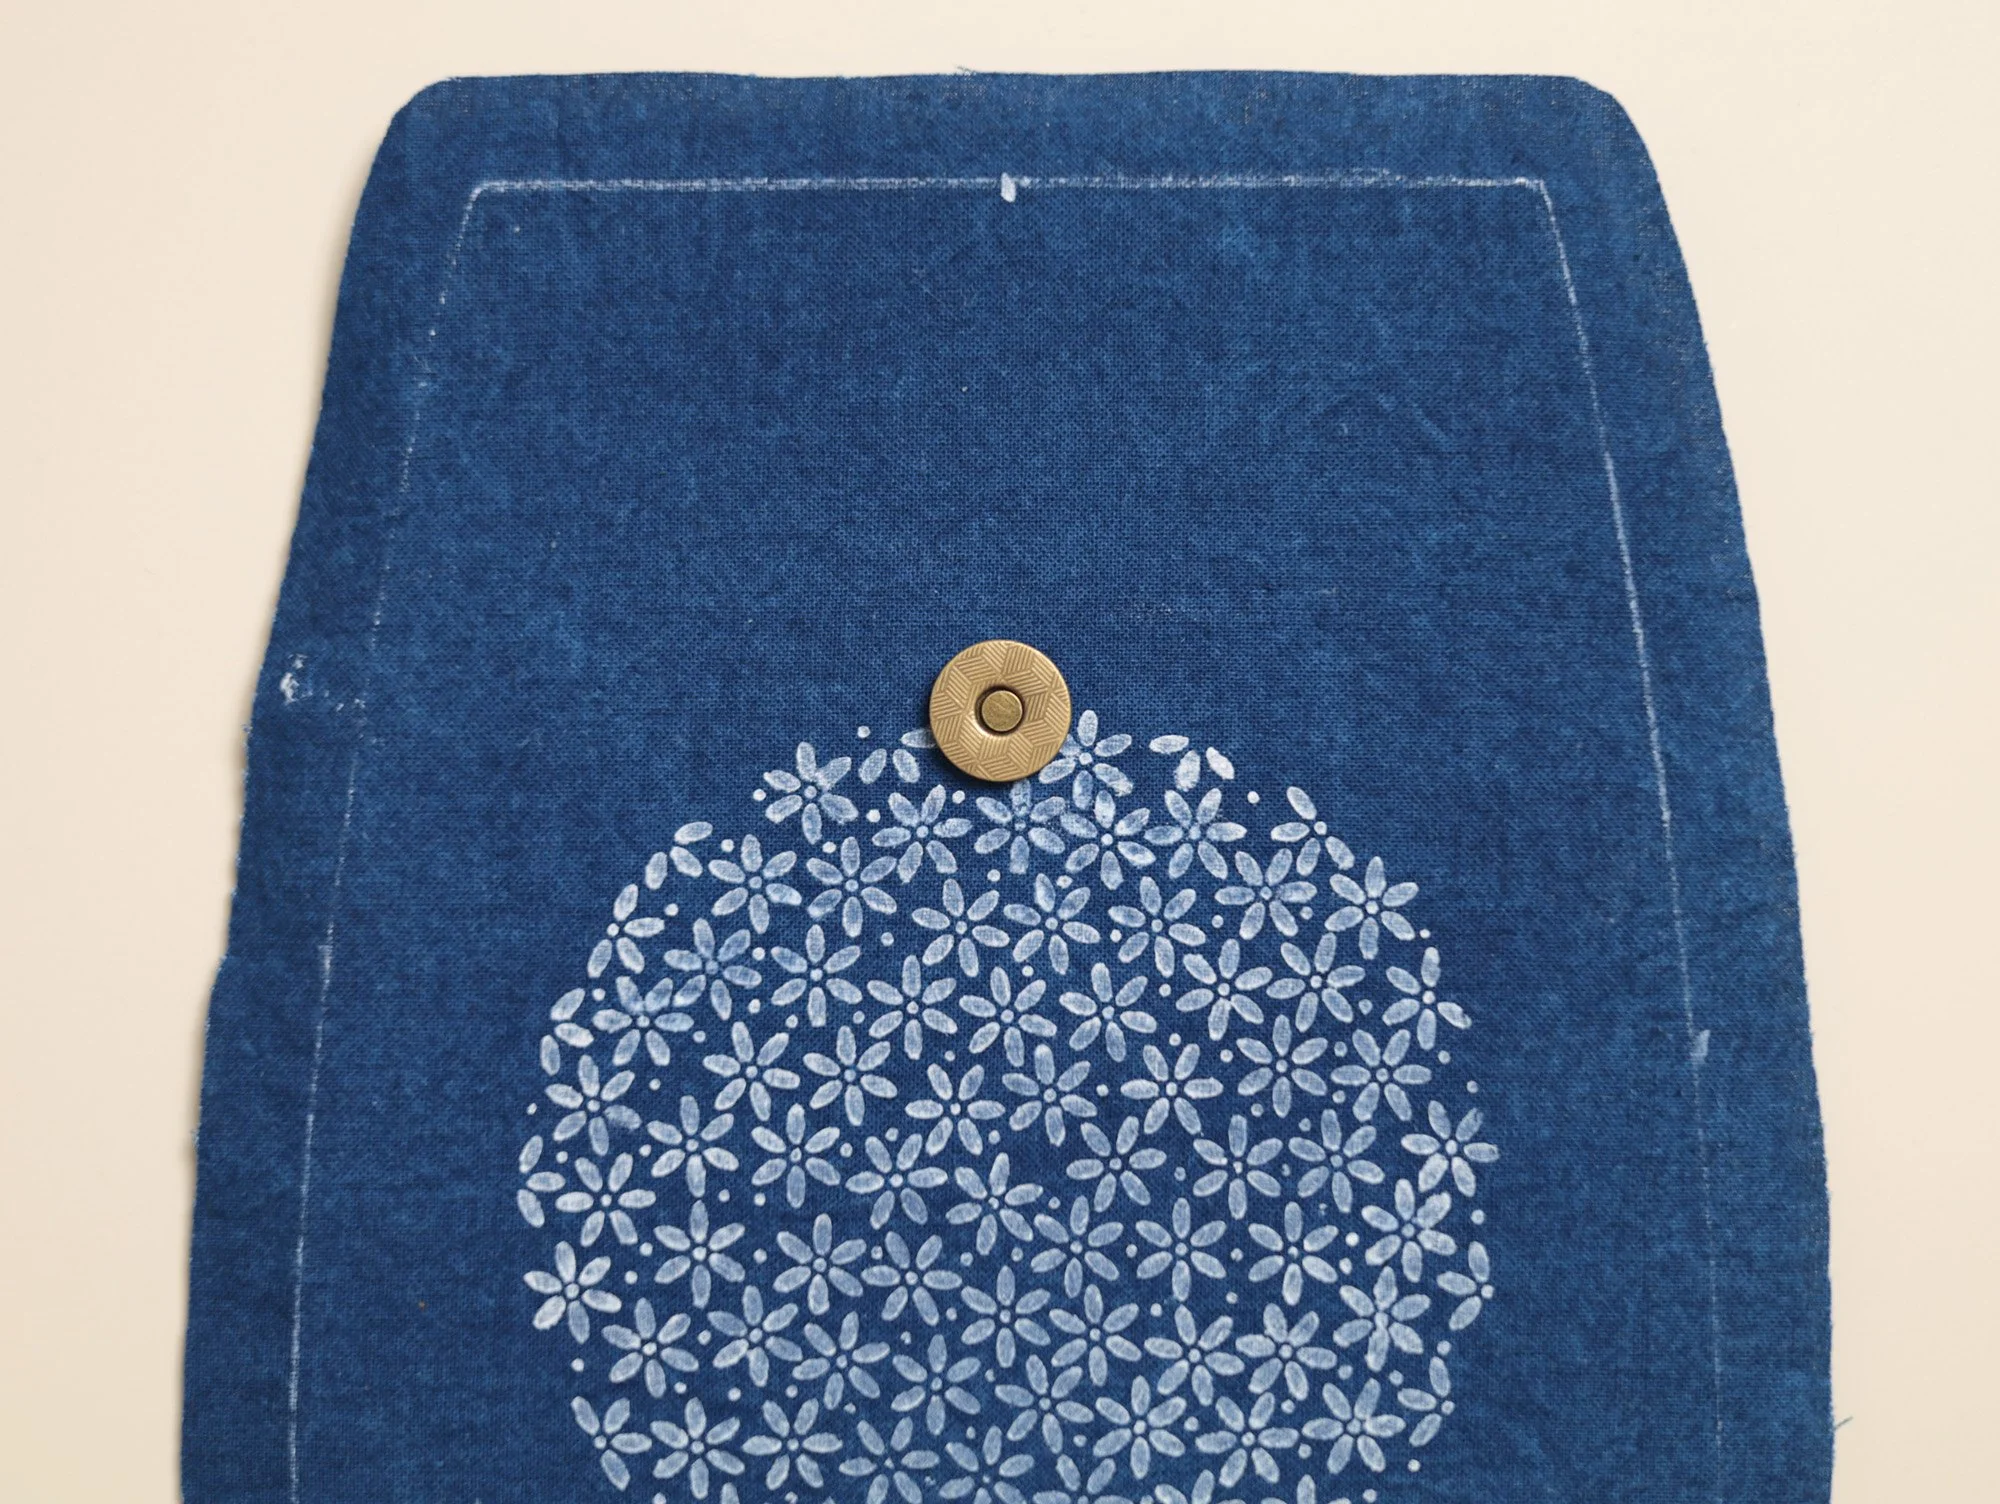
Take one main fabric piece for the bag body and mark the position of the snap button on the right side according to Pattern A. This will be the front piece of the bag body.
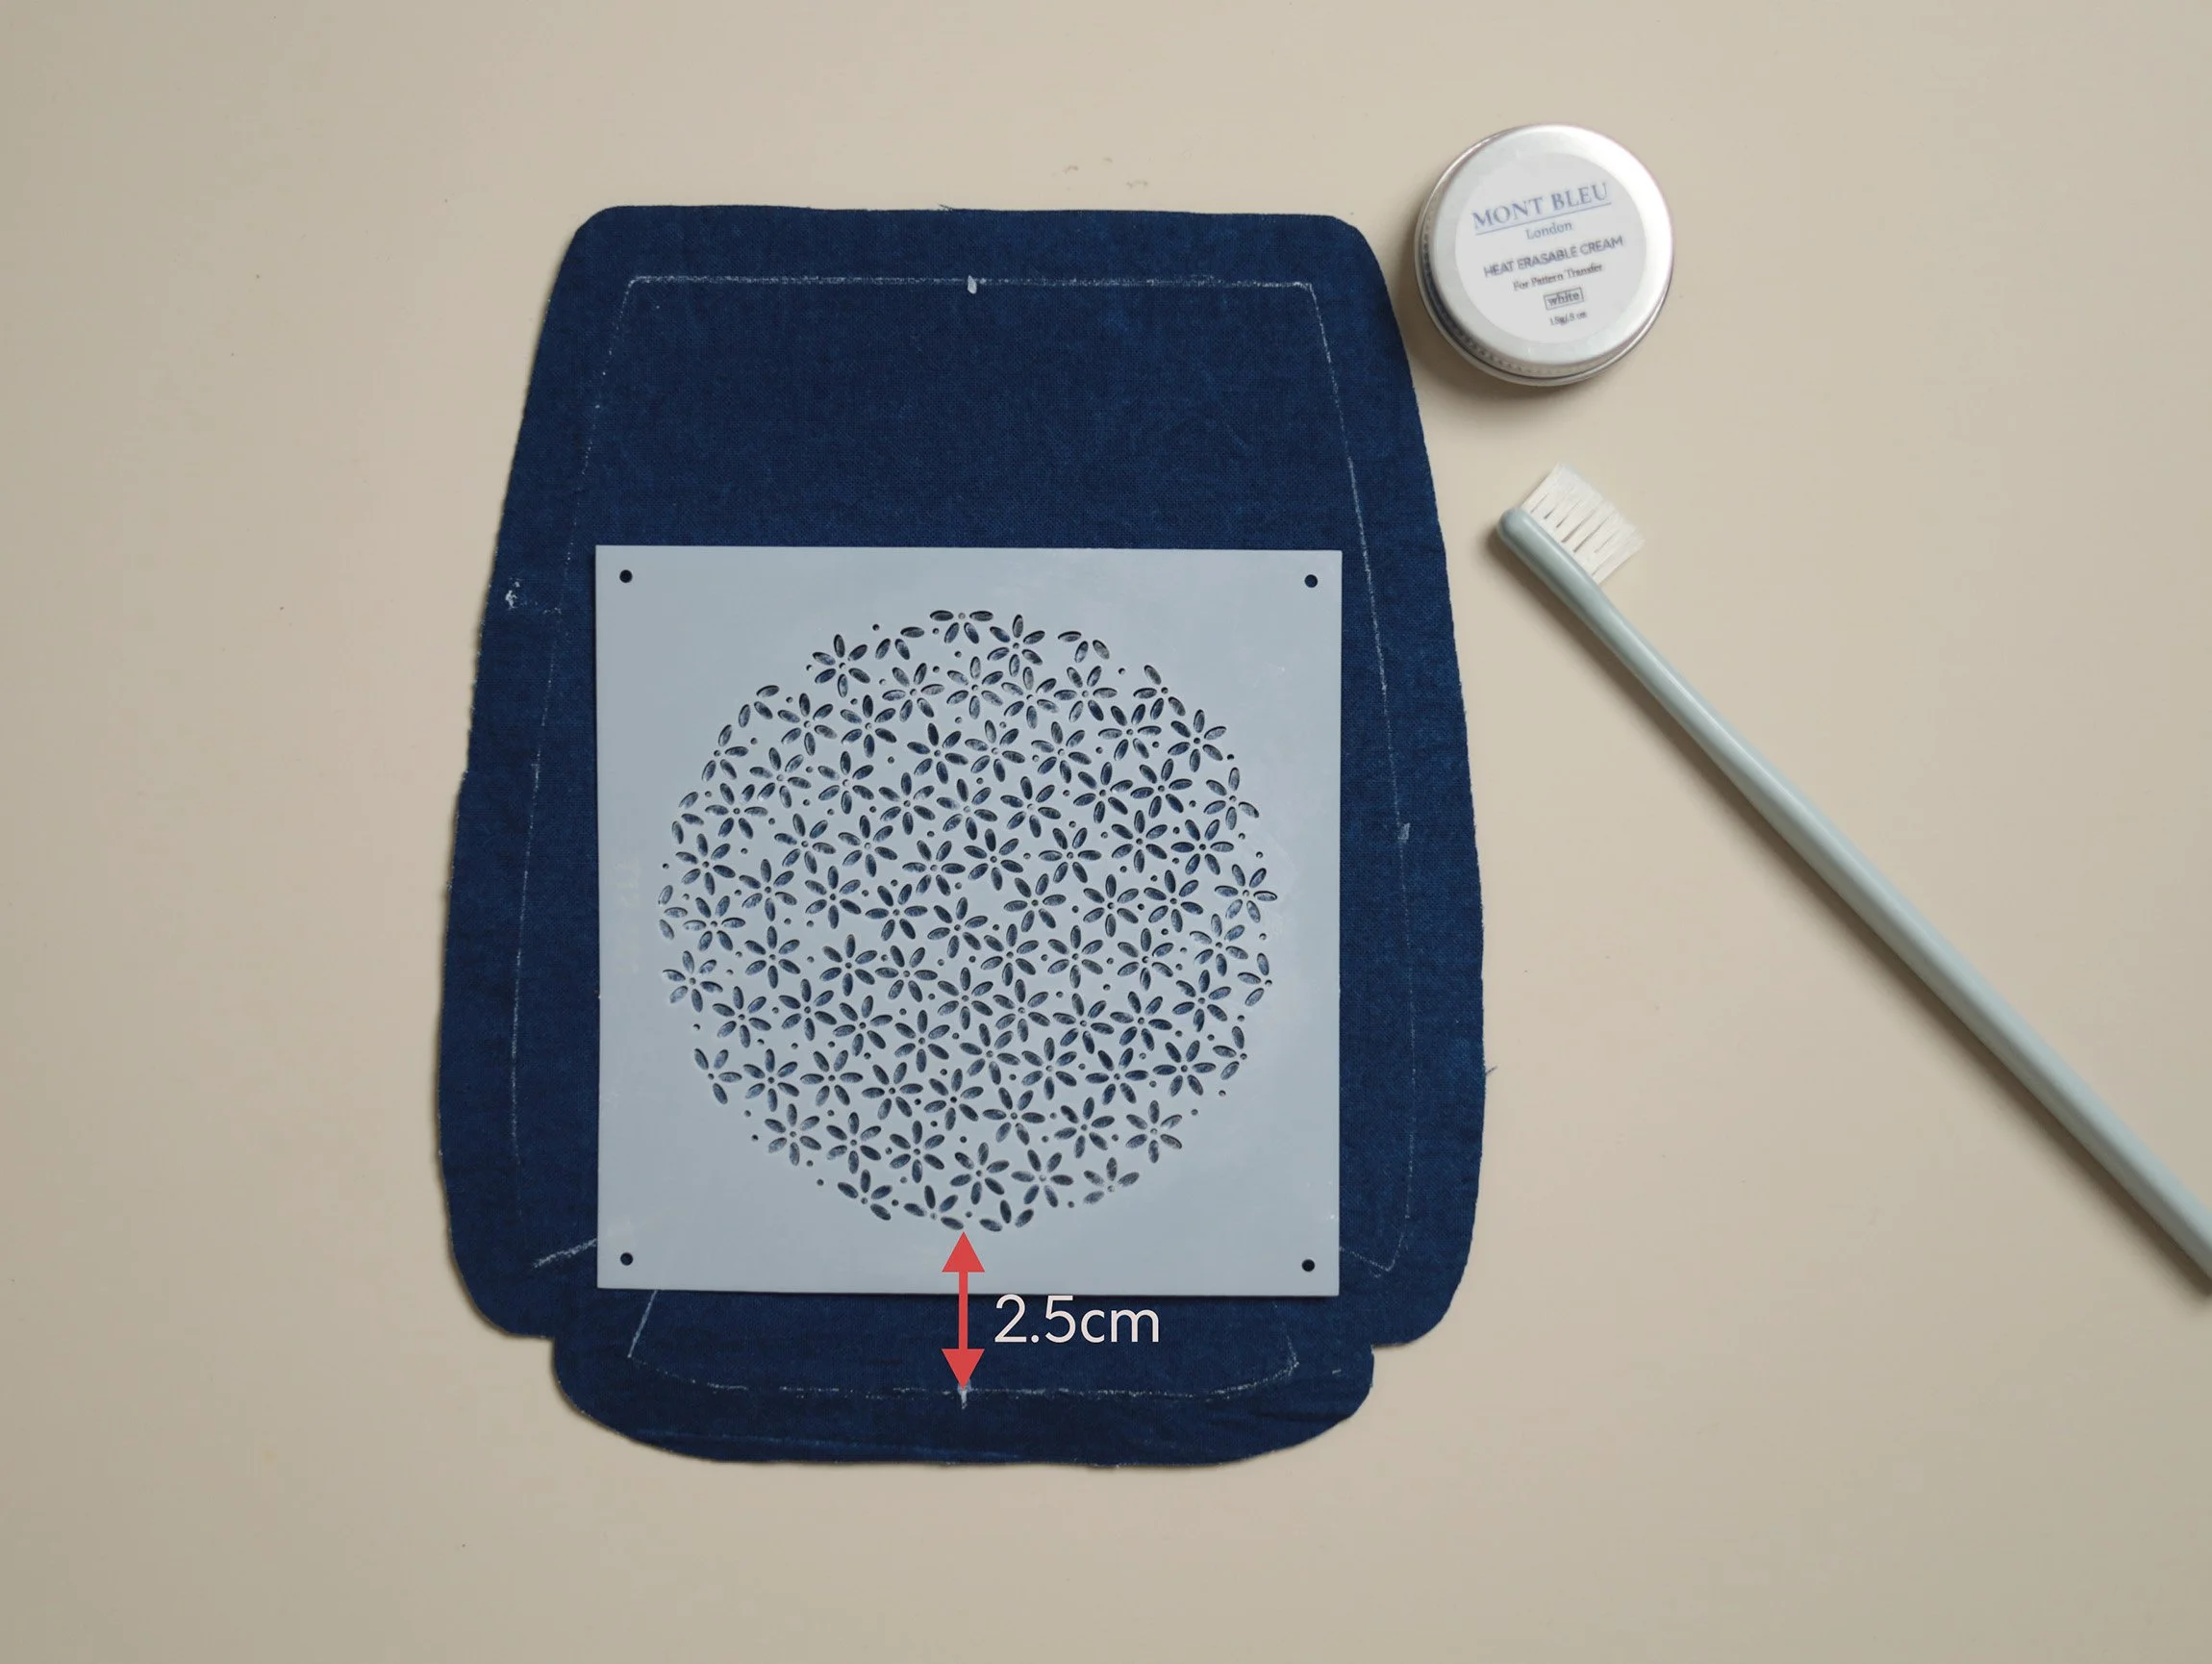
Optional: For the embroidery bag, transfer the stencil pattern (T12-S01) onto the front piece using a heat-erasable pen or cream (recommended). Other stencils or patterns may also be used here instead. (For your reference, stencil T12-S01 measures 12 × 12 cm, with a 1cm margin between the pattern and the stencil edge. We positioned the stencil so that the bottom edge of the pattern is approximately 2.5 cm from the bag base. )
Tip: For complex patterns like T12-S01, use heat-erasable cream and a toothbrush—it’s quicker and easier than a pen.
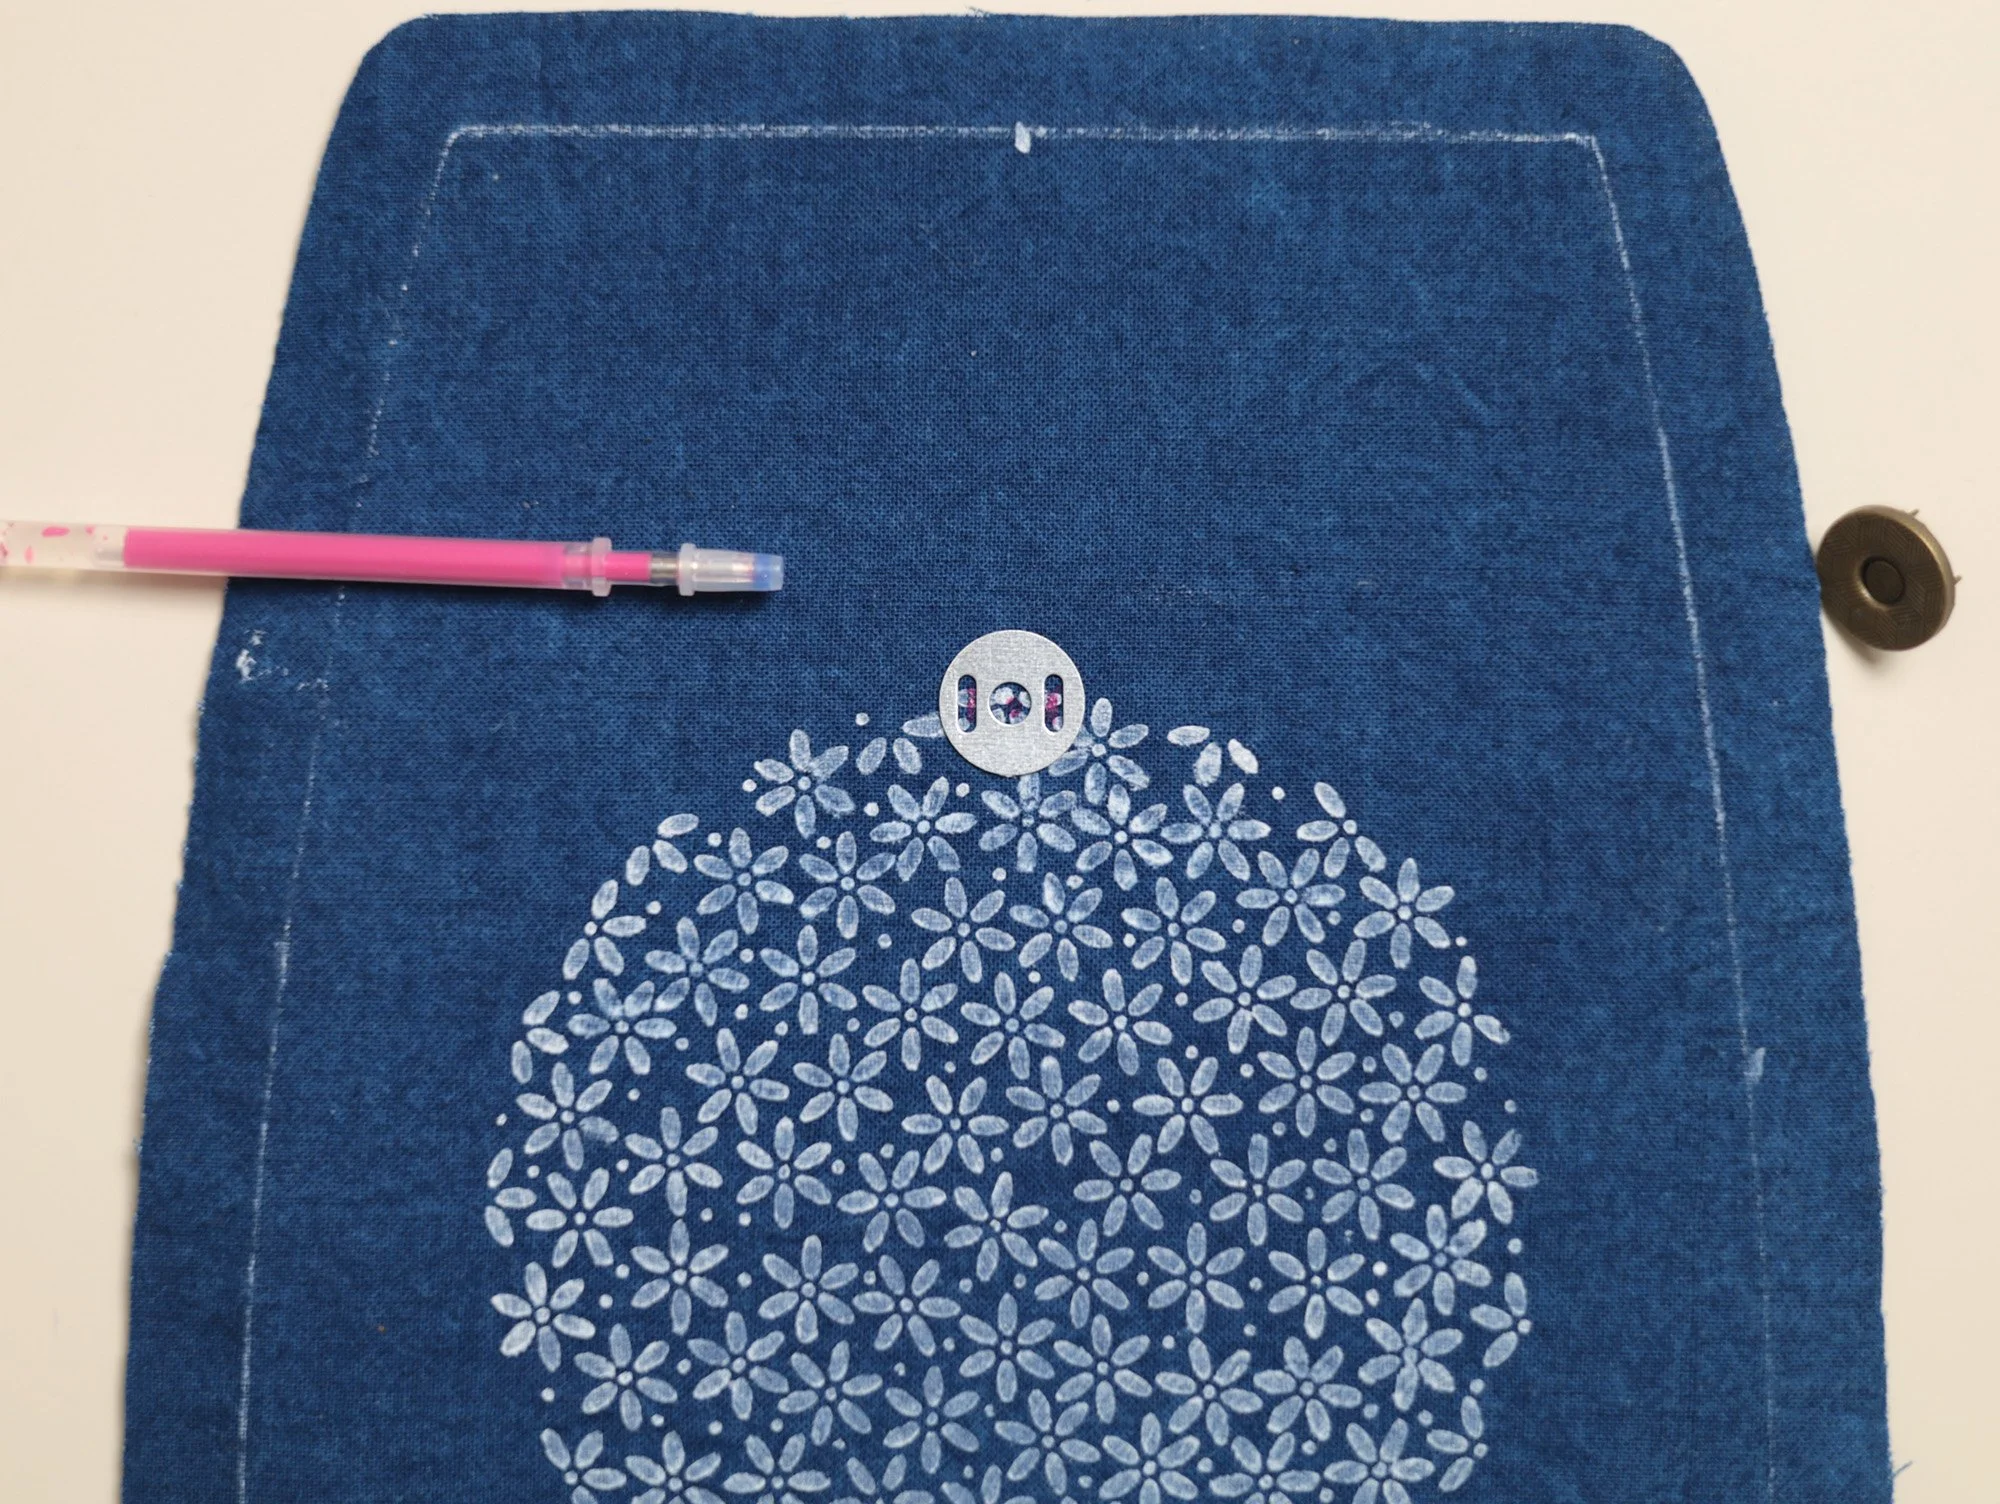
For all bags,install the female part of the magnetic snap following the same method as the male part.
Optional: For the embroidery bag, complete the embroidery before moving on to the next step.
Embroidery tips:
If using our plant-dyed Sashiko thread, cut a length of approximately 60 cm, thread the needle, and tie a knot at one end. Avoid using very long thread to prevent tangling.
Make two straight stitches per petal and a French knot (or a bead) per dot. For the petals, do not pull the thread tight—let the stitches rest on the fabric without tension. We used a mix of 1.5 and 2mm seed beads.
5. Make the D-ring/Strap Tabs.
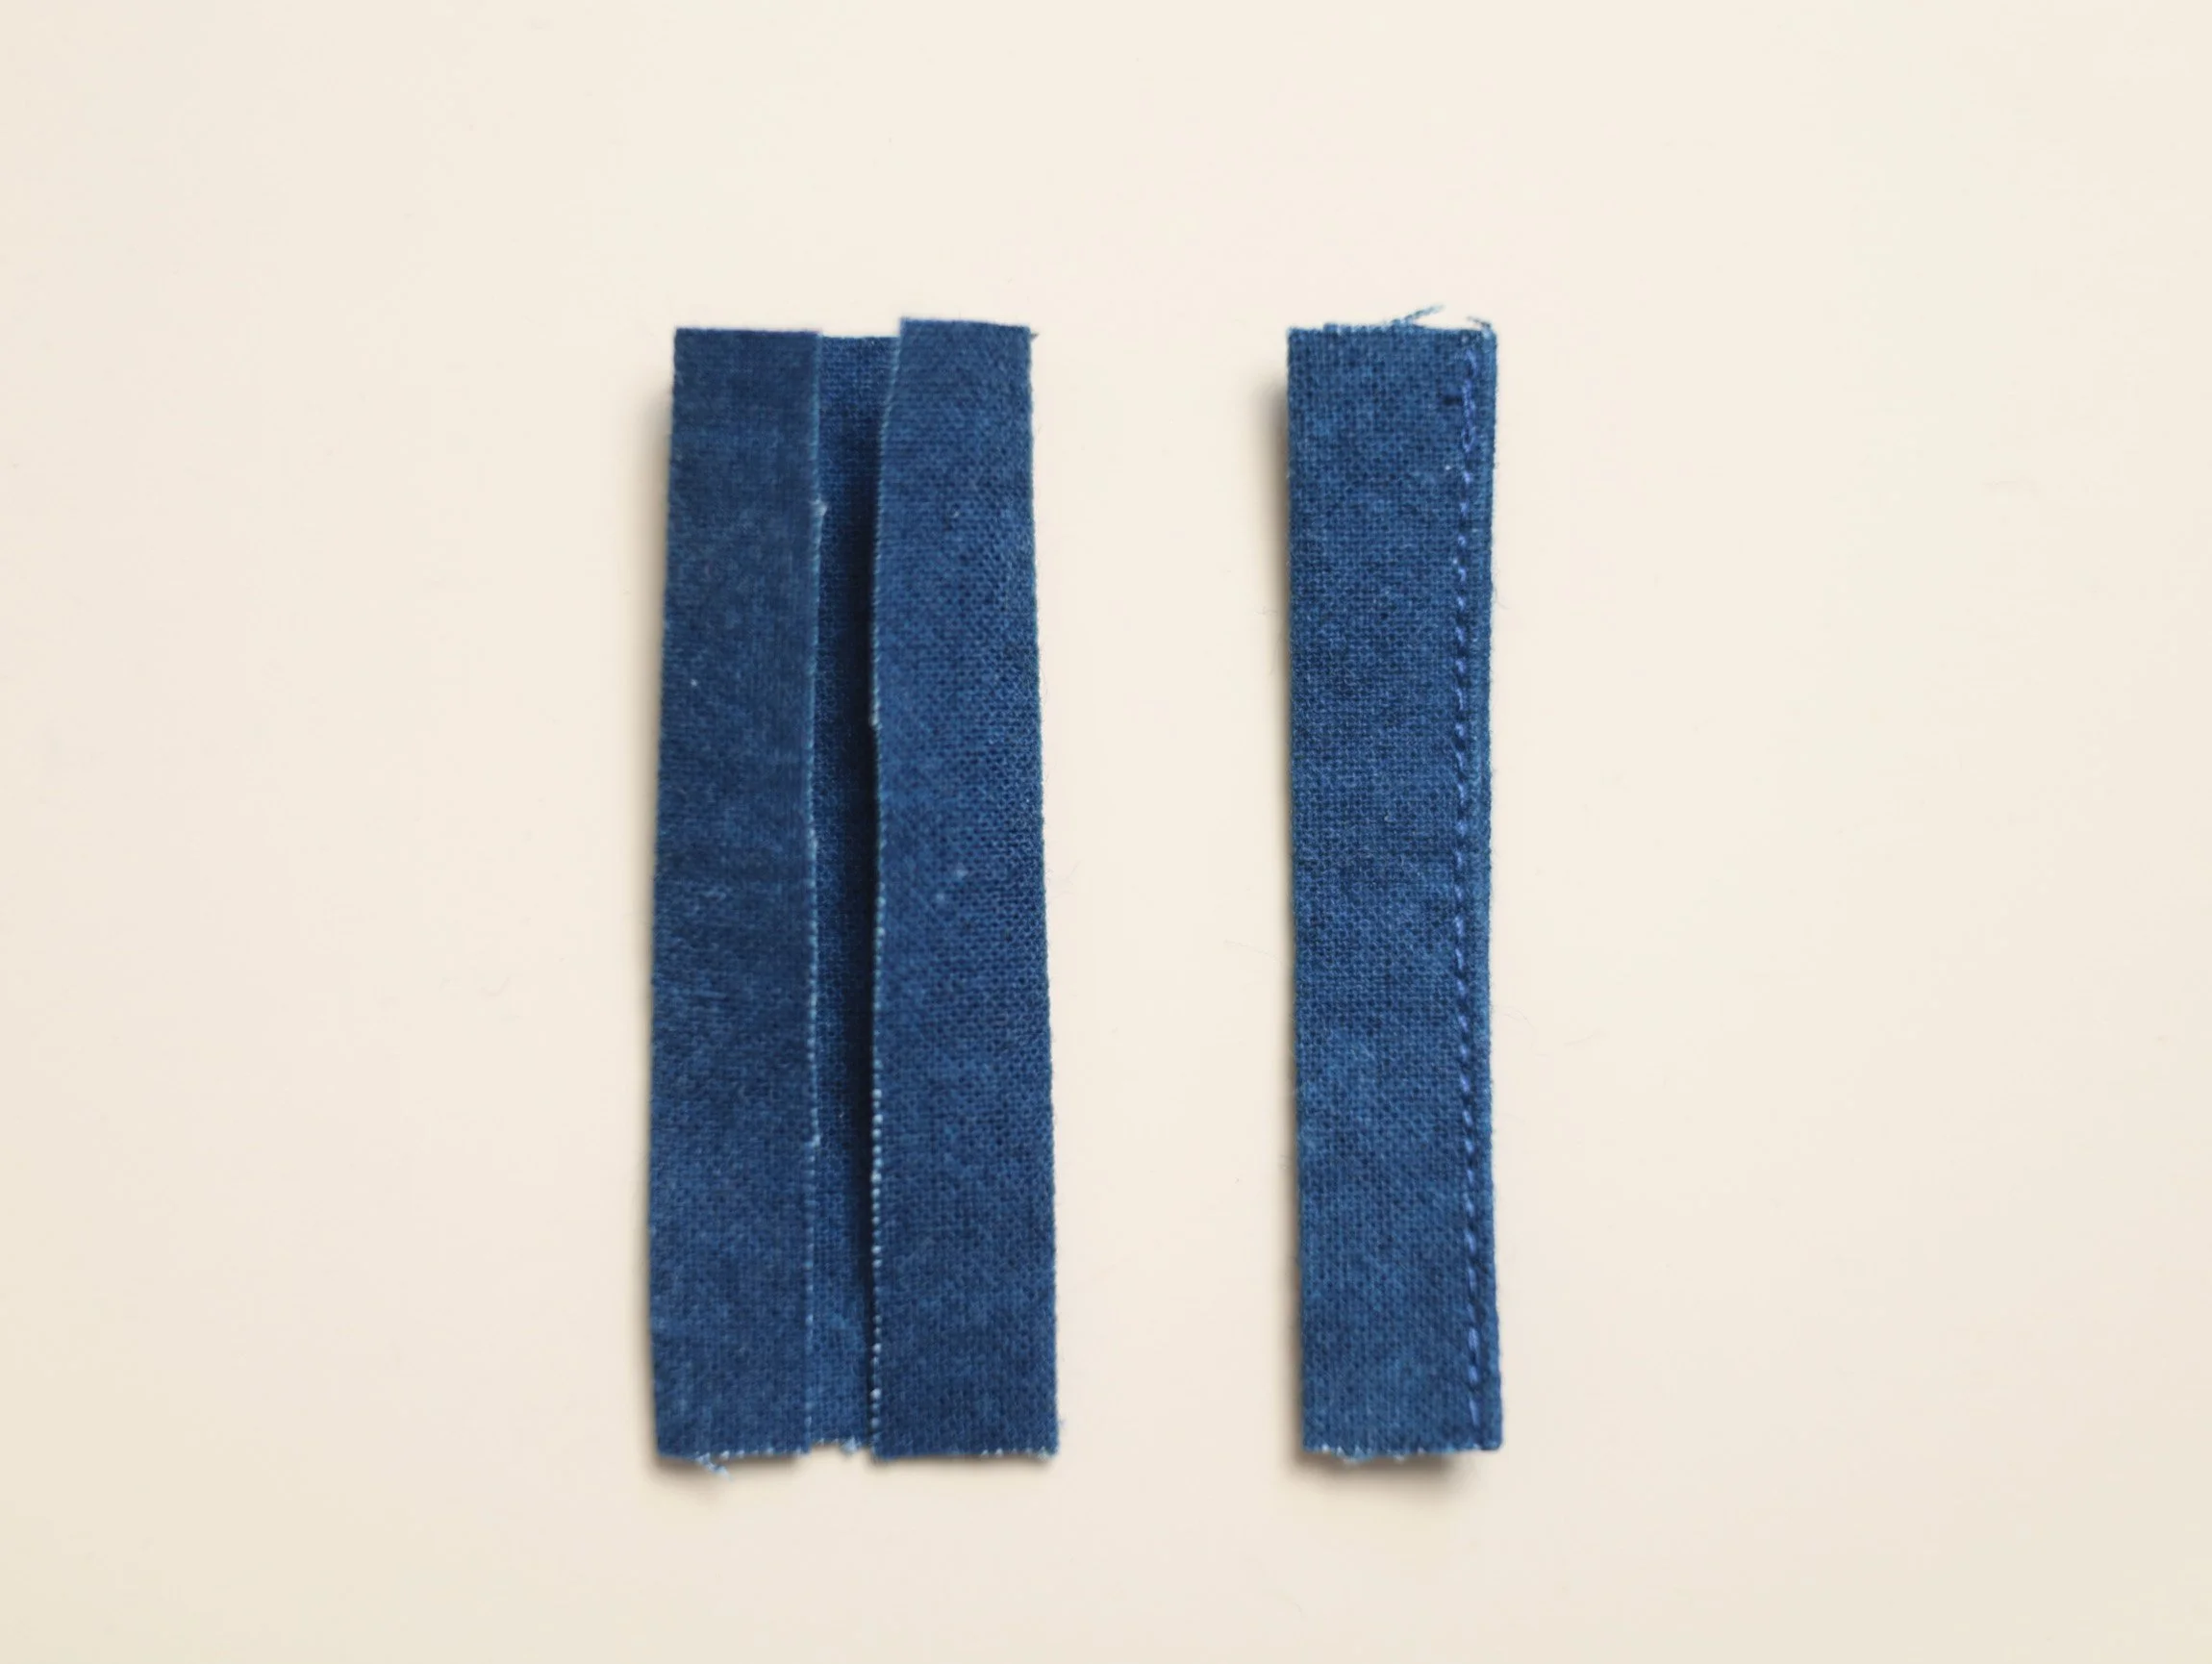
Cut two 4 × 6 cm pieces for the strap tabs. Fold each piece in half lengthwise (wrong sides together) and press. Open, fold both long edges to the centre, then fold in half again. Topstitch 1 mm from the long edge.
Fold the tab in half, matching the short sides together. Take the front piece of the bag body and mark the placement points for the strap tabs according to Pattern A. Place the tabs at the placement points with their raw edges facing the sides of the bag. We left around 1cm of the loop inside the bag edge - you can adjust this according to your needs. Baste the tabs in place within the seam allowance.
Note: The measurements in this step are flexible and can be adjusted to fit your D‑ring size or strap‑attachment method. If using D-rings, we recommend a type that can be opened and attached to the tabs later, rather than at this stage. Otherwise, attach the D-rings now (this will make machine sewing more difficult later).
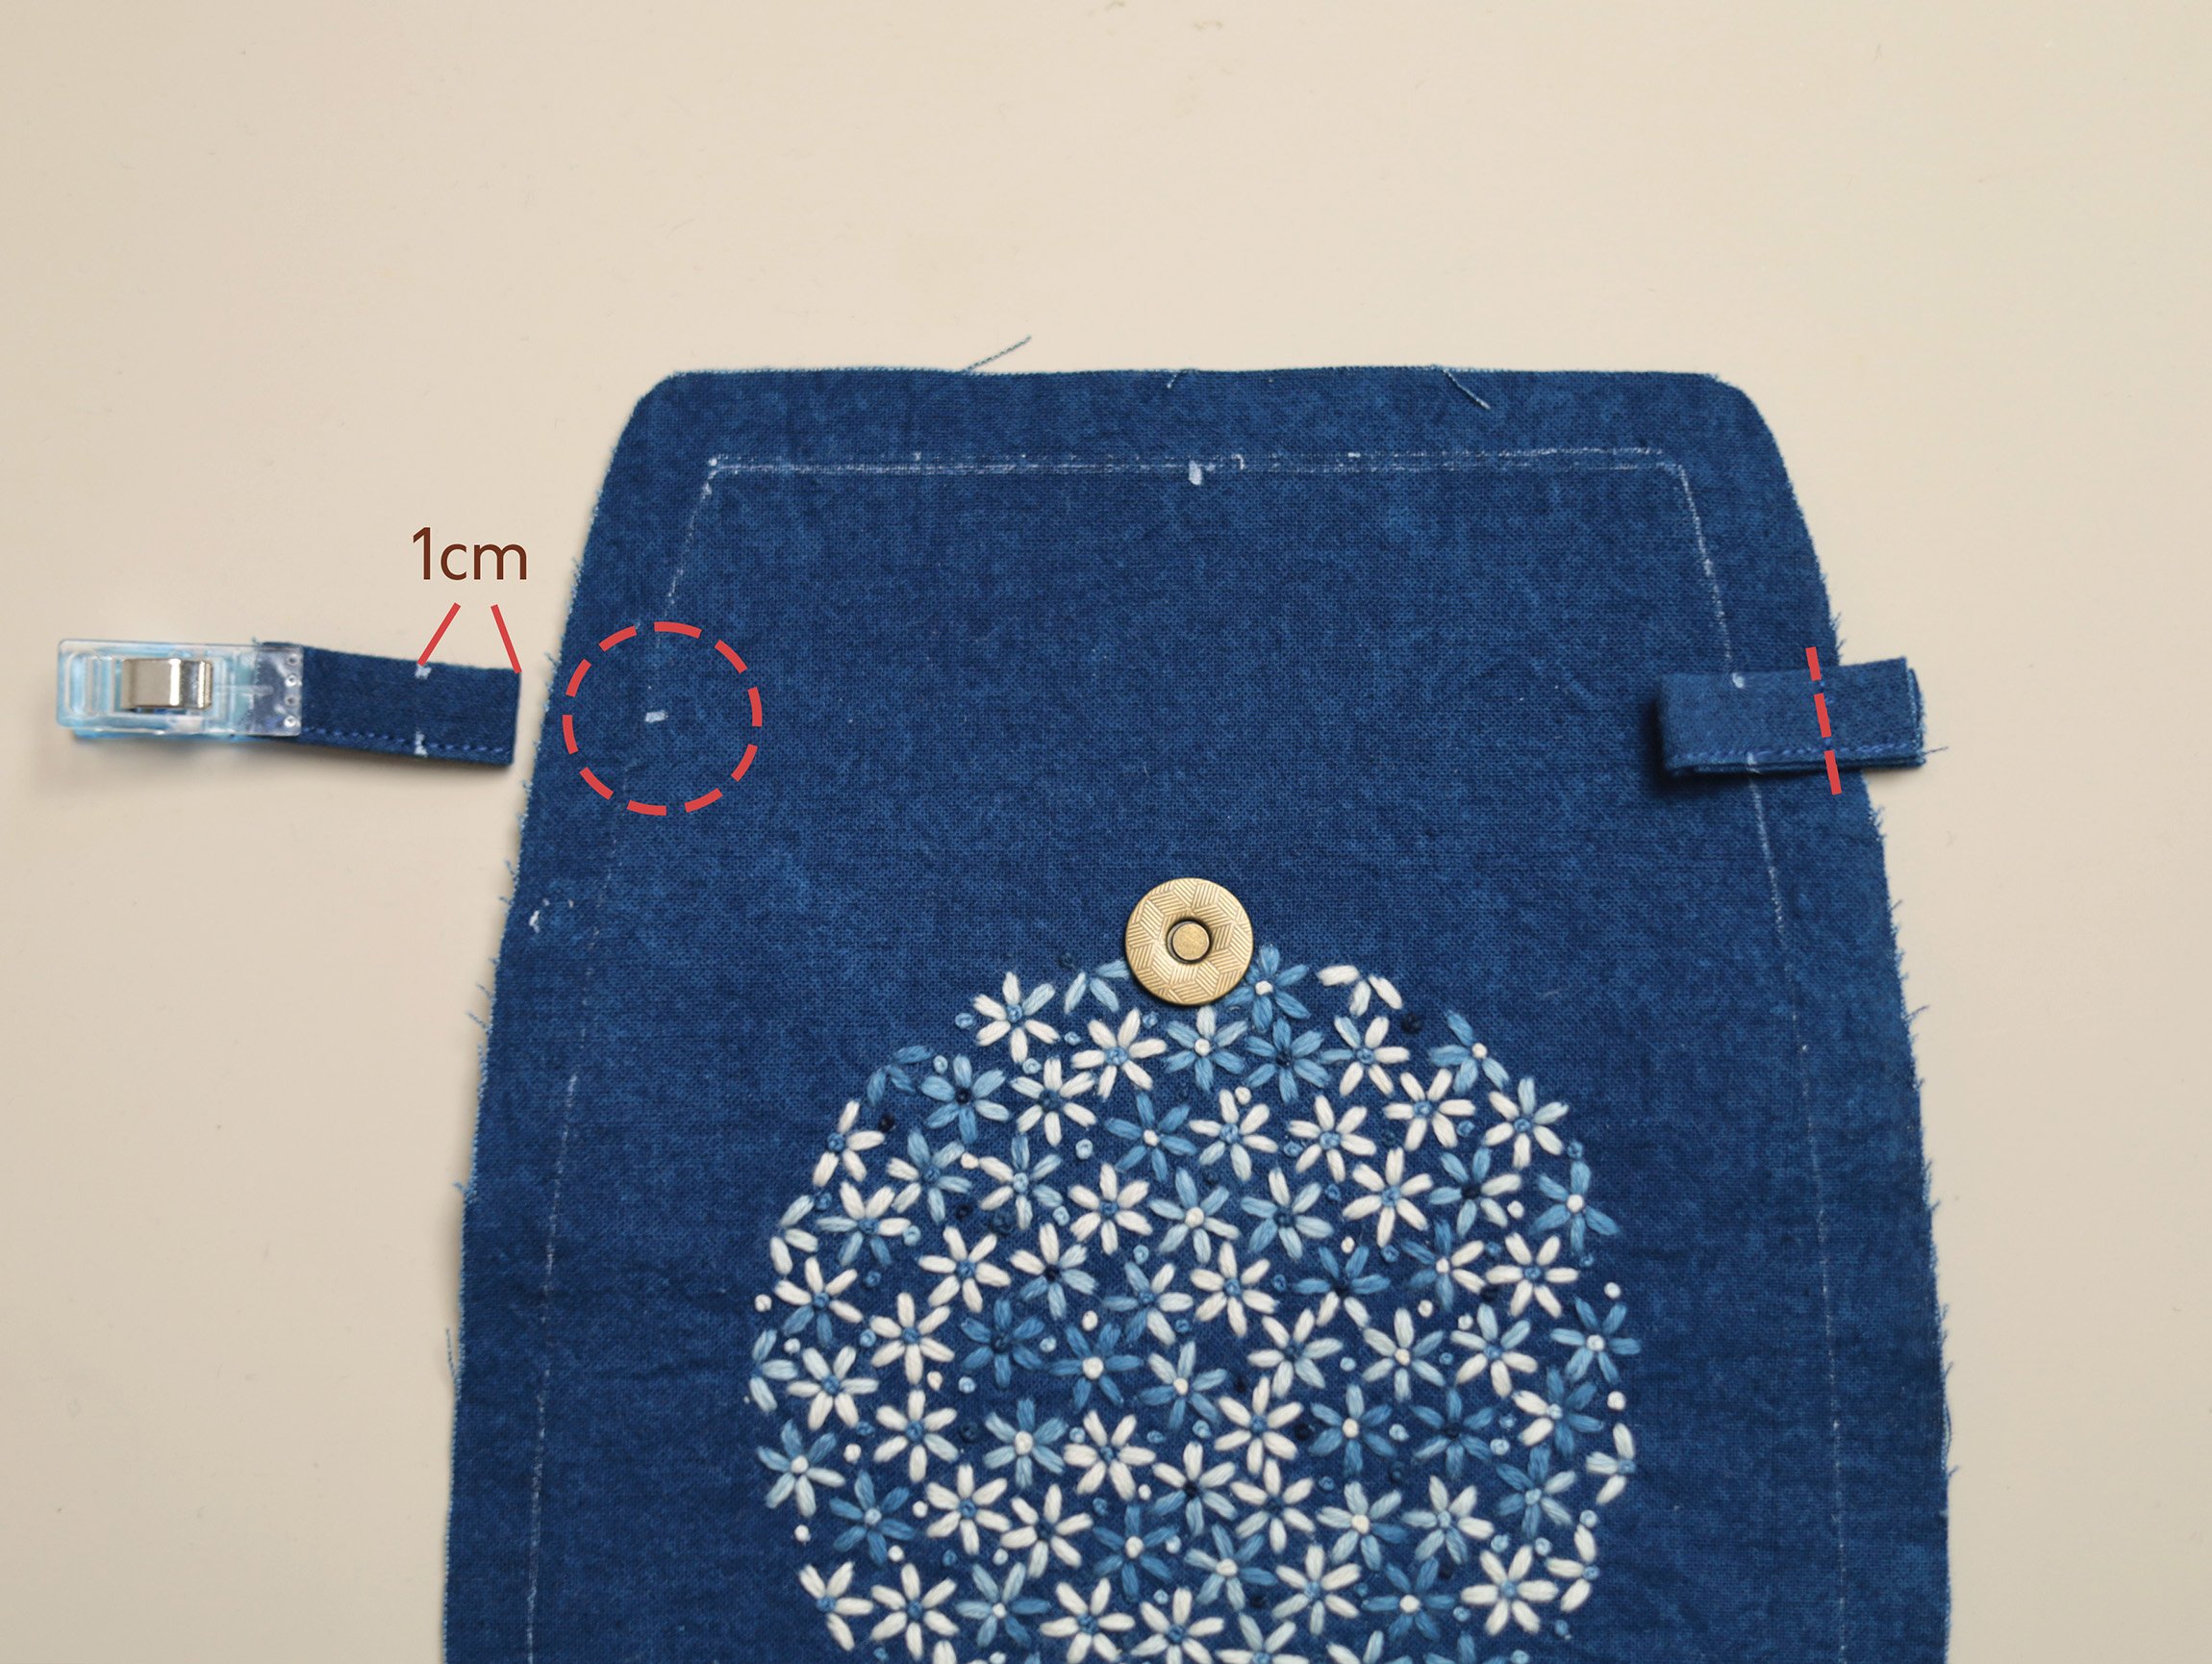
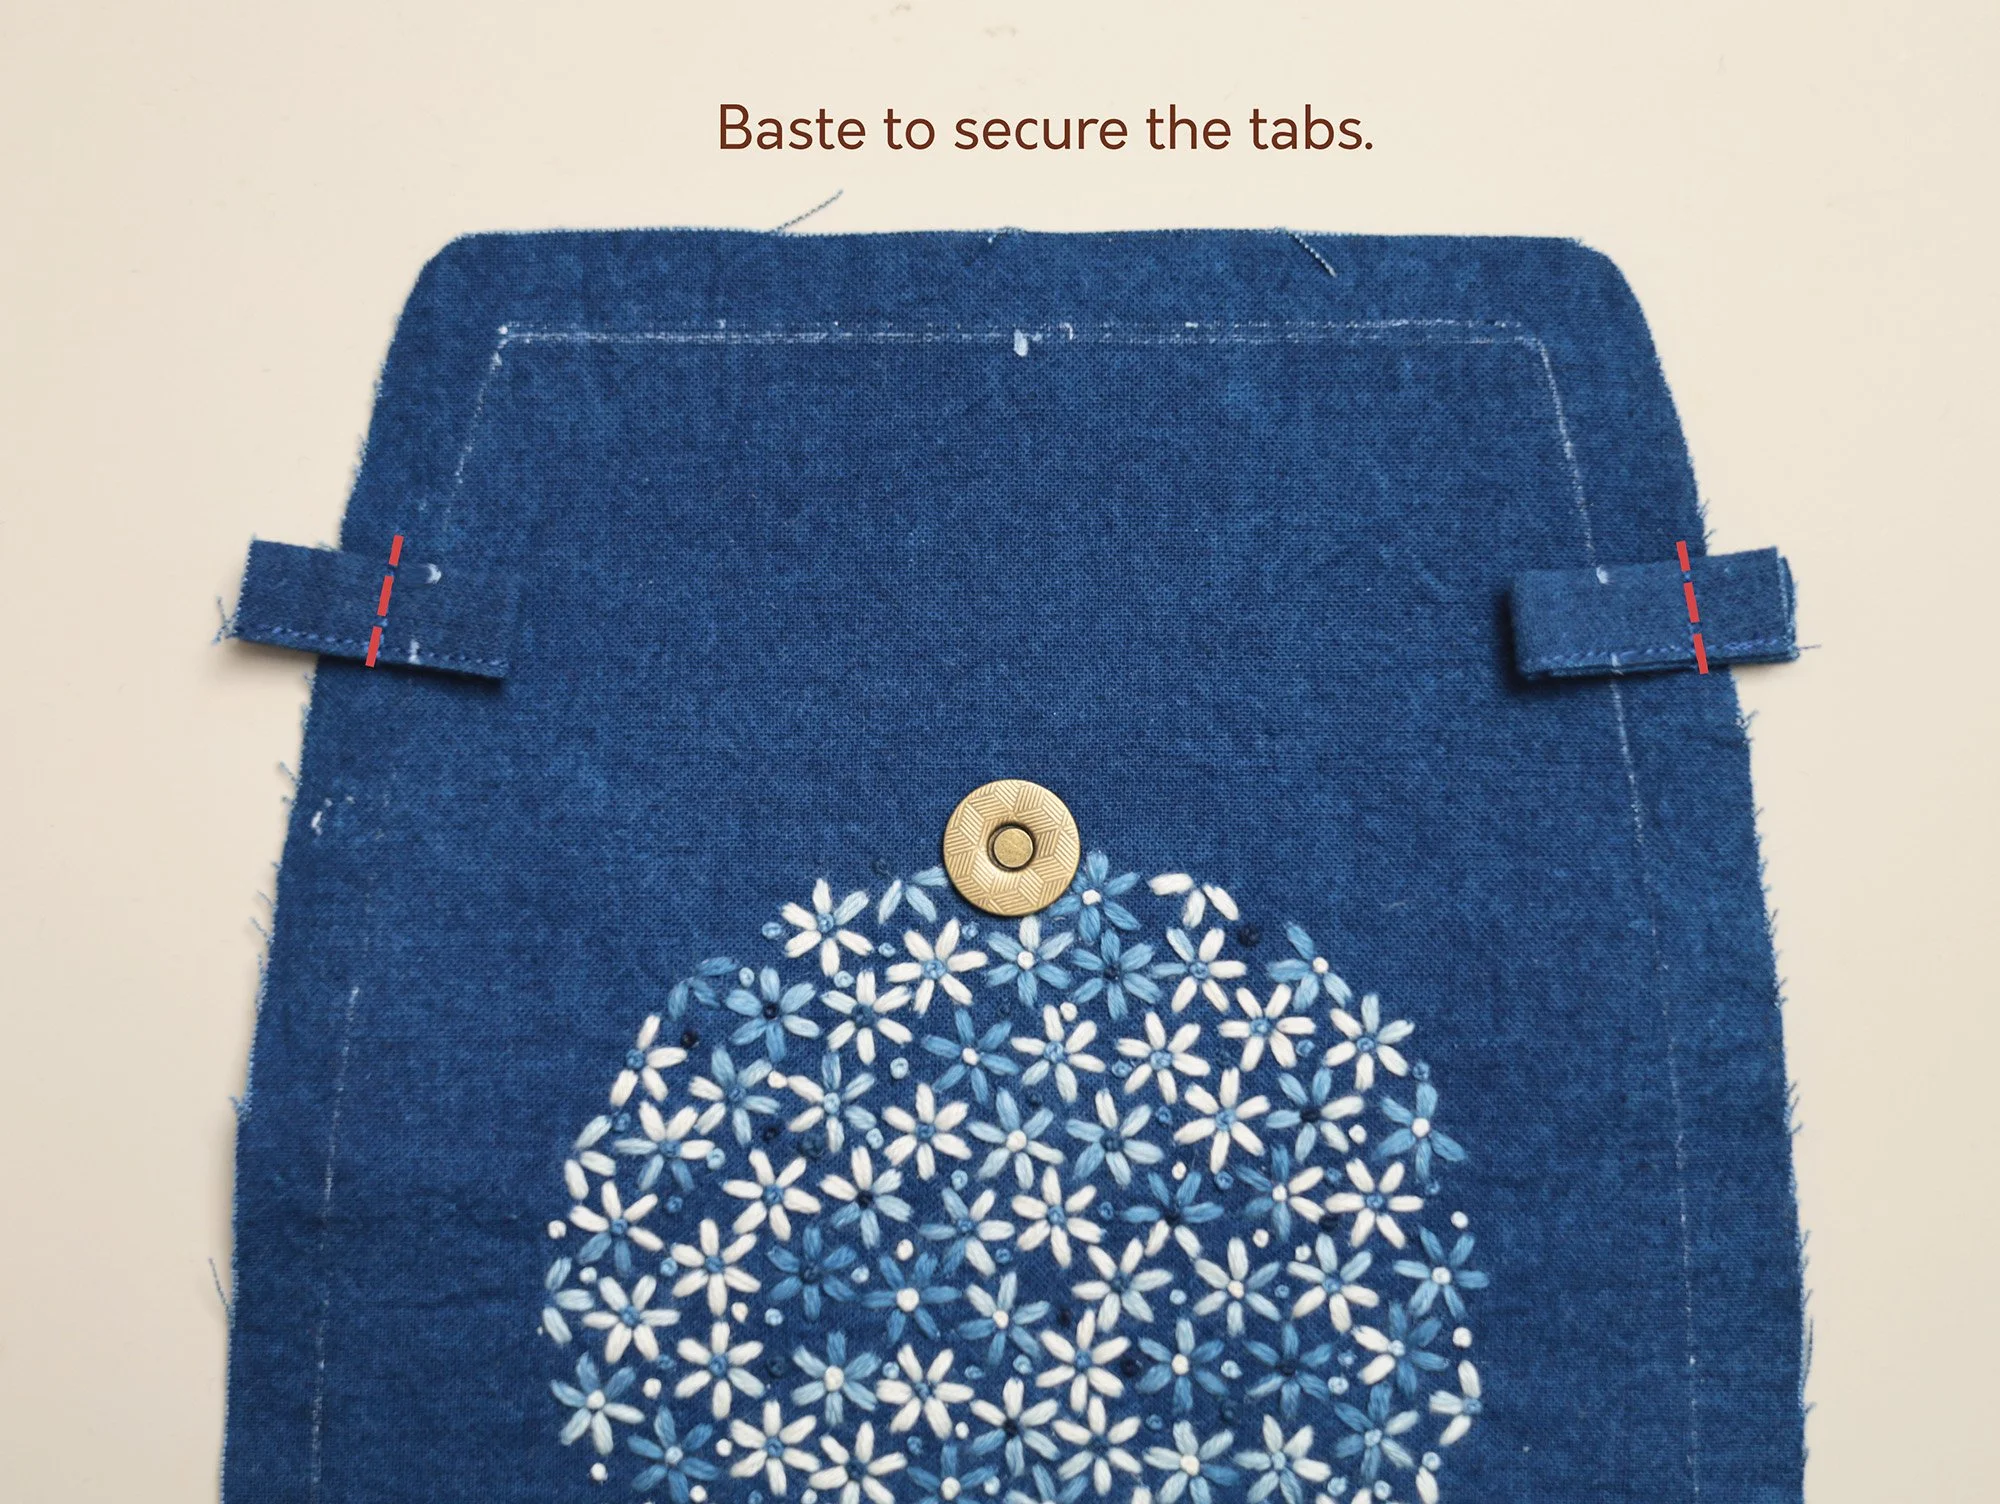
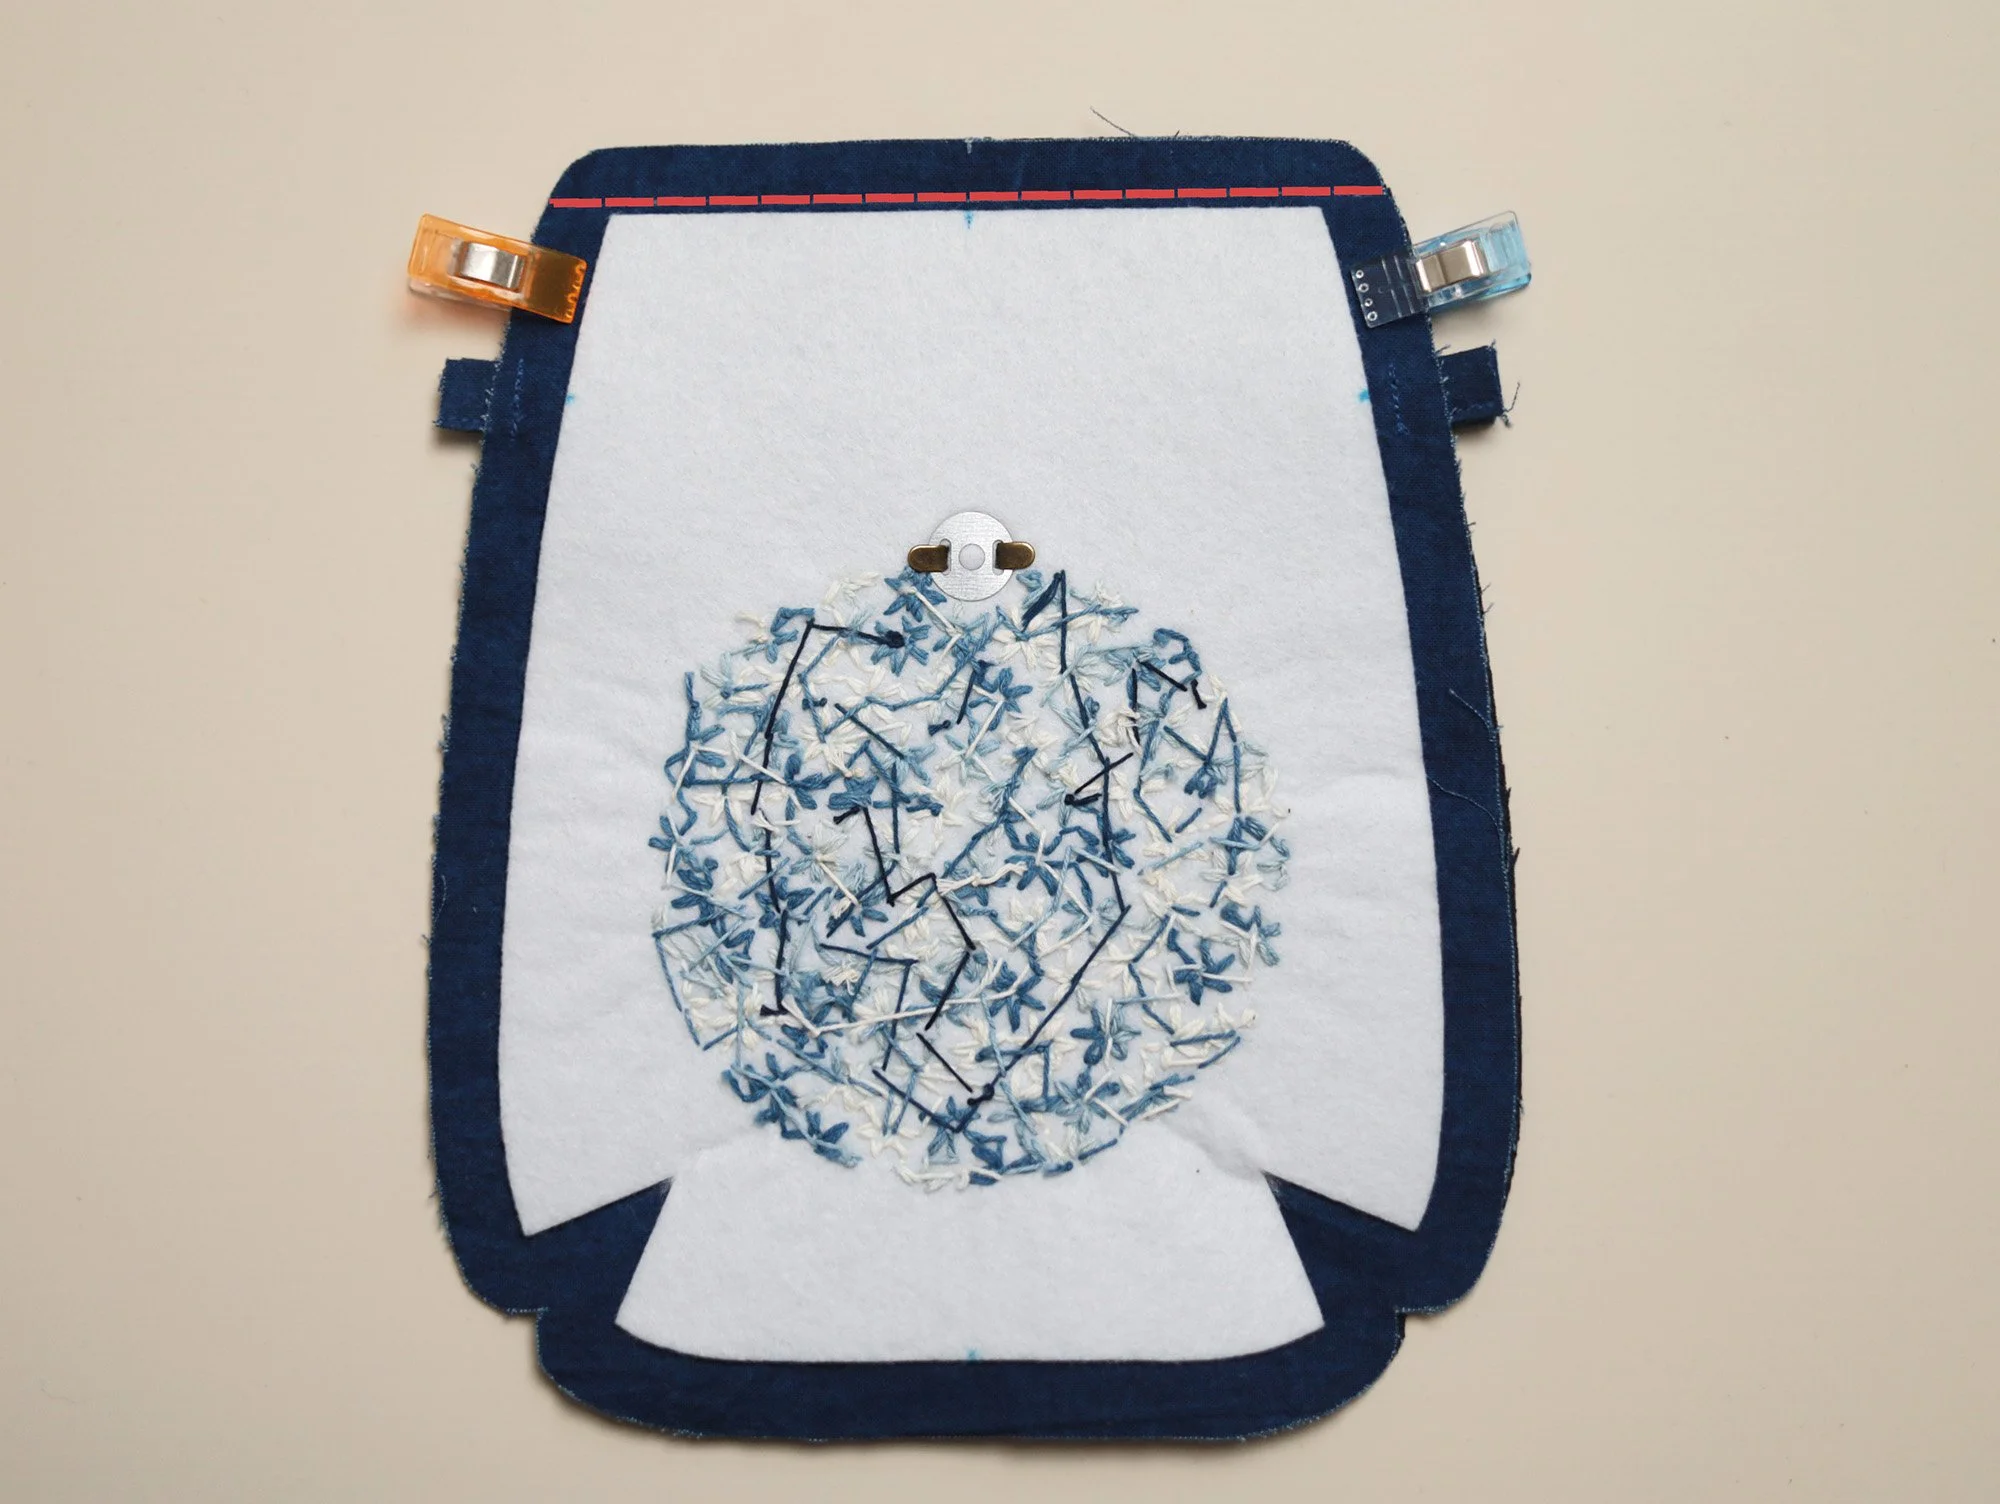
Place a piece of bag lining on top of the bag front piece, right sides together and raw edges aligned. Clip the layers in place and stitch along the top edge, 1–2 mm from the interfacing edge.
6. Prepare the bag body
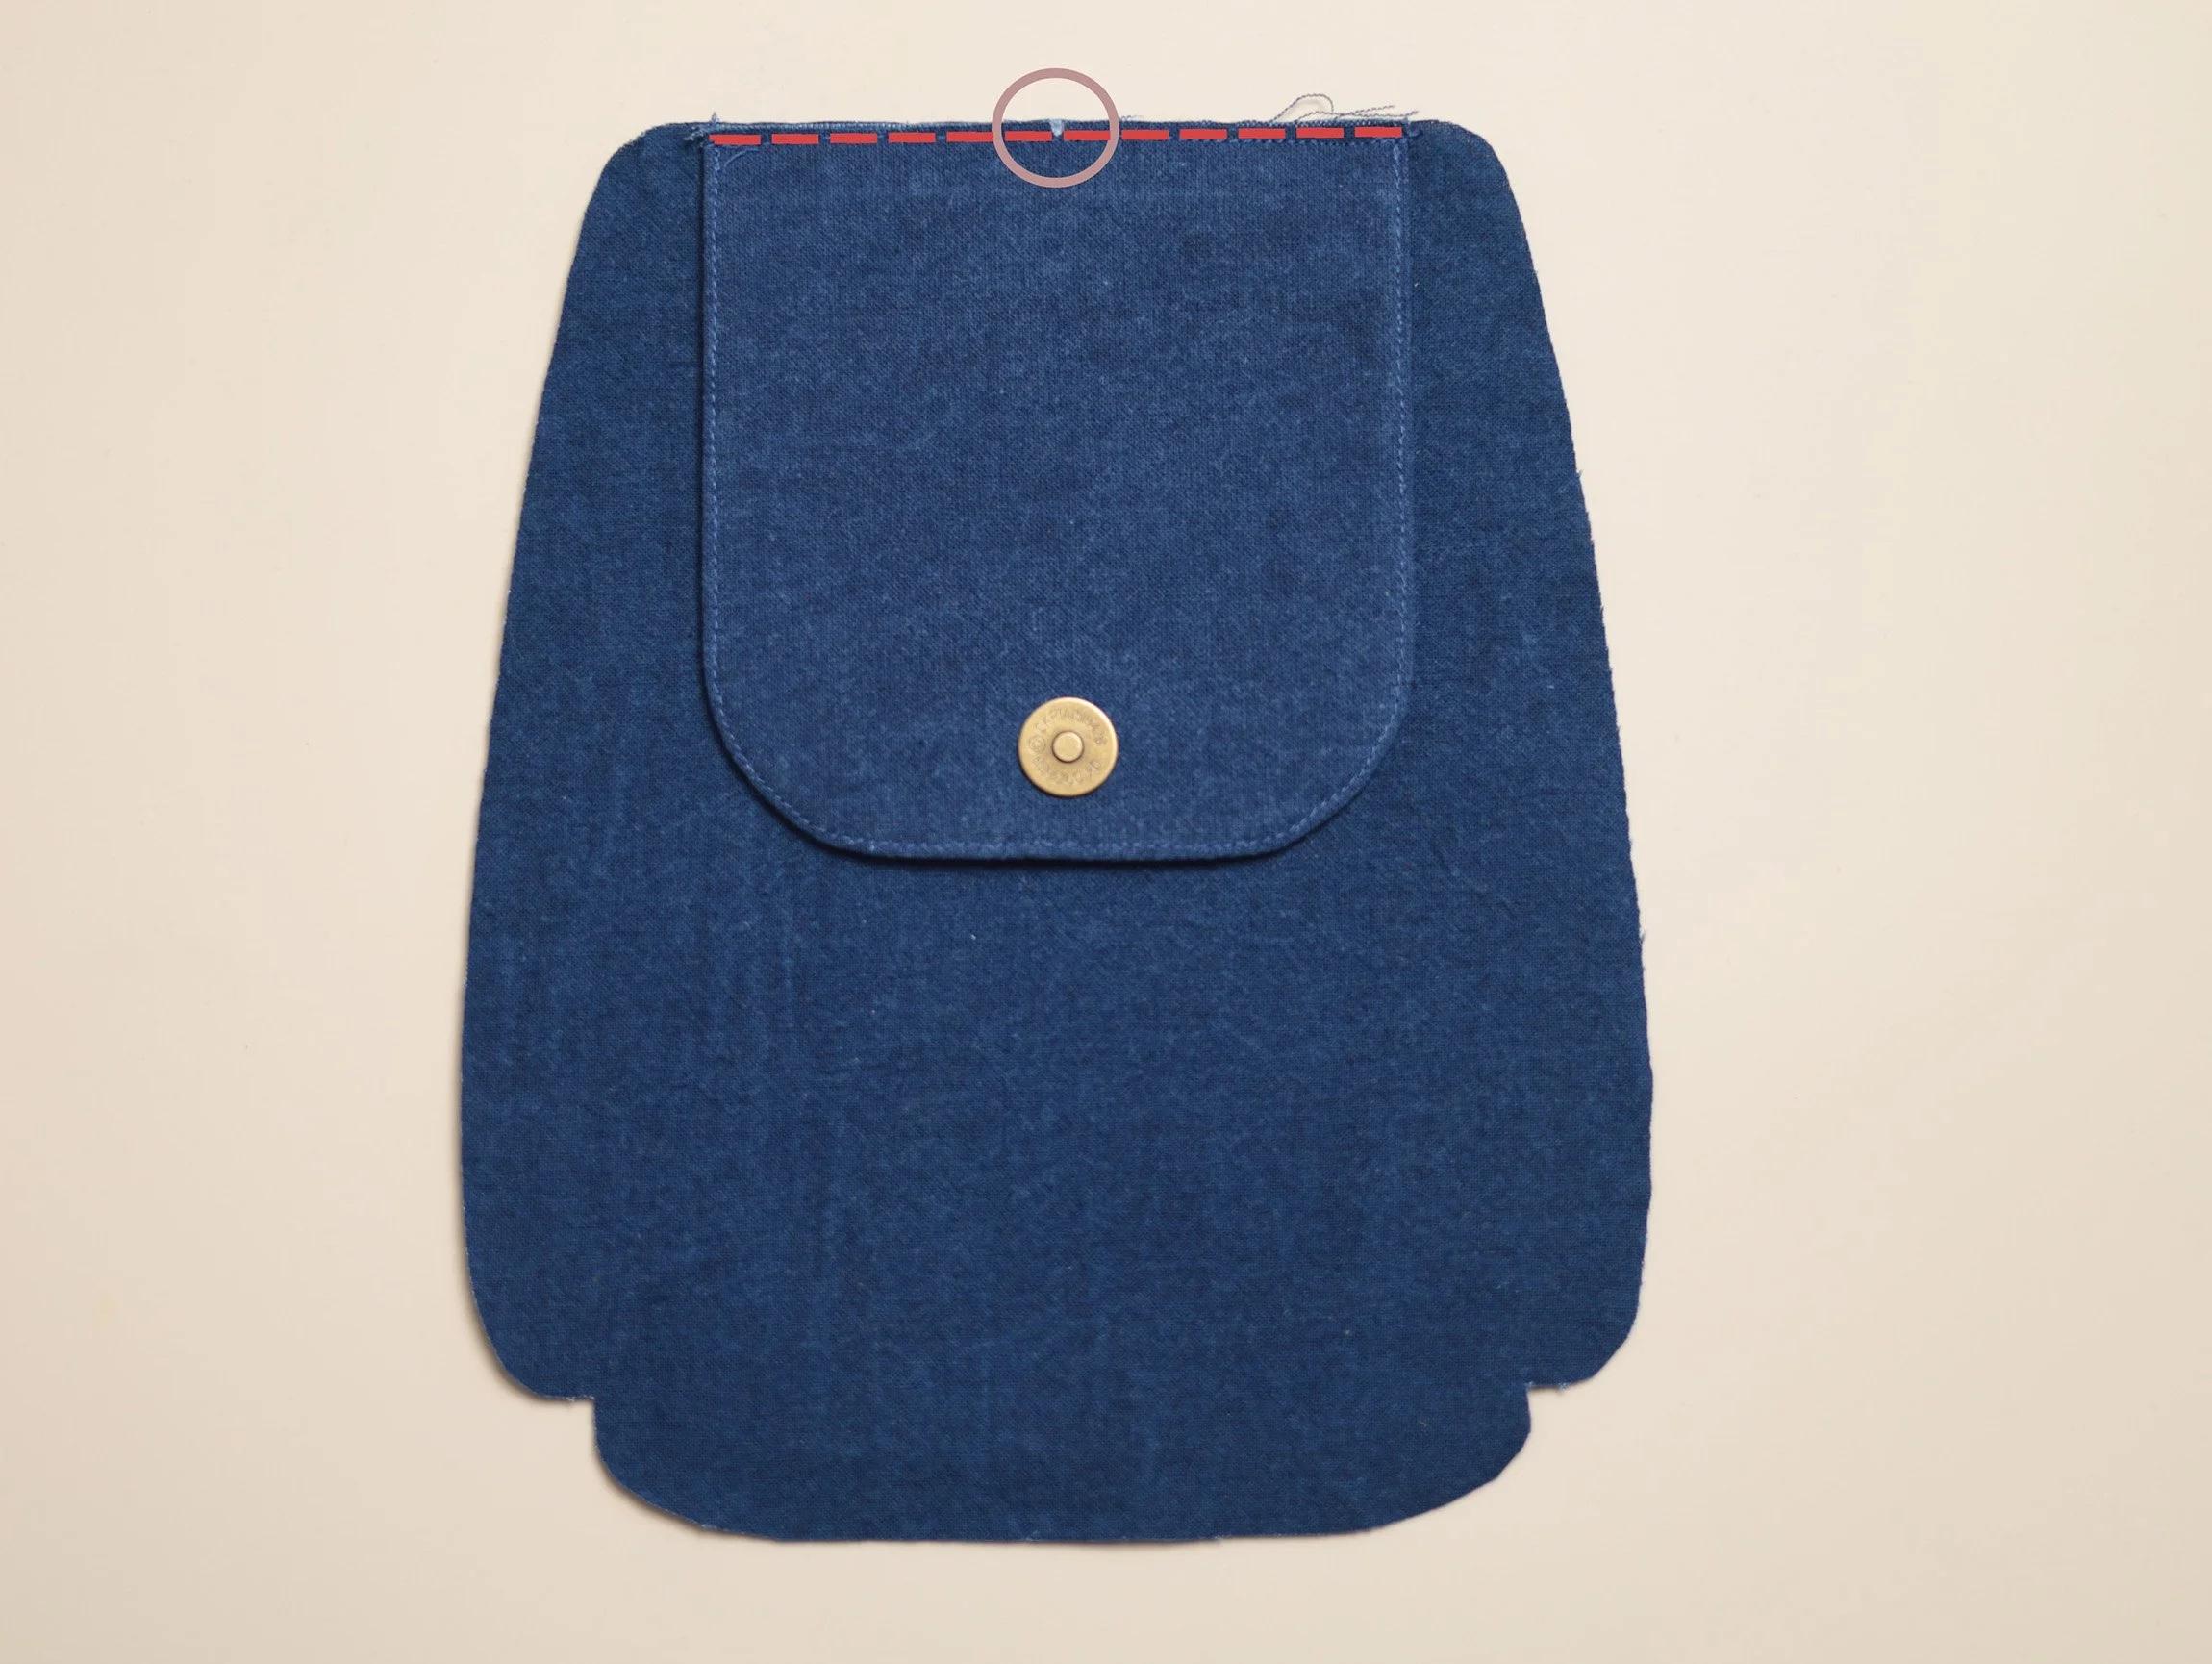
Place the bag flap on top of the bag back piece, right sides together, raw edges and their centre points aligned. Baste to secure within the seam allowance.
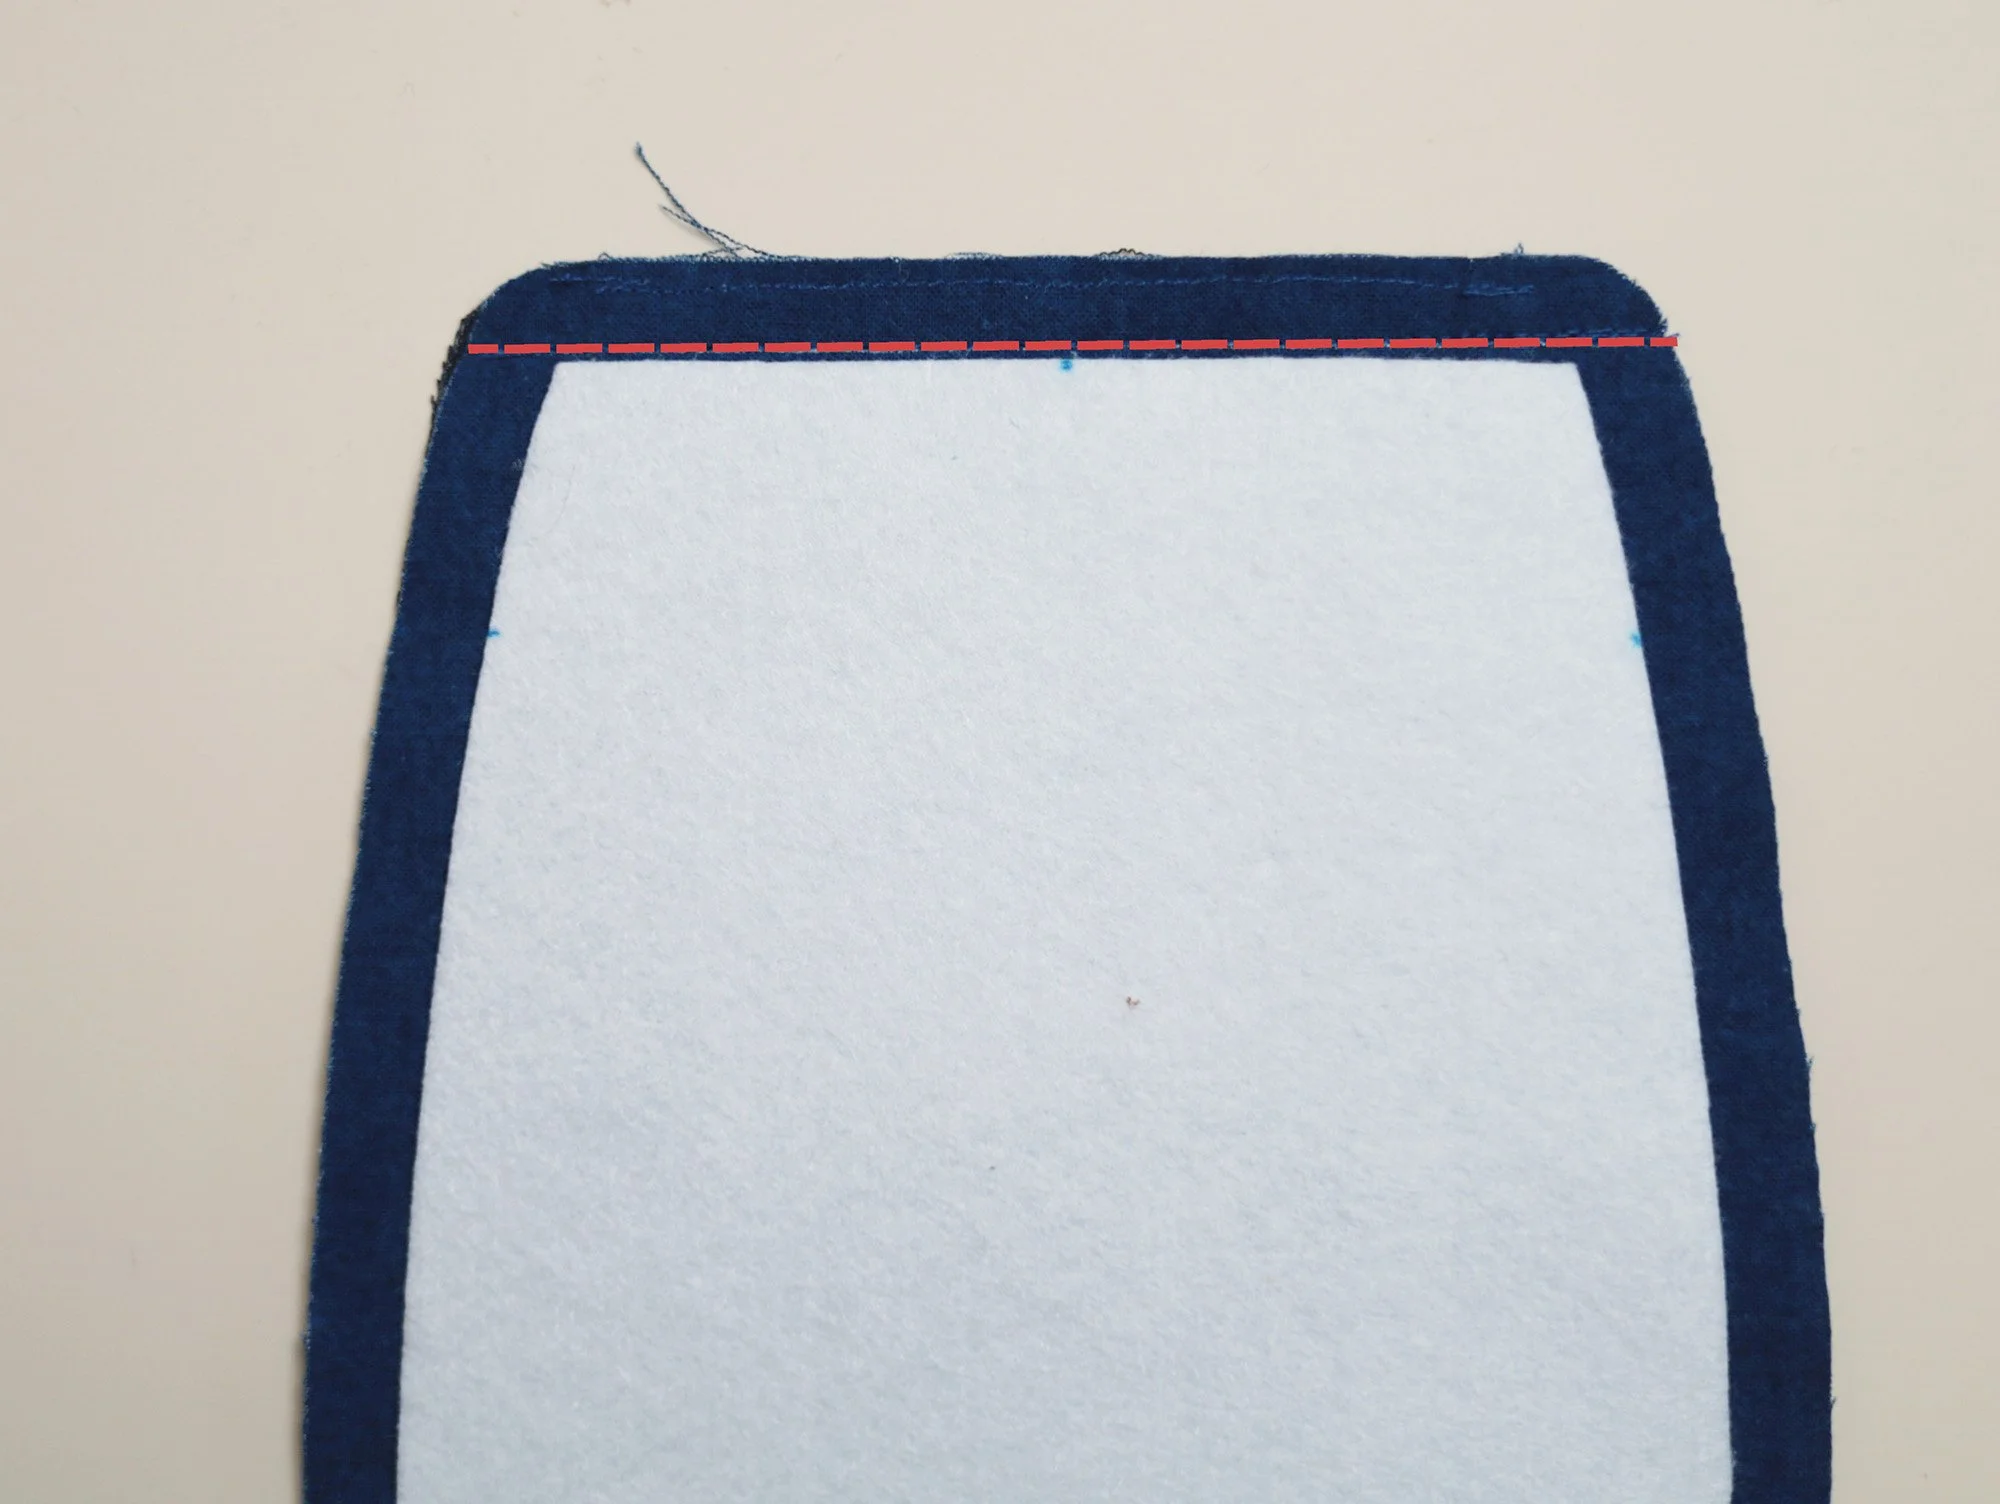
Place the other bag lining piece on top of the bag back piece, right sides together and raw edges aligned. Clip the layers in place and stitch along the top edge, 1–2 mm from the interfacing edge.
Sew the base corner darts:
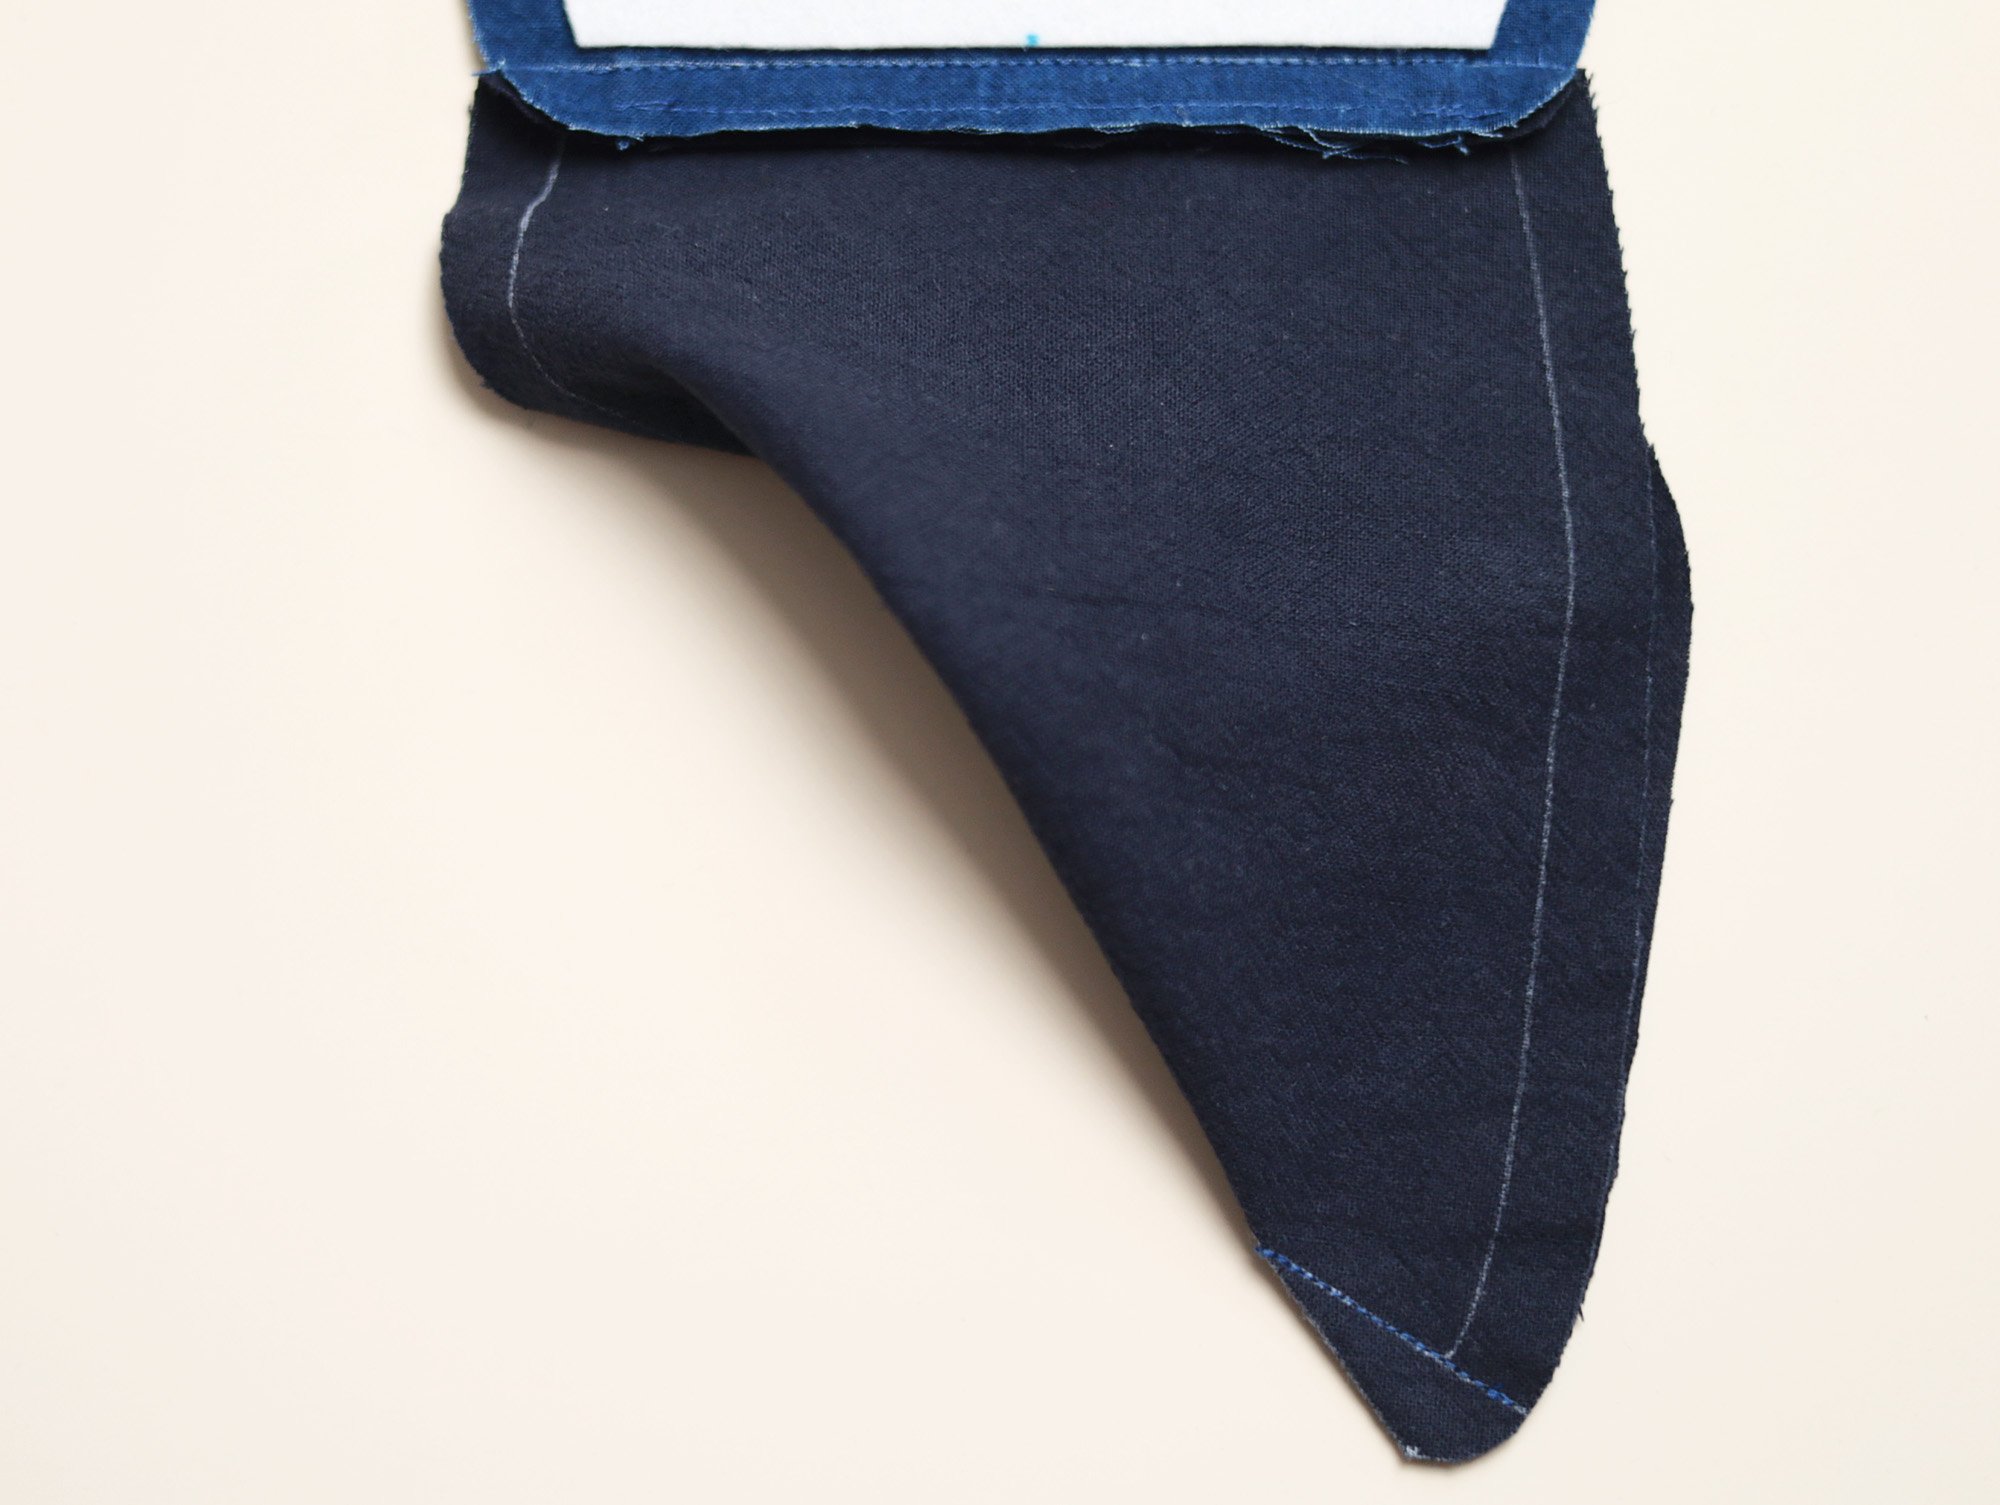
For the four darts on the lining fabric, fold the fabric at the base corner, right sides together, aligning the dart markings and secure with clips or pins. Stitch along the marked dart line. (Backstitch at both ends to secure.)
For the four darts on the man fabric, it’s best to draw the reference lines 1~2mm from the interfacing edges first, and use those lines as the new dart lines for stitching.
7. Assemble the bag.
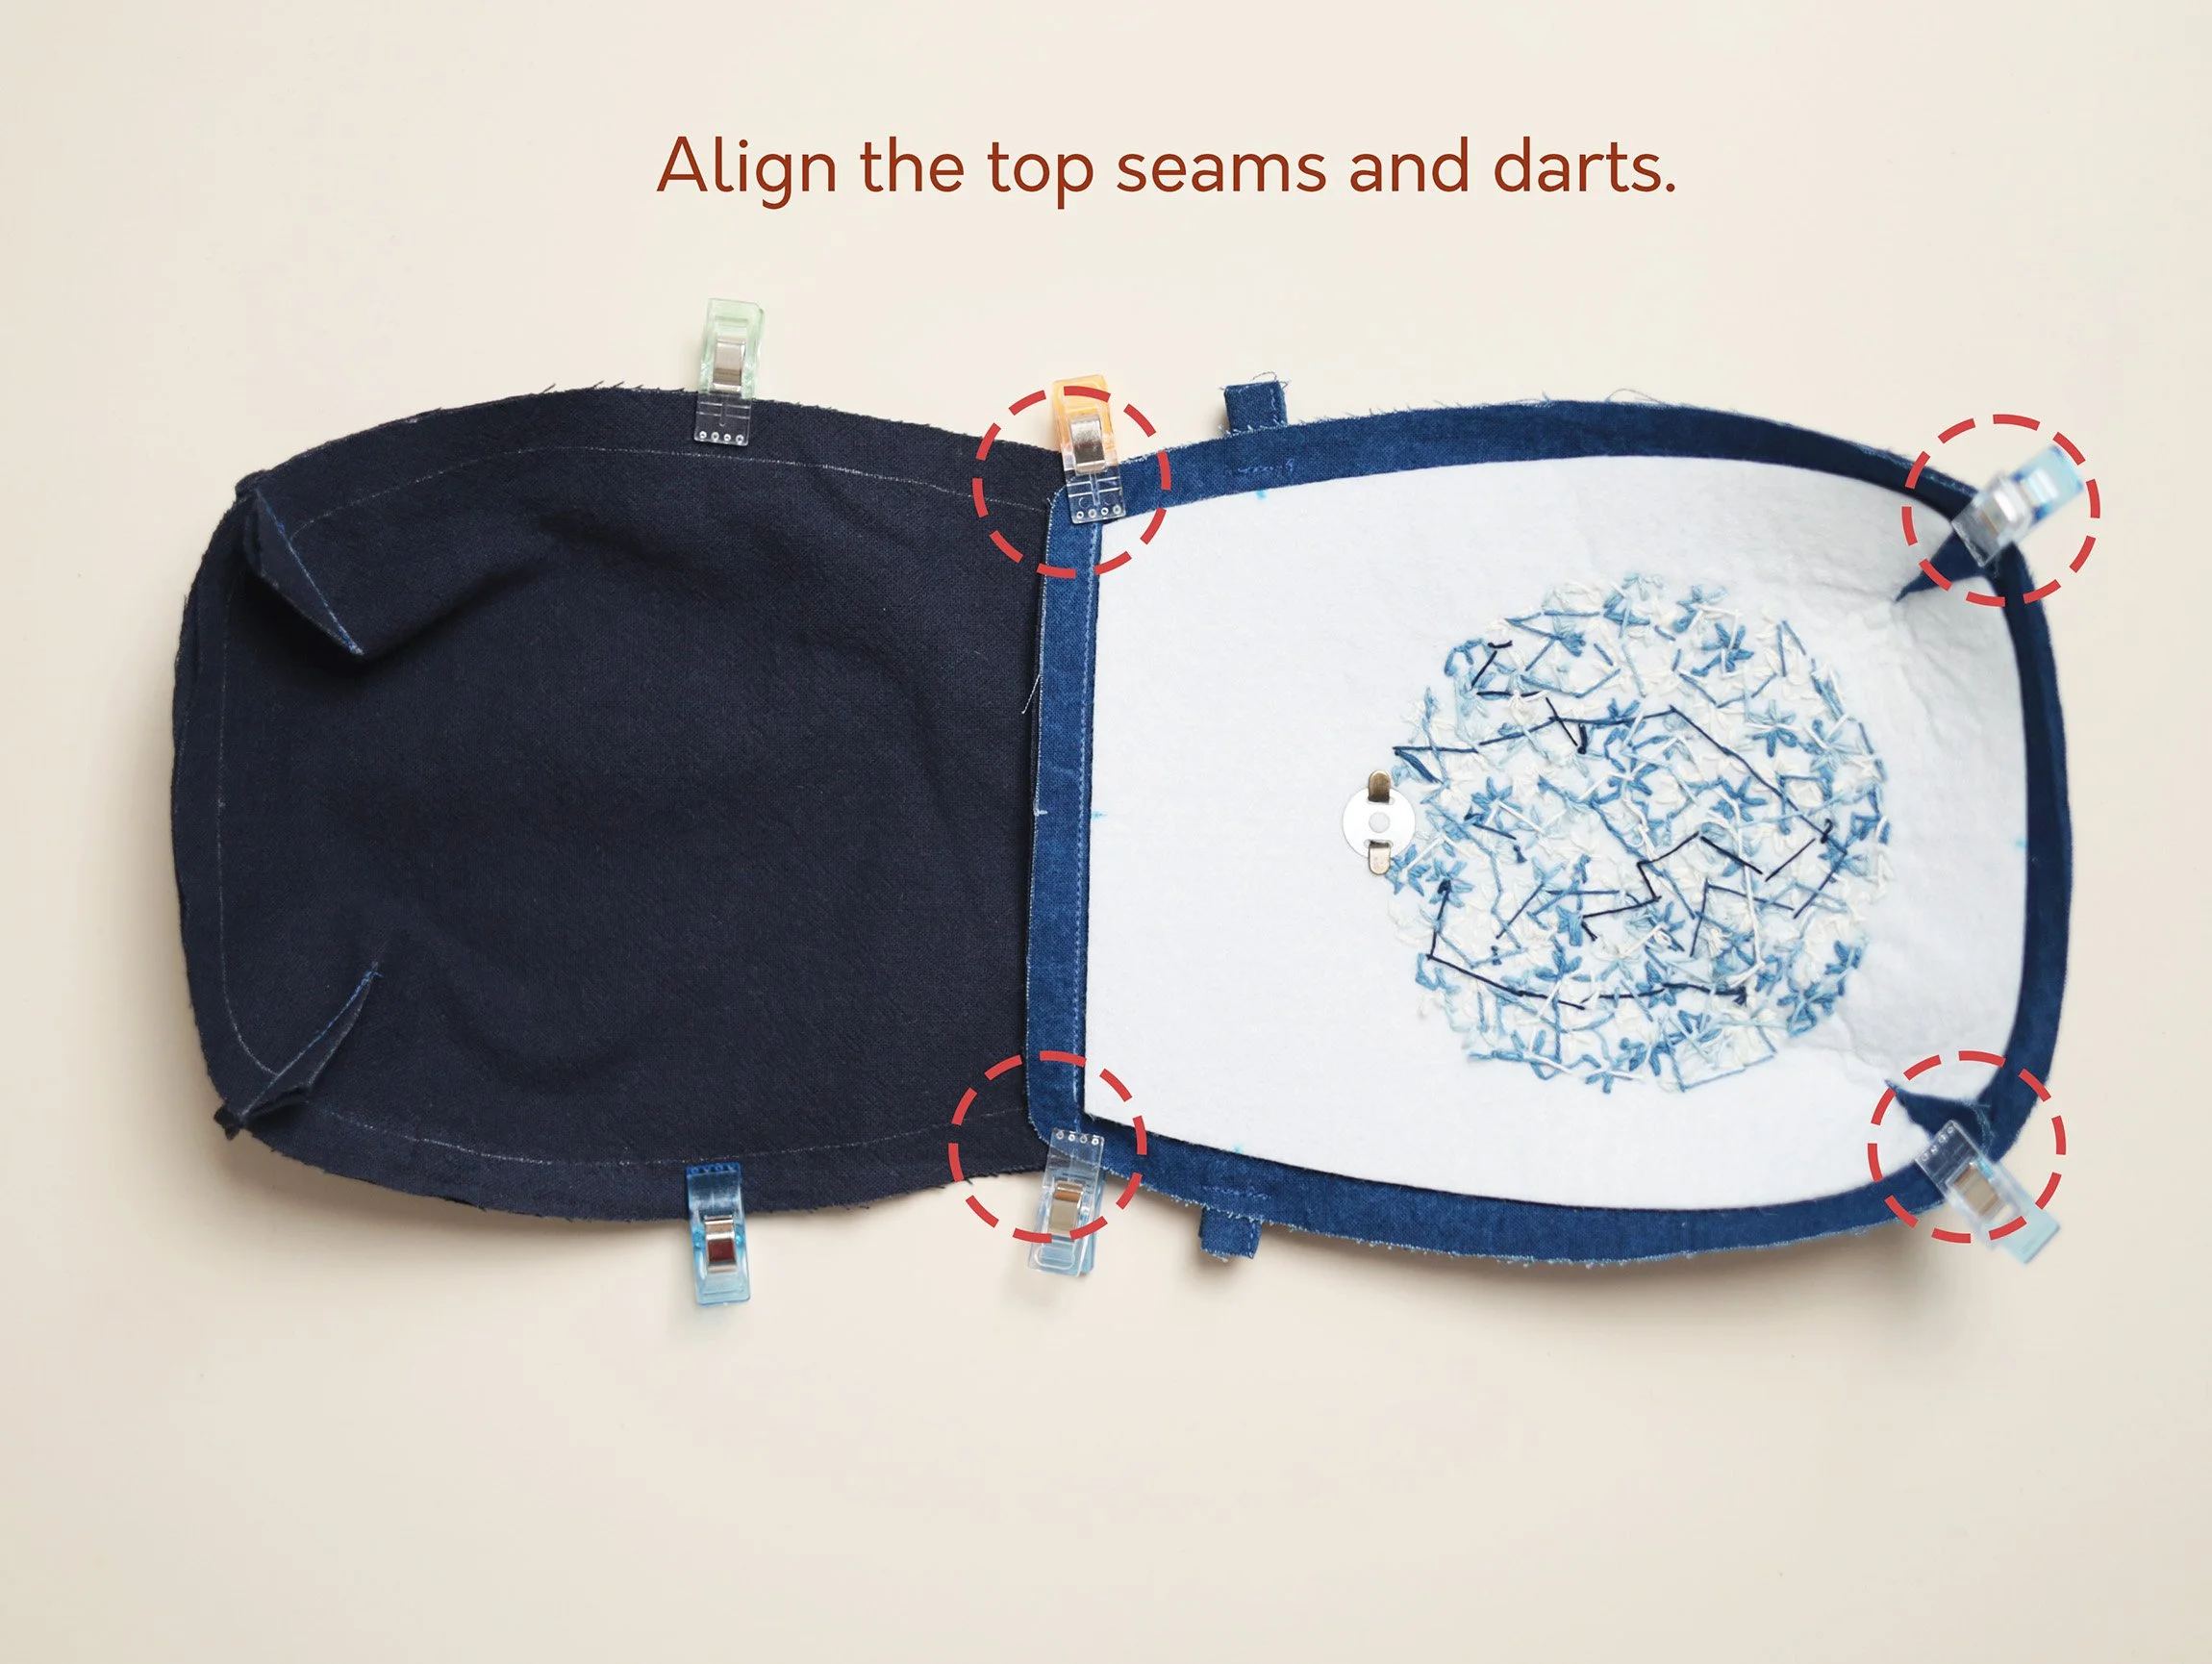
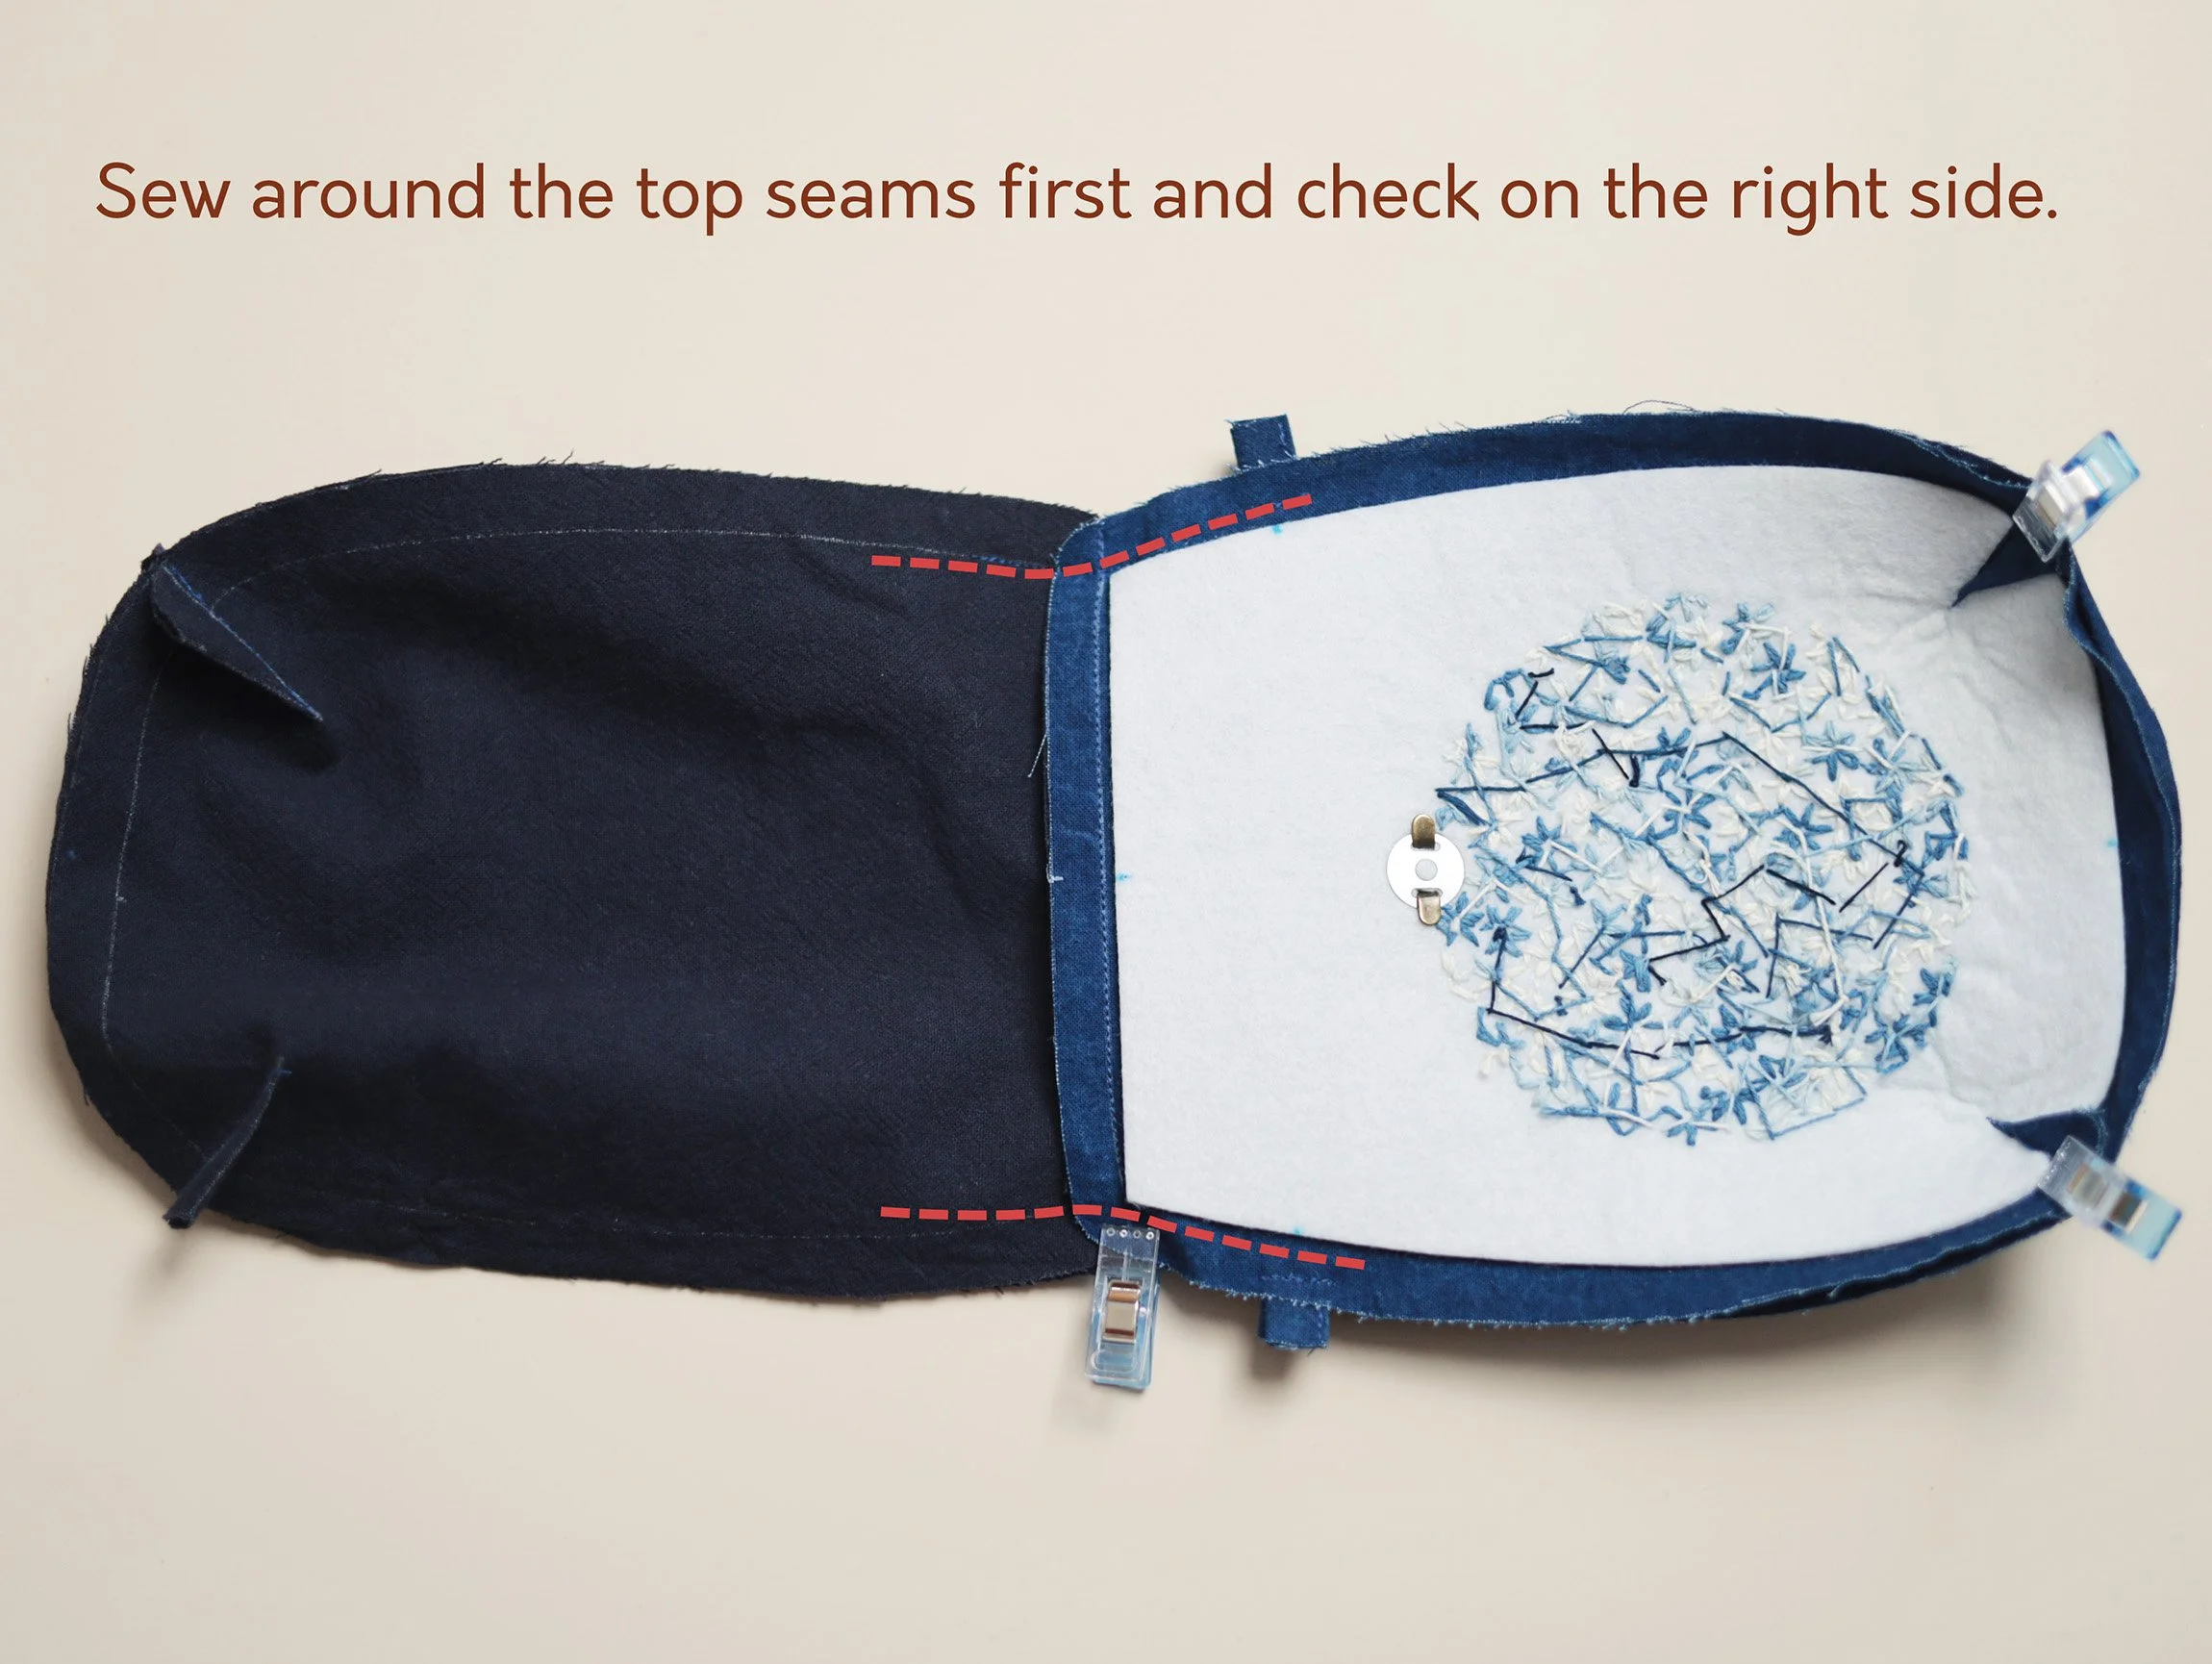
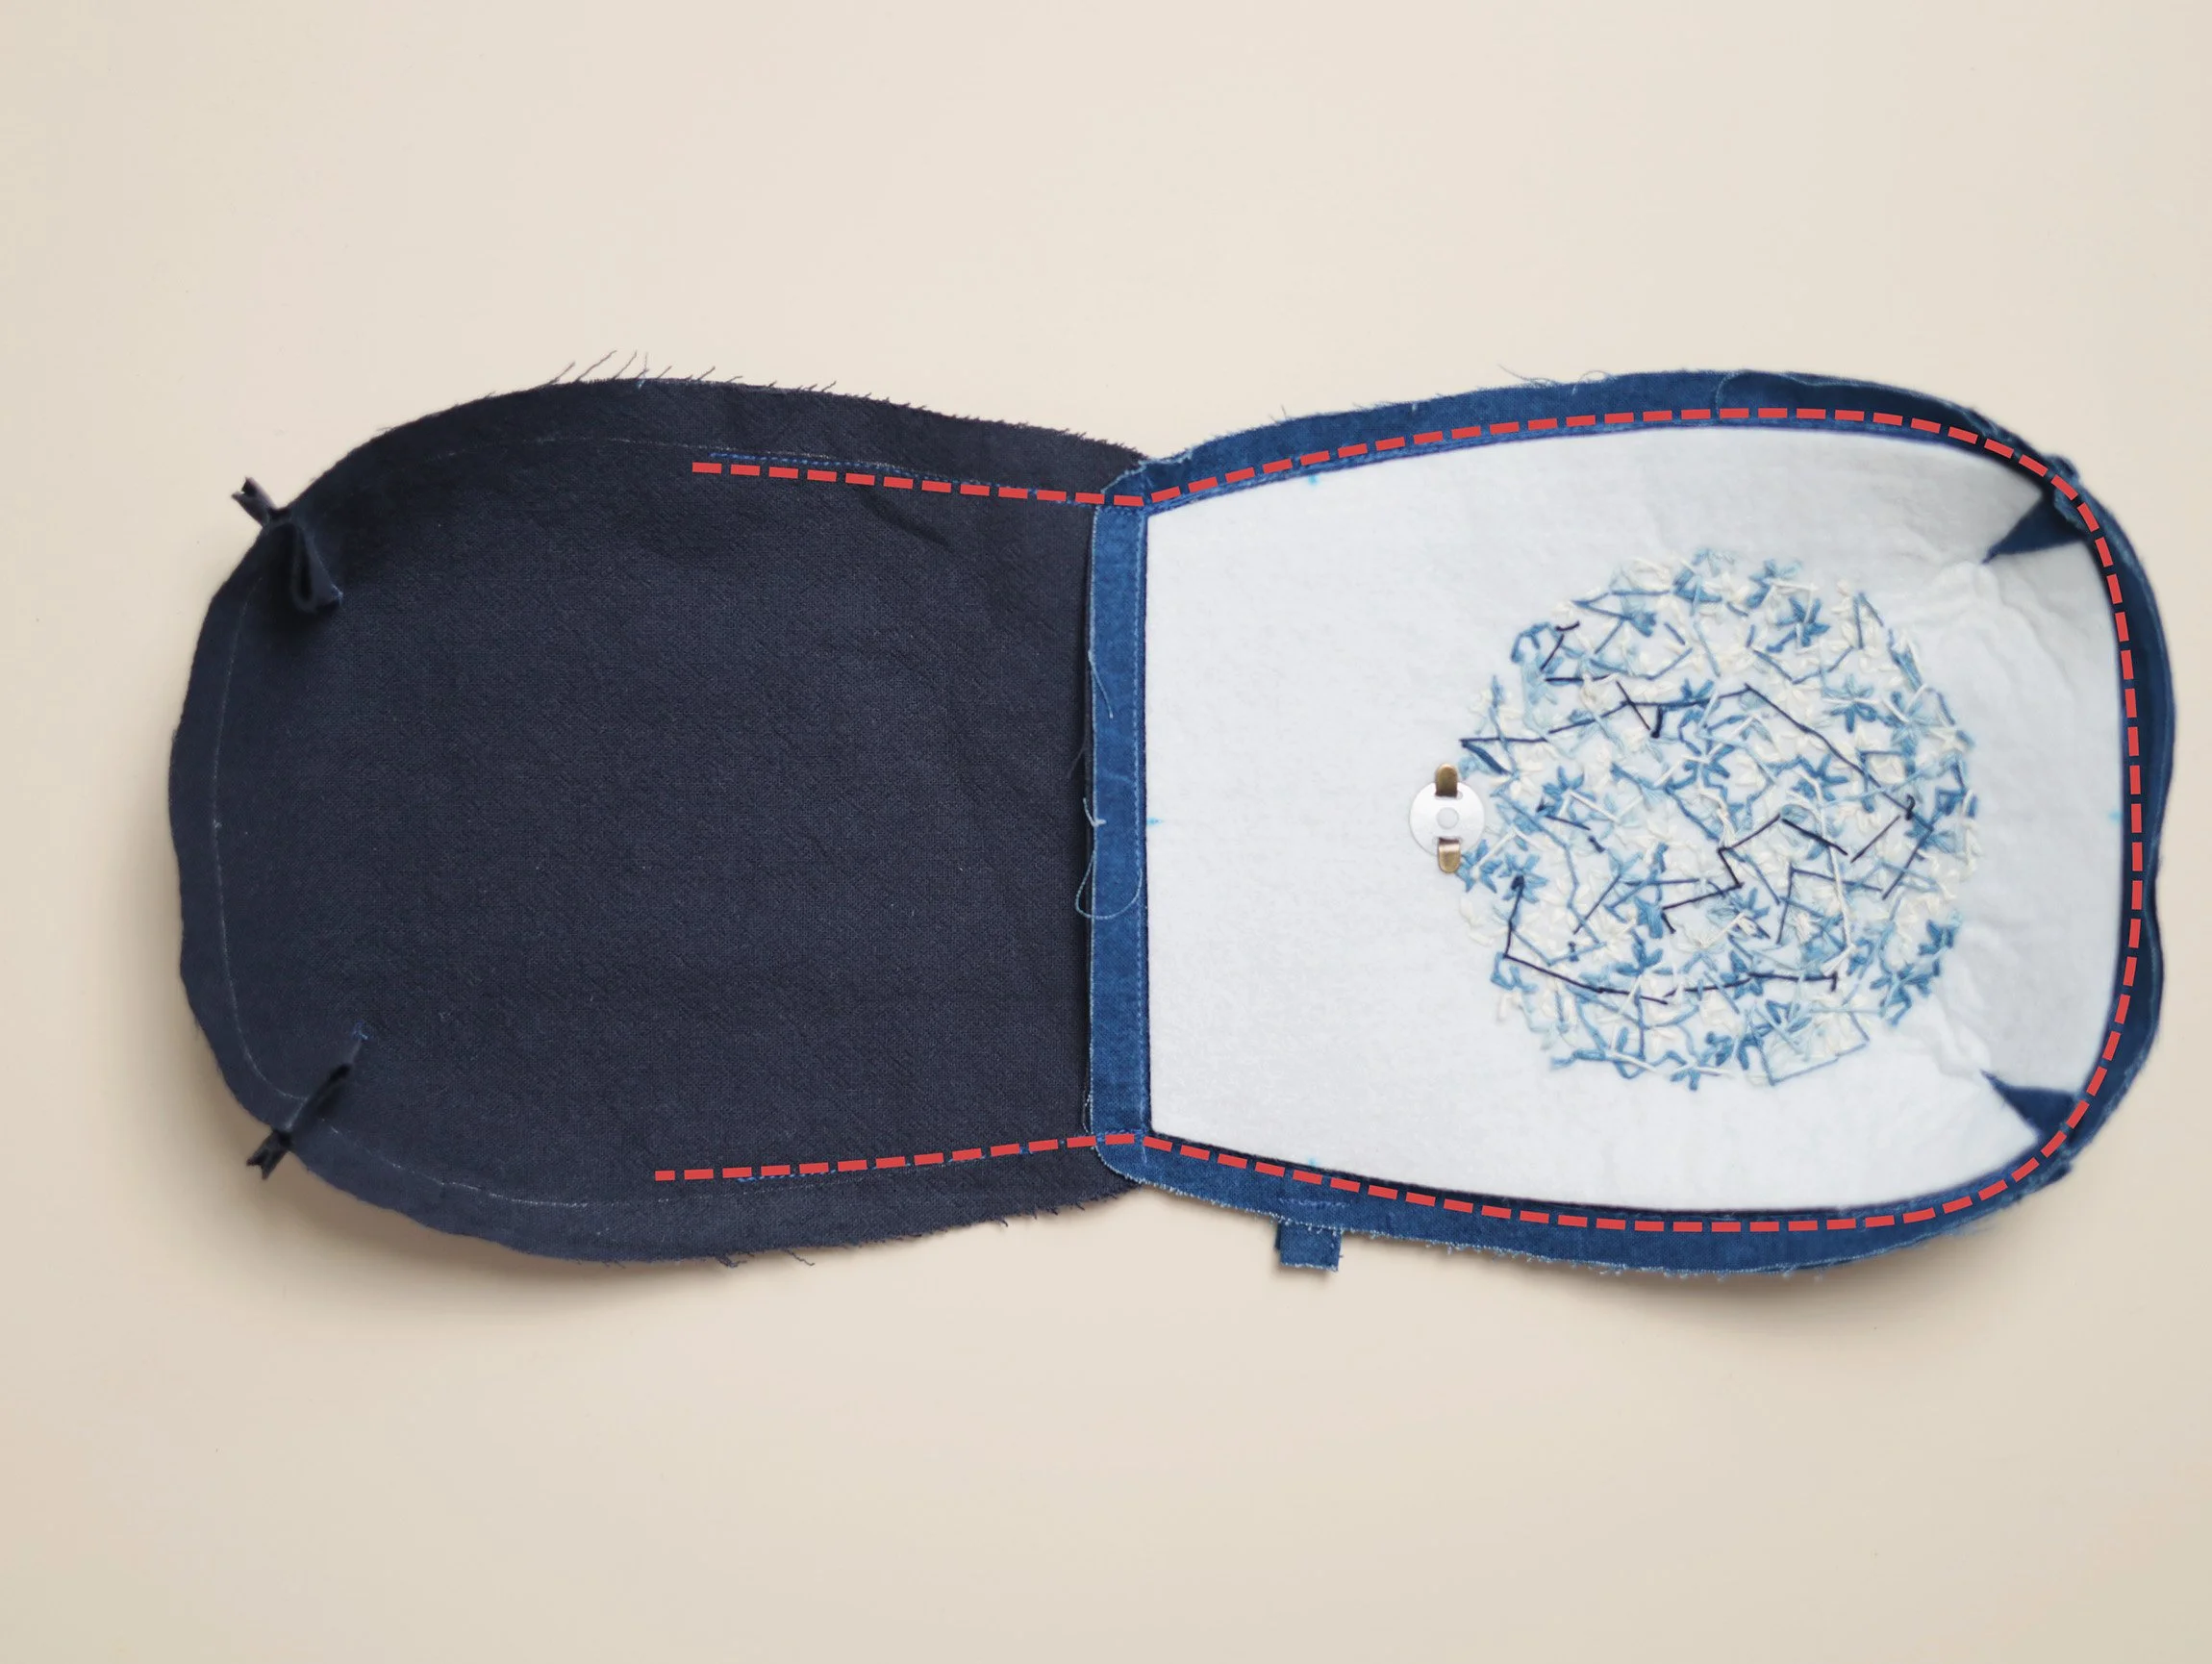
Open out the front and back pieces and place them together, with main fabrics on one side and linings on the other and their right sides facing. Make sure the top seams and darts on both layers are aligned. Secure these places with clips. Start around the centre of one lining side seam. Stitch around and stop at the centre of the opposite side, leaving a large opening on the bag lining.
Tips:
To ensure the bag is assembled correctly, stitch a short section on both sides of the opening first and check the top seams are aligned . Once satisfied, sew the rest.
Press each pair of darts in opposite directions to reduce bulk.
On the main side, stitch 1–2 mm from the interfacing edge as usual. On the lining side, stitch 2–3 mm inside the pattern line to reduce the lining size for a better fit.
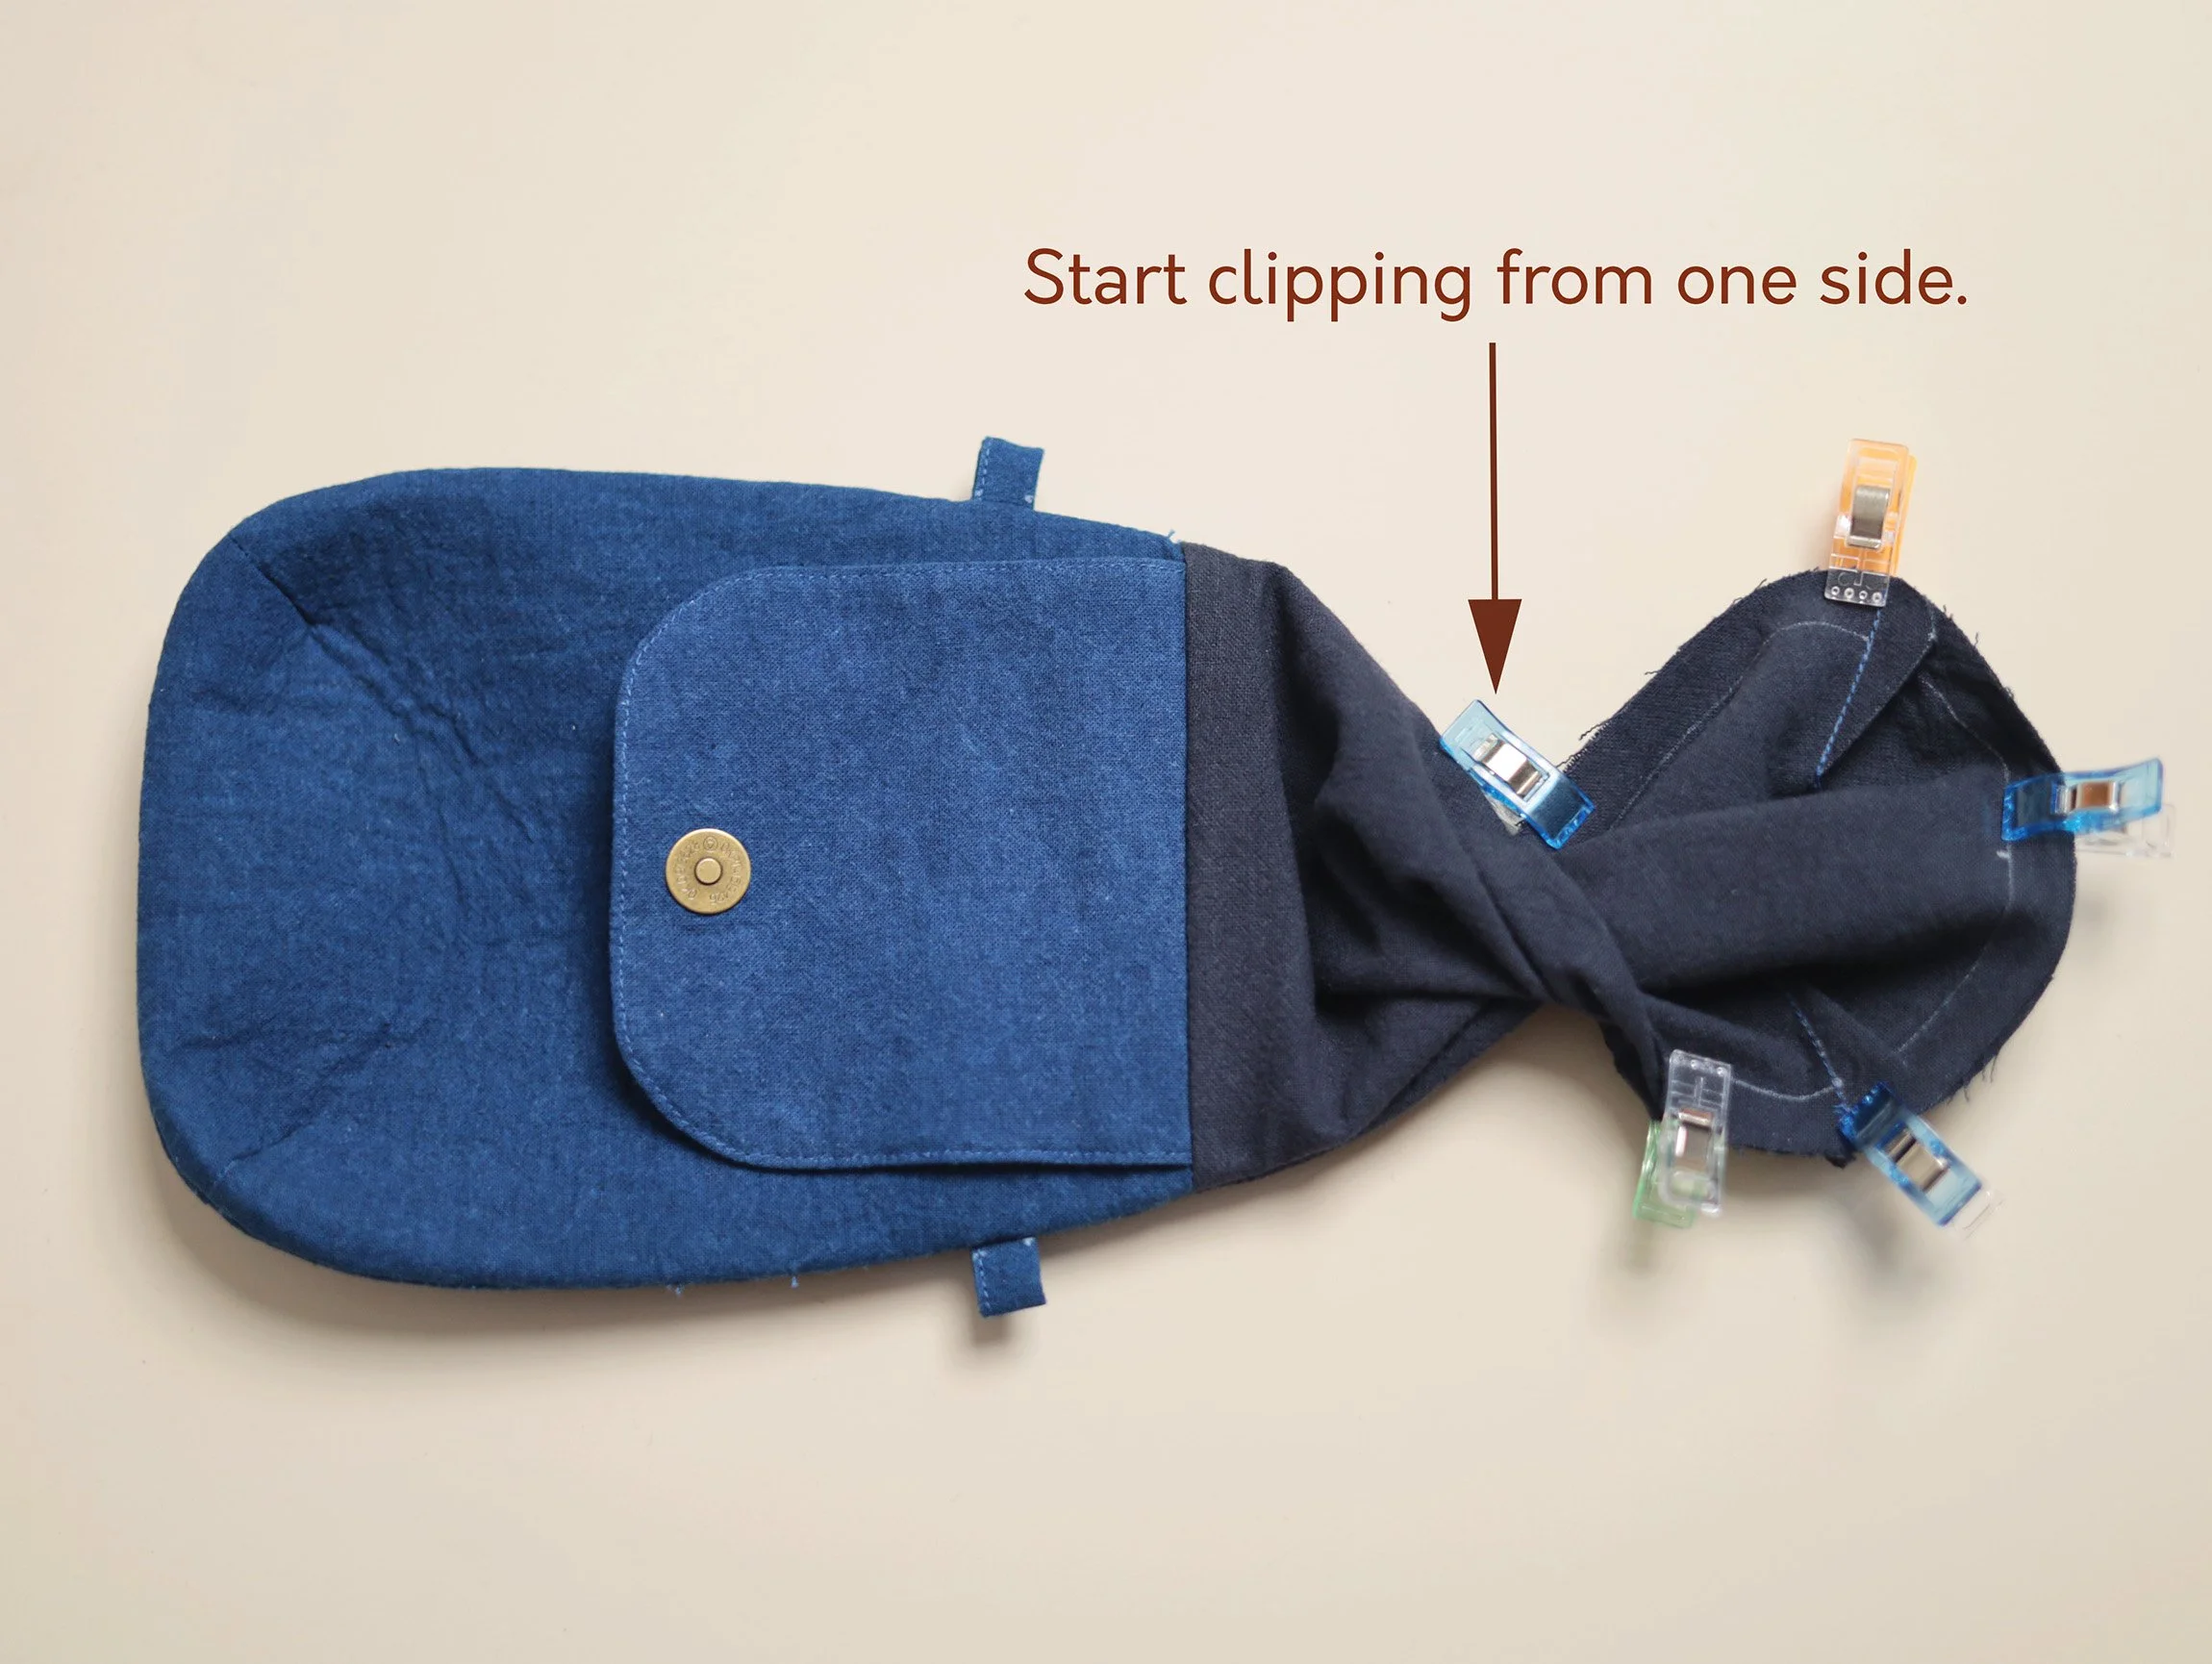
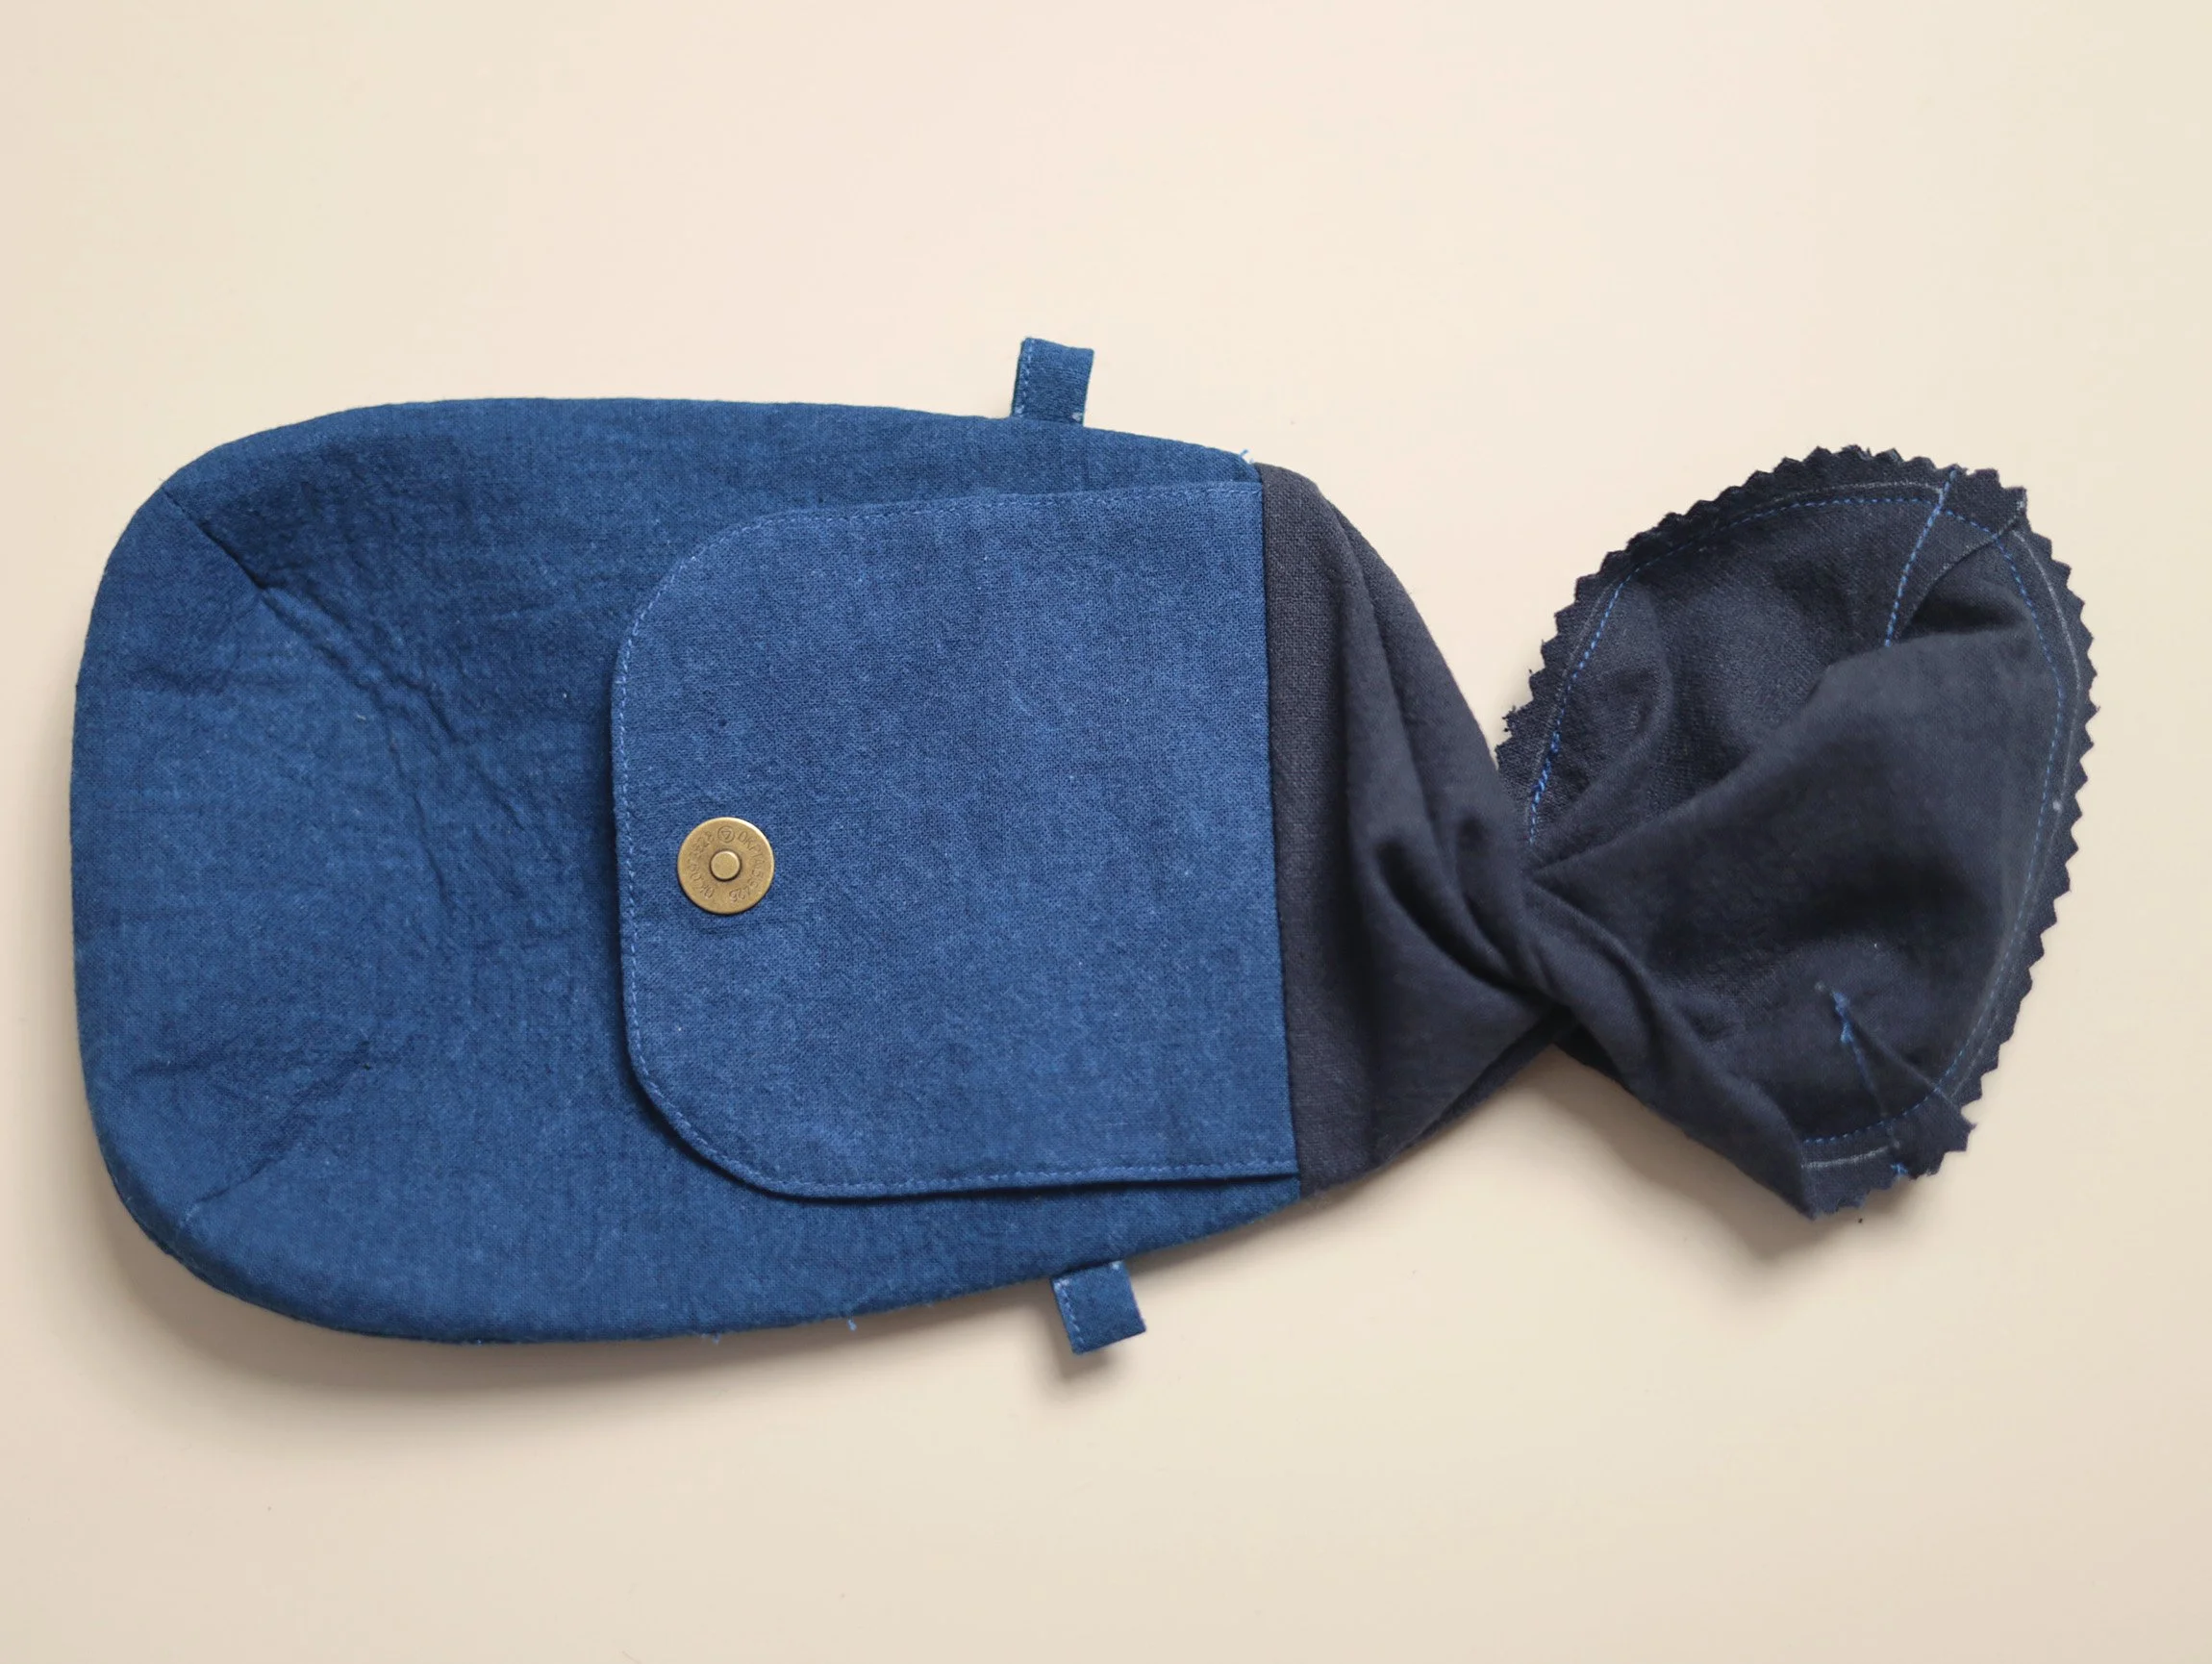
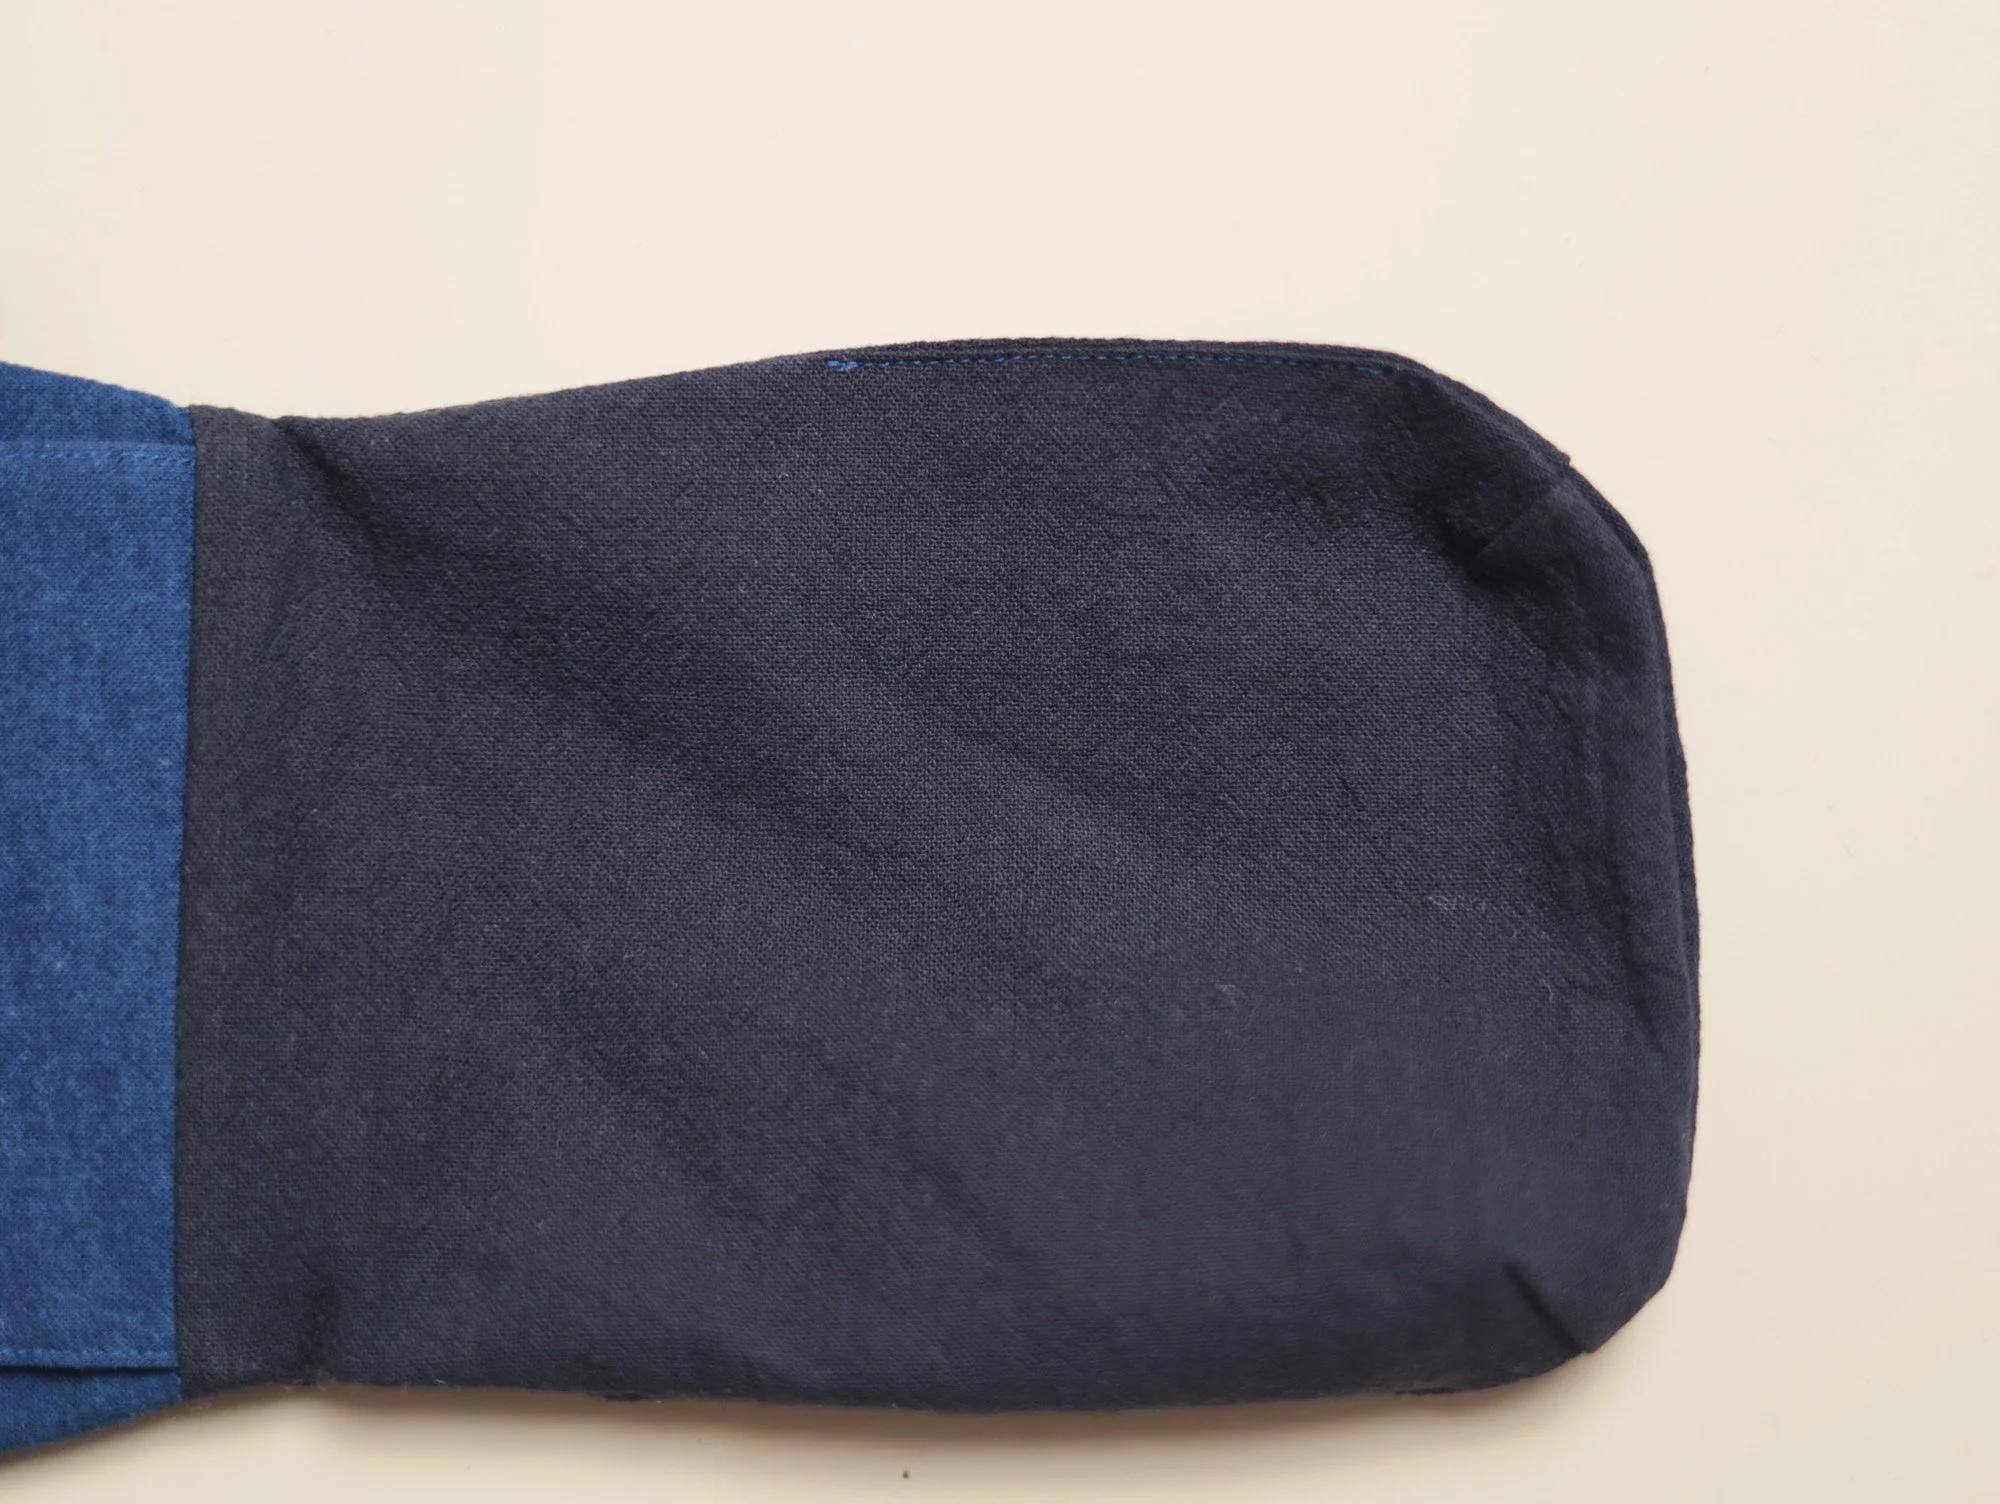
Turn the bag right side out by gently pushing the main fabric through into the lining.
Starting from one side of the lining opening, align the lining pieces with right sides together and clip the seams. Clip as far as possible, then stitch 2–3 mm inside the pattern line. Trim half of the seam allowance.
Turn the lining right side out and close the opening by topstitching 1 mm from the edge or by hand stitching with a hidden stitch.
Optional: Topstitch 1–2 mm from the top edge around the opening.
7. Bag strap.
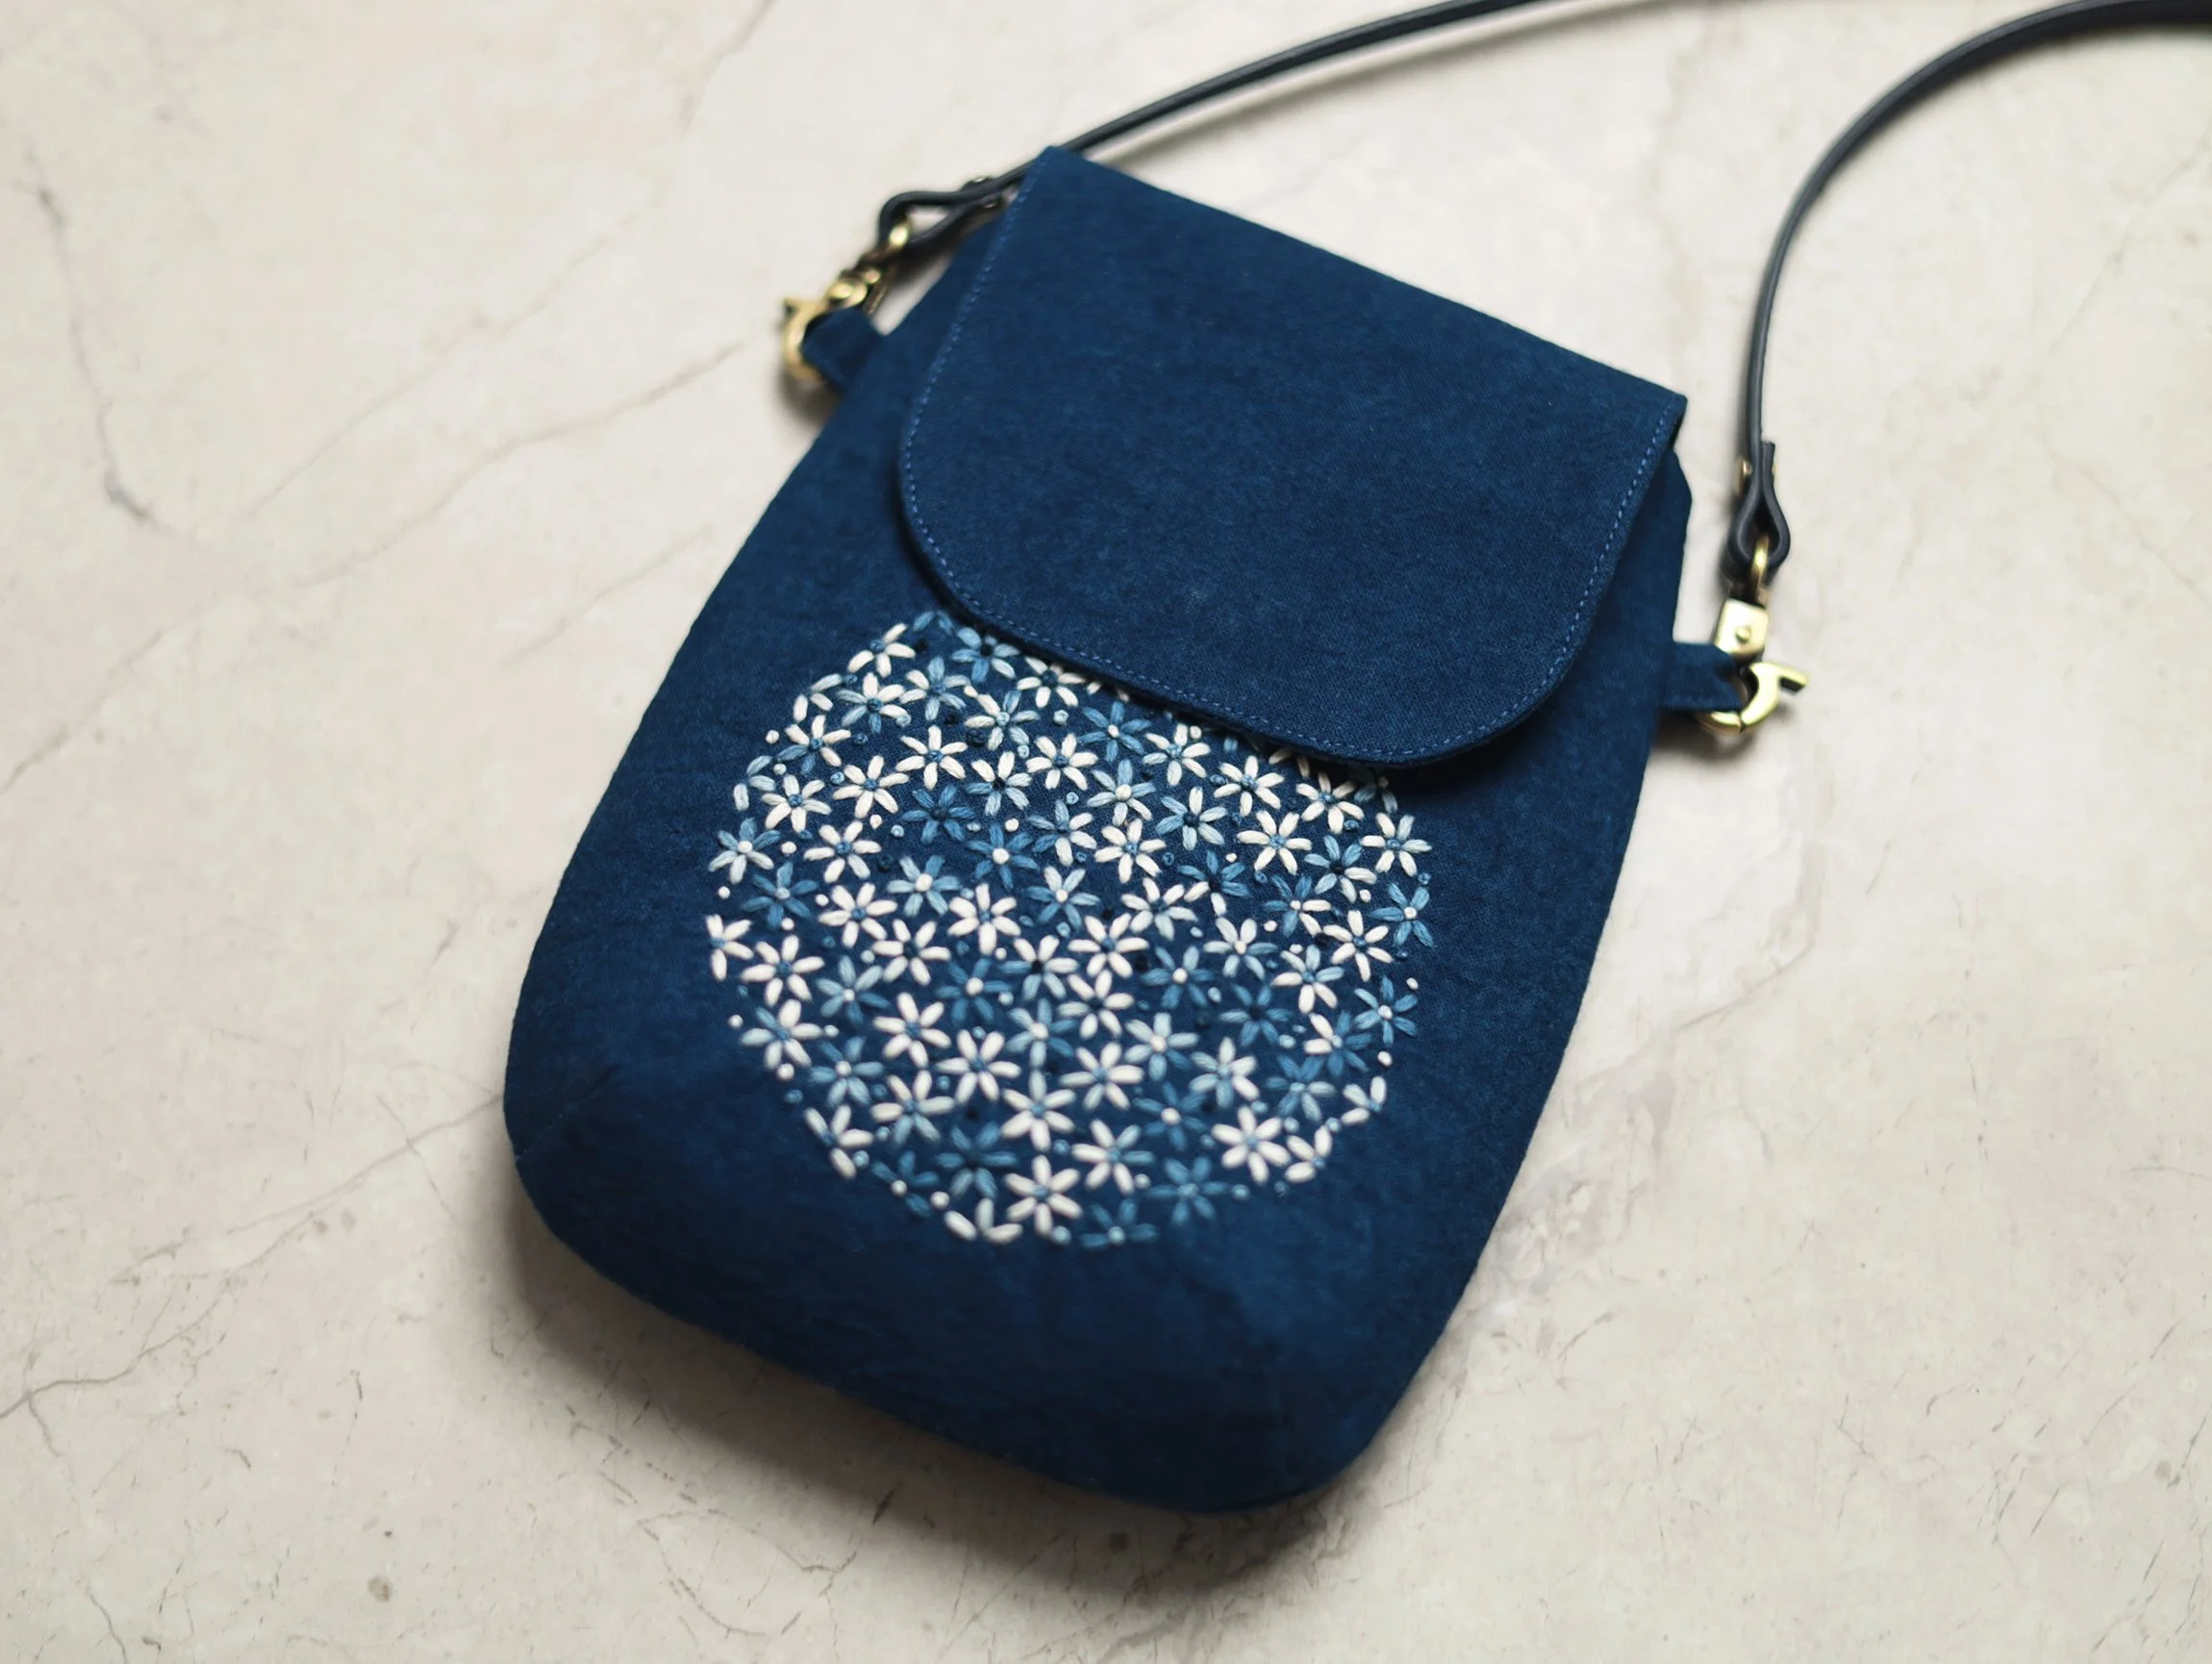
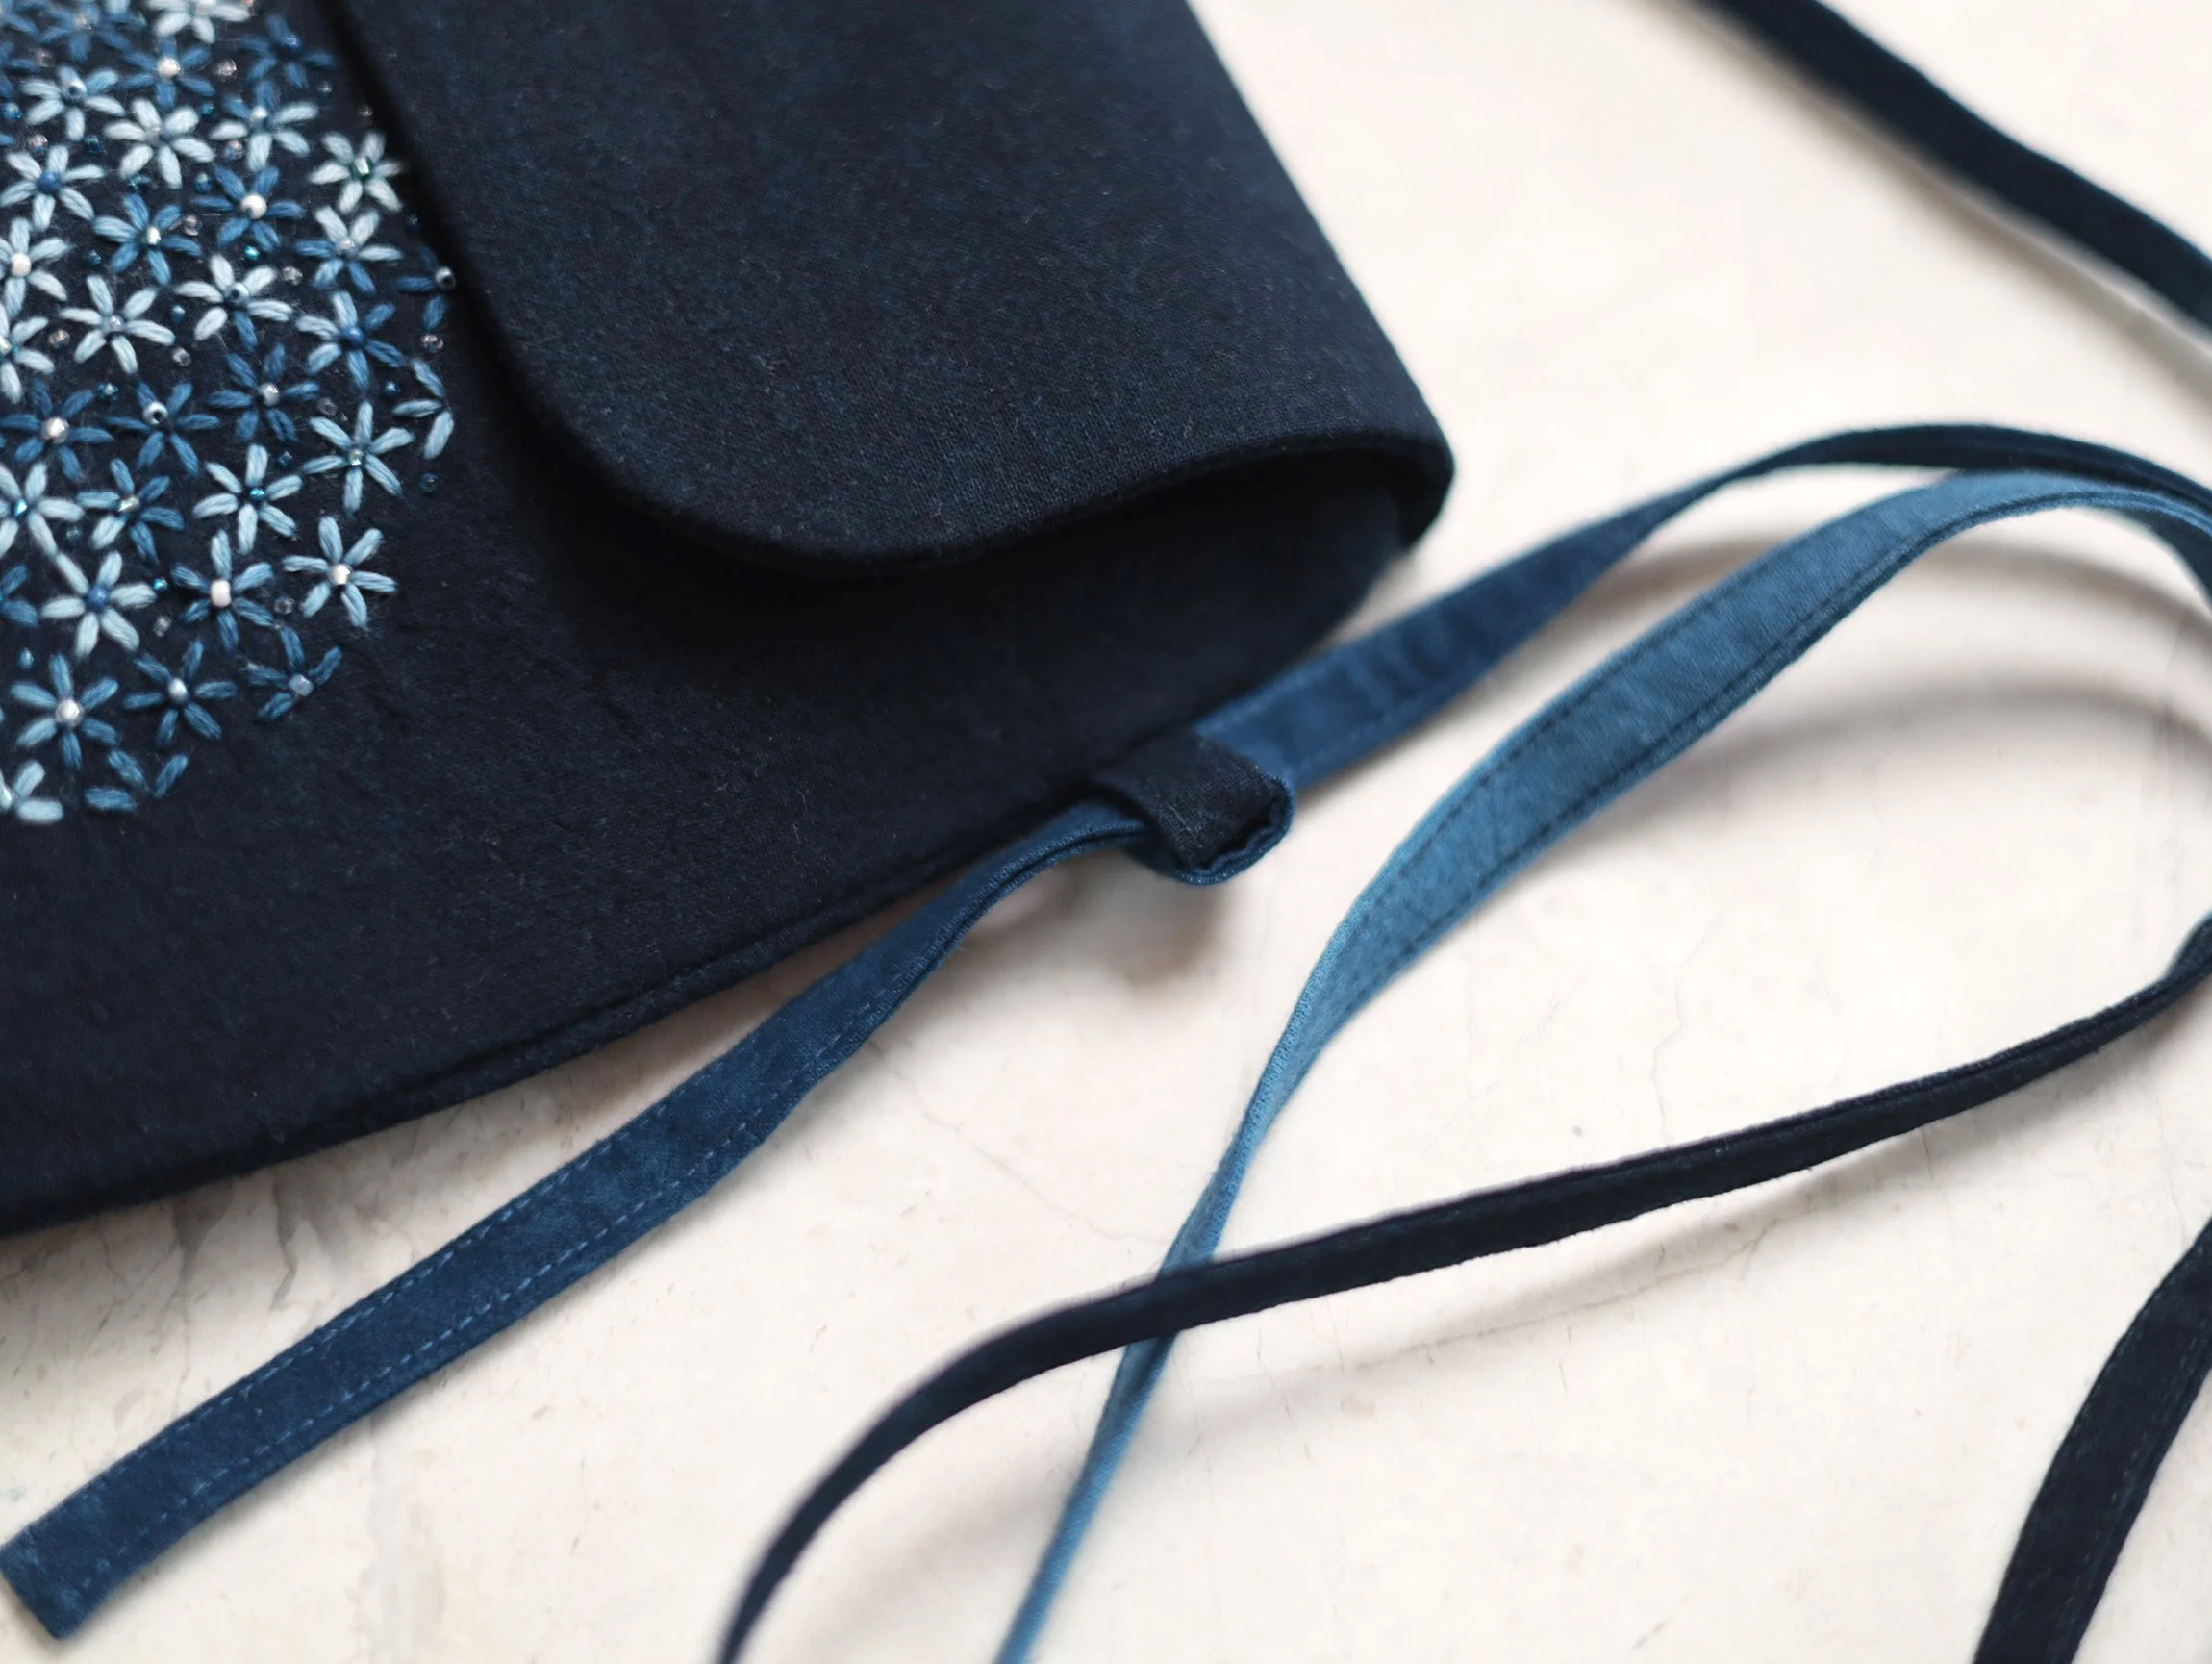
For a crossbody bag, the strap length is typically 110–120 cm. The ideal length may vary depending on the attachment method, your height, and personal preference.
You can use a ready-made leather strap or make your own fabric strap (free tutorial available here)—both are good options. We also offer high-quality leather straps in various colours in our shop.
8. Fabric-covered button decoration (optional).
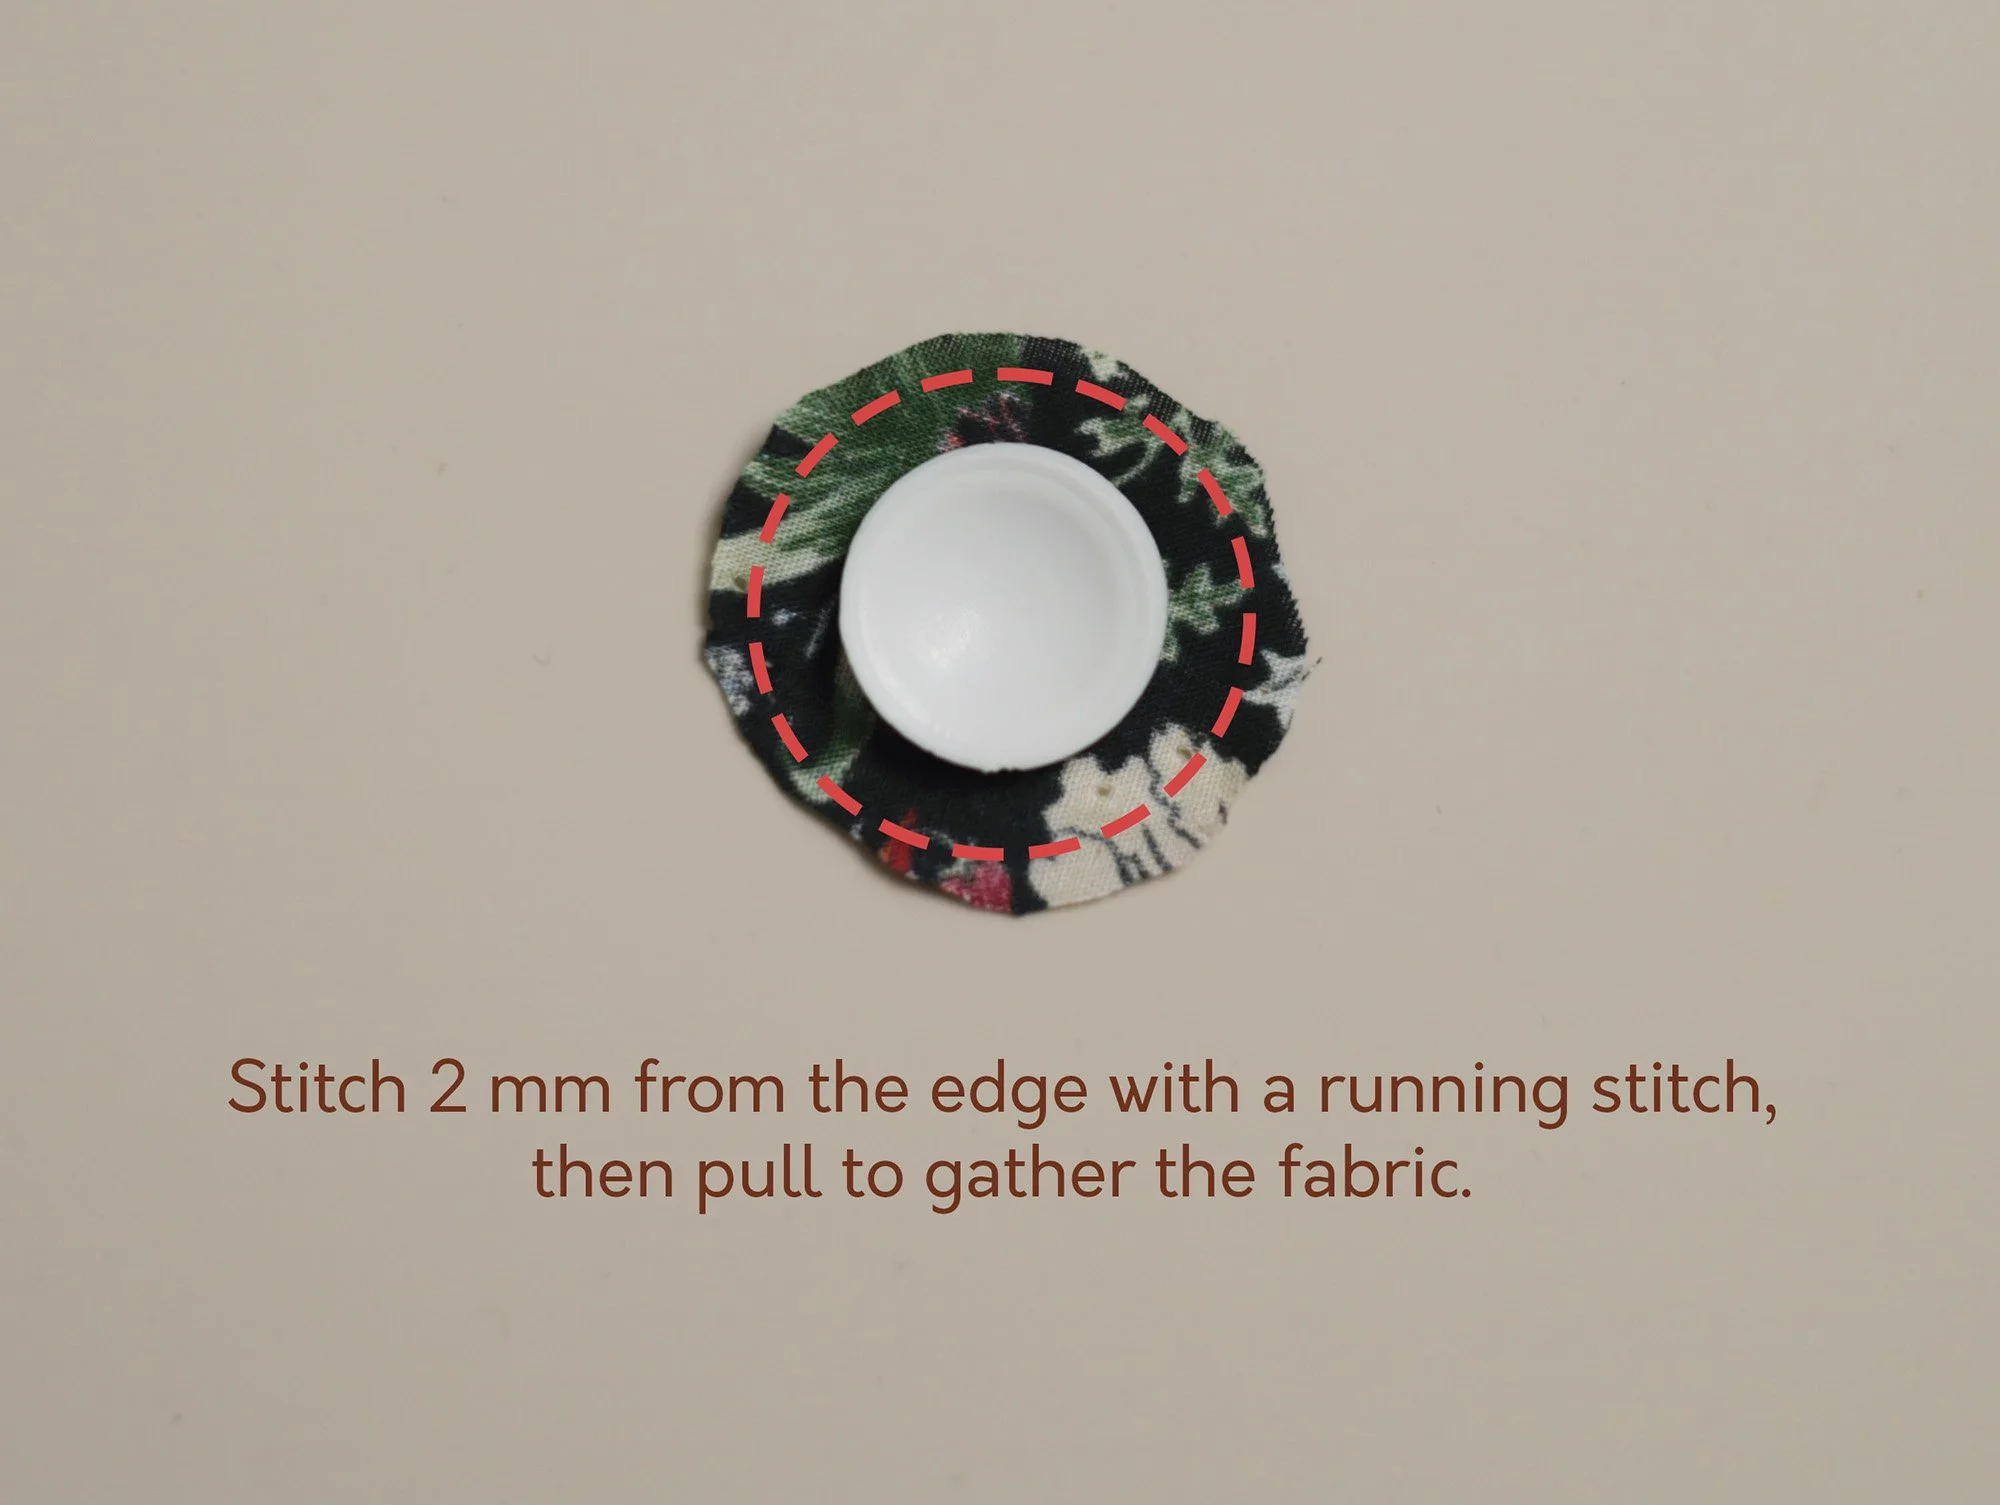
Cut a circular fabric piece 5–6 mm larger than the half button (1.5 cm used). Place the button centred on the wrong side, face down.
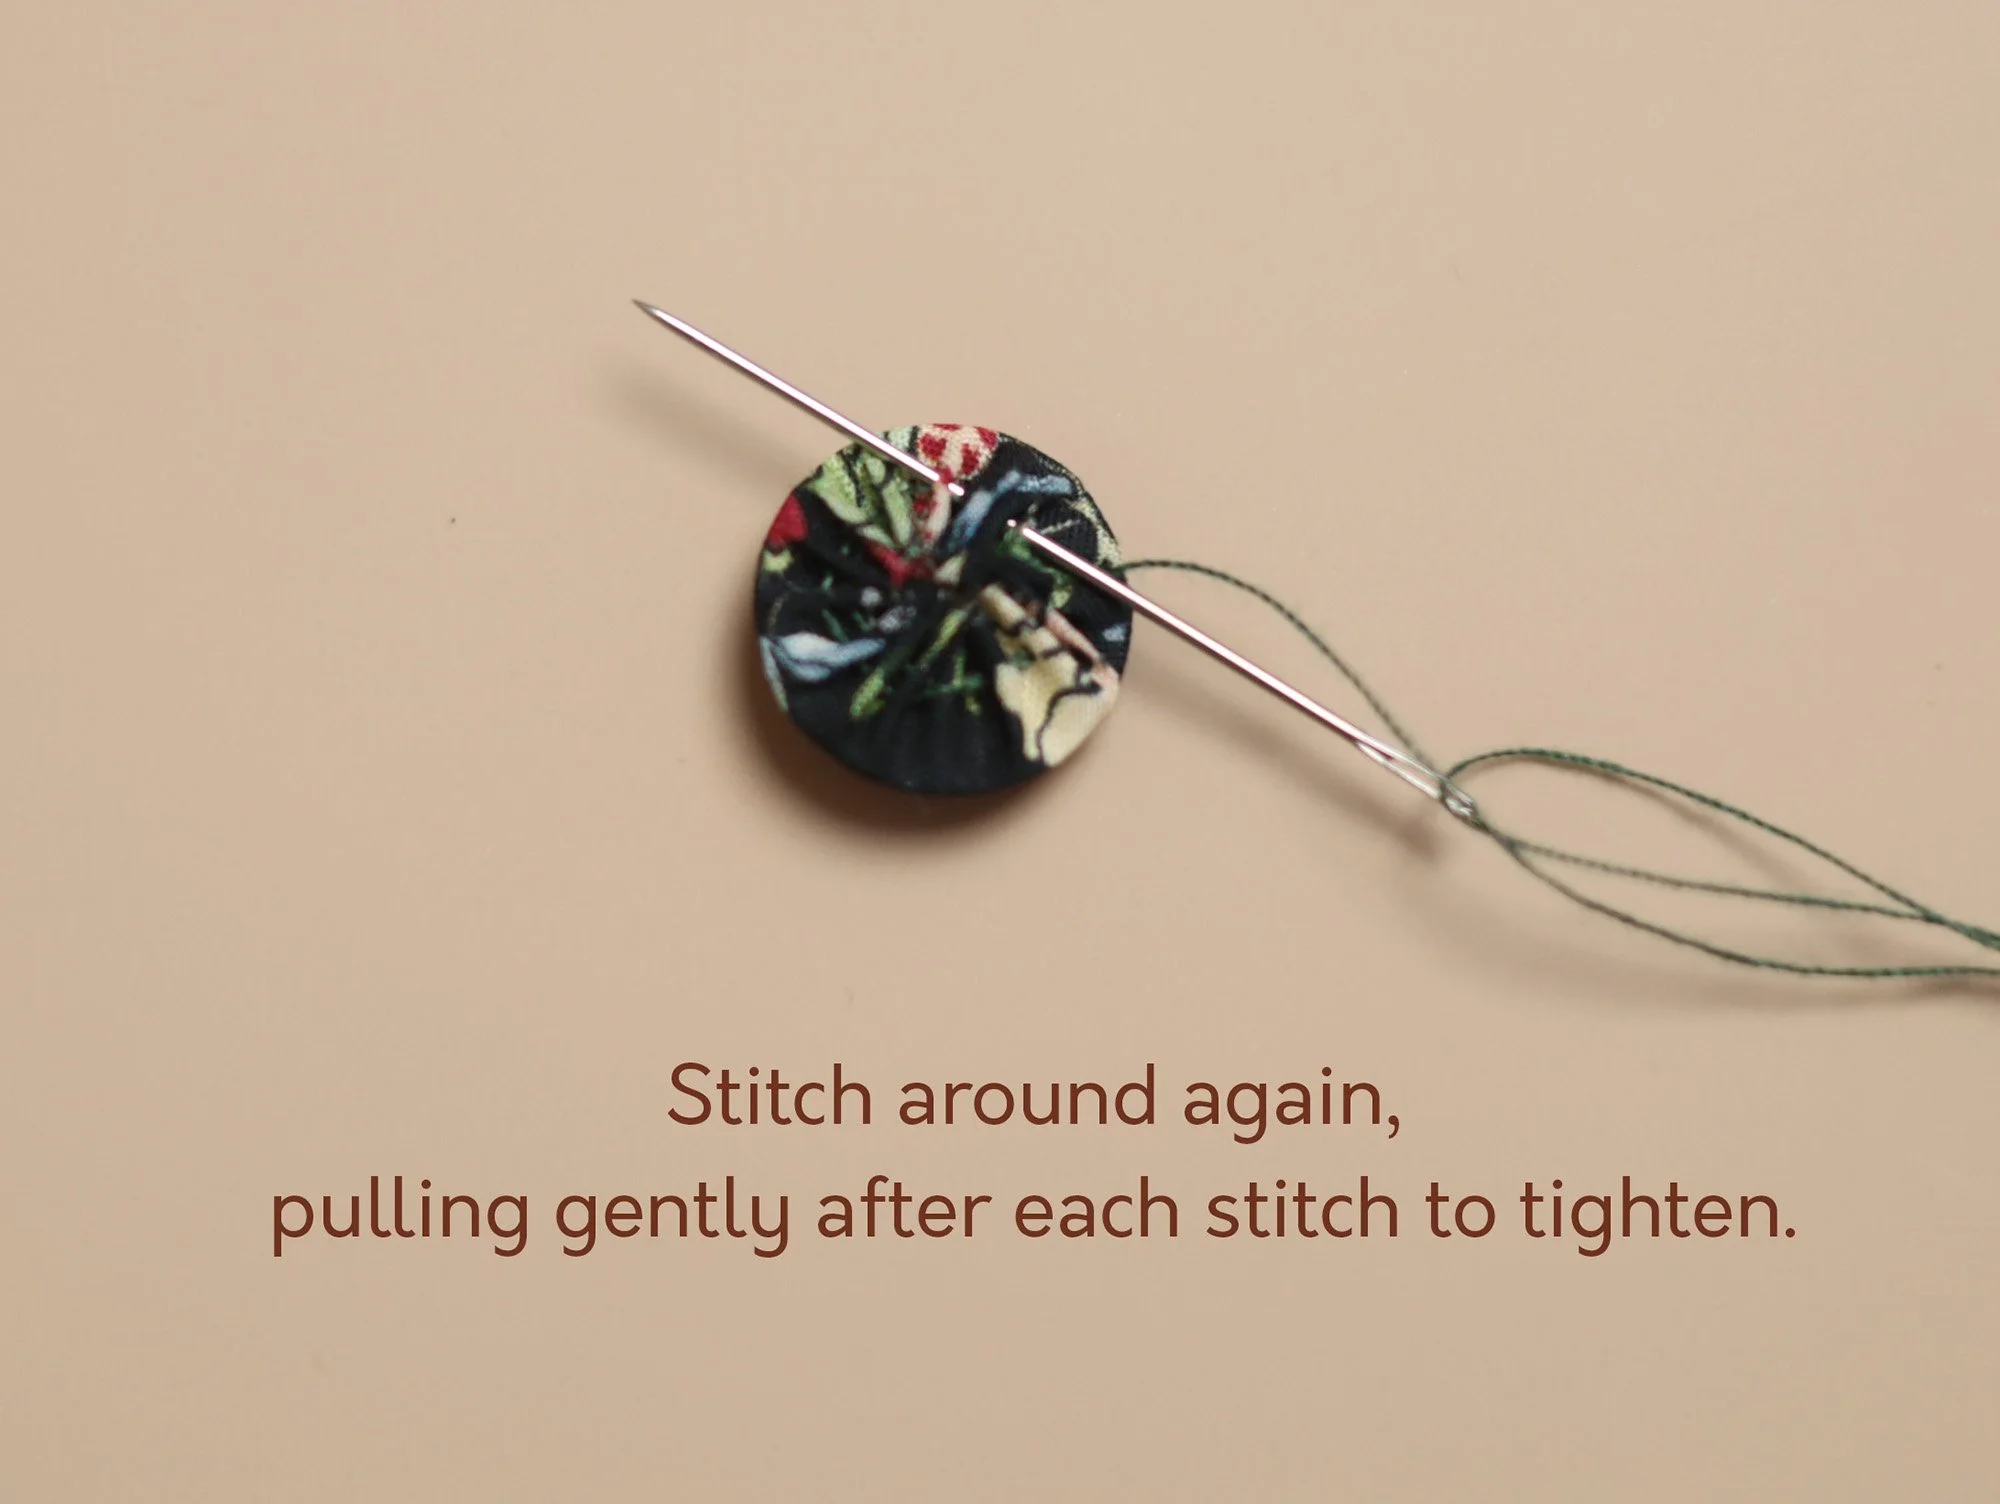
Stitch 2 mm from the edge with a running stitch, then pull to gather the fabric around the button. Stitch around once more, gently pulling after each stitch to further tighten the fabric.
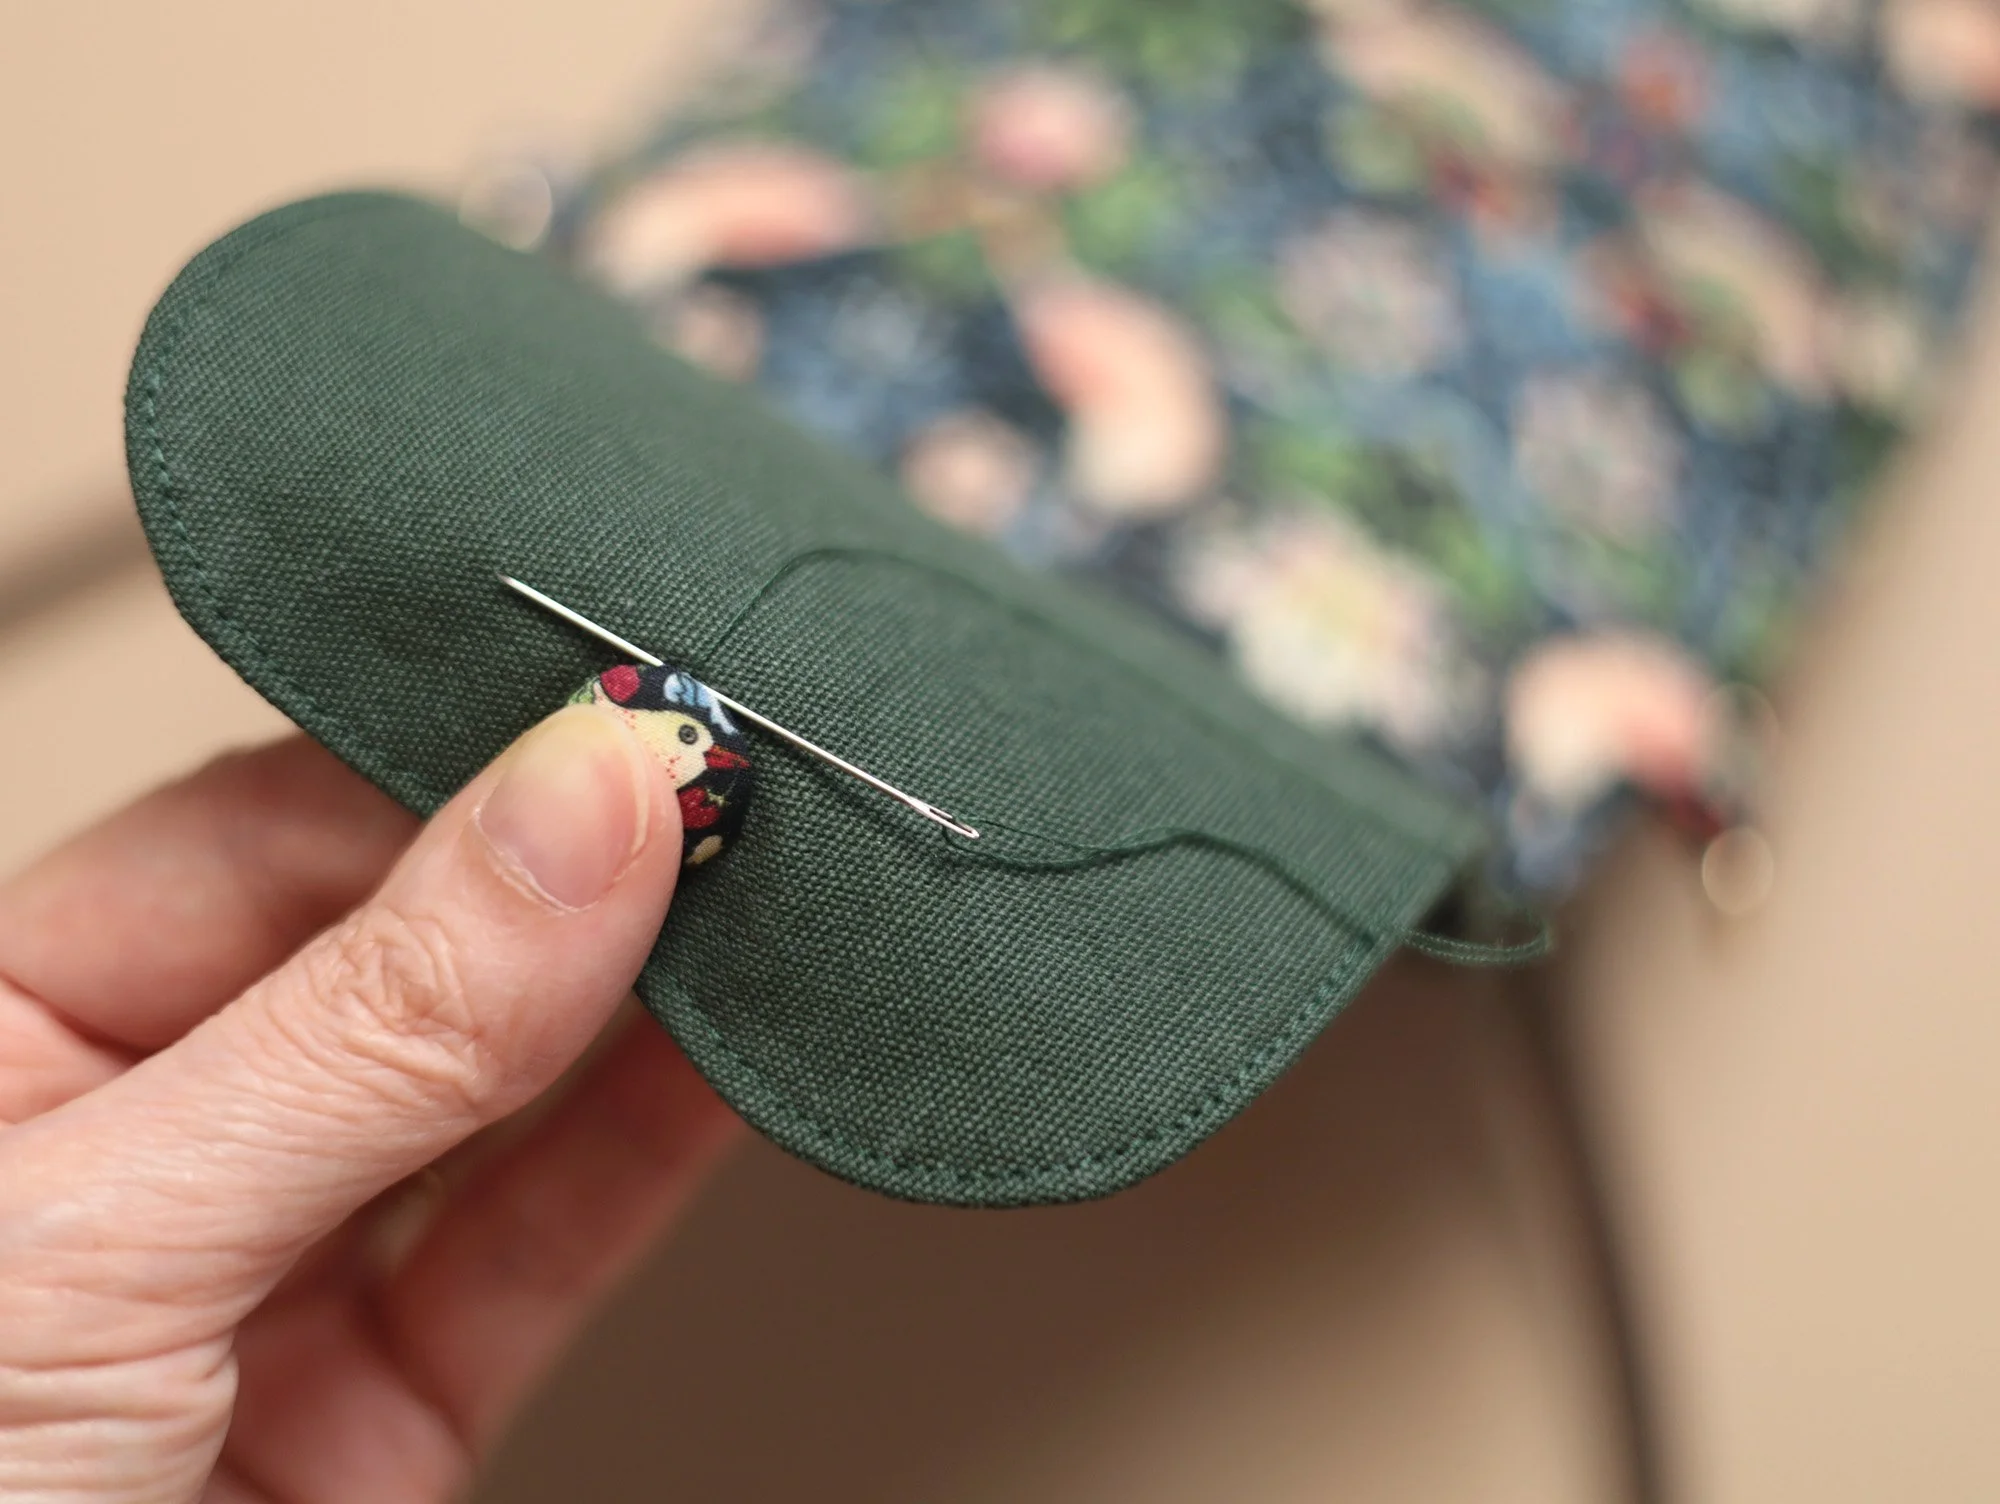
Sew the button in place on the right side of the flap using a hidden stitch.
Congratulations! Your embroidery project is now complete!
Visit our website www.montbleu.co.uk for more fun craft projects.
If you spot any mistakes in this tutorial, have suggestions for improvement, or would like to share your finished projects, please don’t hesitate to contact us.