
Heidi
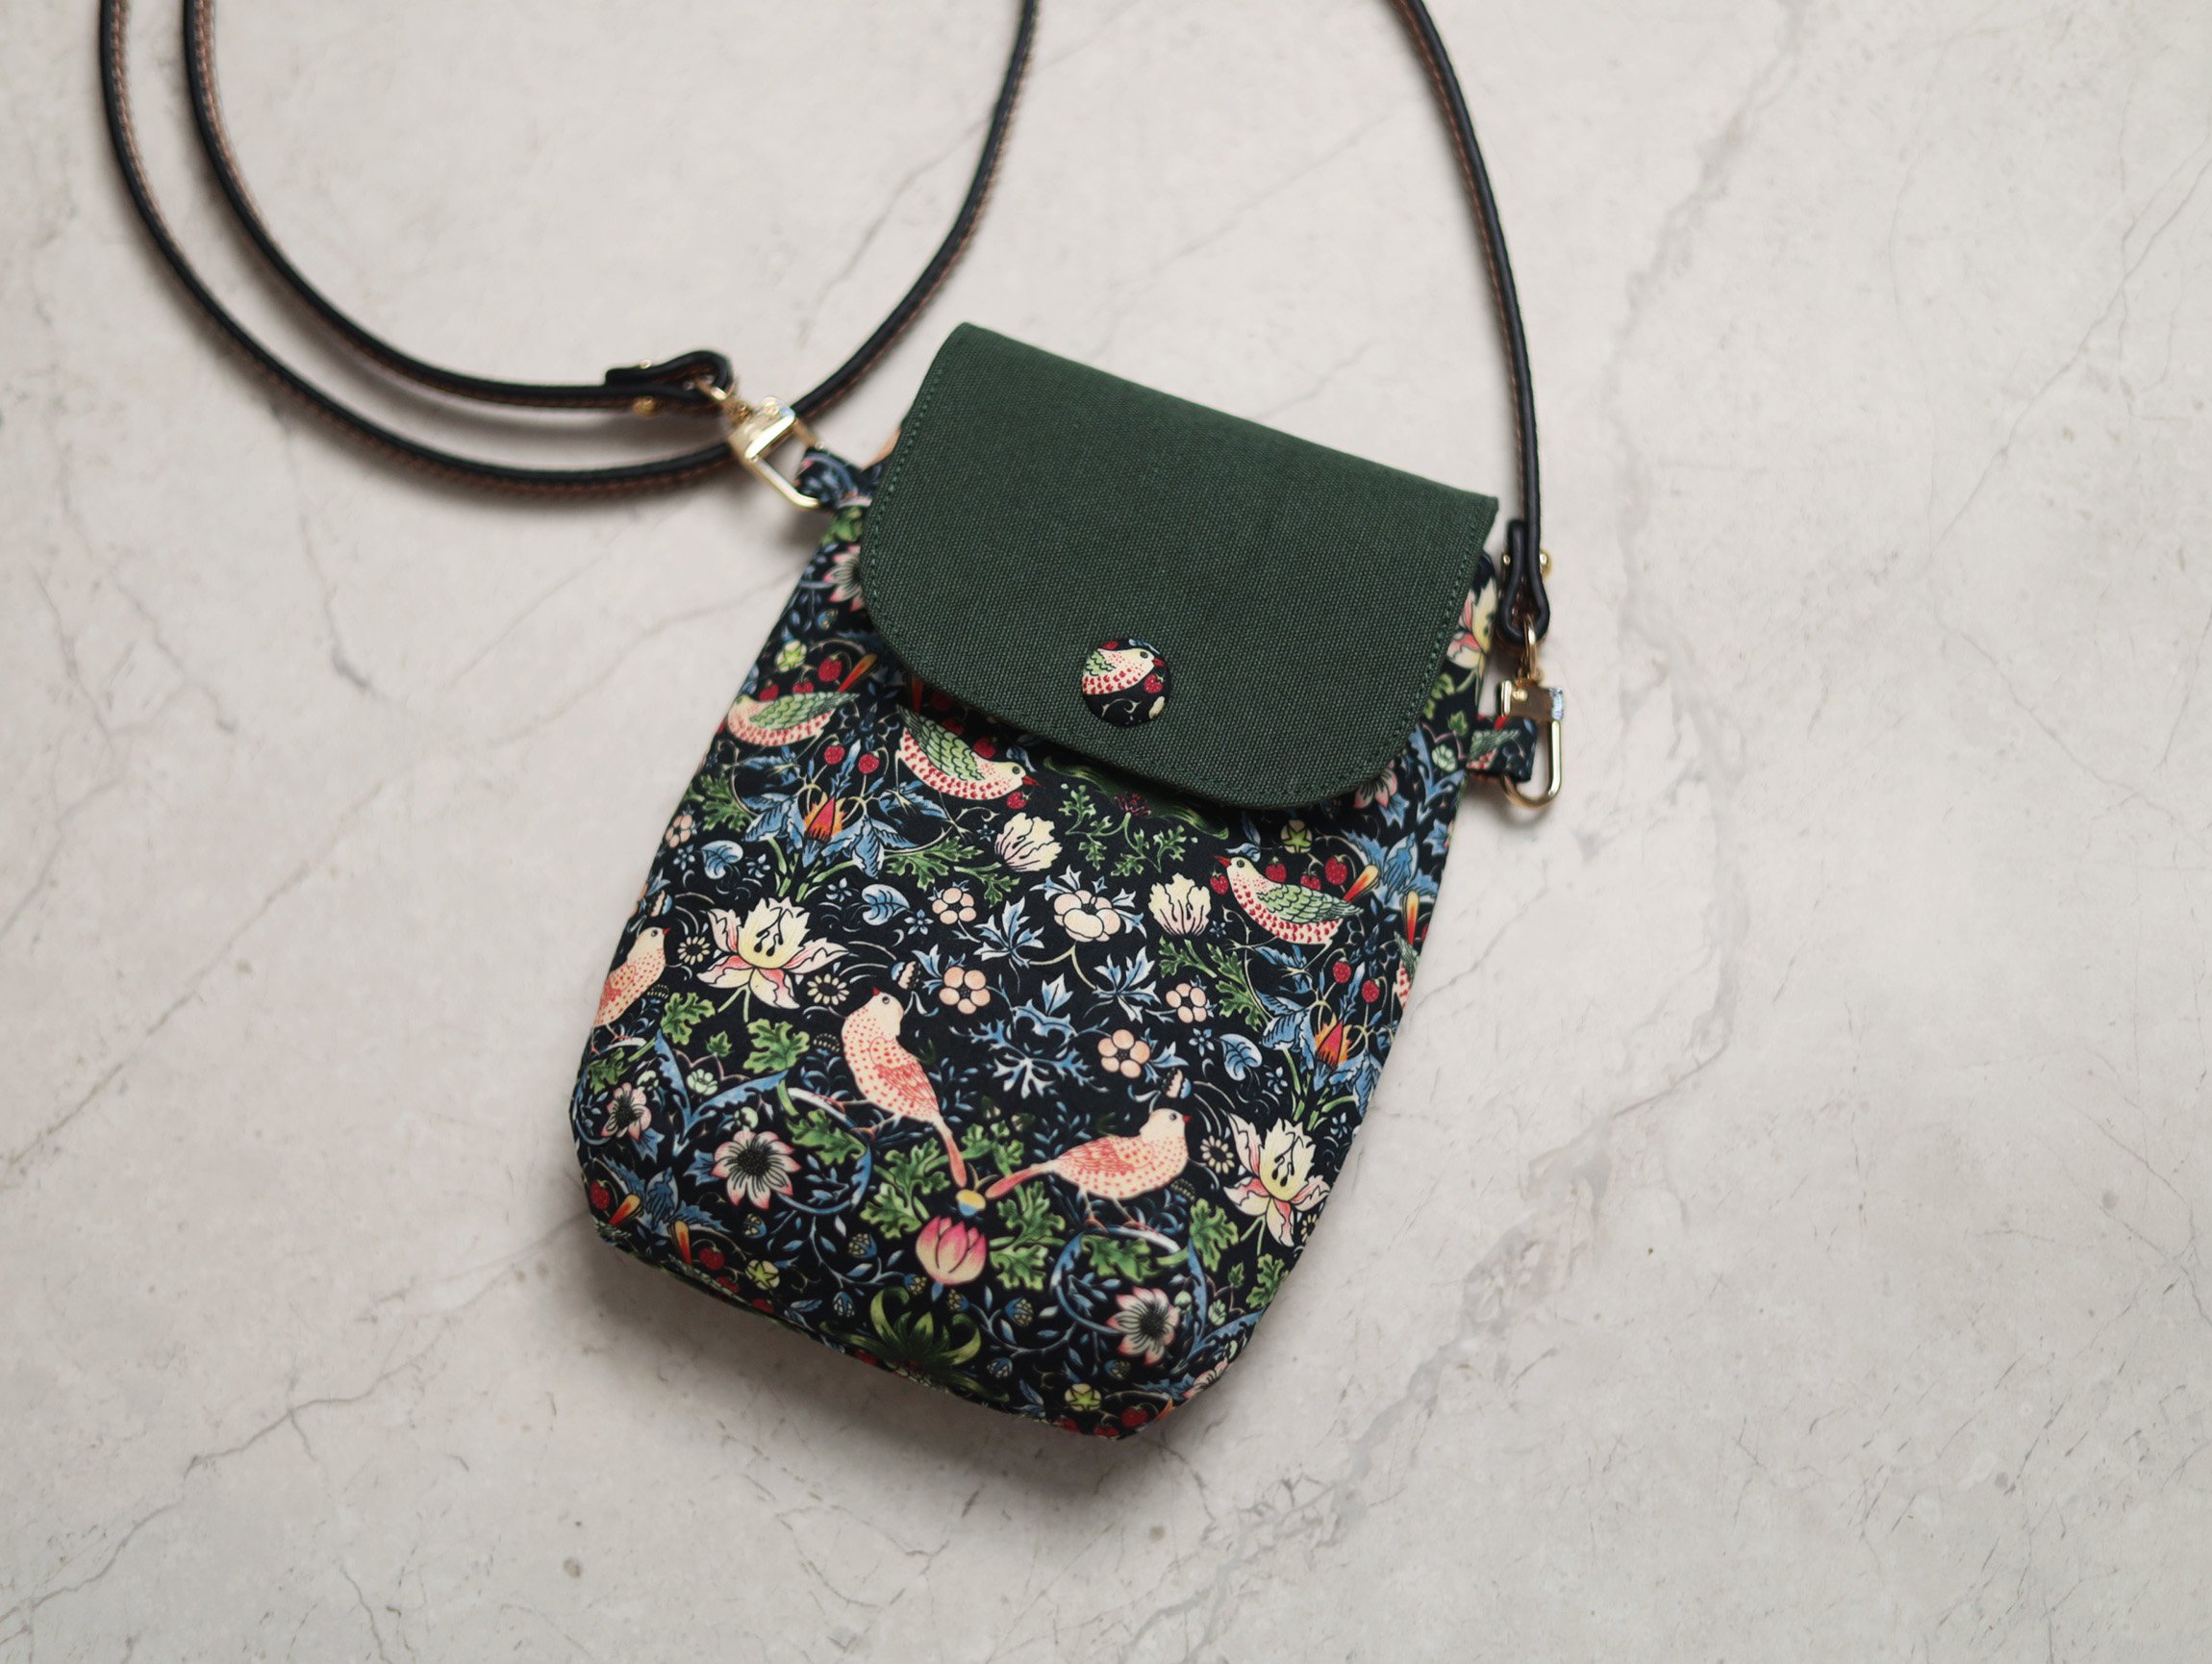
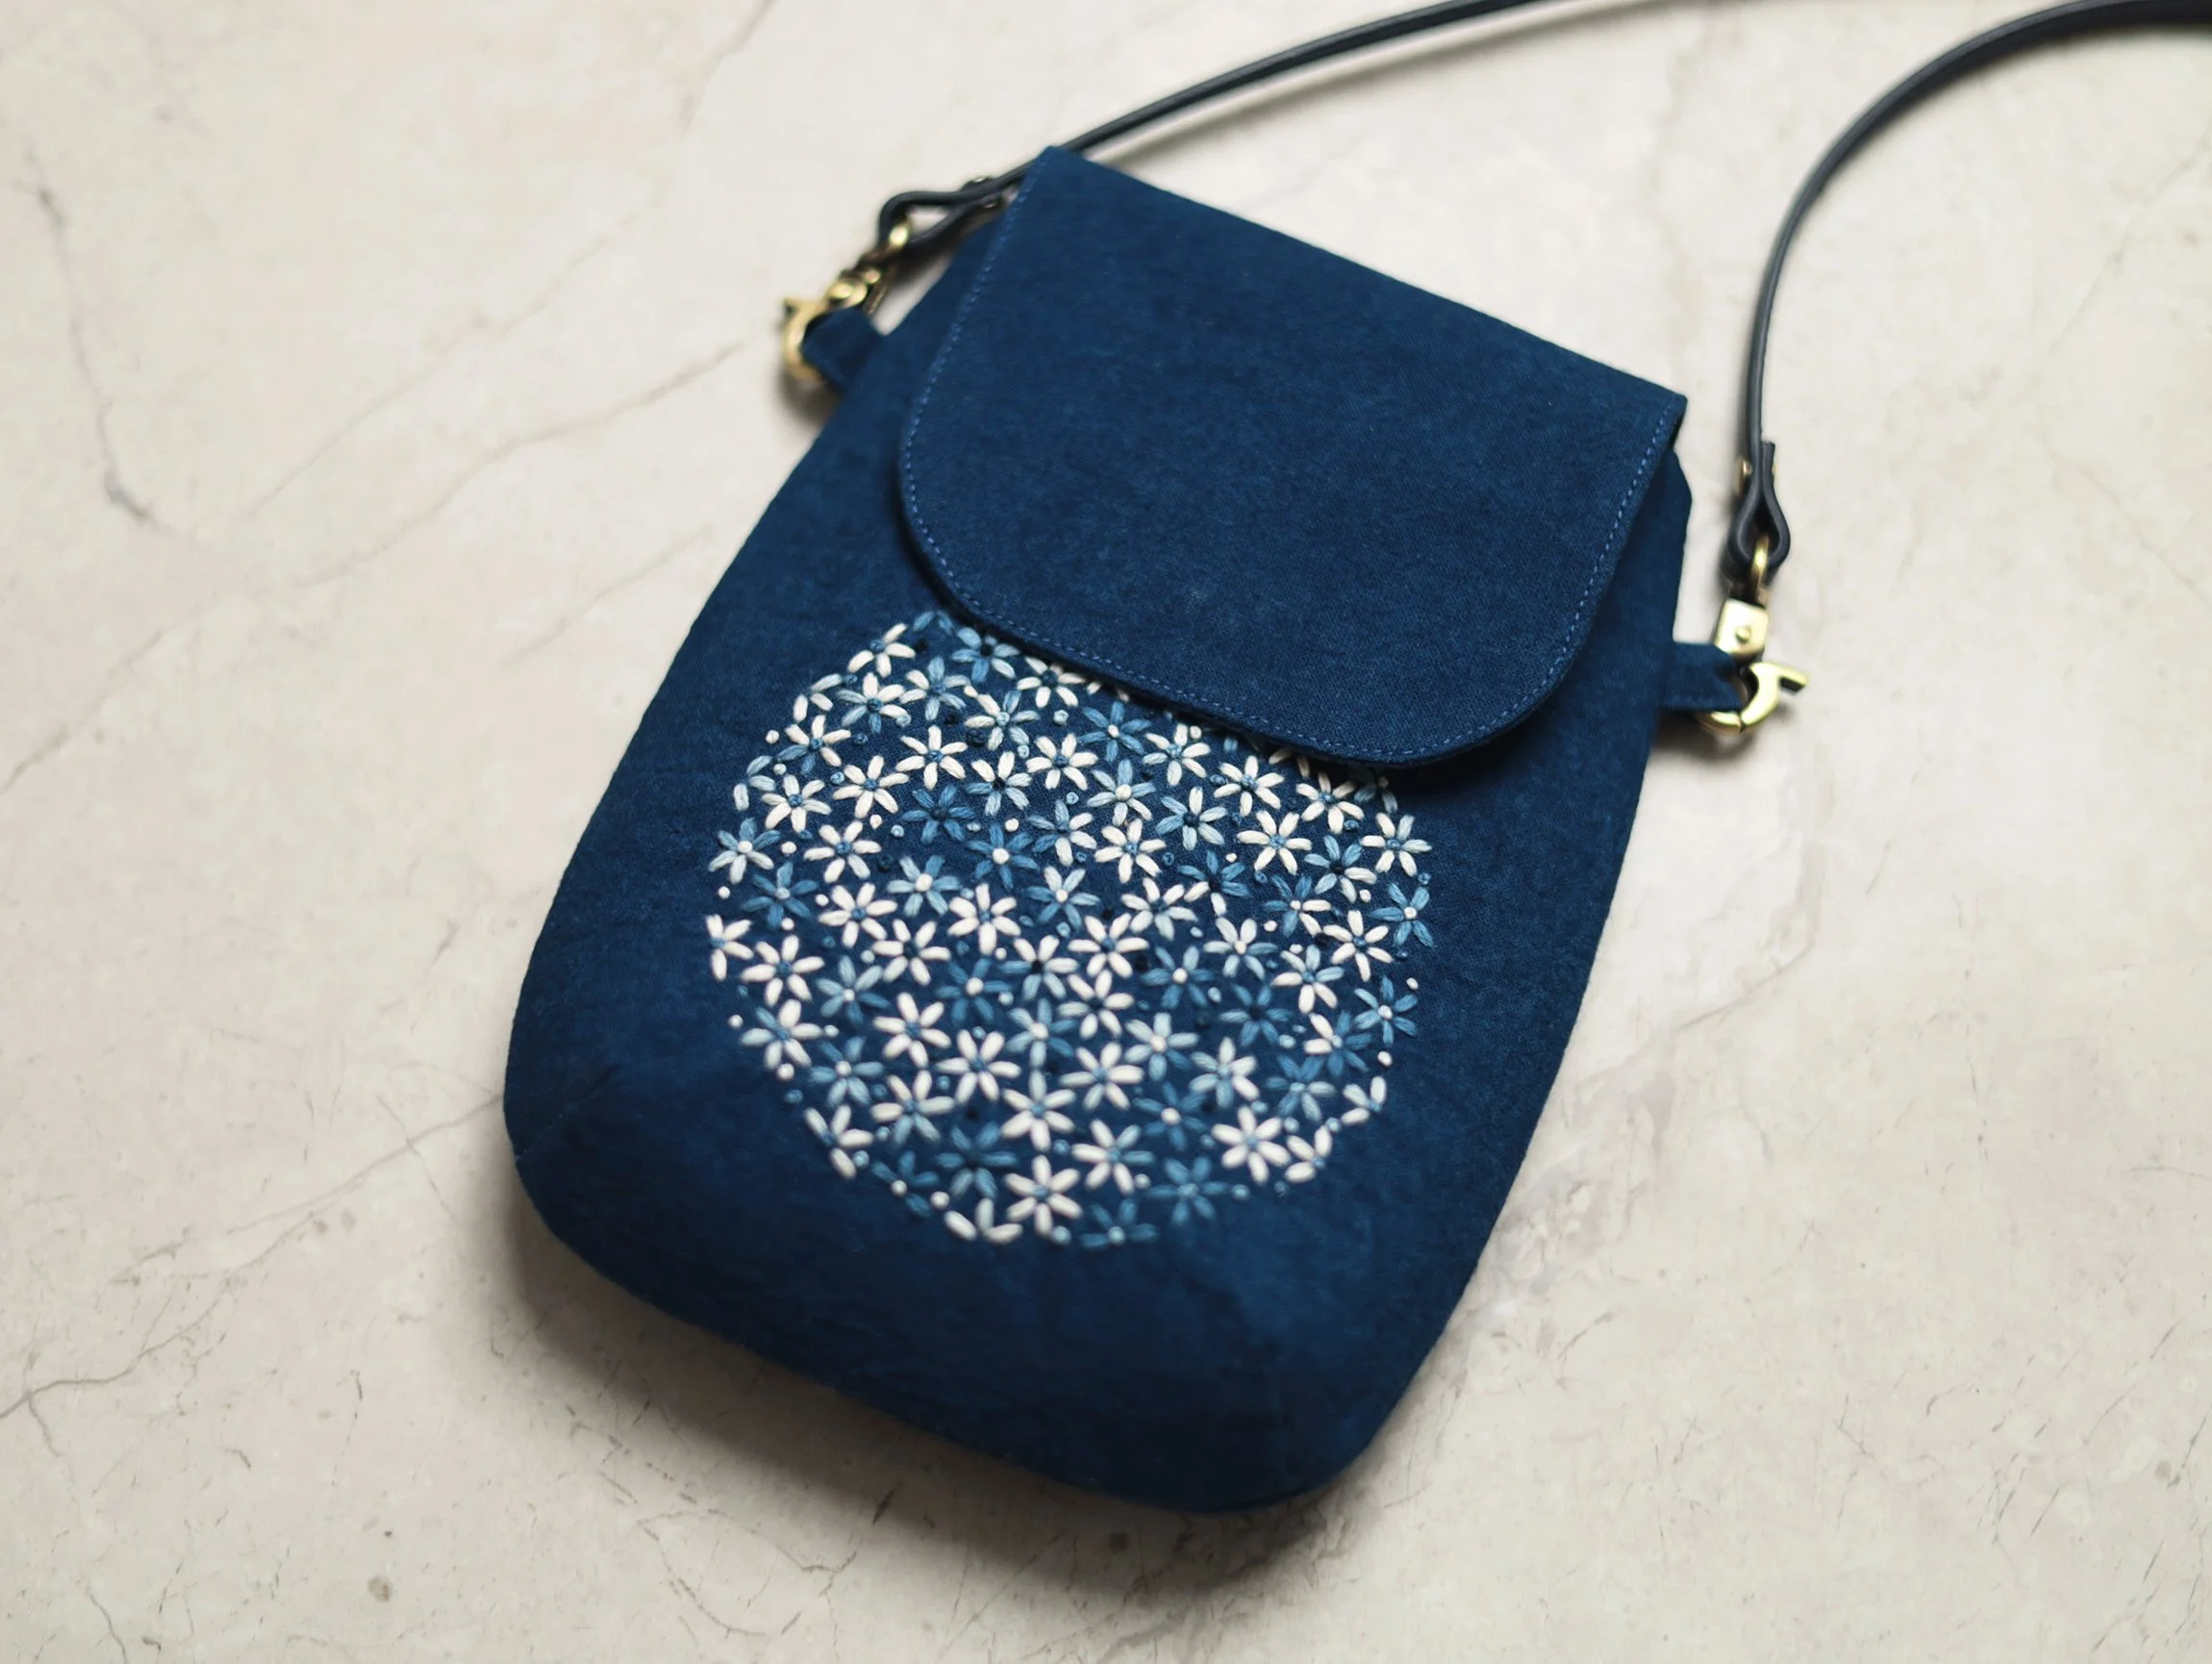
Sashiko Coin Purse with Magnetic Fan Closure
Step-by-Step Photo & Video Tutorial (Beginner-Friendly)
Project Notes
The coin purse is available in five unique embroidery patterns. You can also get creative by designing your own pattern, swapping in a new look using one of our many stencil designs, or simply make it with fabric without any embroidery. To make fabric purse without embroidery, skip step 2 in the tutorial.
Fabric Choice: Medium-weight woven cotton or linen fabric (We used our indigo plant-dyed fabrics, which are ideal for Sashiko patterns.)
Interfacing/Stabiliser(referred to as ‘interfacings’ in our tutorials) Guidelines: There are many types of interfacings. We use light- to mid-weight fusible woven interfacing and fusible fleece for most projects. For this project, light- to mid-weight fusible fleece interfacing is sufficient.
This project can be sewn by machine or by hand. Whether sewing by hand or machine, backstitch at the beginning and end of each seam to secure the stitches. To avoid repetition, this will not be mentioned in the following tutorial.
All seam allowances (SA) are 0.7cm (¼”) unless otherwise stated.
Sewing & Embroidery Tutorial
1. Cut interfacing pieces:
Place the stencil on the fusible fleece. Trace the bag outline only — follow the stitching line and do not include the seam allowance. Repeat to create a second traced outline. Cut out both fleece pieces along the traced lines.
Important tip: When cutting fusible fleece interfacing, trim slightly inside the traced outline.
For lightweight, thin fleece: cut about 1~2 mm inside the line.
For mid-weight or thicker fleece: cut about 2~3 mm inside the line.
Leaving a small gap between the interfacing edge and the stitching line helps reduce bulk and creates a cleaner, neater finish.
Cut fabric pieces:
Trace both the stencil outline and the stitching line onto the wrong side of the main fabric using a fabric marker that is not heat-erasable. Cut it out. Cut a second piece of main fabric in the same way.
Cut two pieces of lining fabric in the same way. (You can place two layers of fabric together and cut both pieces at once.)
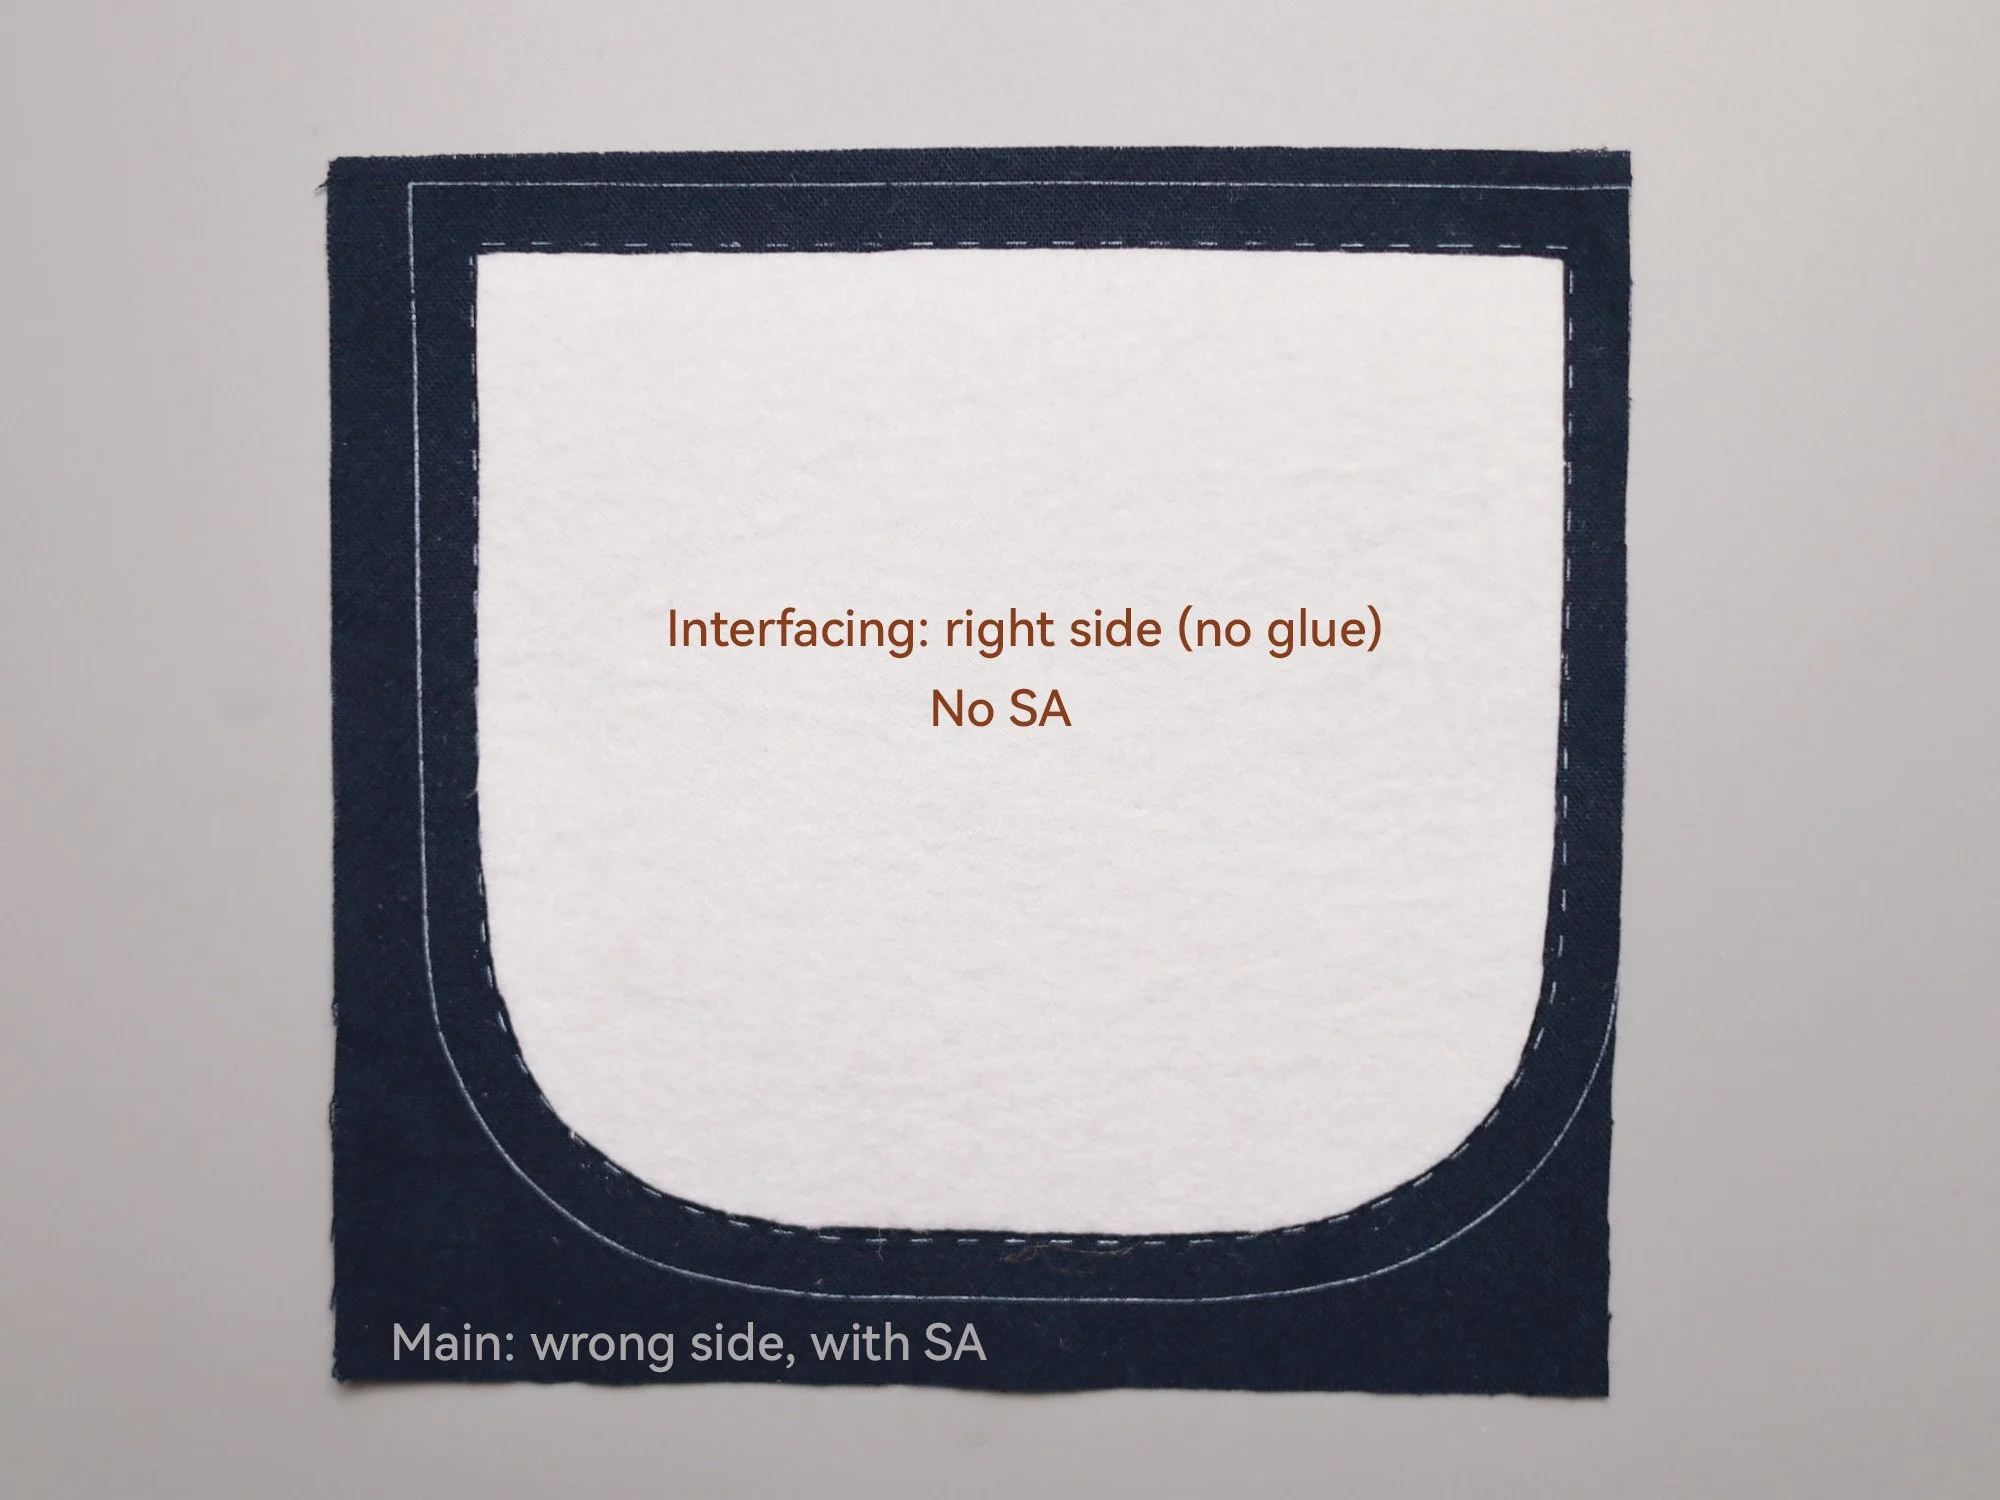
Apply interfacings to fabric pieces:
Place one fusible fleece piece on the wrong side of one main fabric piece and check whether it overlaps any of the stitching lines. If necessary, trim away the excess so the fleece sits approximately 2 mm inside the stitching lines all the way around. With the fleece centred inside the stitching line, cover it with a scrap fabric and press to attach. Flip over and press on the right side to attach the fleece securely. Repeat with the other fleece and main fabric piece.
Tip: If using thick fleece, trim edges at 45° to reduce bulk (demonstrated in the first video tutorial below). This will give the seams a neat, clean finish once sewn.
2. Embroidery
Transfer the embroidery patterns:
There are two stencils for the purse: one for the front and one for the back. Place one stencil on the right side of a main fabric piece, and Transfer the design by either:
tracing it with a heat-erasable pen or refill, or
applying heat-erasable cream with a toothbrush.
Repeat the process with the second stencil on the remaining main fabric piece.
Tips:
You can stitch before attaching fleece, but we recommend stitching with fleece attached. The fleece acts as a stabiliser for embroidery, allowing you to stitch without a hoop. It also gives a better finish and helps the fleece fuse more securely.
In the tutorial video, we used standard embroidery thread, which should be separated into individual strands first. Two strands were used for all the embroidery patterns. You can thread the needle with one strand and tie both ends together, or use two strands and tie one end.
You can also use fine or medium Sashiko thread. Sashiko thread cannot be separated, so use it as a single strand. Thread the needle and tie one end.
For stencils, the lines are not continuous. If preferred, use a heat-erasable pen to connect the lines first, or connect them directly with stitches during embroidery.
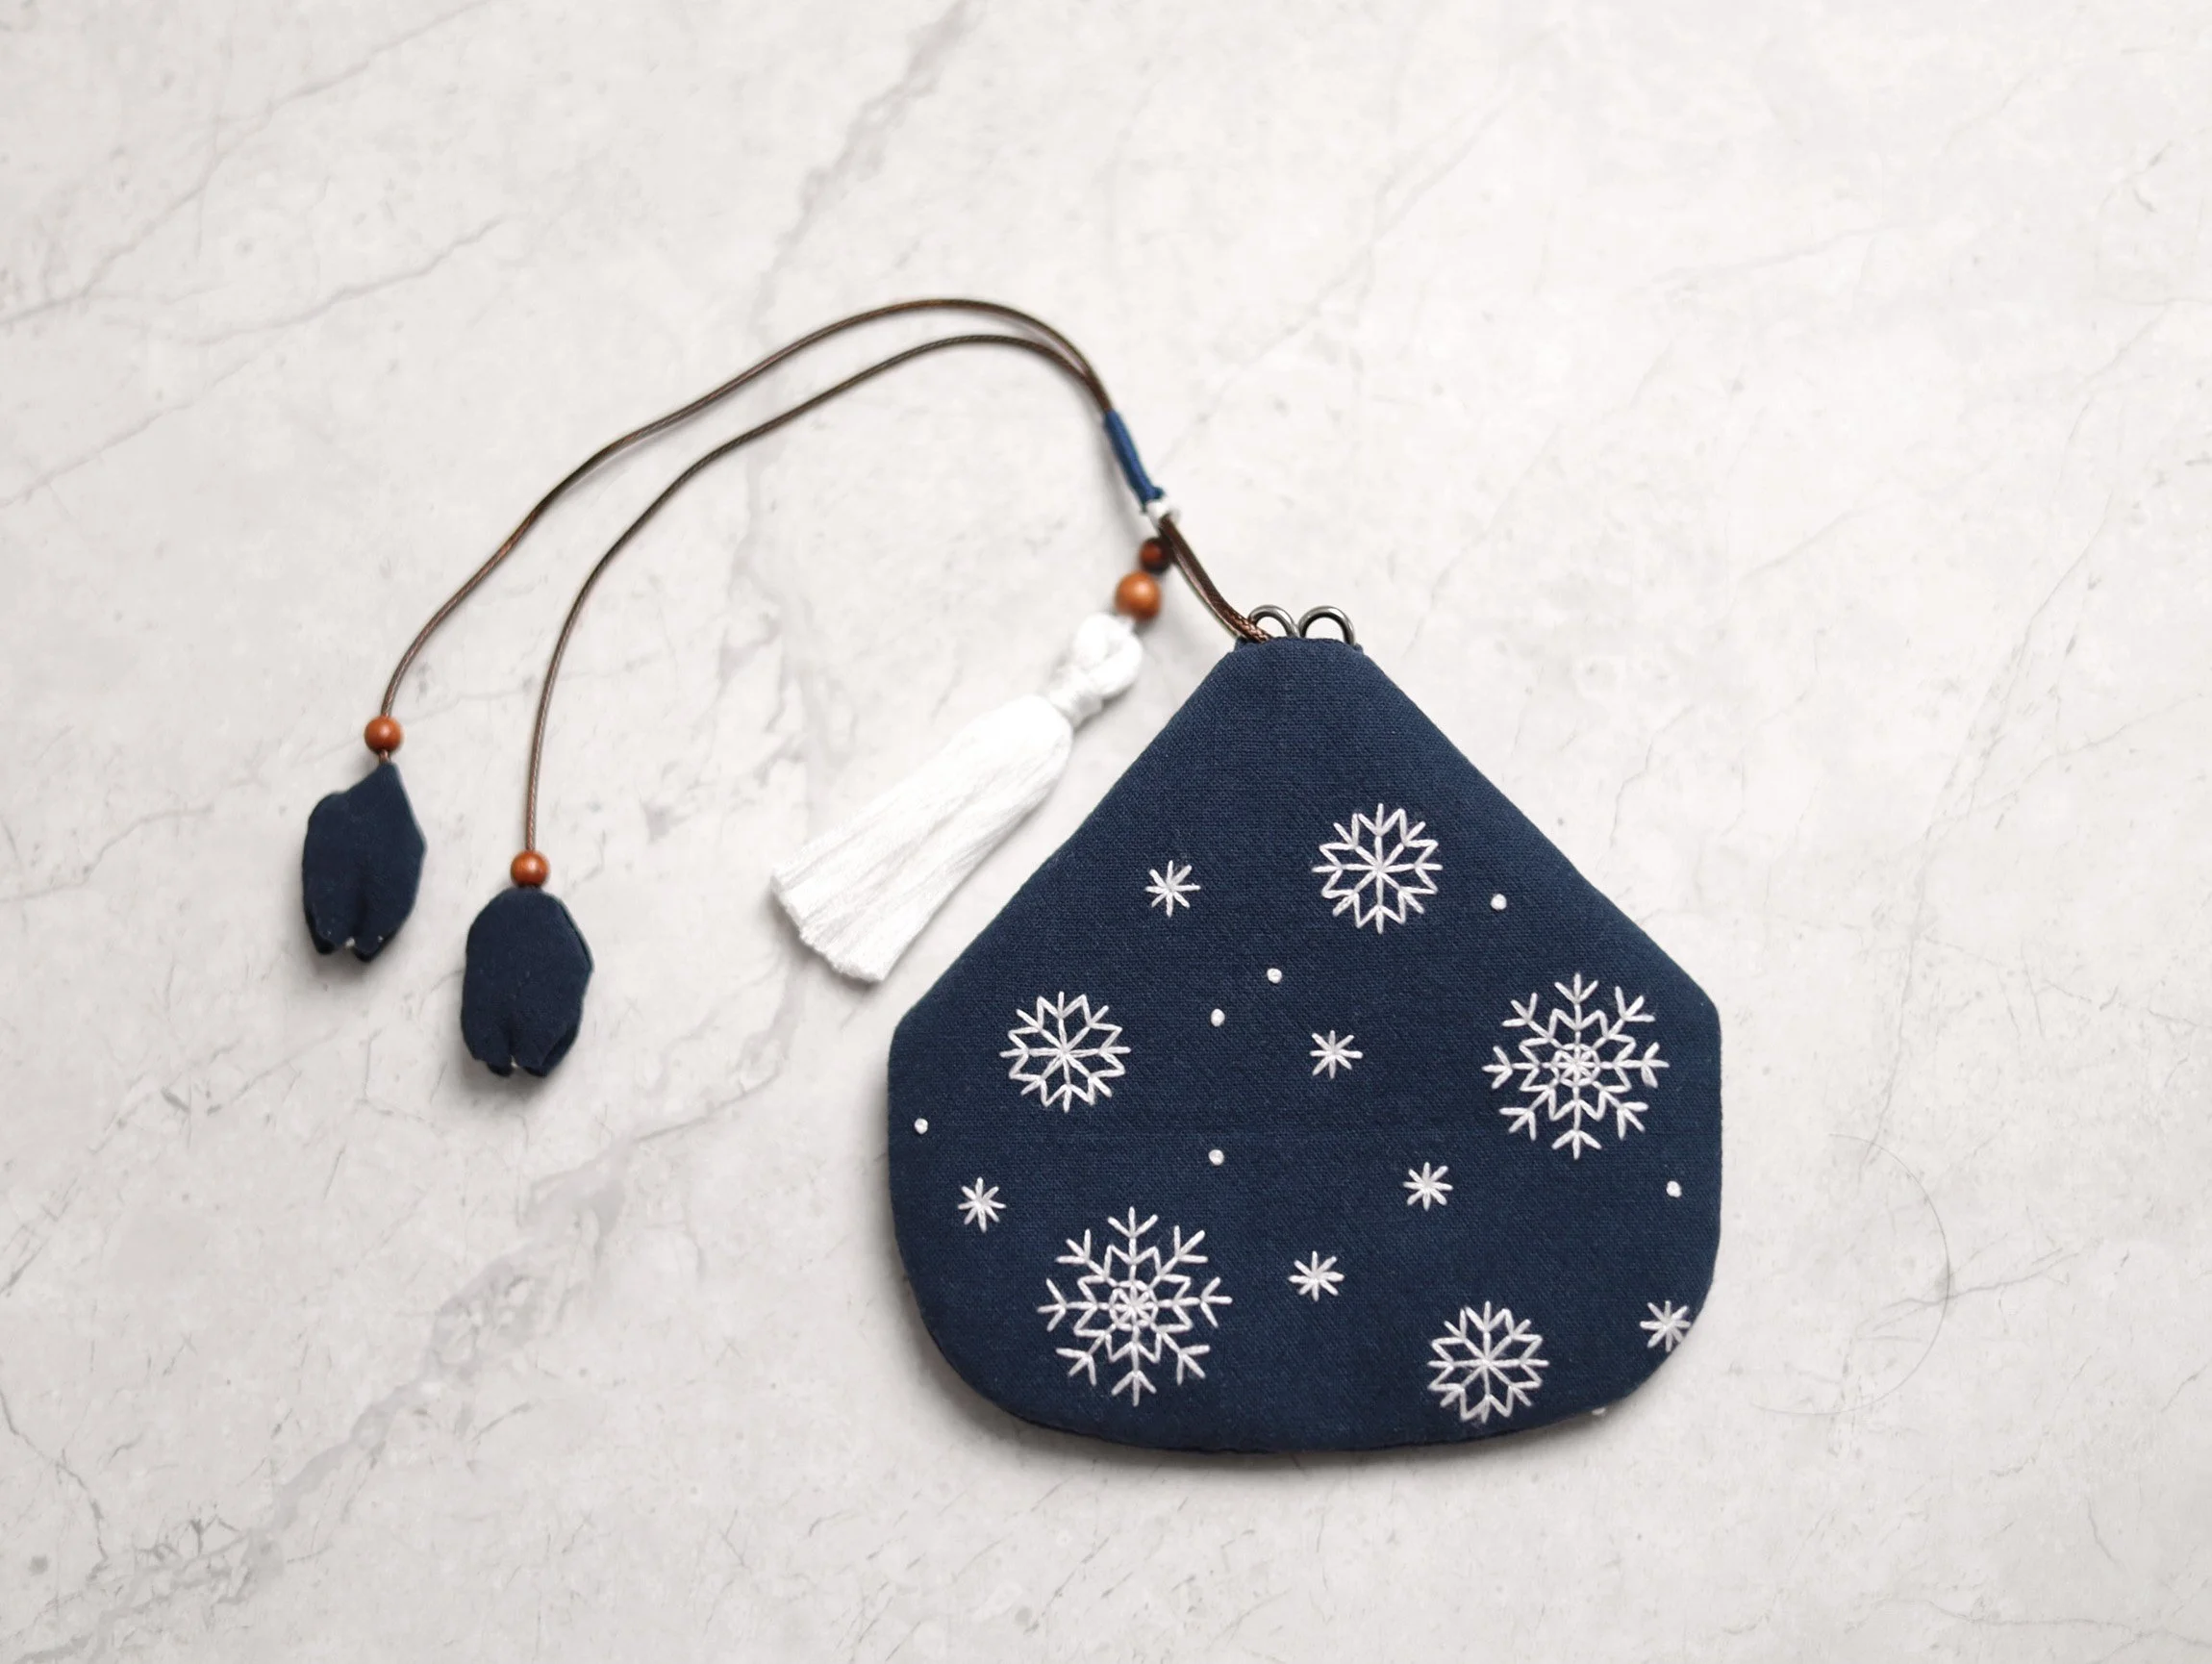
For beginners, watch the video tutorial below for embroidery. The five patterns are ordered from easy to difficult: Persimmon Flower, Snowflake, Ocean Waves, Seven Treasures, and Lotus Leaves.
For experienced stitchers, the stitches used in each pattern are listed below for reference.


Stitch Guide
Persimmon Flower: Straight Stitch throughout
Snowflake: Straight Stitch for all snowflakes; French Knot for dots. (If using the stencils, please refer to the photo below for connecting the lines.)
Ocean Waves: Backstitch for waves; Outline or Stem Stitch for seagulls; Satin Stitch for the moon
Seven Treasures: Backstitch or Running Stitch throughout. (See the photos below for the traditional sashiko method by stitching in one direction first, then turning and stitching in the opposite direction.)
Lotus Leaves: Outline Stitch throughout. (Finish the spokes at a point very close to, but not directly on, the centre of the circle.)
4. Front Piece - snap button & embroidery (Optional).
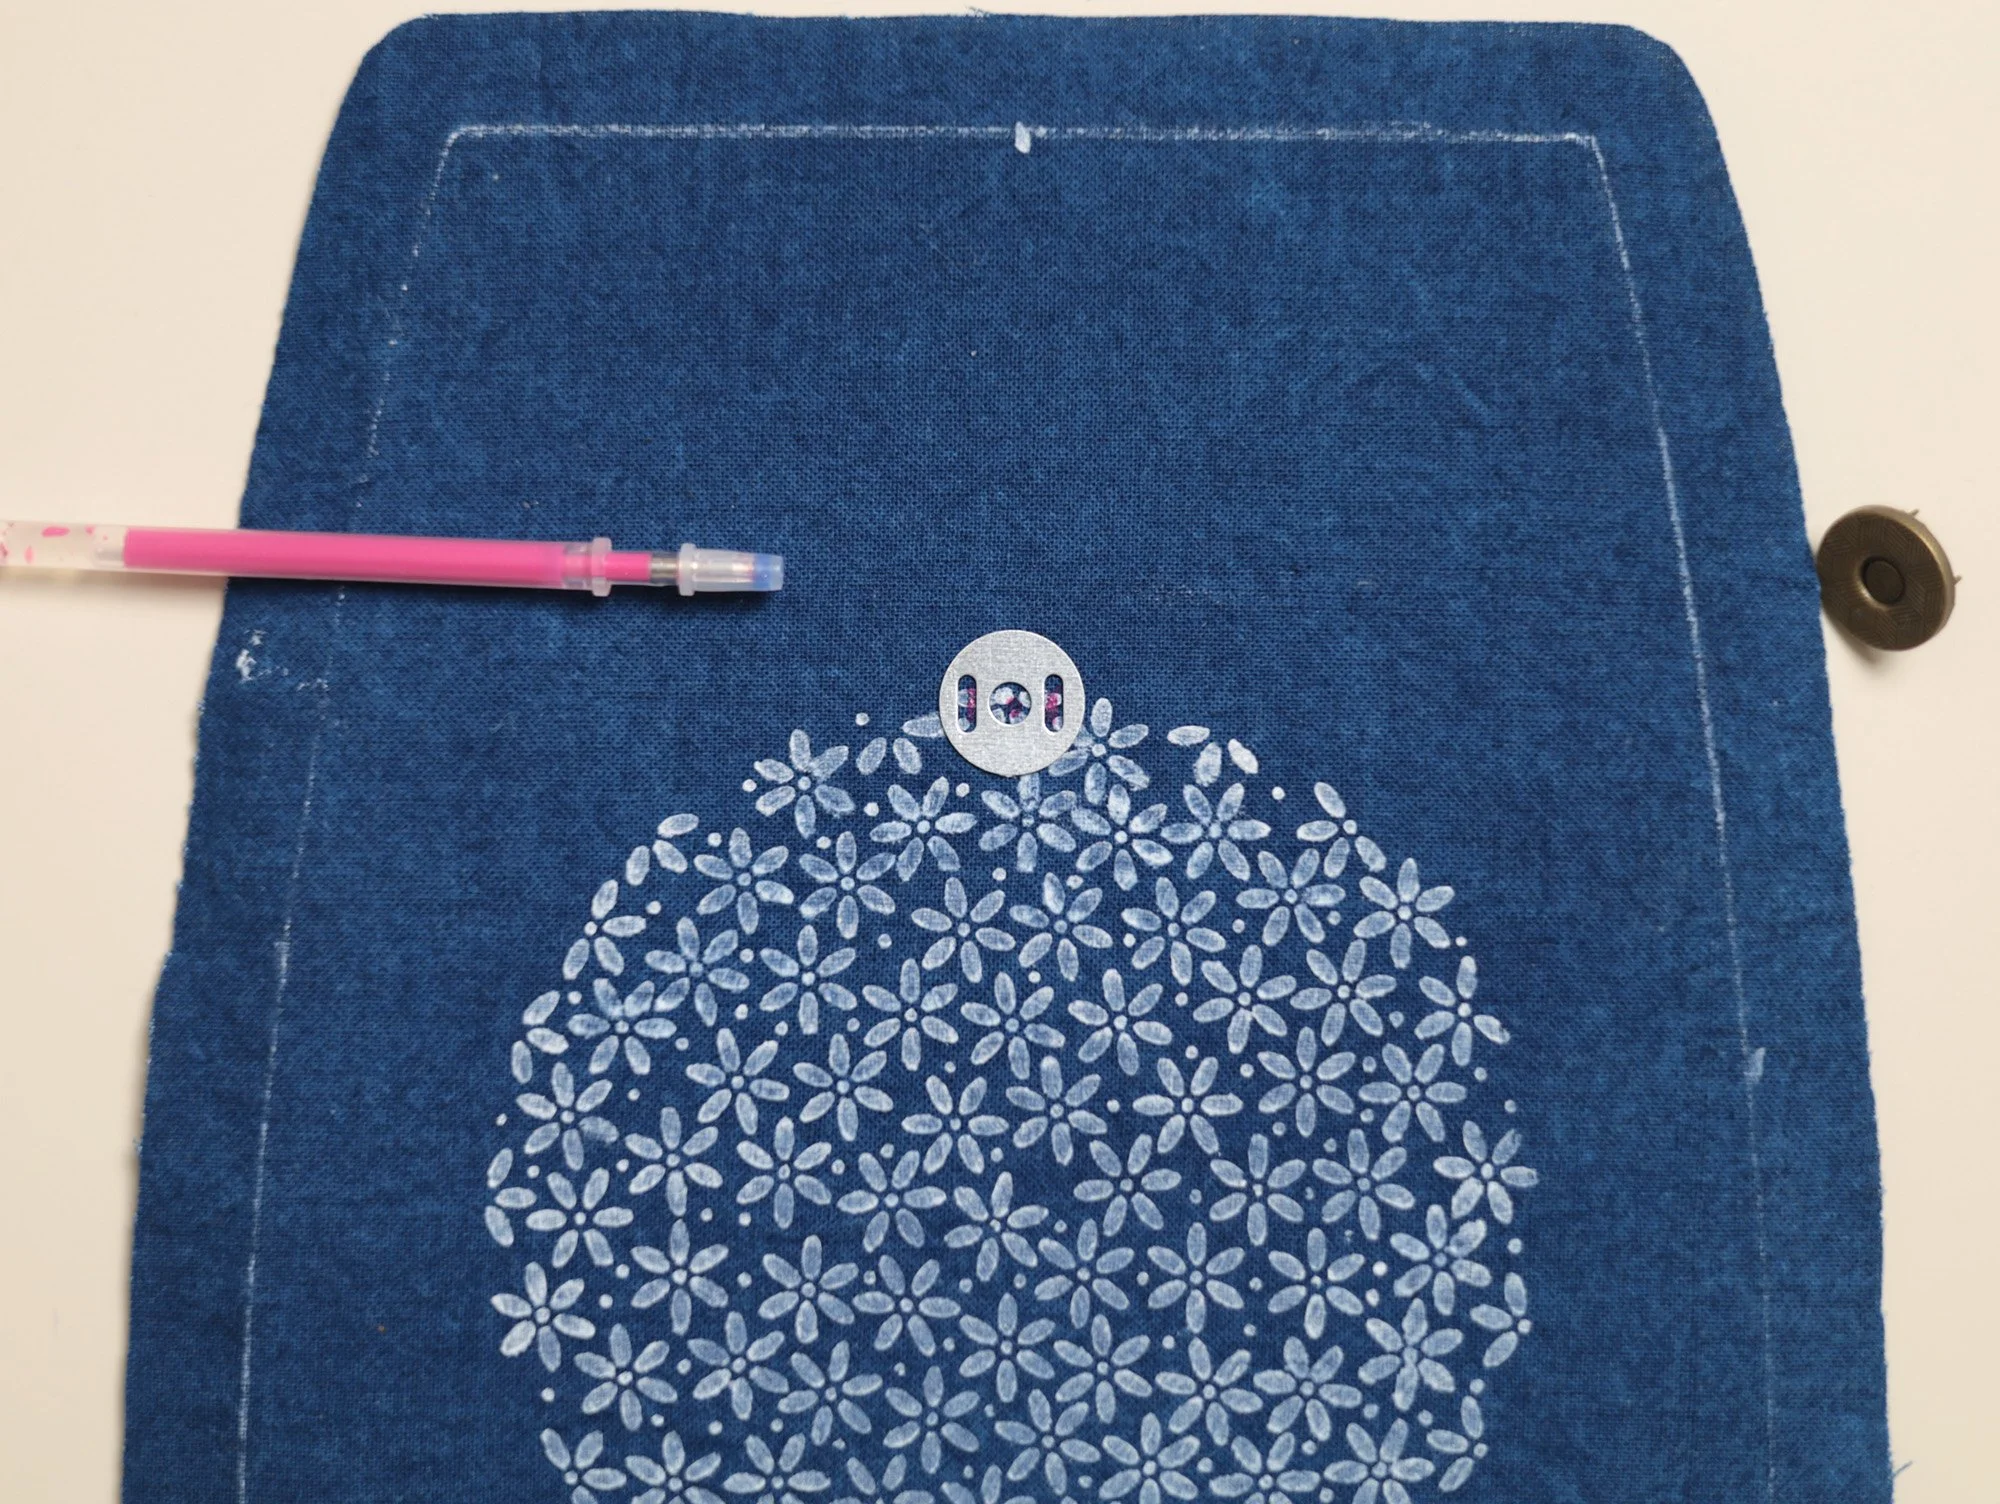
Take one main fabric piece for the bag body and mark the position of the snap button on the right side according to Pattern A. This will be the front piece of the bag body.
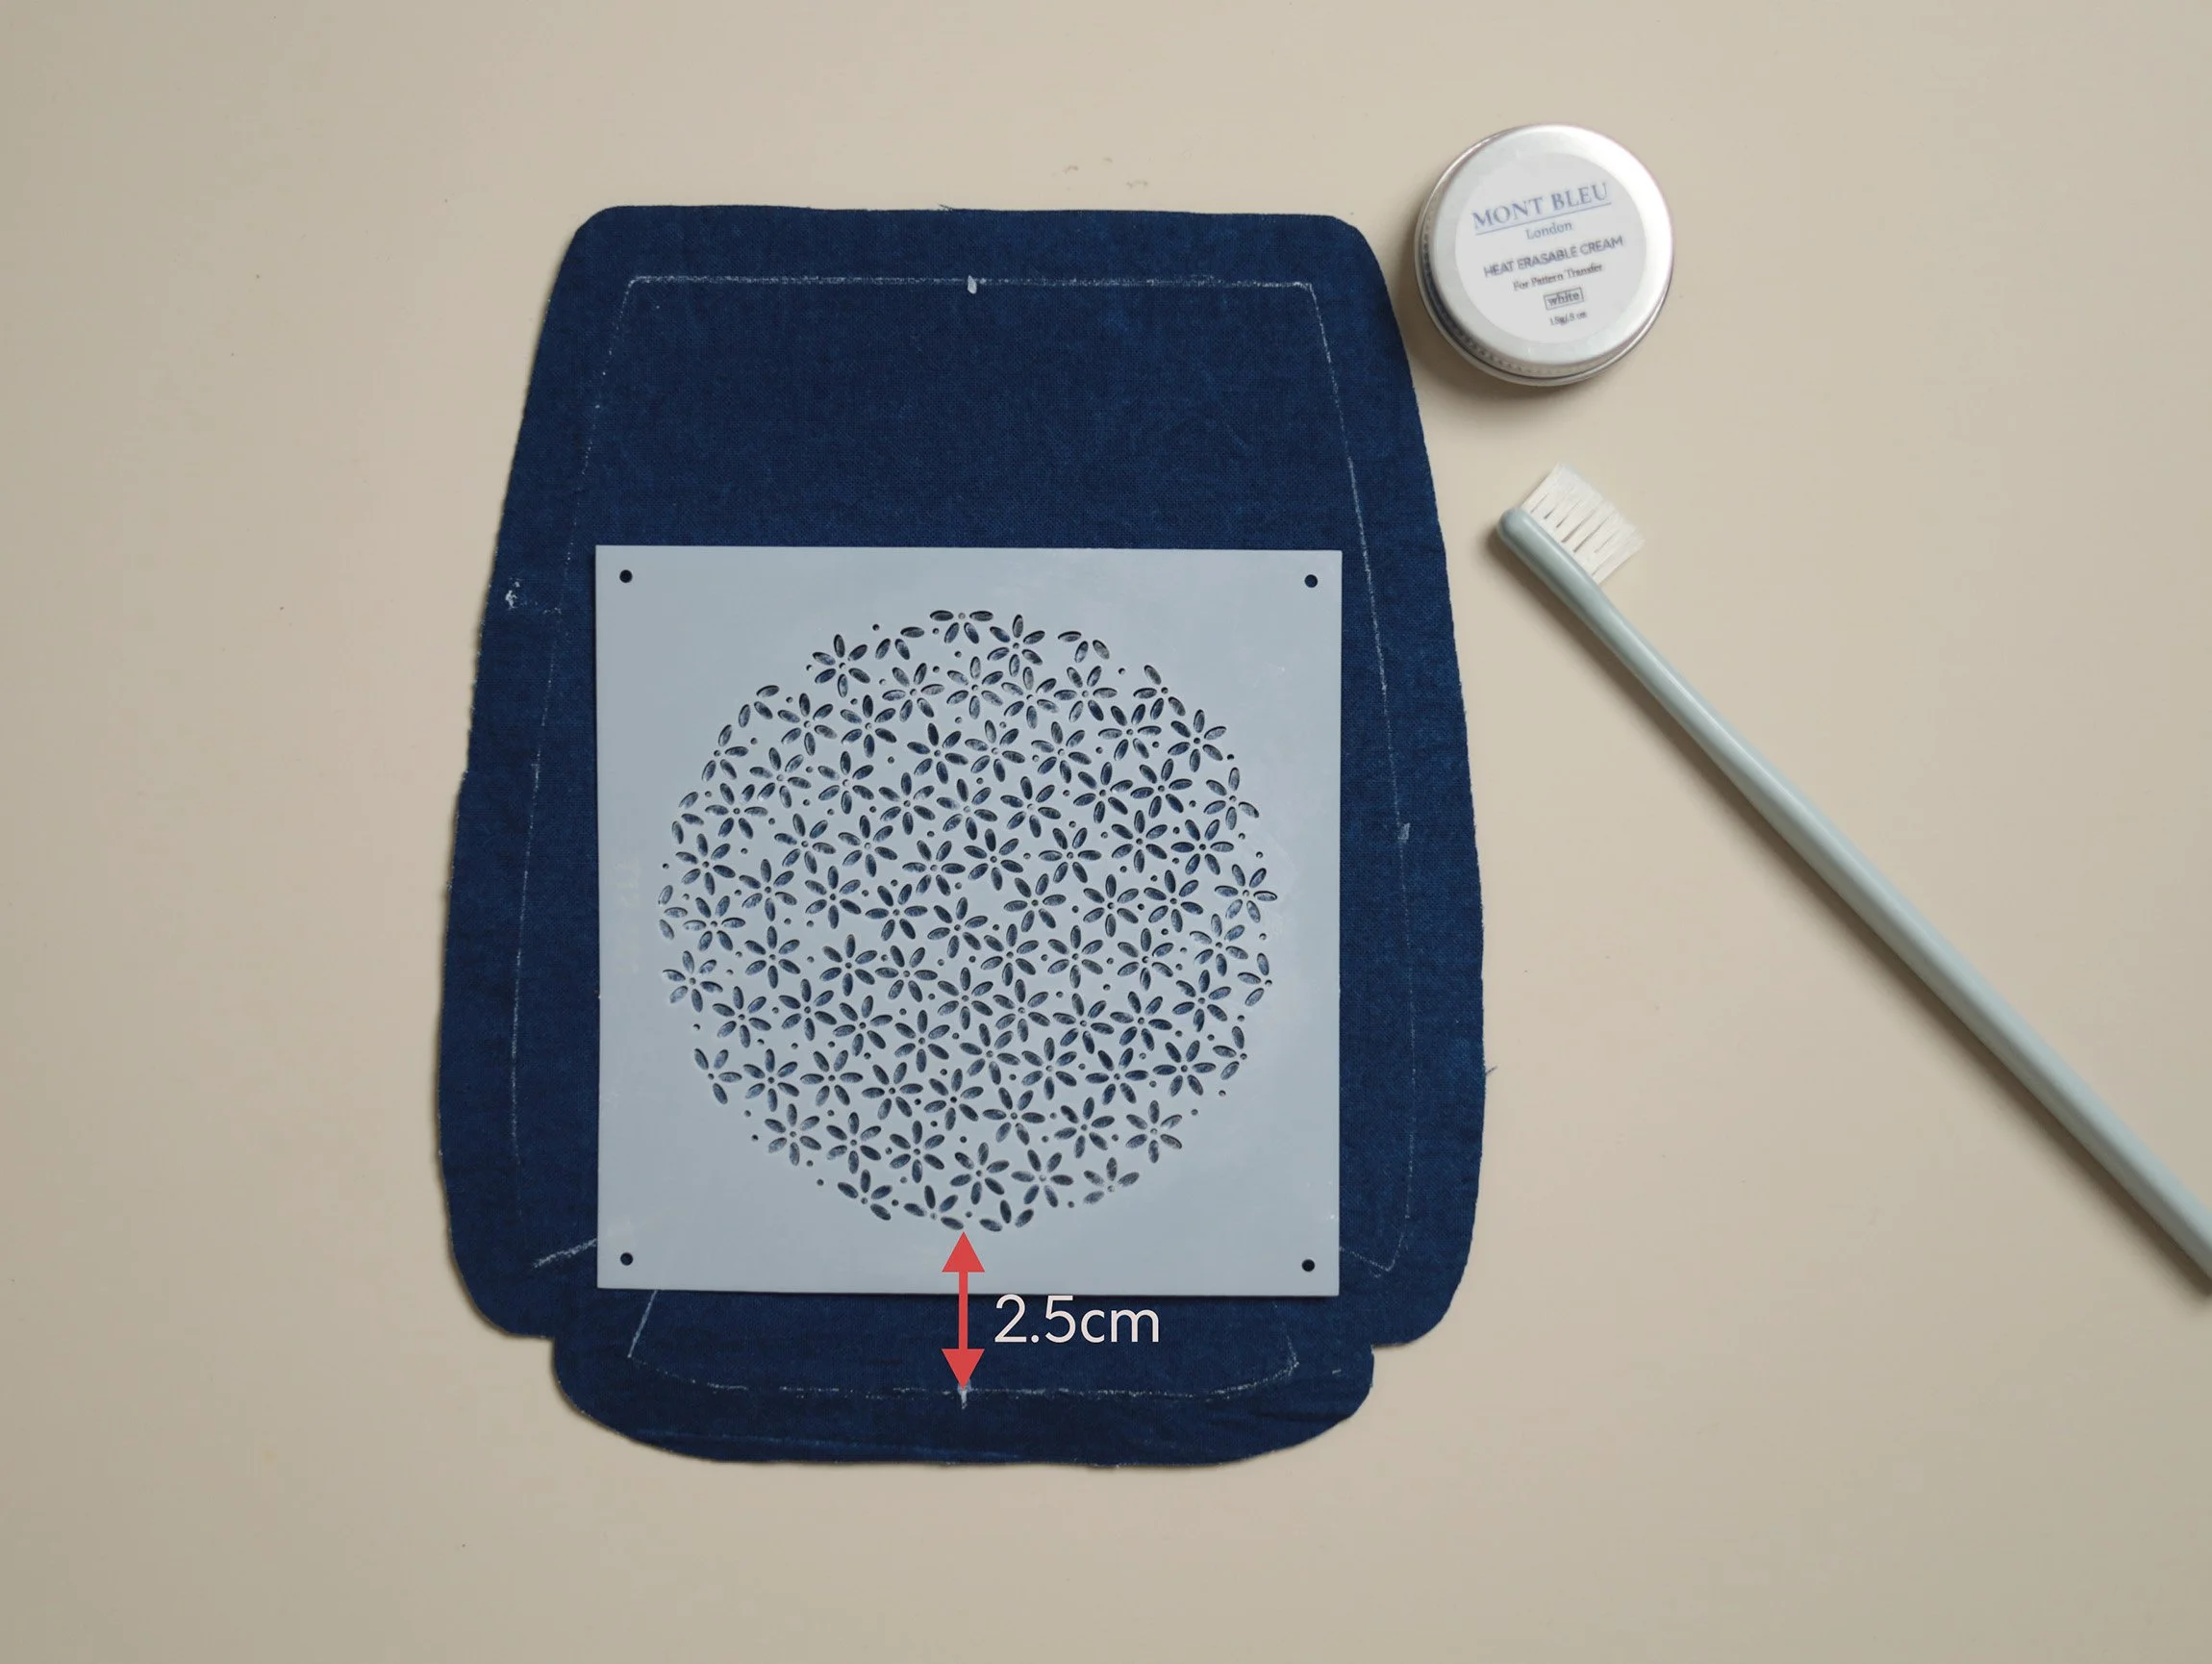
Optional: For the embroidery bag, transfer the stencil pattern (T12-S01) onto the front piece using a heat-erasable pen or cream (recommended). Other stencils or patterns may also be used here instead. (For your reference, stencil T12-S01 measures 12 × 12 cm, with a 1cm margin between the pattern and the stencil edge. We positioned the stencil so that the bottom edge of the pattern is approximately 2.5 cm from the bag base. )
Tip: For complex patterns like T12-S01, use heat-erasable cream and a toothbrush—it’s quicker and easier than a pen.
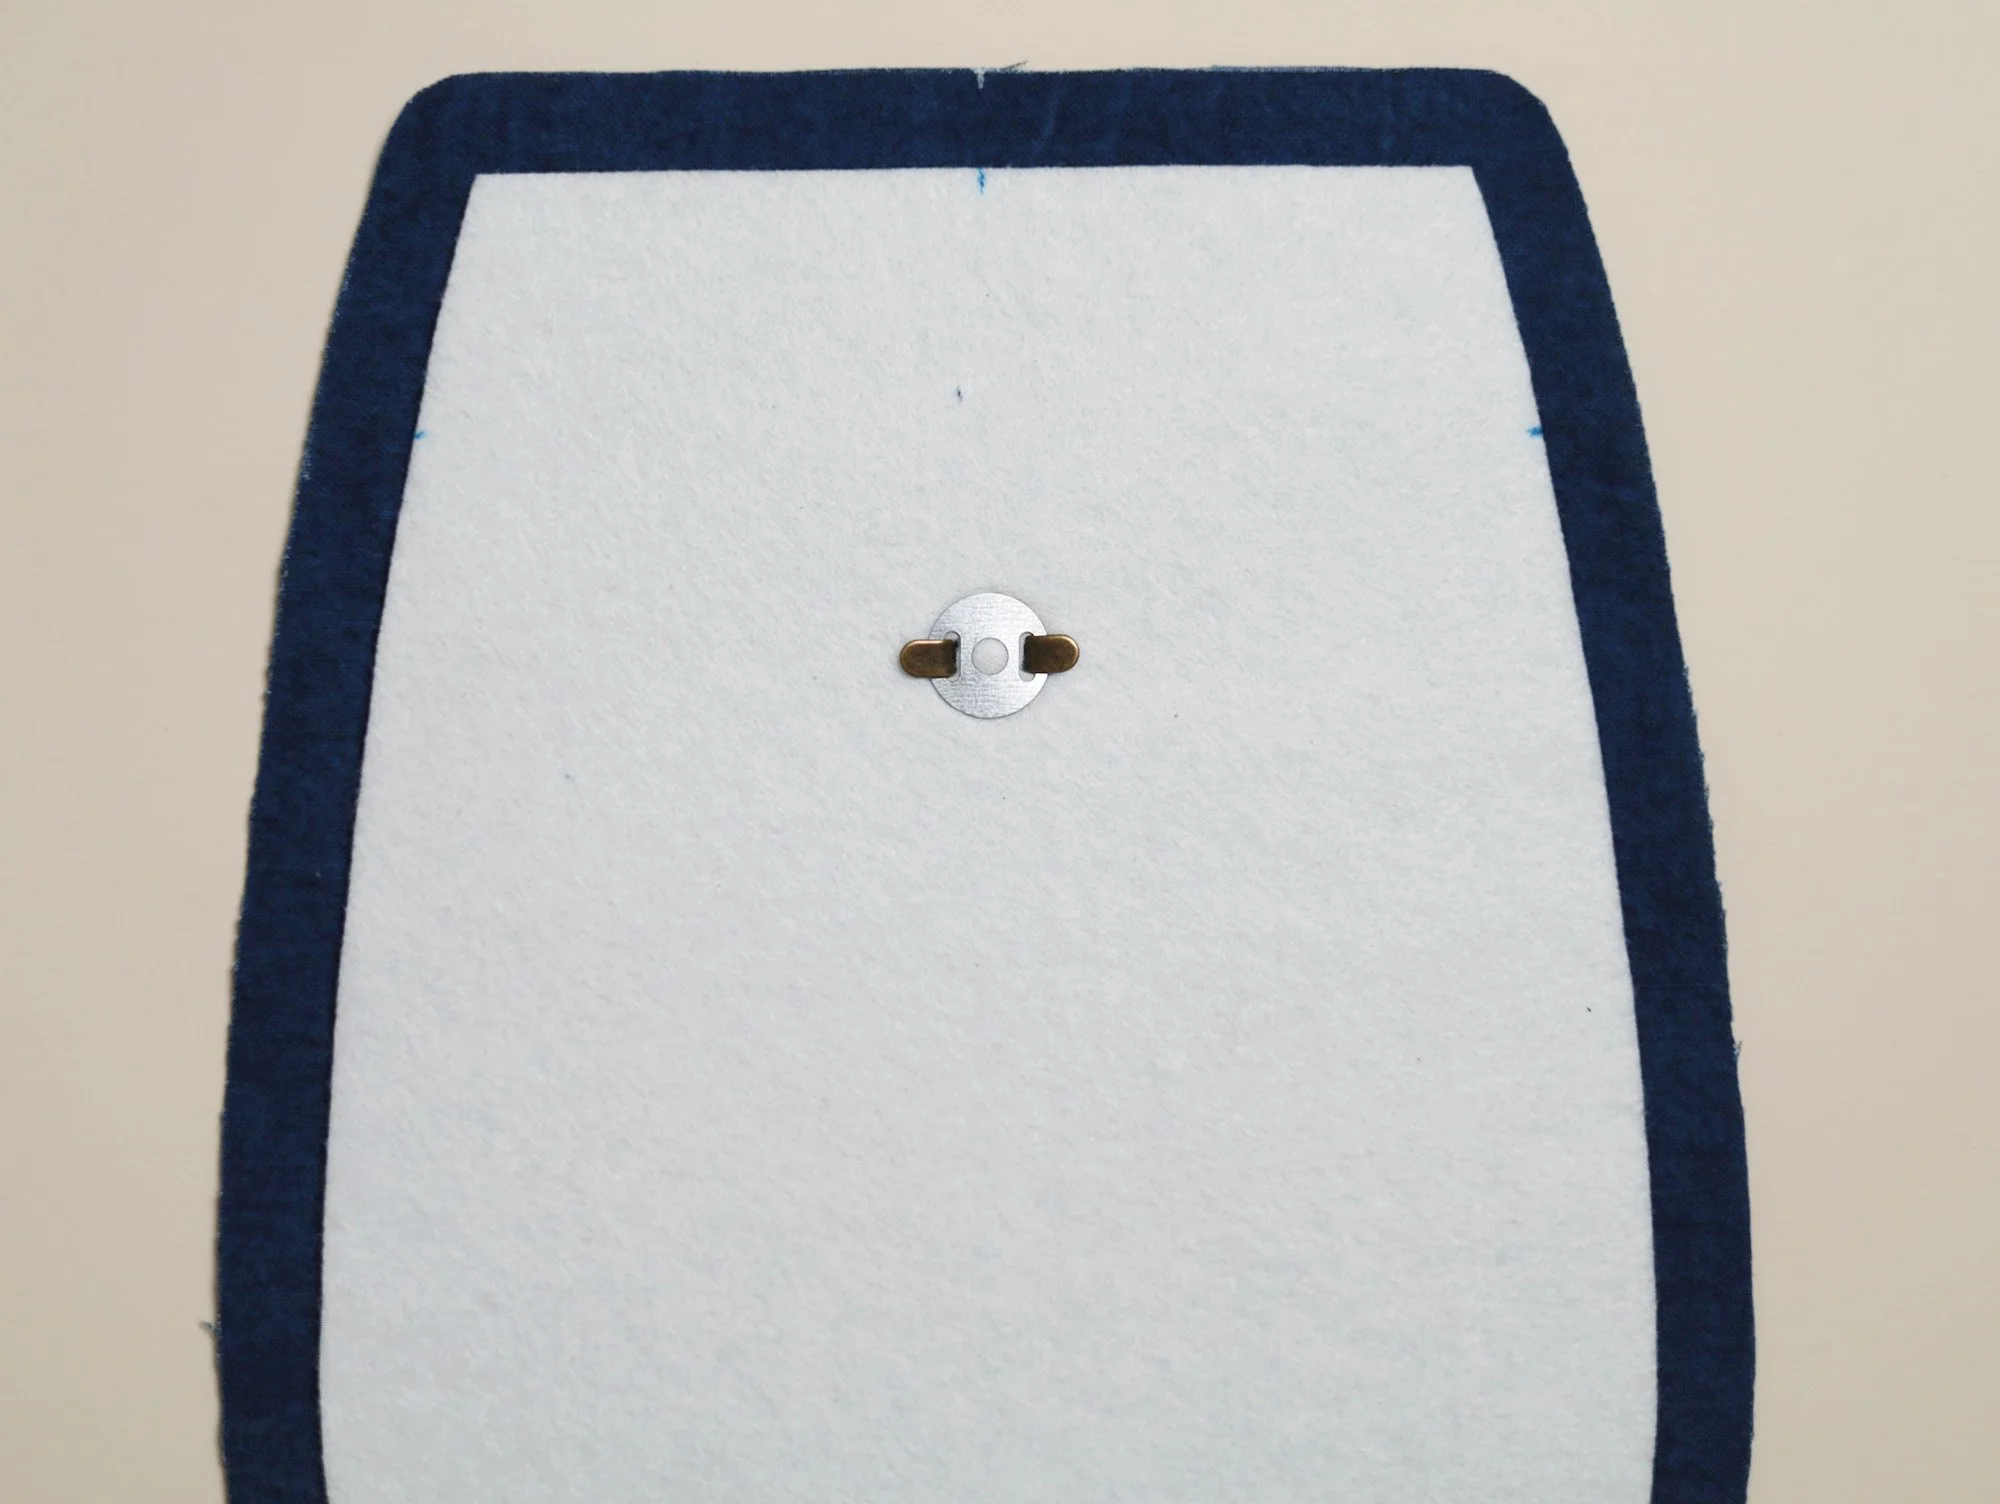
For all bags,install the female part of the magnetic snap following the same method as the male part.
Optional: For the embroidery bag, complete the embroidery before moving on to the next step.
Embroidery tips:
If using our plant-dyed Sashiko thread, cut a length of approximately 60 cm, thread the needle, and tie a knot at one end. Avoid using very long thread to prevent tangling.
Make two straight stitches per petal and a French knot (or a bead) per dot. For the petals, do not pull the thread tight—let the stitches rest on the fabric without tension. We used a mix of 1.5 and 2mm seed beads.

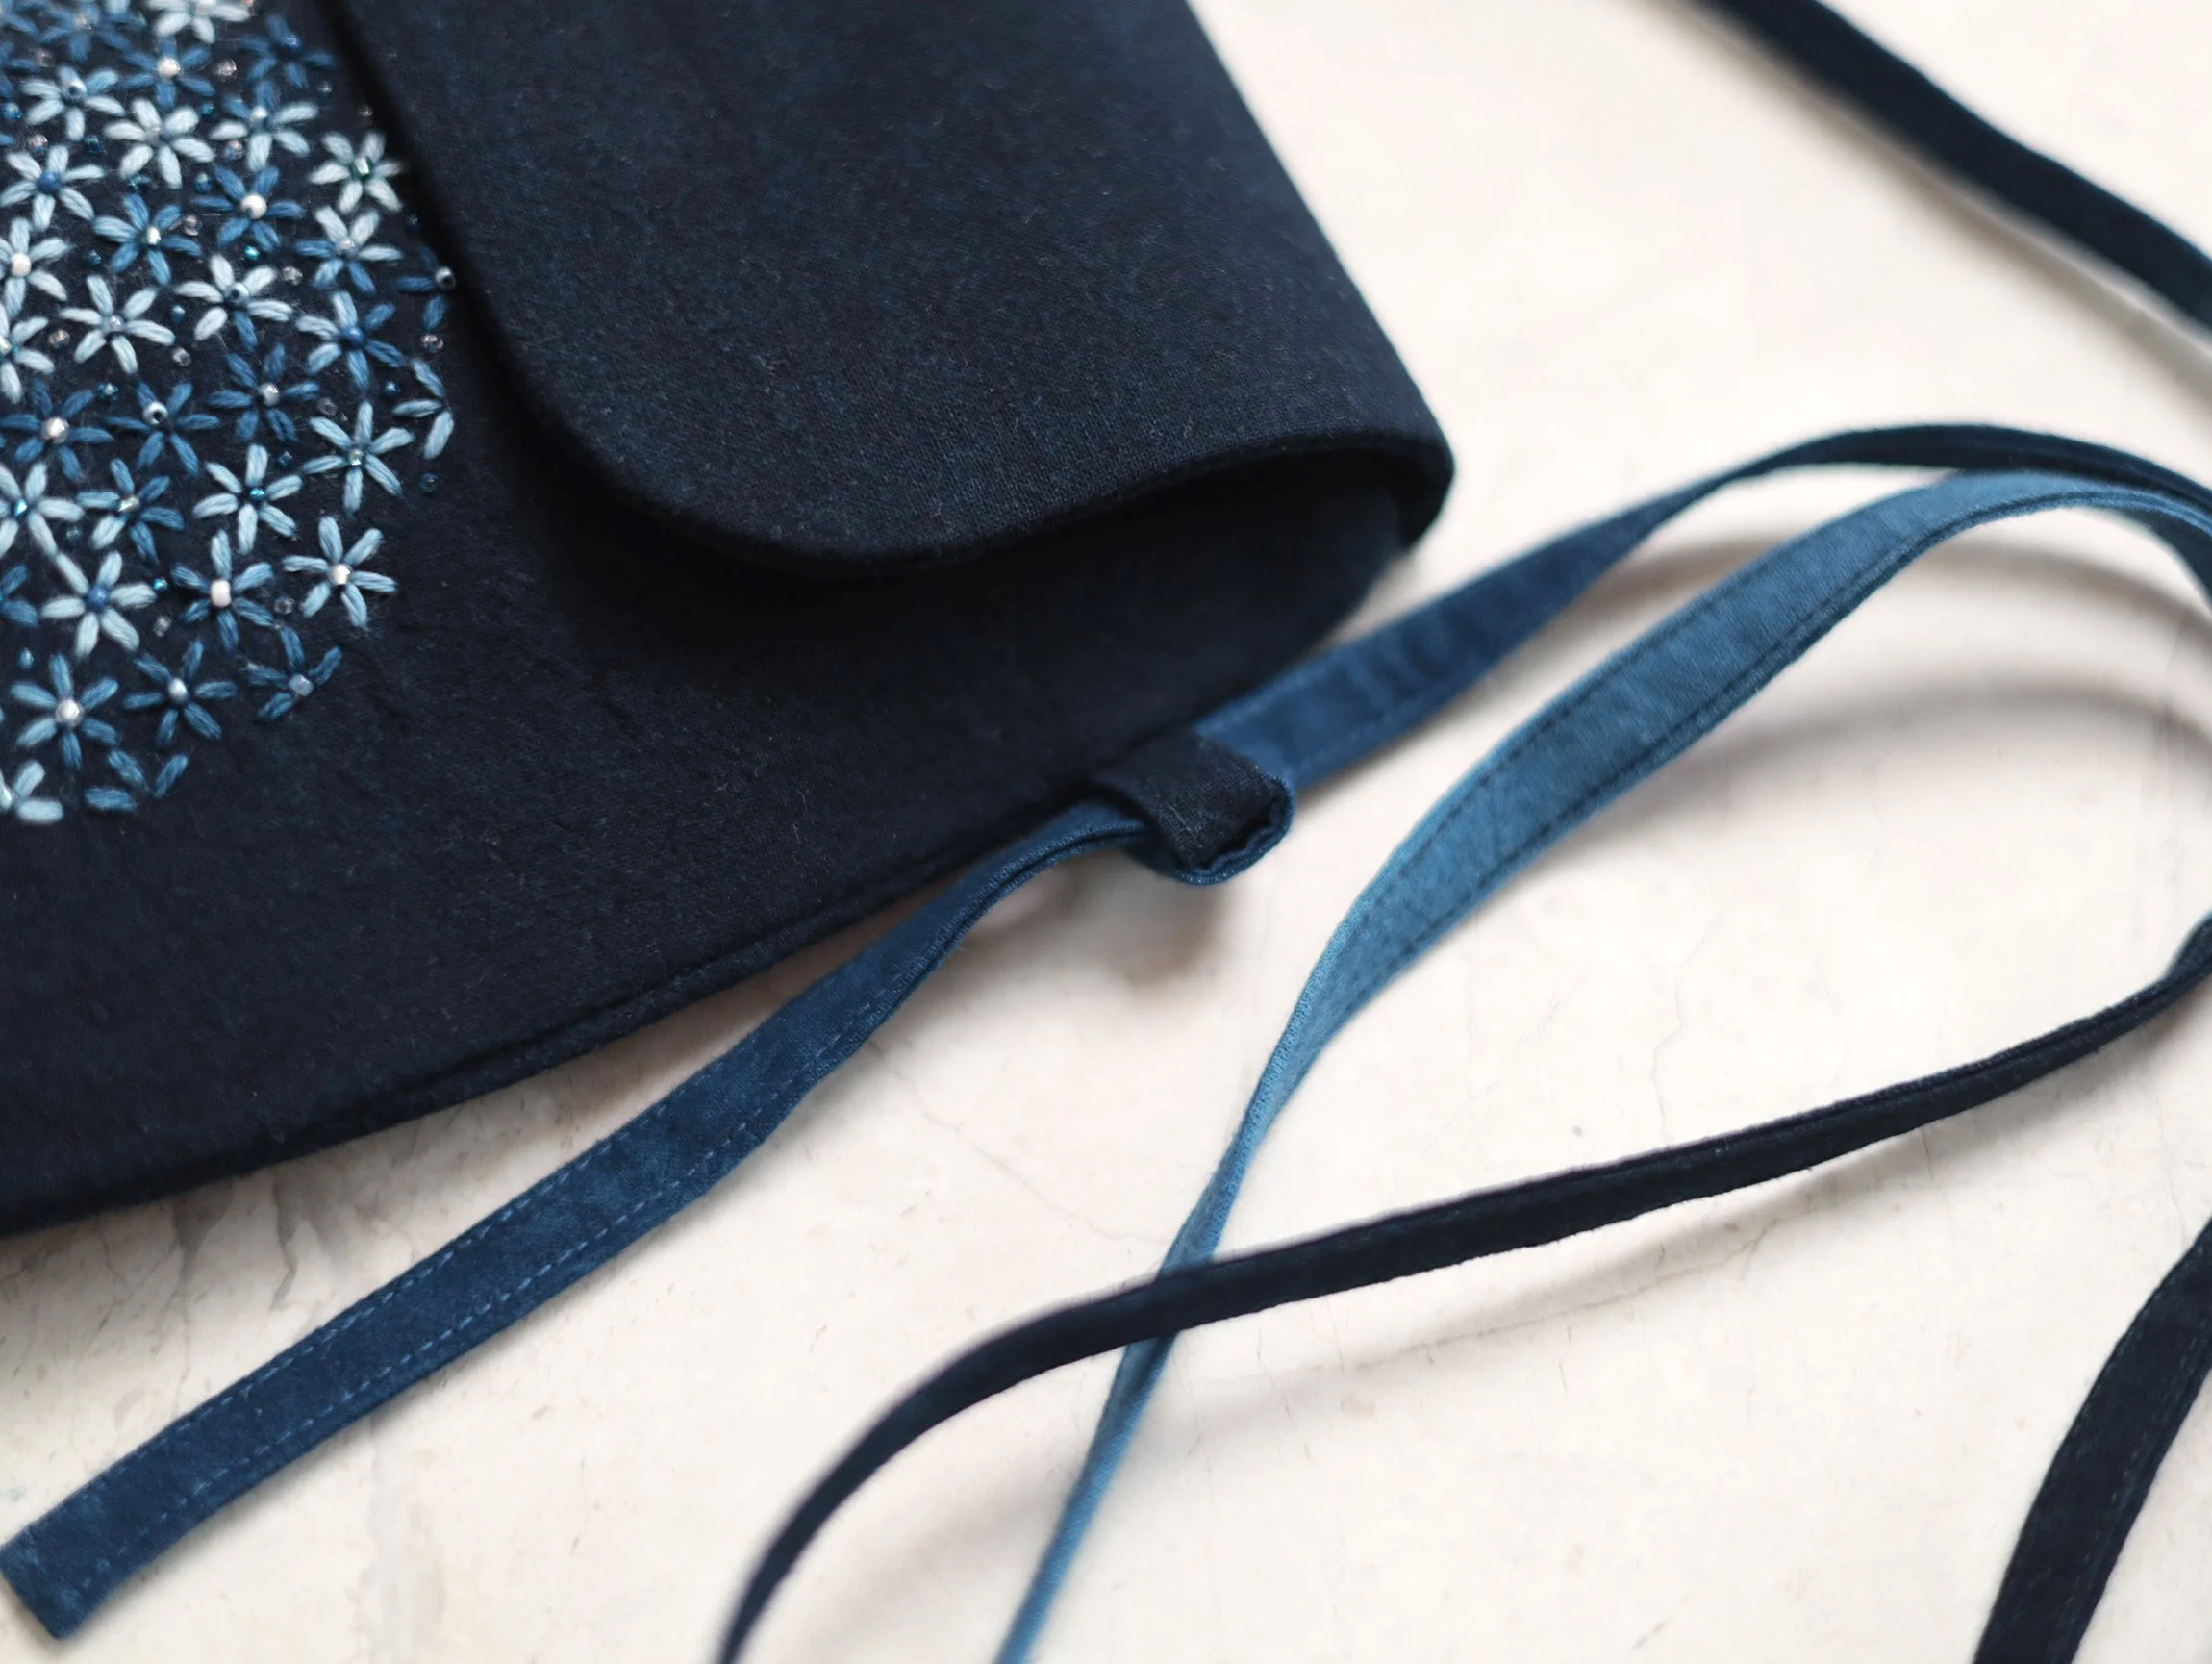
5. Make the D-ring/Strap Tabs.
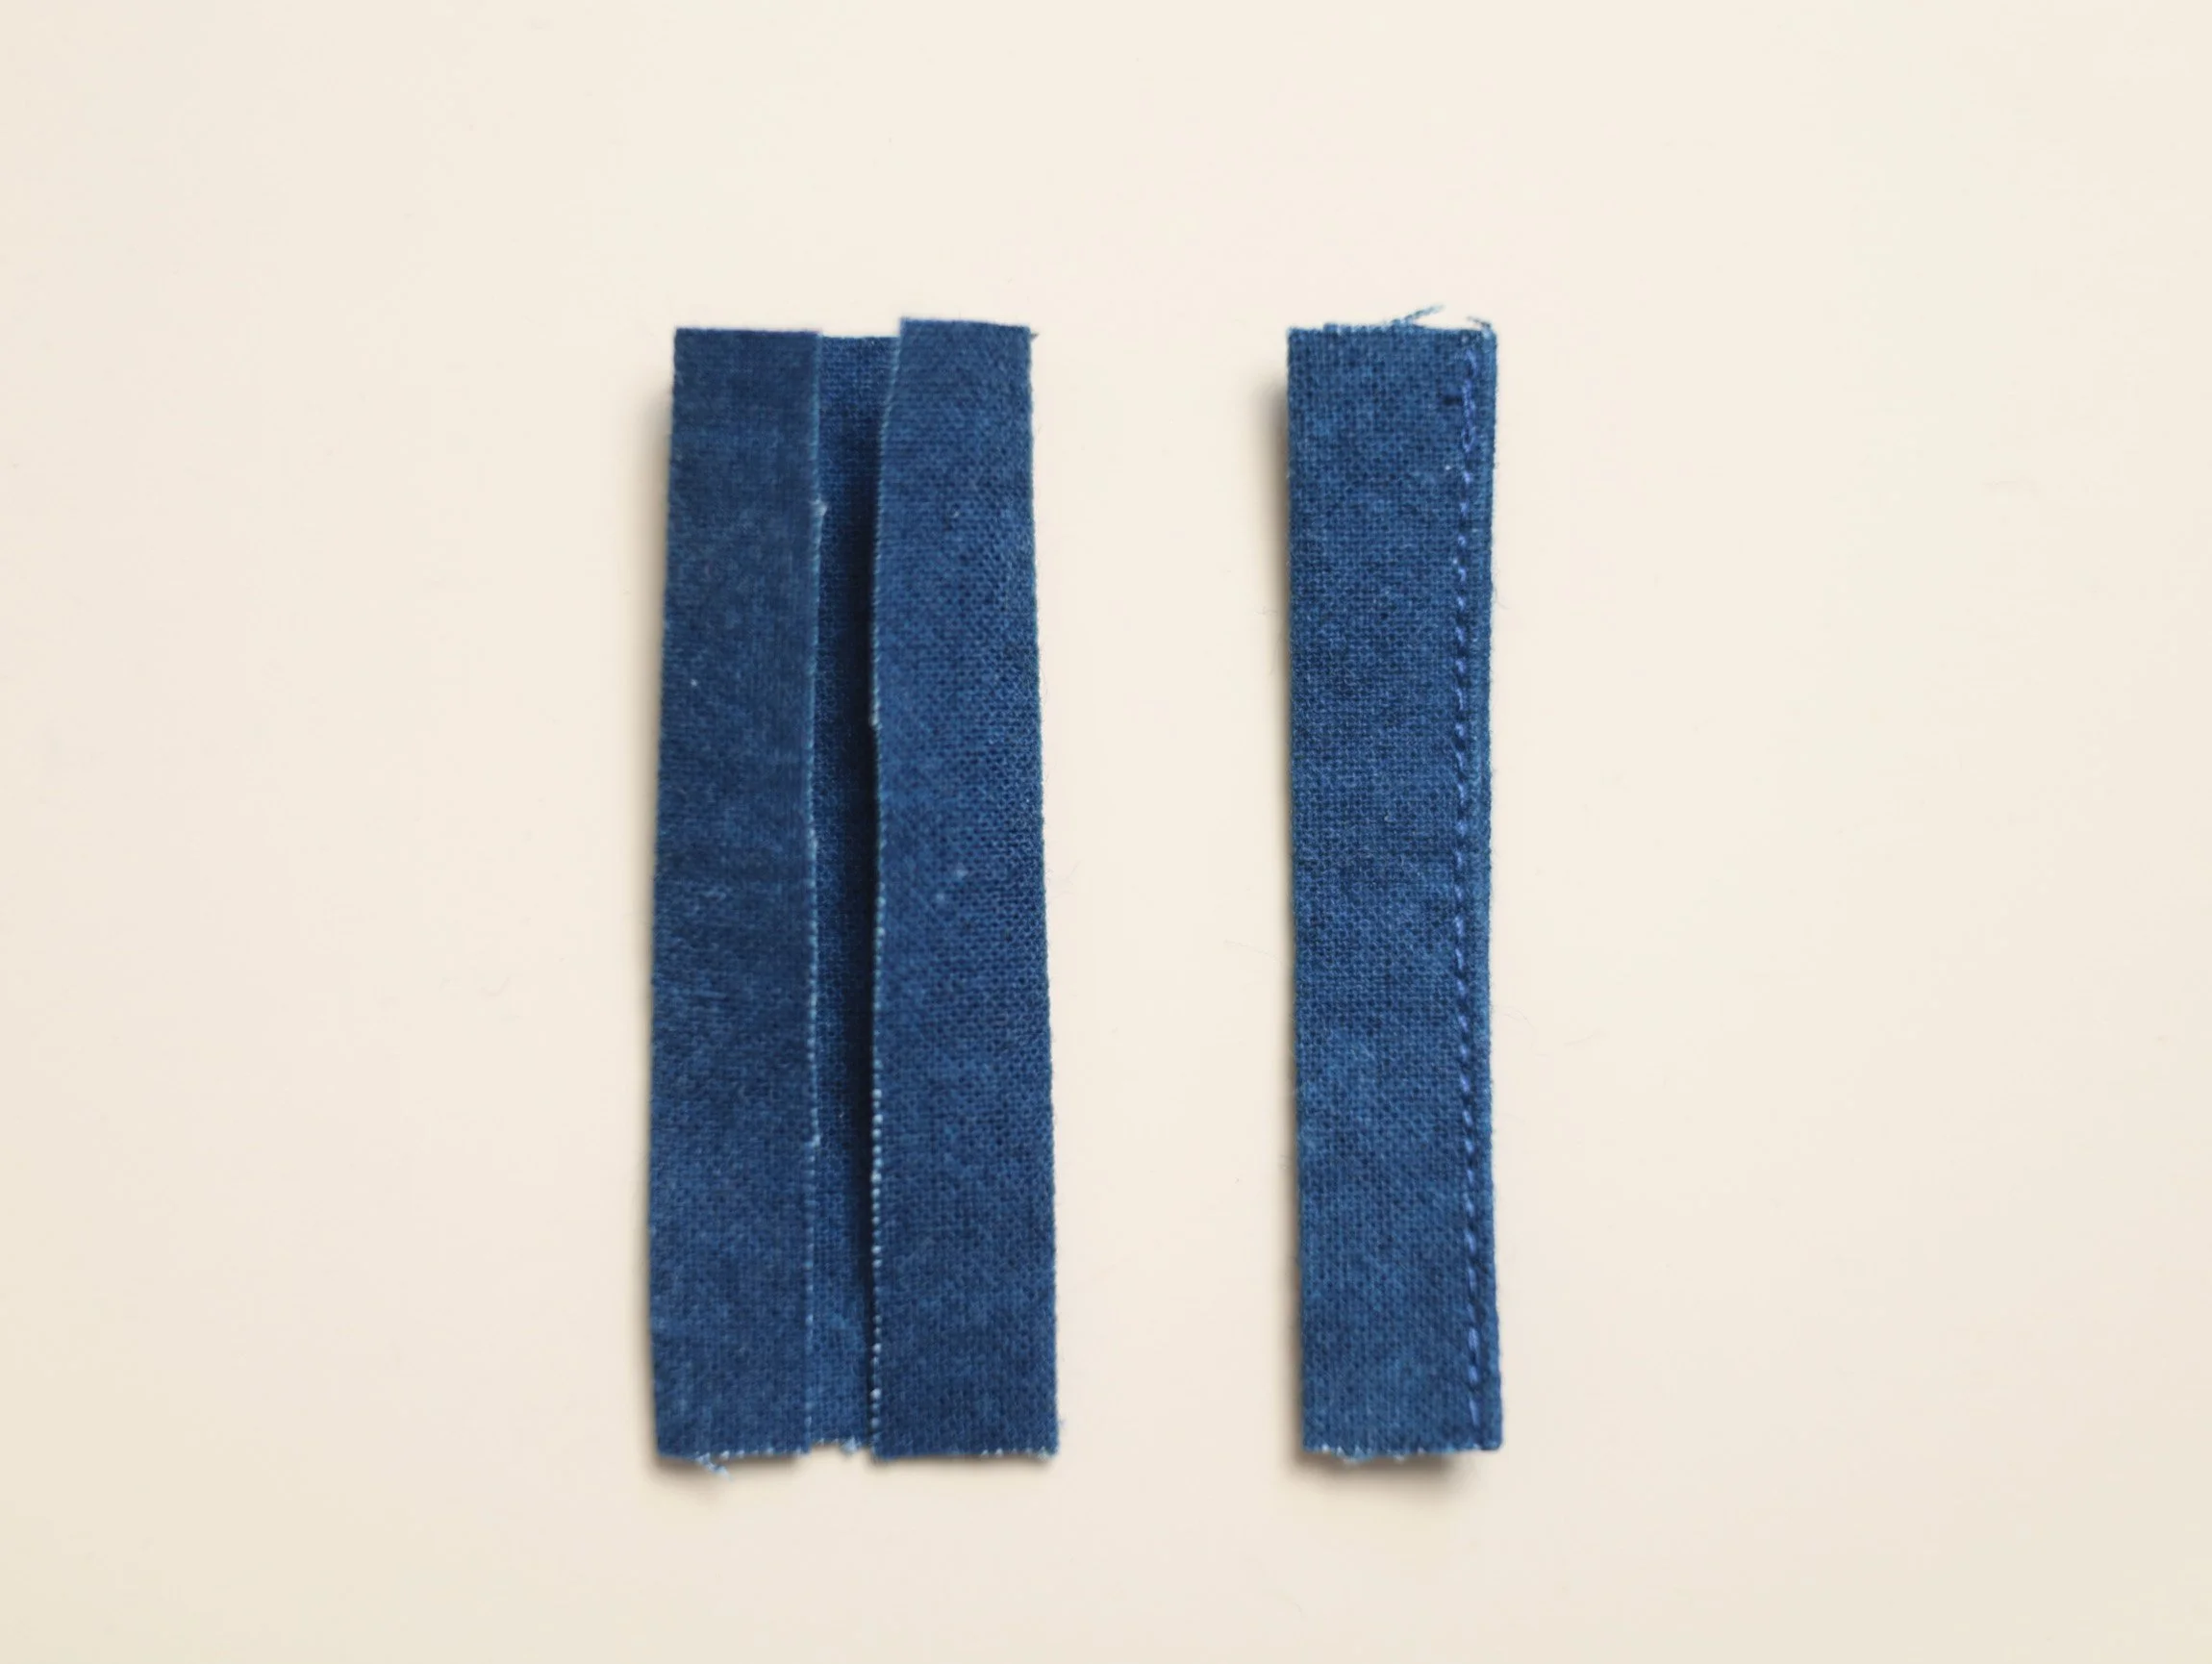
Cut two 4 × 6 cm pieces for the strap tabs. Fold each piece in half lengthwise (wrong sides together) and press. Open, fold both long edges to the centre, then fold in half again. Topstitch 1 mm from the long edge.
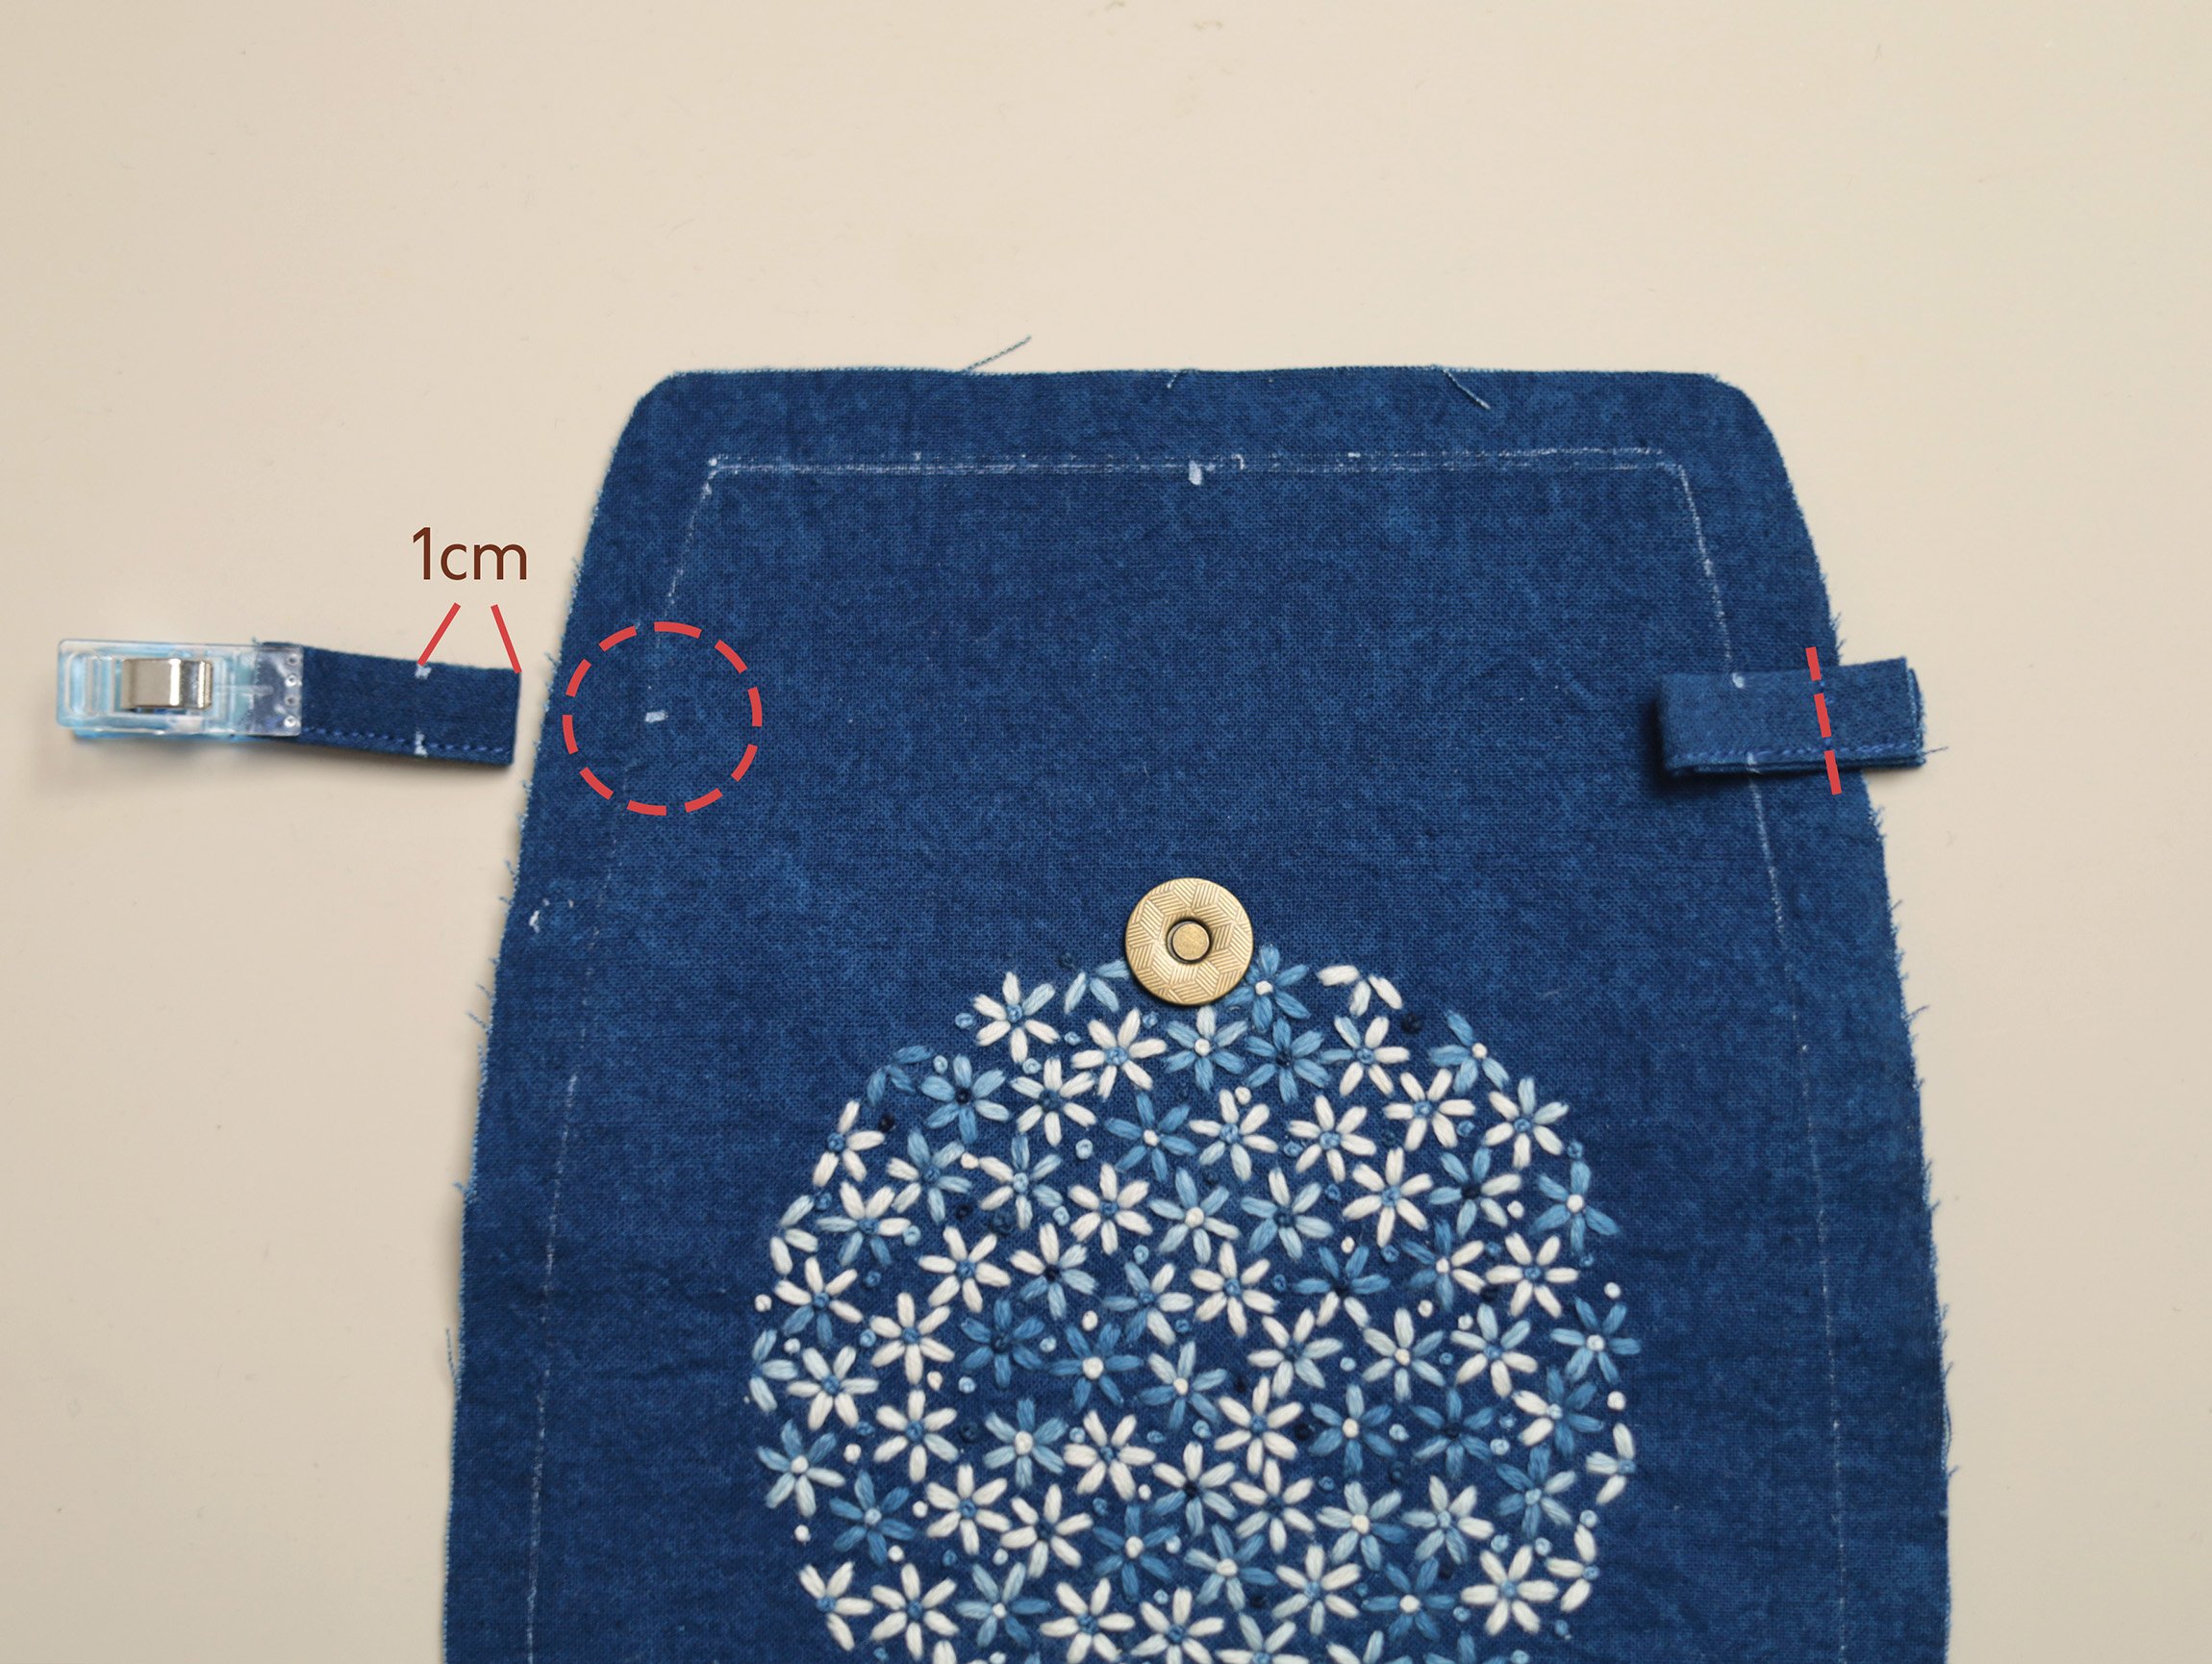
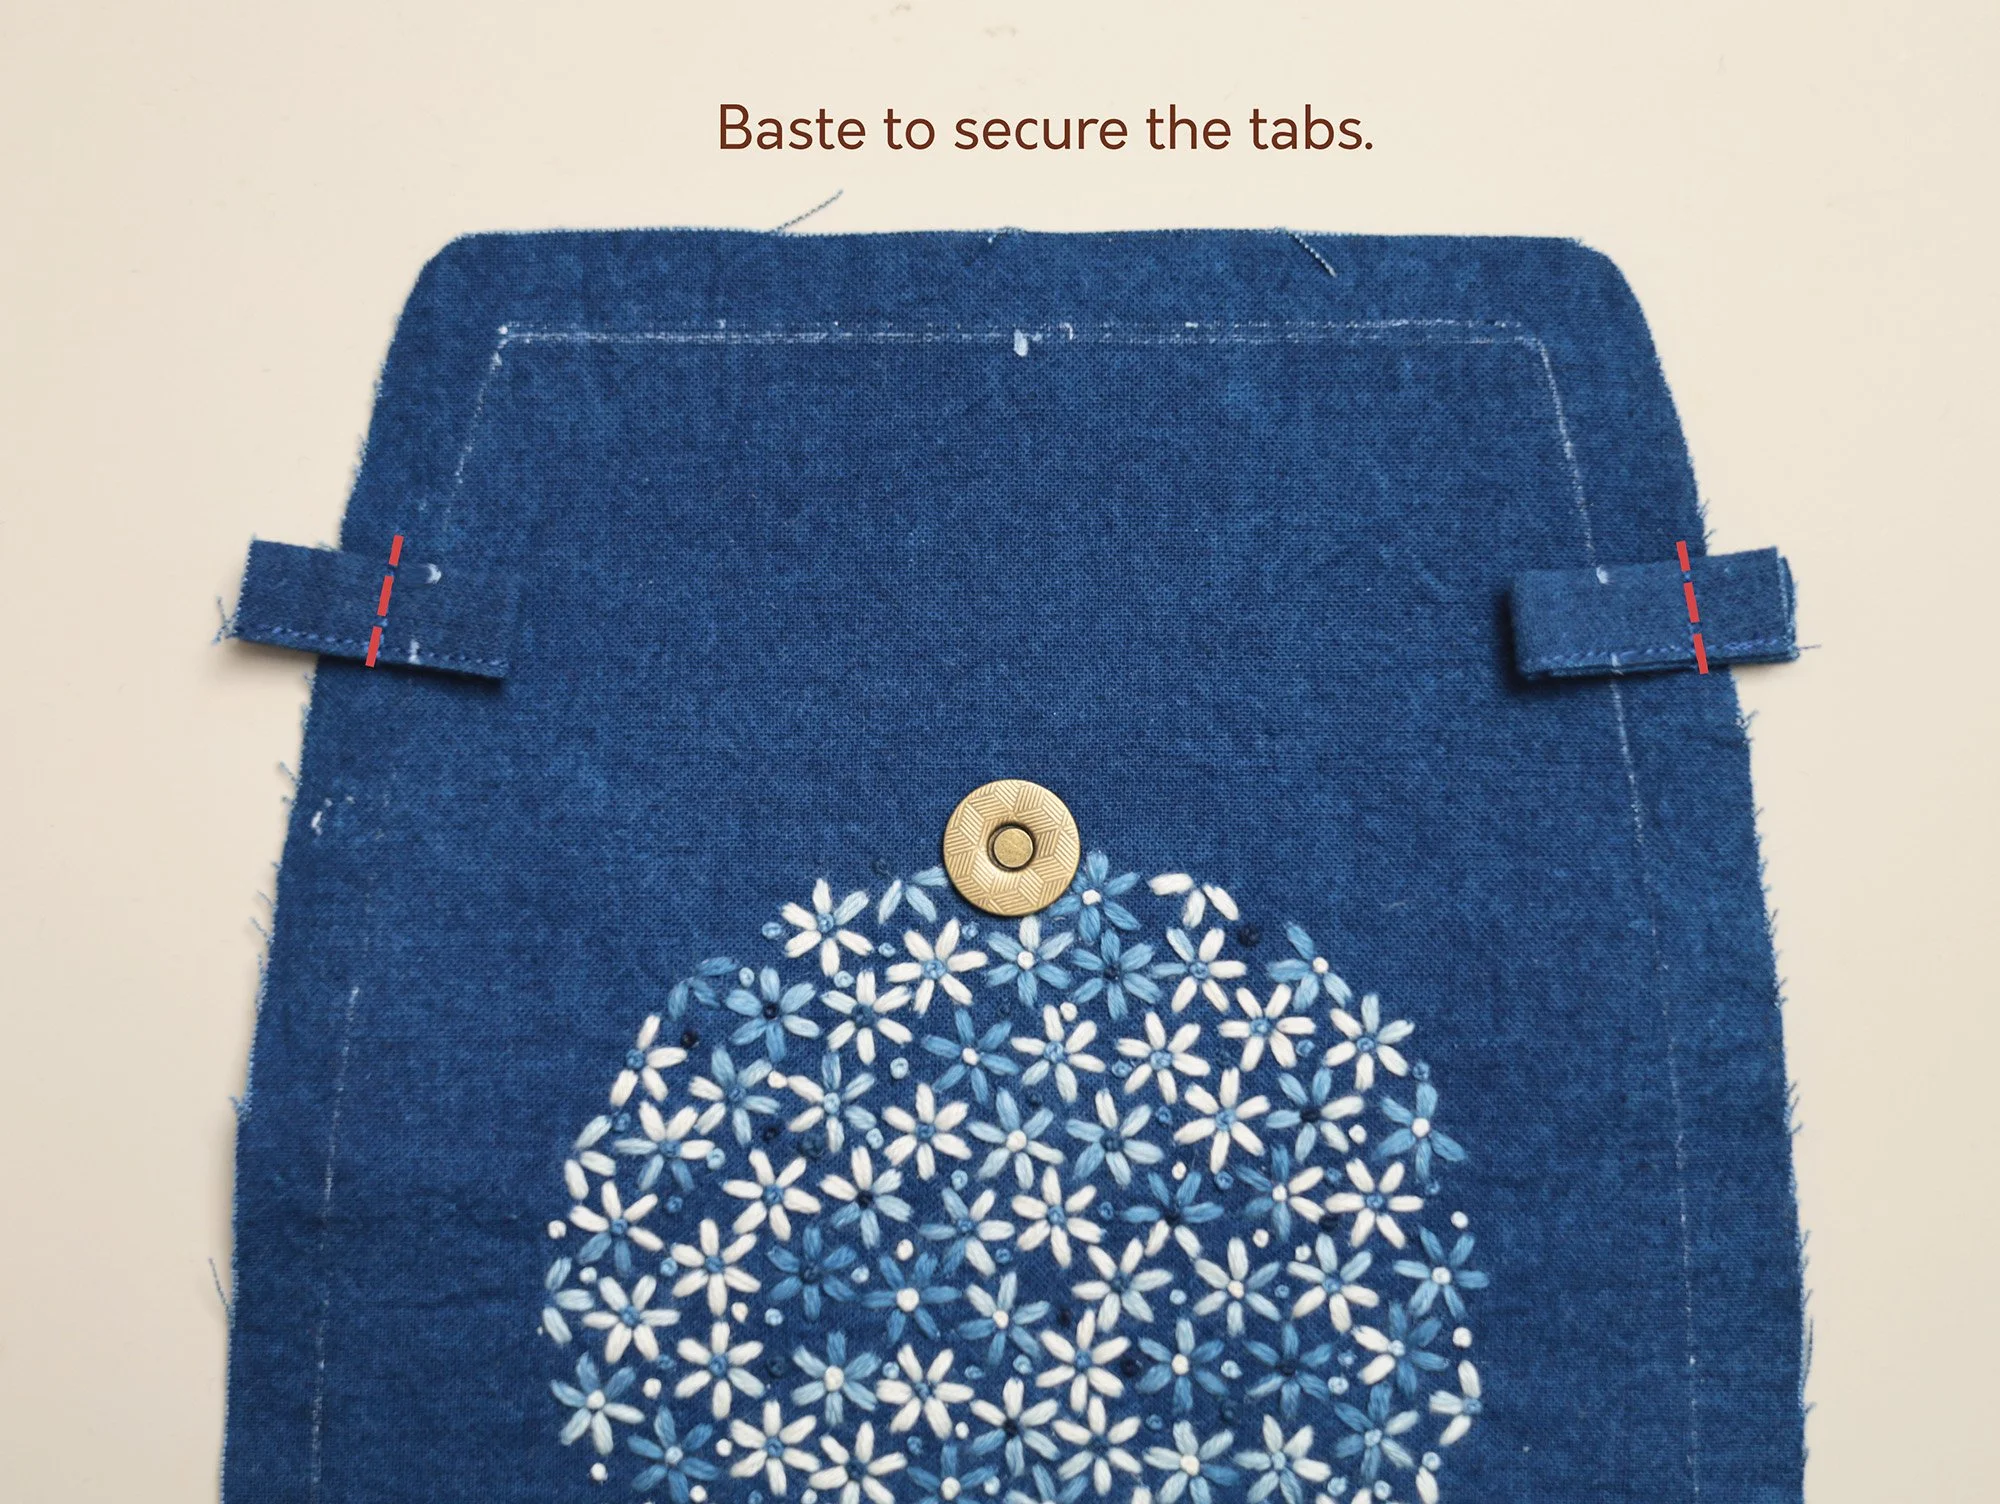
Fold the tab in half, matching the short sides together. Take the front piece of the bag body and mark the placement points for the strap tabs according to Pattern A. Place the tabs at the placement points with their raw edges facing the sides of the bag. We left around 1cm of the loop inside the bag edge - you can adjust this according to your needs. Baste the tabs in place within the seam allowance.
Note: The measurements in this step are flexible and can be adjusted to fit your D‑ring size or strap‑attachment method. If using D-rings, we recommend a type that can be opened and attached to the tabs later, rather than at this stage. Otherwise, attach the D-rings now (this will make machine sewing more difficult later).
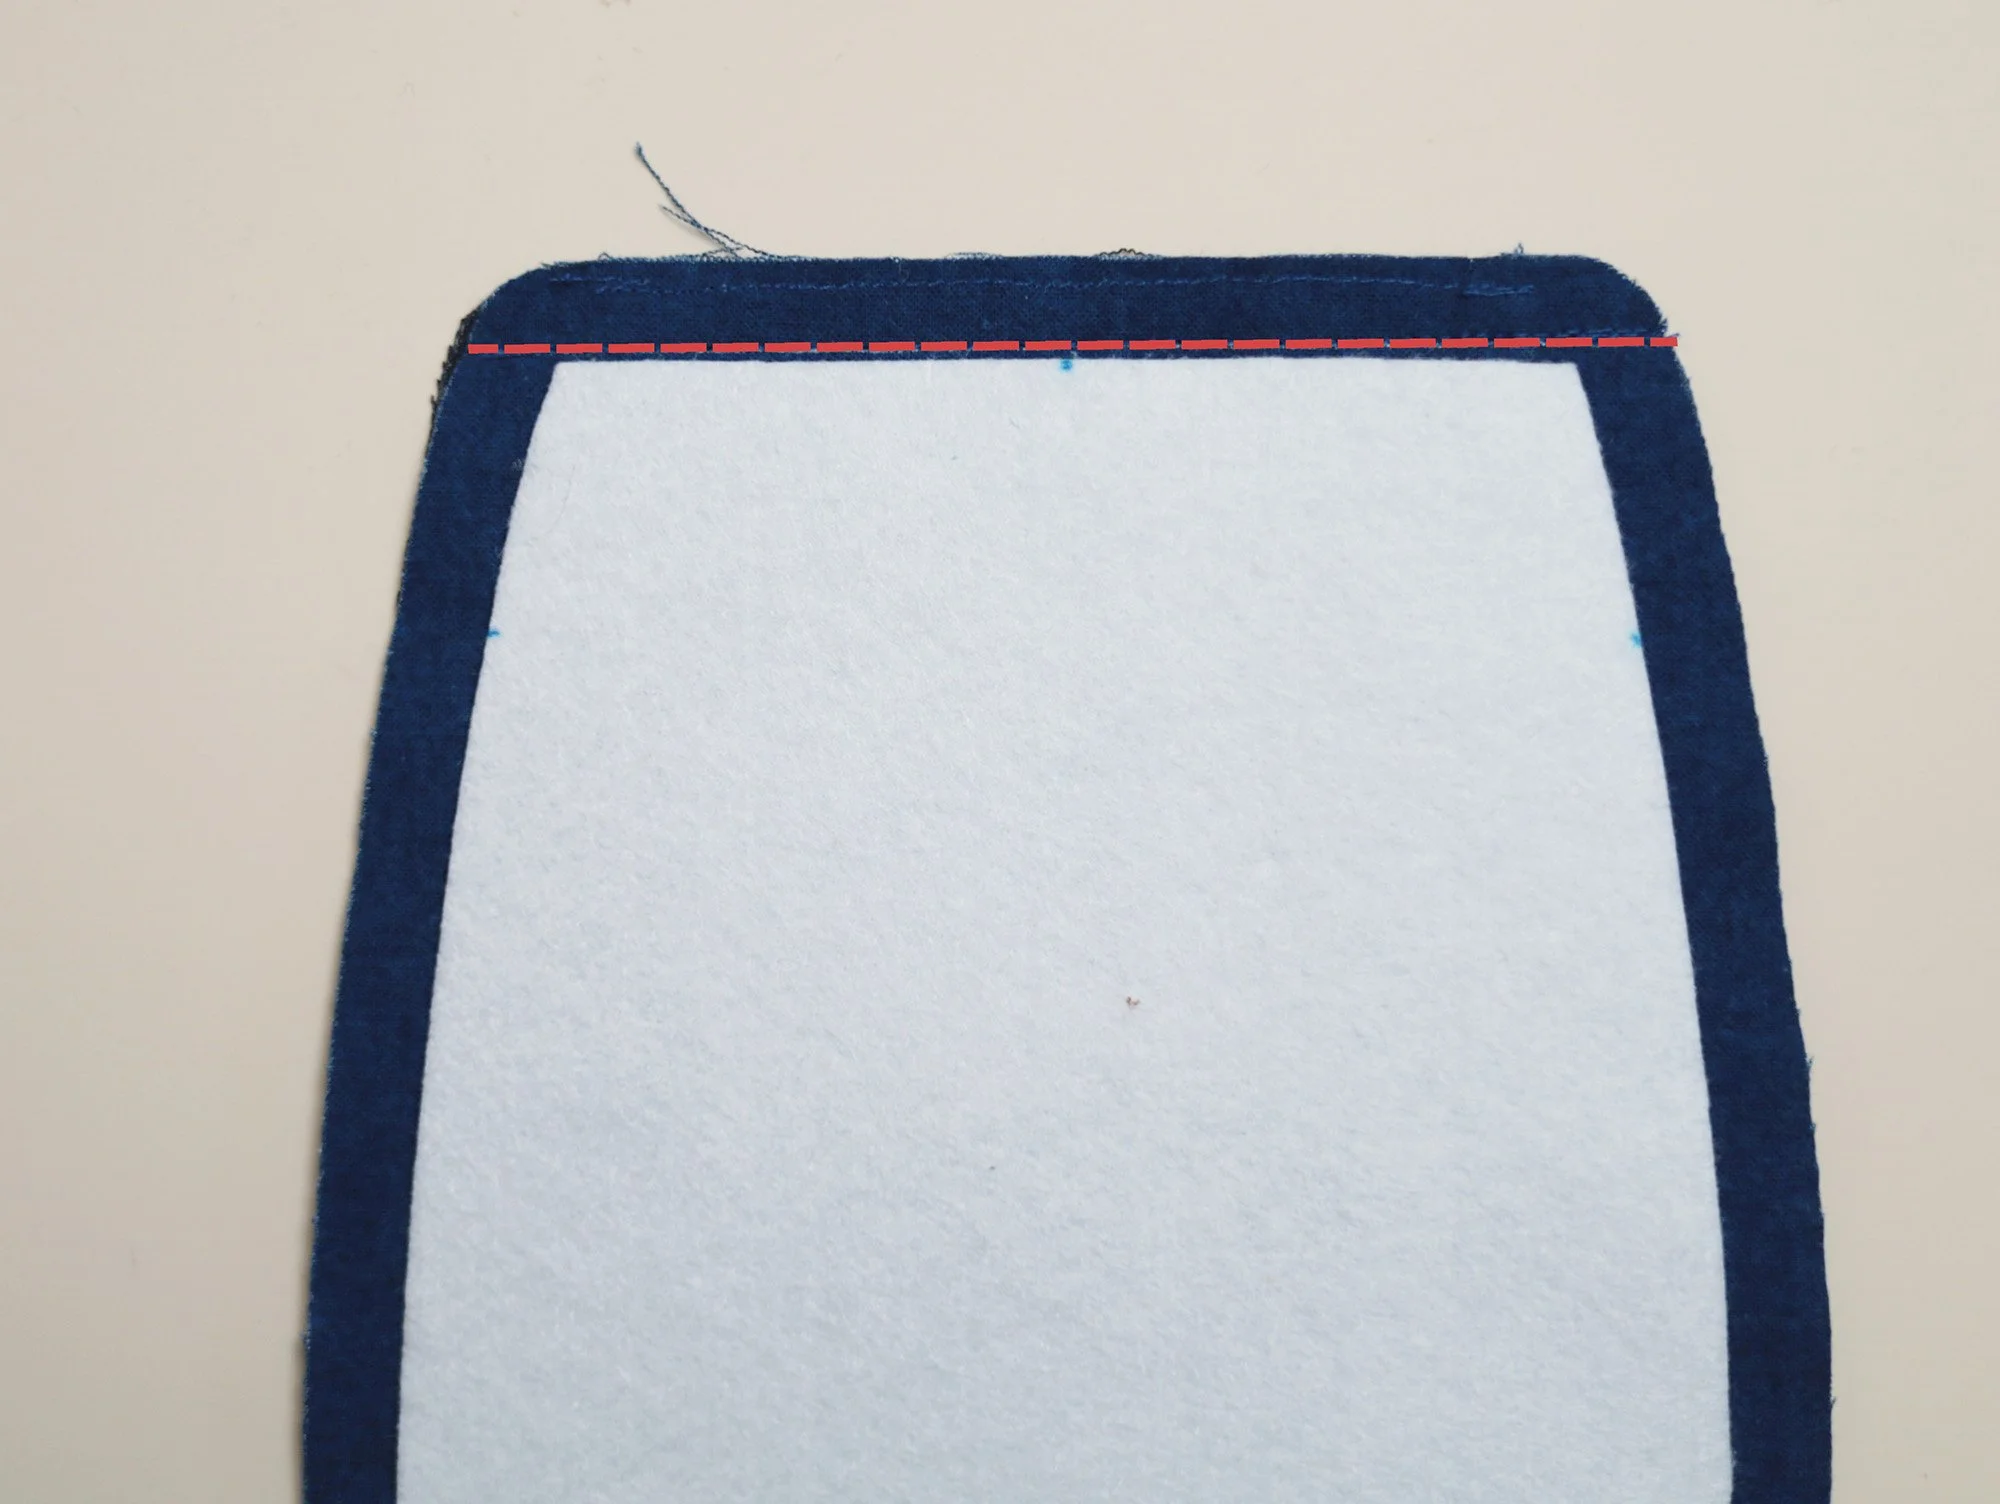
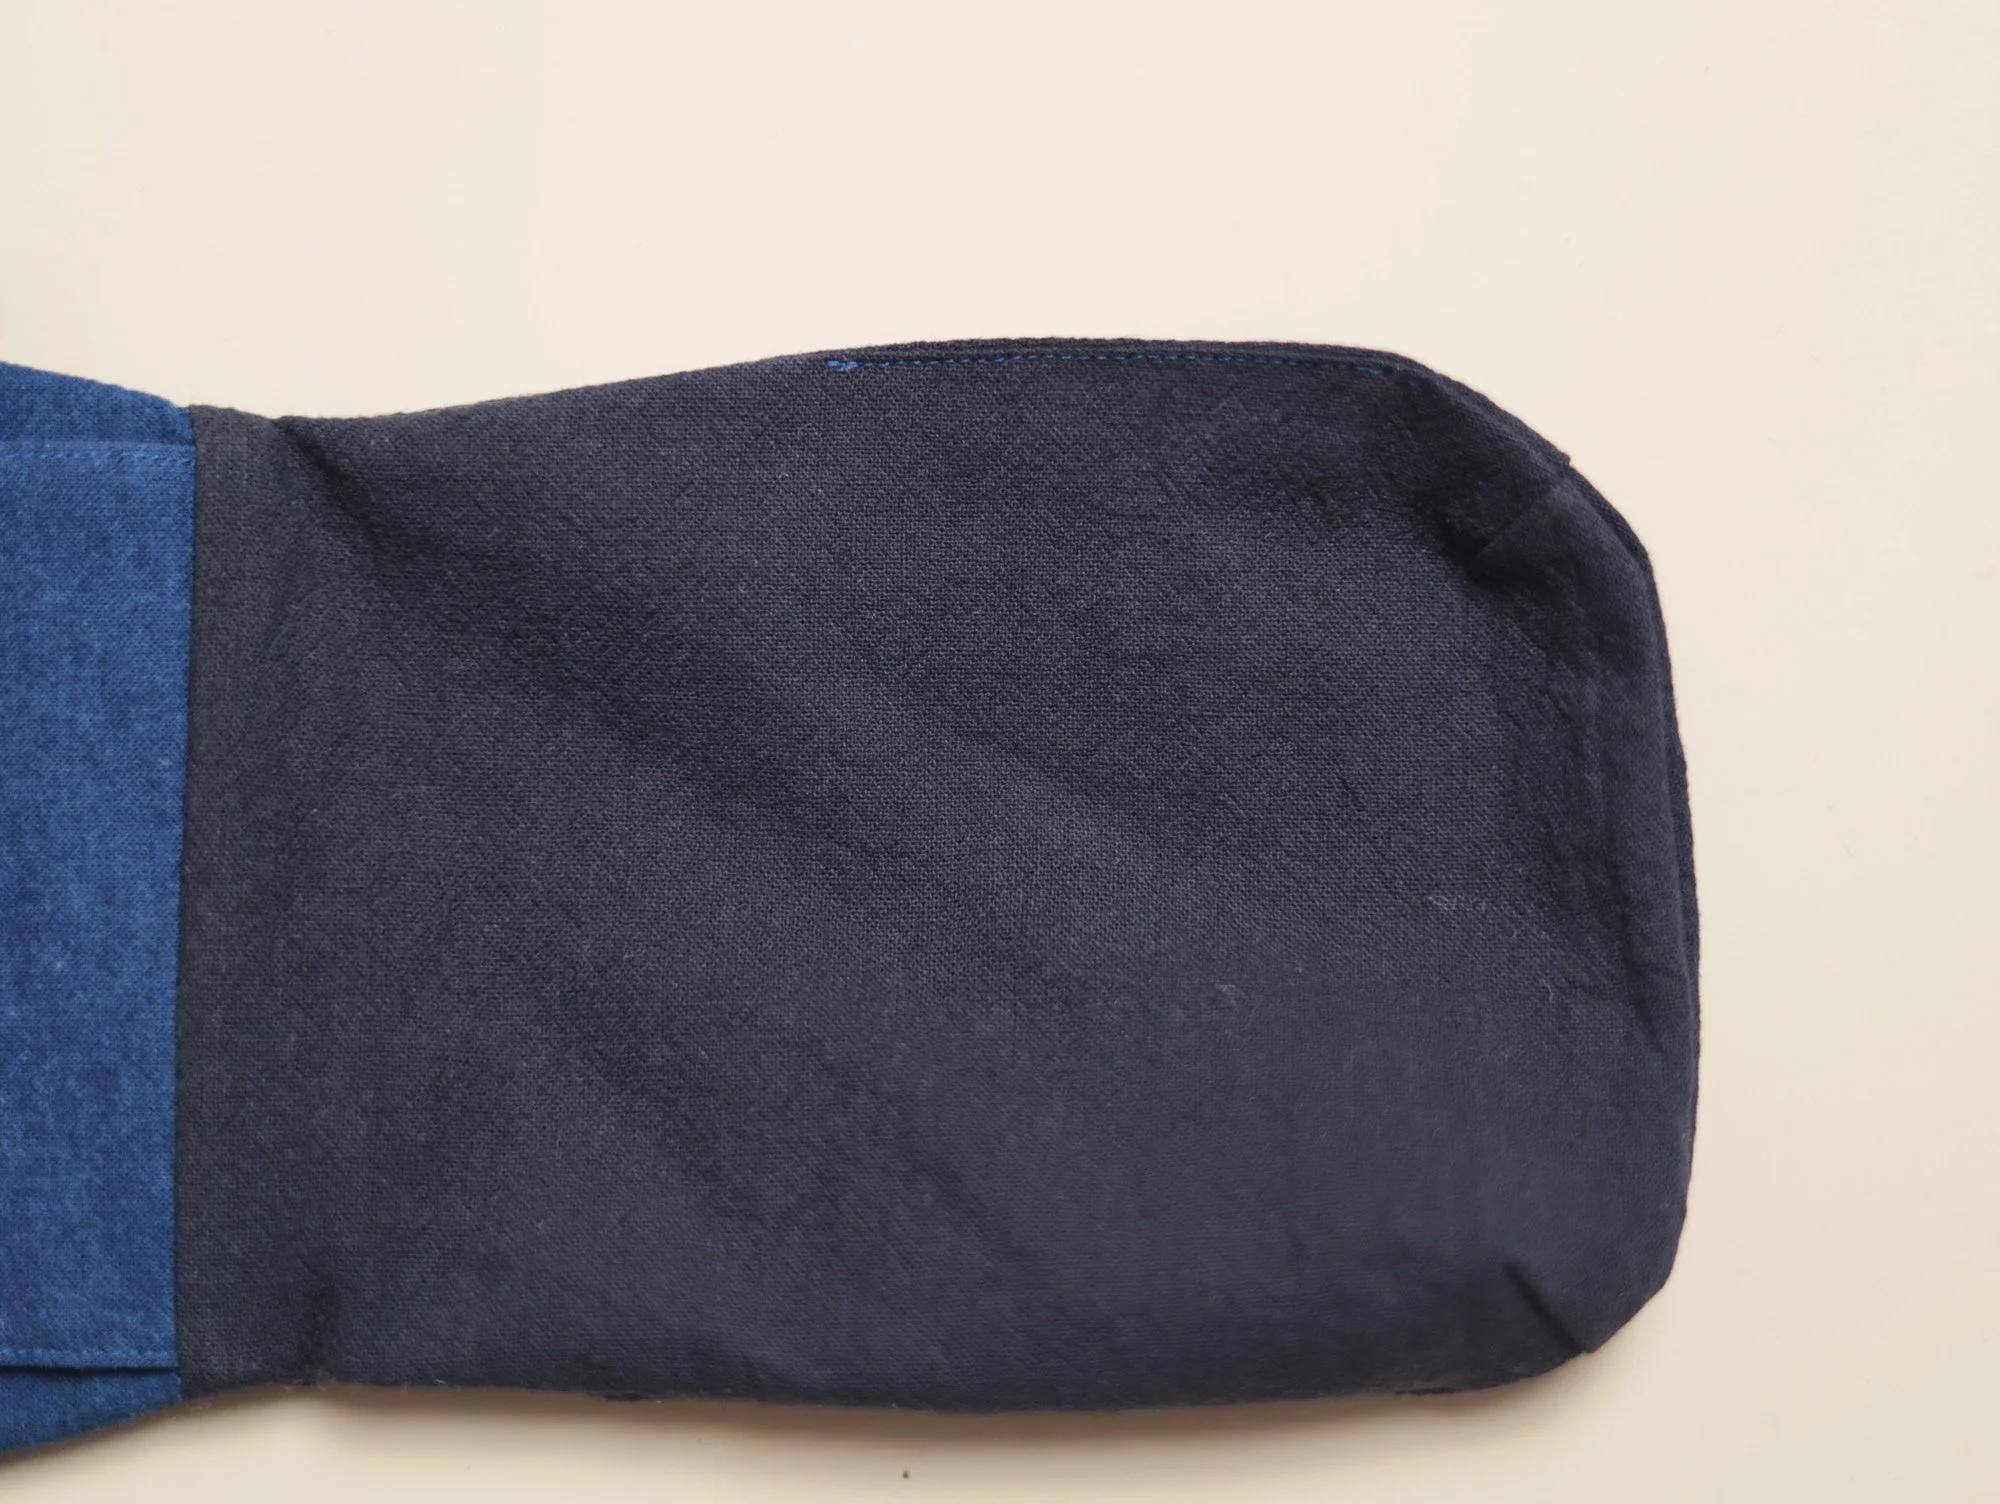
Place a piece of bag lining on top of the bag front piece, right sides together and raw edges aligned. Clip the layers in place and stitch along the top edge, 1–2 mm from the interfacing edge.
6. Prepare the bag body

Place the bag flap on top of the bag back piece, right sides together, raw edges and their centre points aligned. Baste to secure within the seam allowance.
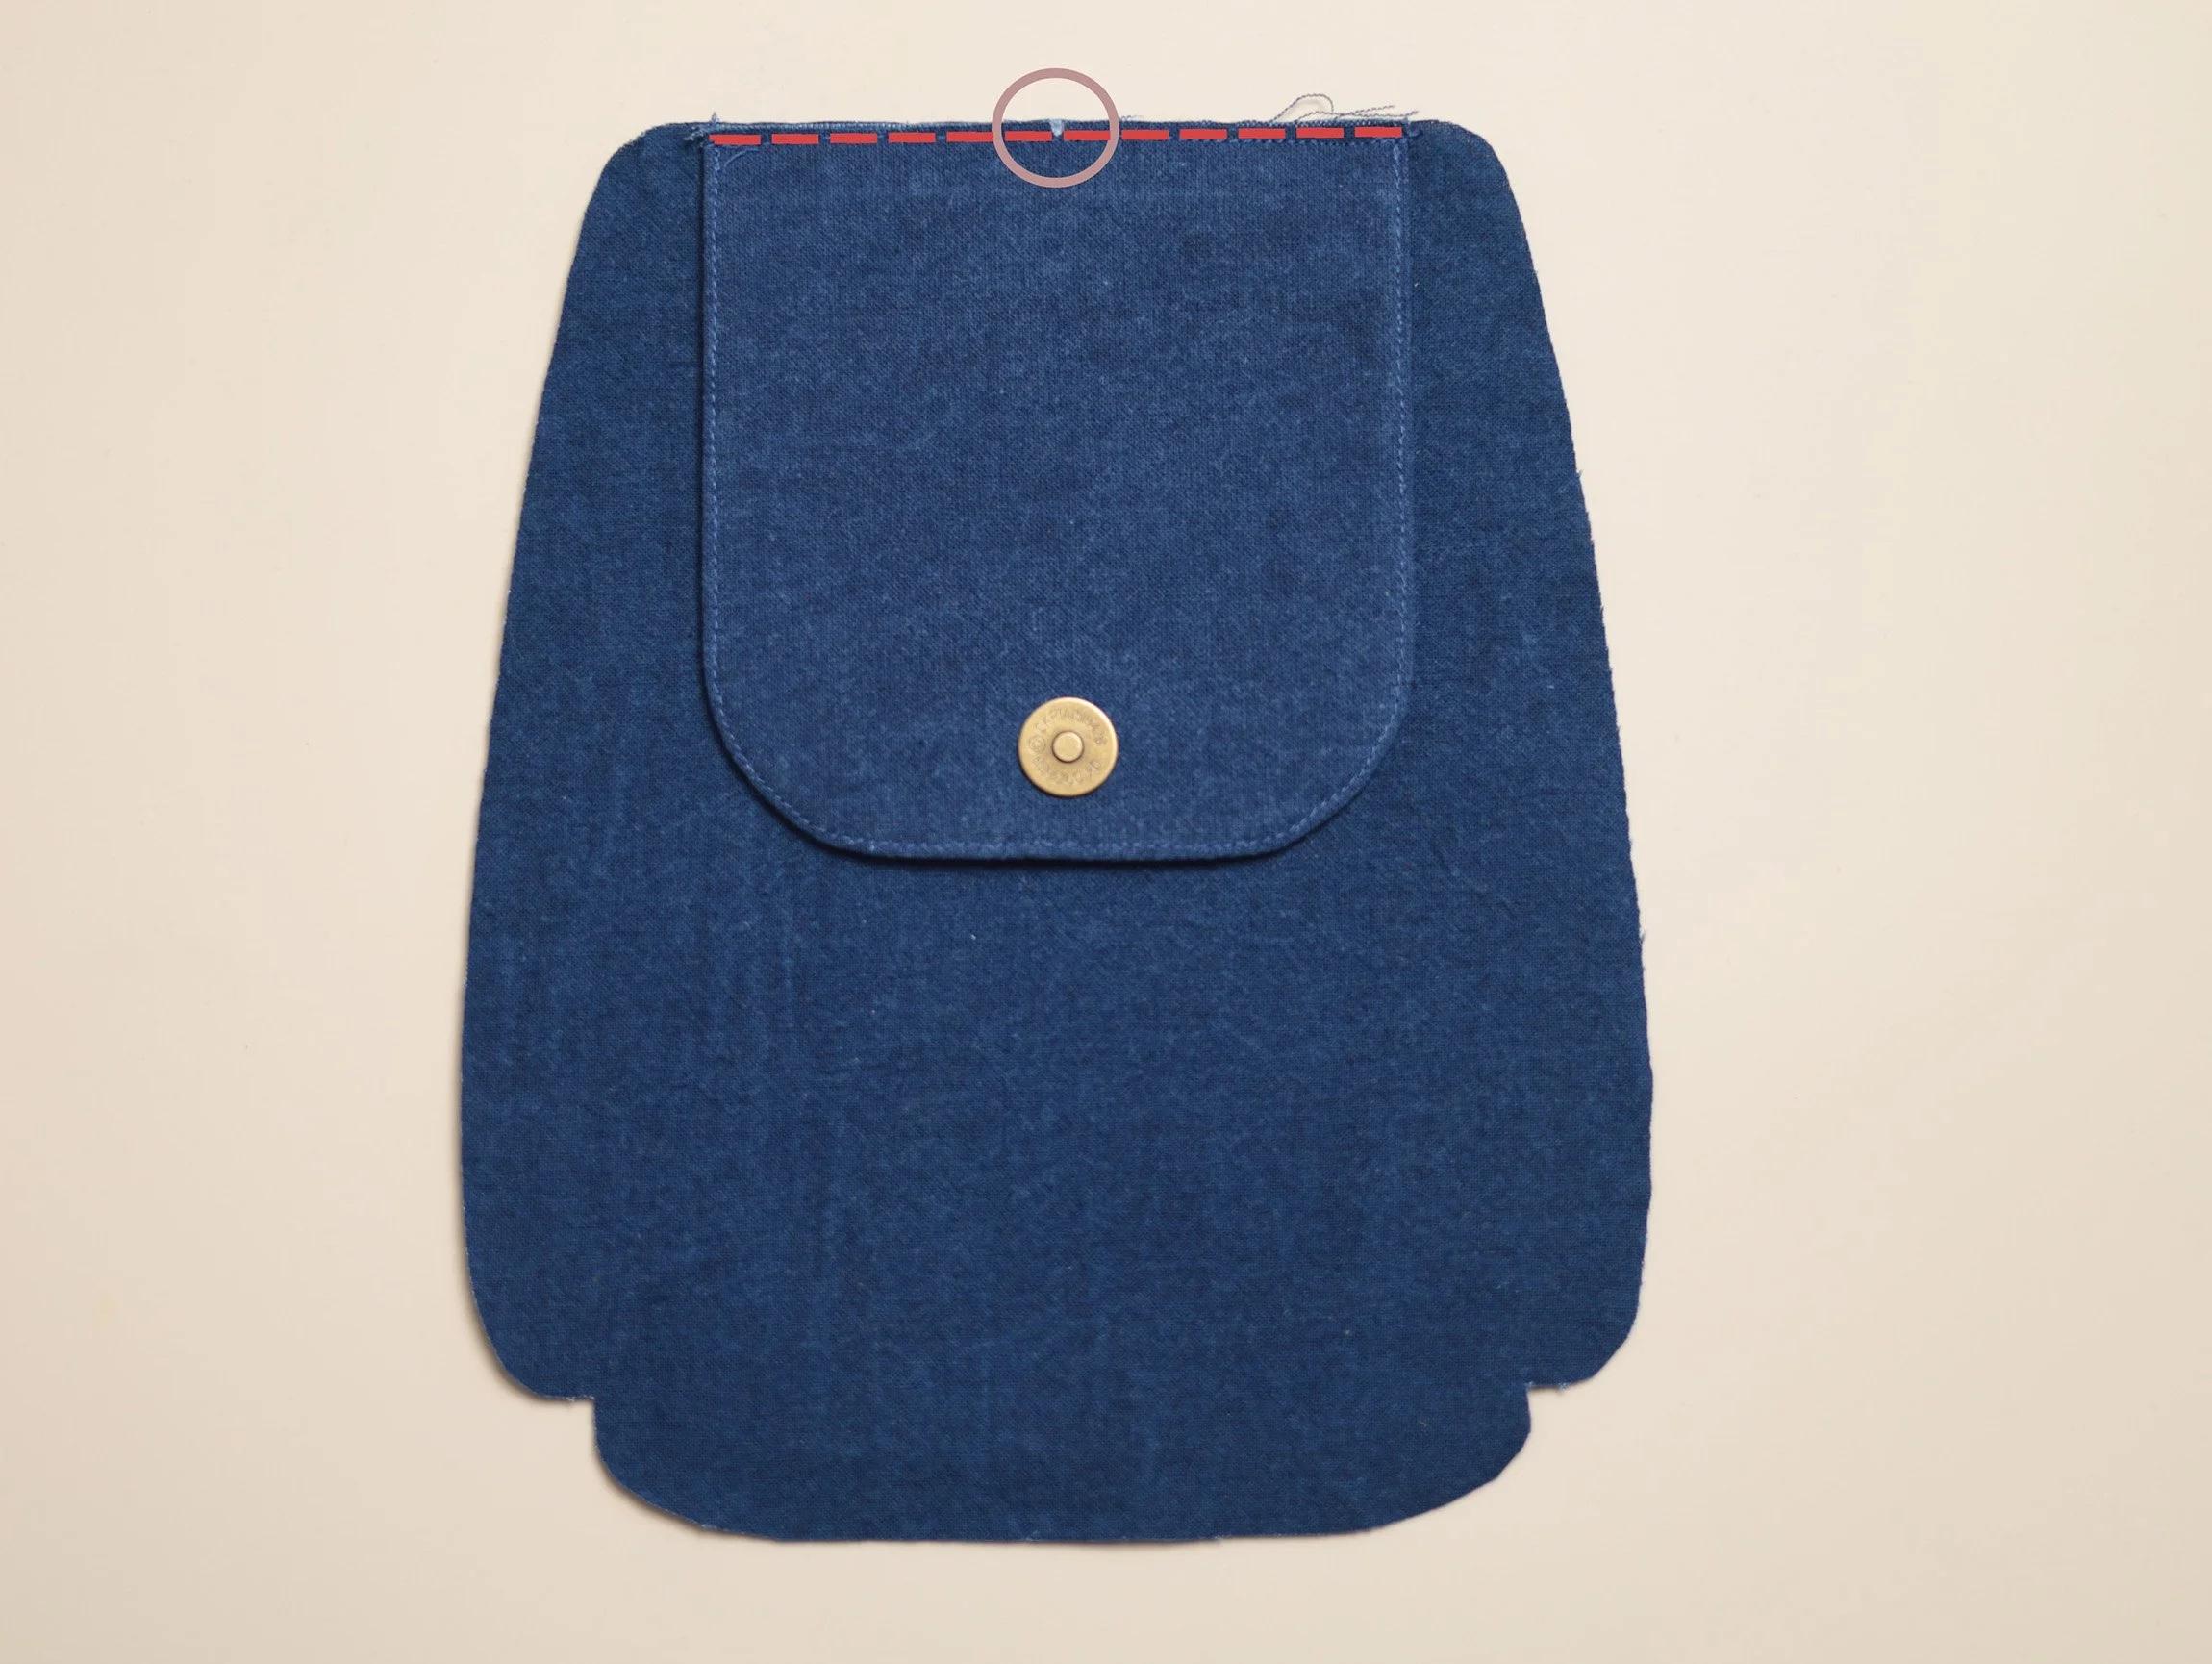
Place the other bag lining piece on top of the bag back piece, right sides together and raw edges aligned. Clip the layers in place and stitch along the top edge, 1–2 mm from the interfacing edge.
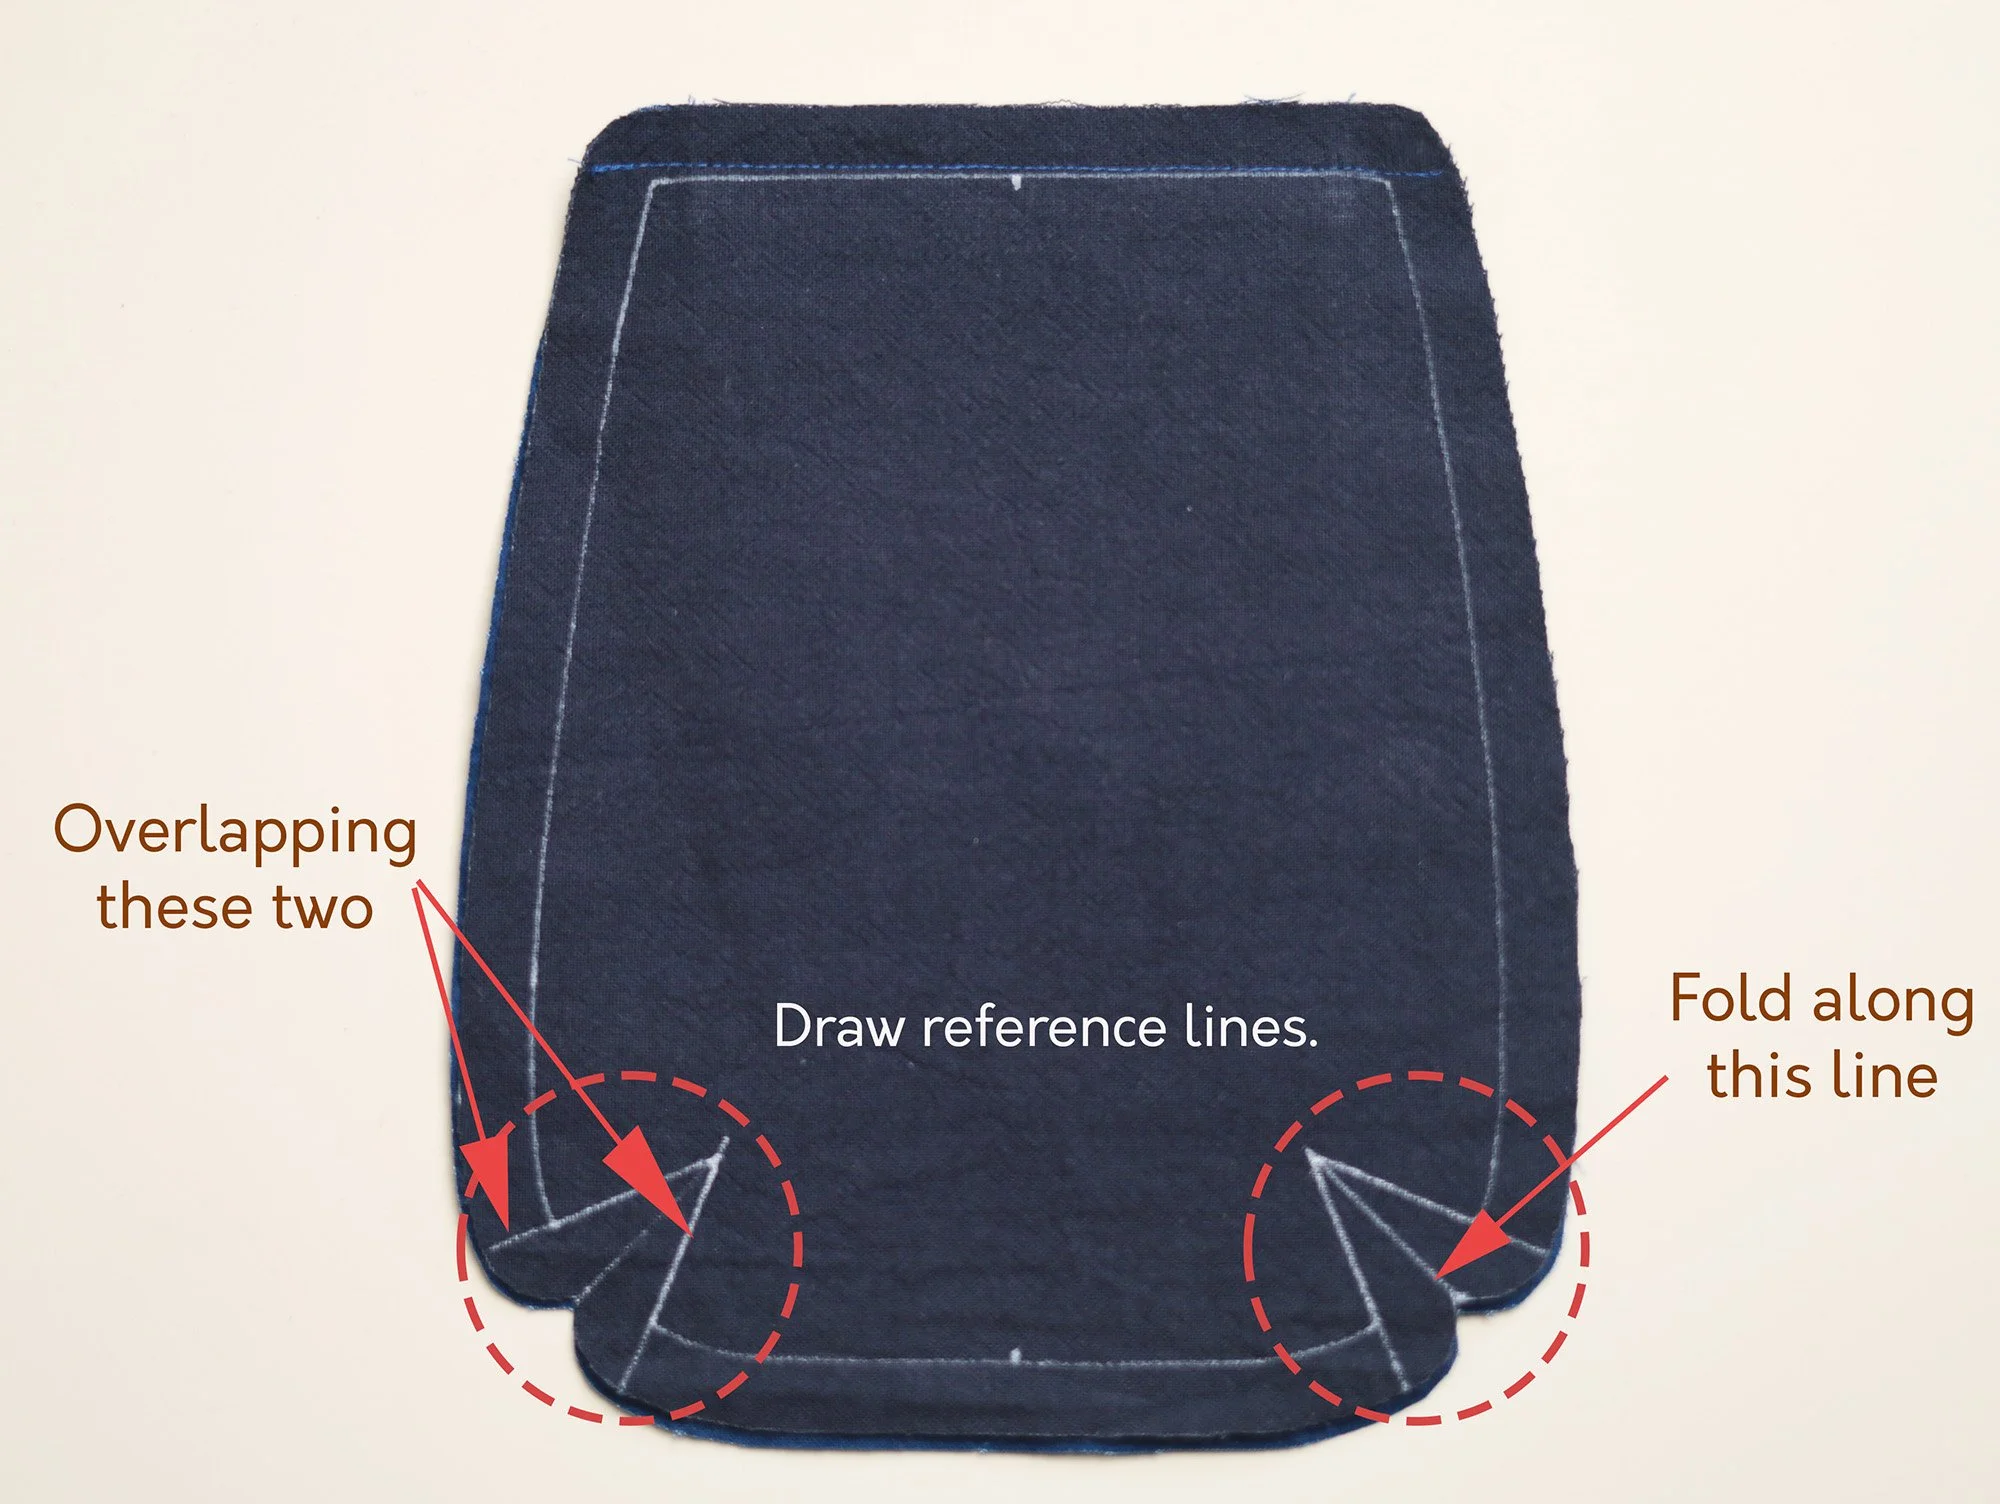
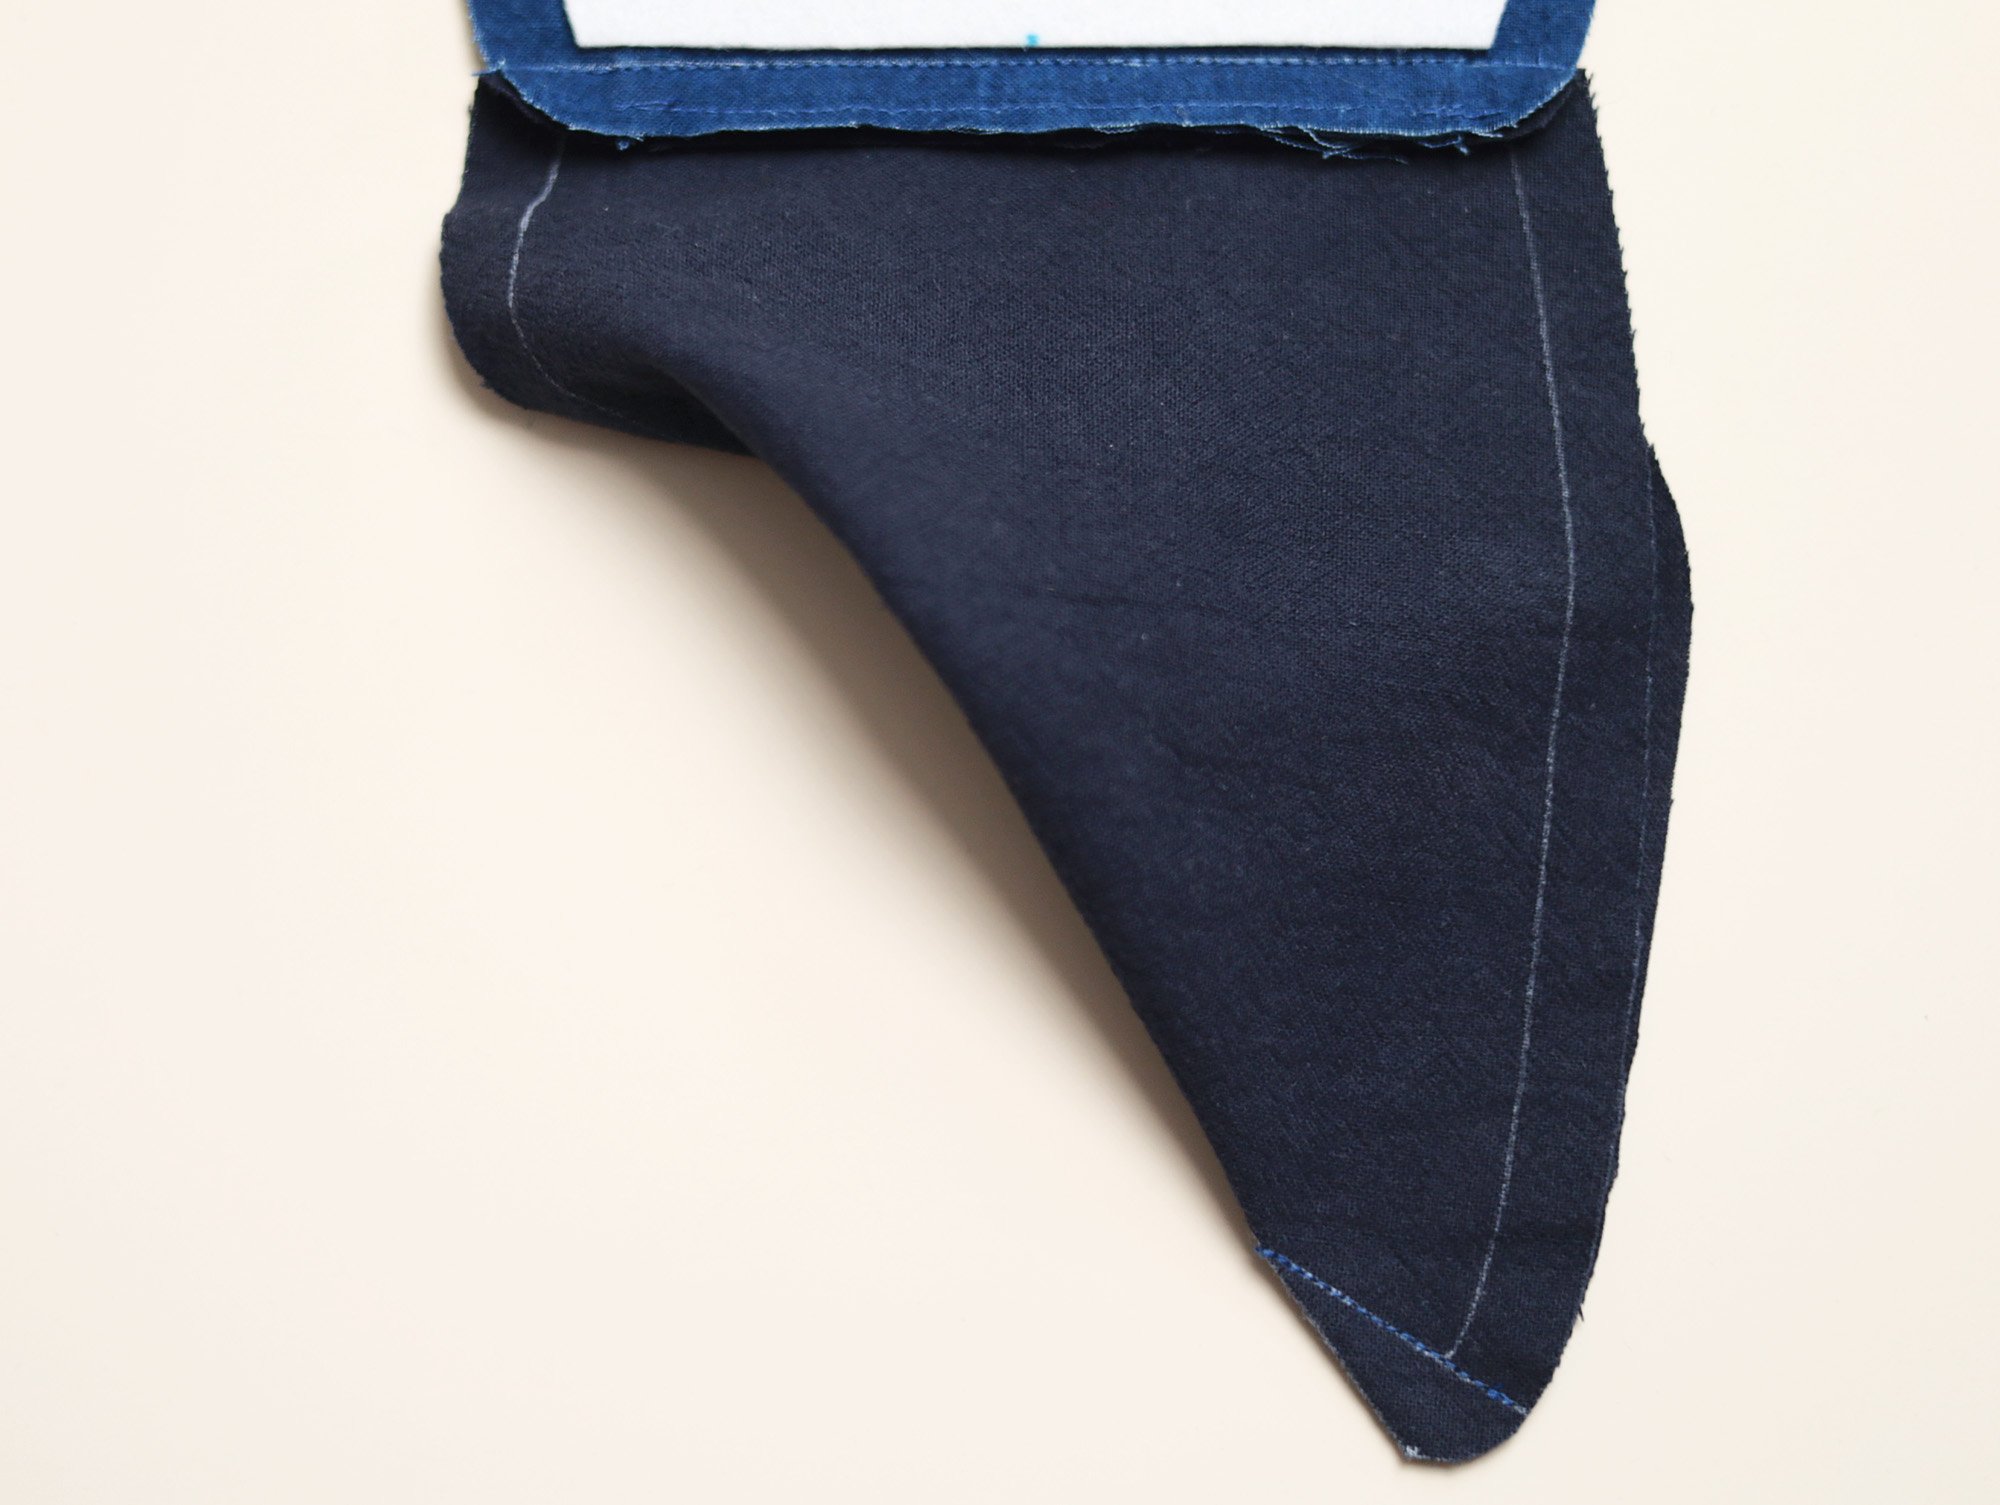
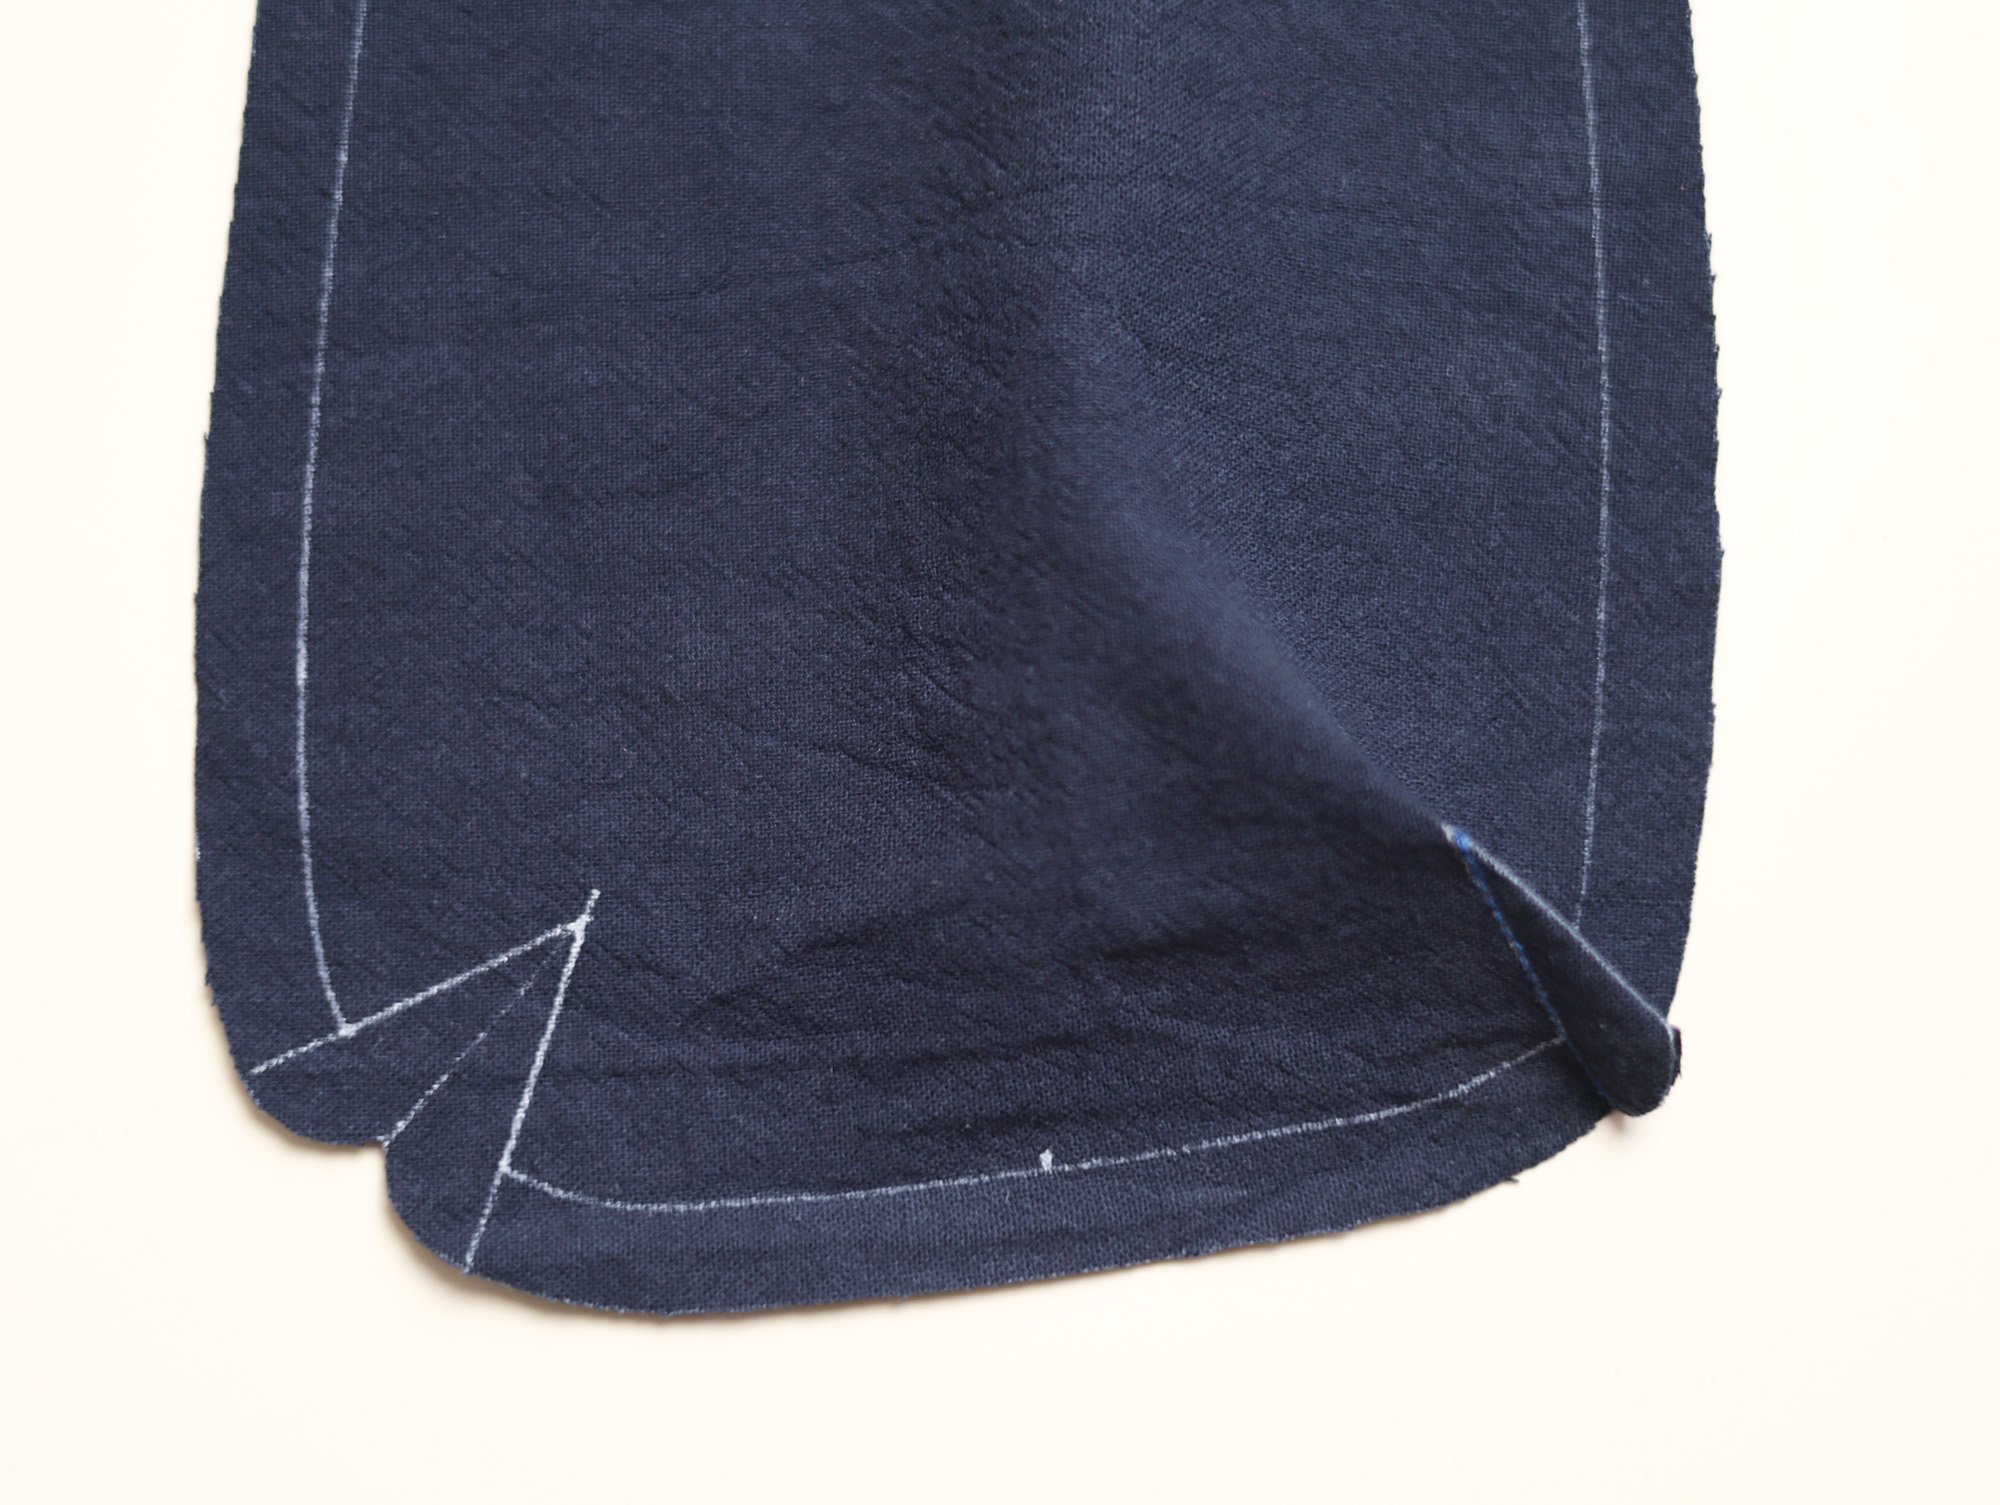
Sew the base corner darts:
For the four darts on the lining fabric, fold the fabric at the base corner, right sides together, aligning the dart markings and secure with clips or pins. Stitch along the marked dart line. (Backstitch at both ends to secure.)
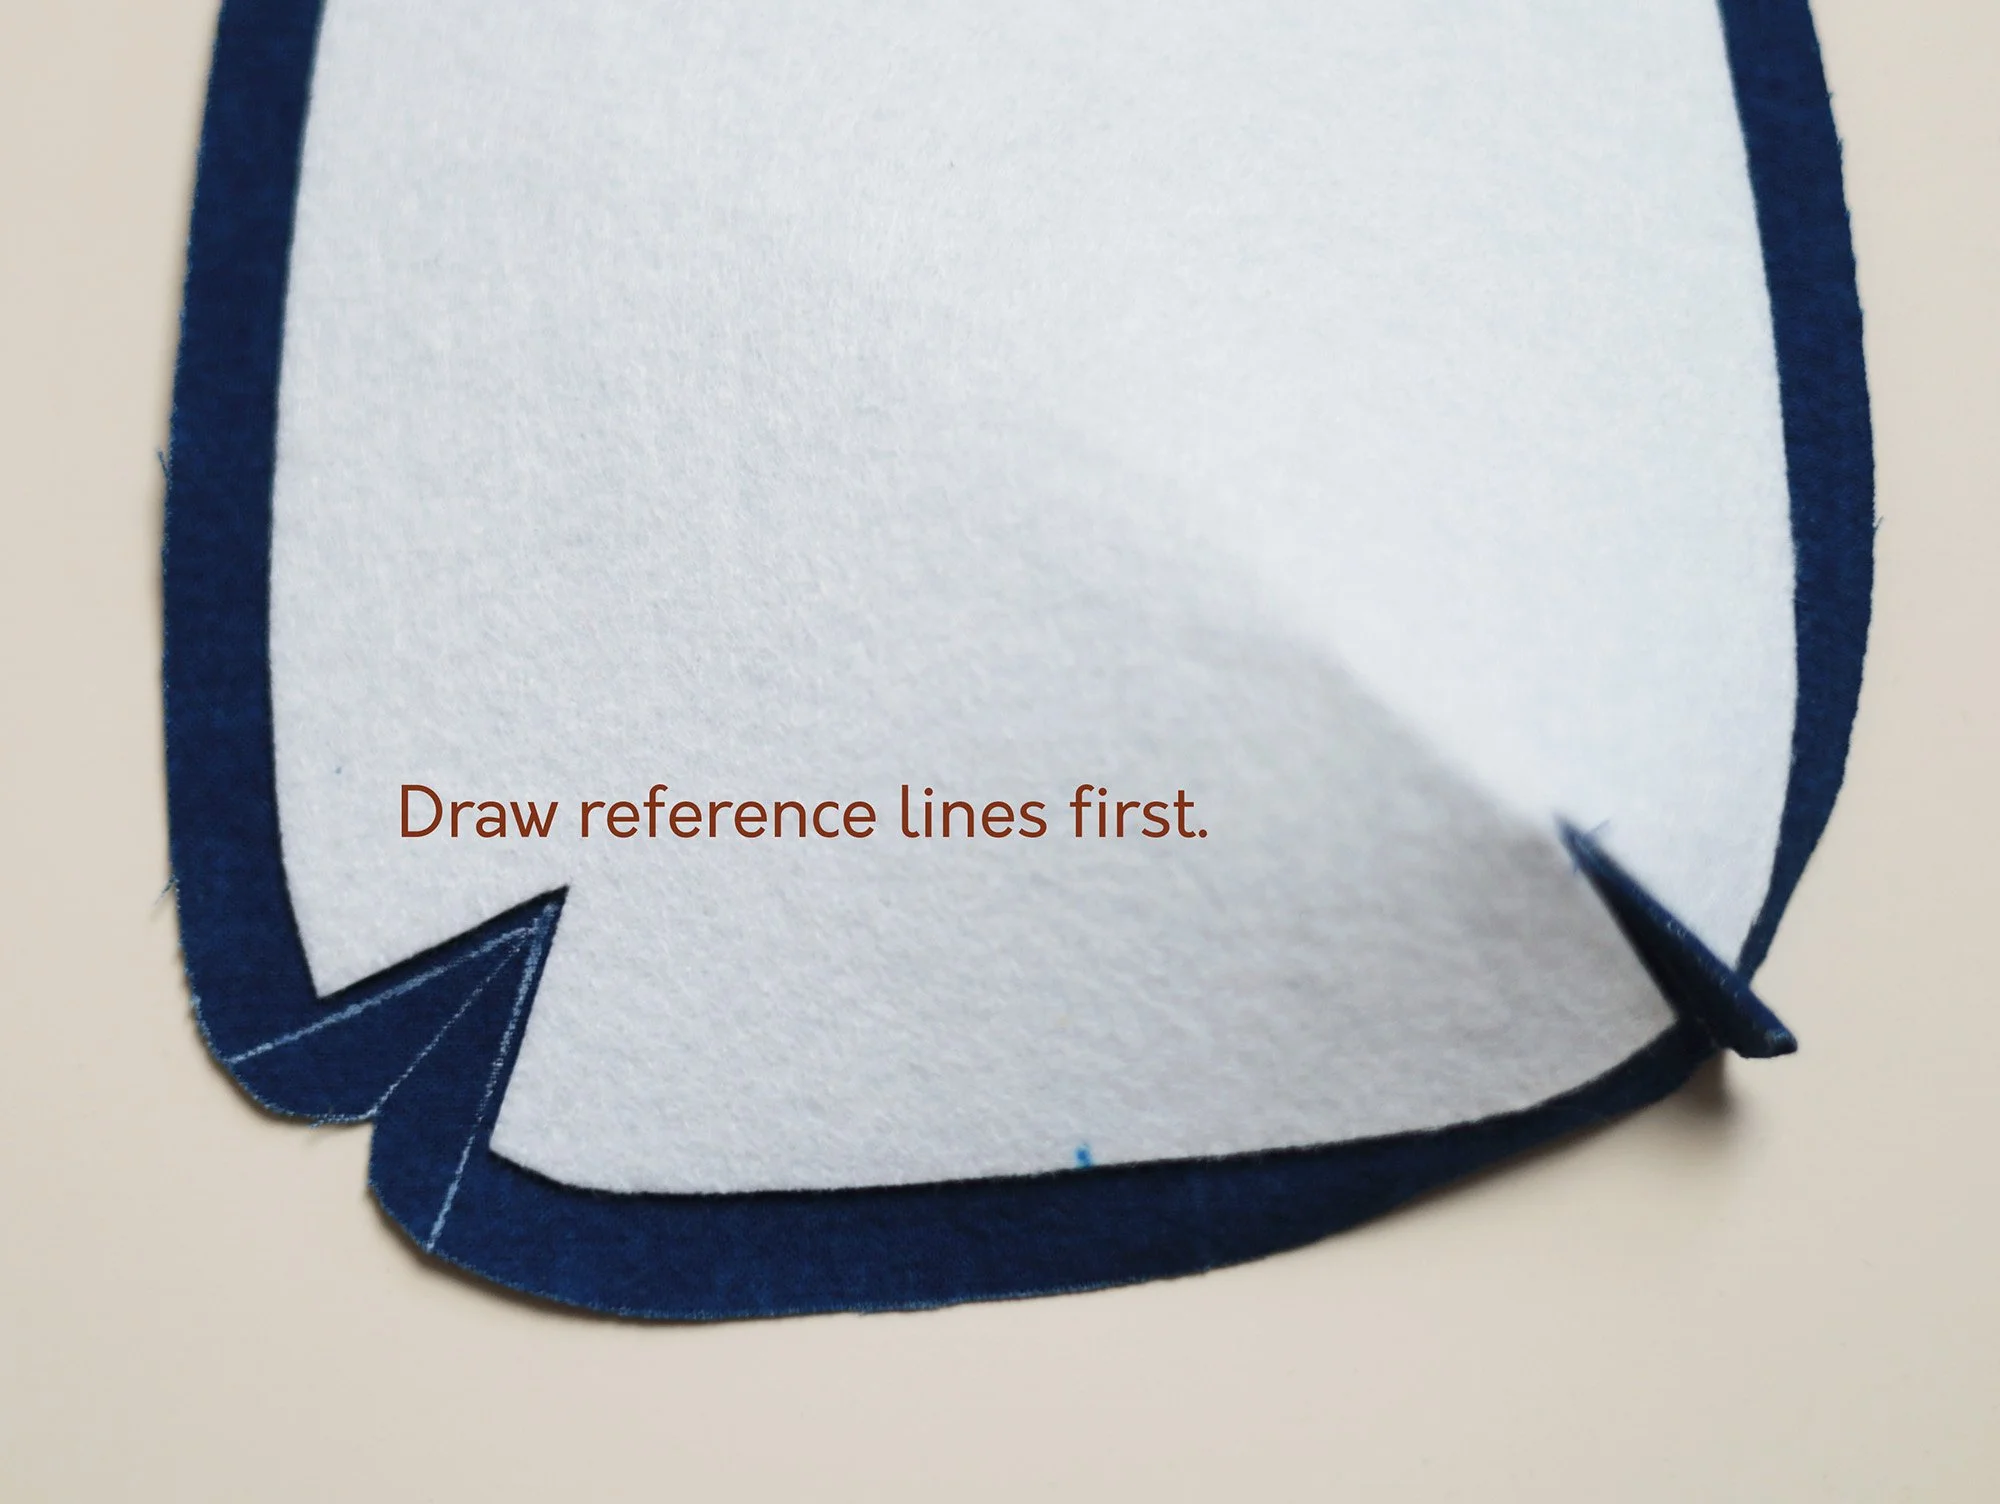
For the four darts on the man fabric, it’s best to draw the reference lines 1~2mm from the interfacing edges first, and use those lines as the new dart lines for stitching.
7. Assemble the bag.
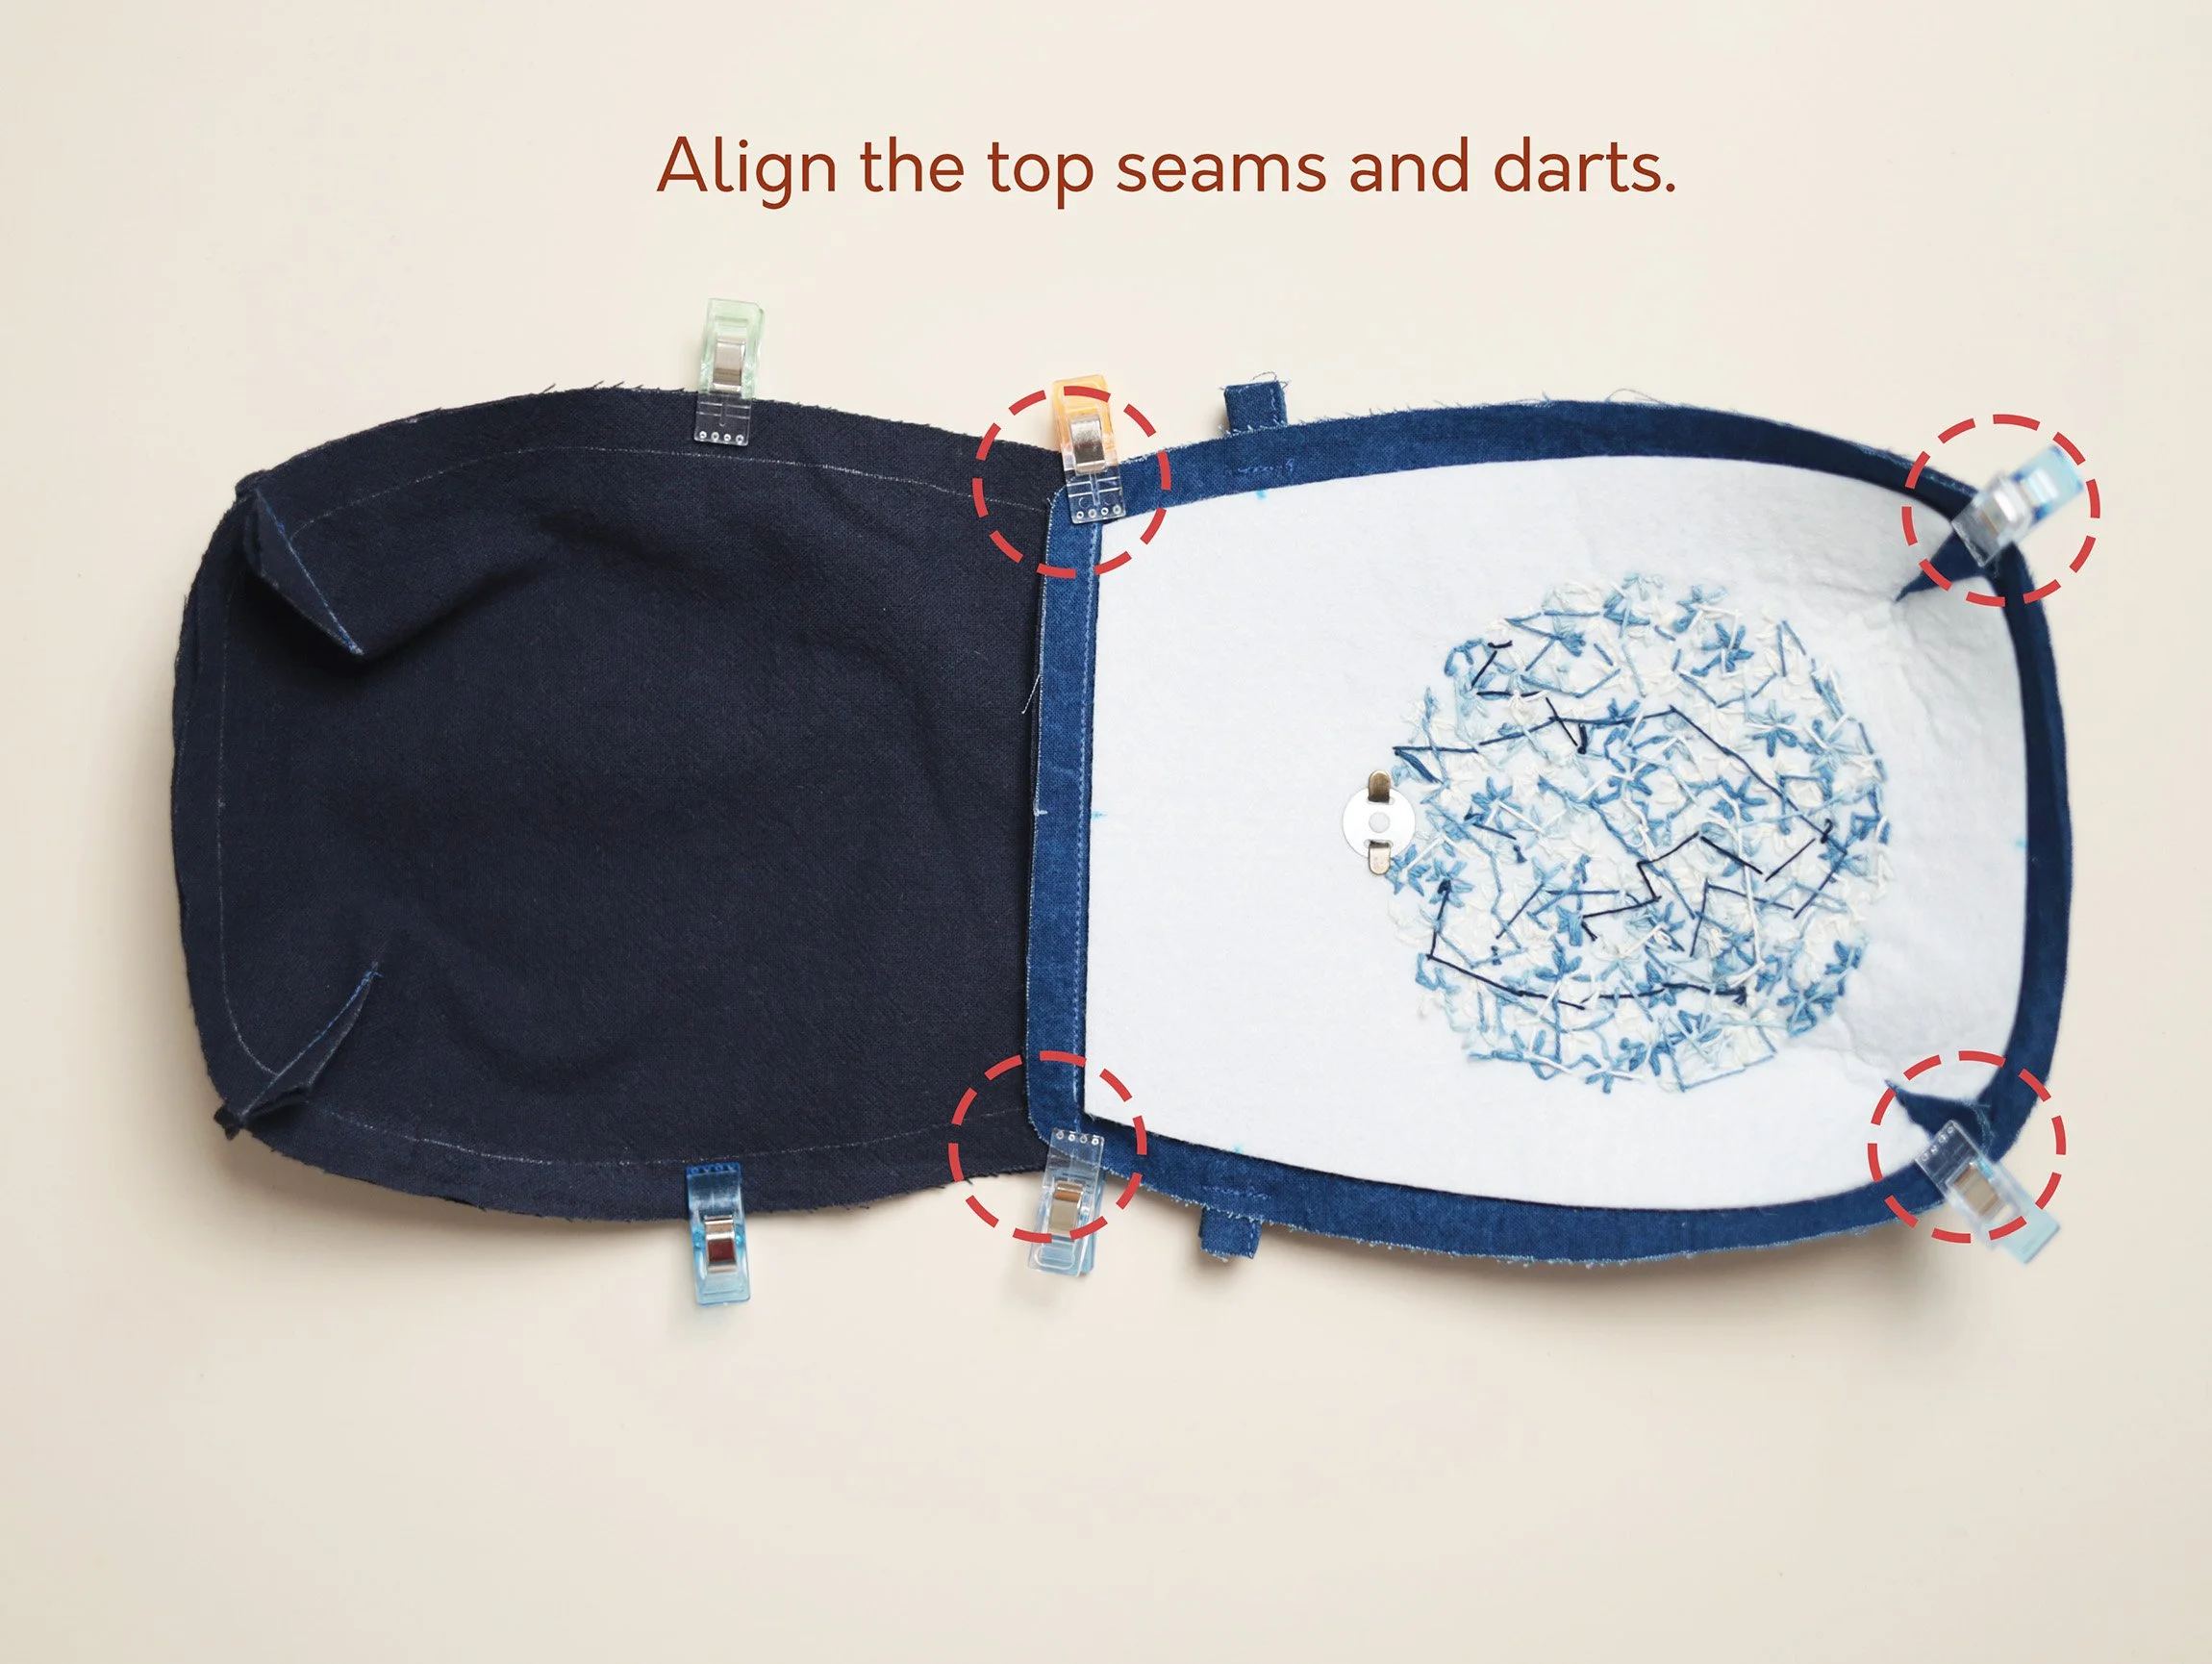
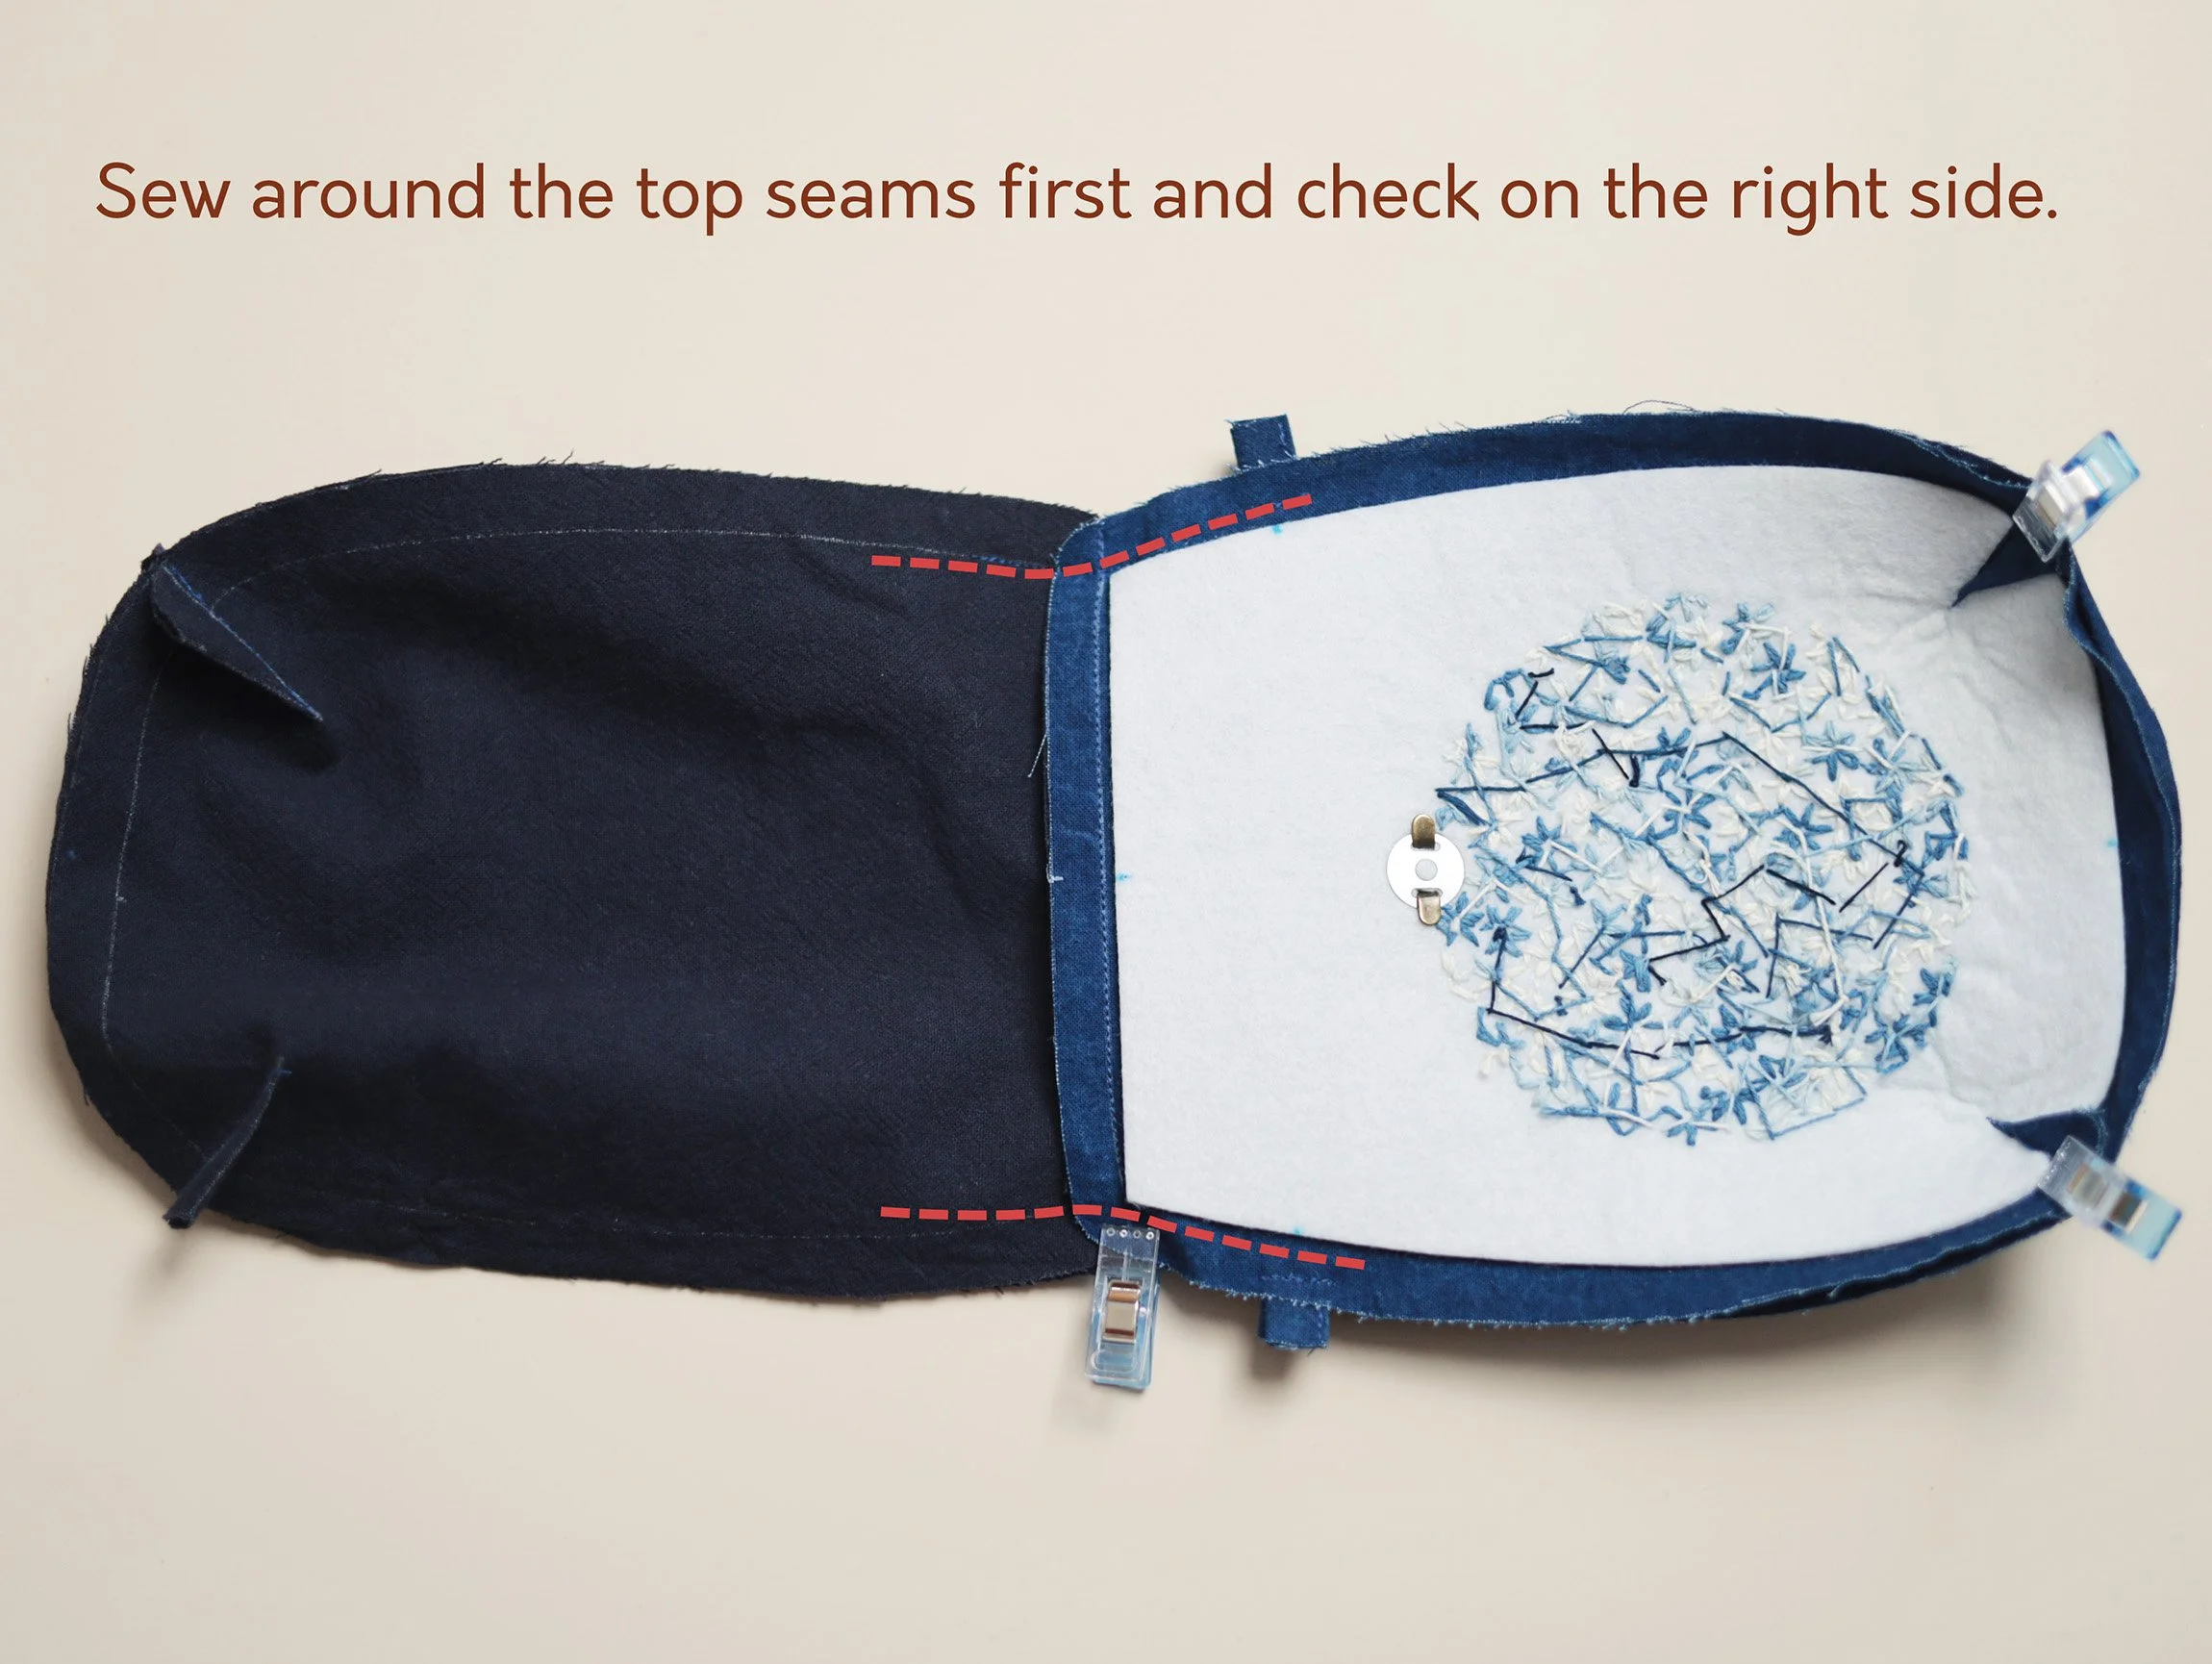
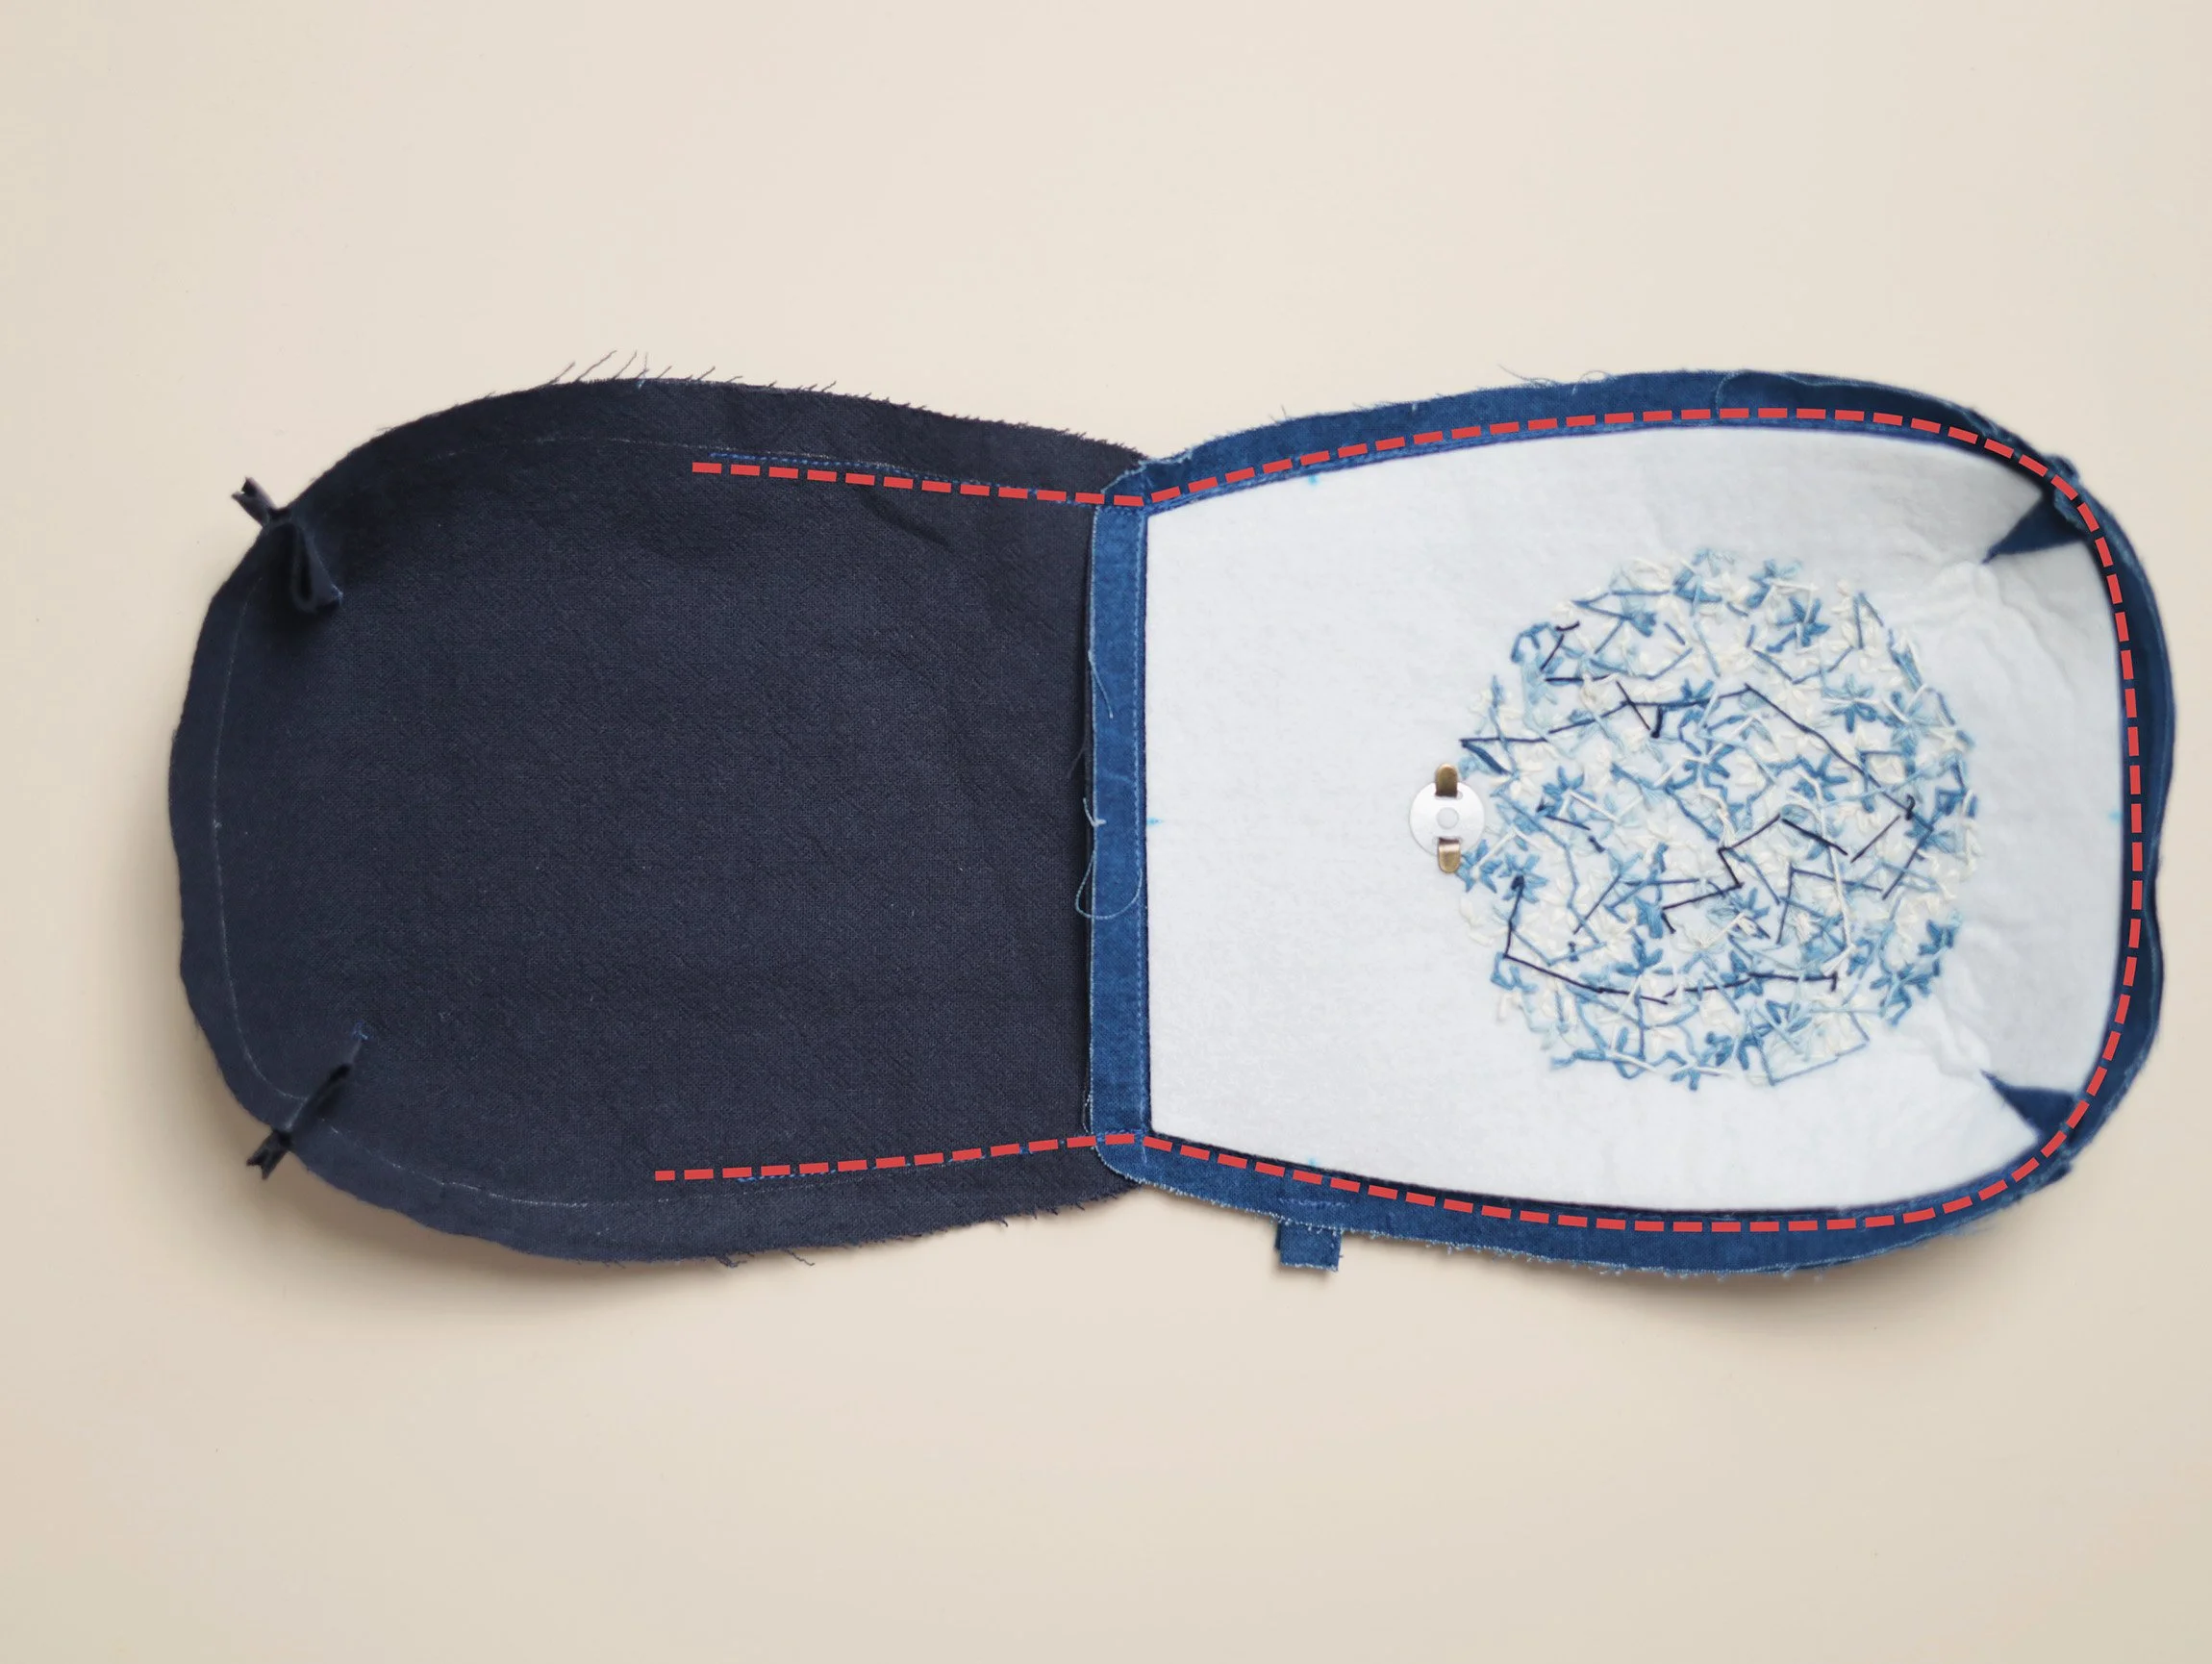
Open out the front and back pieces and place them together, with main fabrics on one side and linings on the other and their right sides facing. Make sure the top seams and darts on both layers are aligned. Secure these places with clips. Start around the centre of one lining side seam. Stitch around and stop at the centre of the opposite side, leaving a large opening on the bag lining.
Tips:
To ensure the bag is assembled correctly, stitch a short section on both sides of the opening first and check the top seams are aligned . Once satisfied, sew the rest.
Press each pair of darts in opposite directions to reduce bulk.
On the main side, stitch 1–2 mm from the interfacing edge as usual. On the lining side, stitch 2–3 mm inside the pattern line to reduce the lining size for a better fit.
Turn the bag right side out by gently pushing the main fabric through into the lining.
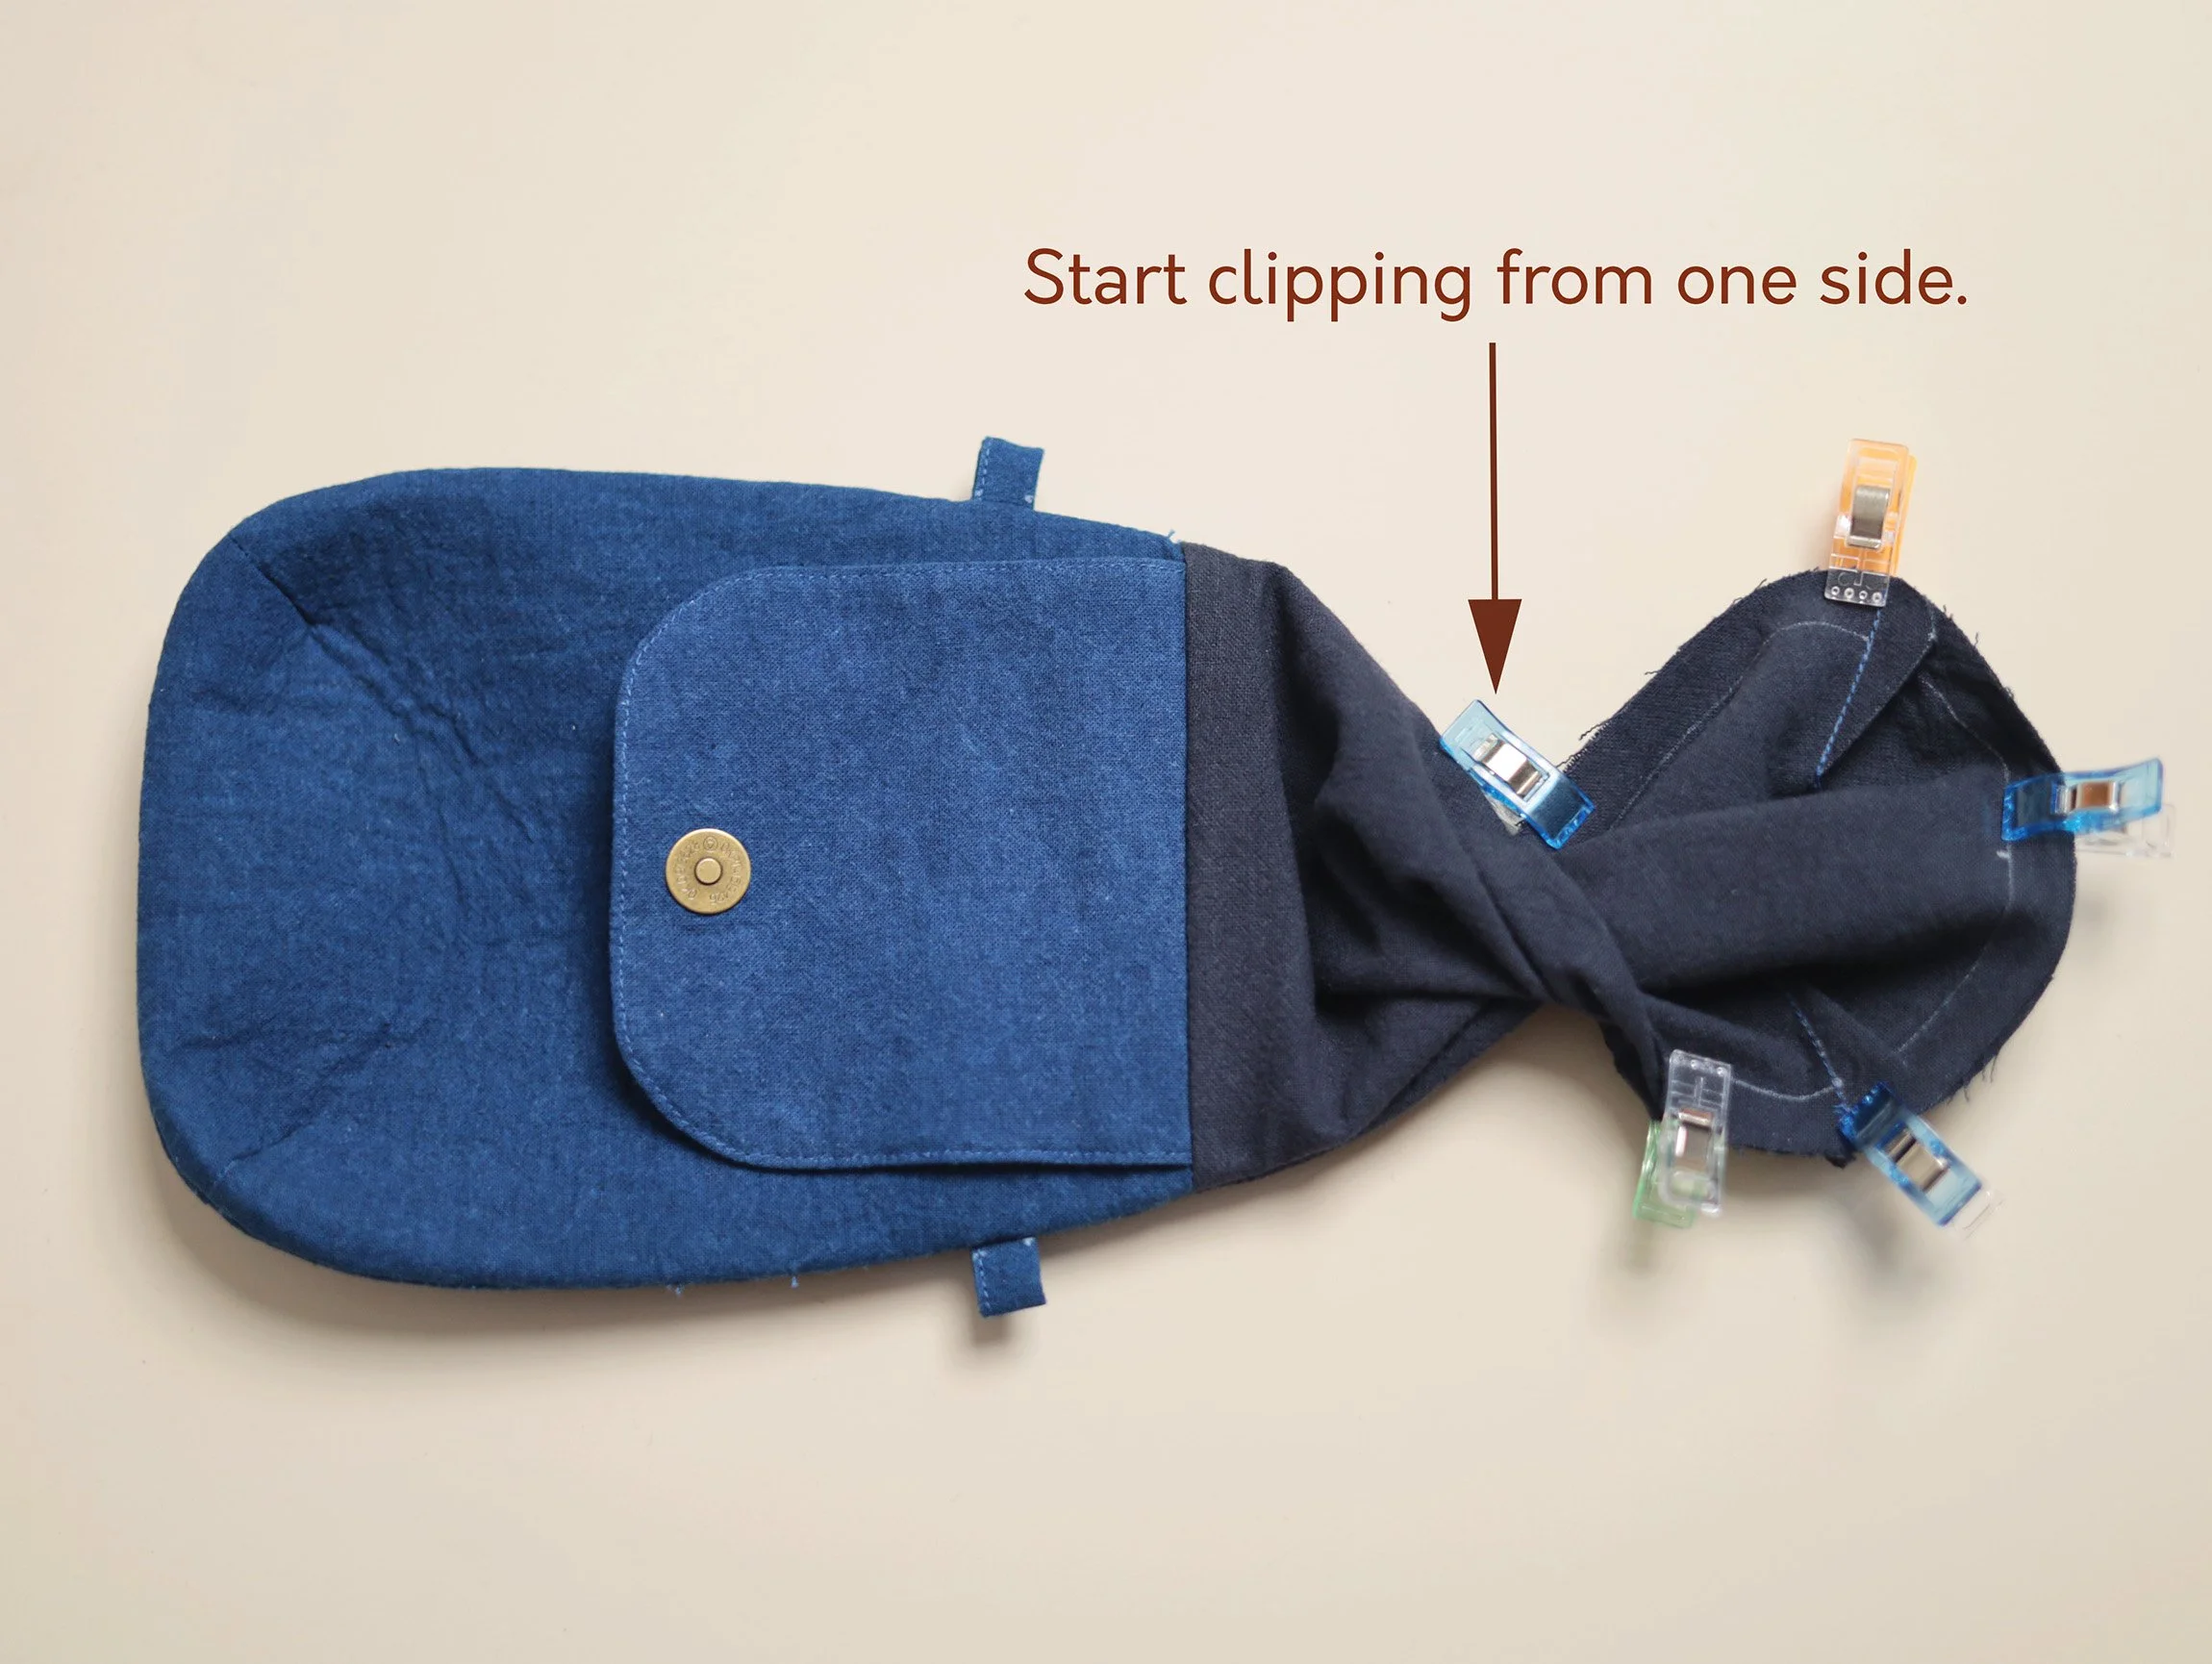
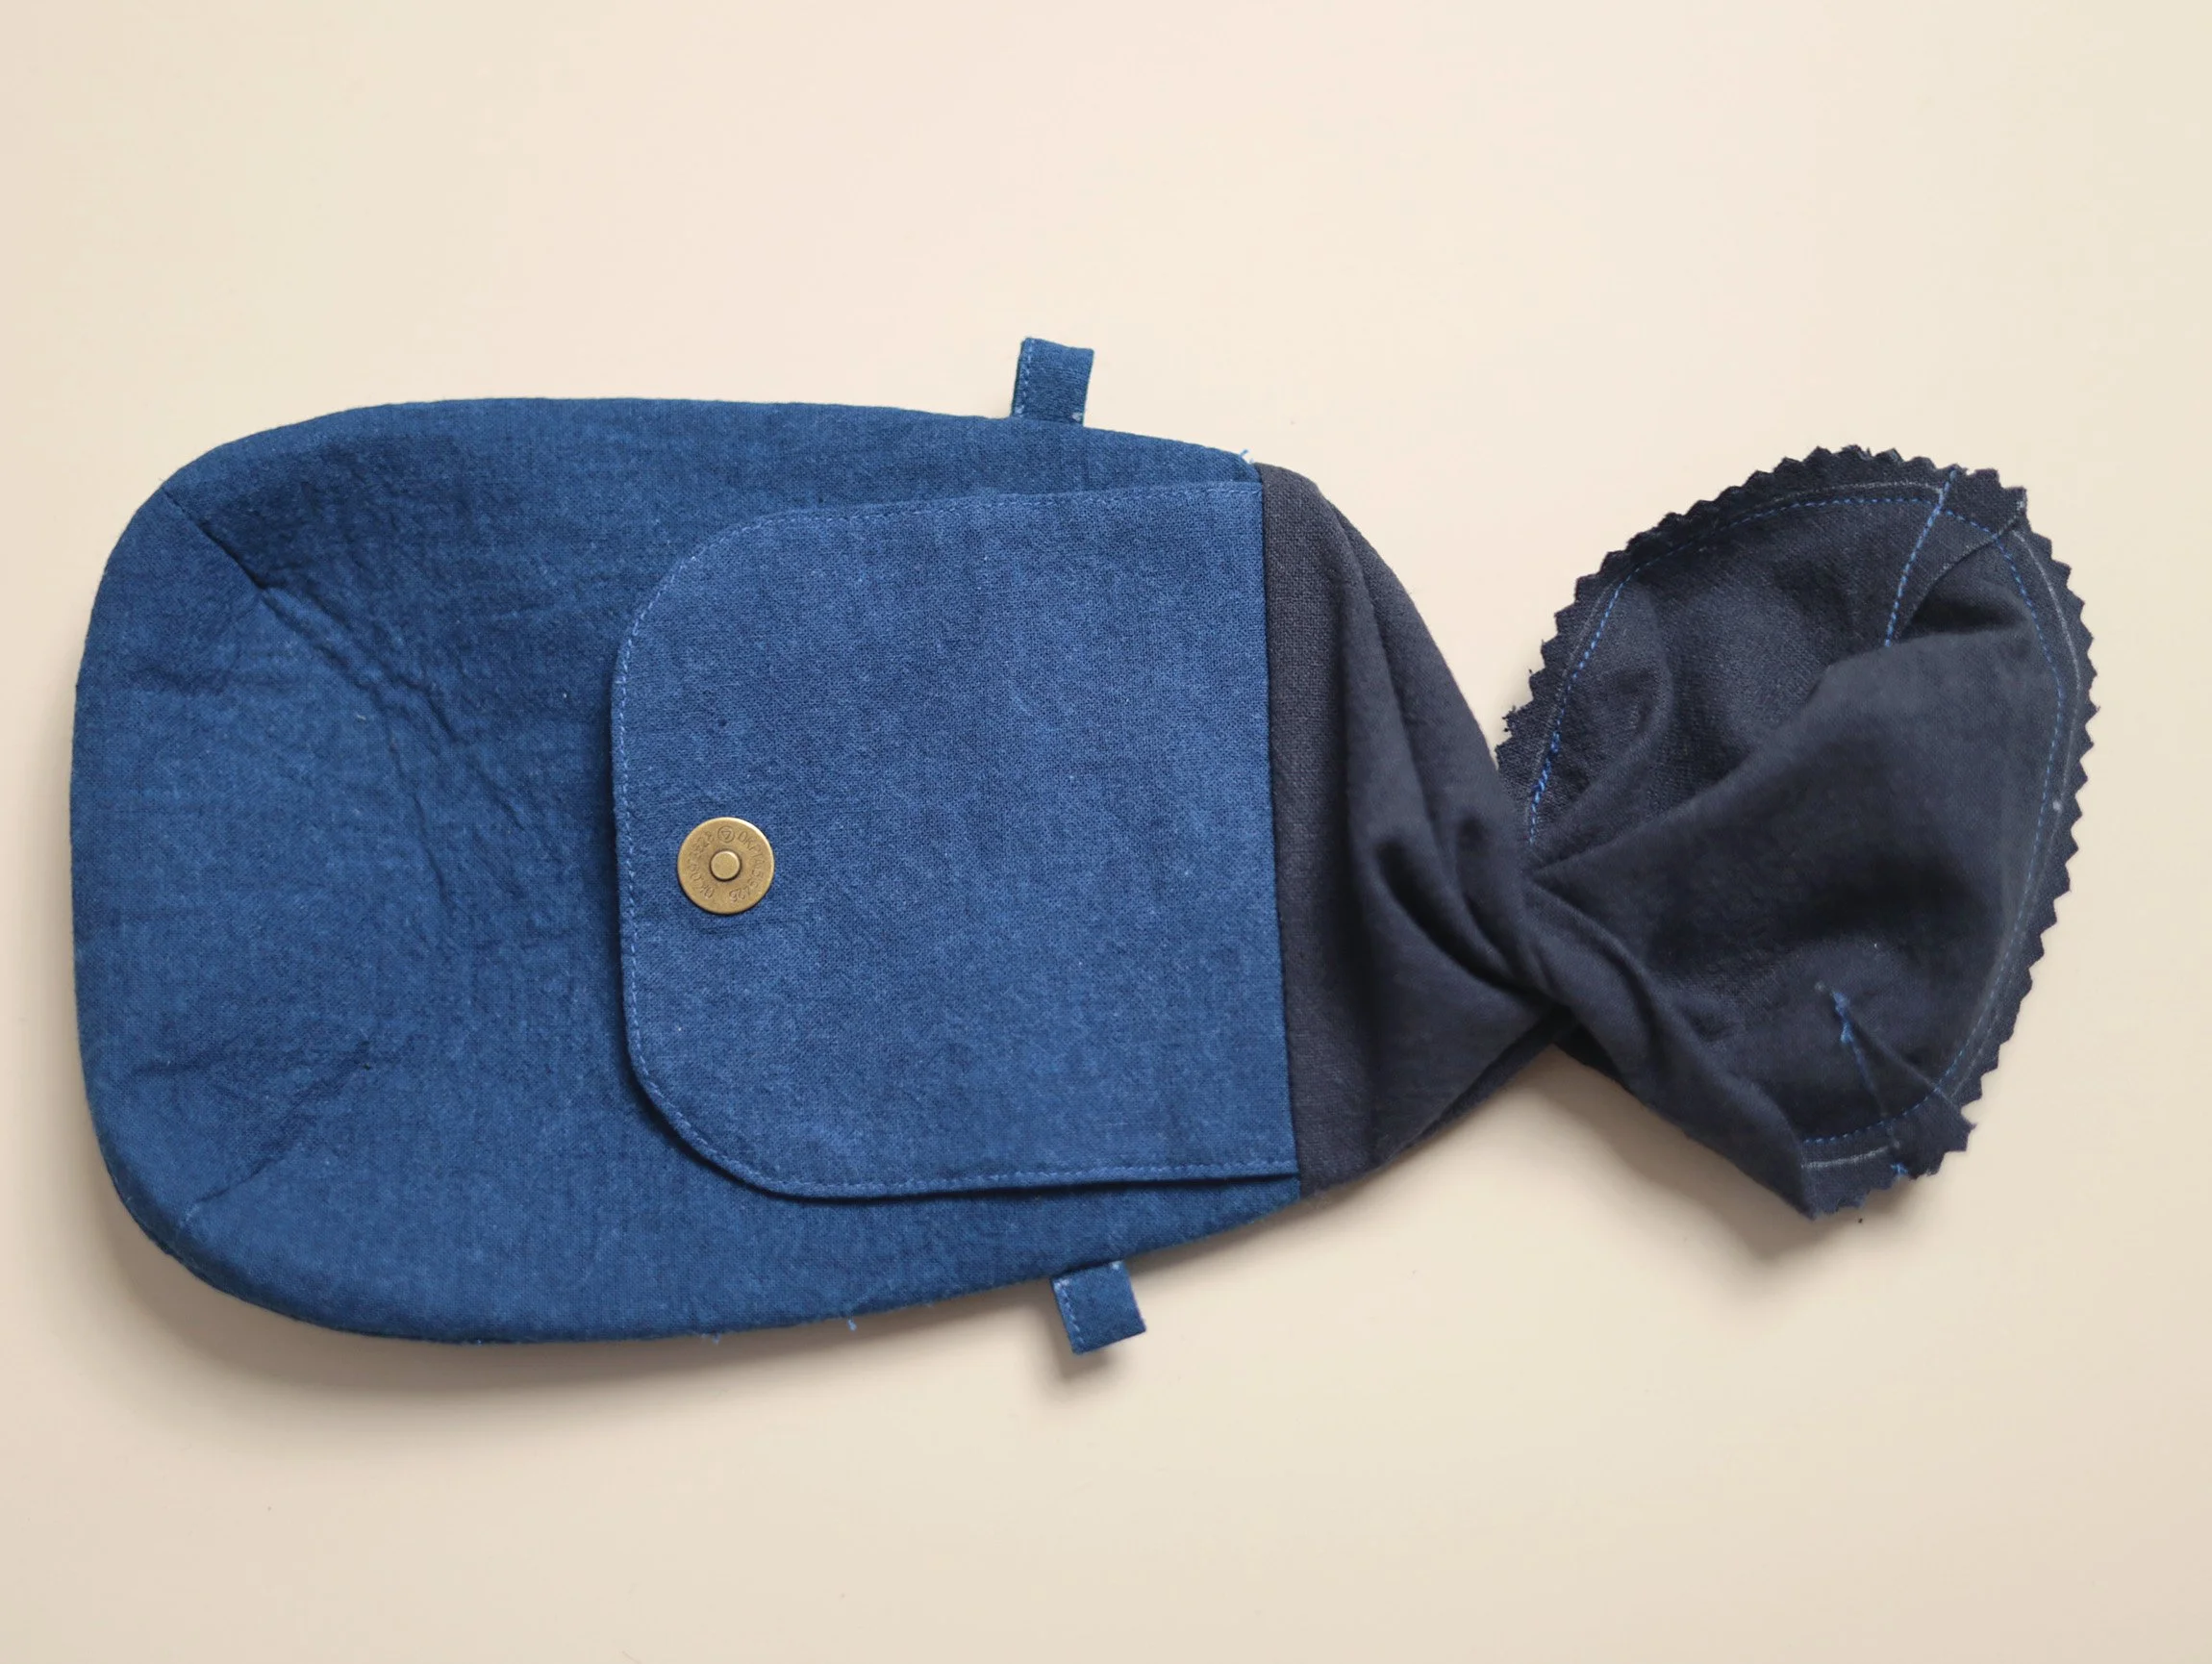
Starting from one side of the lining opening, align the lining pieces with right sides together and clip the seams. Clip as far as possible, then stitch 2–3 mm inside the pattern line. Trim half of the seam allowance.
Turn the lining right side out and close the opening by topstitching 1 mm from the edge or by hand stitching with a hidden stitch.
Optional: Topstitch 1–2 mm from the top edge around the opening.
7. Bag strap.
For a crossbody bag, the strap length is typically 110–120 cm. The ideal length may vary depending on the attachment method, your height, and personal preference.
You can use a ready-made leather strap or make your own fabric strap (free tutorial available here)—both are good options. We also offer high-quality leather straps in various colours in our shop.
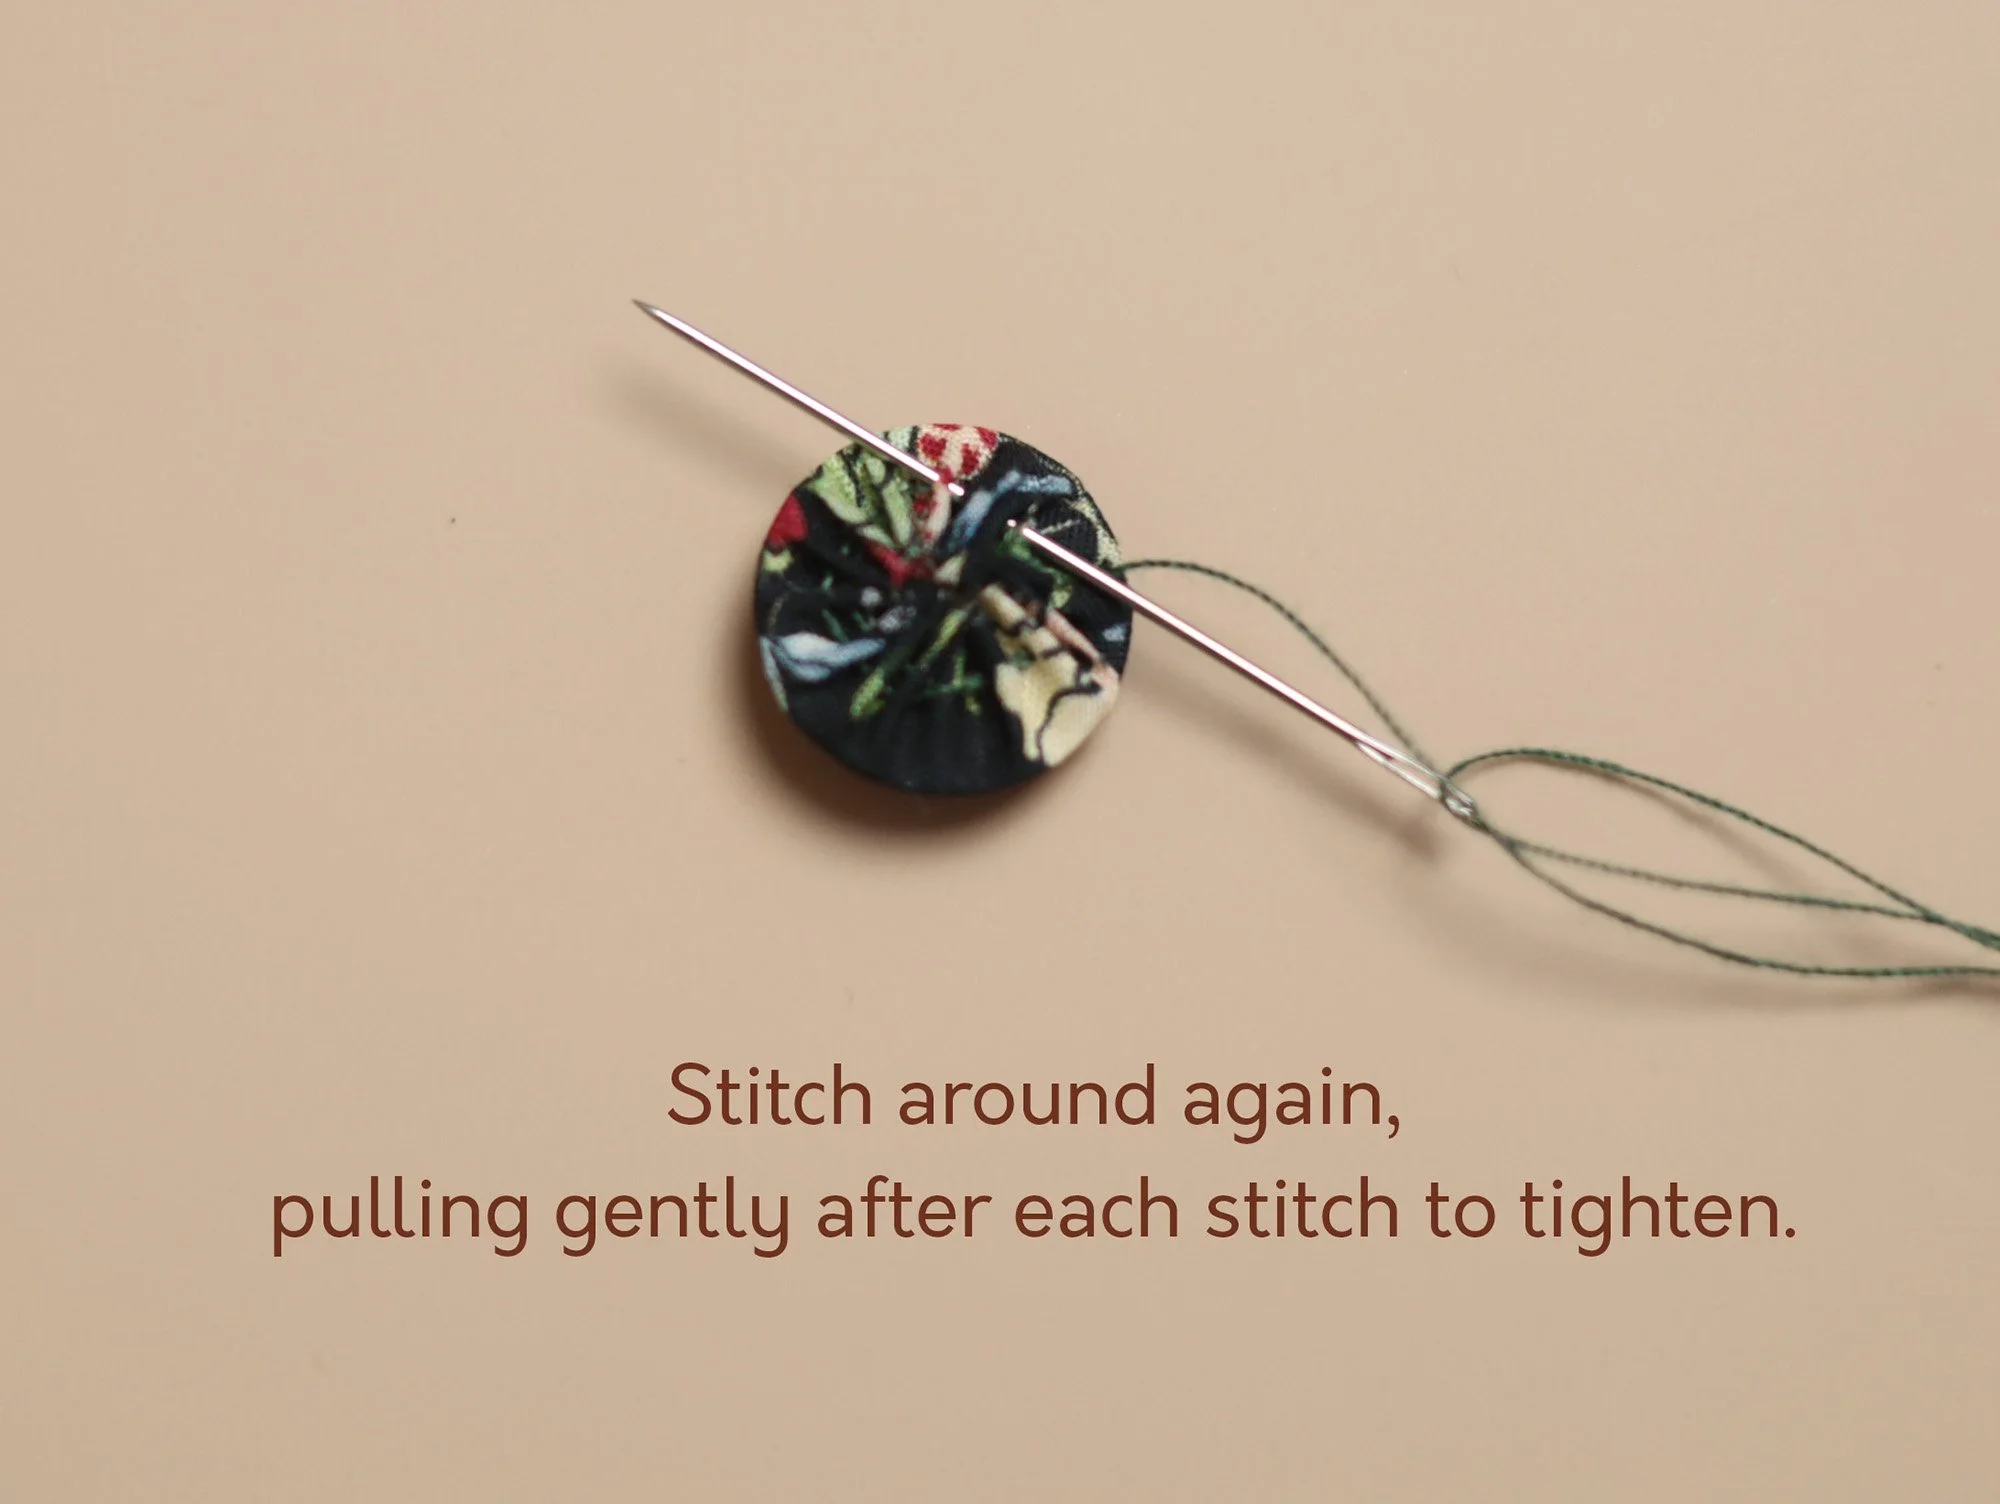
8. Fabric-covered button decoration (optional).
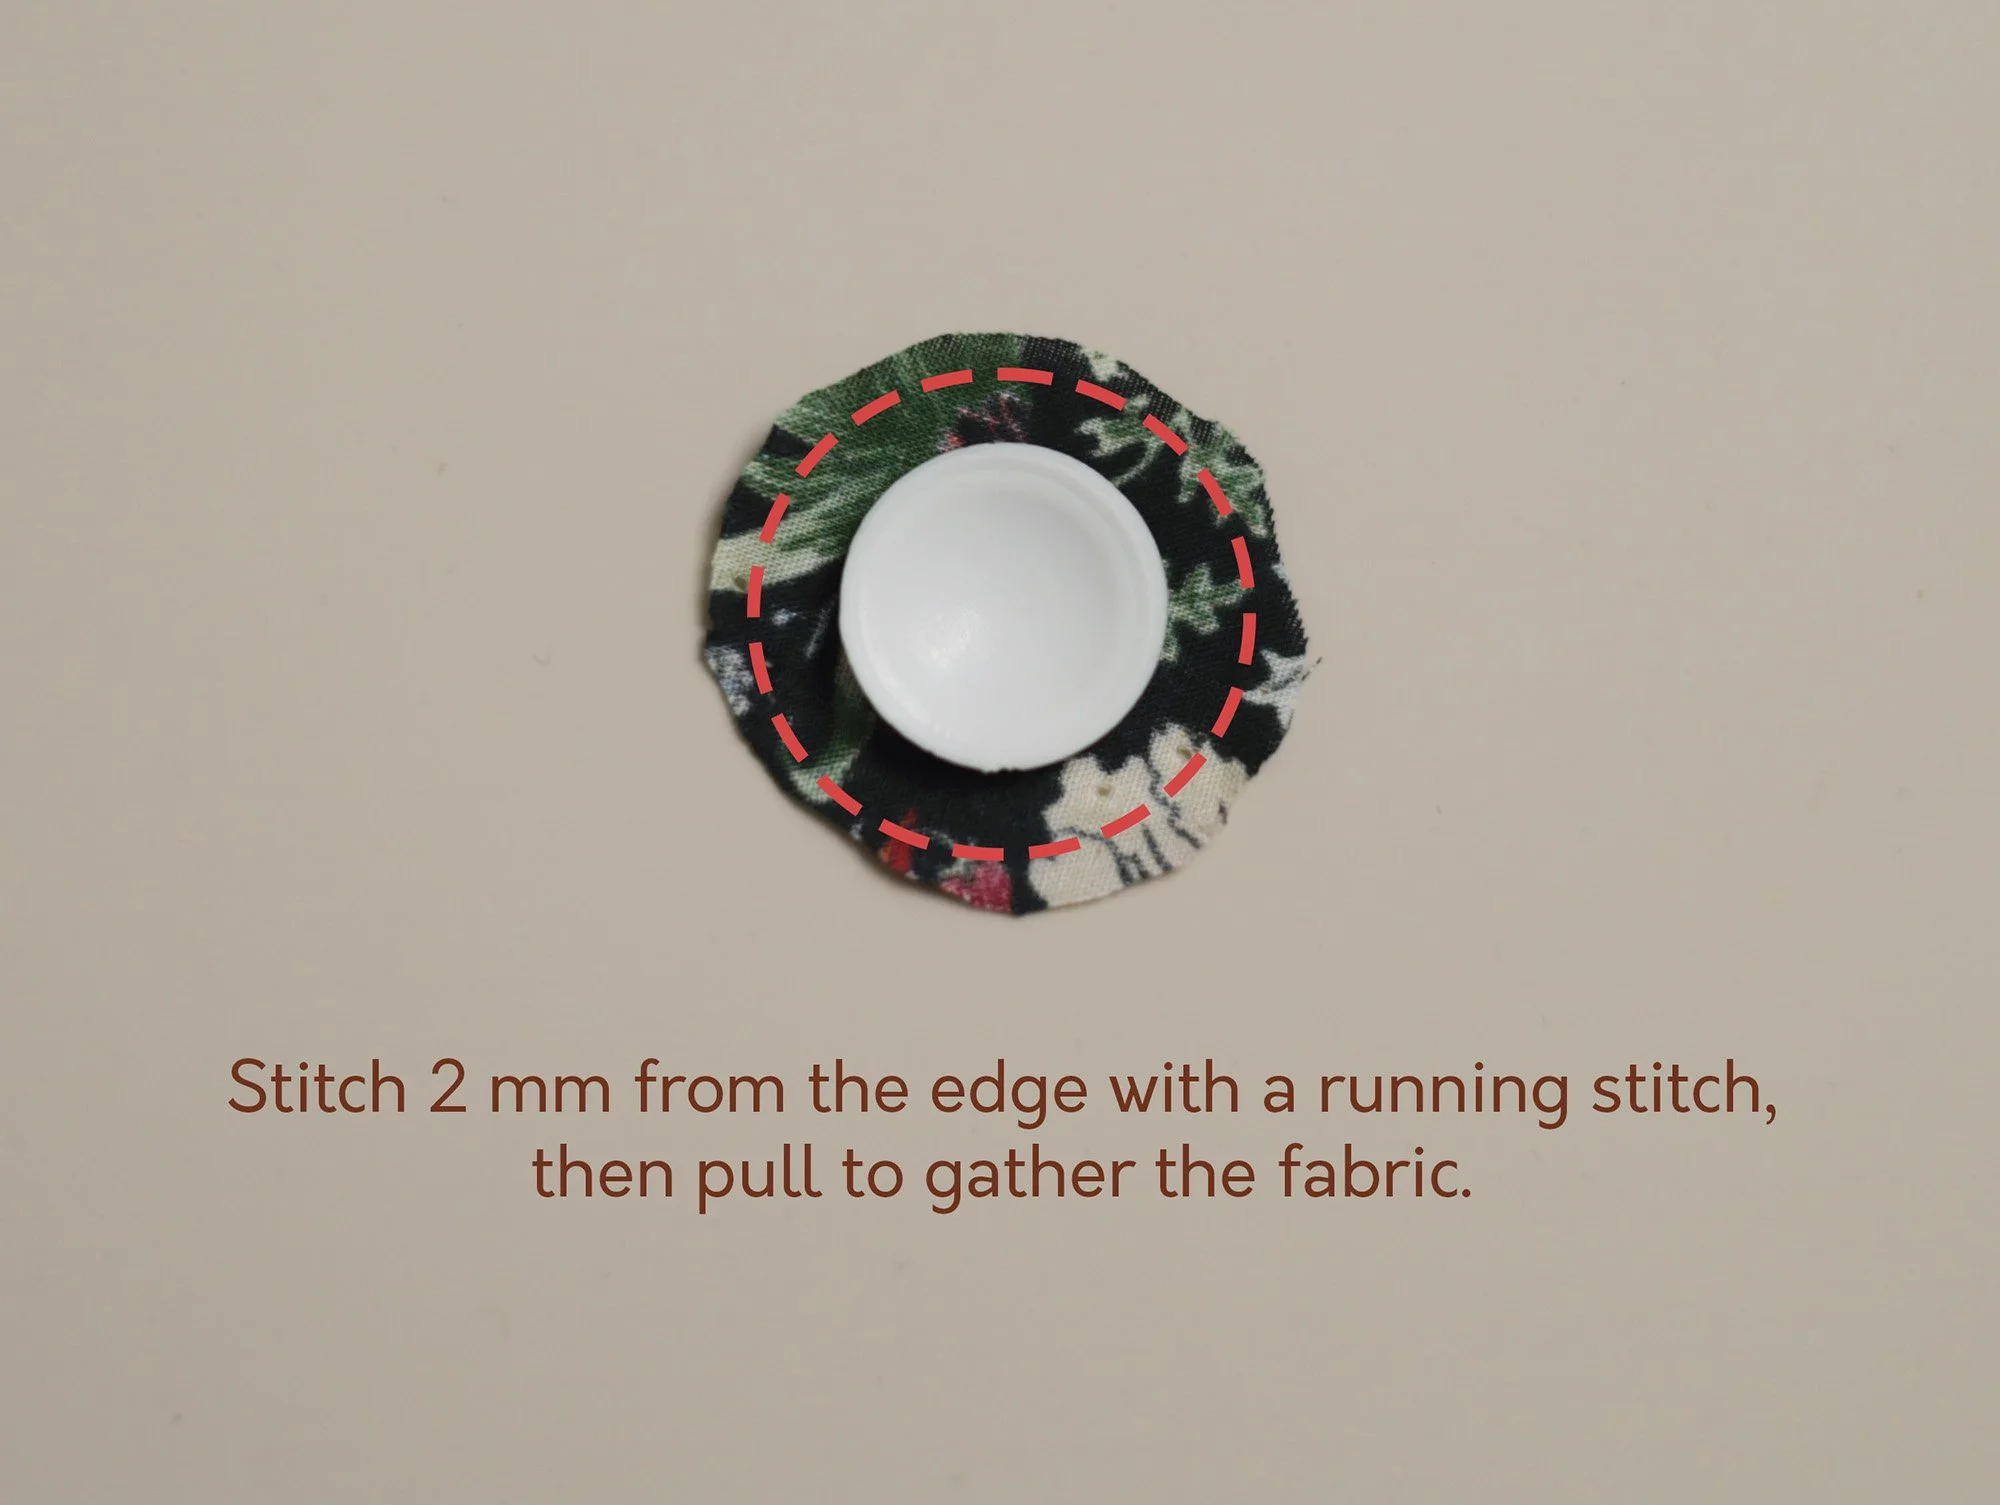
Cut a circular fabric piece 5–6 mm larger than the half button (1.5 cm used). Place the button centred on the wrong side, face down.
Stitch 2 mm from the edge with a running stitch, then pull to gather the fabric around the button. Stitch around once more, gently pulling after each stitch to further tighten the fabric.
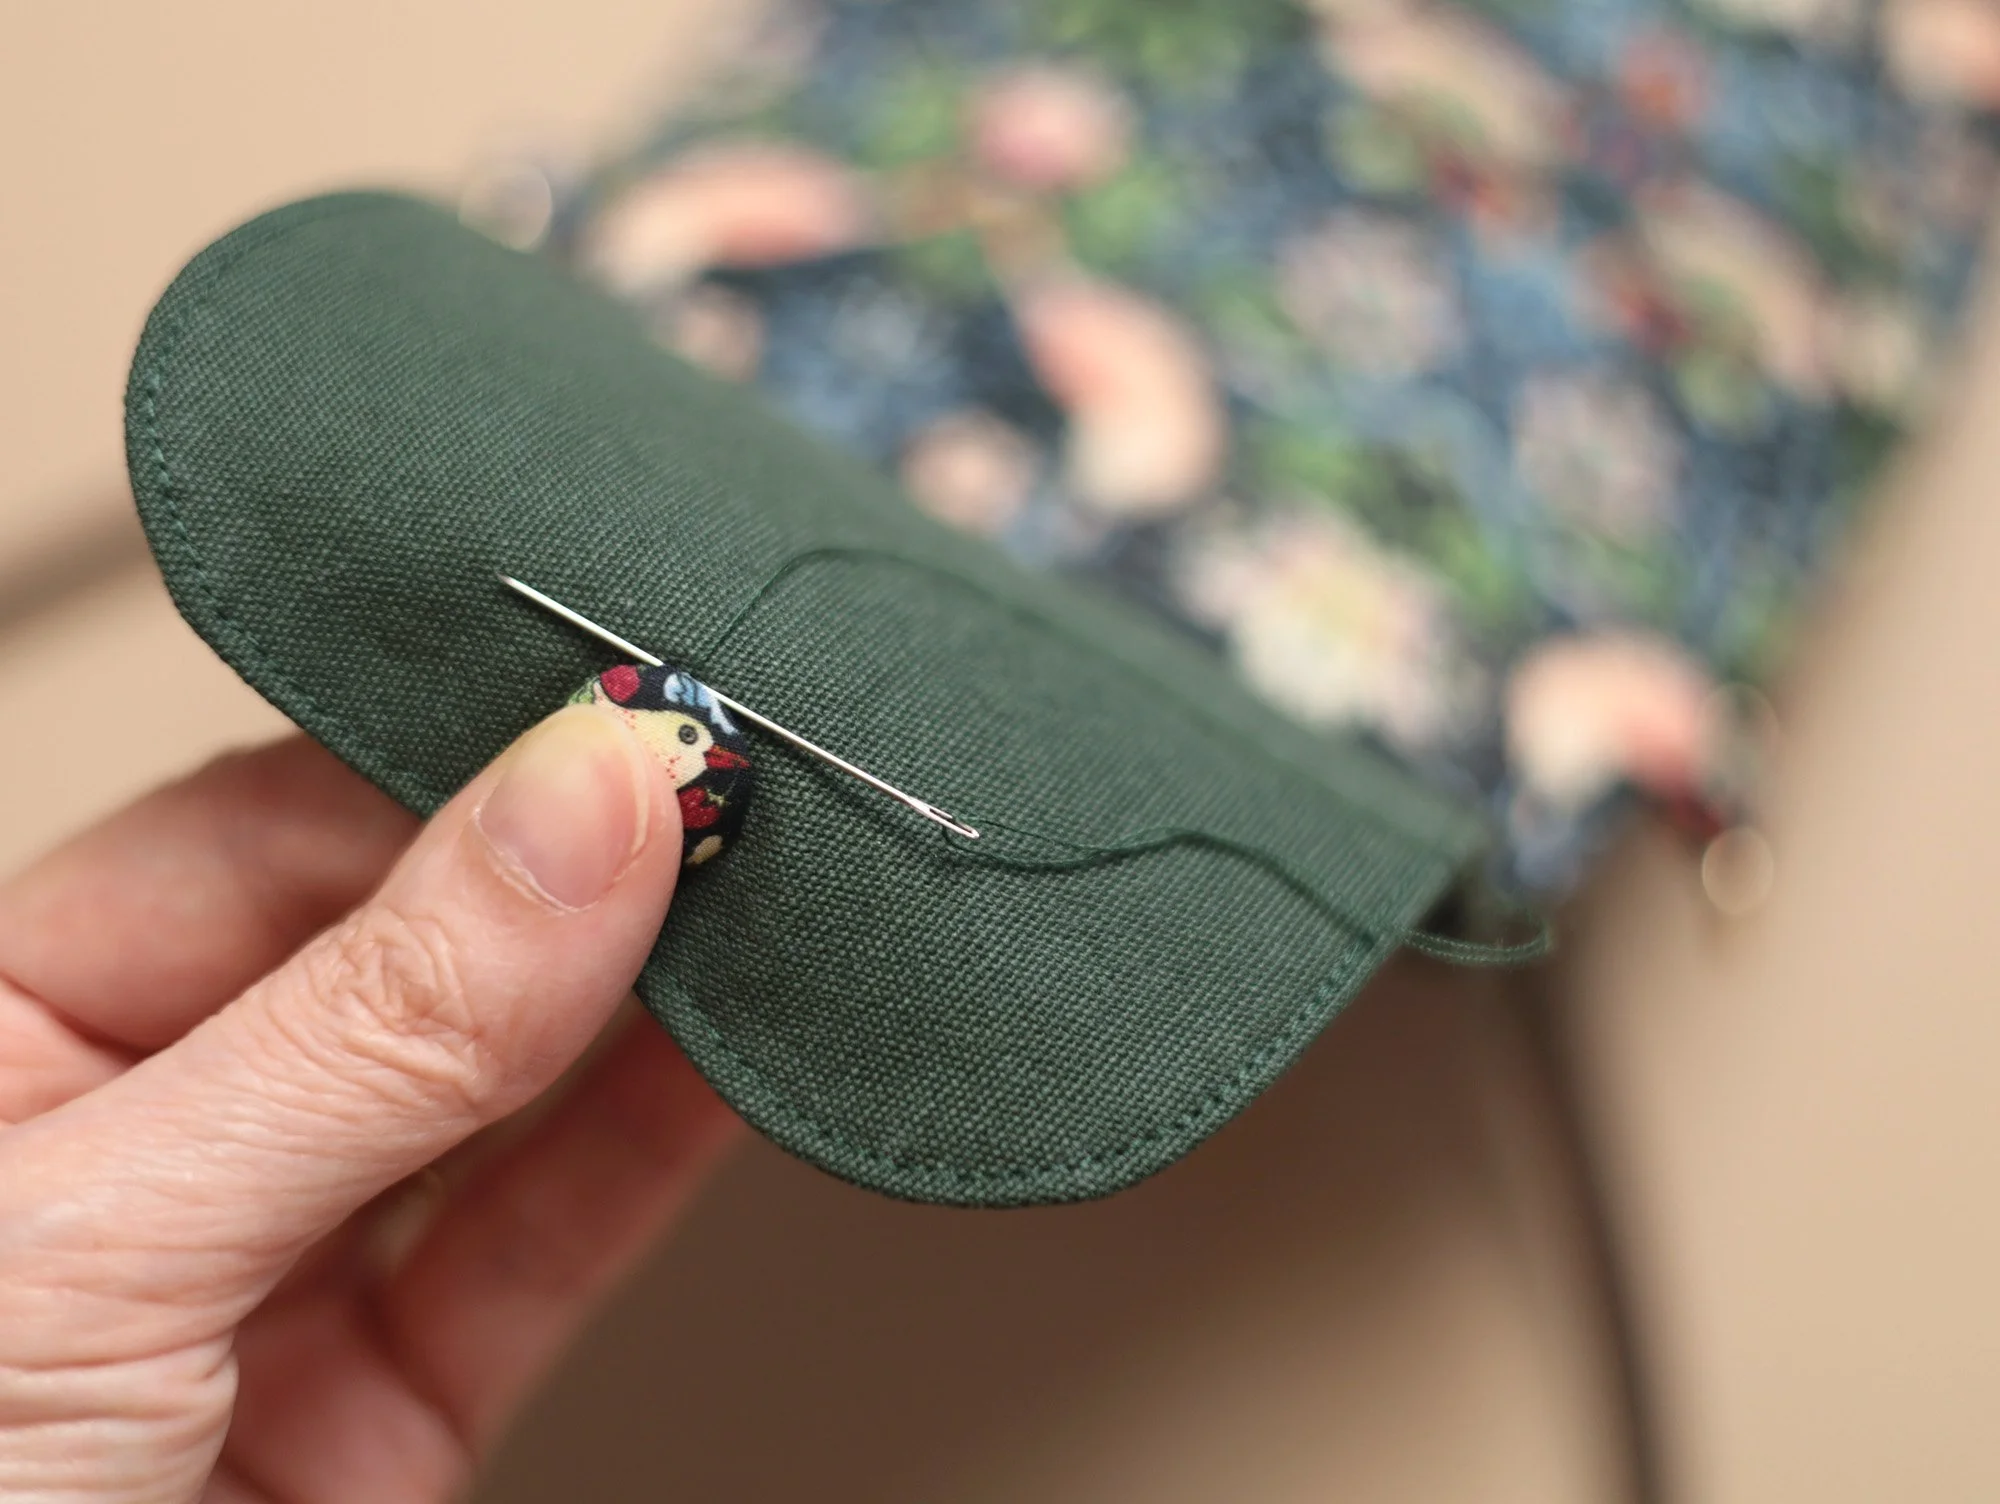
Sew the button in place on the right side of the flap using a hidden stitch.
Congratulations! Your embroidery project is now complete!
Visit our website www.montbleu.co.uk for more fun craft projects.
If you spot any mistakes in this tutorial, have suggestions for improvement, or would like to share your finished projects, please don’t hesitate to contact us.