
Bead Embroidery Brooch Kits: Secret Garden
- Full Embroidery & Assembly Tutorials
Embroidery Tips for Beginners
The standard stranded cotton embroidery thread has six strands of fine threads twisted together into a big one (main thread). The instructions in our DIY kits and patterns will clearly indicate how many strands you will need to use for each part of the embroidery.
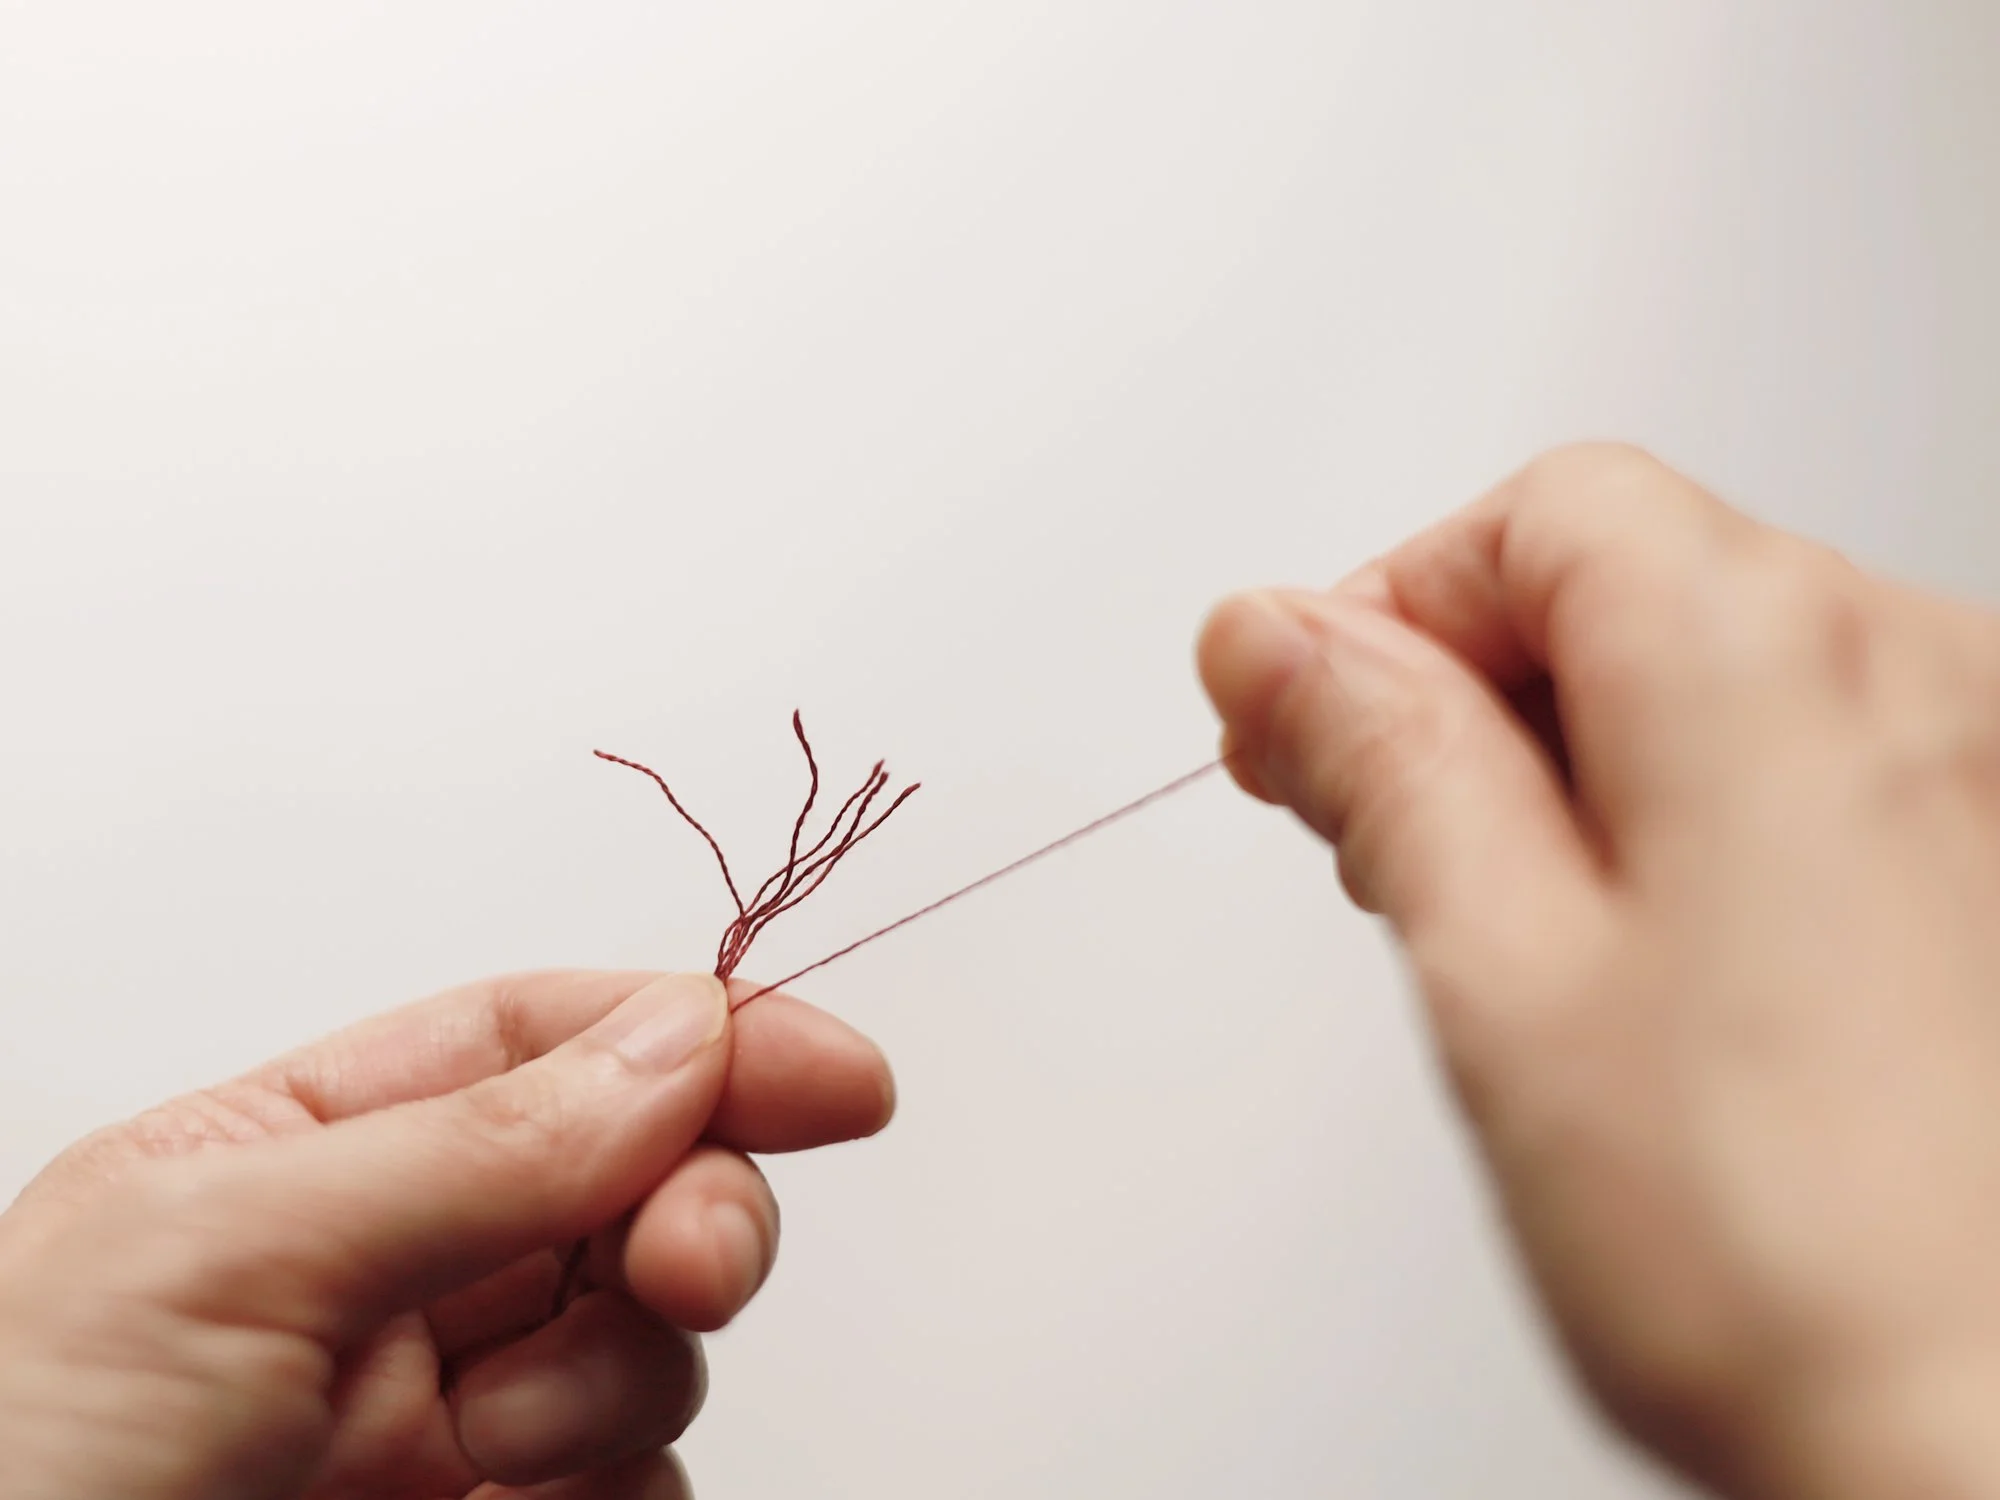
No matter how many strands you use, you will always need to separate each strand from the main thread first. Cut the thread to the desired length, hold it in one hand, and pull the strand out one by one until you have the required number. Gather them into a single bunch for stitching.
Use one of the illustrated methods to thread the needle. Method A can be used for any number of strands, while Method B is suitable only for an even number of strands.
For some brooches, you may also need to use wool yarn for stitching. In this case, there is no need to separate the yarn into strands - treat the entire piece as one strand.

About the Kits
There are different needles included in the Kit. The thinnest ones are beading needles, the medium ones are embroidery needles for cotton thread, and the thickest one is for wool yarn (only needed and included in some kits).
For beading, choose the embroidery thread that closely matches the bead colour.
The embroidery pattern printed on the fabric is heat-erasable. Please avoid exposing it to sunlight for extended periods, ironing or washing before you finish the project.
Embroidery Tutorial - Kit #1: Lilac & Cosmos
Embroidery Tutorial - Kit 2: Hydrangea & Chamomile
Embroidery Tutorial - Kit 3: Pansy & Butterfly
Embroidery Tutorial - Kit 4: Hydrangea & Fruit Tree
Brooch-Making Tutorial: Kit #1~2
Brooch-Making Tutorial: Kit #3~5
No-Glue Methods for Brooch-Making
1. Stems: Instead of applying glue to the wires before wrapping the threads, use 2mm wide double-sided tape.
As shown in the photos below, I apply the tape along the full length of the stem, then fold it at one end to wrap and cover the other side completely.

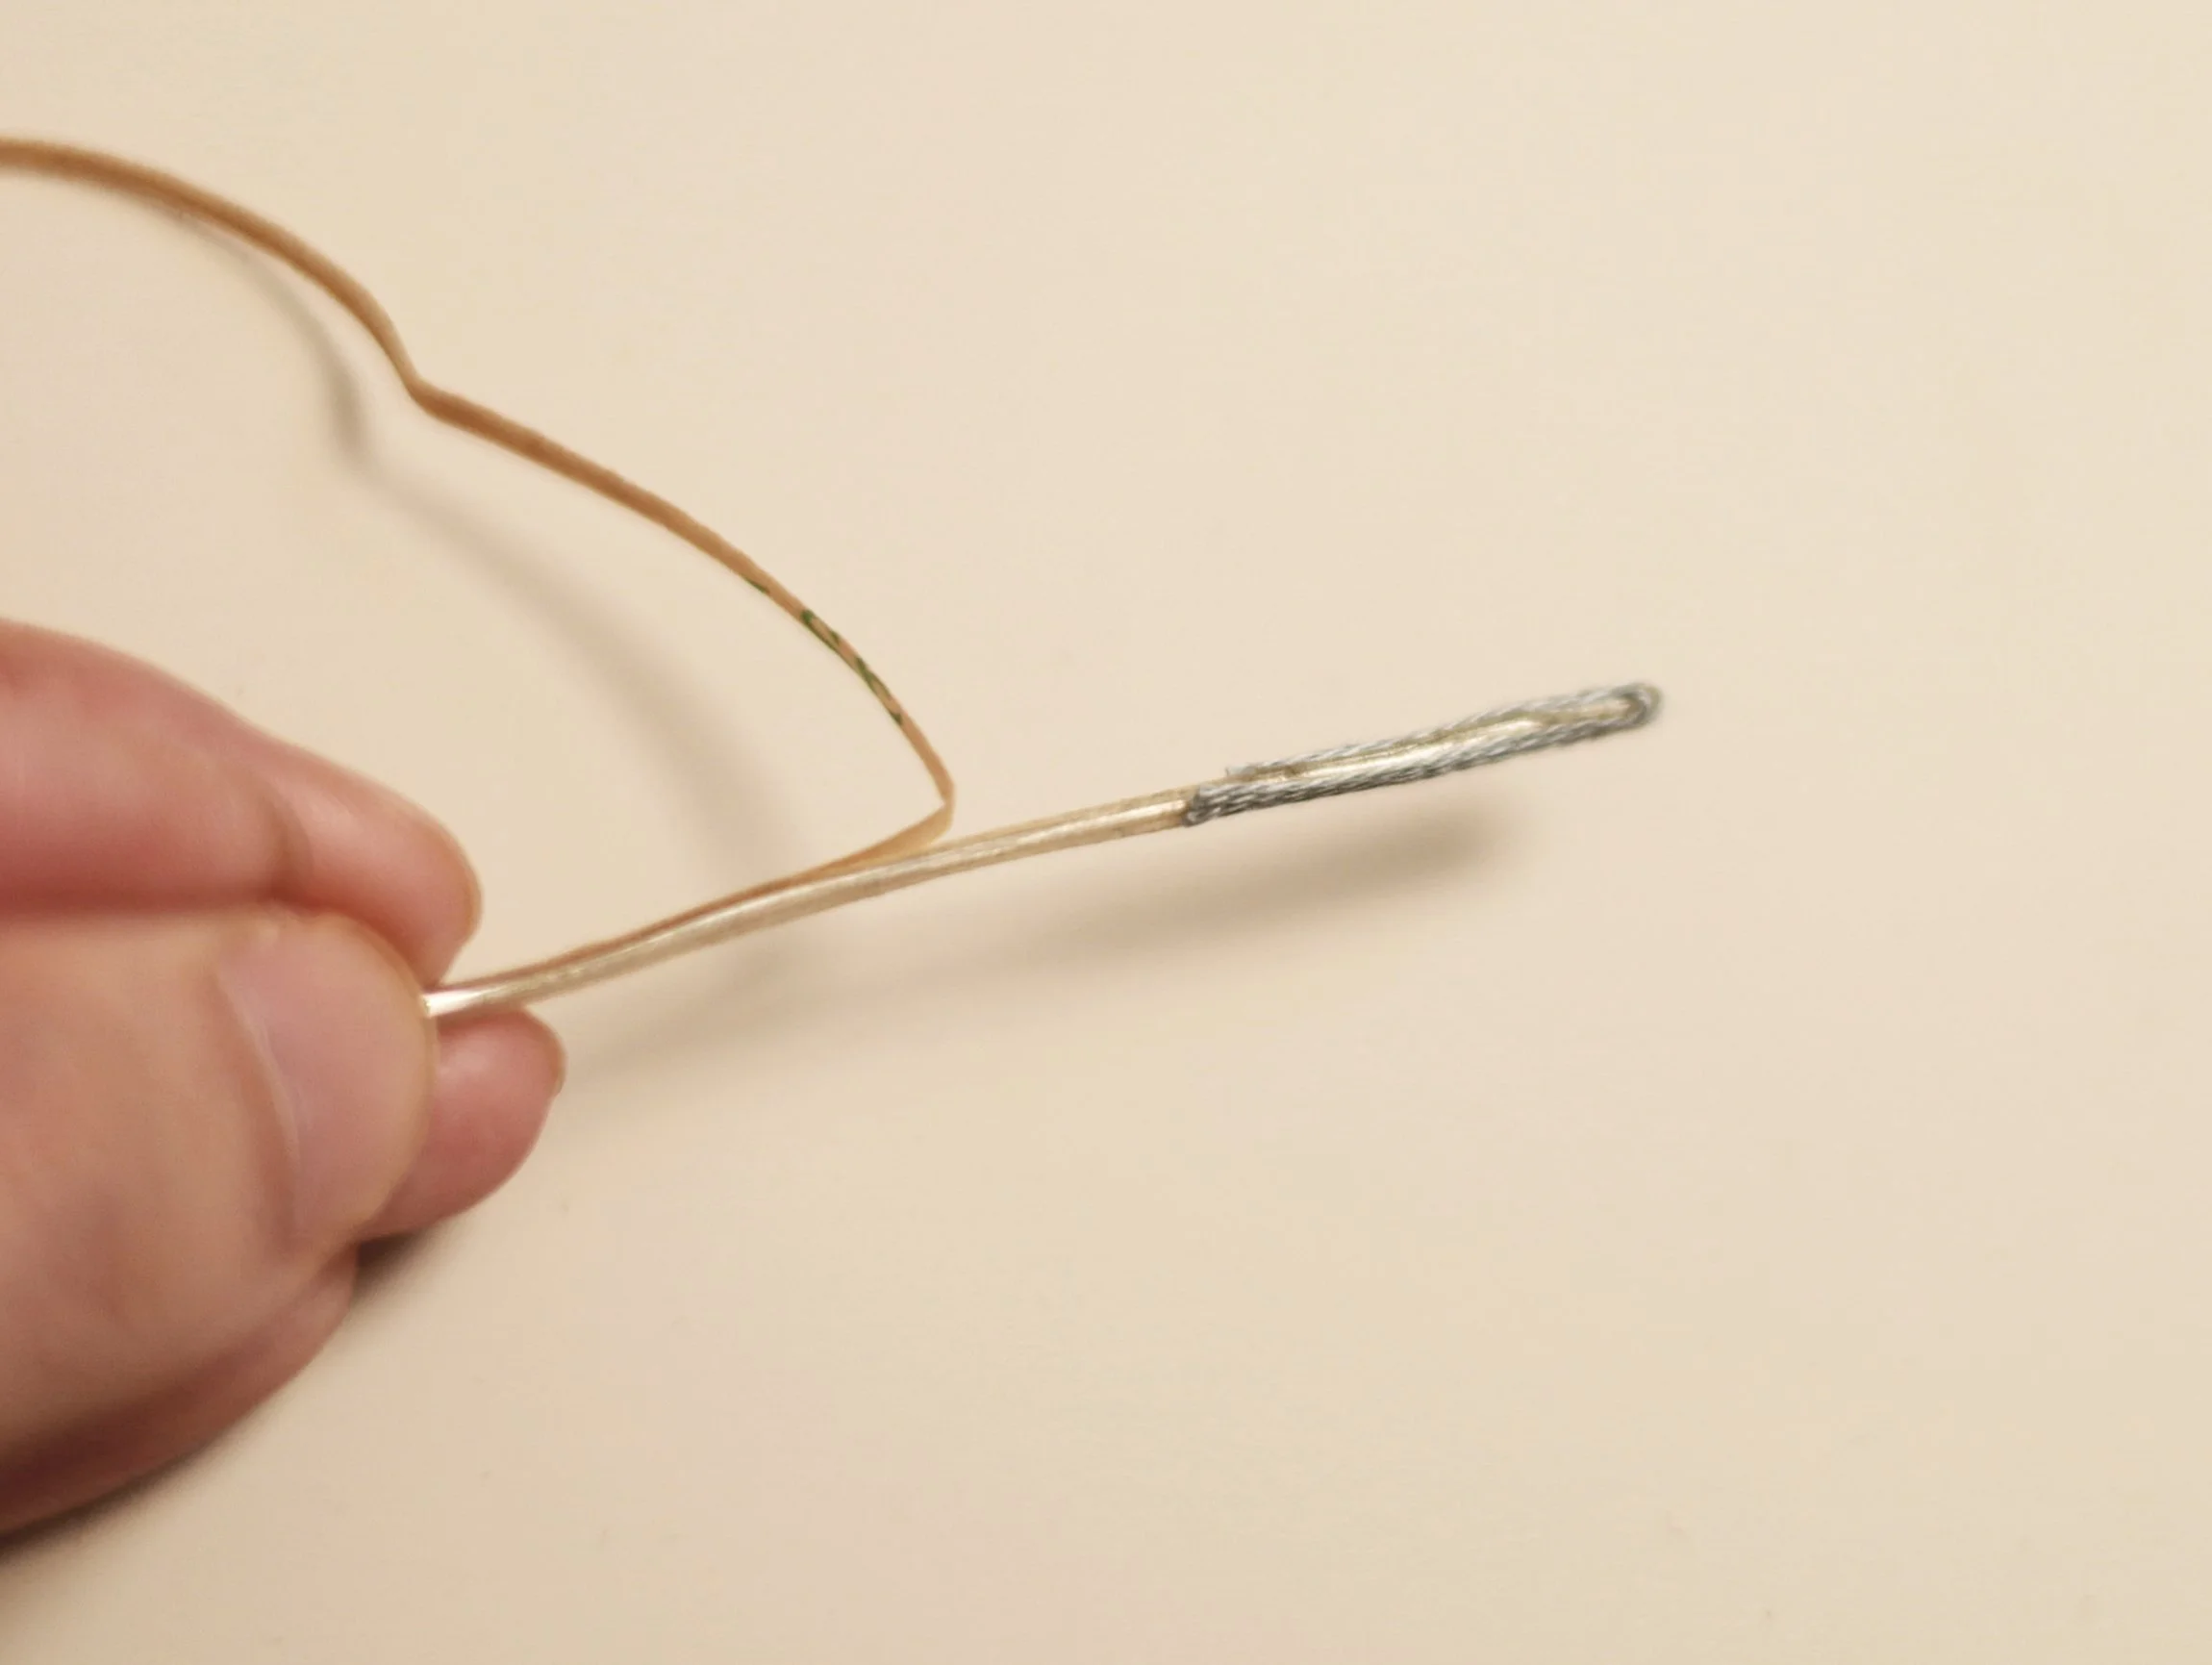


If preferred, you can cut a short length of 4-strand thread to cover the folded end of the stem first, before wrapping the long thread along the stem.
2. Seam allowance: For experienced stitchers, simply stitch to secure the seam allowance to the back of the embroidery pieces using single-strand thread. No need to worry about the stitches you use - simply stitch in any way you like to secure the seam allowances in place. Likewise, stitch to attach the stems to the back of the flowers using 2 strands of thread.

3. Attach the back: For experienced stitchers, use Blanket Stitch to attach the felt to the back of the brooch instead of using glue.
First, place the embroidery pieces on the felt, and trace the outline using the heat-erasable pen refill in the kit. Cut it out along the traced outline. Sew the pin on the right side of the felt (i.e. the side without tracing). Place the felt with its wrong side touching the back of the embroidery piece. If needed, trim the excess felt so that it is not visible from the front. Use 2 strands of thread and blanket stitch to bind the edges.
Note: Make sure each stitch goes through both the felt and the edge of the folded organza fabric.


