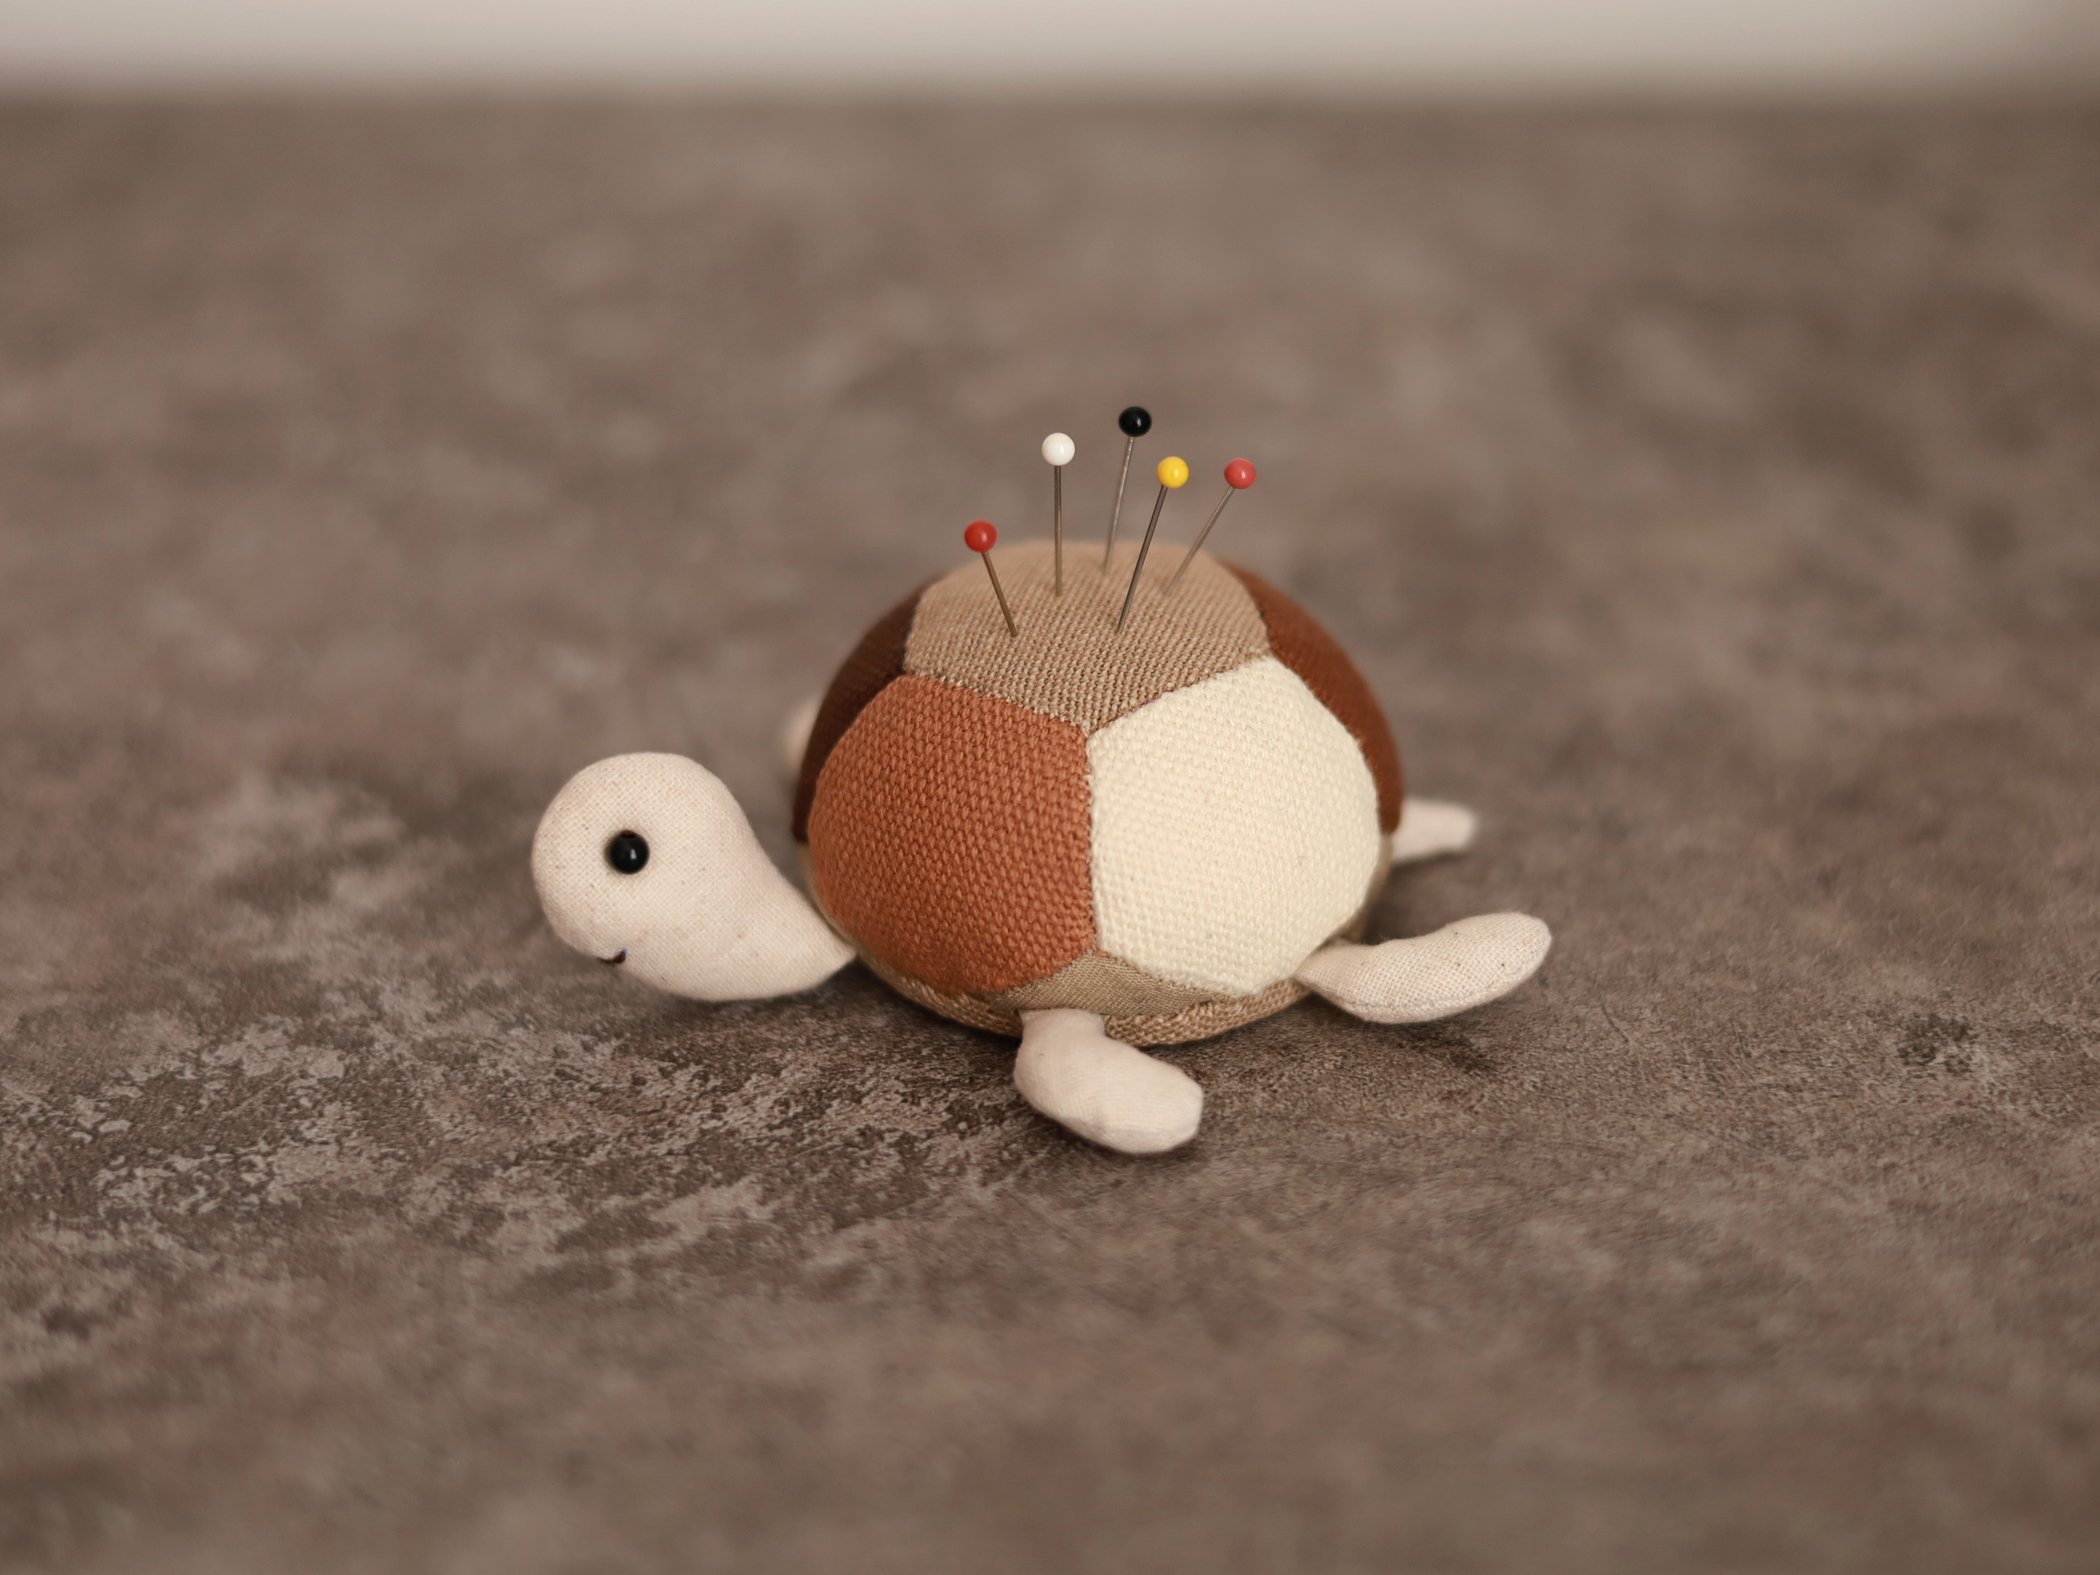
Turtle Pincushion
- a perfect scrap buster project
- no sewing machine required
Supplies
• Light- or medium-weight fabrics (You may want to use different fabrics for different part of the turtle - please use the patterns to work out how much you would need for each fabric)
• Toy filling, two beads of 3mm (diameter) for eyes, & plastic/paper card for base
• Sewing thread in matching colour & needle
• Embroidery thread in your chosen colour for mouth
Sewing Tutorial
1. Turtle’s Back/Shell
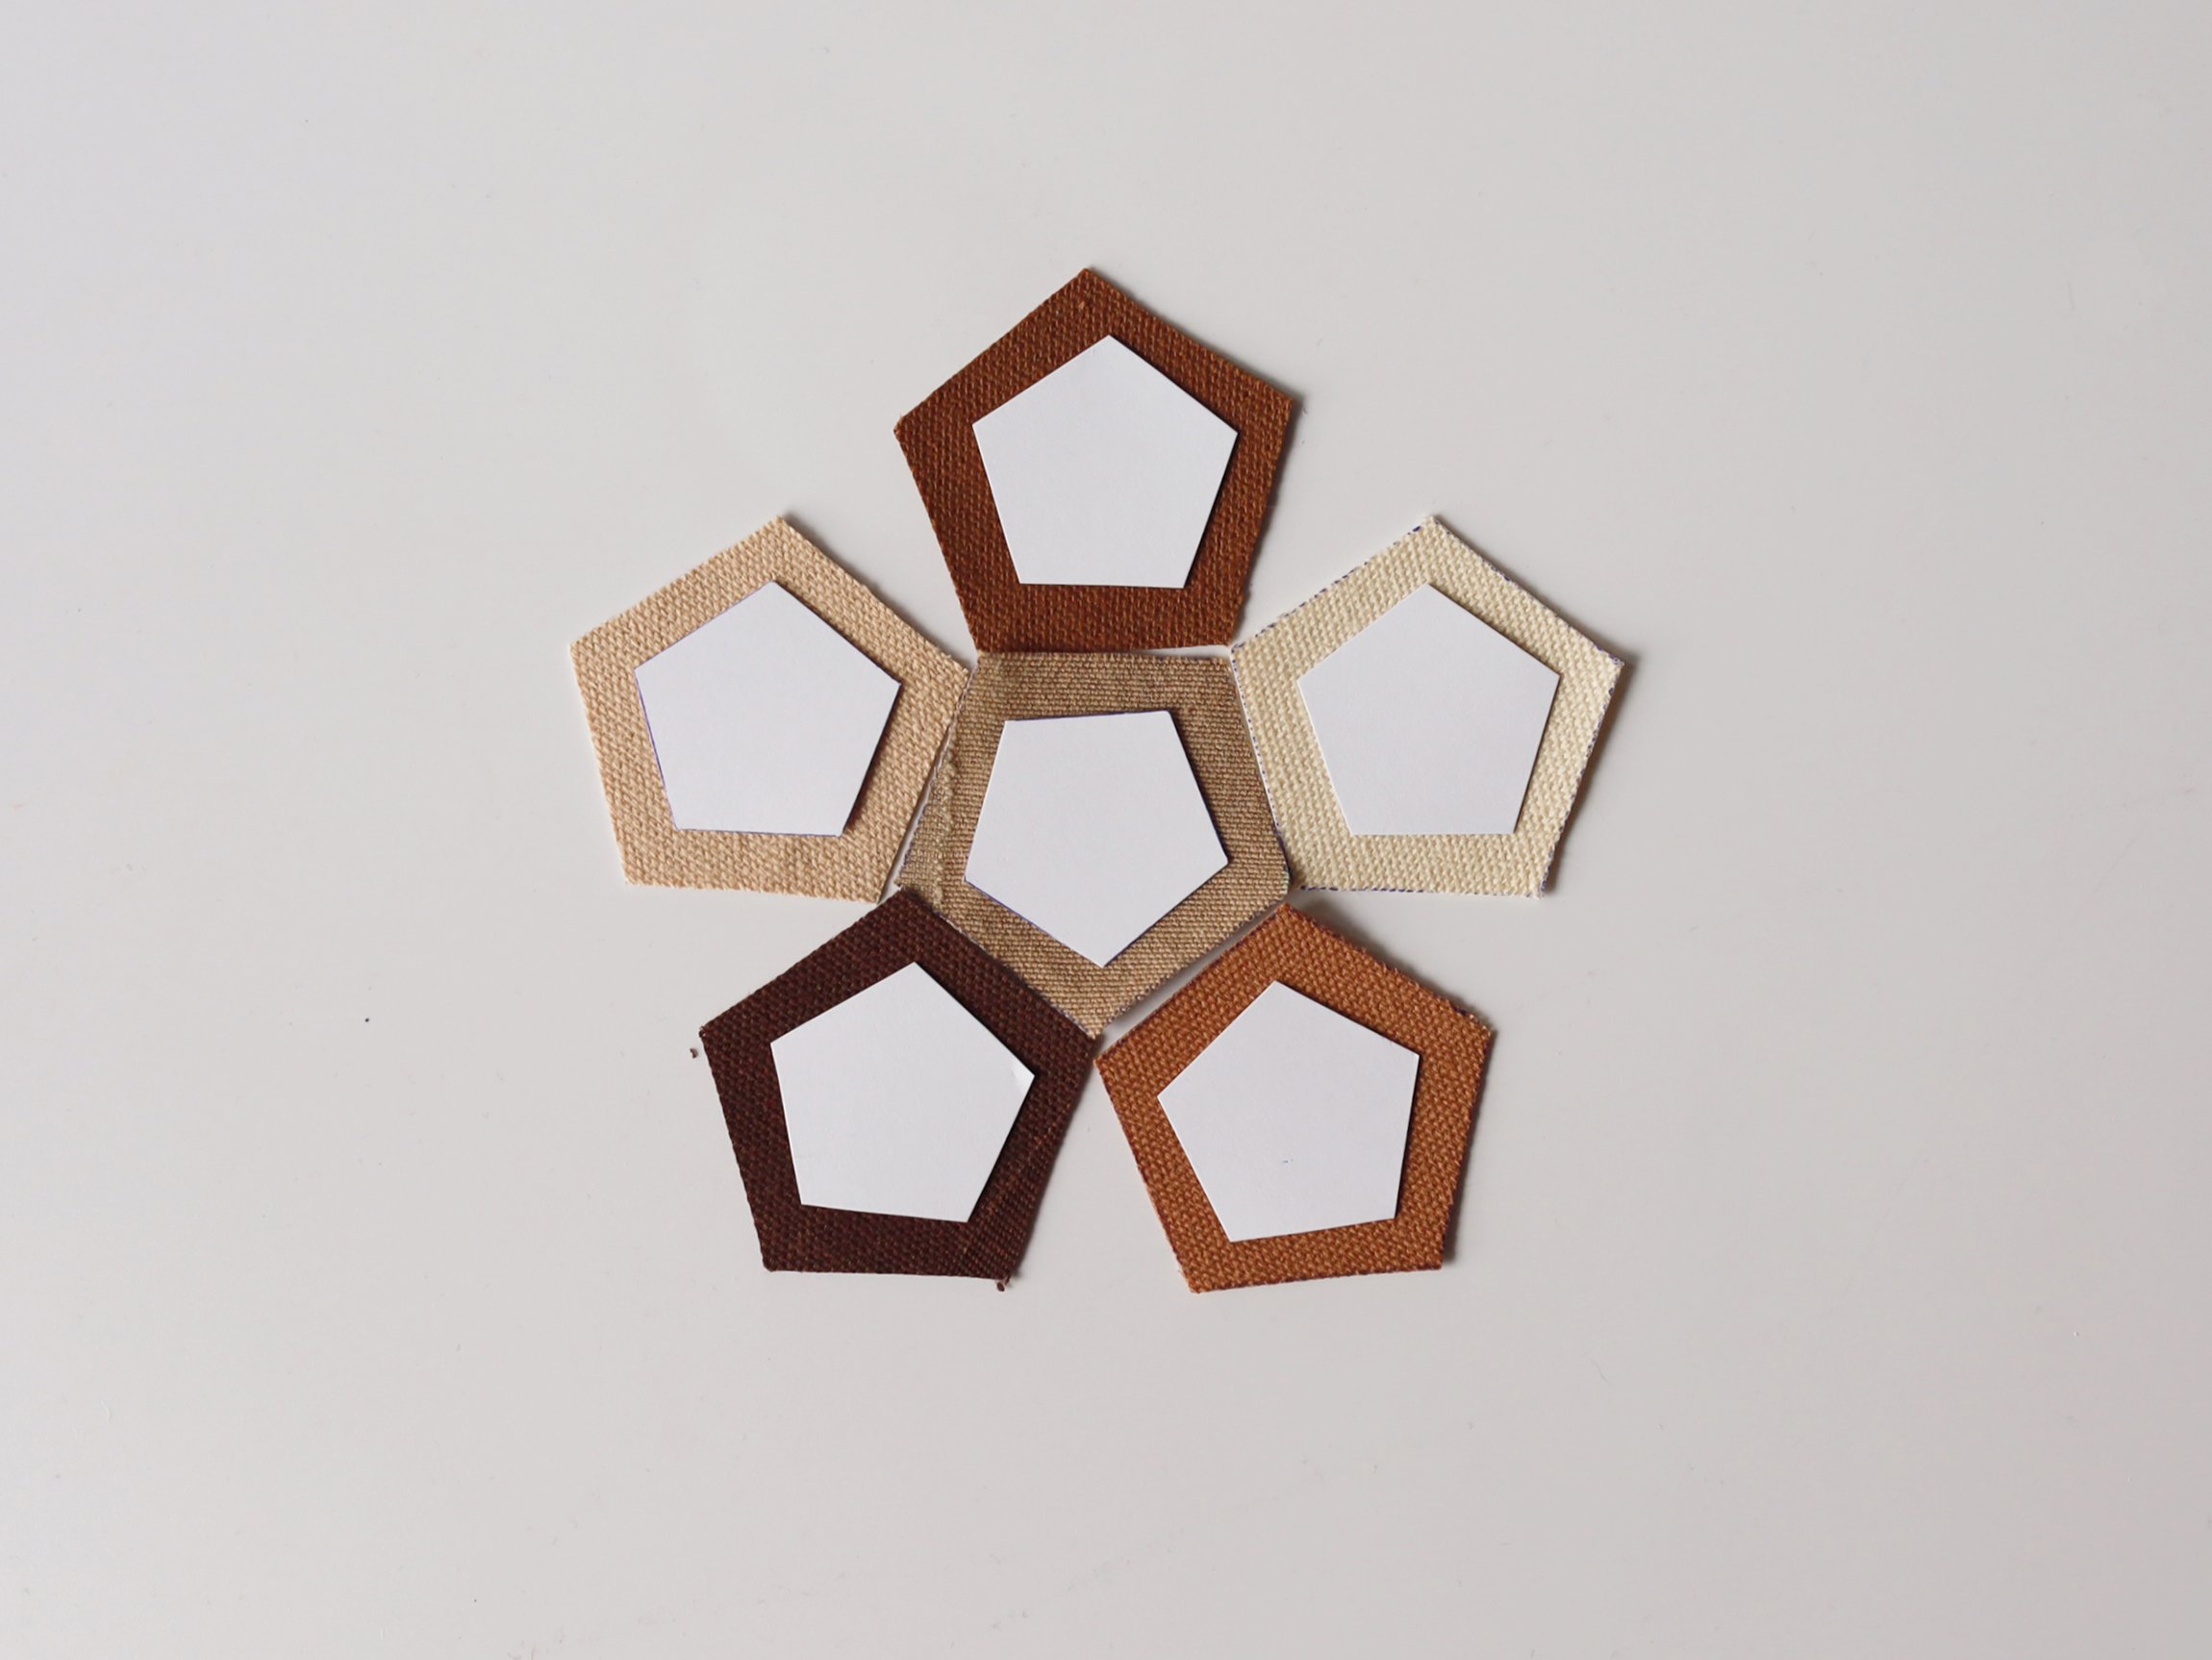
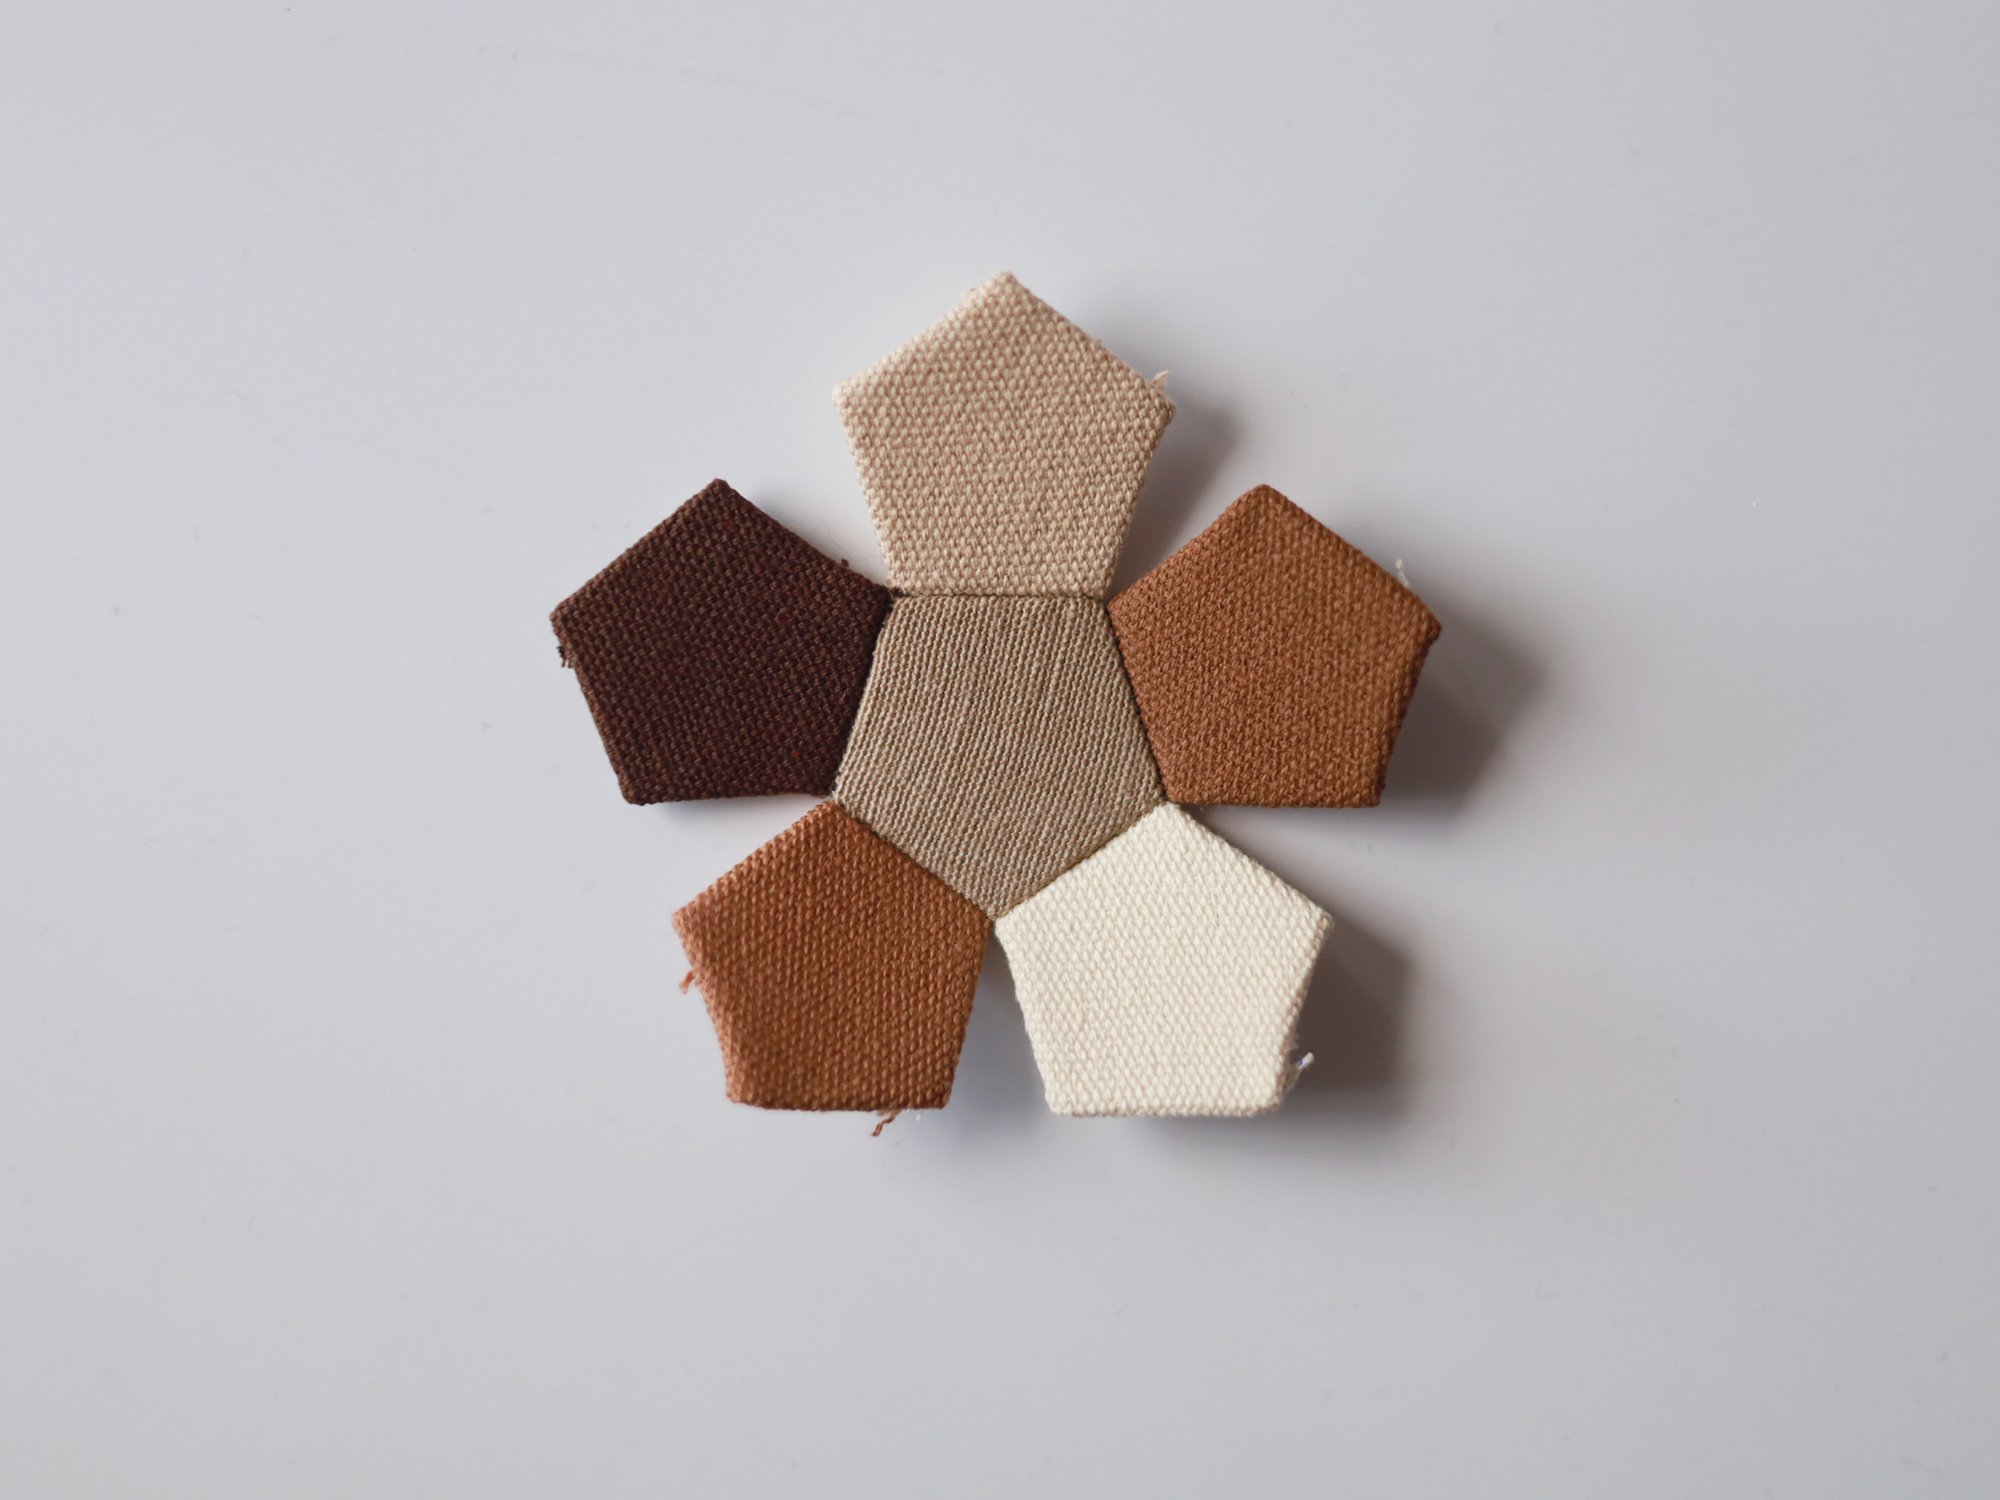
a. Cut the fabrics according to pattern A, B, C, paying attention to the number of pieces required for each pattern. If using different fabrics for pattern A, arrange them in the way as desired in the finished look (see the photo below).


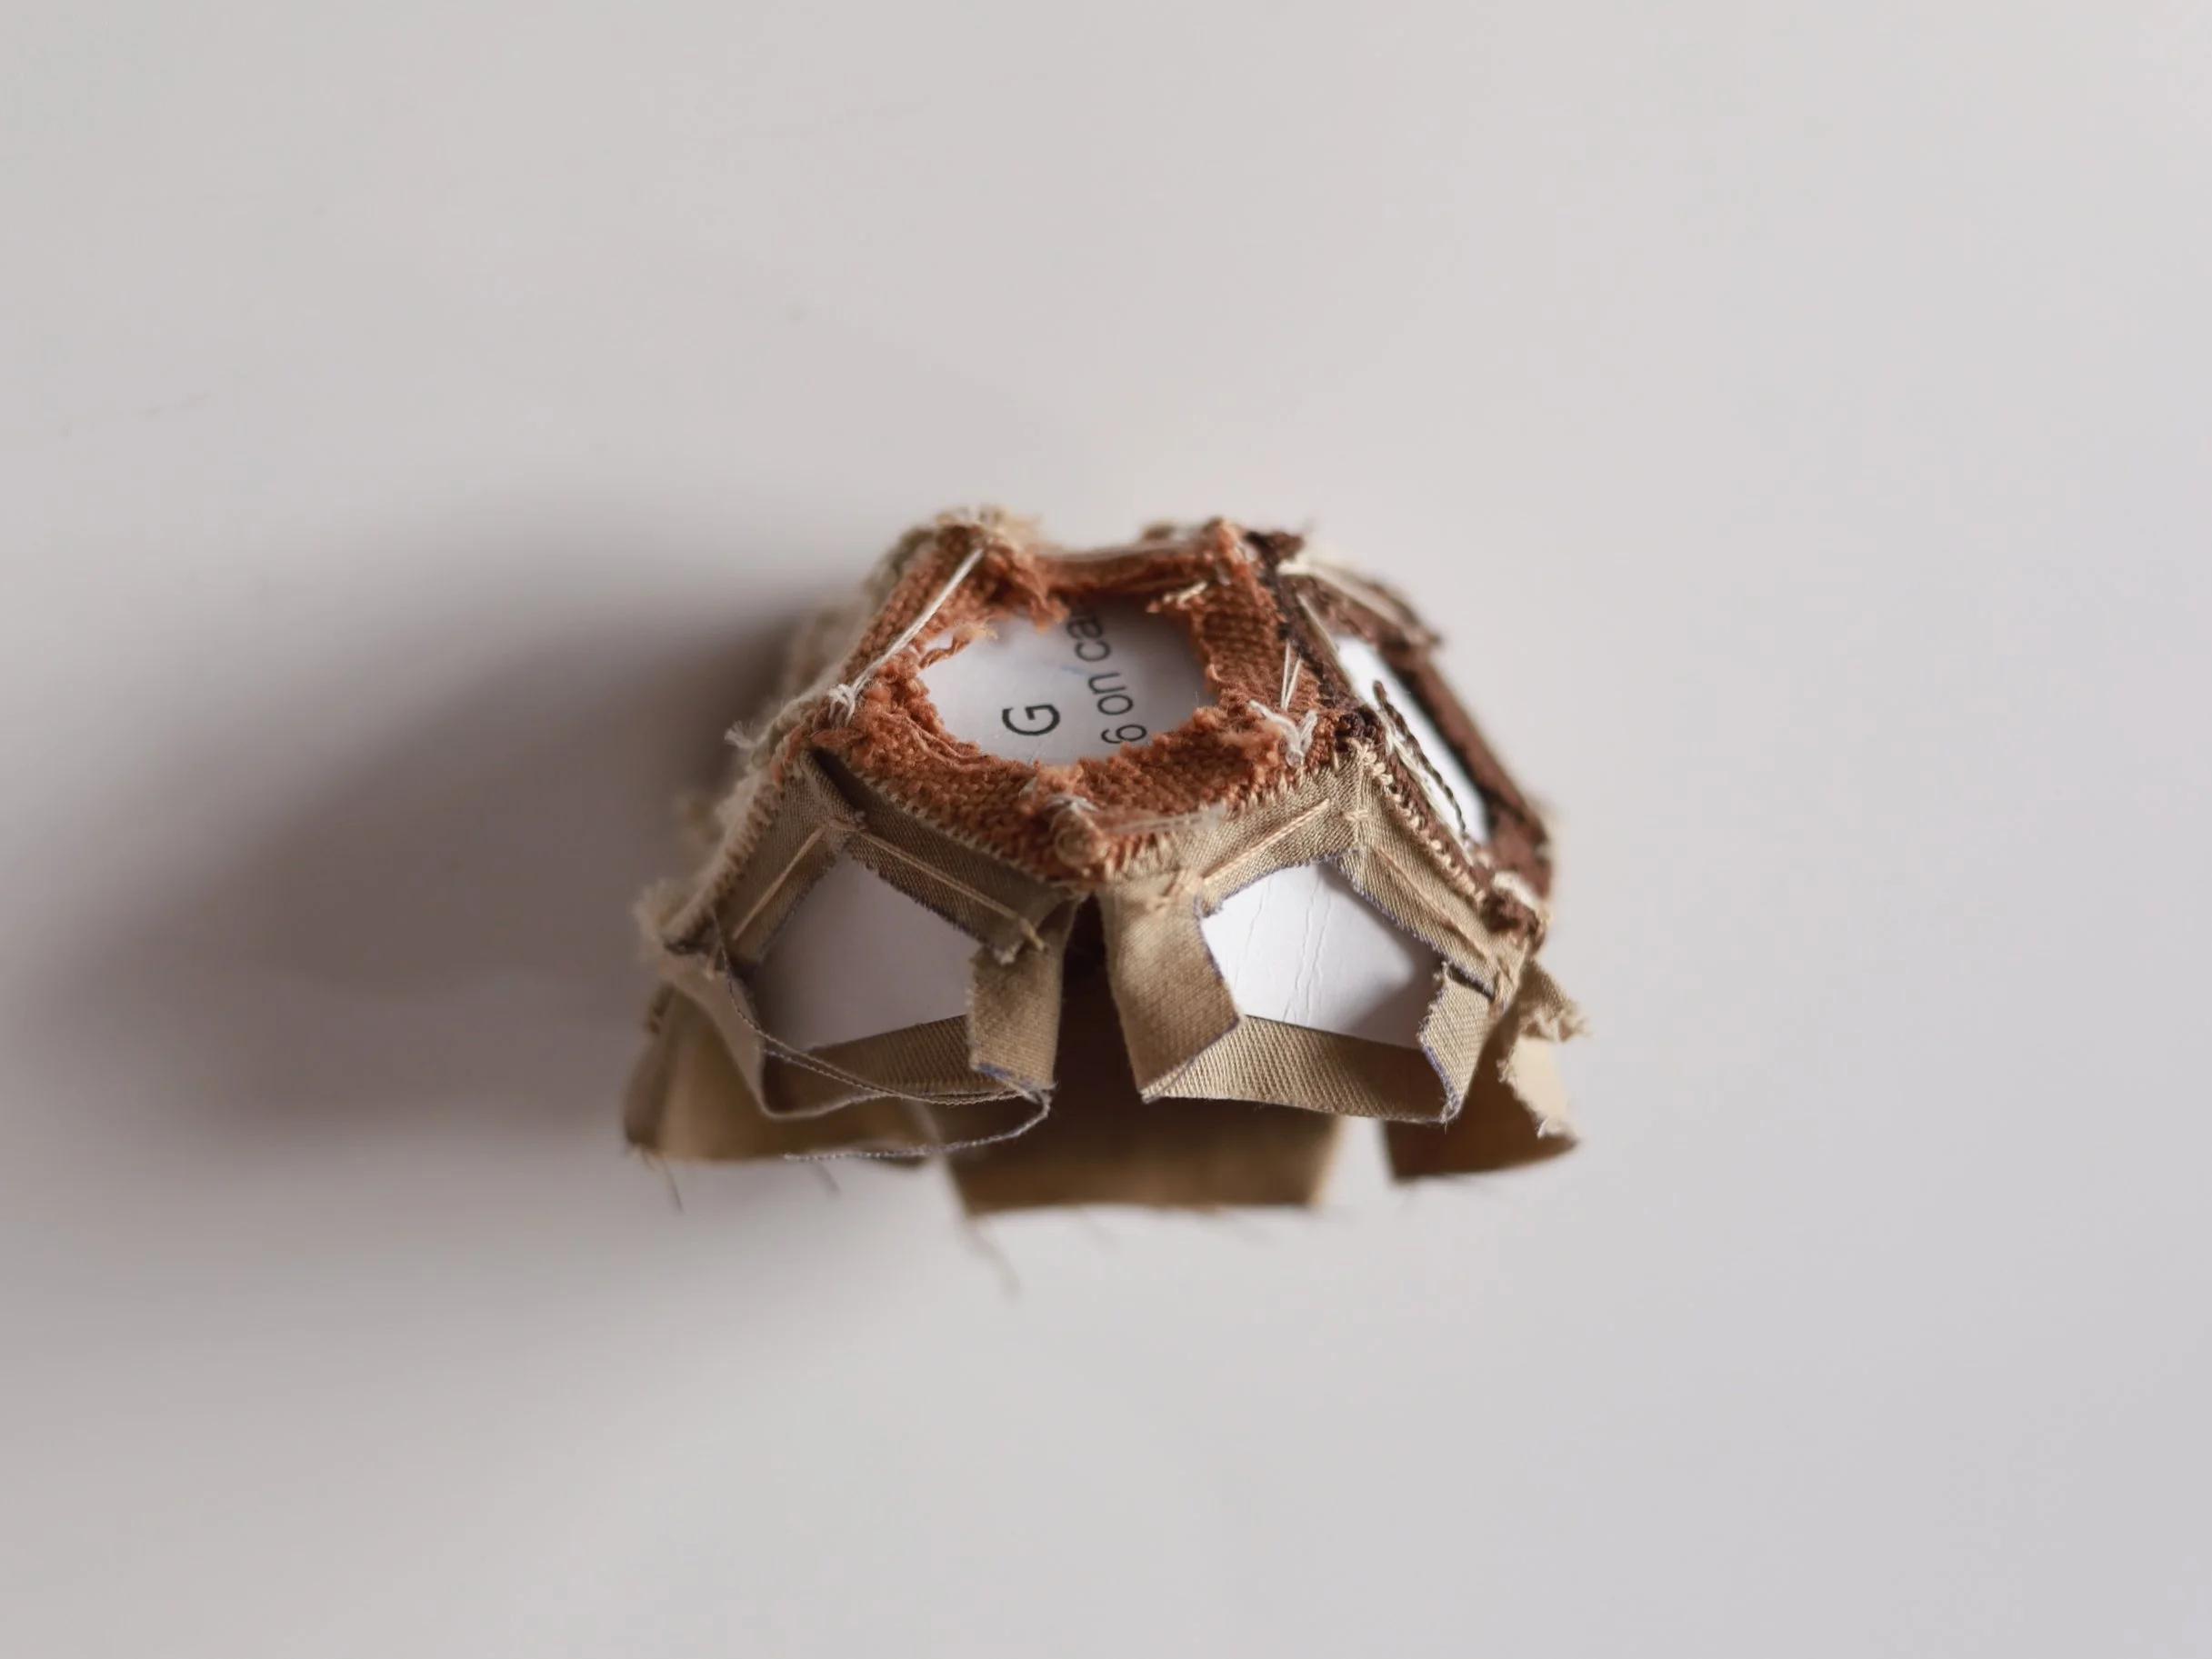
b. Trace and cut 6 pieces of pattern G and 5 pieces of H on thick paper (mine is 200gsm - recycle the clothes labels, old cards or packages as they are ideal for it!).
• Place one piece of G (paper) in the centre of the wrong side of one pattern A (fabric). Secure it in place with a wonder clip (I didn’t do it for my first turtle, and as you can see from the photo, the paper didn’t stay quite in the centre).
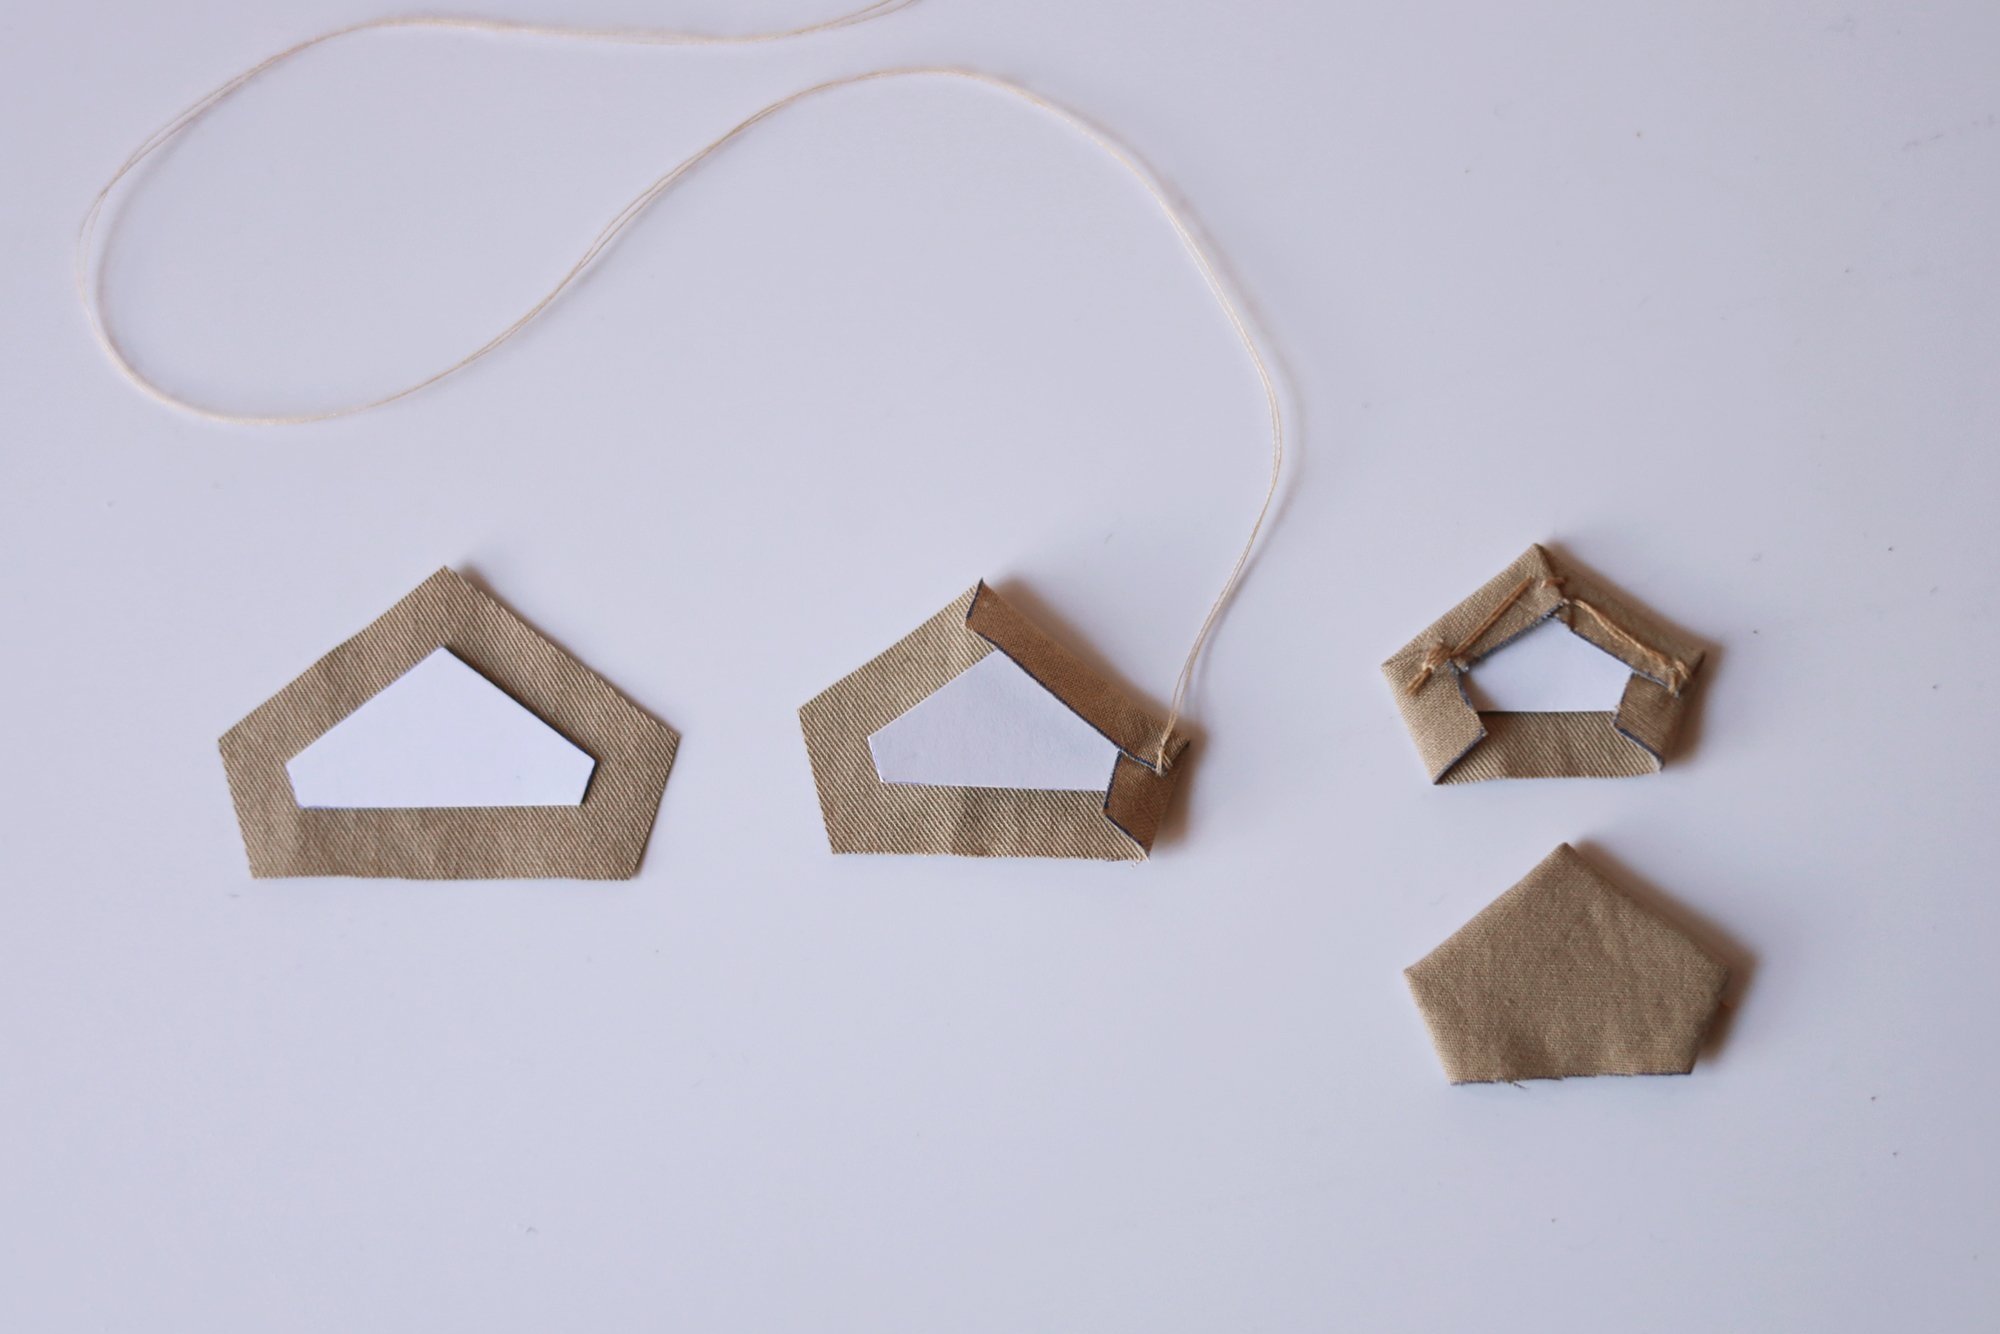
• Fold one side of A along the same side of G, press and hold with fingers.
• Fold the adjacent side over, press and hold with fingers around the corner, secure it with two or three stitches where the fabric overlaps. Do not sew through the paper.
• Move on with the next adjacent side until all the sides have been folded along the paper pattern G and the corners secured.
• Sew 3 times at the last corner and cut the thread. There should be no need to finish off with a knot.


c. One by one, join the 5 sides of the Pattern A piece in the centre with the surrounding 5 pieces:
Take the centre piece and one of the 5 surrounding pieces, align the edges with their right sides touching, sew by hand from corner to corner using whip stitch.
Whip stitch: the needle always goes through the layers of fabric from the same side to the other at 90 degrees. Use small stitches (around 1mm apart). Pull the thread tight after each stitch so that it will be less visible from the right side once finished. Reinforce the corners by sewing a few more stitches there.


d. One by one, join the adjacent sides of the surrounding 5 pieces of A using whip stitch in the same way as in step c.

e. With one paper H in the centre of one fabric B, fold in adjacent sides (except the bottom side) and secure the overlapping corners with 2-3 stitches. Repeat with the other 4 pieces of H and B.
f. Join the two top sides of pattern B to the bottom sides of pattern A, as shown in the photo. With the right sides touching, sew
the sides together by hand using whip stitch. Remove all the paper patterns once done.


g. (Optional: Add decorative stitches to pieces A if preferred. Small running stitches were sewn along each side of pieces A for the blue sashiko turtle.) With the right sides touching, sew the adjacent sides of pieces B together by hand using whip stitch.


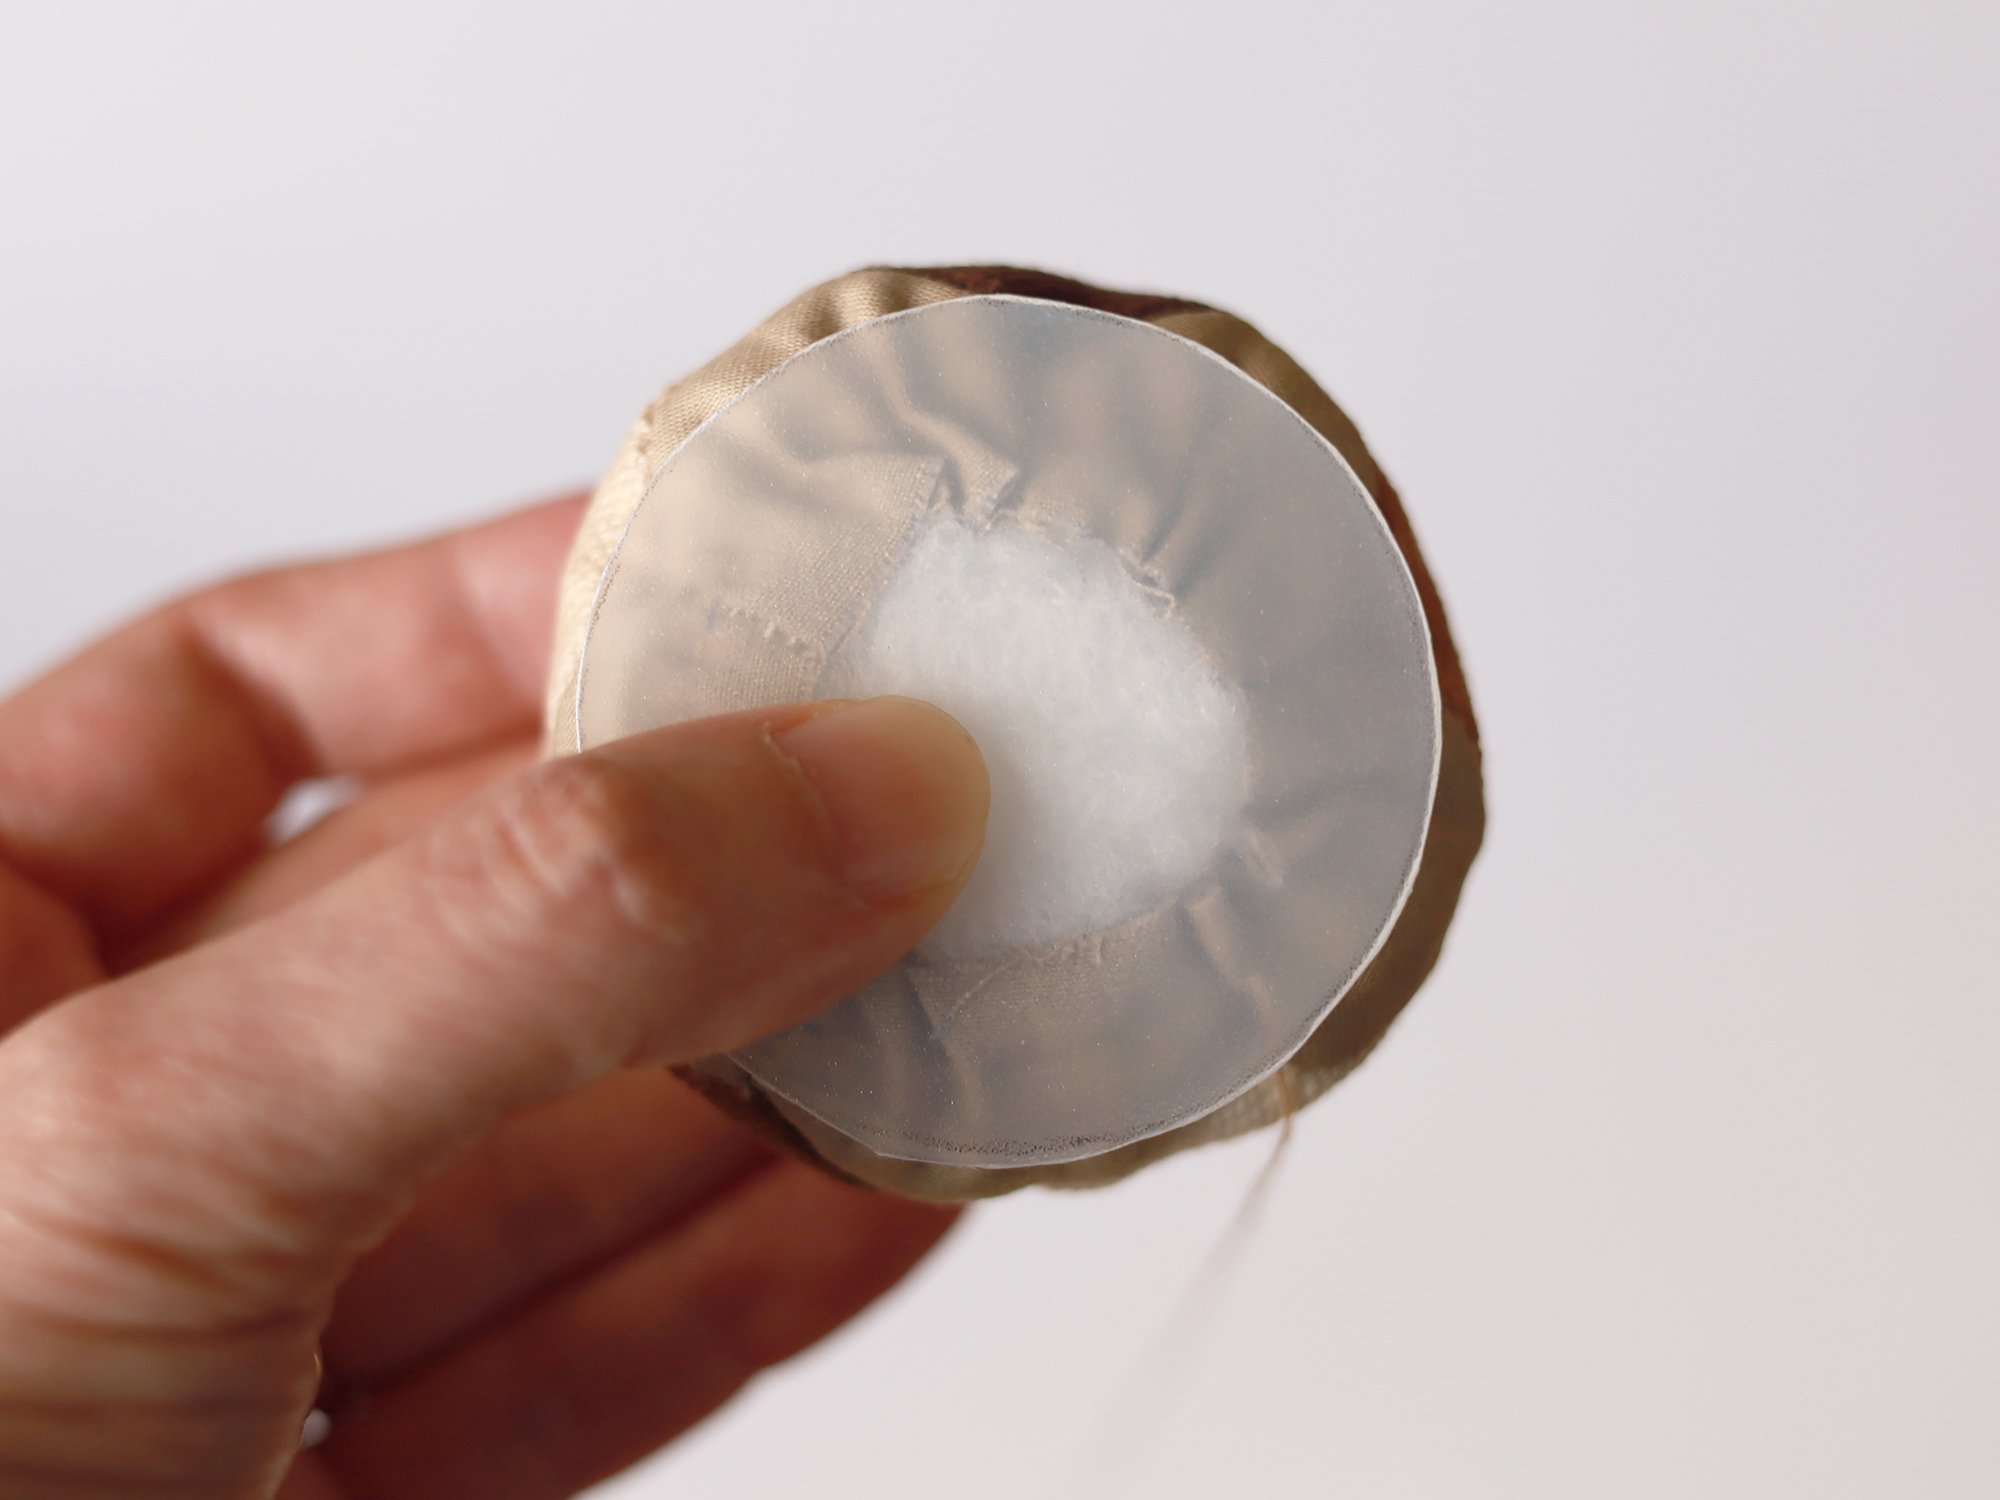
h. Starting 5mm from the top of the side seam of pattern B, sew around the circular opening using large running stitch, leaving a long tail of thread at the beginning and end. Pull the tails to gather the opening while filling it with toy fillings.


i. Cut a plastic card (recycle old loyalty cards or plastic takeaway box if possible) using the smaller circle of pattern C (i.e. without seam allowance). Adjust the size of the turtle back until it is more or less the same size as the card, and tie the thread tails to fix the opening.

2. Turtle’s Head, Legs and Tail
a. Fold the fabric for turtle’s body in half, and trace patterns D, E, and F to the fabric. Leave some space between patterns (at least 3mm seam allowance for each pattern). Sew along the solid outlines using small stitches either with sewing machine or by hand using back stitch. Do not sew across the openings.


b. With 3mm seam allowance, cut off the pieces for pattern D, E, F. Note that the 3mm seam allowance only needs to be added to the seams (i.e. your sewing lines), not the opening. Clip along the curves and turning points, being careful not to cut into the sewing lines.


c. With the help of a tweezer and a plastic sewing needle for kids (or anything pointy but not too sharp), turn the pieces to the right side. (See steps C1-C2 below.)
c1. Insert the tweezer into the fabric, push a bit of the fabric into the opening of the tweezer, with the tweezer holding the
fabric, push the fabric in the opposite direction of the tweezer.

c2. Remove the tweezer and push the fabric from outside with the eye of the plastic needle, while pulling the seam allowance in the opposite direction. This will turn the fabric to the right side.


d. Stuff the head, legs and tail with toy fillings using the eye of the plastic needle.
e. With the seams aligned, sew a few basting stitch across the head close to the sewing line on the seam allowance.


3. Assembly
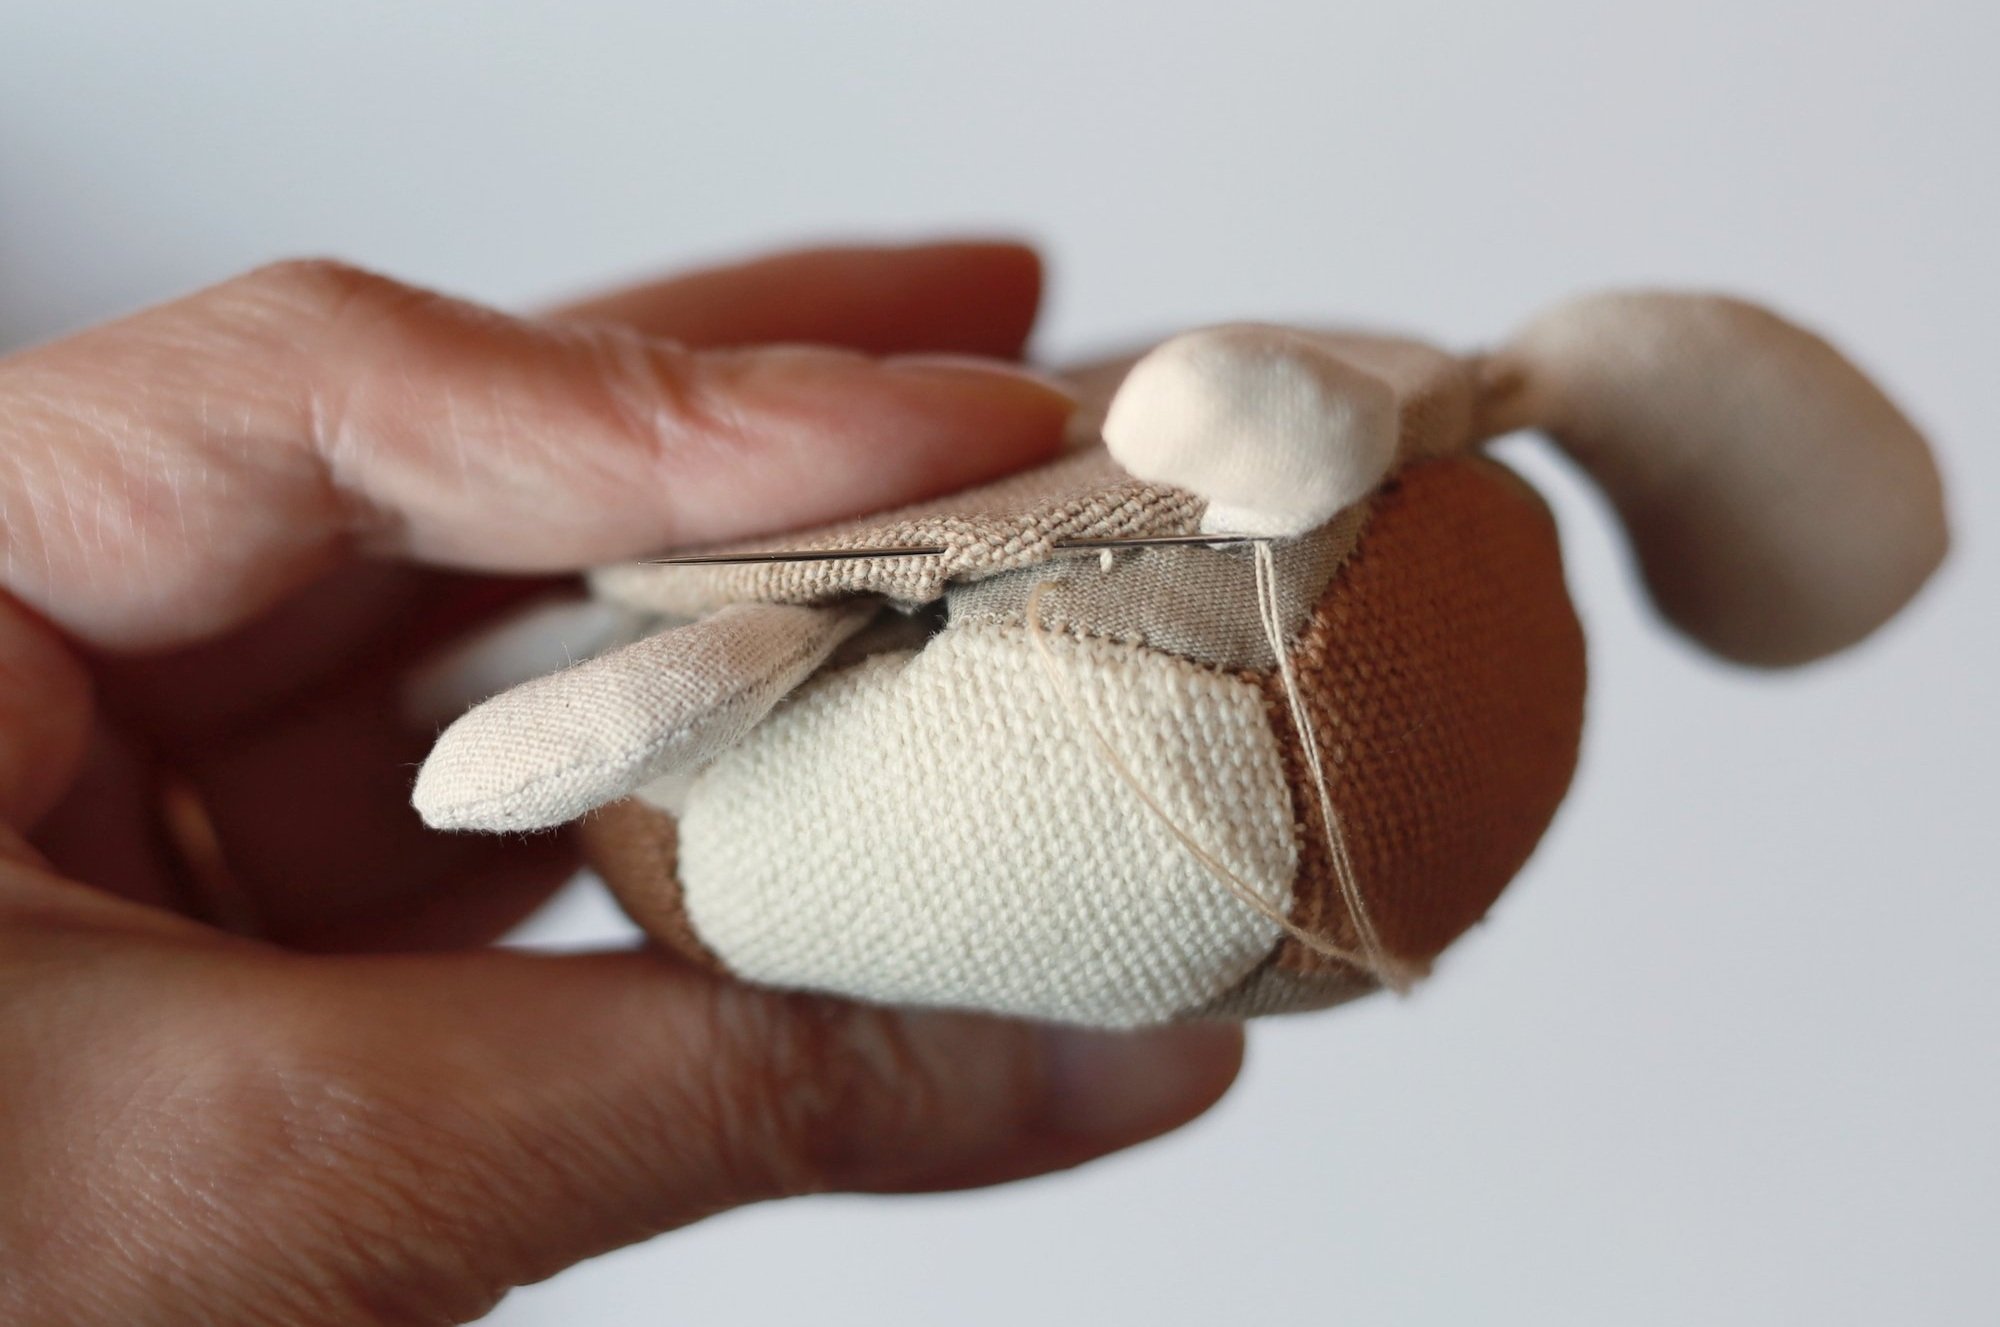
a. Find a suitable place to attach the head to the shell. Sew to secure.
• Once the head is sewn, the central line from the head across the shell will determine the position of the tail. Sew to secure.
• Place the legs at the positions and angles you prefer, pin to secure, or mark the leg on the shell fabric. (If not sure, with the head and tail, the legs should more or less divide the circle into 6 equal parts.)
• Attach the legs one by one by sewing them to the shell.


b. Sew around the fabric piece C approx. 5mm from the raw edge using large running stitch. Place the round plastic card in the centre of fabric. Pull the thread to gather the fabric around the card. Tie a knot to finished off. This is the base for the shell.


c. Fill the shell with more toy filling until it is firm enough as a pincushion. Place the base to the bottom of the shell with the
wrong sides touching. Sew around by hand to attach the base using hidden stitch. Pull the thread tight after each stitch to hide it.
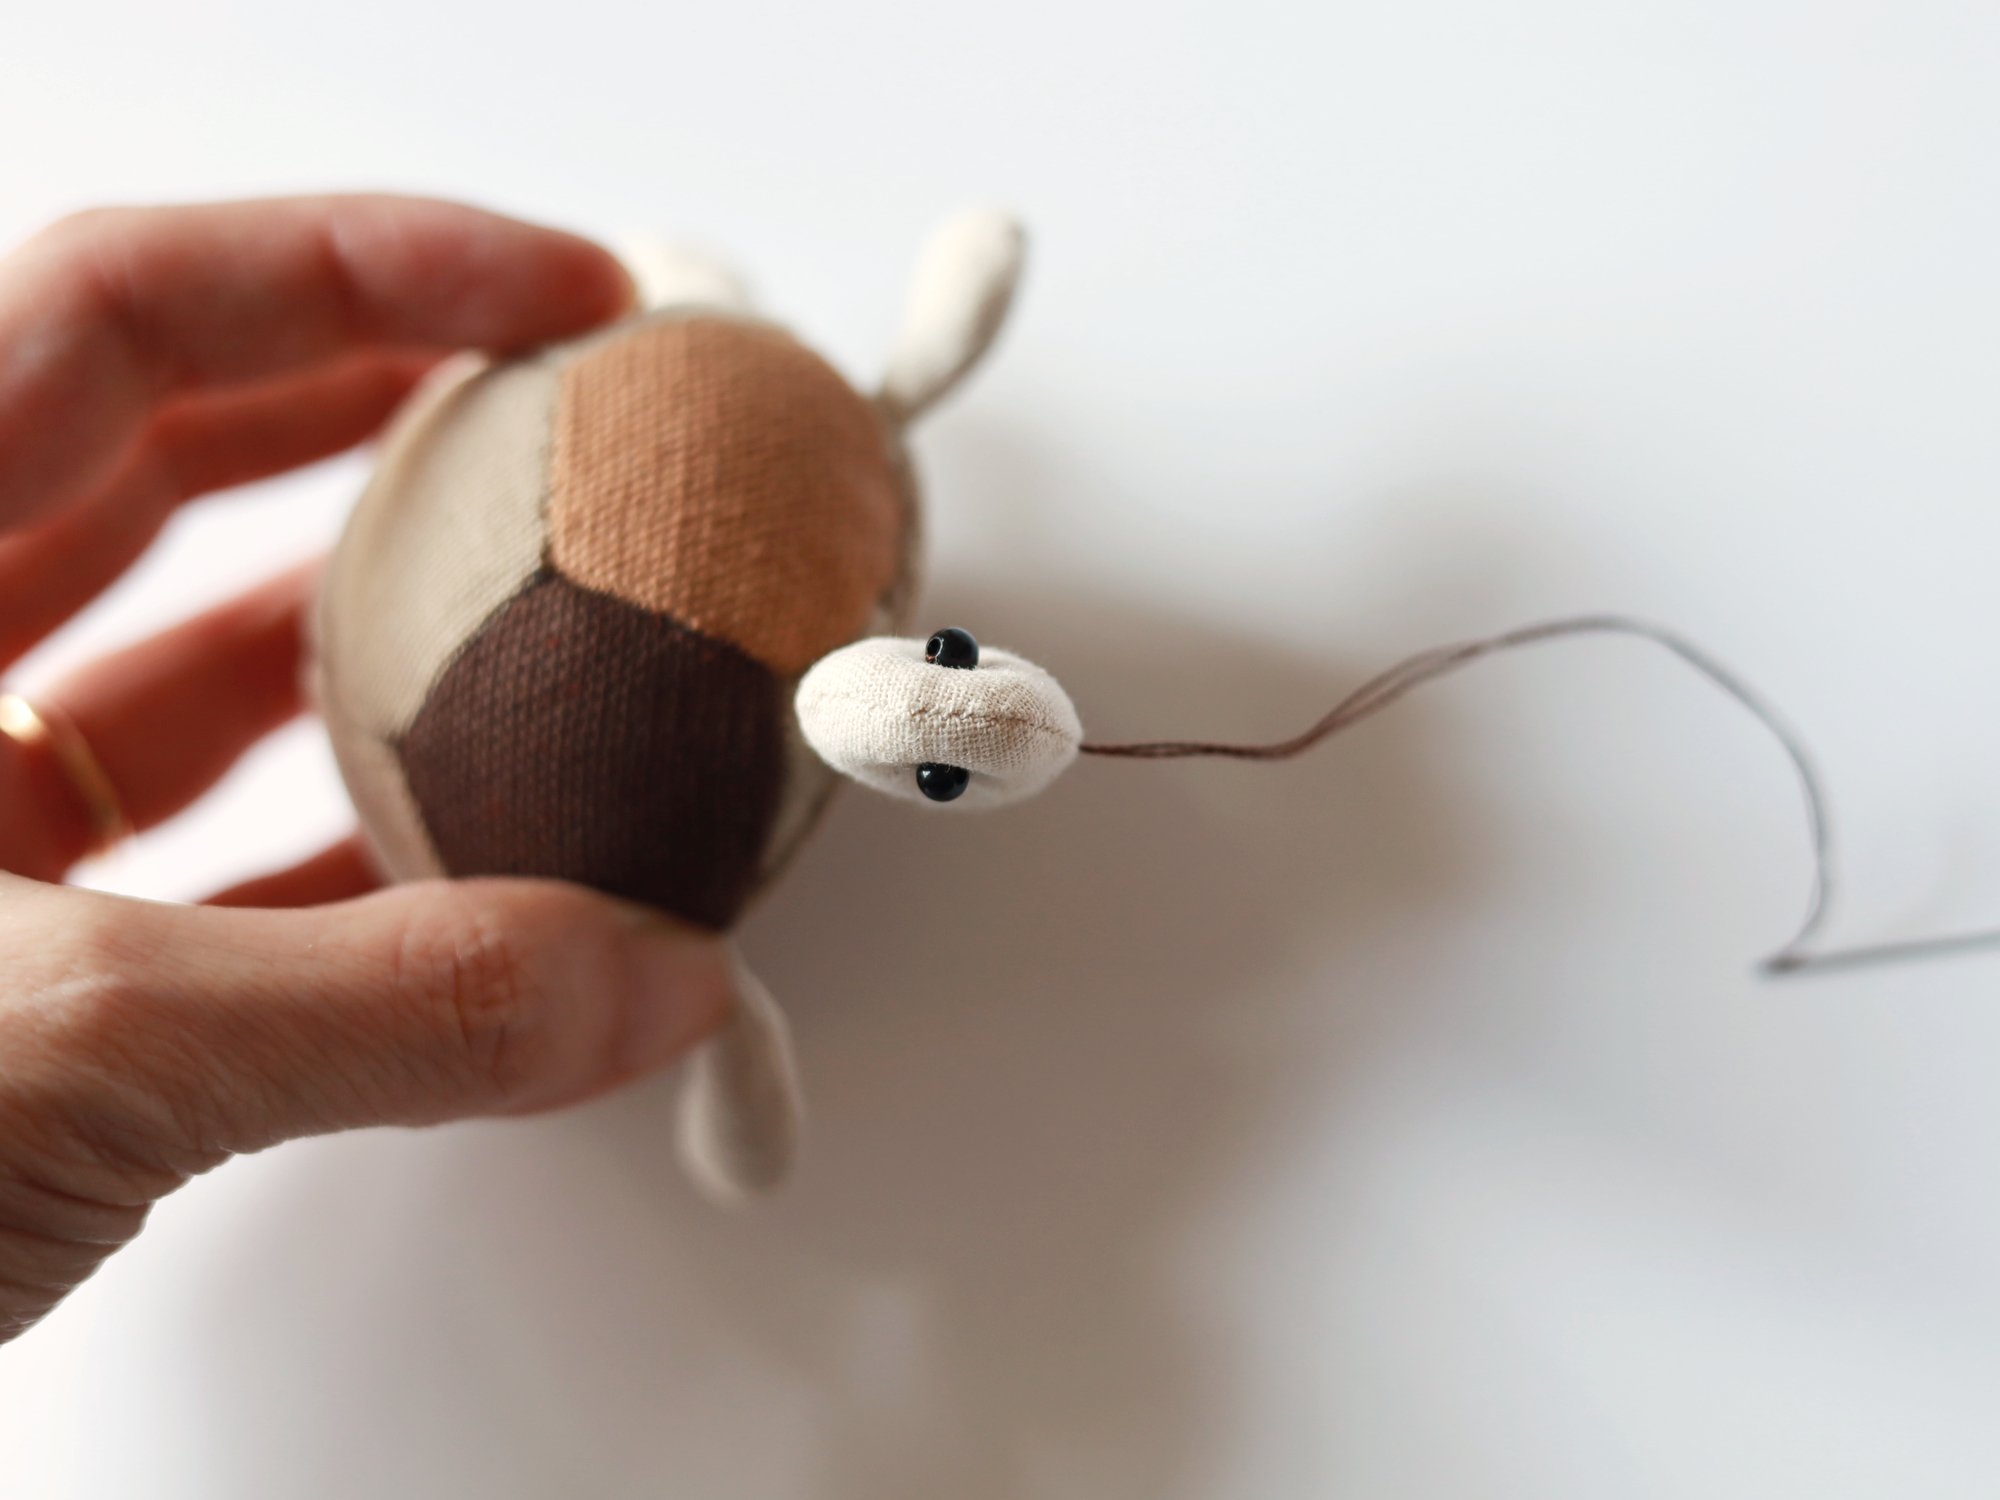
d. Mark the eyes and mouth on the head with a heat erasable pen if needed. Sew the beads on for the eyes as shown in the
photos. Start the first stitch from the seam and pull the knot into the fabric to hide it.


e. Starting from the centre of the mouth, sew each side of the mouth with small stem stitch (or any stitch you want to use).
Finish your sewing at the centre seam. Tie a knot and get the needle in the seam and out from anywhere else on the head, pull the knot through the seam so that it is hidden in the fabric. Cut off the thread.


Congratulations! You have now made a super cute turtle pincushion!