
Whale Shark Bags
This tutorial shows how this pair of retired jeans was turned into a brand new whale shark backpack. You can choose to make it with or without the zip opening, to different sizes, and as a backpack or crossbody bag.
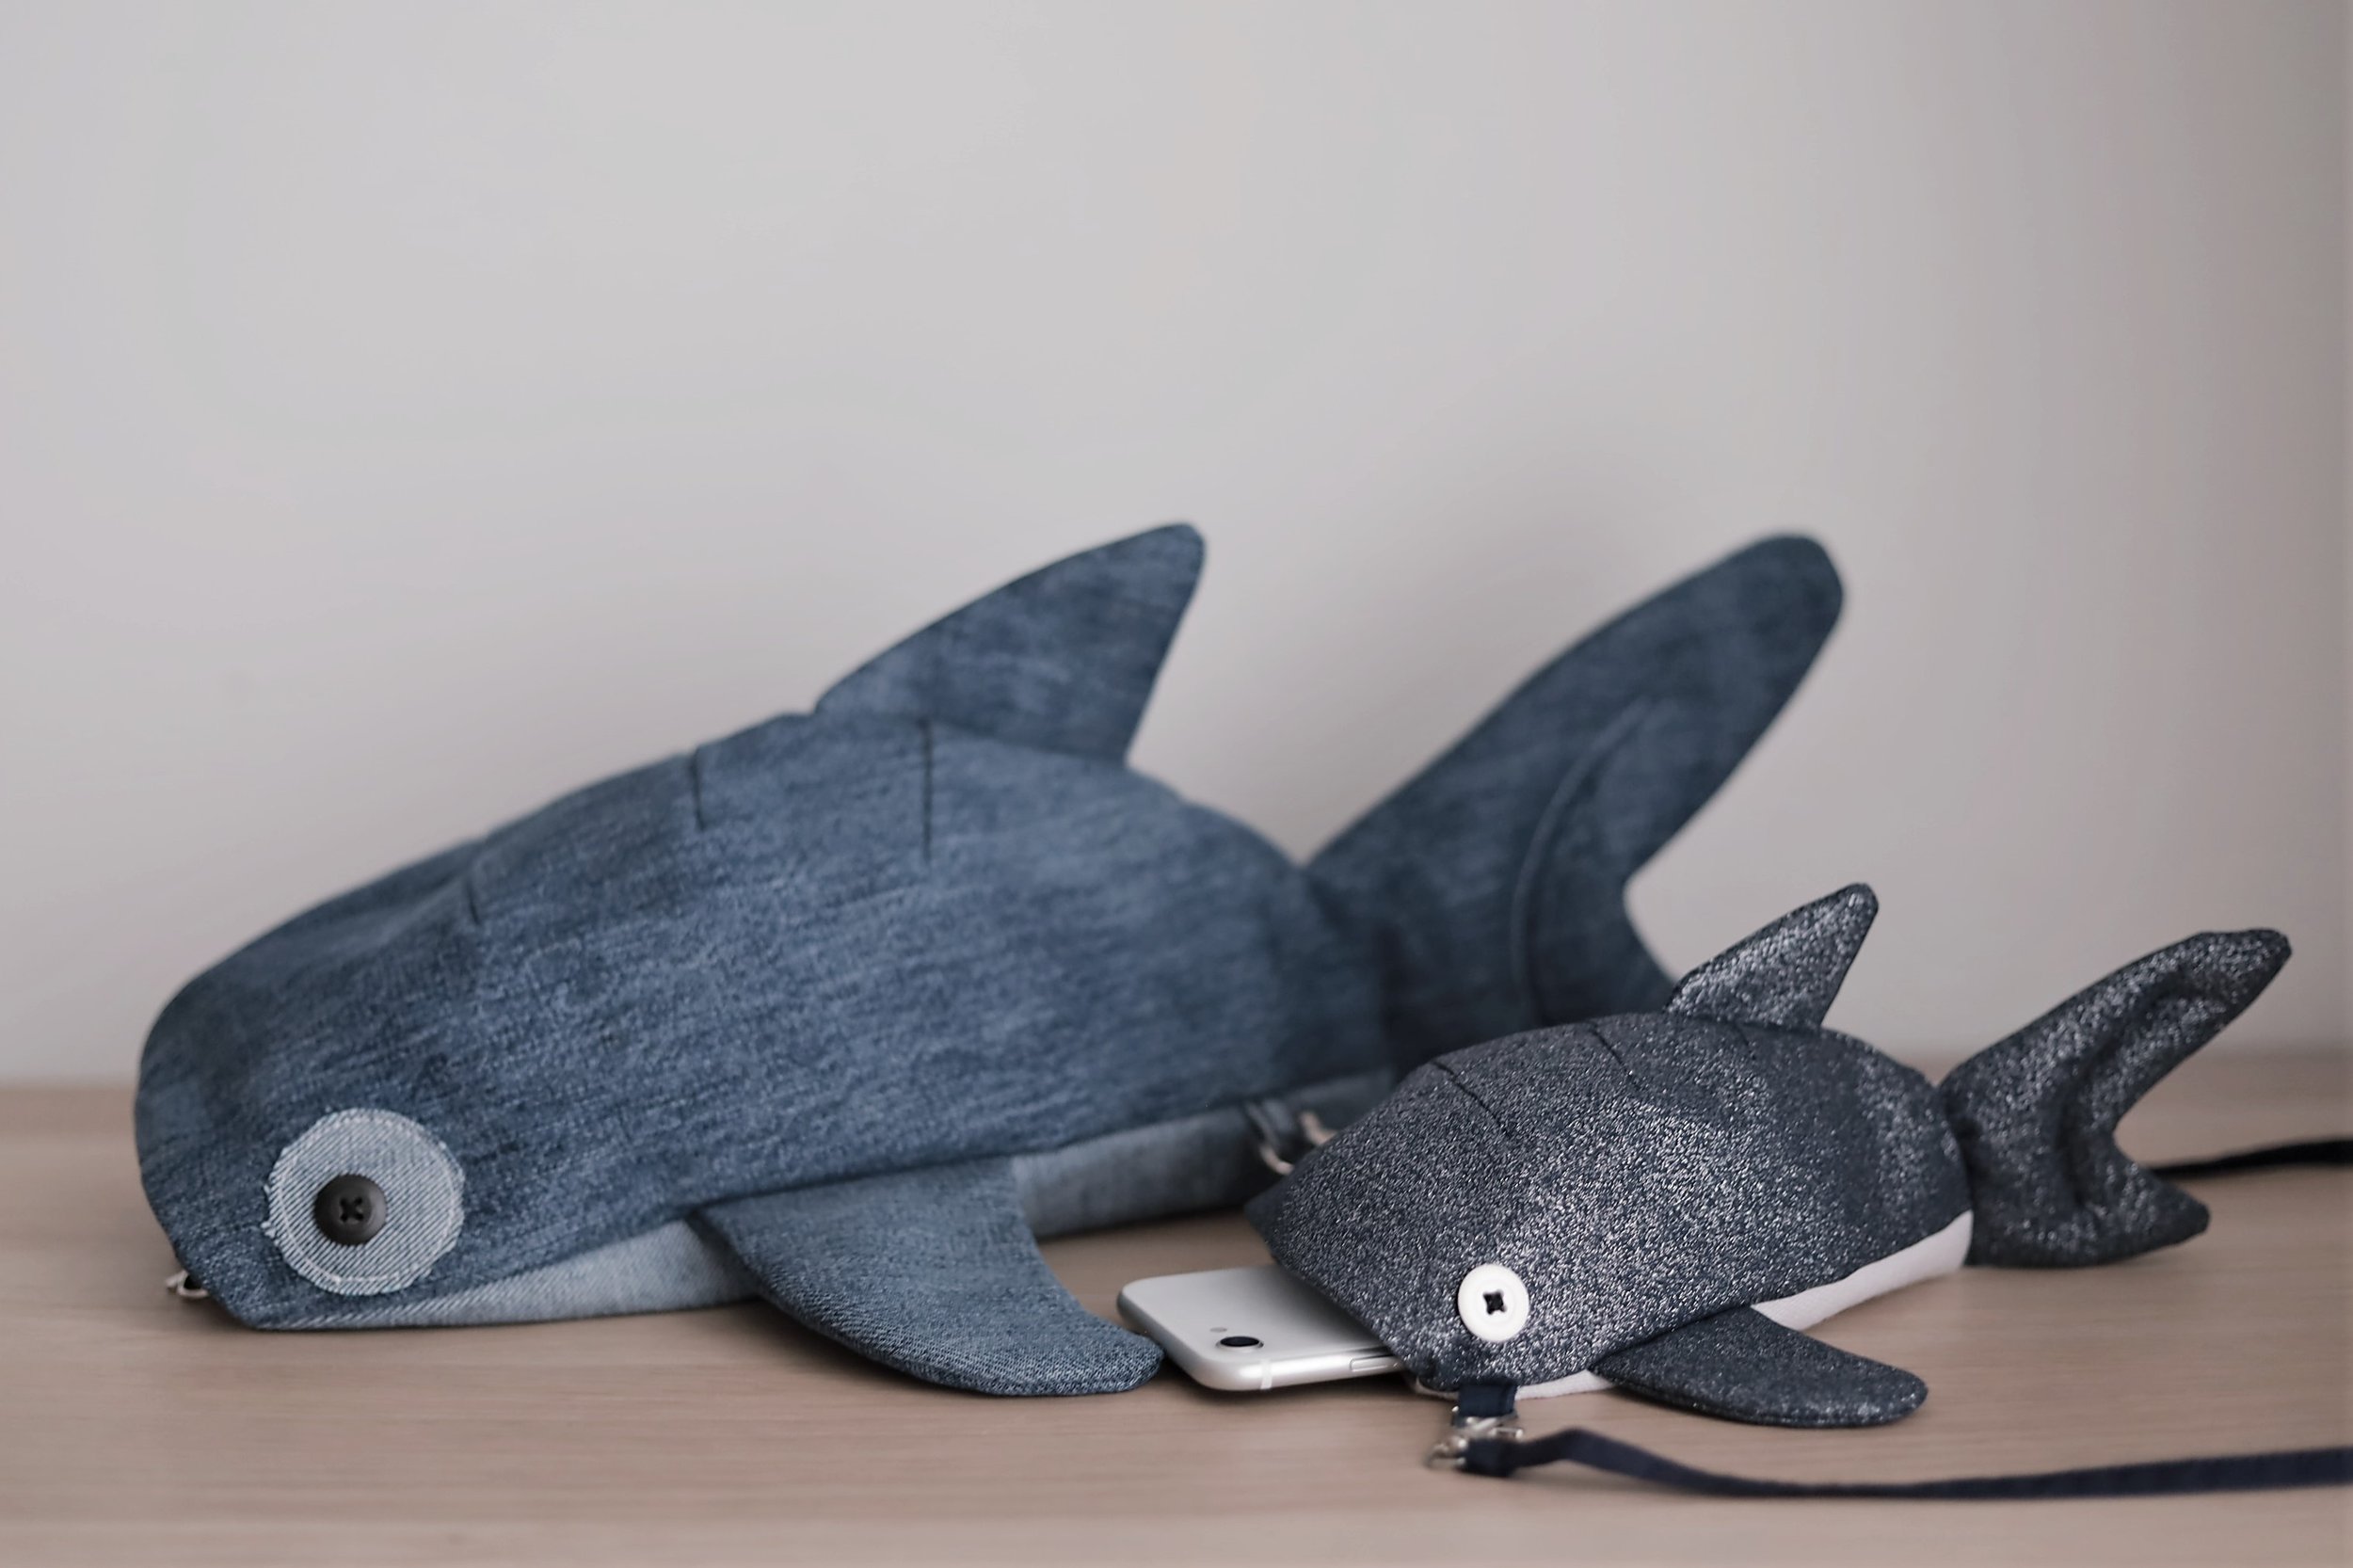


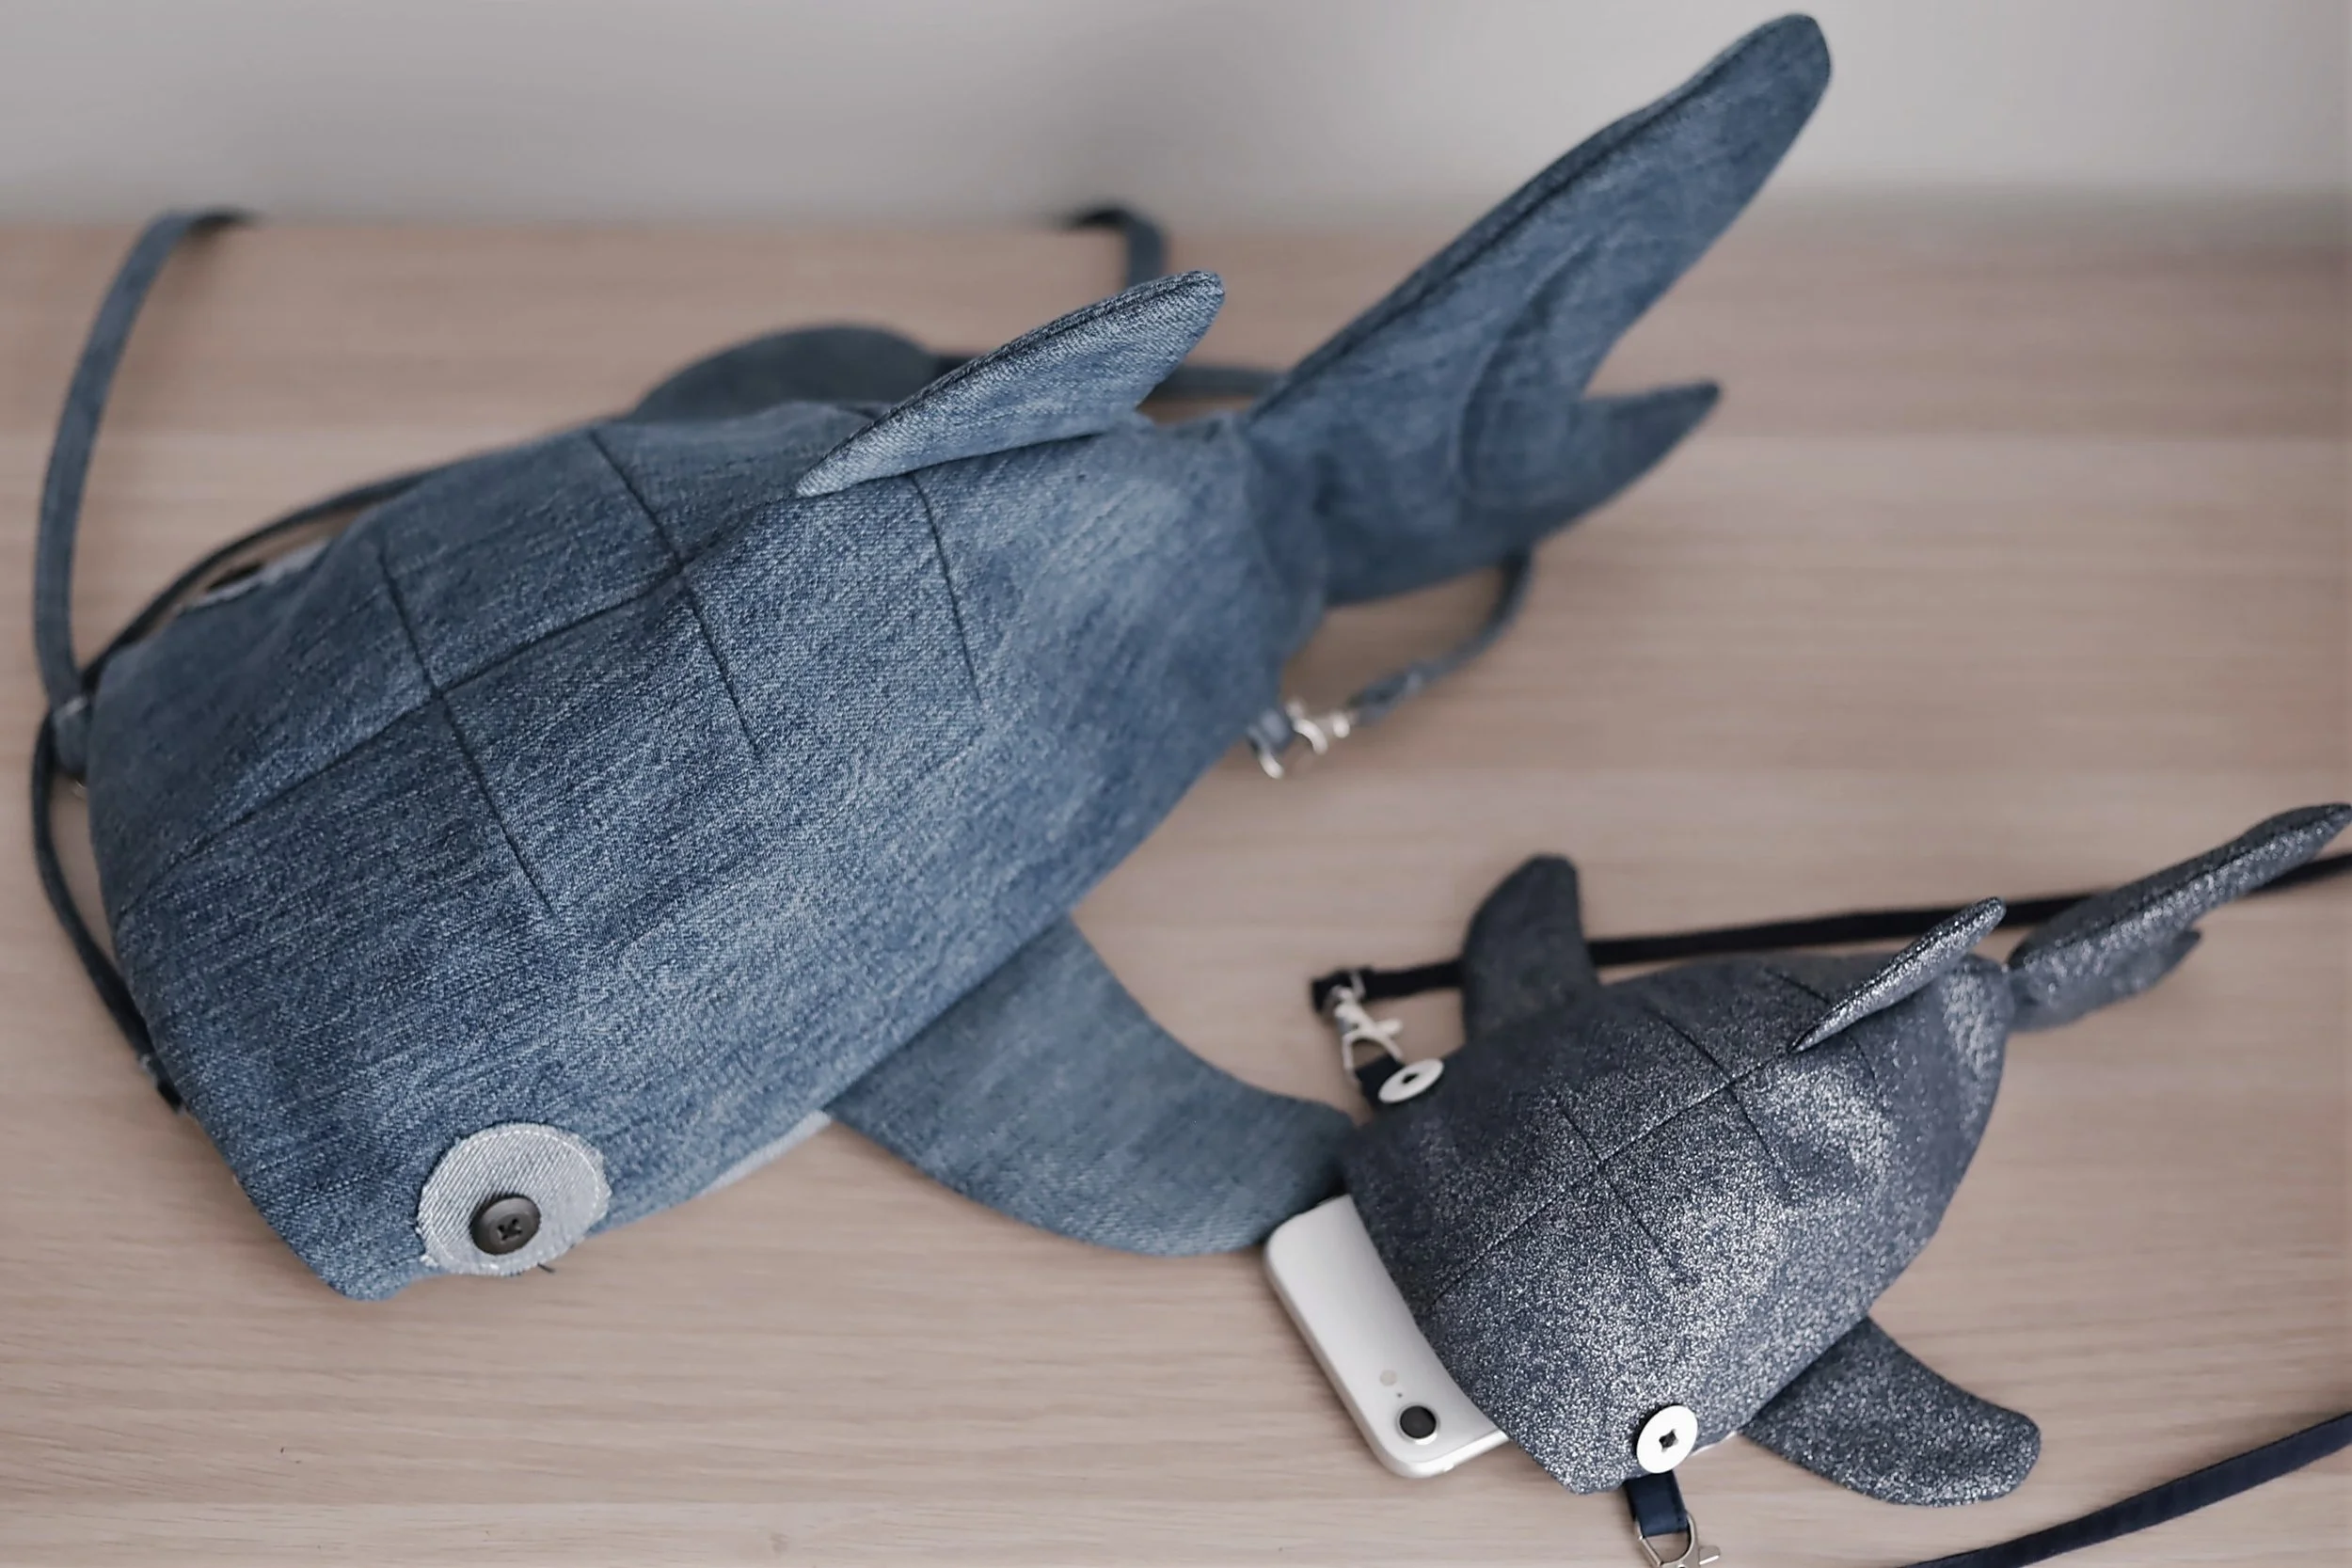
Although the large size bag is more suitable for those with some experience of sewing, partly because of the thick denim fabric I used (I have a industrial sewing machine. I think a domestic sewing machine will also do the job, but might require turning the hand wheel manually occasionally for some really thick areas.) , and partly because of the zip opening. But I then made a small crossbody version with no zip and slightly lighter fabrics – this one is definitely easier to make!
Supplies:
Main fabric: medium to heavy weight fabric, such as denim, canvas or PU; or light weight fabric with additional interfacing
Lining fabric: any standard light to medium weight fabric
Interfacing of your choice and a small amount of hollowfibre polyester filling
2 (for small size crossbody bag) or 4 (for large size crossbody or backpack) lobster clasps with inside diameter around 15mm
2 buttons for eyes (optional)
1 zipper of 15cm (optional)
Sewing Tutorial
Print the pattern with the scale as you desire: 100% for the large size and 55% for the small size, and anything in between for medium sizes.
For large size (i.e.100% scale), all seam allowances are 1cm (⅜”). For other sizes, the seam allowance = 1cm x the scale. For example, if you printed the pattern with 70% scale, the seam allowances should be 0.7cm.
We recommend adding interfacing to the main fabric - this will make the bag more structured and hold its shape better.
1. Creating fins
a. Pair the pattern pieces for fins (two pairs of dorsal fins (A), one pair of pectoral fin(B), and one pair of tail(C)) with the right sides touching and raw edges lined up. For dorsal fins (A) and Pectoral fin (B), you can add a layer of interfacing to make the fins sturdier. I used some thin battering. You can also use other fabrics as interfacing. Sew slowly around the curved edges as indicated in the picture. Trim off half of the seam allowance using pinking shears.


b. Turn the fins and tail to the right side with the help of a pointy stick and iron flat. Stuff the tail (C) with a small amount of polyester filling. Put a little at a time and spread them evenly. Don’t put too much fillings as it would make it difficult to sew the curve in the middle. We only need enough to hold the shape of the tail. Sew the curve in the middle of the tail. Sew along the opening with half seam allowance (e.g. 0.5cm for the large size).


2. Creating loops and eyes
a. Loops: For large size bag, cut 4 pieces of square measuring 5cm*5cm on the main fabric. For small or medium crossbody bag you will only need to cut 2 squares measuring 4cm*4cm. Fold the squares in half with wrong sides touching and iron flat. Open the squares and fold in both raw edges to meet in the central line. Fold again along the central line and iron. Sew close along the edge using 0.1cm seam allowance.
(For my mummy shark, I directly cut off the belt loops from the jeans so I can skip this step. See the picture for step 3b.)

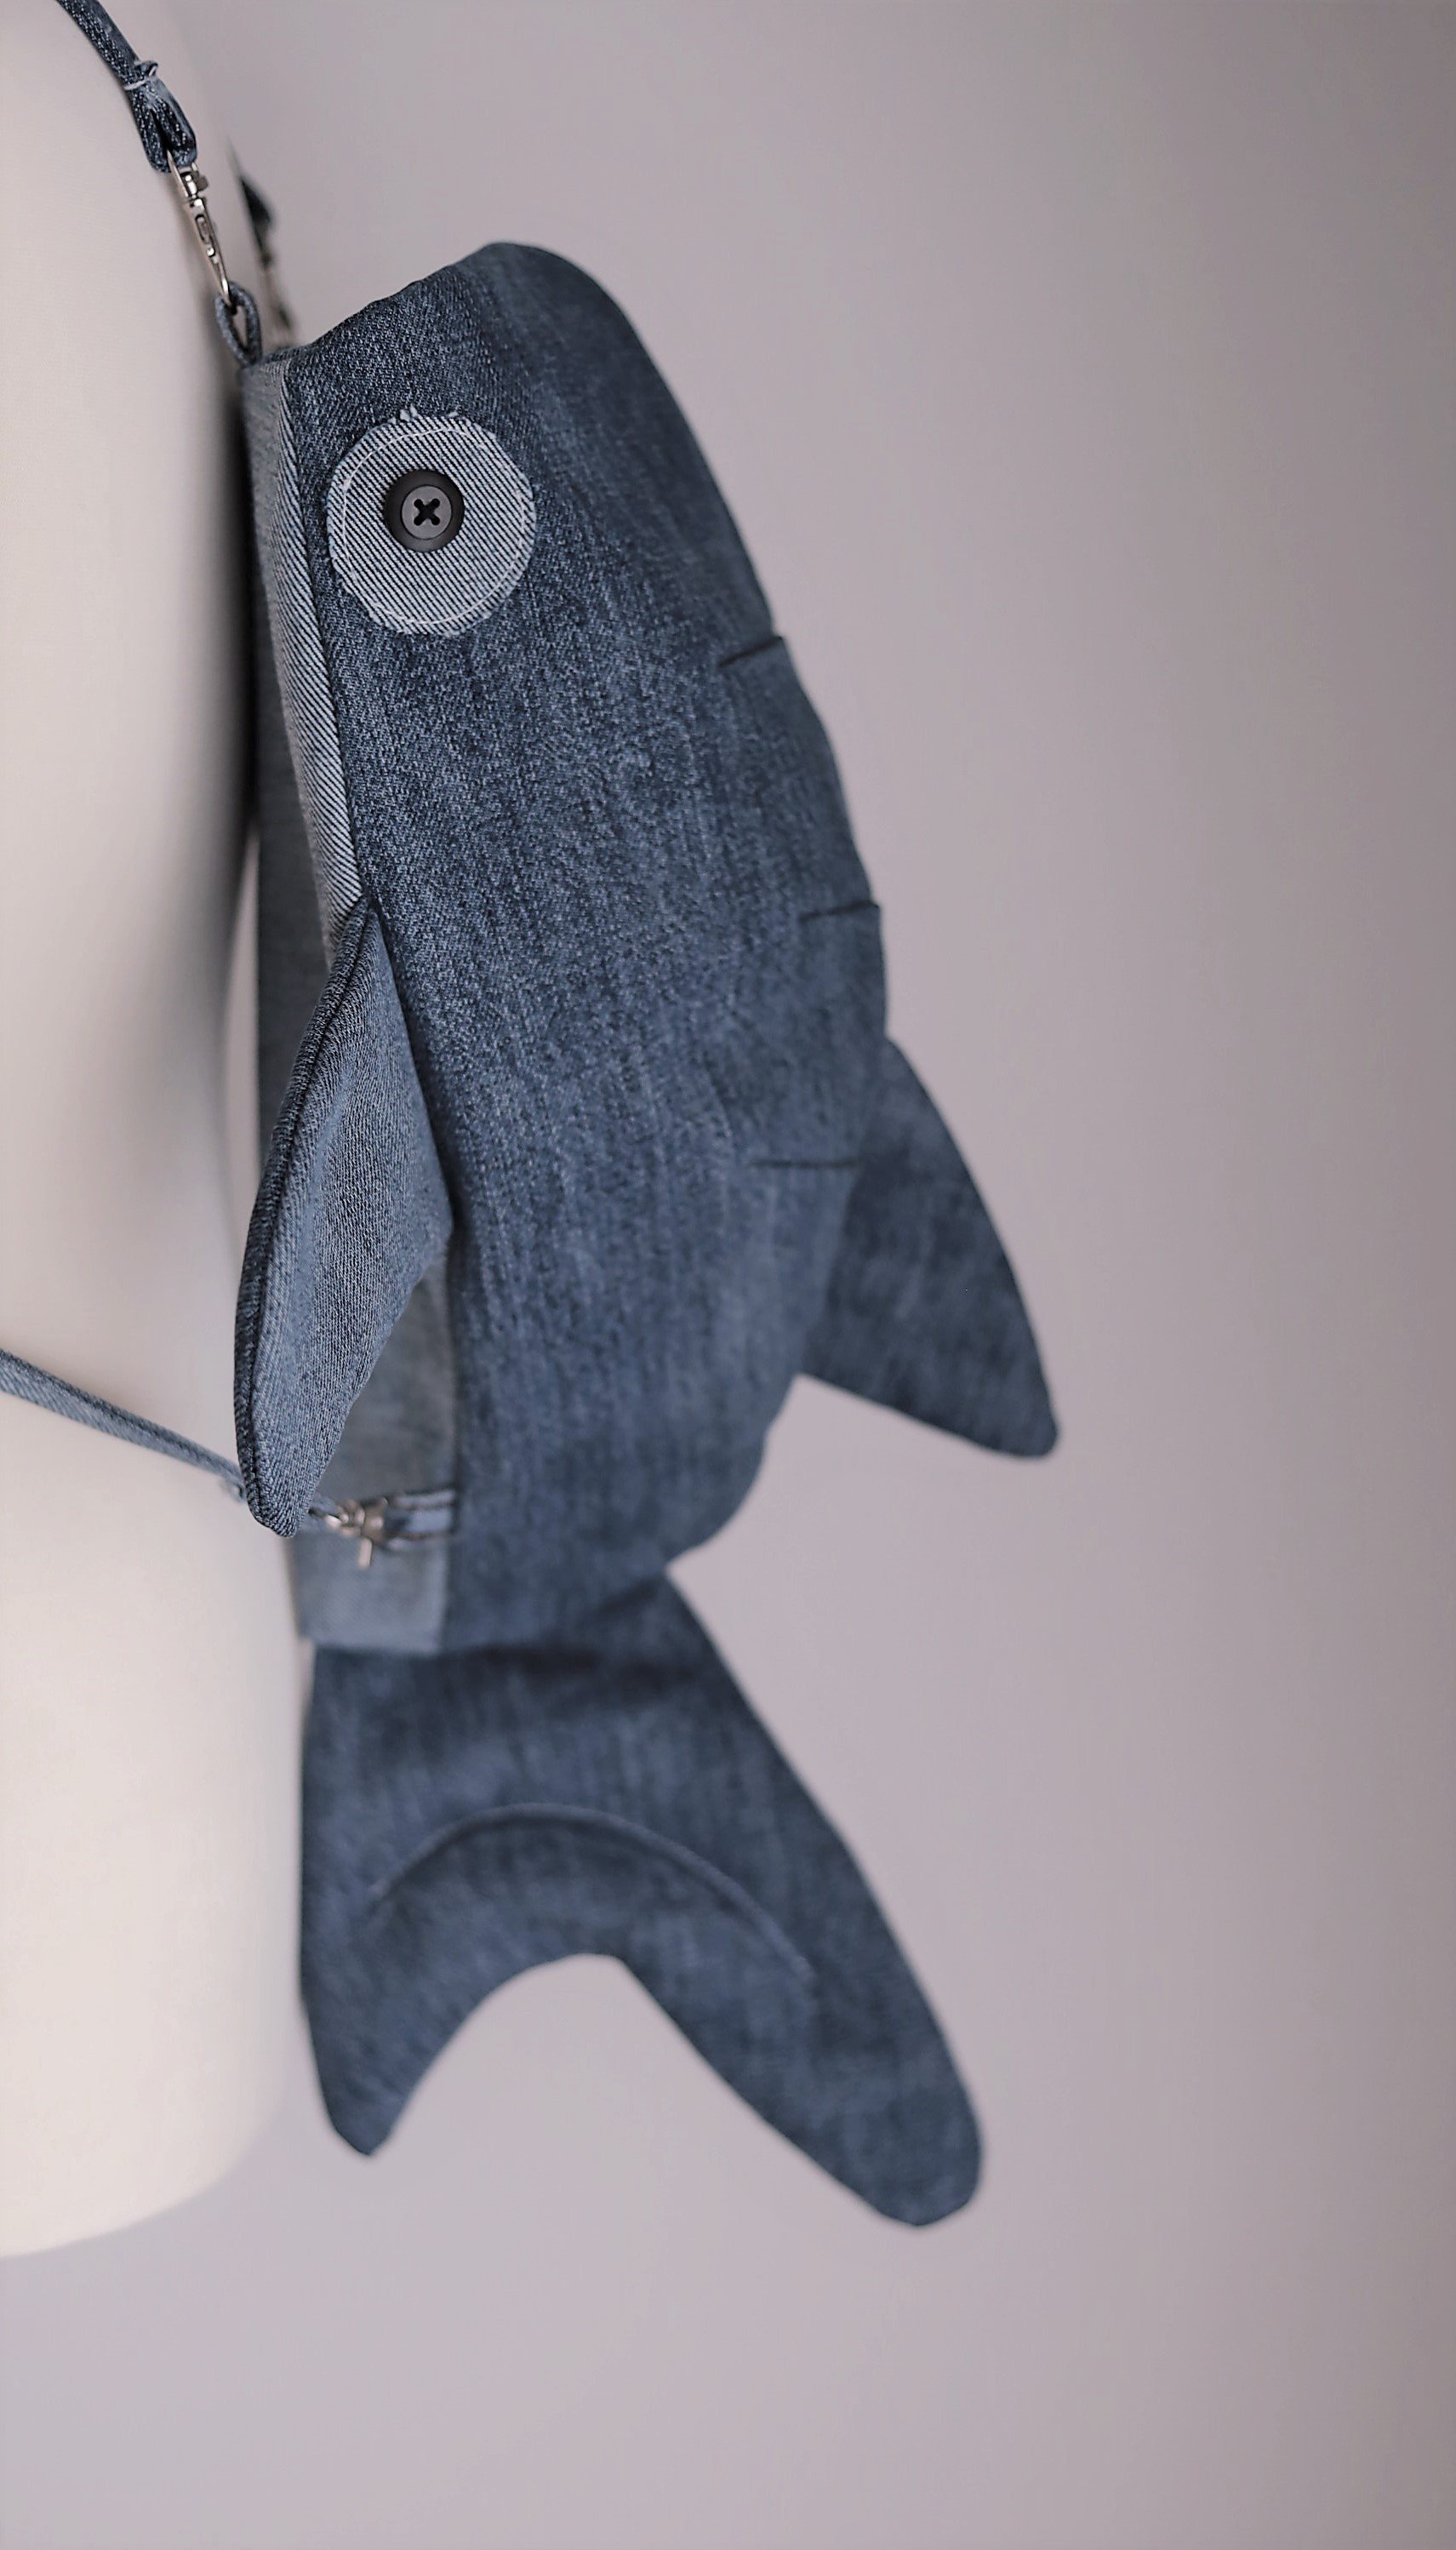
b. eyes: Cut two circles (see Back (D) pattern piece) from the fabric you choose for the eyes. For large size mummy shark, I use the wrong side of the denim fabric for eyes. For small bag baby shark I simply used buttons. I also add buttons for mummy shark’s eyes but it is optional. Pin the circles to the right side of the back pieces (D) according to the pattern, and sew slowly around using 0.1cm seam allowance. Sew the buttons on by hand.

3. Creating the body
a. Sew the darts on the back pieces (D) and iron them towards the tail. Place the two back pieces (D) together with the right sides touching and the pectoral fin (B) sandwiched in between – the pectoral fin should start from the marked point for “fin” on the pattern.


Line up the raw edges, sew along the back curve and stop at the point marked with “tail” on pattern (D).


b. Fold the loops created in step 2a in half, and attach them to the right side of the belly piece (E) according to the marked positions on pattern half seam allowance. For mummy shark, attach 4 loops in total as shown in the picture, and 2 for baby shark using the read marks on pattern. Align the front of the dorsal fin (A) to the mark on pattern (E) and sew along the raw edge using half seam allowance.
Place the belly (E) and Back (D) together with the right sides touching and raw edges lining up. Sew the side seams.


4. Attaching the lips & tail
a. Place the upper lip piece (F) and lower lip (G) together with the right sides touching and the short sides lining up. The longest side of (F) should be with the longest side of (G). Sew along the two short sides. Iron the seams open.

b. With right sides touching, place the lips around the shark body. The larger/longer side should face the tail. Make sure the side seams of the lips are aligned with the side seams of the body, and the centre of the lips are aligned with the centre of the back and belly. Sew around to attach the lips. Flip the lips to the right side and iron. Fold it in and iron again.


c. Turn the body to the wrong side. Insert the tail from the mouth with the big side facing the centre back. With the tail sandwiched in the middle, line up the raw edges and sew along. Turn to the right side and iron.


5. Creating the lining
a. Sew the darts on the back lining pieces (H), and iron the dart towards the tail. Place the two back lining pieces (H) together with the right sides touching and the raw edges lining up. Sew along the back curve.


b. Make the inner pocket (optional): Fold both sides and the bottom edges of the pocket piece (I) to the wrong side by the seam allowance (i.e. 1cm for mummy shark) once and iron flat. Fold down the top edge twice to the wrong side by the seam allowance. Sew along using 0.1cm seam allowance. Attach the pocket piece (I) to the belly lining(J) as indicated on the pattern, with the wrong side of the pocket (I) touching the right side of the belly lining (J). Sew along both sides and the bottom of the pocket using 0.1cm seam allowance.


c. Place the belly lining (J) and the back lining (H) together with the right sides touching and the raw edges lining up. Sew along the side seams first, leaving a gap on one side for turning later of around 6cm, and then along the tail - it is fine to gather or fold the tail of the belly.

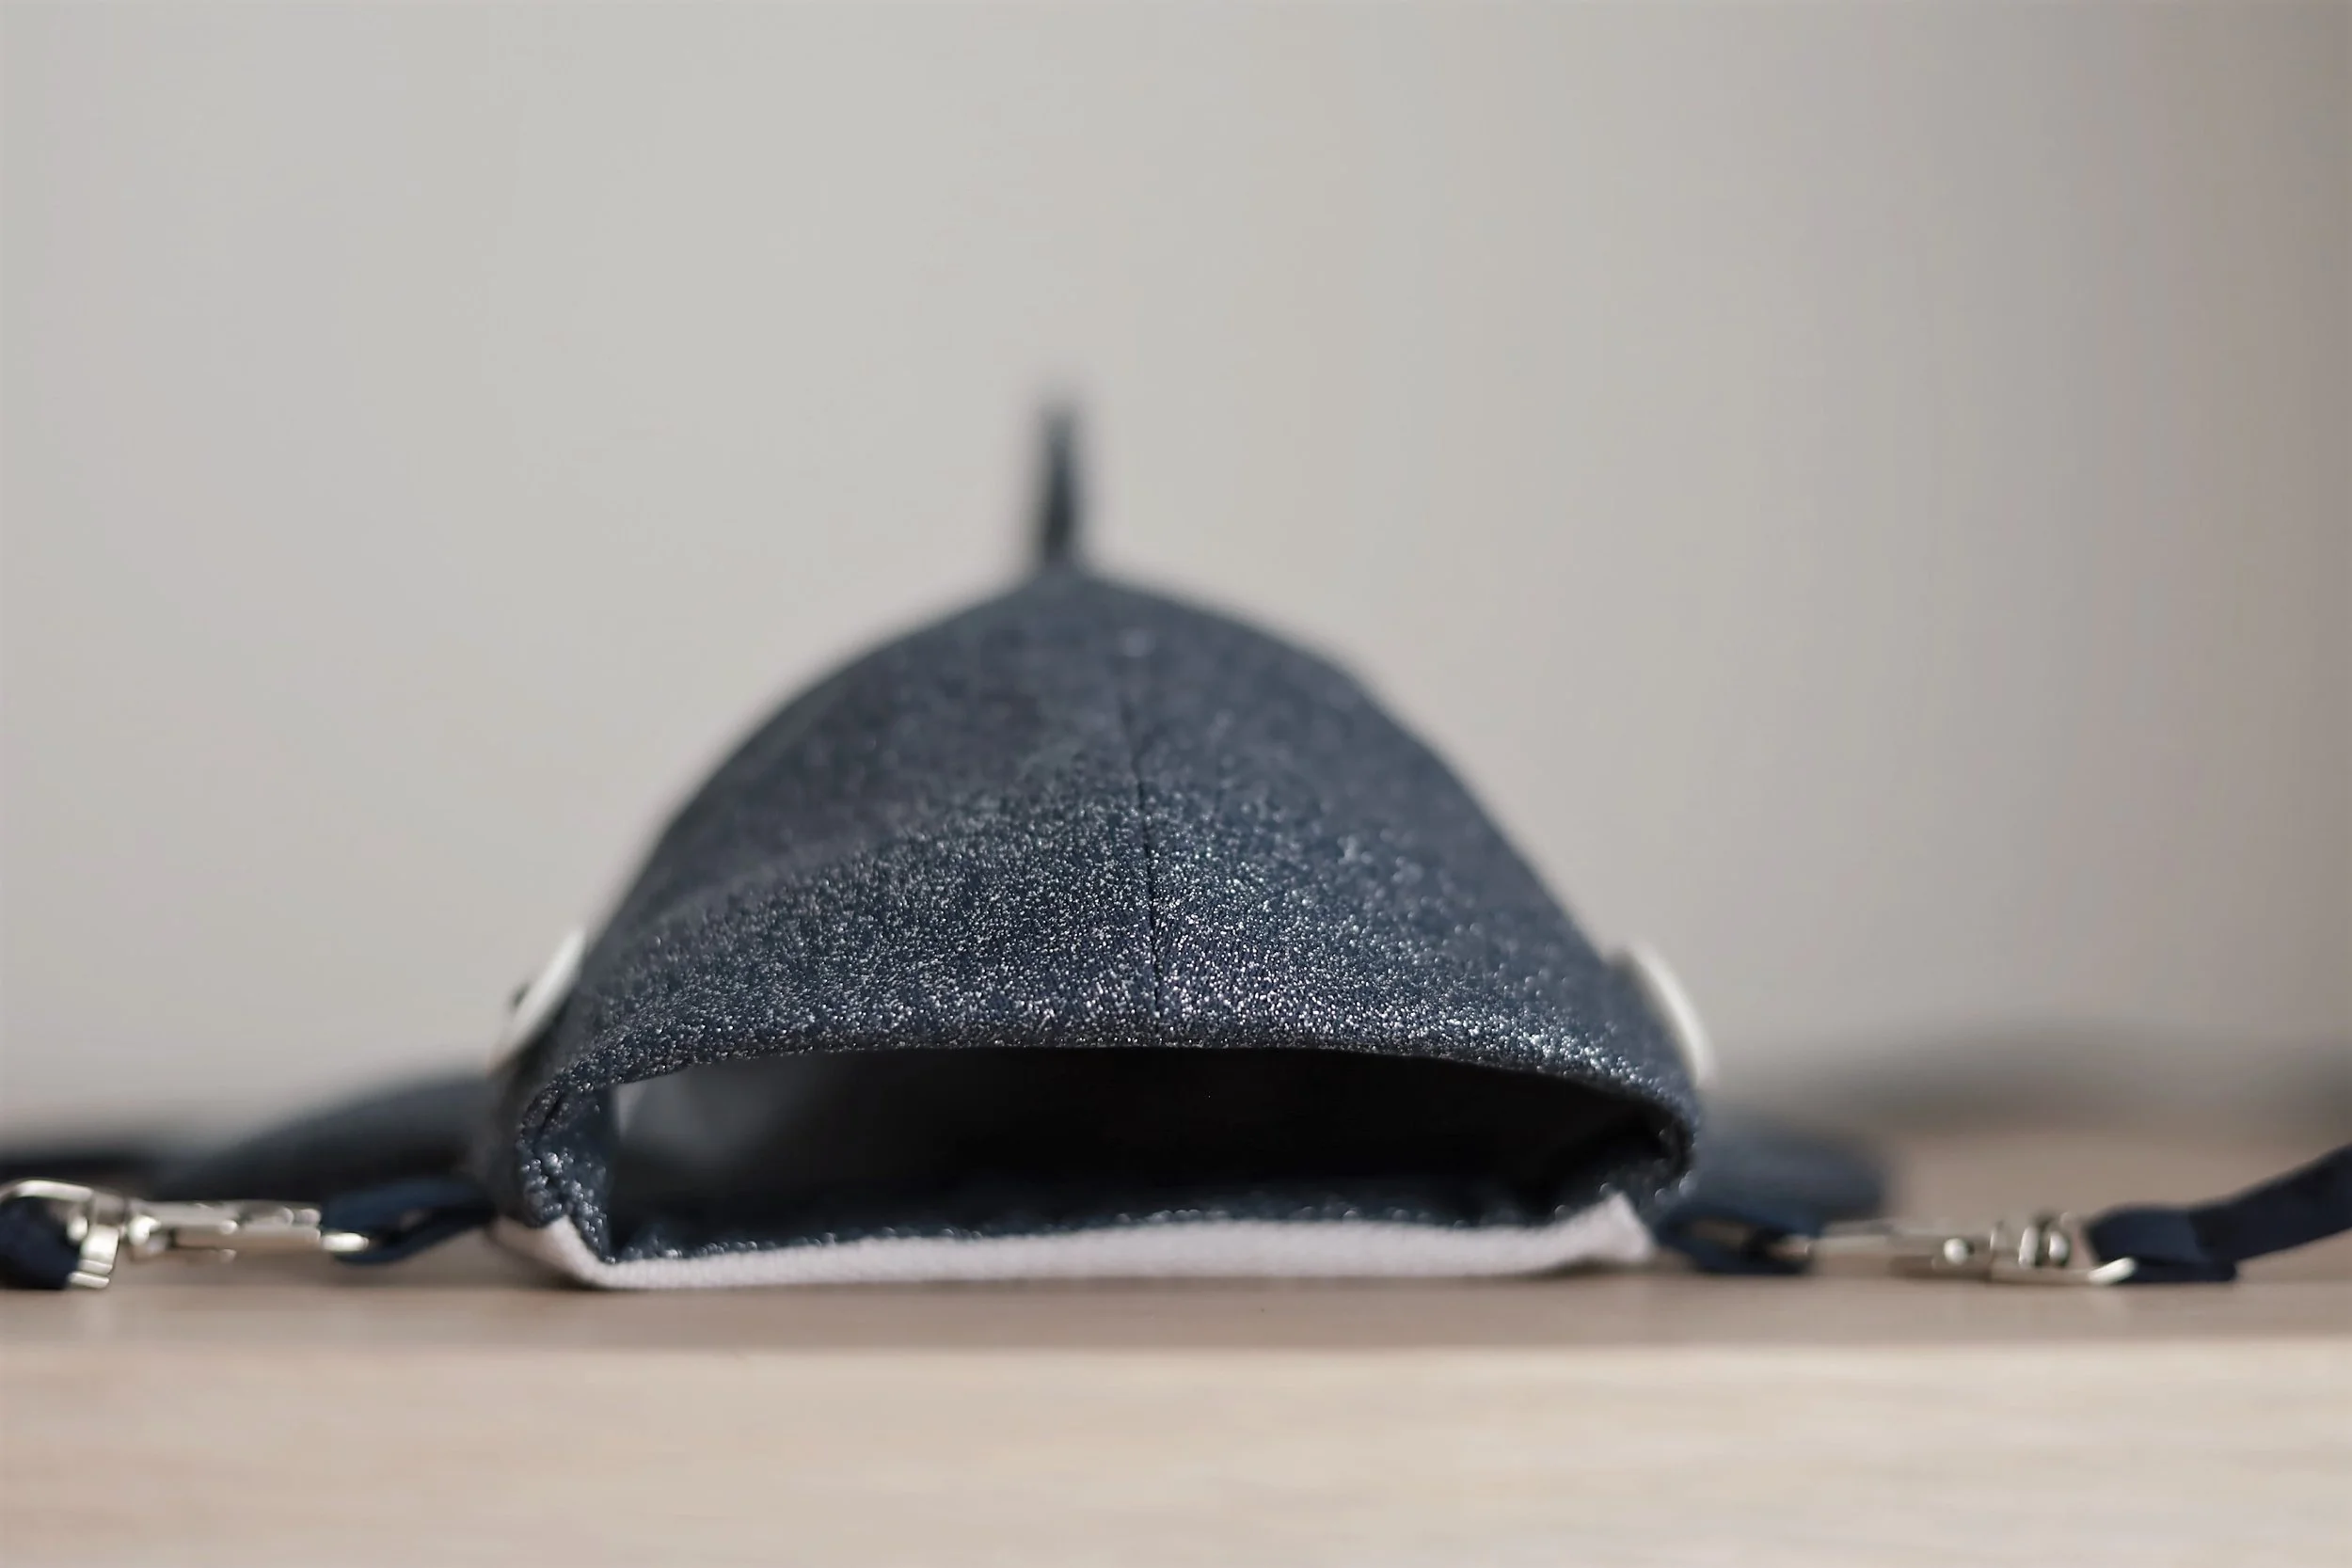
6. Attach the zip (Mummy shark) or finish the opening (baby shark)
a. Zip version:
Place the two upper zip pieces (K) (main and lining) together with the right sides touching and raw edges lining up. Fold in the long straight edge by the seam allowance (e.g. 1cm for mummy shark) to one side (it doesn't matter to which side). Sew along the two short edges. Turn to the right side - now it should be easy to fold in the long straight edges by the seam allowance. Iron flat. Repeat with the lower zip pieces (L).


With the right sides facing up, sandwich one side of the zip in between the main and lining piece of upper zip (K), aligning the middle of the zip with the middle of the long straight side of upper zip piece (K). Change to the zipper foot and sew closely along the edge.
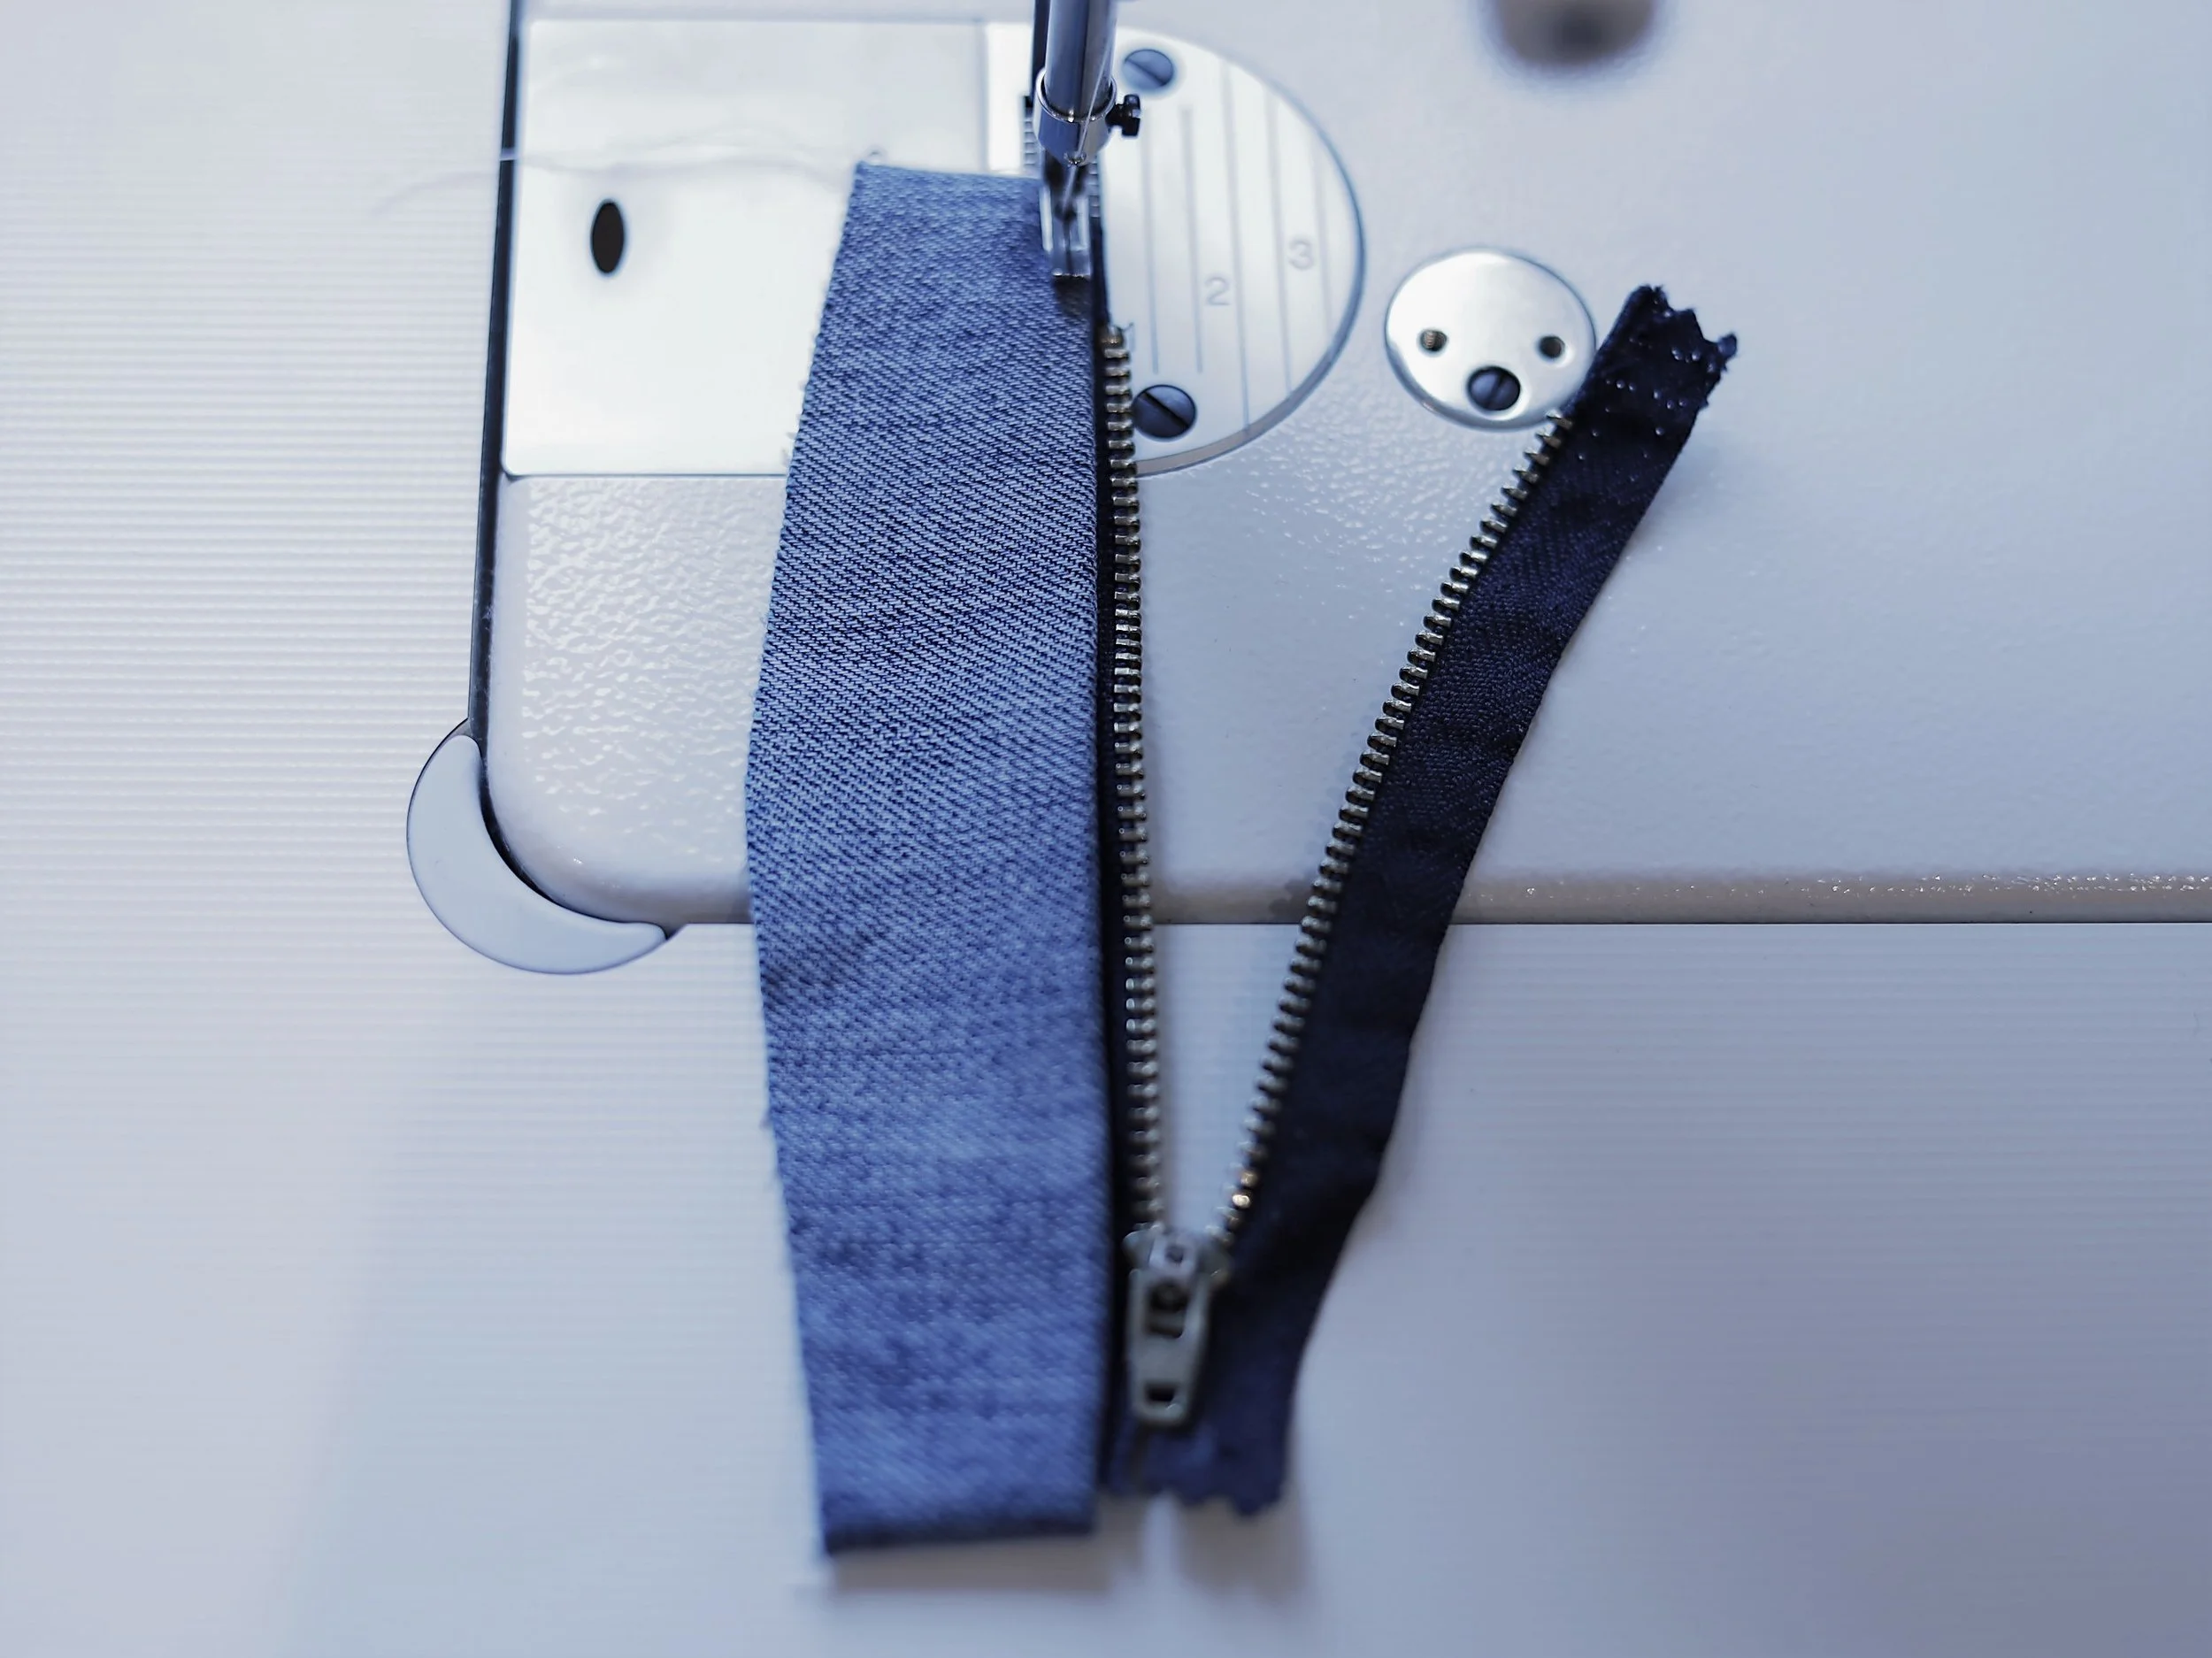

Repeat with the other size of the zip and the lower zip piece (L). When sewing, it might be difficult to pass the pull of the zip. You can either stop there, back stitch, pull the zip to another place, and continue to sew from where you stop; or lift the foot and pull the zip while the needle is still down in the fabric before continue to sew.


b: No zip opening:
Place the two upper zip pieces (K) (main and lining) together with the right sides touching and raw edges lining up. Sew along the three straight edges. Clip the corners. Turn to the right side and iron. Repeat with the lower zip pieces (L).


7. Finishing the bag
a. Zip version:
Turn the body lining wrong side out. With the lining of the zip pieces (K) & (L) touching the right sides of the back lining (H) and belly lining (J) respectively, and the centre of the zip pieces aligned with the centre of the back/belly lining, sew along the raw edges of the zip pieces (K) & (L) using half seam allowance.


b. No zip version:
Turn the body lining right side out. With the lining of the zip piece (K) & (L) touching the right sides of the back lining (H) and belly lining (J) respectively, and the centre of the zip pieces aligned with the centre of the back/belly of the body lining, sew along the raw edges of the zip pieces (K) & (L) using half seam allowance.

c. both versions:
Turn the body main to the right side, and the body lining wrong side out. Place the body main inside the body lining with their right sides touching and the raw edges lining up. Make sure to align their side seams and the centre points. Sew around the opening. (This step is much easier for no zip version. With zip in the middle, it is more difficult and you will have to tuck in the zip during sewing so that it is not in the way. )


d. Pull the body main out from the gap on the body lining you left in step 5c. Close the gap by sewing along using 0.1cm seam allowance or sewing by hand using hidden stitch. Tuck in the lining.


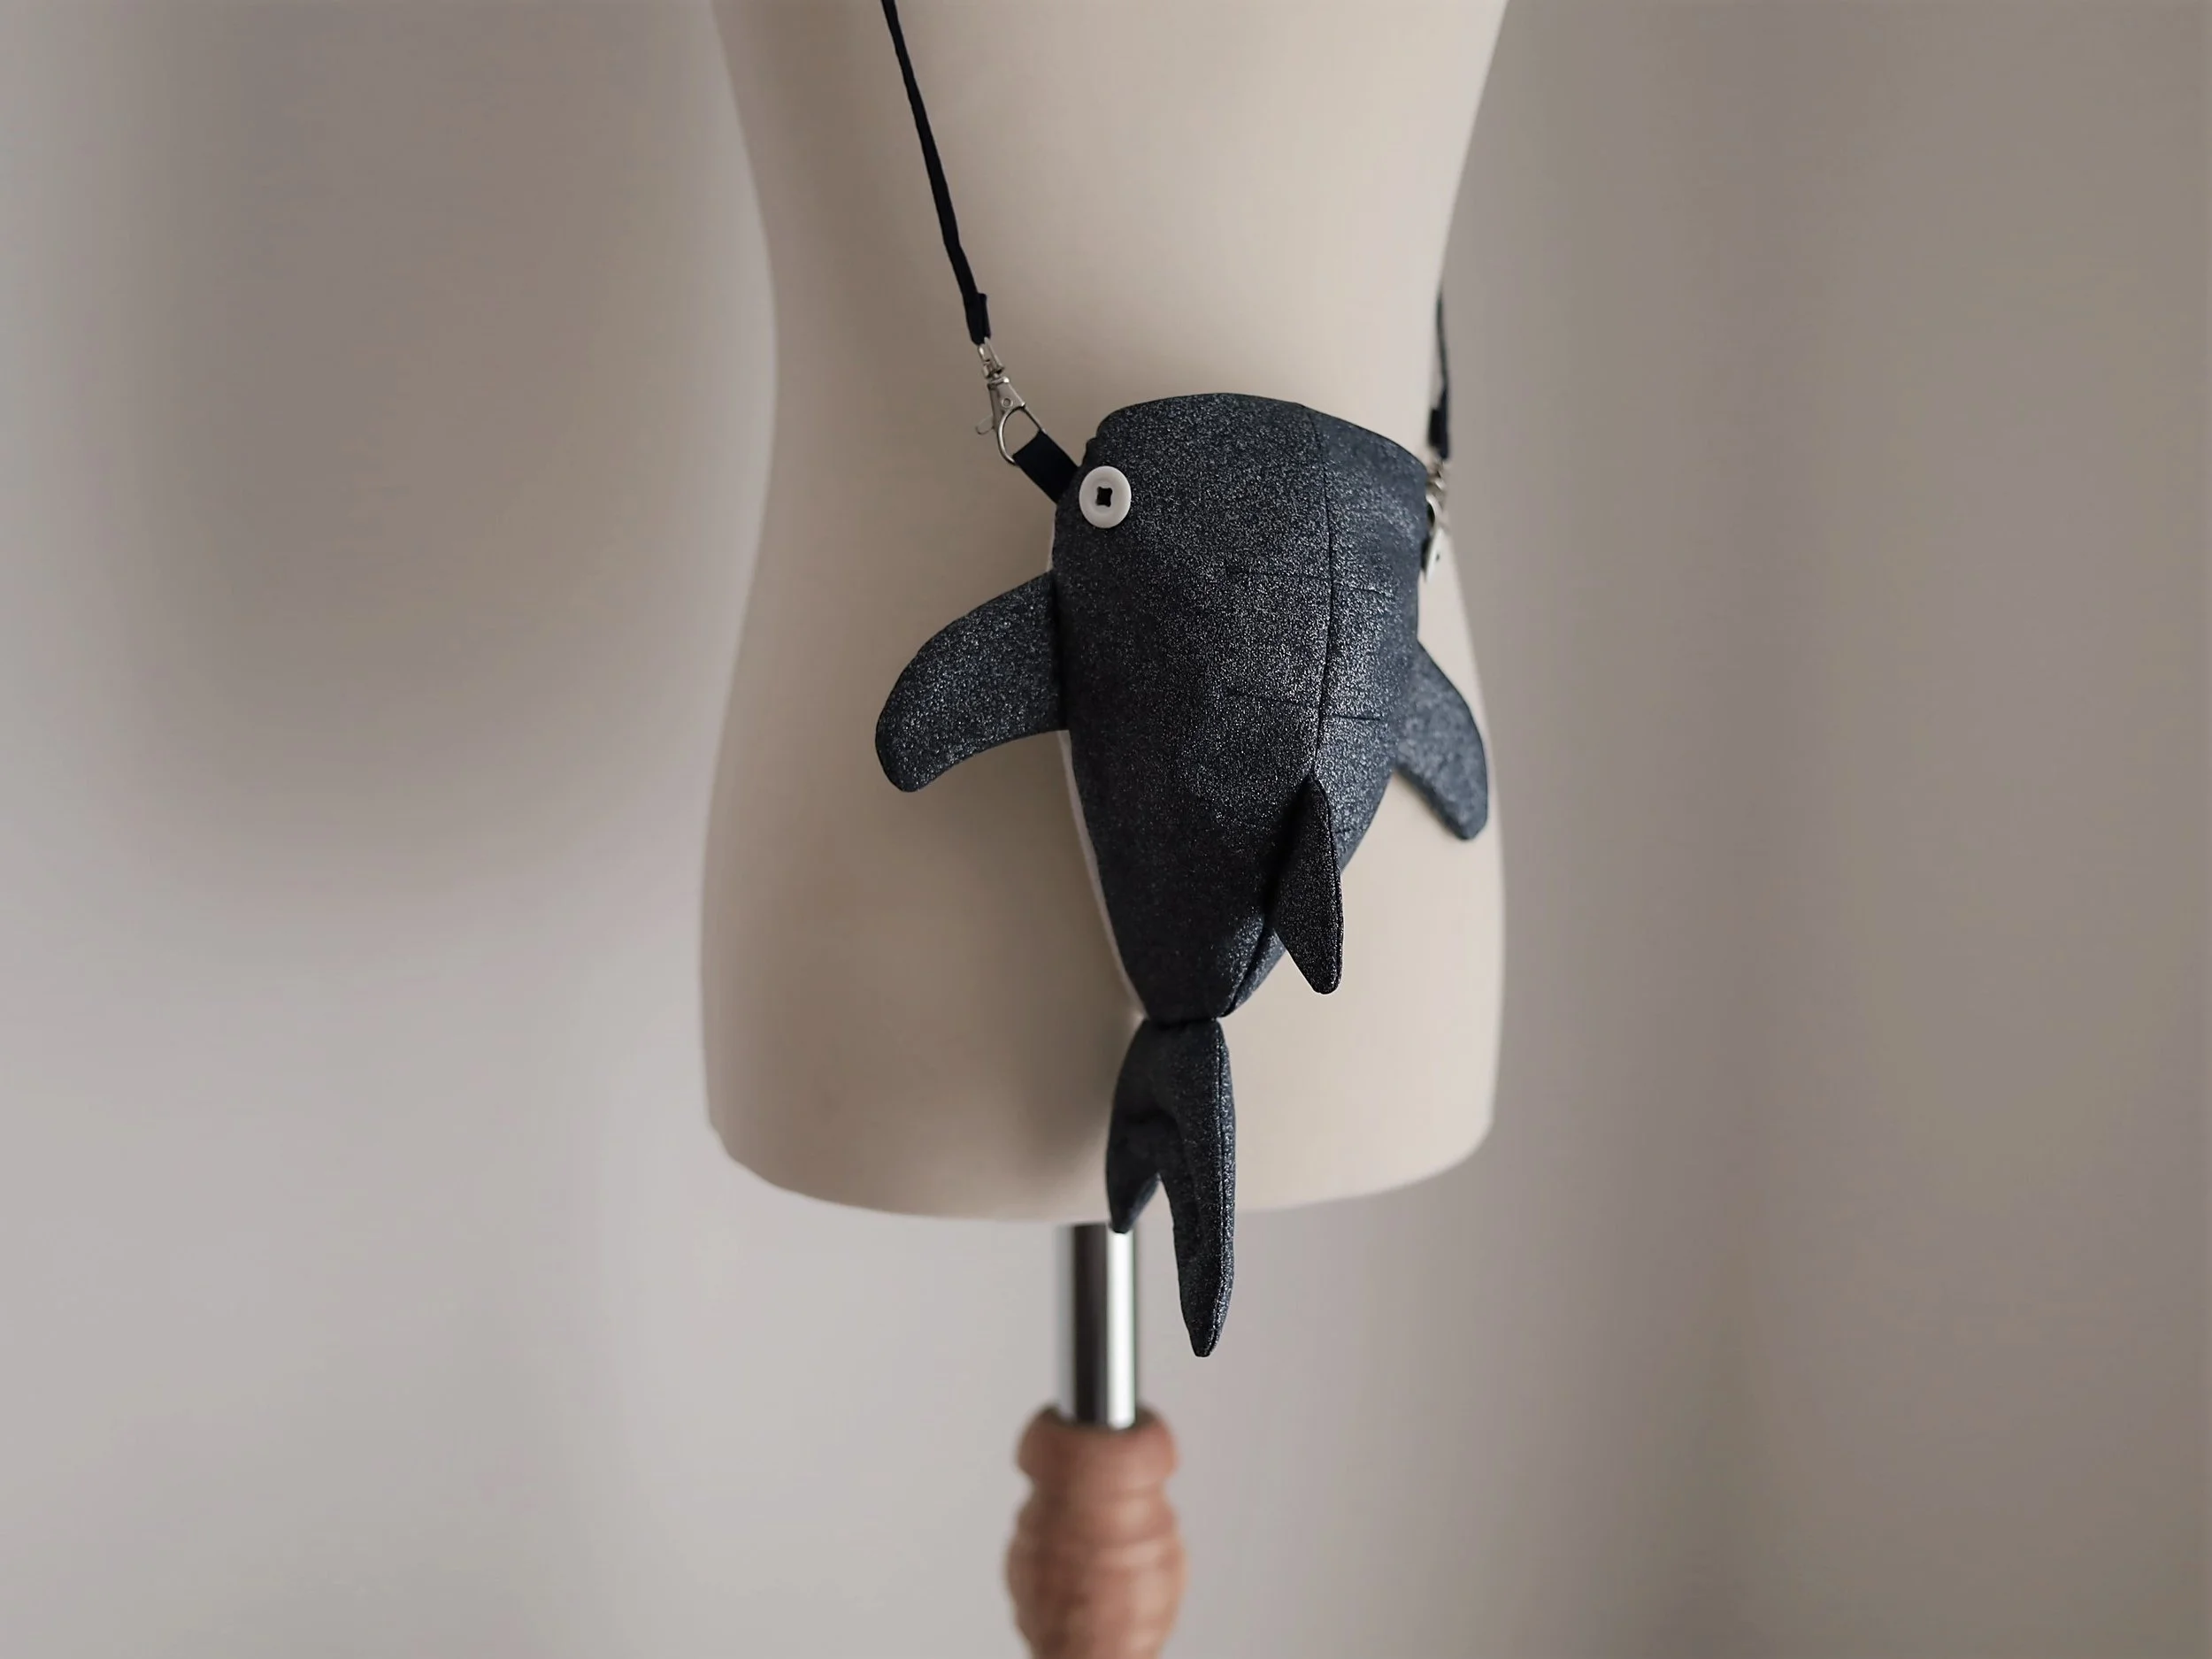
e. Strap(s): Cut one or two long strip(s) from the fabric of your choice. The number and length depend on whether it is backpack (two straps) or crossbody (one strap), and whether it is for grown-up or children. The best thing to do is to use either a measuring tap or a long rope to work out the desired length. The width of the strip = the desired width of the finished strap x 4. (I used 3cm for baby shark and 4.5cm for mummy shark because I only have small size lobster clasps and I need to make sure the straps fit the clasps. )
Follow the same method in step 2a to create the strap(s). Thread the end through the lobster clasp, fold over and sew across to fix it. Attach the lobster clasps as desired. Congratulations - you have now created your shark bag!
