Sashiko Coaster (or Placemat) Tutorial
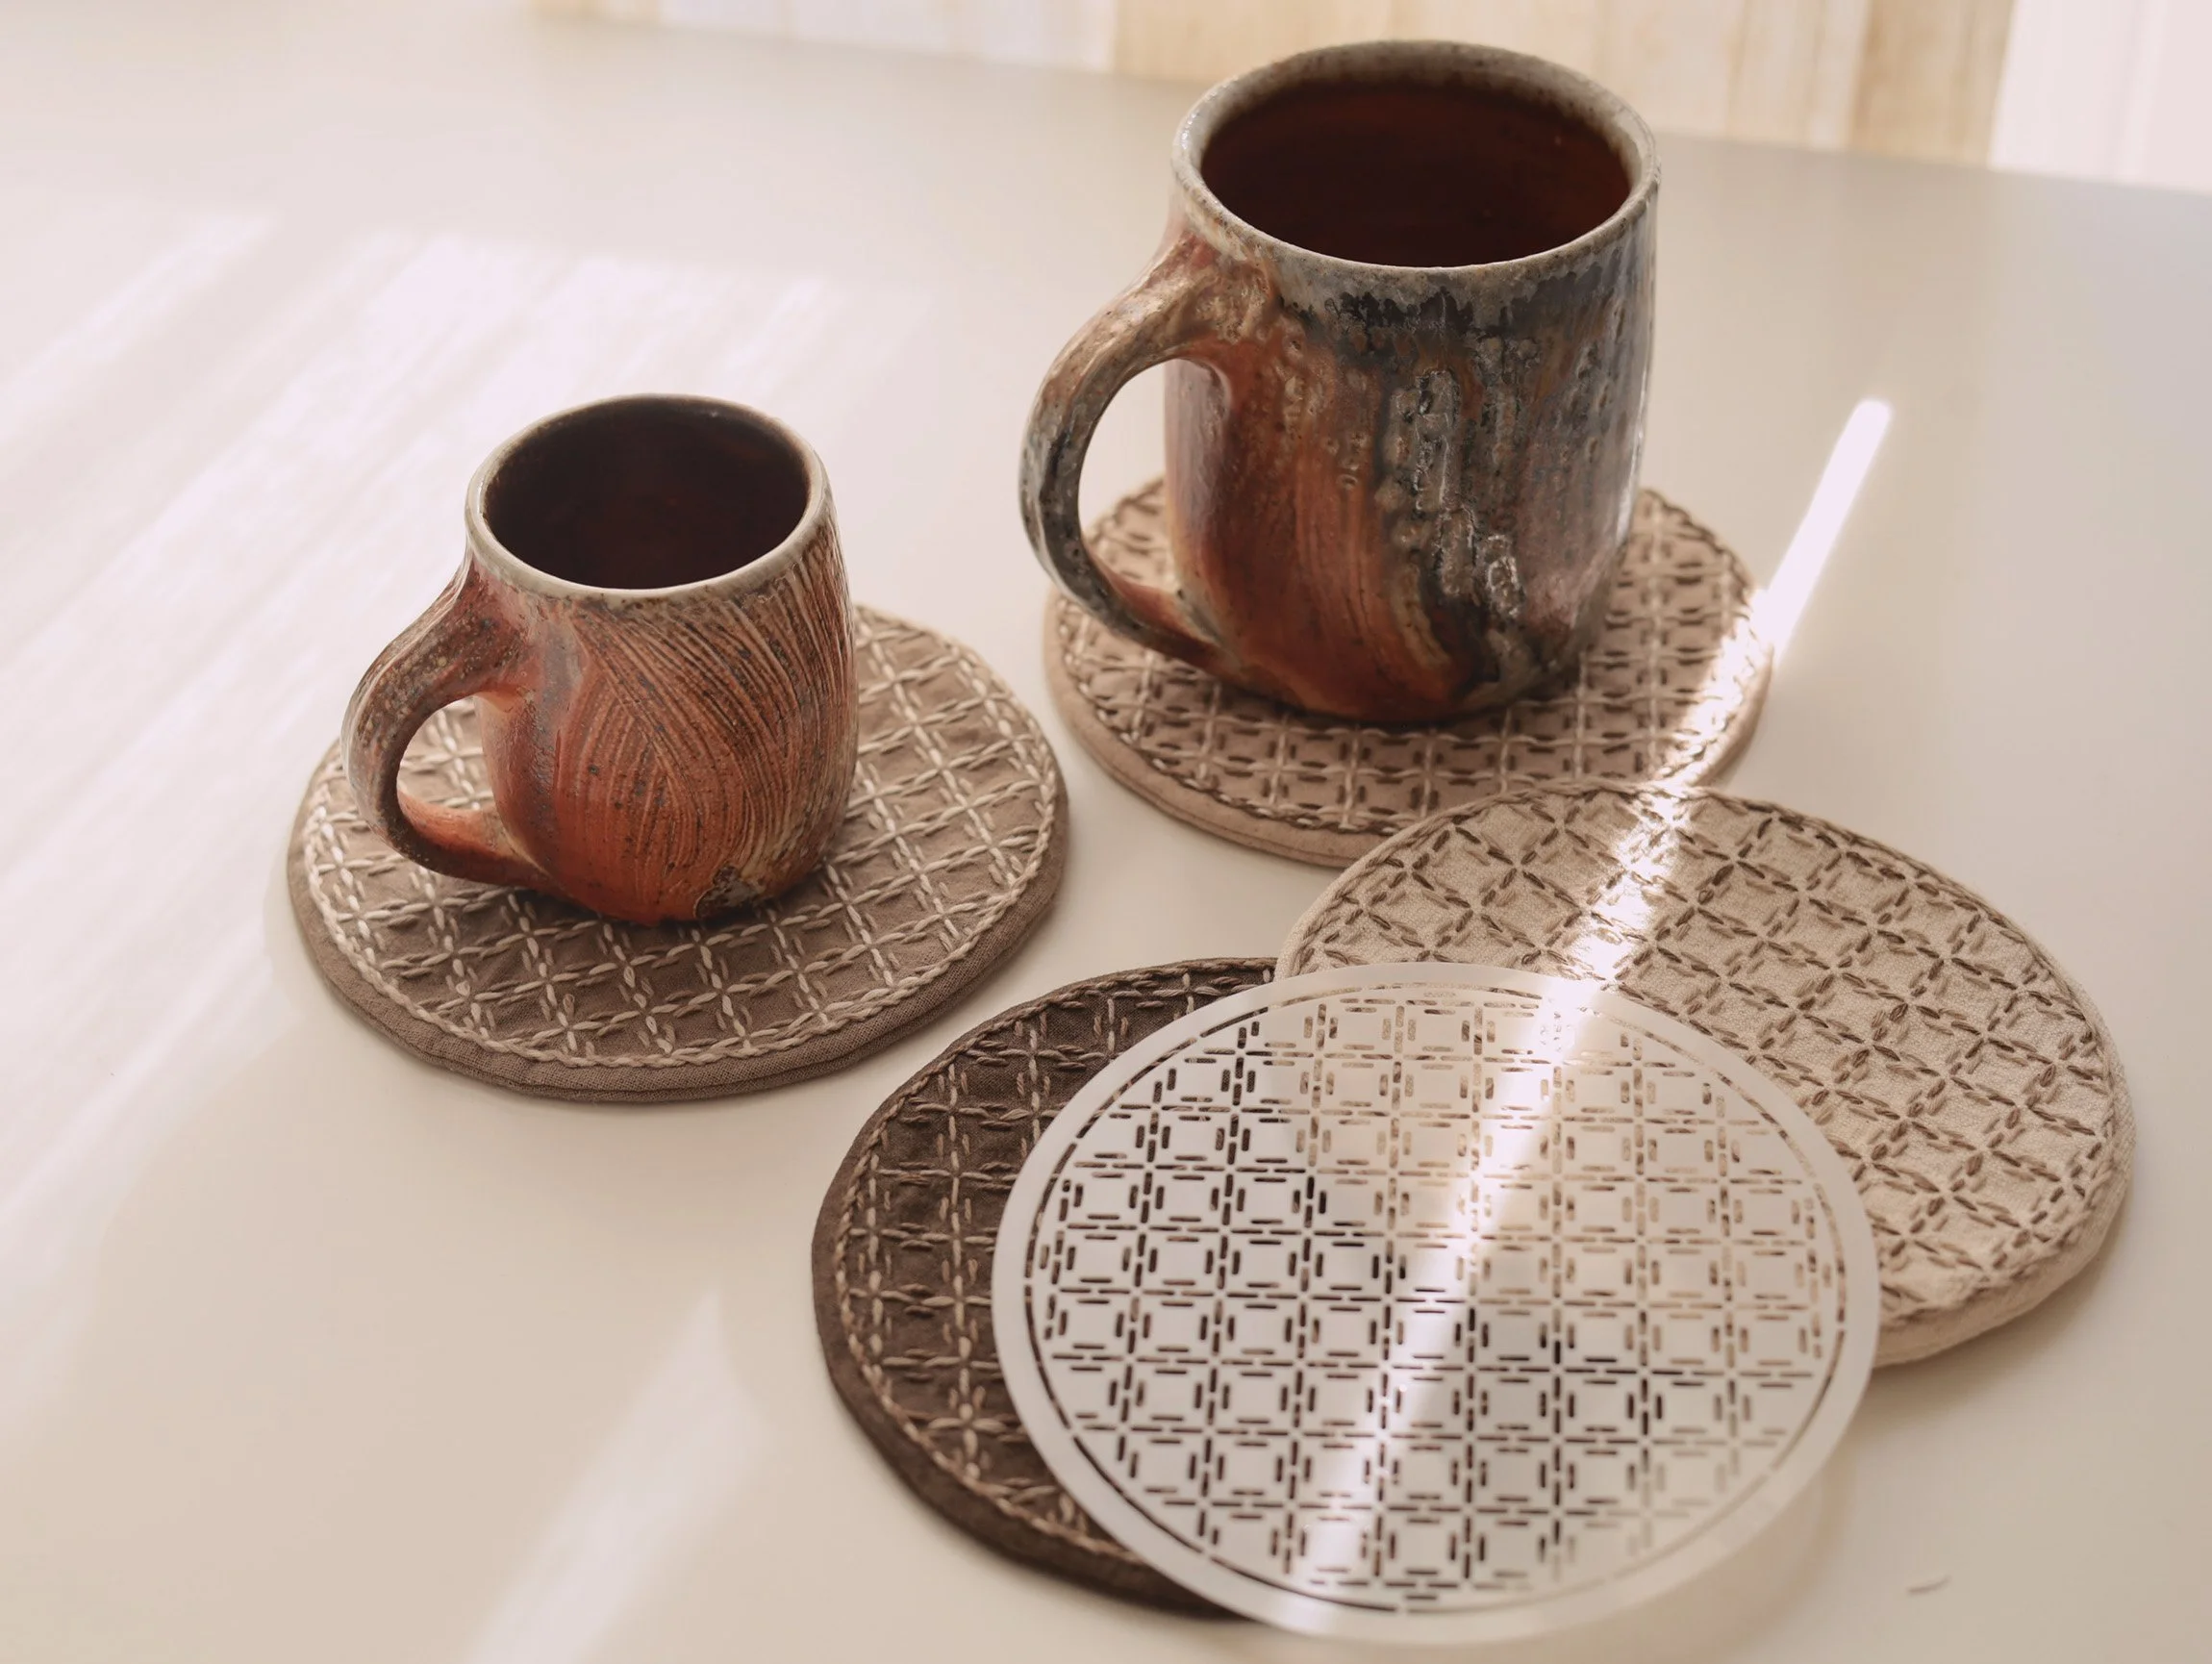
This tutorial demonstrates how to make the sashiko coasters shown in the cover photo. The same method can be used to create coasters or placemats with any of our other stencil designs.
Before You Begin
Interfacing: There are many different types of interfacing available. For coasters and placemats, we recommend using fusible fleece. Choose the thickness and texture that best suits your preference and the look and feel you would like your coaster or placemat to have.
Sewing Method: The sewing method may vary depending on the type of fleece interfacing you use. For the coasters in this tutorial, we use a lightweight, thin, and soft fusible fleece interfacing and a Sewing Method suitable for it. For thick or stiff fleece interfacings, please refer to the sewing method in step 4 of the Hexi Daisy Coaster Tutorial.
Fabrics and Thread: Medium-weight woven cotton or linen fabric and medium-weight Sashiko thread.
Embroidery and Sewing Tutorial
1. Cut fabric and interfacing pieces: For each coaster or placemat, you will need one piece of main fabric for the top side where the stitching is done, one piece of lining fabric for the back, and one piece of fleece interfacing. We use the same fabric for both the main and lining pieces.
Cut all pieces into squares slightly larger than the stencil, including seam allowance. (For this stencil (IS015), the inner circle marks the embroidery border, and the outer edge of the stencil indicates the sewing line (i.e. the finished size of the coaster). The circle has a diameter of 12 cm, so we cut the pieces into 15 cm squares to allow sufficient seam allowance. If your stencil already includes seam allowance, simply cut the pieces slightly larger than the stencil.)
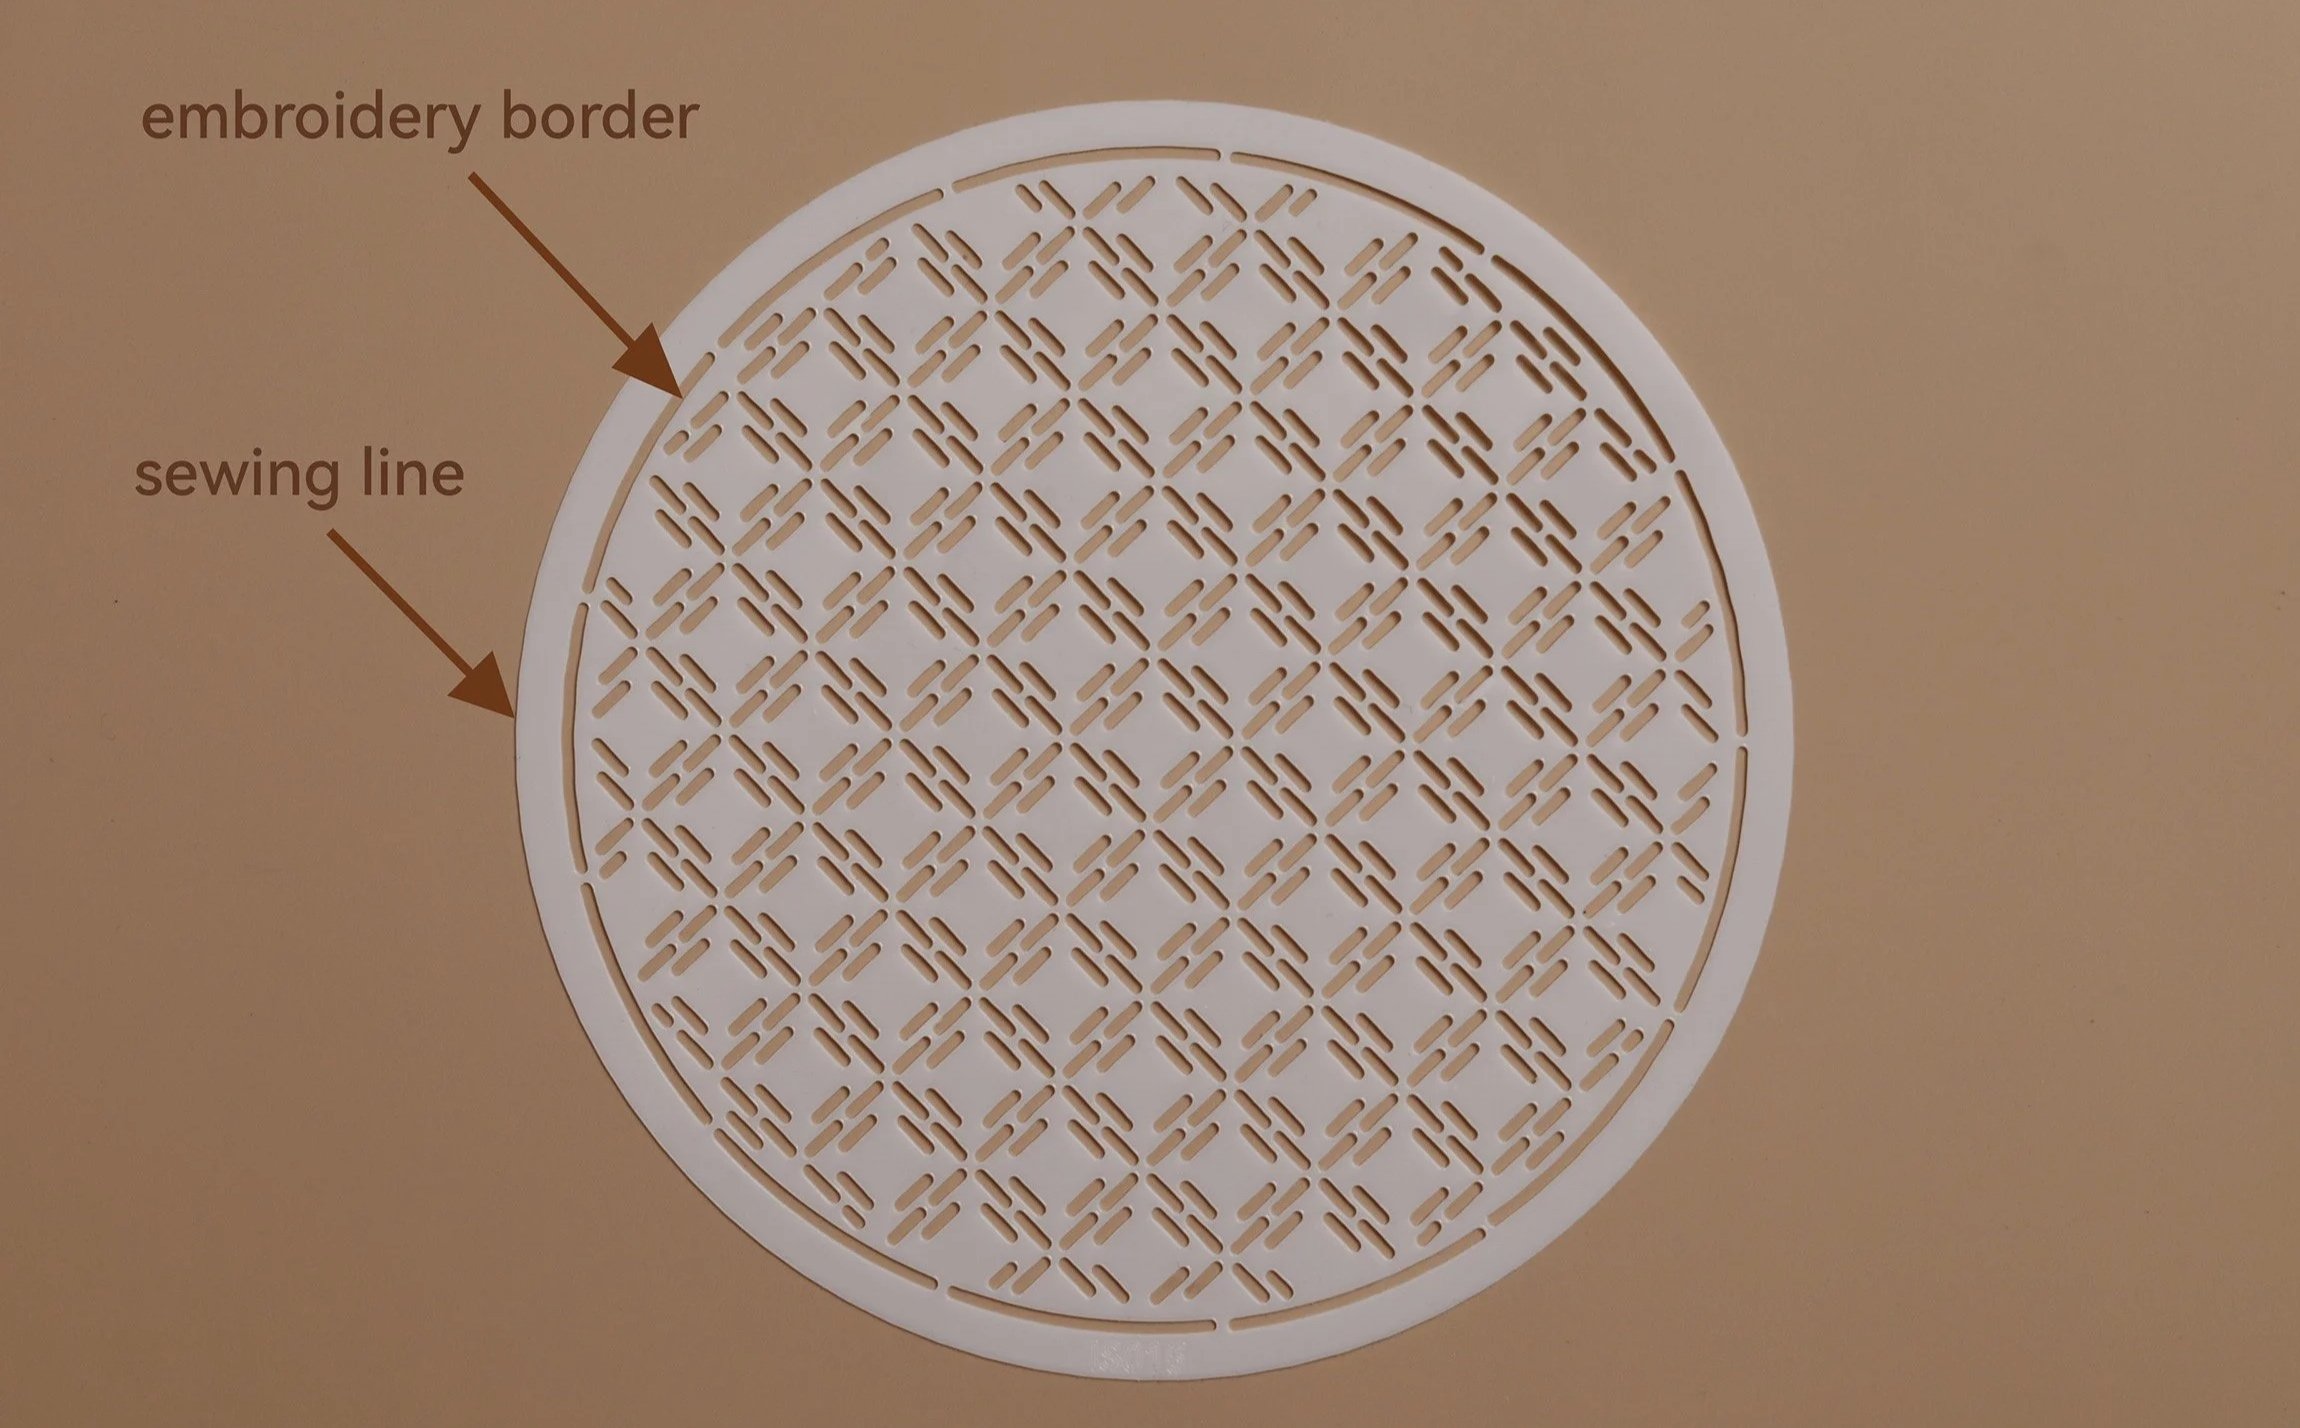
2. Transfer pattern: Center the stencil and transfer the pattern onto the right side of the main fabric using a heat-erasable pen or cream. (Heat-erasable pens/refills are suitable for tracing the outline of the stencil and simple patterns with continuous lines. For more complex patterns with many short lines, applying heat-erasable cream with a toothbrush is much quicker.) Make sure to leave enough space for seam allowance around the stencil outline.
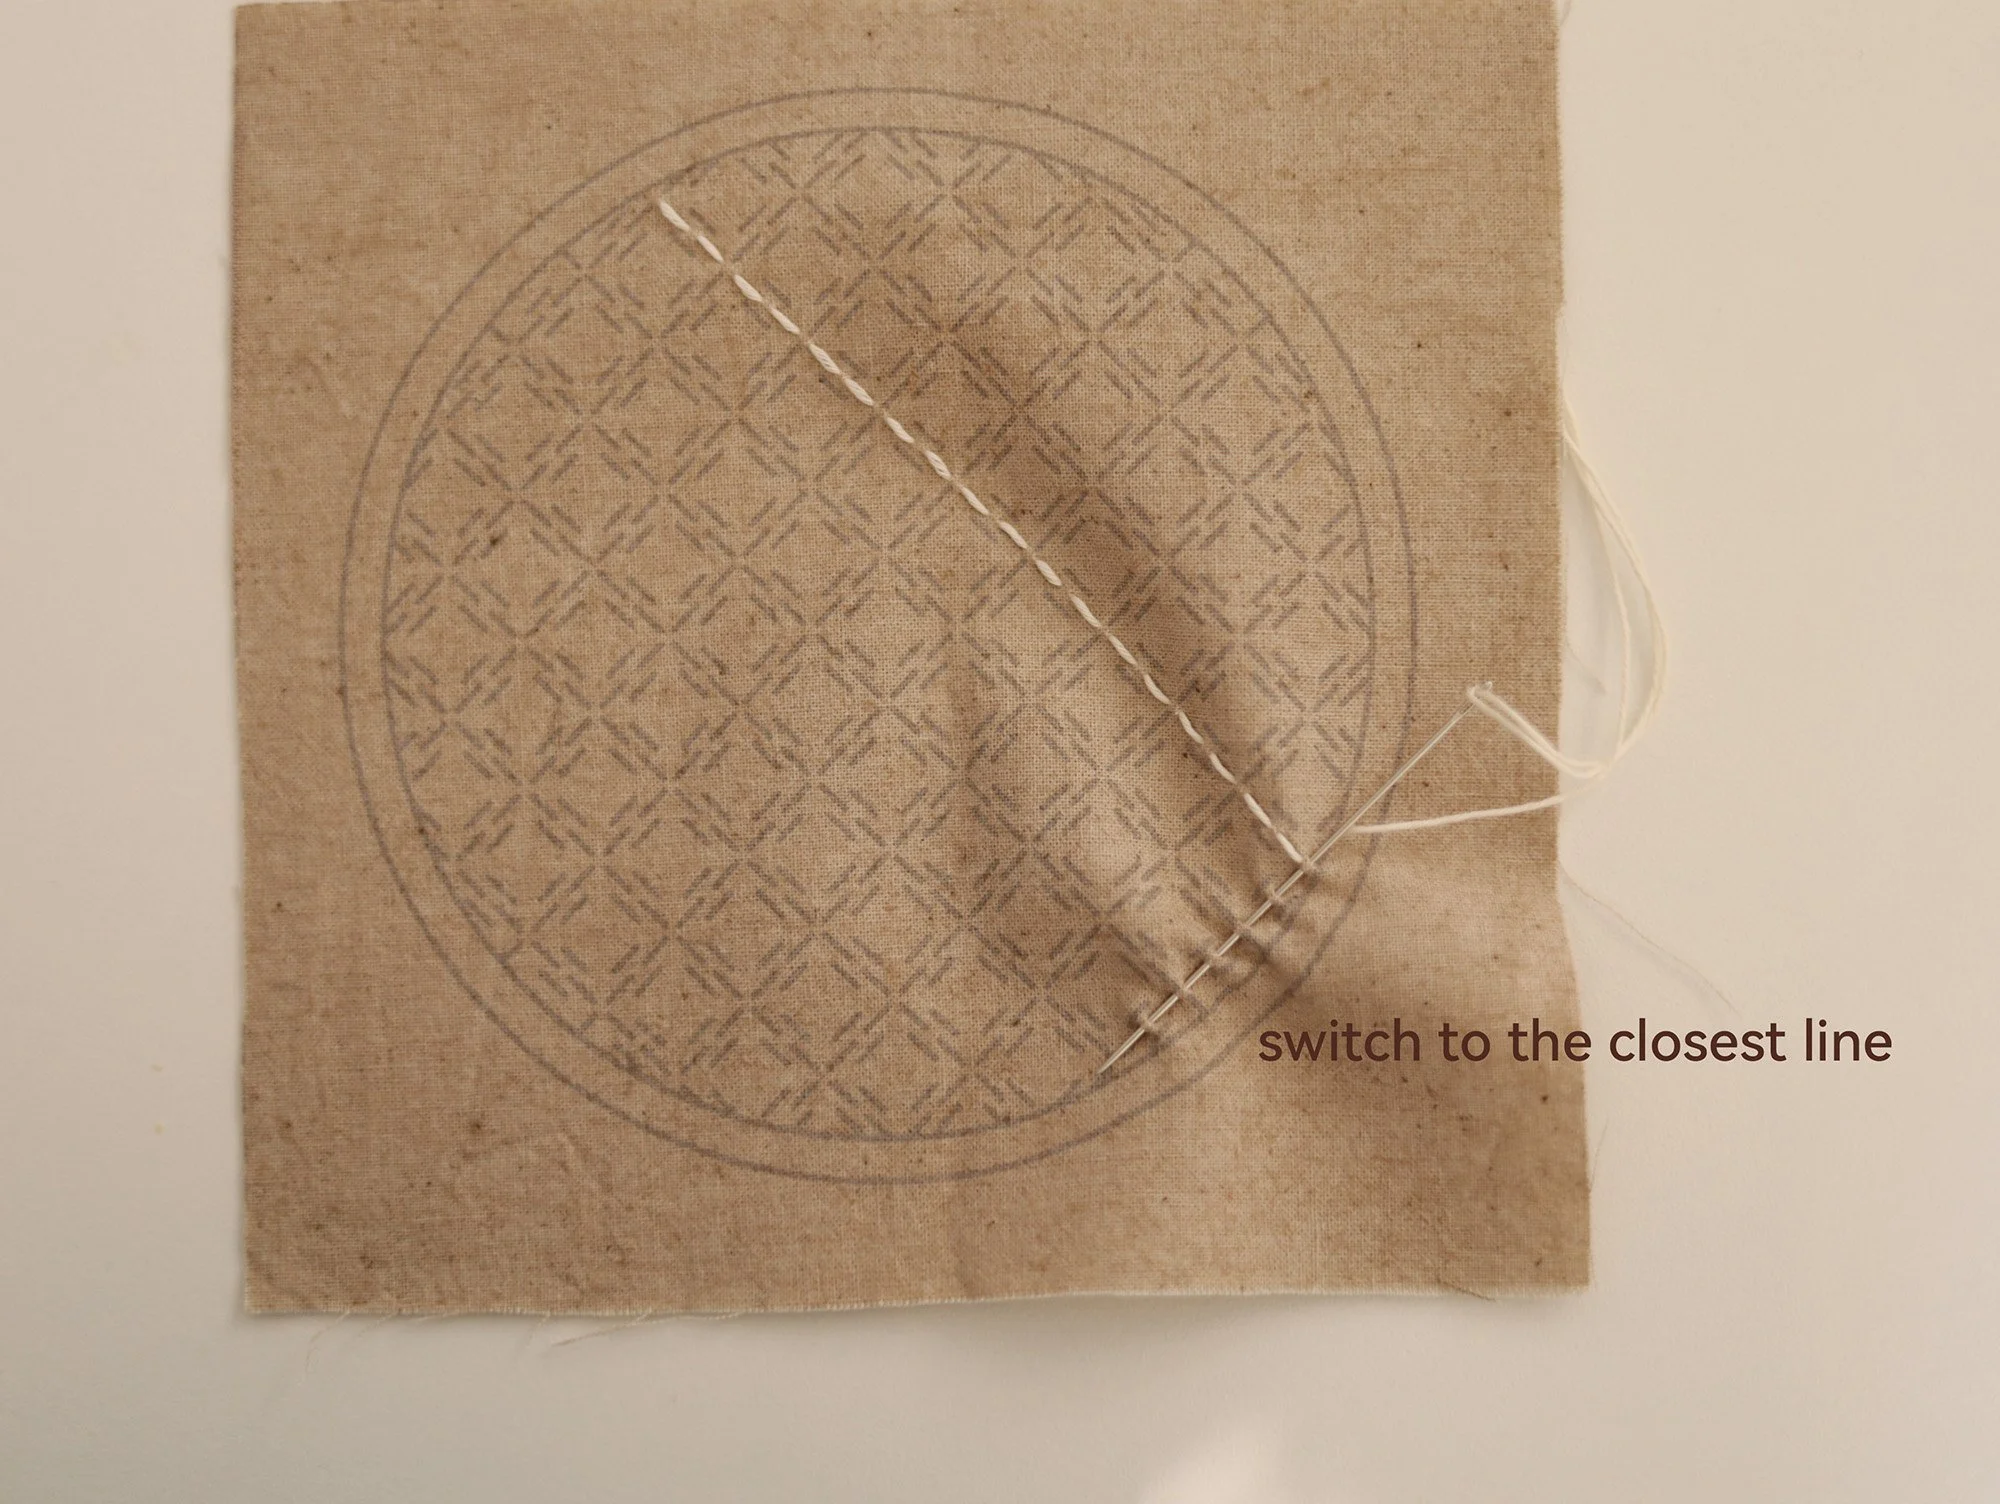
3. Sashiko embroidery: Sashiko is a simple embroidery technique—essentially just running stitch throughout. You can make several stitches at a time, but remember to always smooth out the fabric after each stitch so it lies flat and doesn’t gather.
You can either stitch all the lines in one direction first and then stitch the lines in the other direction, or move to the nearest line and continue stitching from there (see the second photo below.) However, if the distance to the next line is too great (more than 1 cm), it is better to finish off the thread and start again.
We used two colours of Sashiko thread for this pattern: one colour for the central line in each group of three lines and for the border stitches, and another colour for the two side lines in each group, as well as for weaving through the border stitches. For the border, the stitch length and spacing between stitches is around 3 mm. Make even running stitches to complete the border, then switch to the other colour for weaving through the stitches.
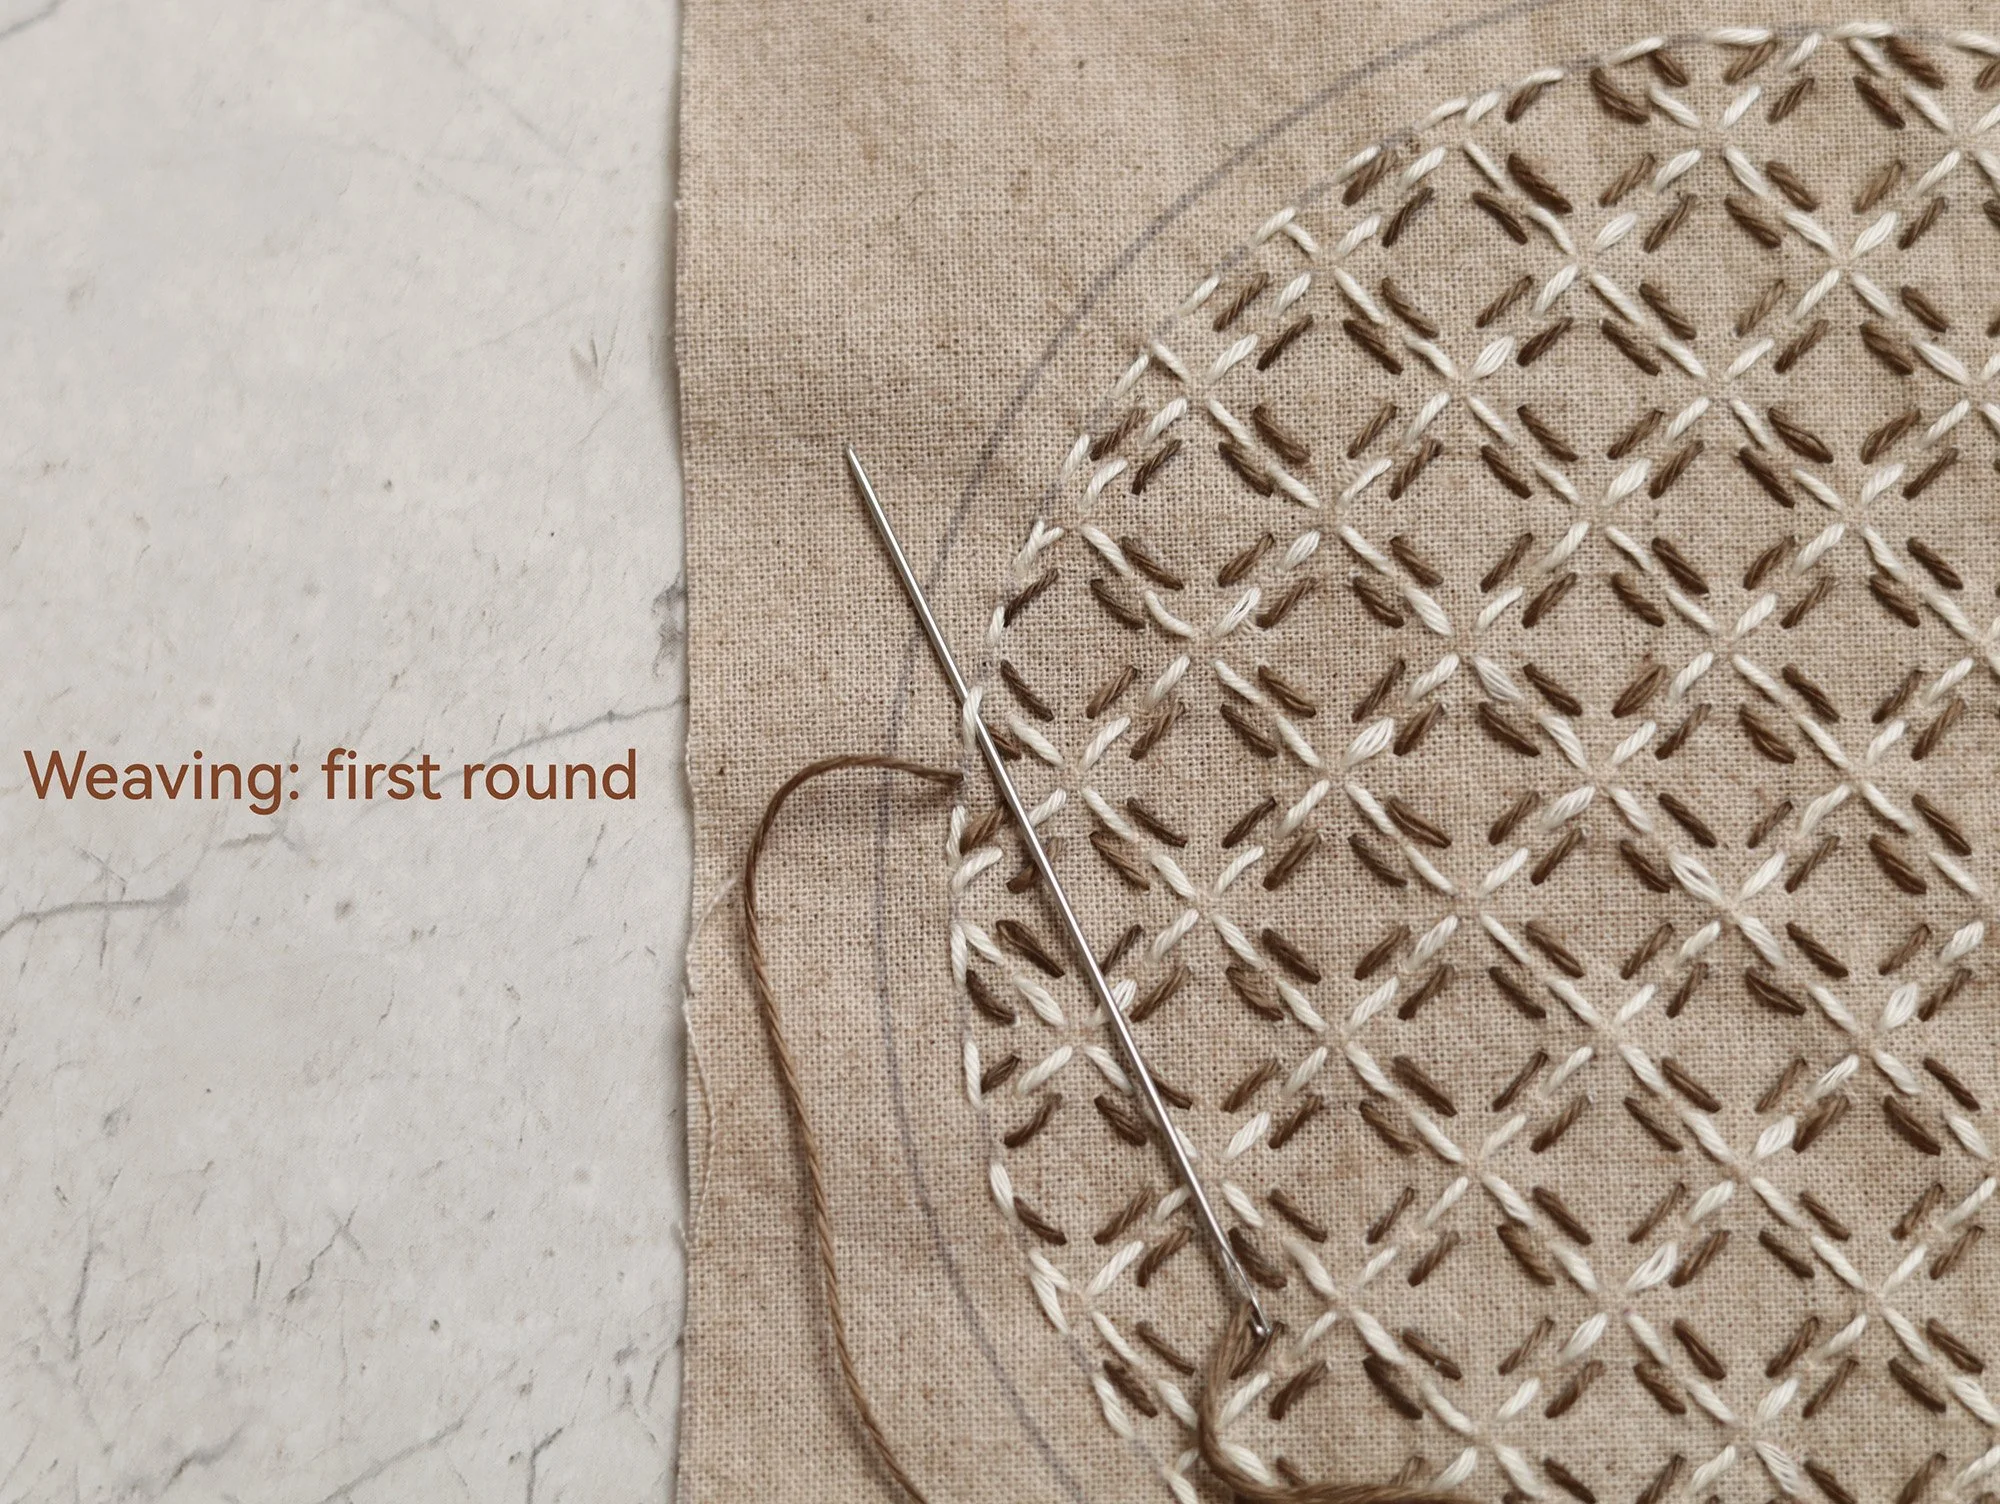
Weaving (First round): Bring the needle up from the middle of any gap between two stitches, and pass the needle from underneath the first stitch, from the inside (motif side) to the outside of the circle. Repeat in the same direction—passing through each stitch from the inside to the outside—until all the border stitches have been threaded. Finish the first round of weaving by inserting the needle at the starting point and bringing it through to the wrong side.
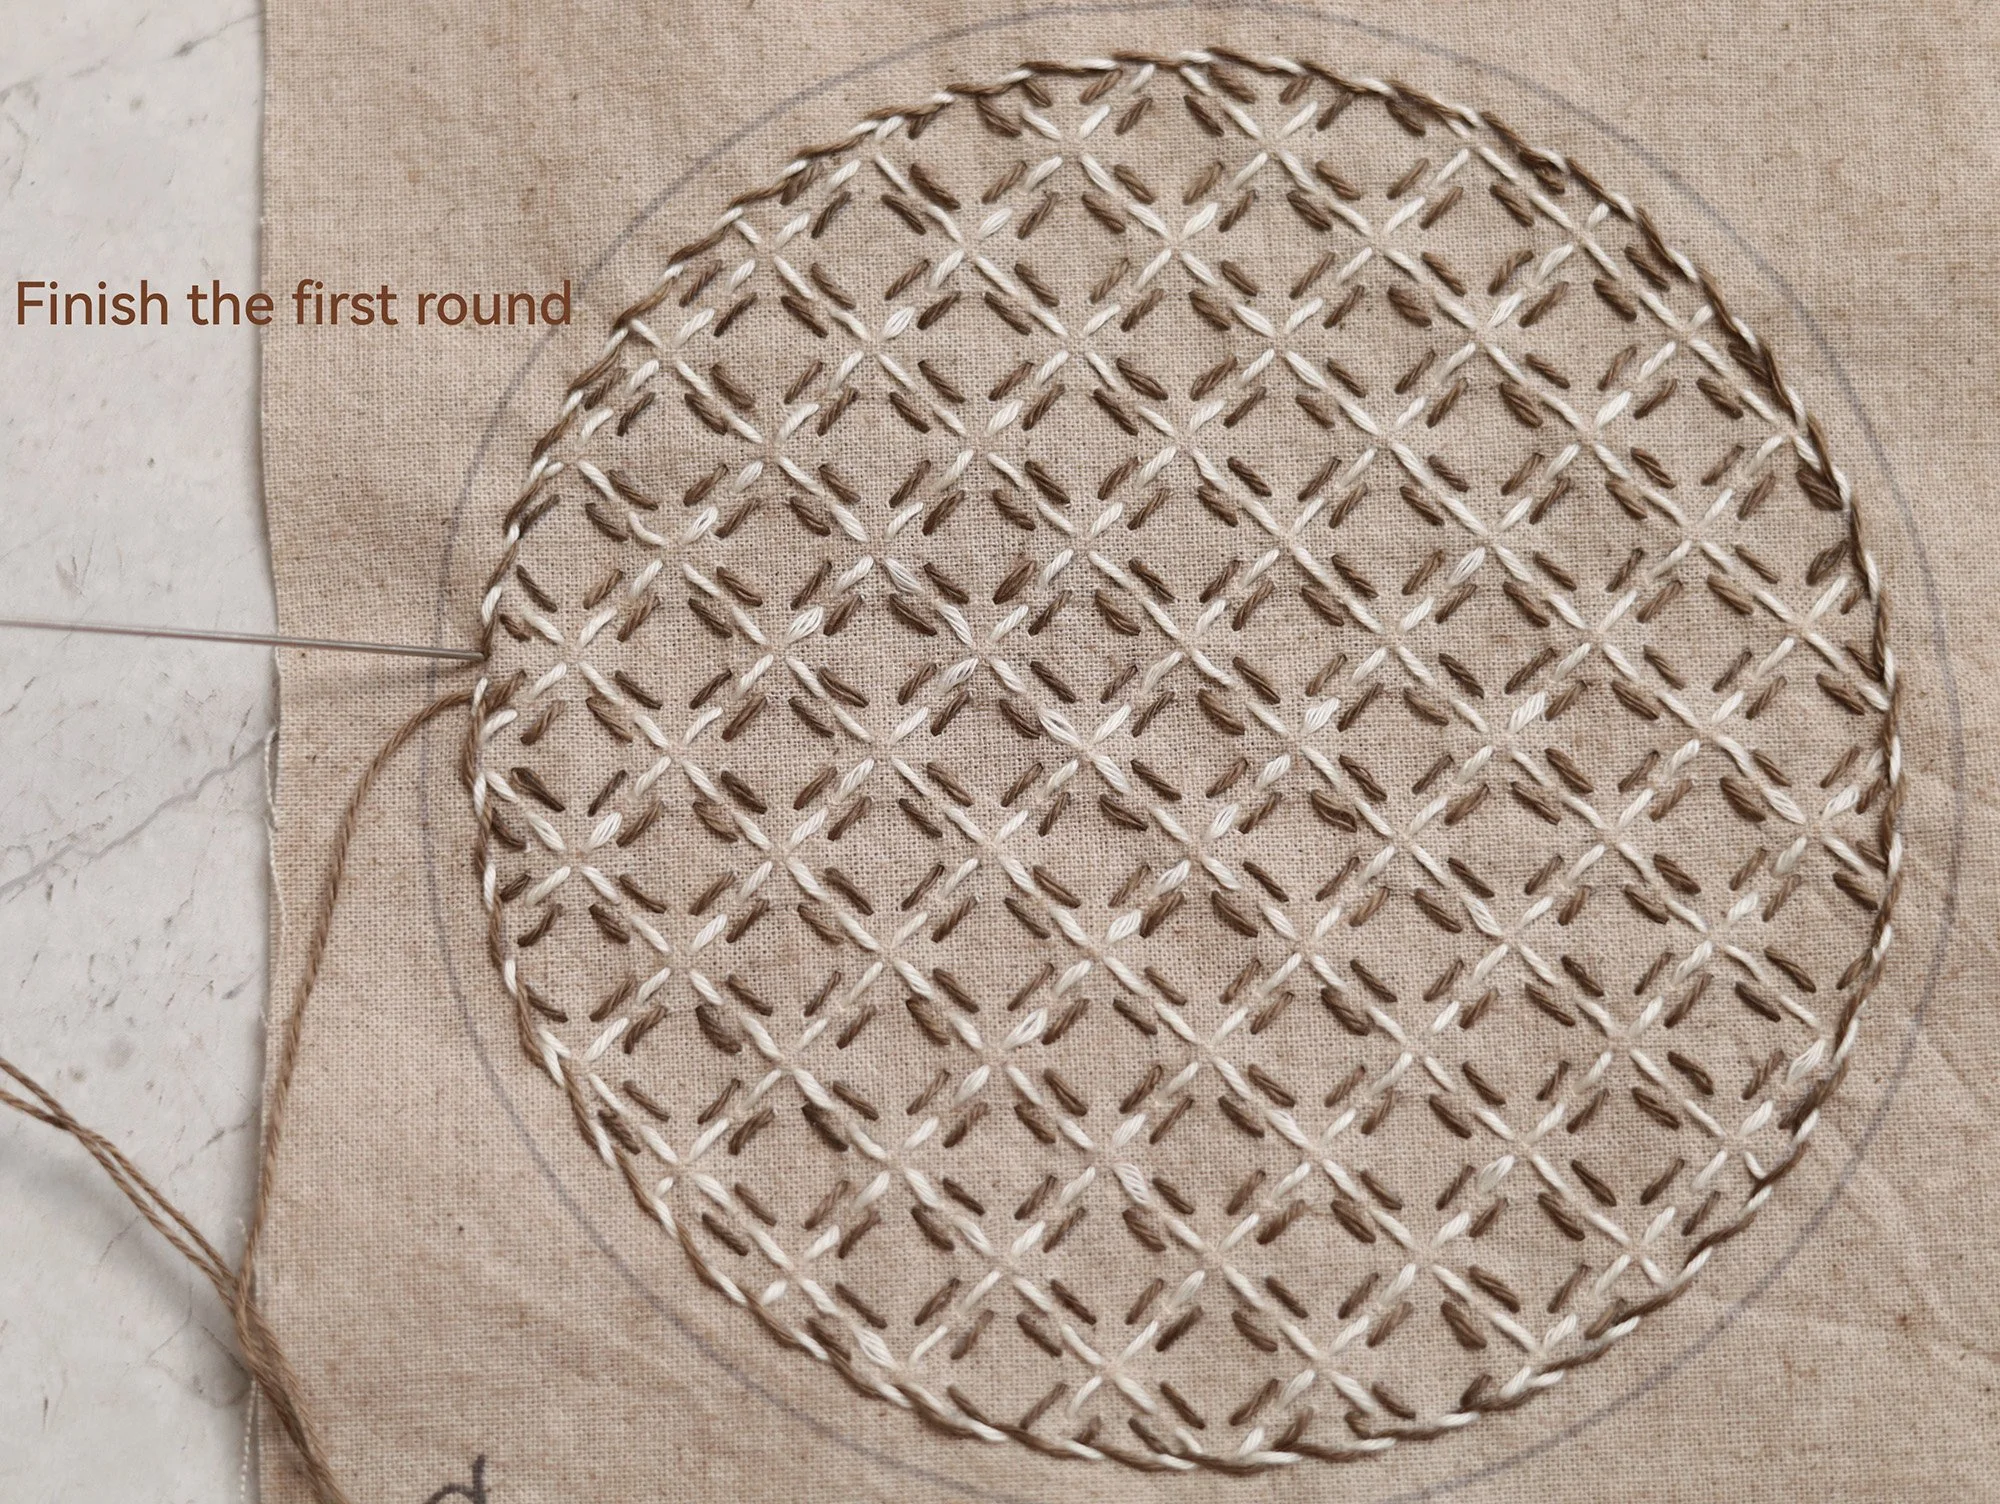
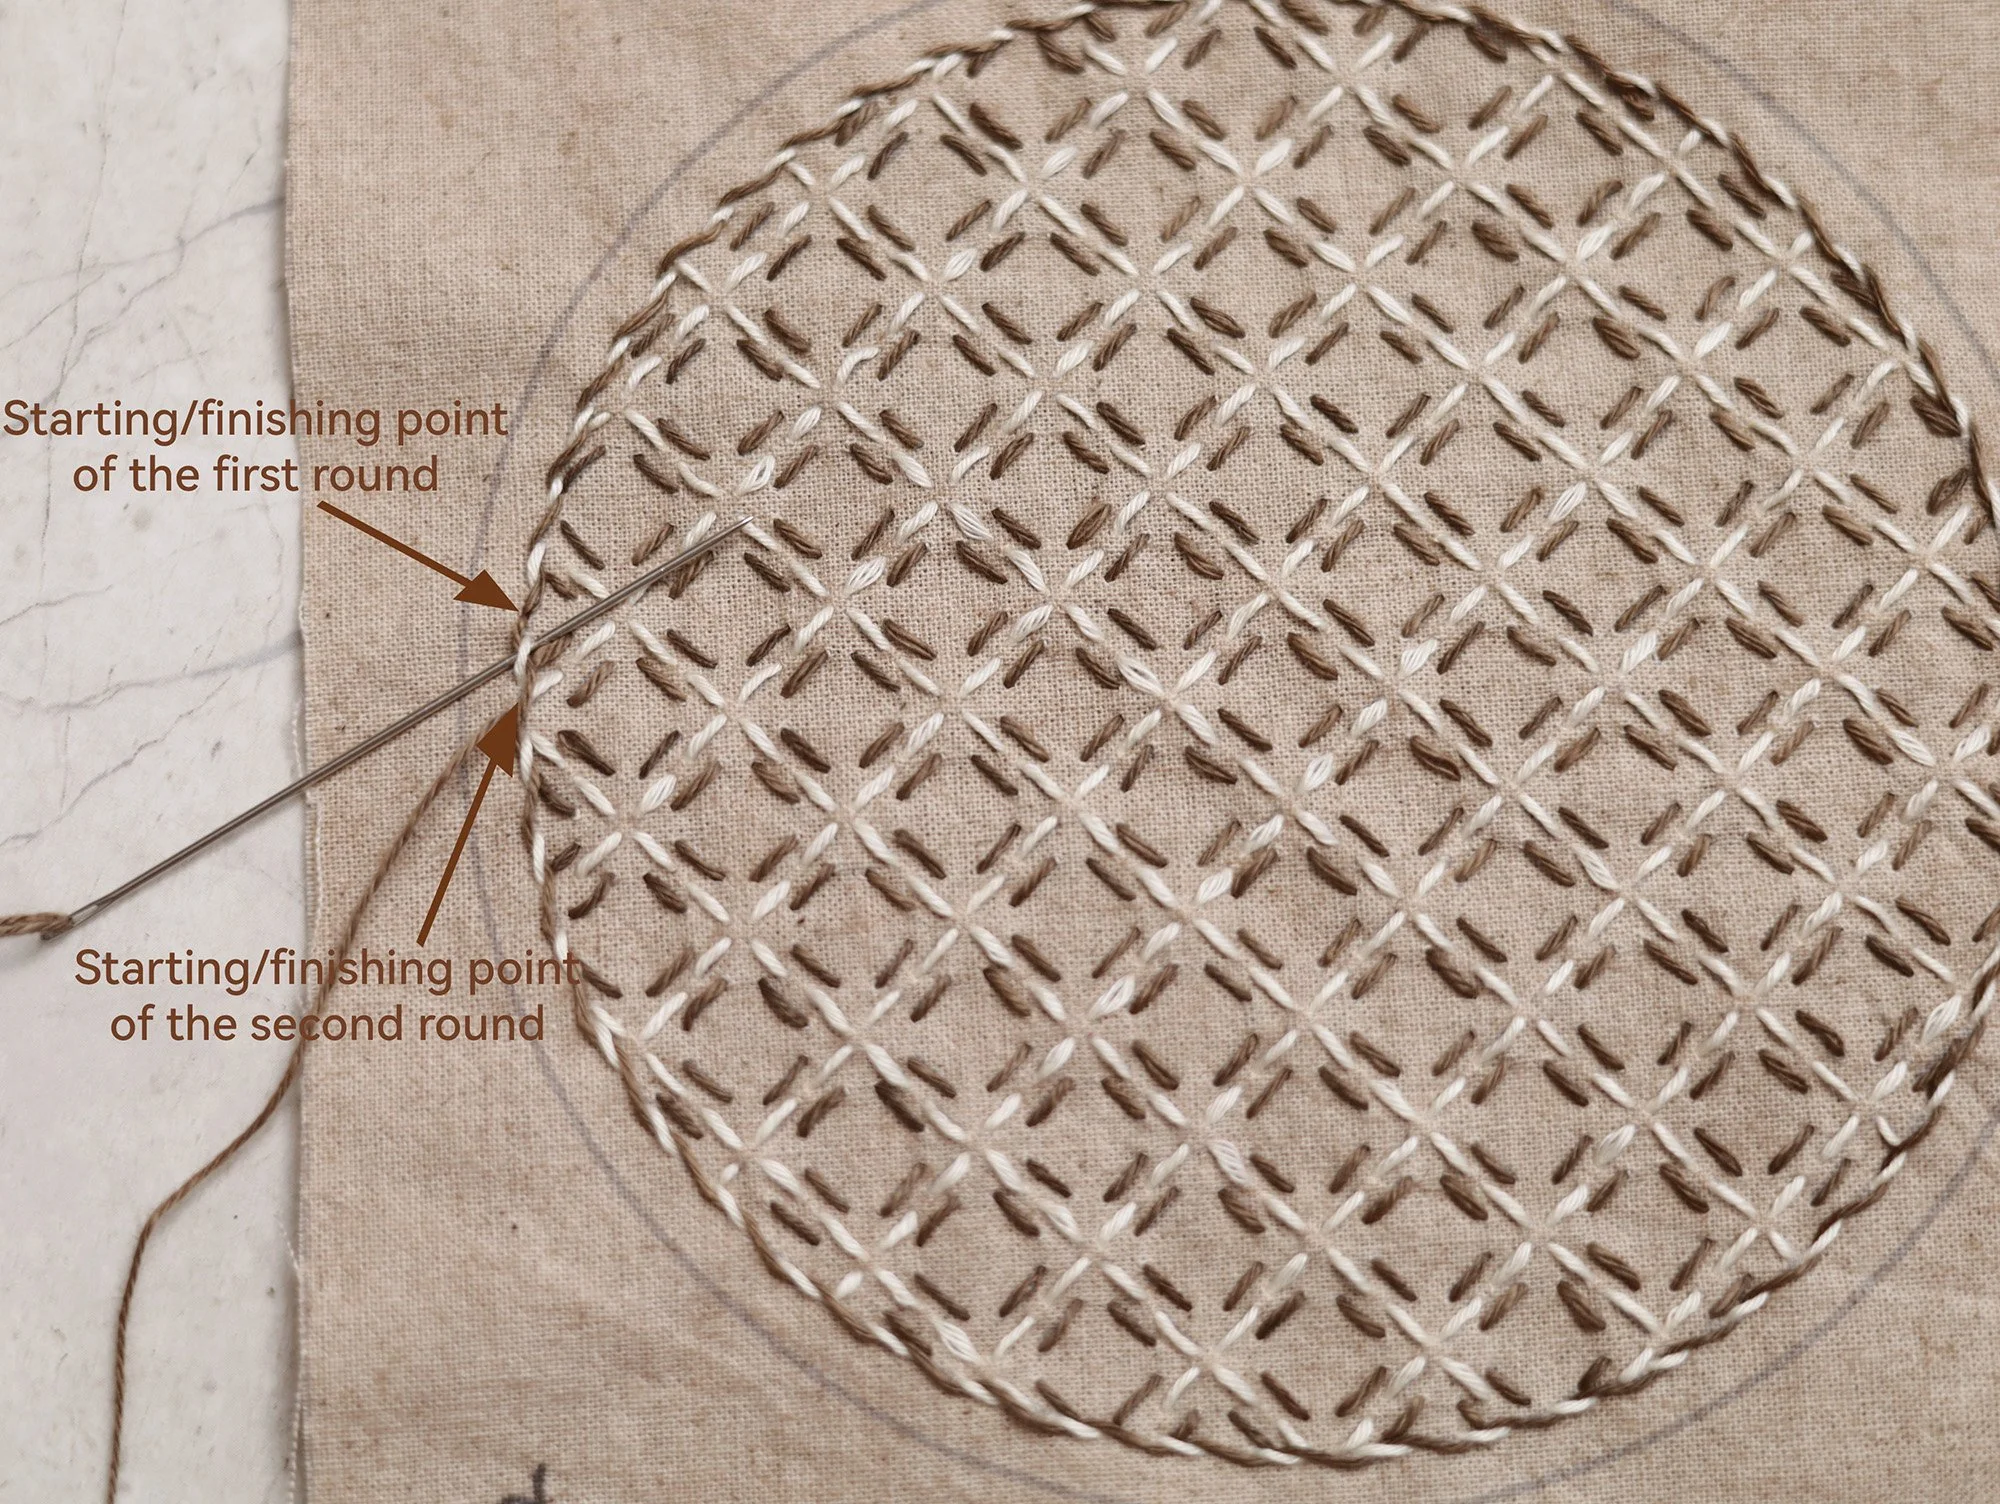
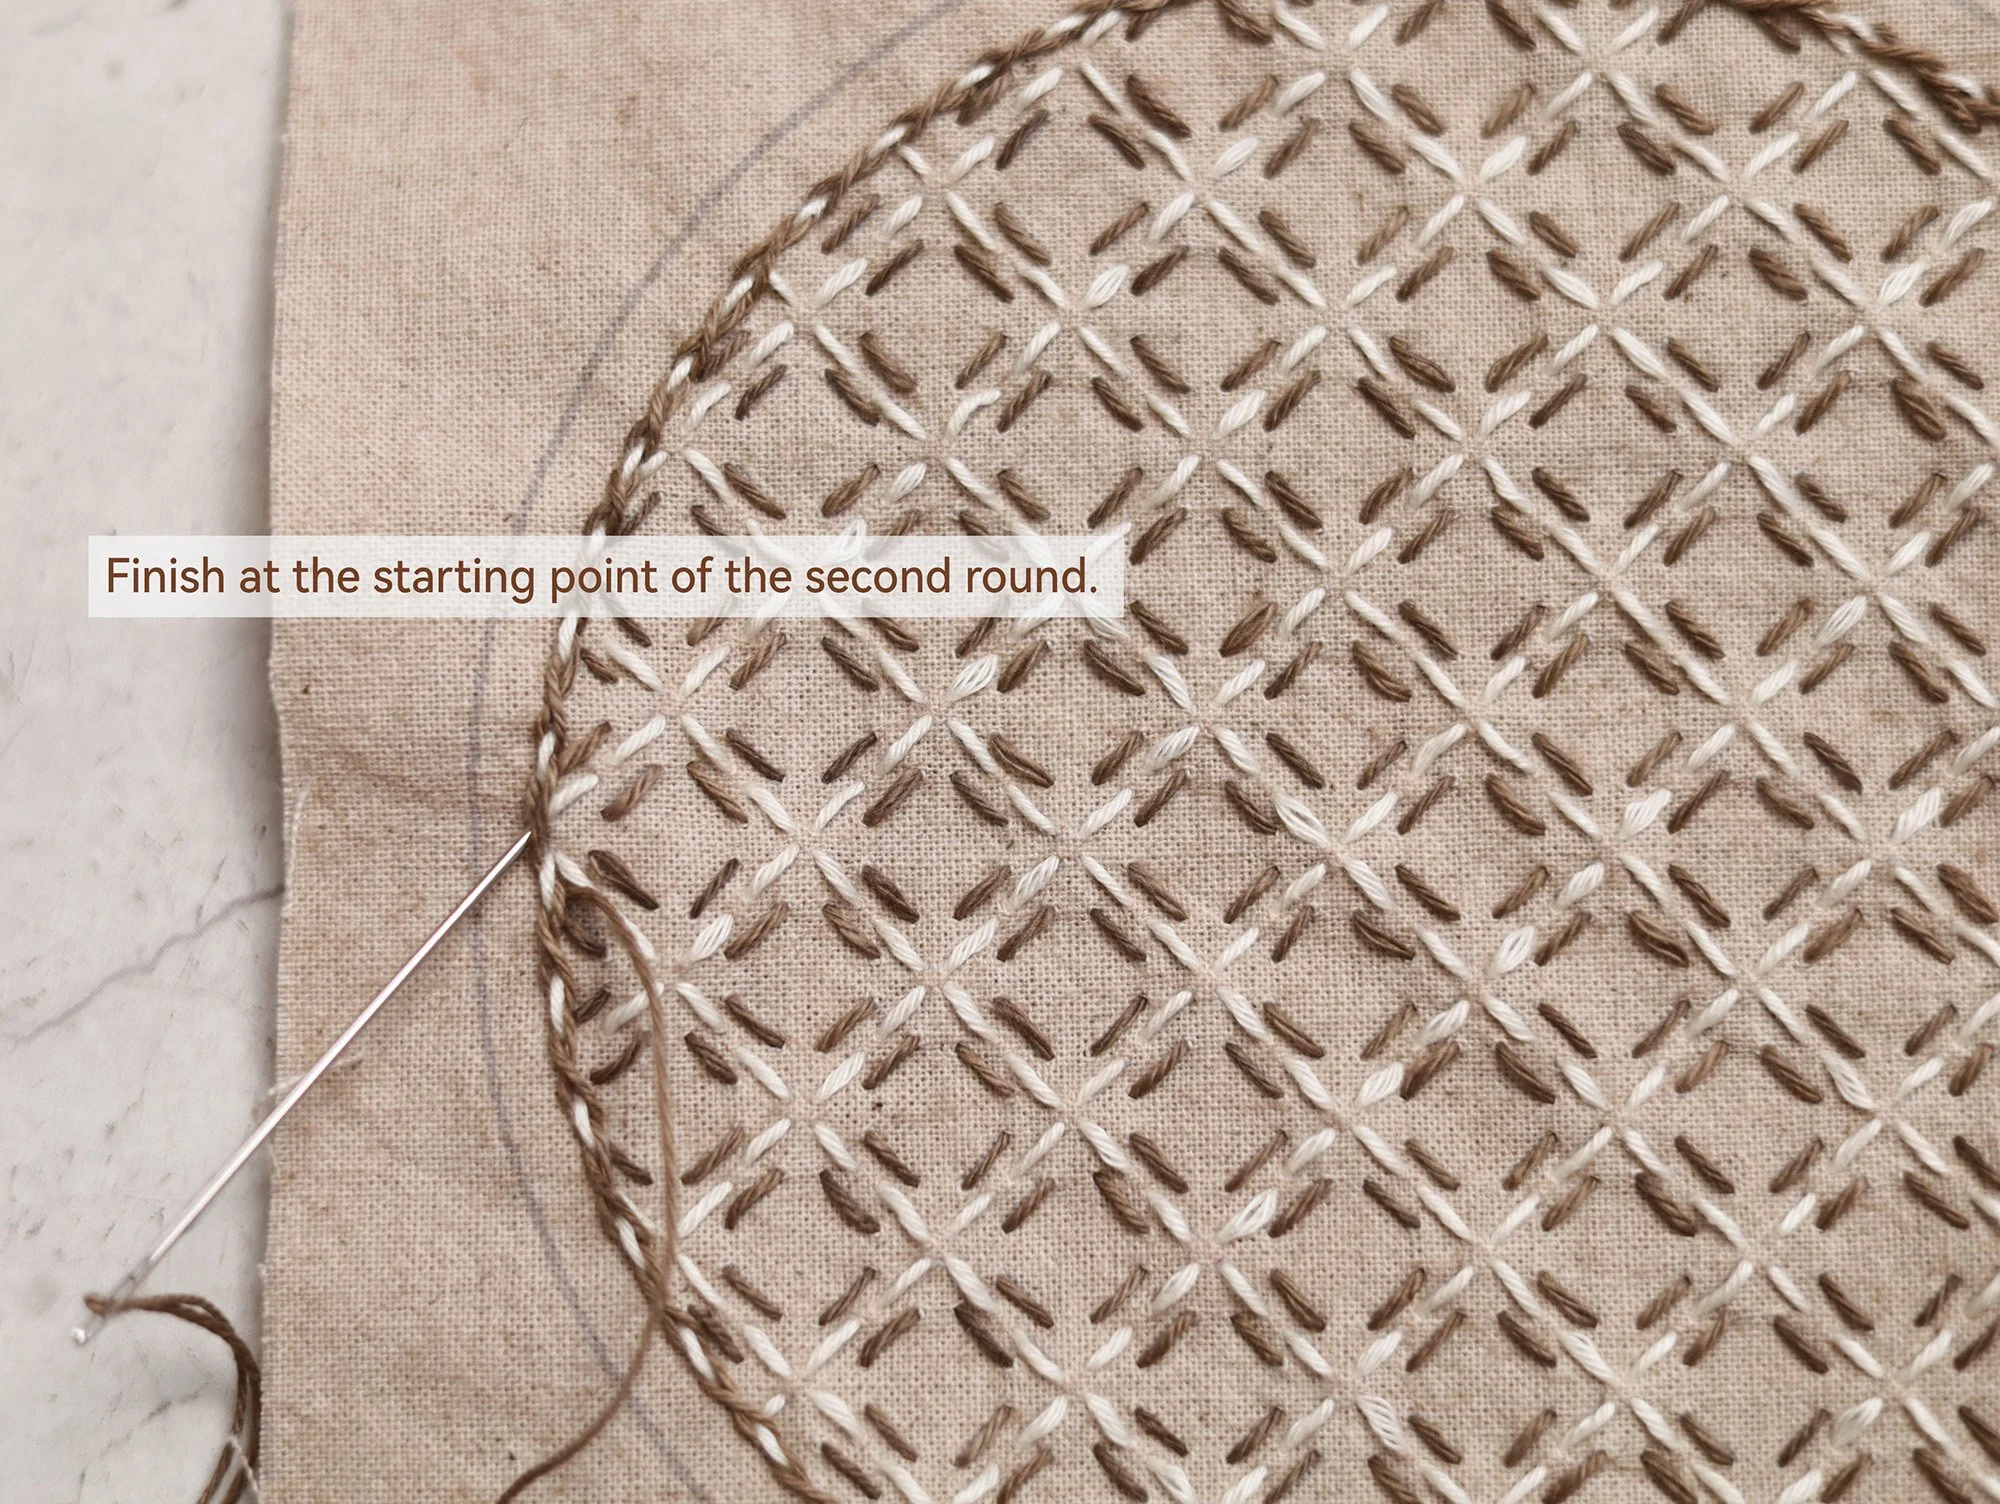
Second round weaving (optional): Bring the needle back up at the midpoint of the previous gap (i.e. move one stitch length back), then pass through the first stitch from underneath, this time from the outside to the inside. Repeat to thread all the stitches in the same way, finishing back at the starting point of the second round. Tie a knot on the wrong side close to the fabric and trim the thread.
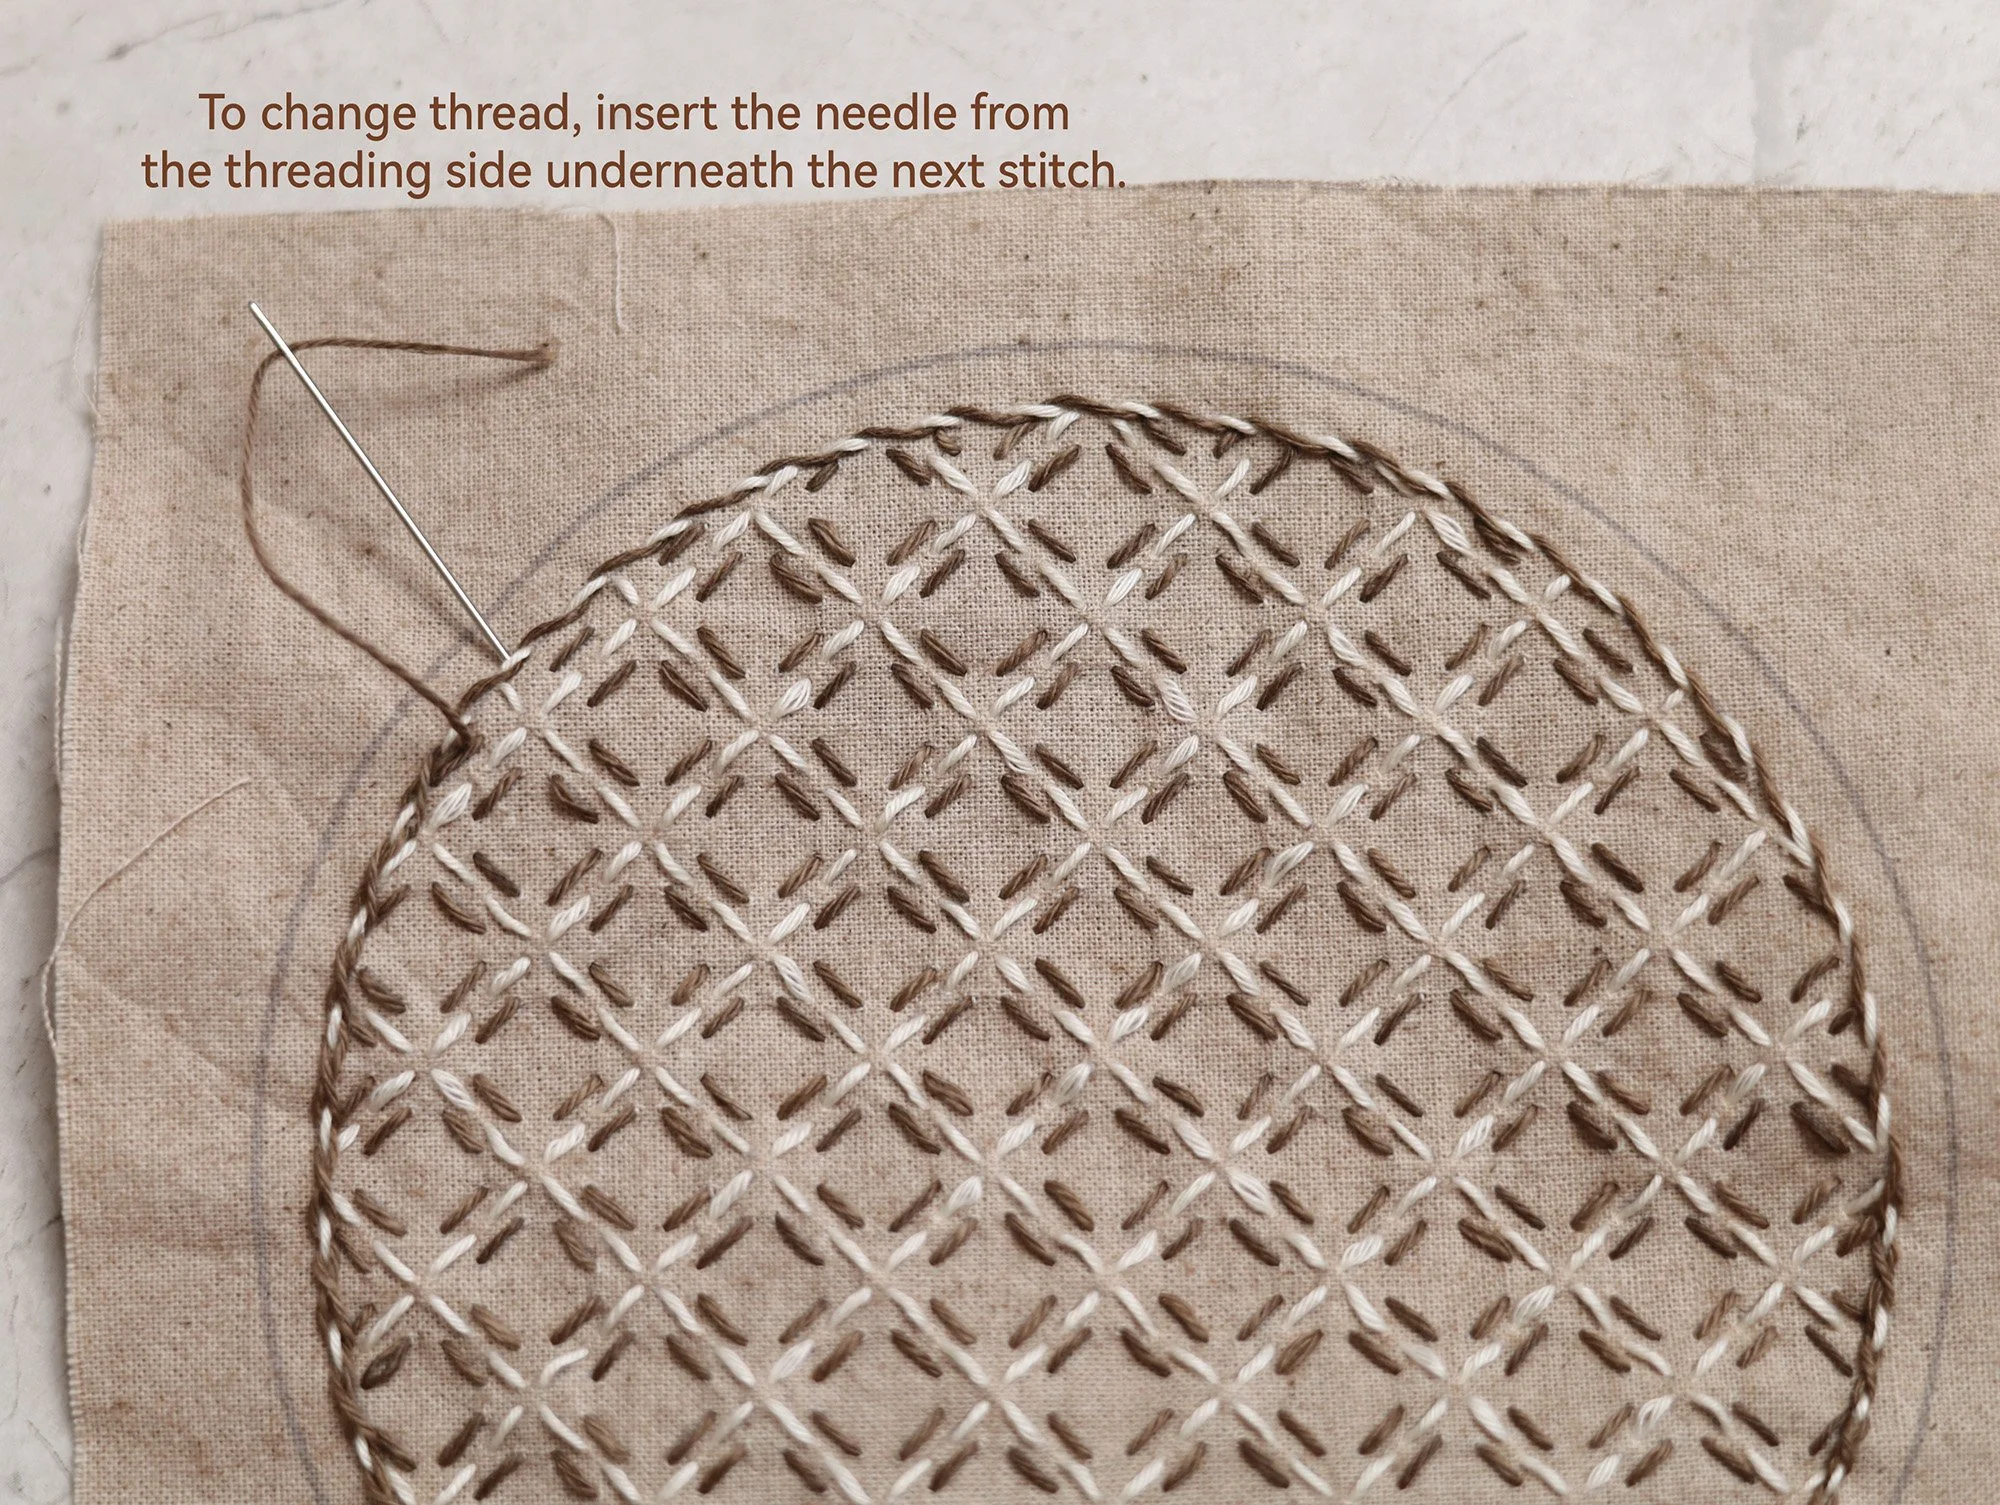
Change thread during weaving: If the thread runs out in the middle of weaving, insert the needle underneath the next stitch from the threading side and bring it to the back. Tie a knot close to the fabric to finish. With a new thread, bring the needle up from the same point on the opposite side and continue weaving.
4. Sewing (Method for thin, light-weight and soft fleece interfacing).
(If you are using medium- or heavy-weight, thick or stiff fleece interfacing, please refer to step 4 in the Hexi Daisy Coaster Tutorial. )
For light-coloured main fabric, hold it against a light source (e.g. a window) and trace the sewing line onto the wrong side. For thick or dark-coloured fabric, fold it along the sewing line, gently crease it with your fingernail, then trace along the crease. Repeat this along the entire sewing line and connect the marks at the end.
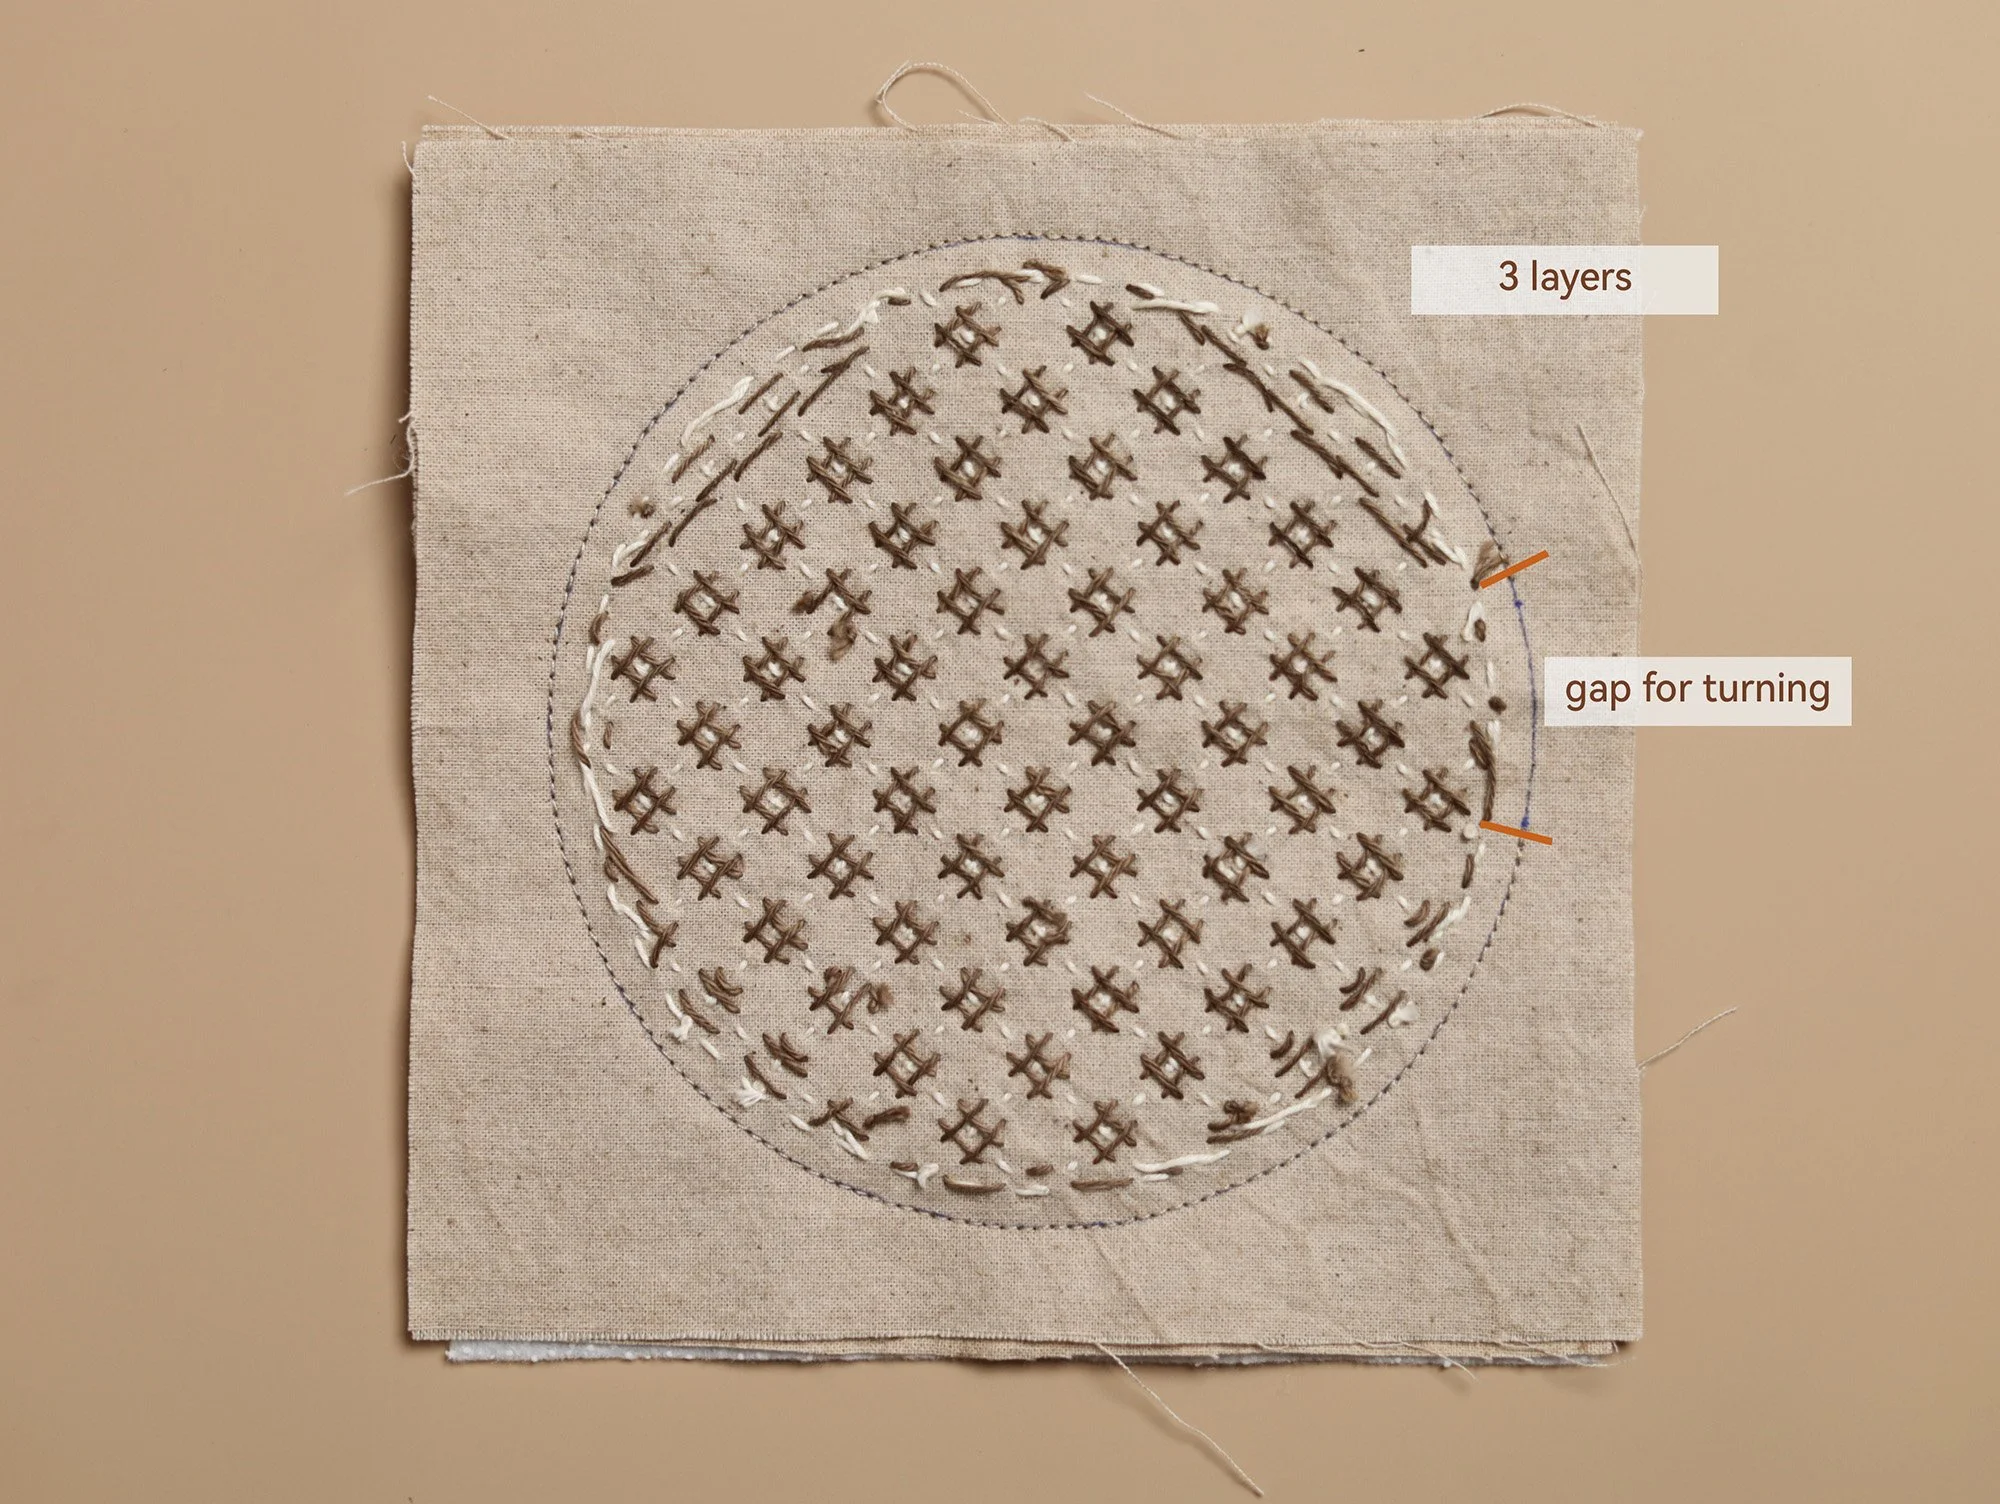
Lay the fleece interfacing with the glue side facing down (or facing up if you prefer it fused to the main fabric). Place the lining fabric on top with the right side facing up, then place the main fabric on top with the wrong side facing up. With the three layers stacked, stitch along the sewing line, leaving a 4–5 cm gap for turning.
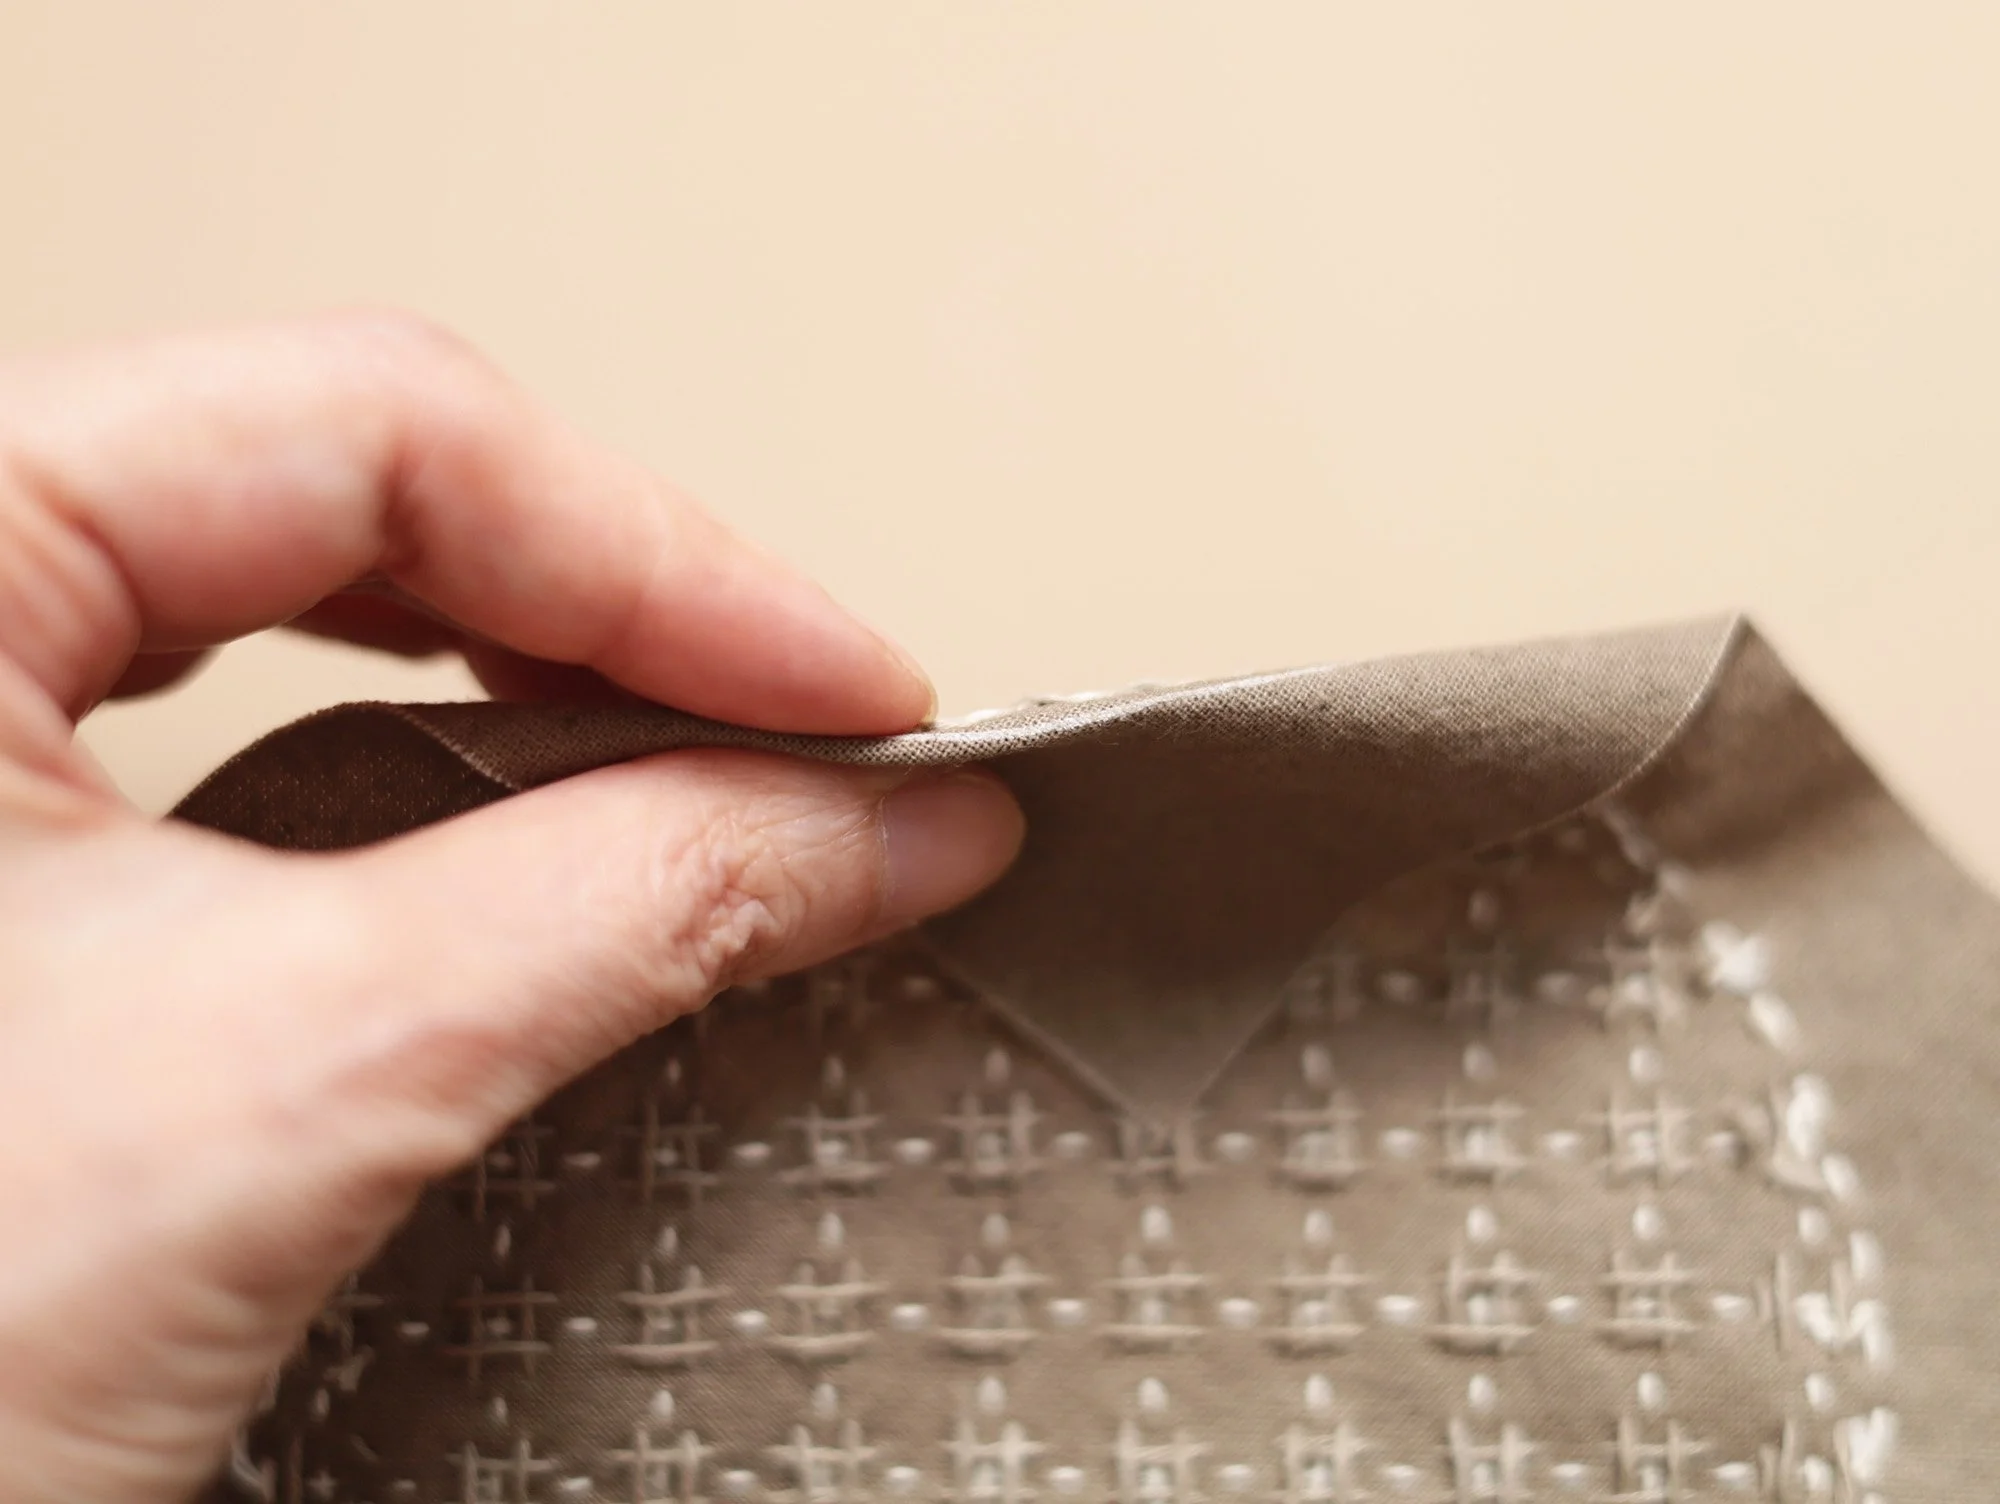
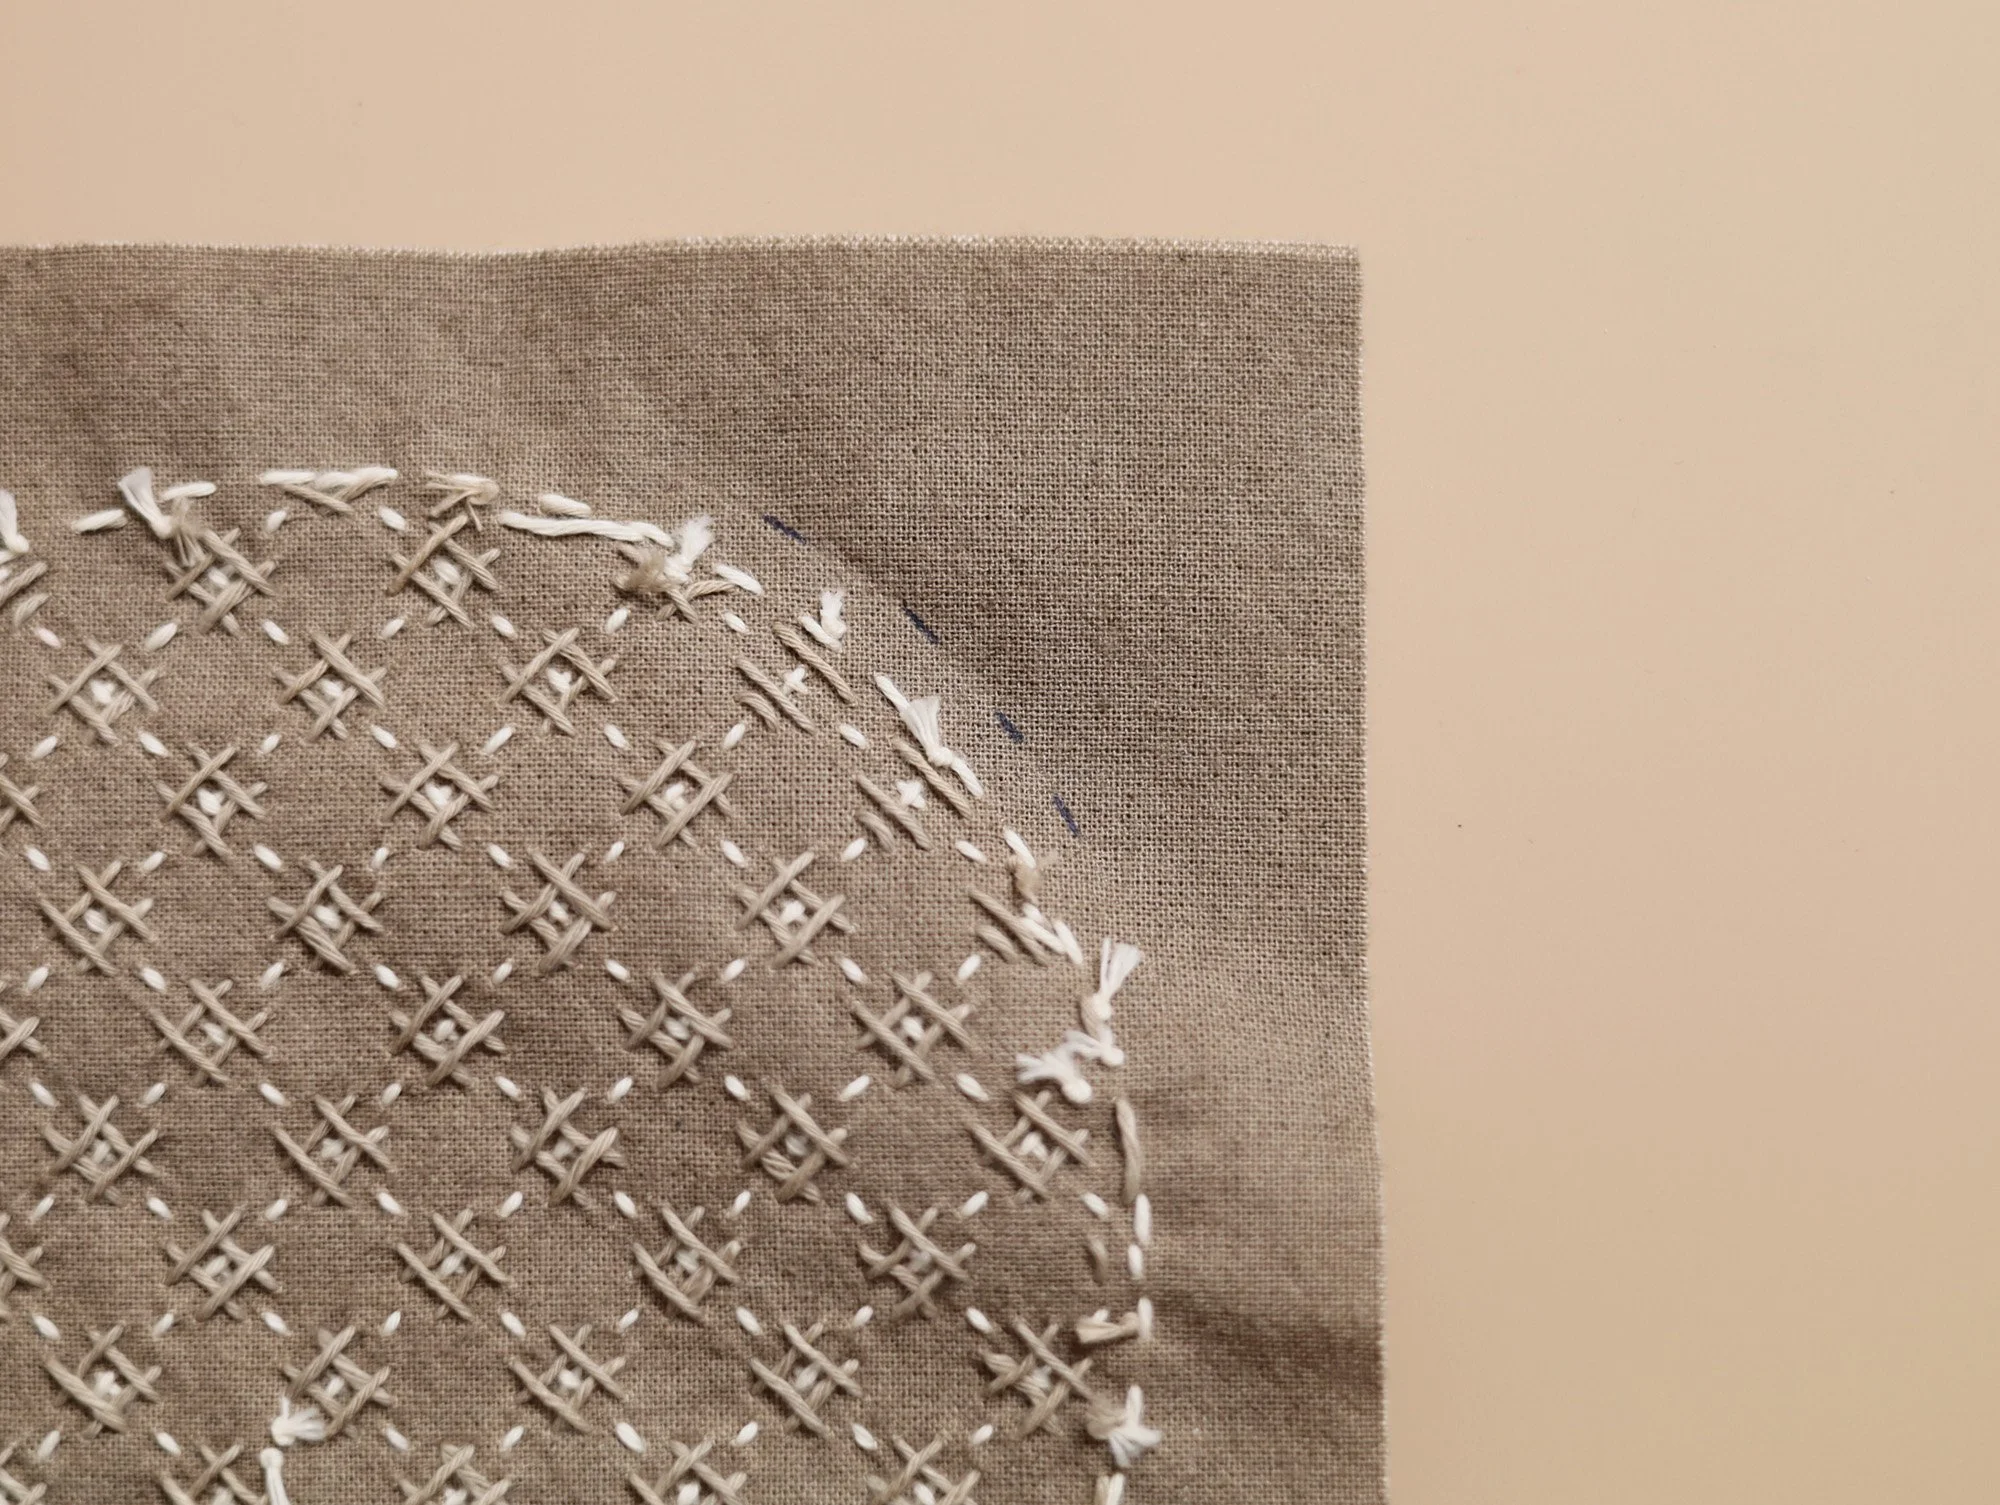
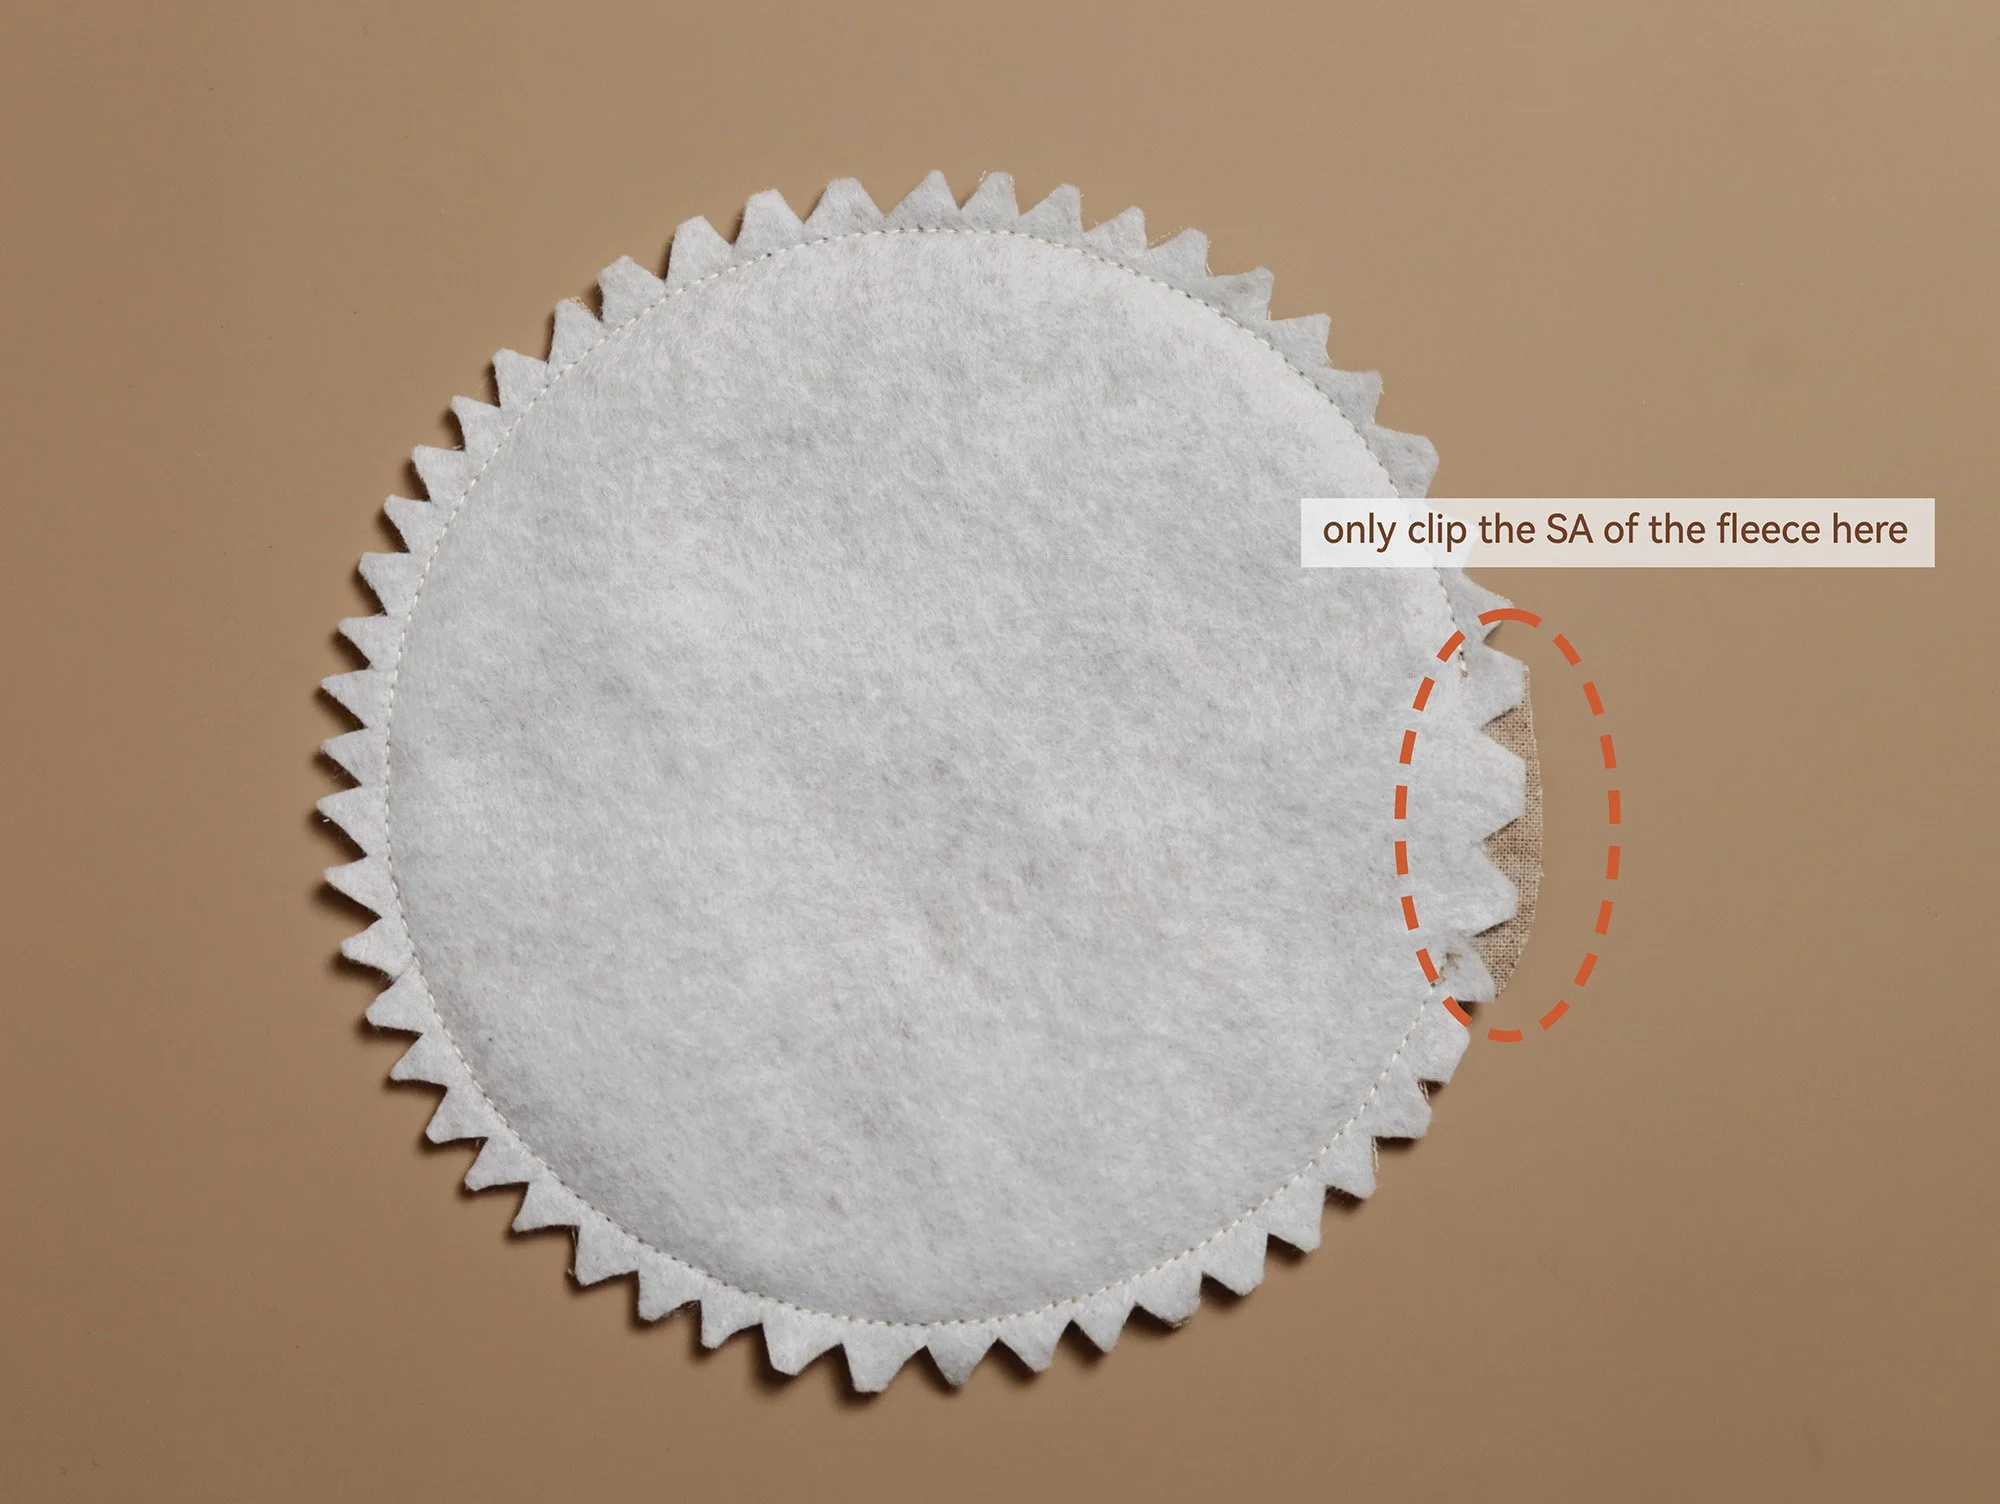
Trim the seam allowance to 3–5 mm using pinking shears, or clip along the edge about 2 mm from the sewing line.
Note: Leave a 5–8 mm seam allowance at the turning gap, and only clip the interfacing in that section.
Separate the main and lining at the gap and turn the coaster right side out. Shape it, close the gap with a ladder stitch (hidden stitch), and press with a hot iron.
Congratulations! Your coaster is now completed!