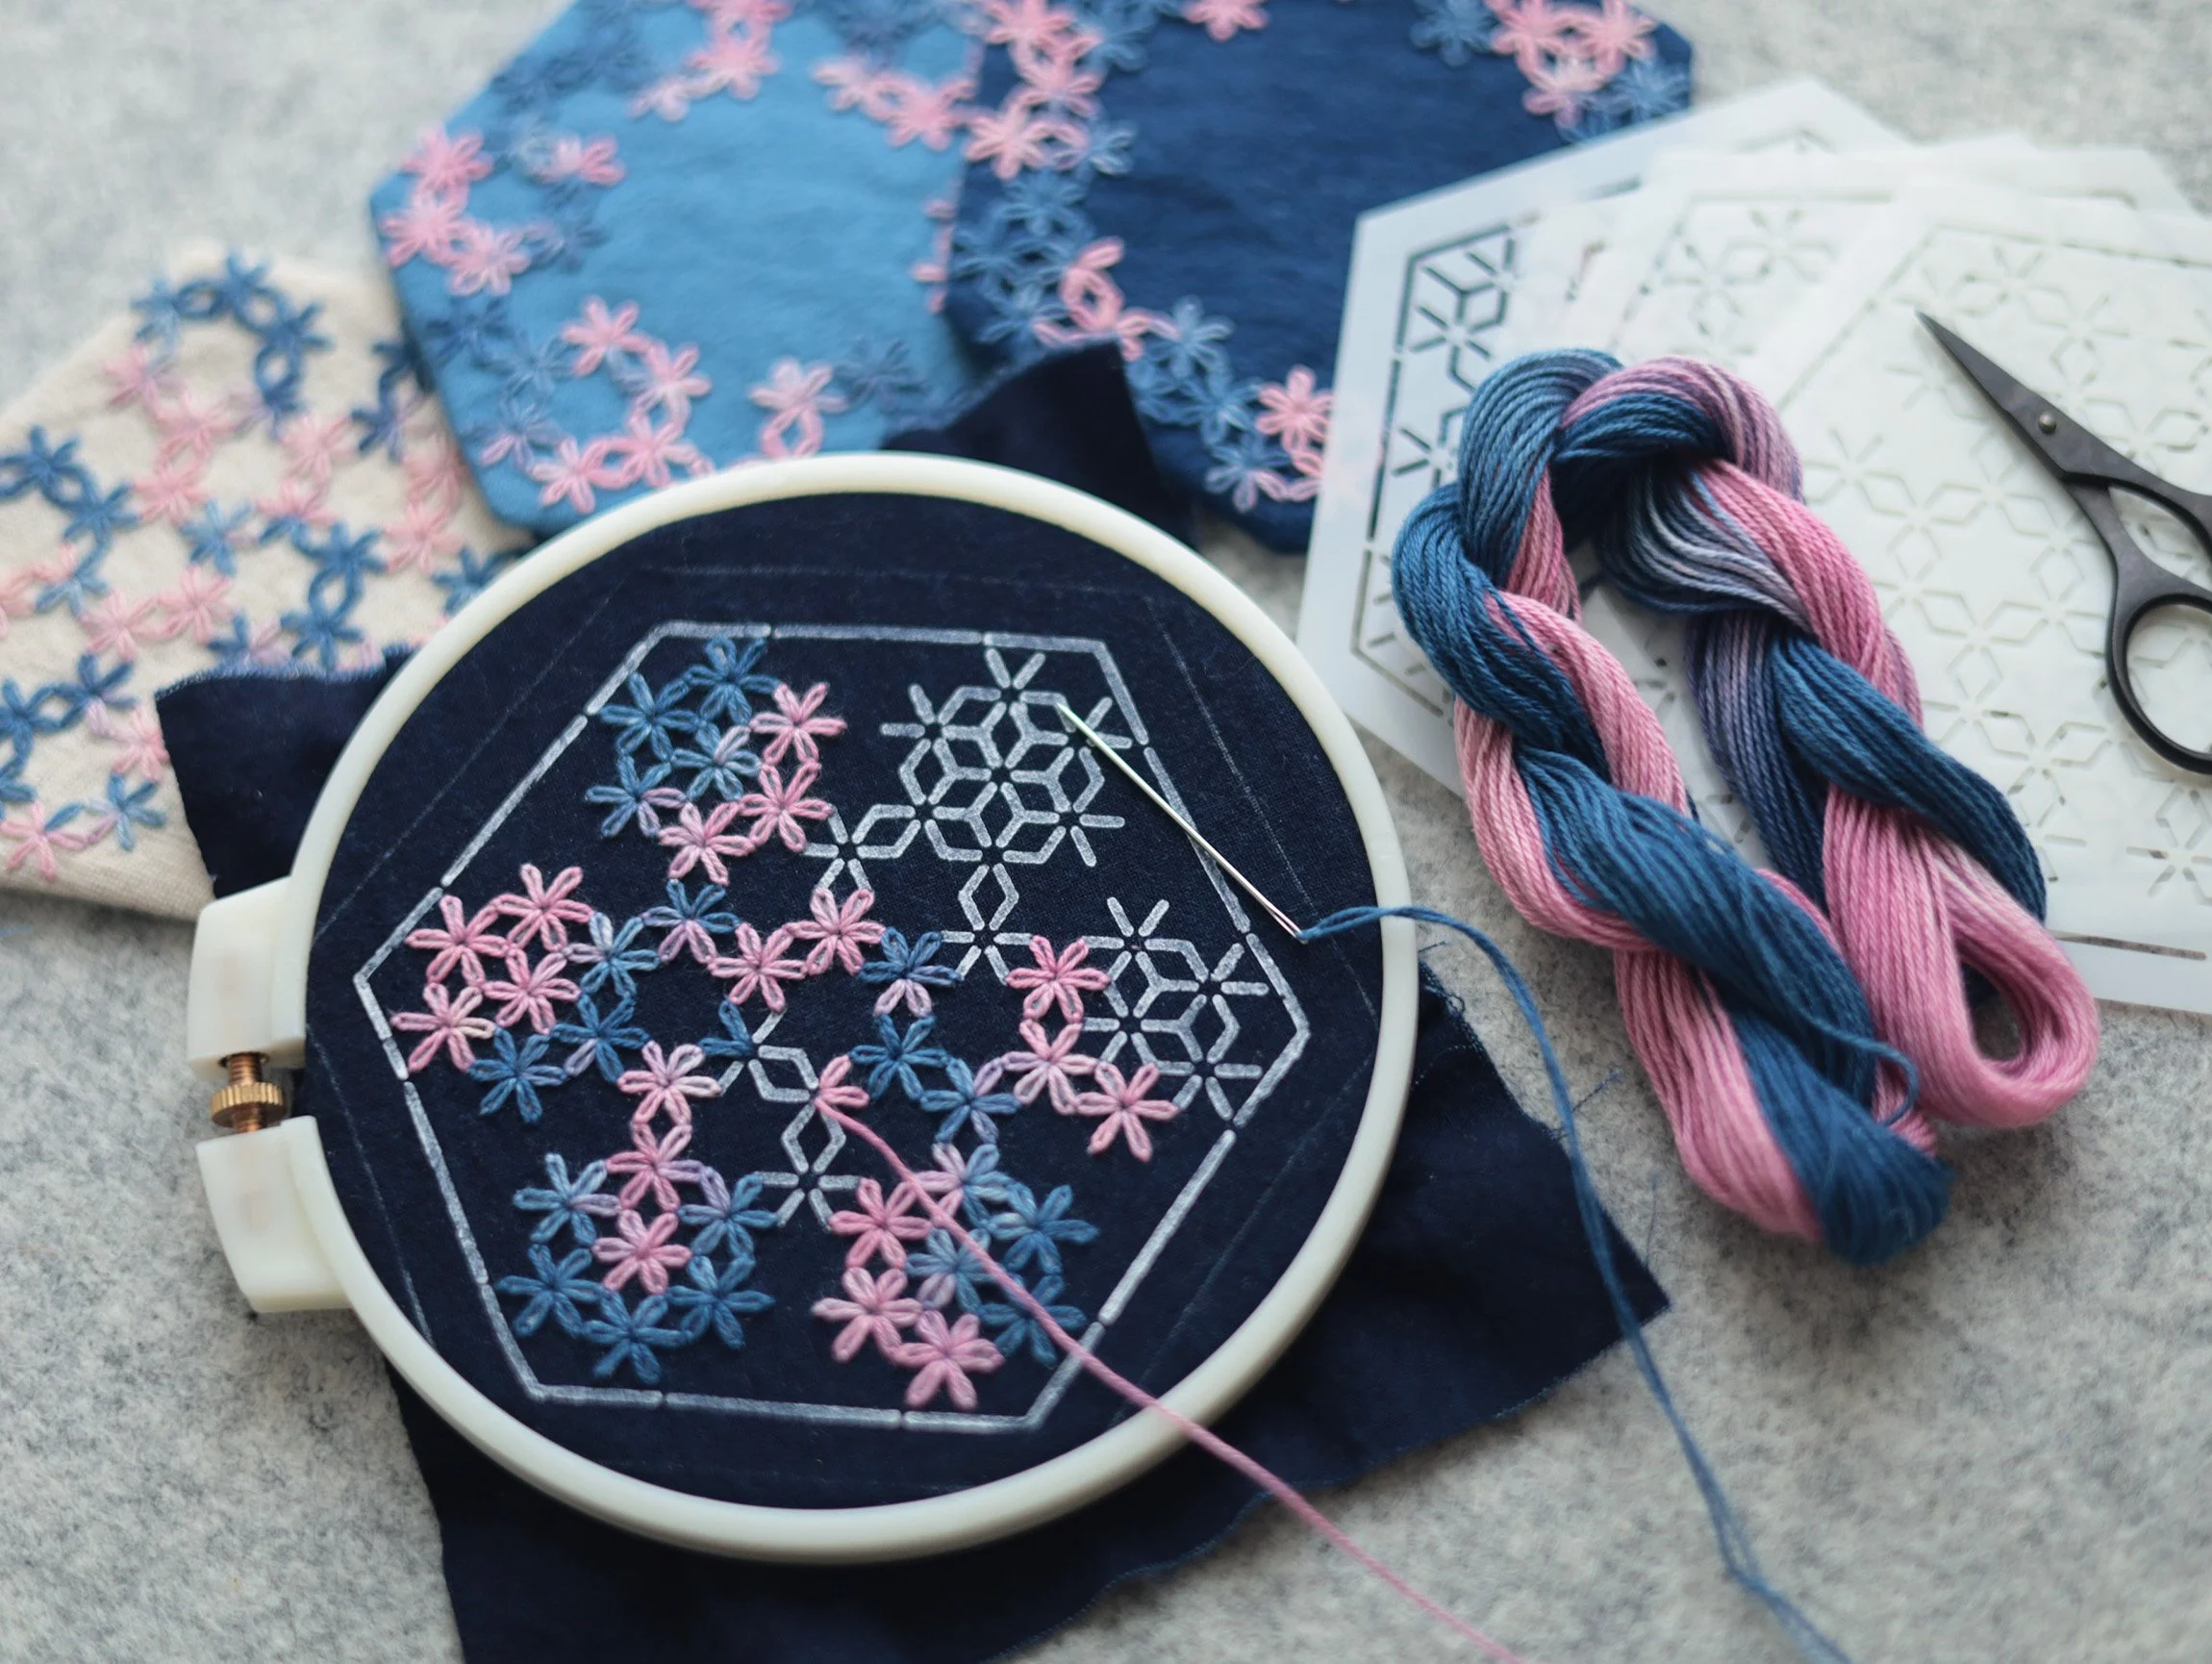
Hexi Daisy Sashiko Style Coaster (or Placemat) Tutorial
This tutorial demonstrates how to make the Sashiko style Hexi Daisy coasters shown in the cover photo. The same method can be used to create coasters or placemats with any of our other stencil designs.
Before You Begin
Interfacing: There are many different types of interfacing available. For coasters and placemats, we recommend using fusible fleece. Choose the thickness and texture that best suits your preference and the look and feel you would like your coaster or placemat to have.
Sewing Method: The sewing method may vary depending on the type of fleece interfacing you use. For the coasters in this tutorial, we use a medium-weight fusible fleece interfacing with a structured texture (slightly stiff), and demonstrate a sewing method that is well suited to this type of interfacing. For light-weight, thin and soft fleece interfacings, please refer to the sewing method in our general Sashiko Coaster Tutorial.
Fabrics and Thread: Medium-weight woven cotton or linen fabric and medium-weight Sashiko thread. You will need 7~9 m of Sashiko thread for each coaster.
We used variegated plant-dyed Sashiko thread (LE27) and indigo plant-dyed fabrics for our coasters. Feel free to choose any other colour combination for your thread and fabric to suit your own style.
Embroidery Hoop: You will need an embroidery hoop approximately 11 cm (4½ in) in diameter for this project. Using a larger hoop will require a larger piece of main fabric, while a smaller hoop will need to be repositioned during embroidery to cover the entire pattern.
Embroidery and Sewing Tutorial
1. Cut fabric pieces: For each coaster or placemat, you will need one piece of main fabric for the top side where the stitching is done, one piece of lining fabric for the back, and one piece of fleece interfacing. We use the same fabric for both the main and lining pieces.
Cut all fabric pieces into squares slightly larger than the stencil, including seam allowance. For this stencil set, the inner hexagon outline marks the sewing line (i.e. the finished size of the coaster), while the outer edge of the stencil indicates the seam allowance.
Note: For the main fabric pieces, also make sure they are large enough to fit your embroidery hoop.
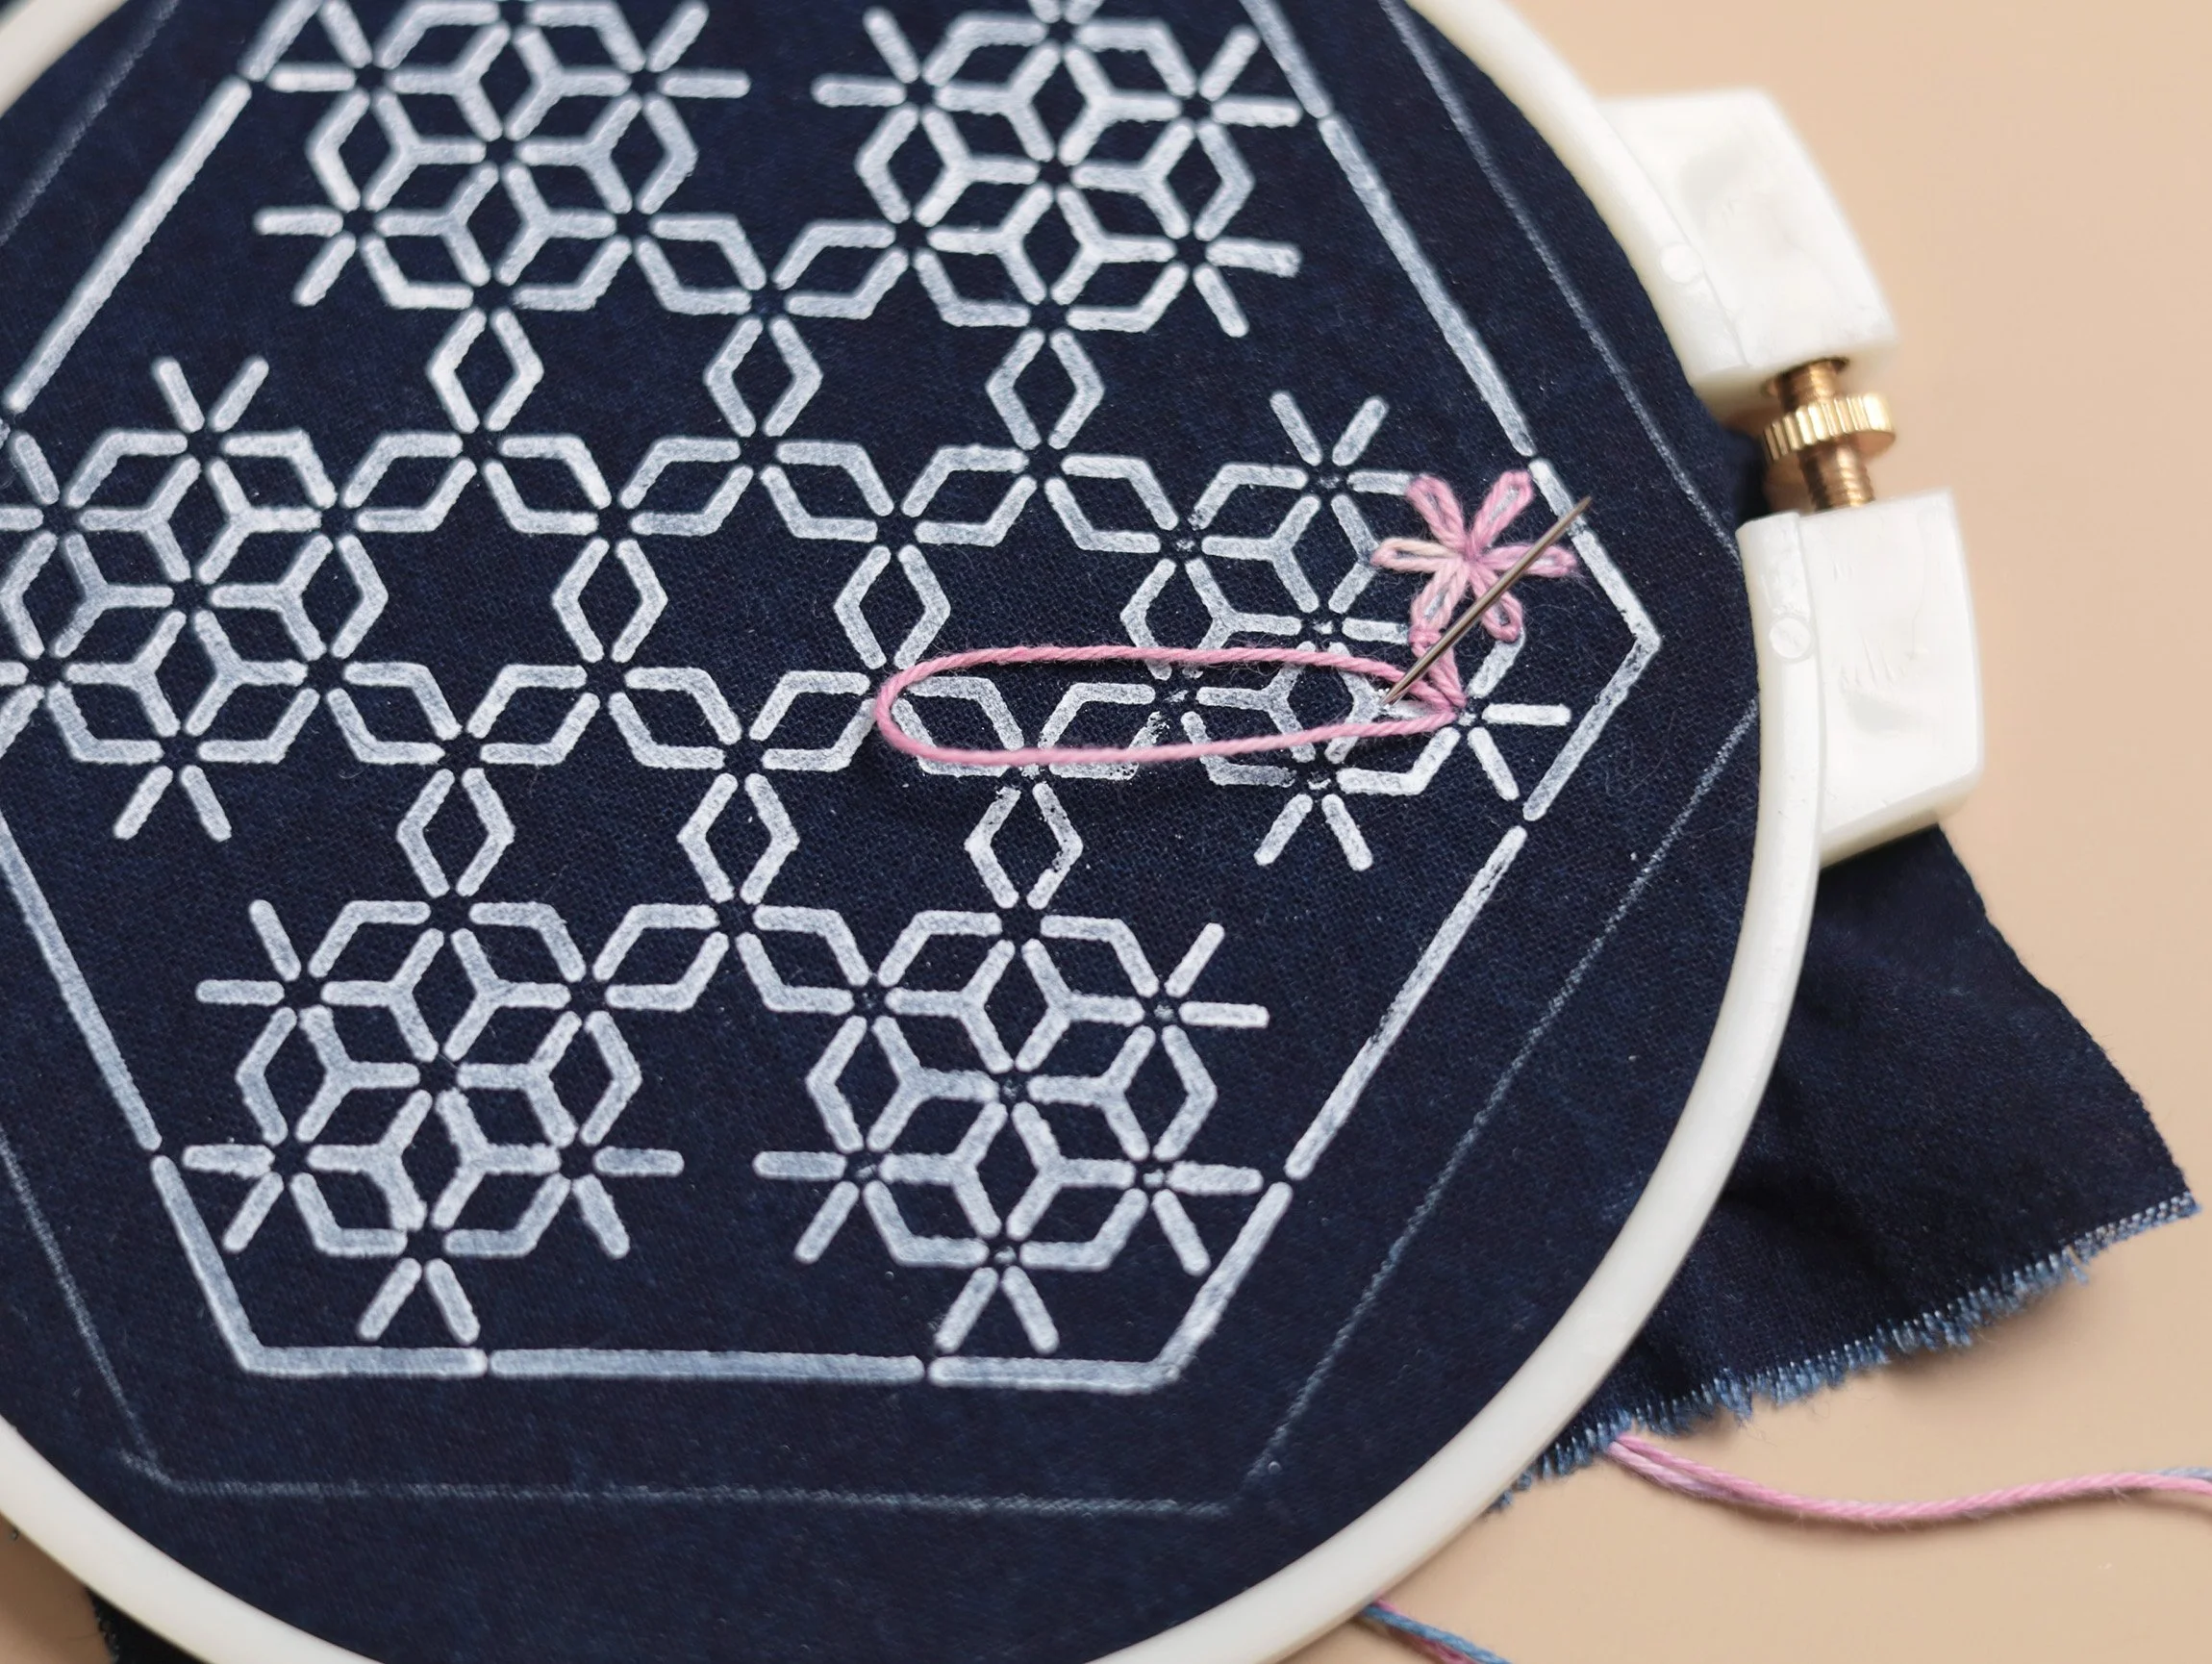
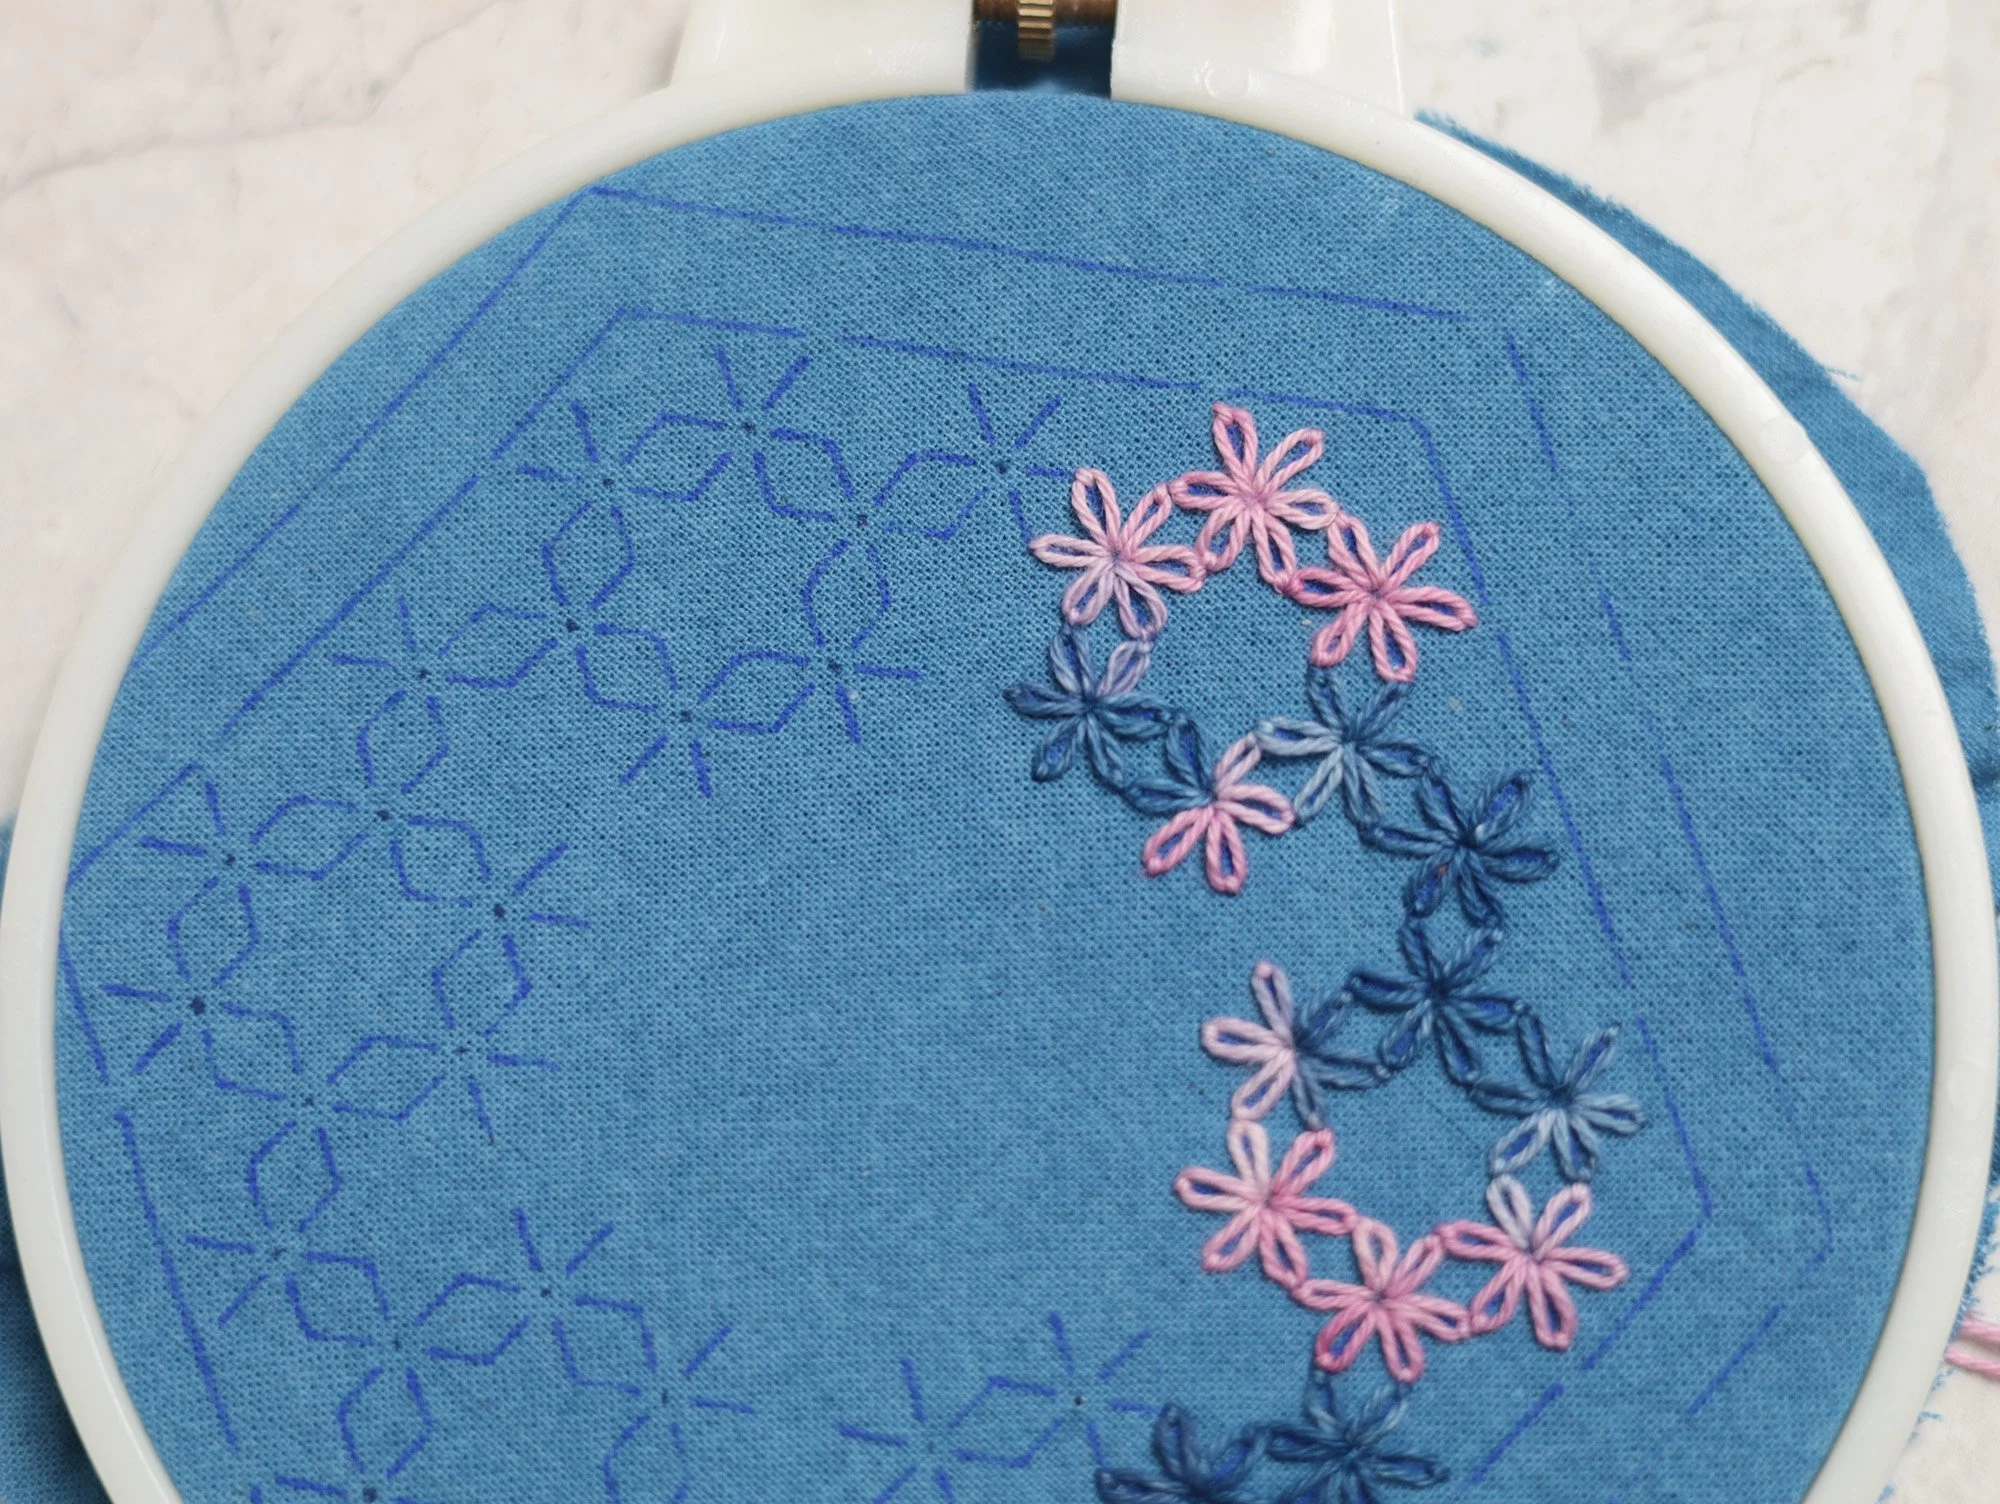
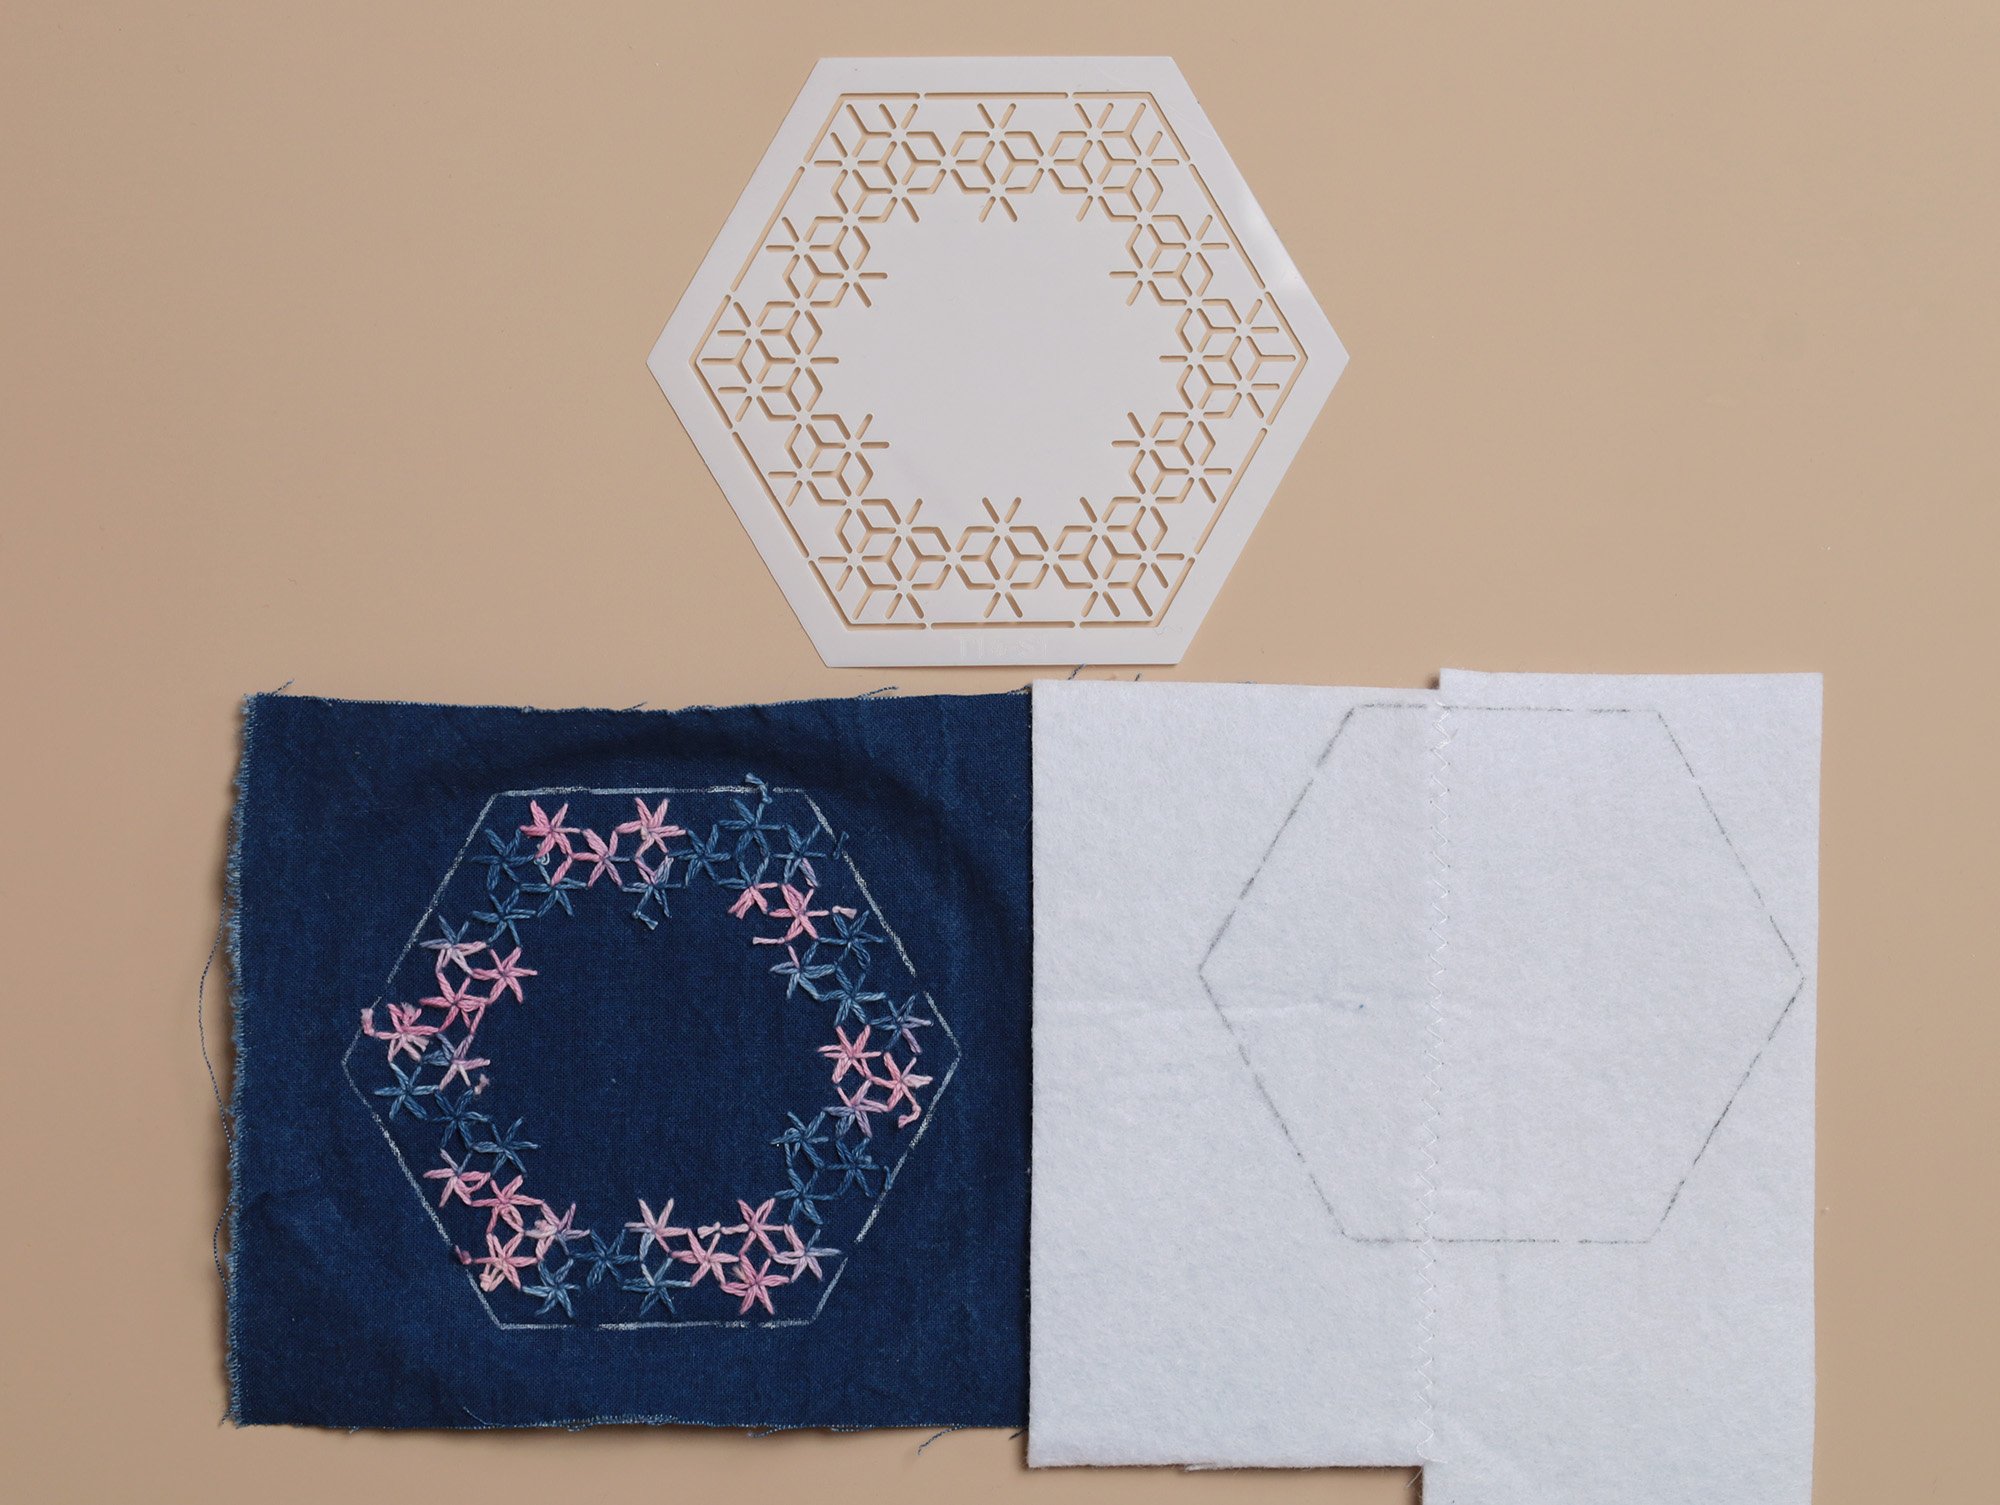
2. Transfer pattern: Center the stencil and transfer the pattern onto the right side of the main fabric using a heat-erasable pen or cream. (Heat-erasable pens/refills are suitable for tracing the outline of the stencil and simple patterns with continuous lines. For more complex patterns with many short lines, applying heat-erasable cream with a toothbrush is much quicker.) Leave enough space for seam allowance around the stencil outline. (Although we did so as shown in the photo, it is not essential to trace the stencil outline.)
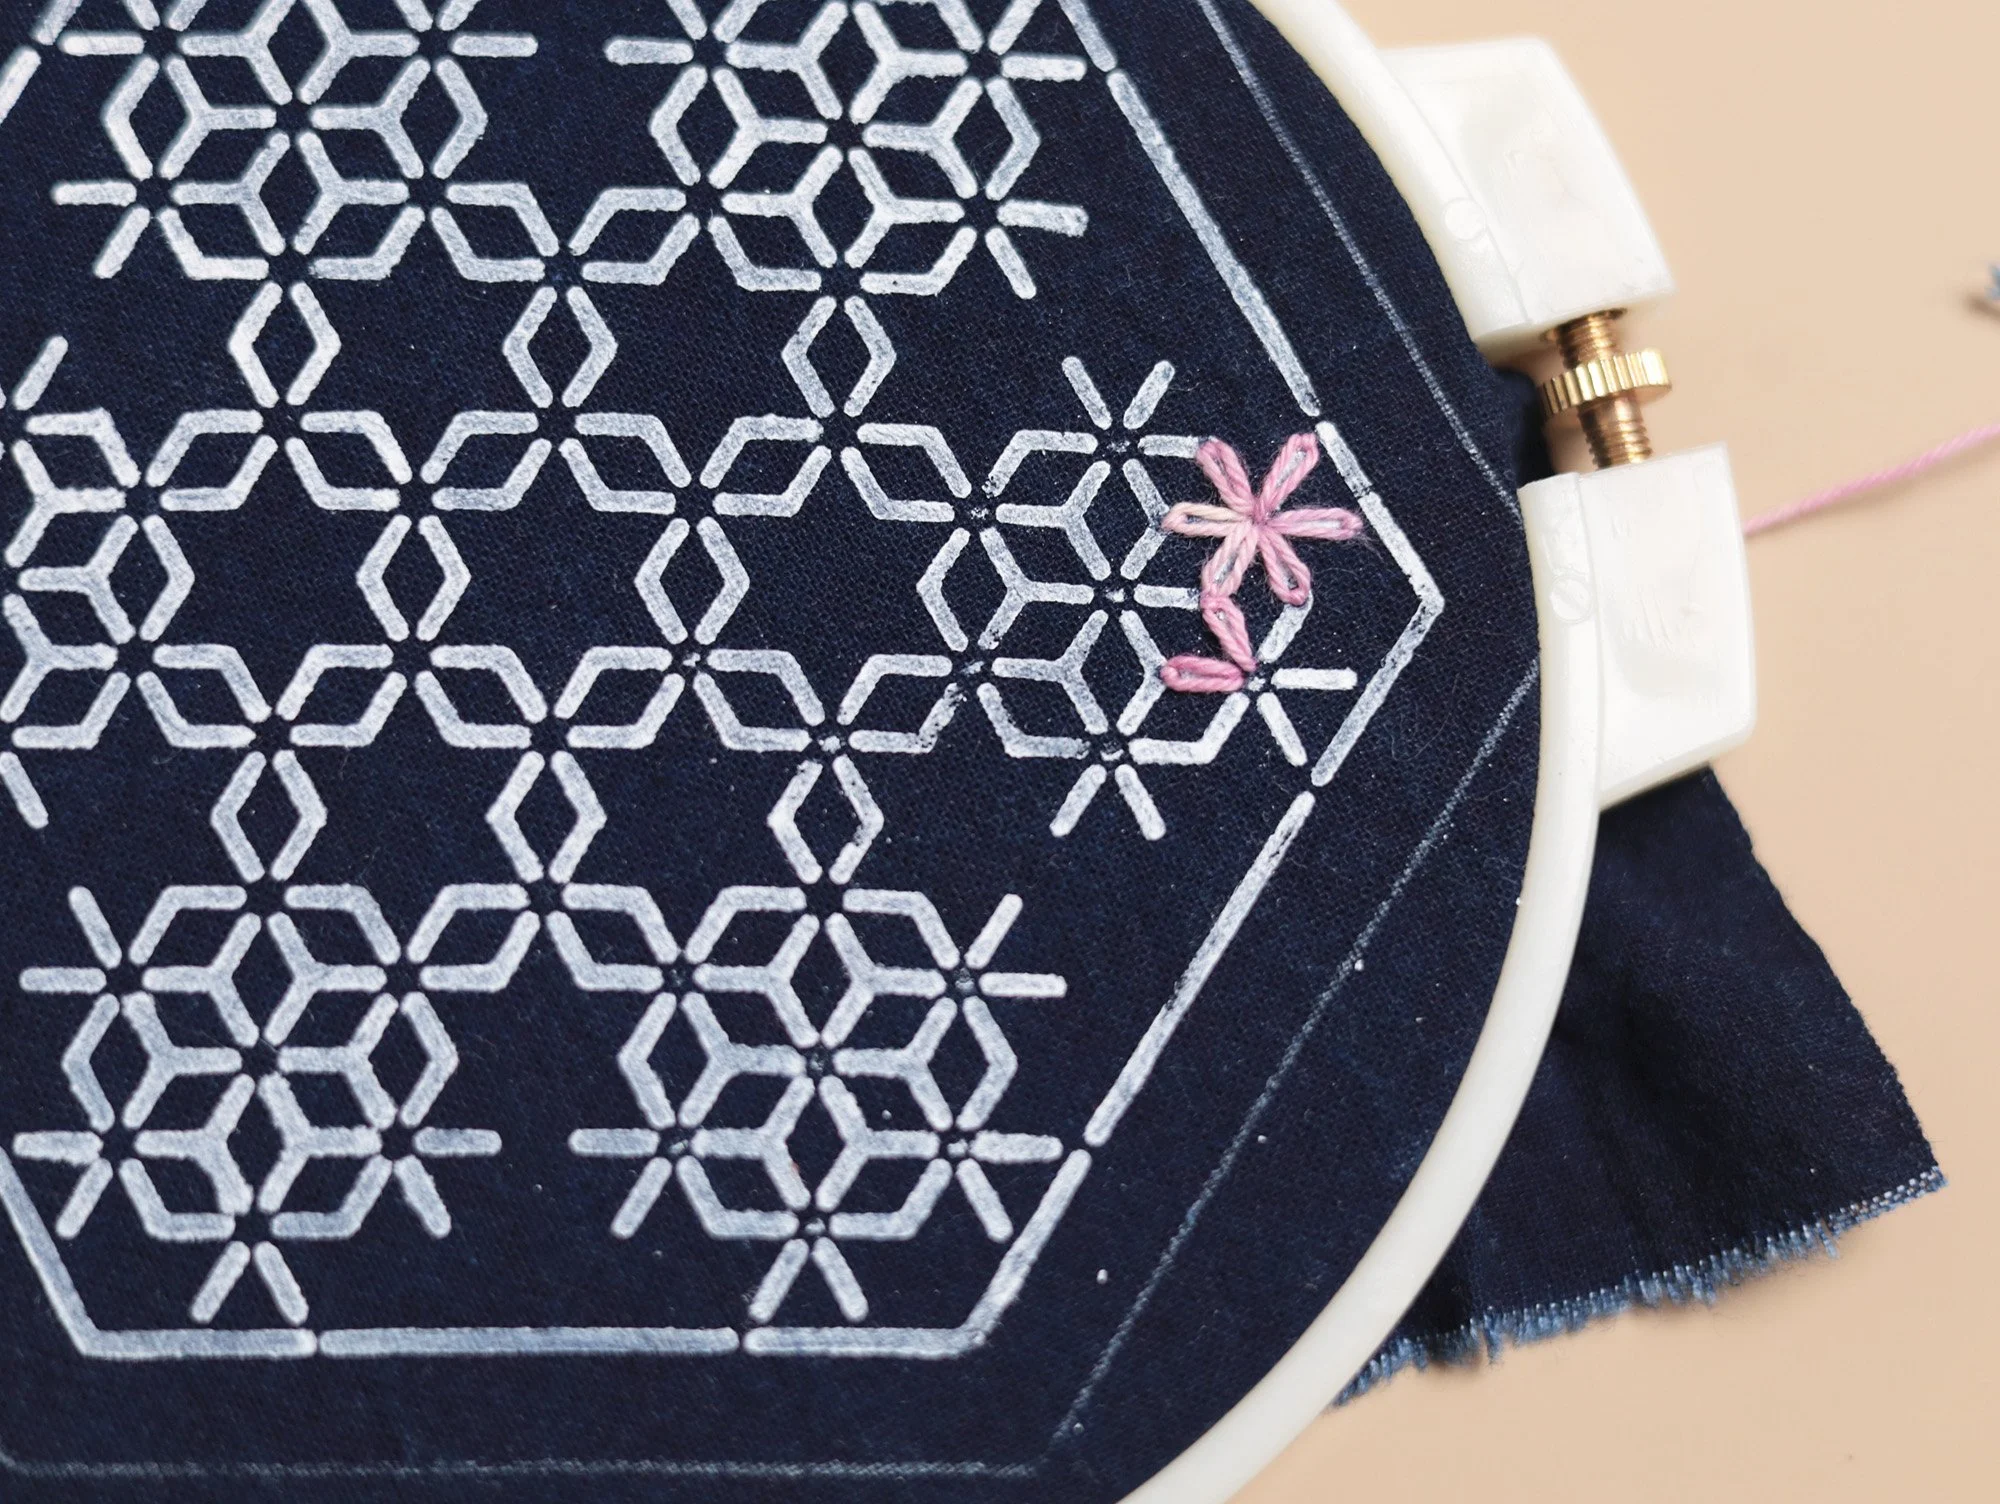
For this project, we recommend using a fine-tip heat-erasable pen to trace the pattern on light-coloured fabric (see photo), and white heat-erasable cream to transfer the pattern onto dark fabric (see photo in step 3).
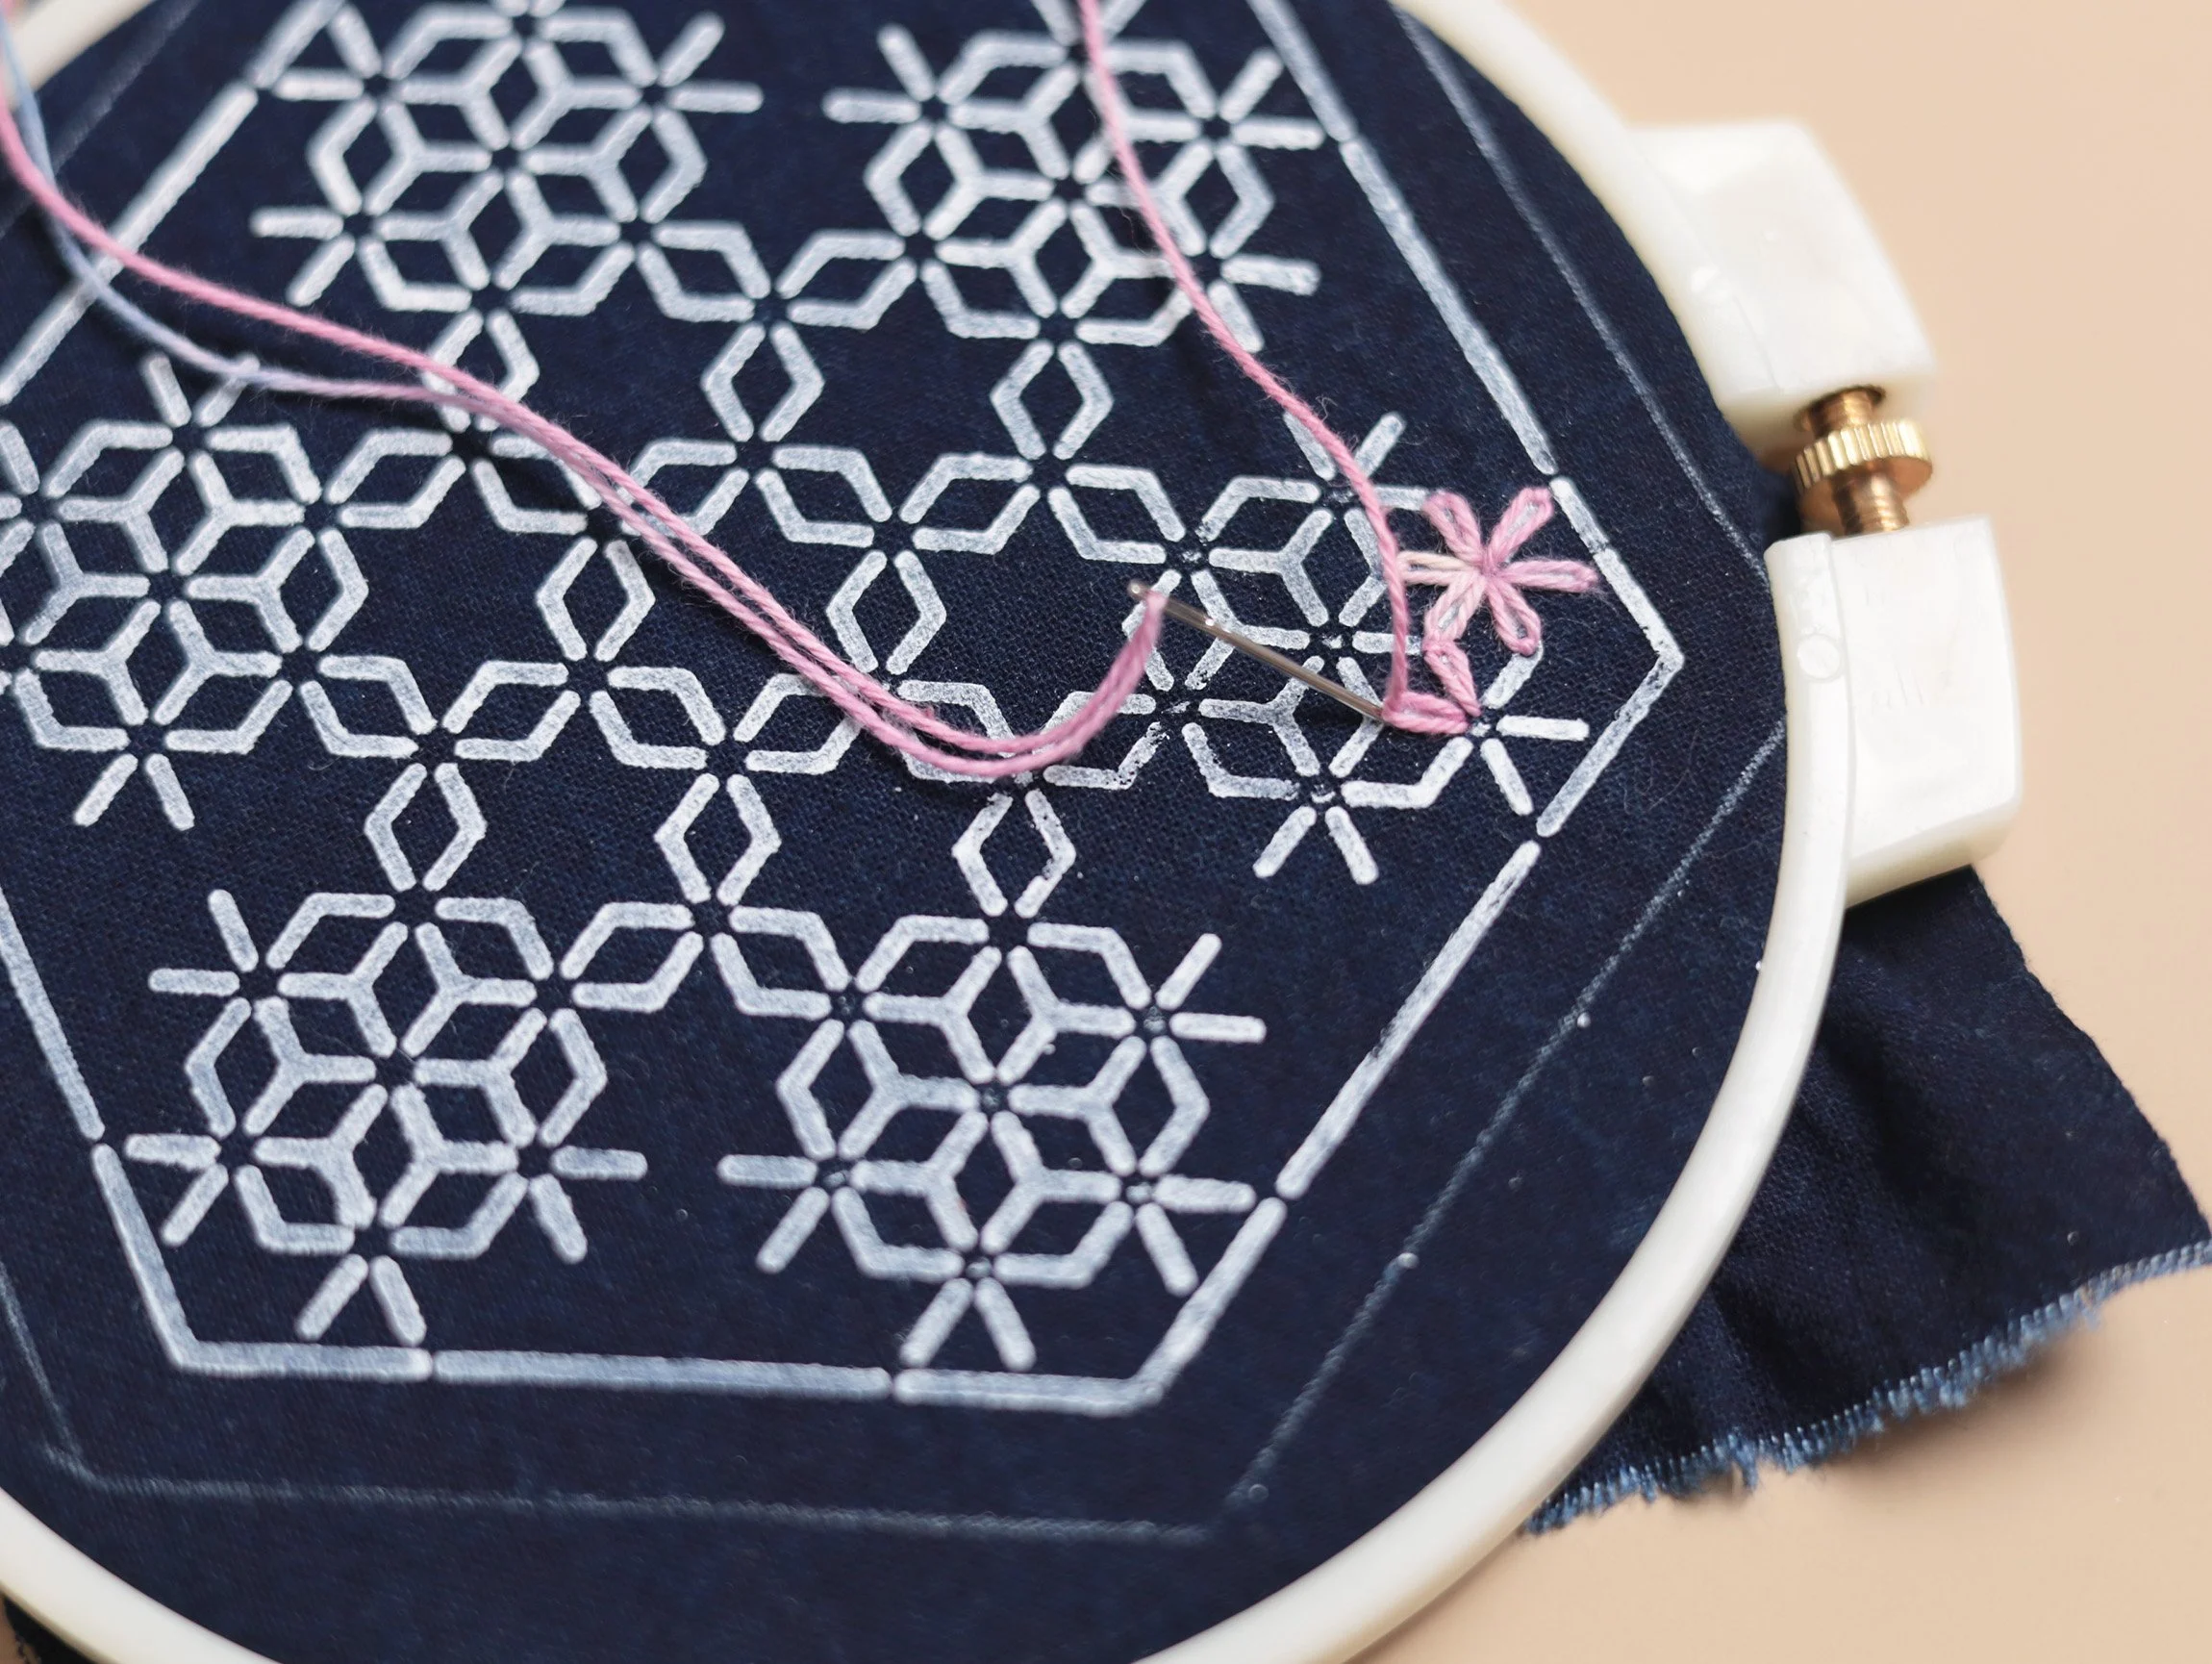
3. Embroidery: Although the design features sashiko patterns, lazy daisy stitch is used throughout instead of the traditional Sashiko running stitch.
Each flower has six petals. Stitch each petal using lazy daisy stitch. Complete the flowers one by one.
(If the distance to the next flower is too great (more than 1 cm), it is better to finish off the thread and start again.)
Lazy Daisy Stitch: Bring the needle up just beside the flower centre on the petal line, rather than directly at the centre, to avoid concentrating too many stitches in one spot. Insert the needle back down at the same point and pull the thread through, leaving a loop on the right side of the fabric. Bring the needle up very close to, but not exactly at, the other end of the petal line. Pass the thread through the loop, and insert the needle on the other side of the loop to secure it (this time at the end point of the petal line).
If two or three petals meet at one point as shown in the photo, leave some space for the other petals.
4. Sewing (for medium/thick, stiff fleece interfacing)
(If you are using thin, light-weight and soft fleece interfacing, please refer to step 4 in the Sashiko Coaster Tutorial. )
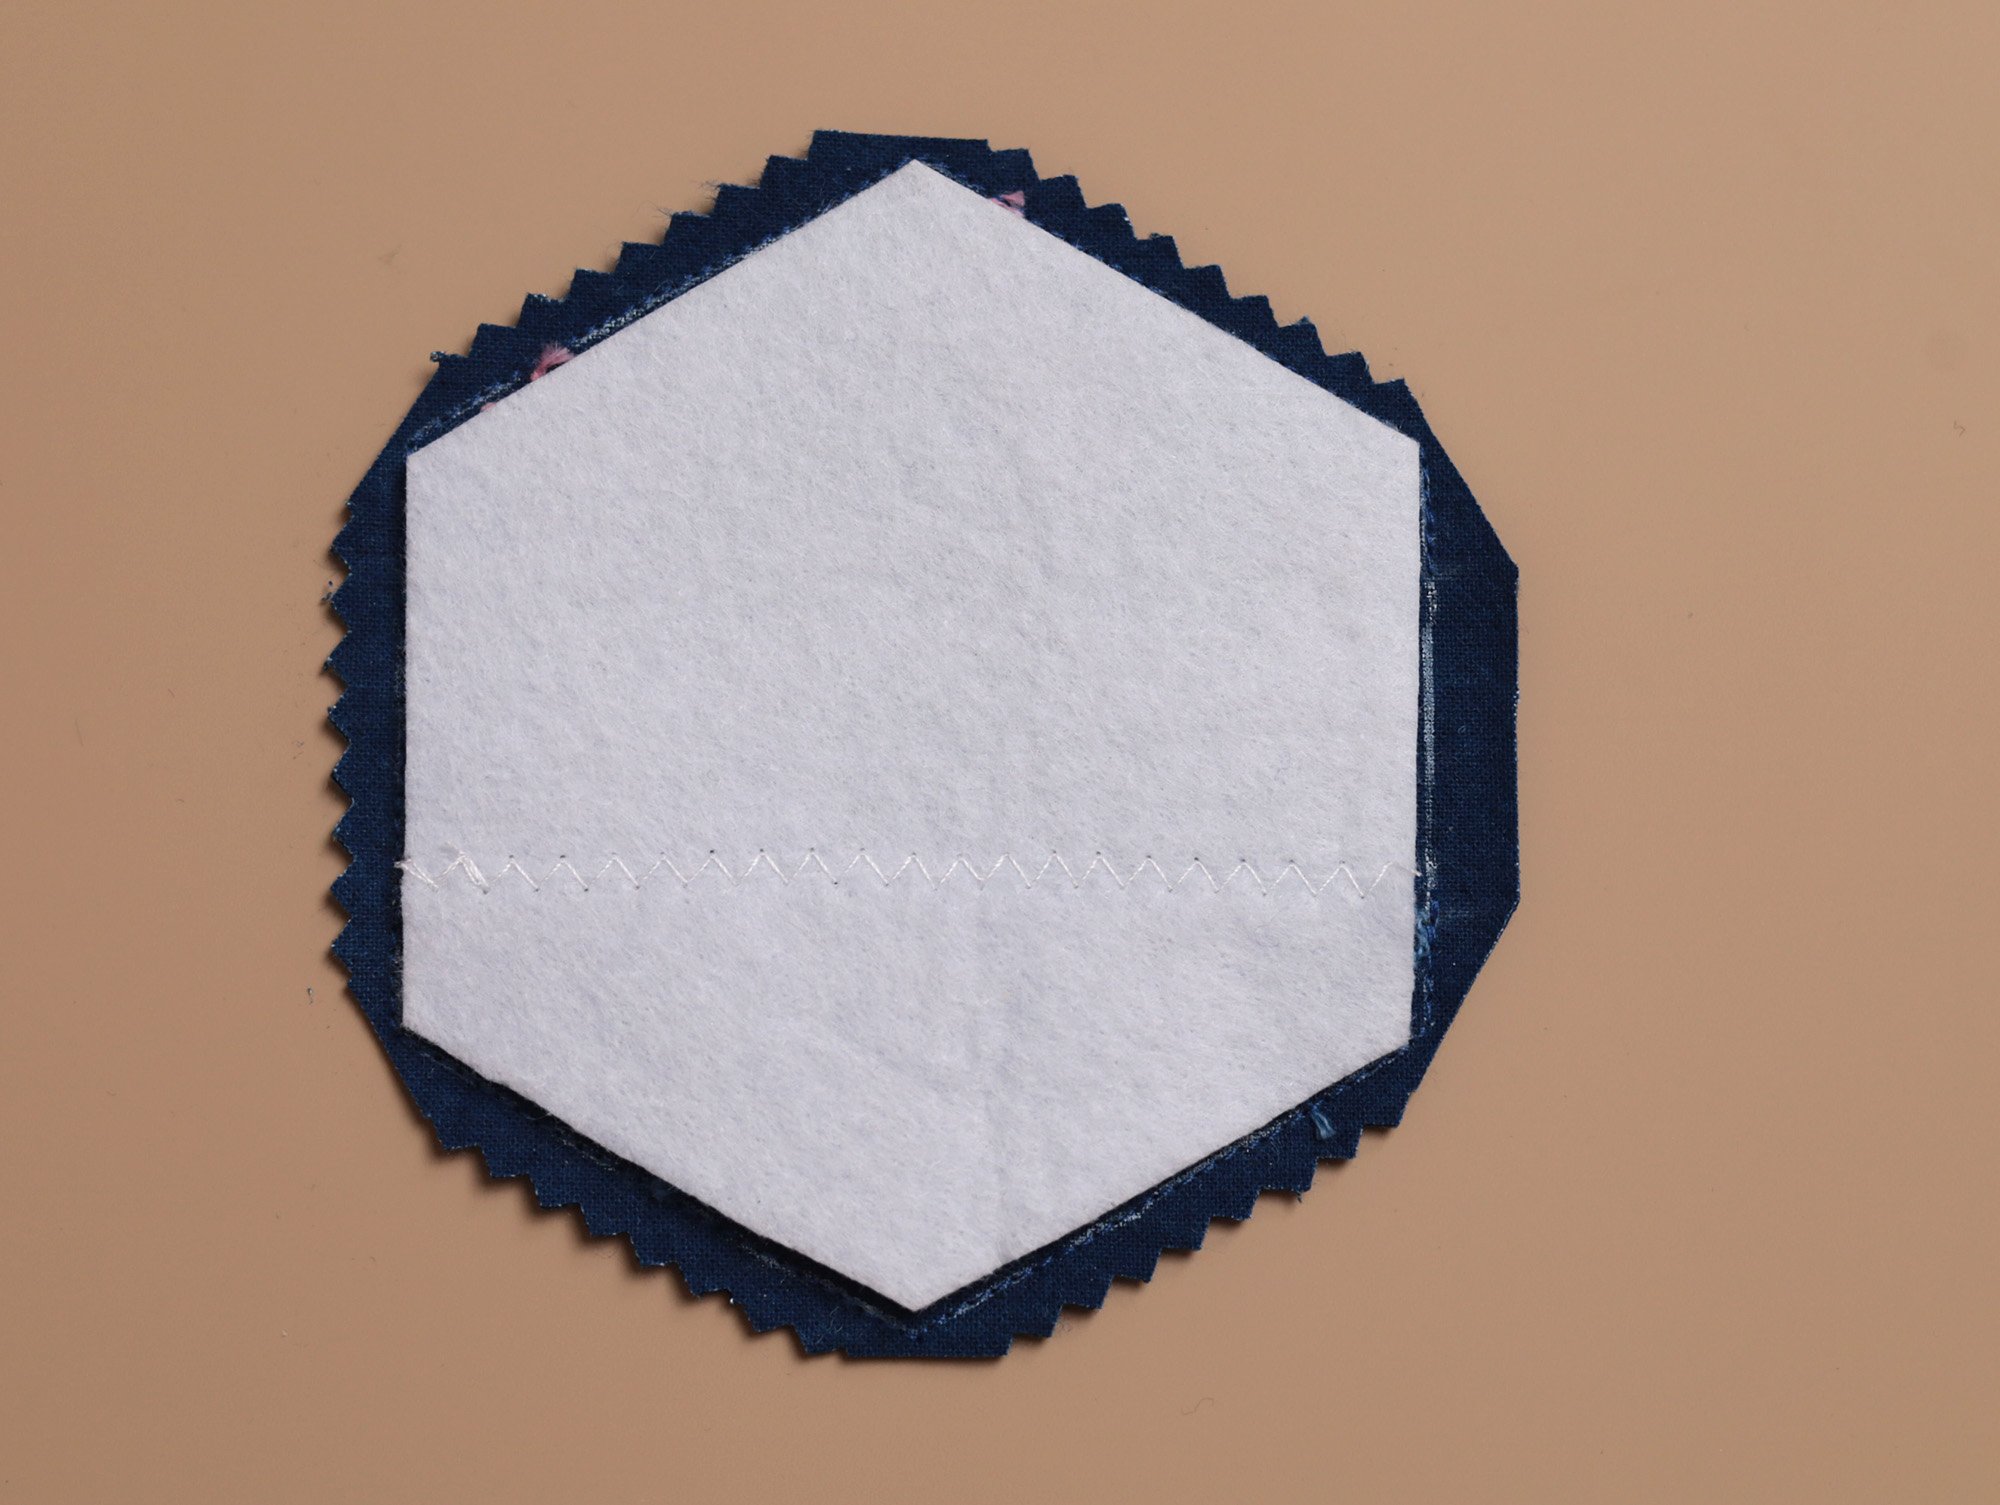
For medium-weight, thick or stiff interfacing, first trace the sewing line (i.e. without seam allowance) from the stencil onto the interfacing, then cut 1–1.5mm inside the traced line.
(Tip: As you can see from the photo, I used scrap pieces of interfacing and stitched them together to make a larger piece.)
Trace the sewing line onto the wrong side of the main fabric:
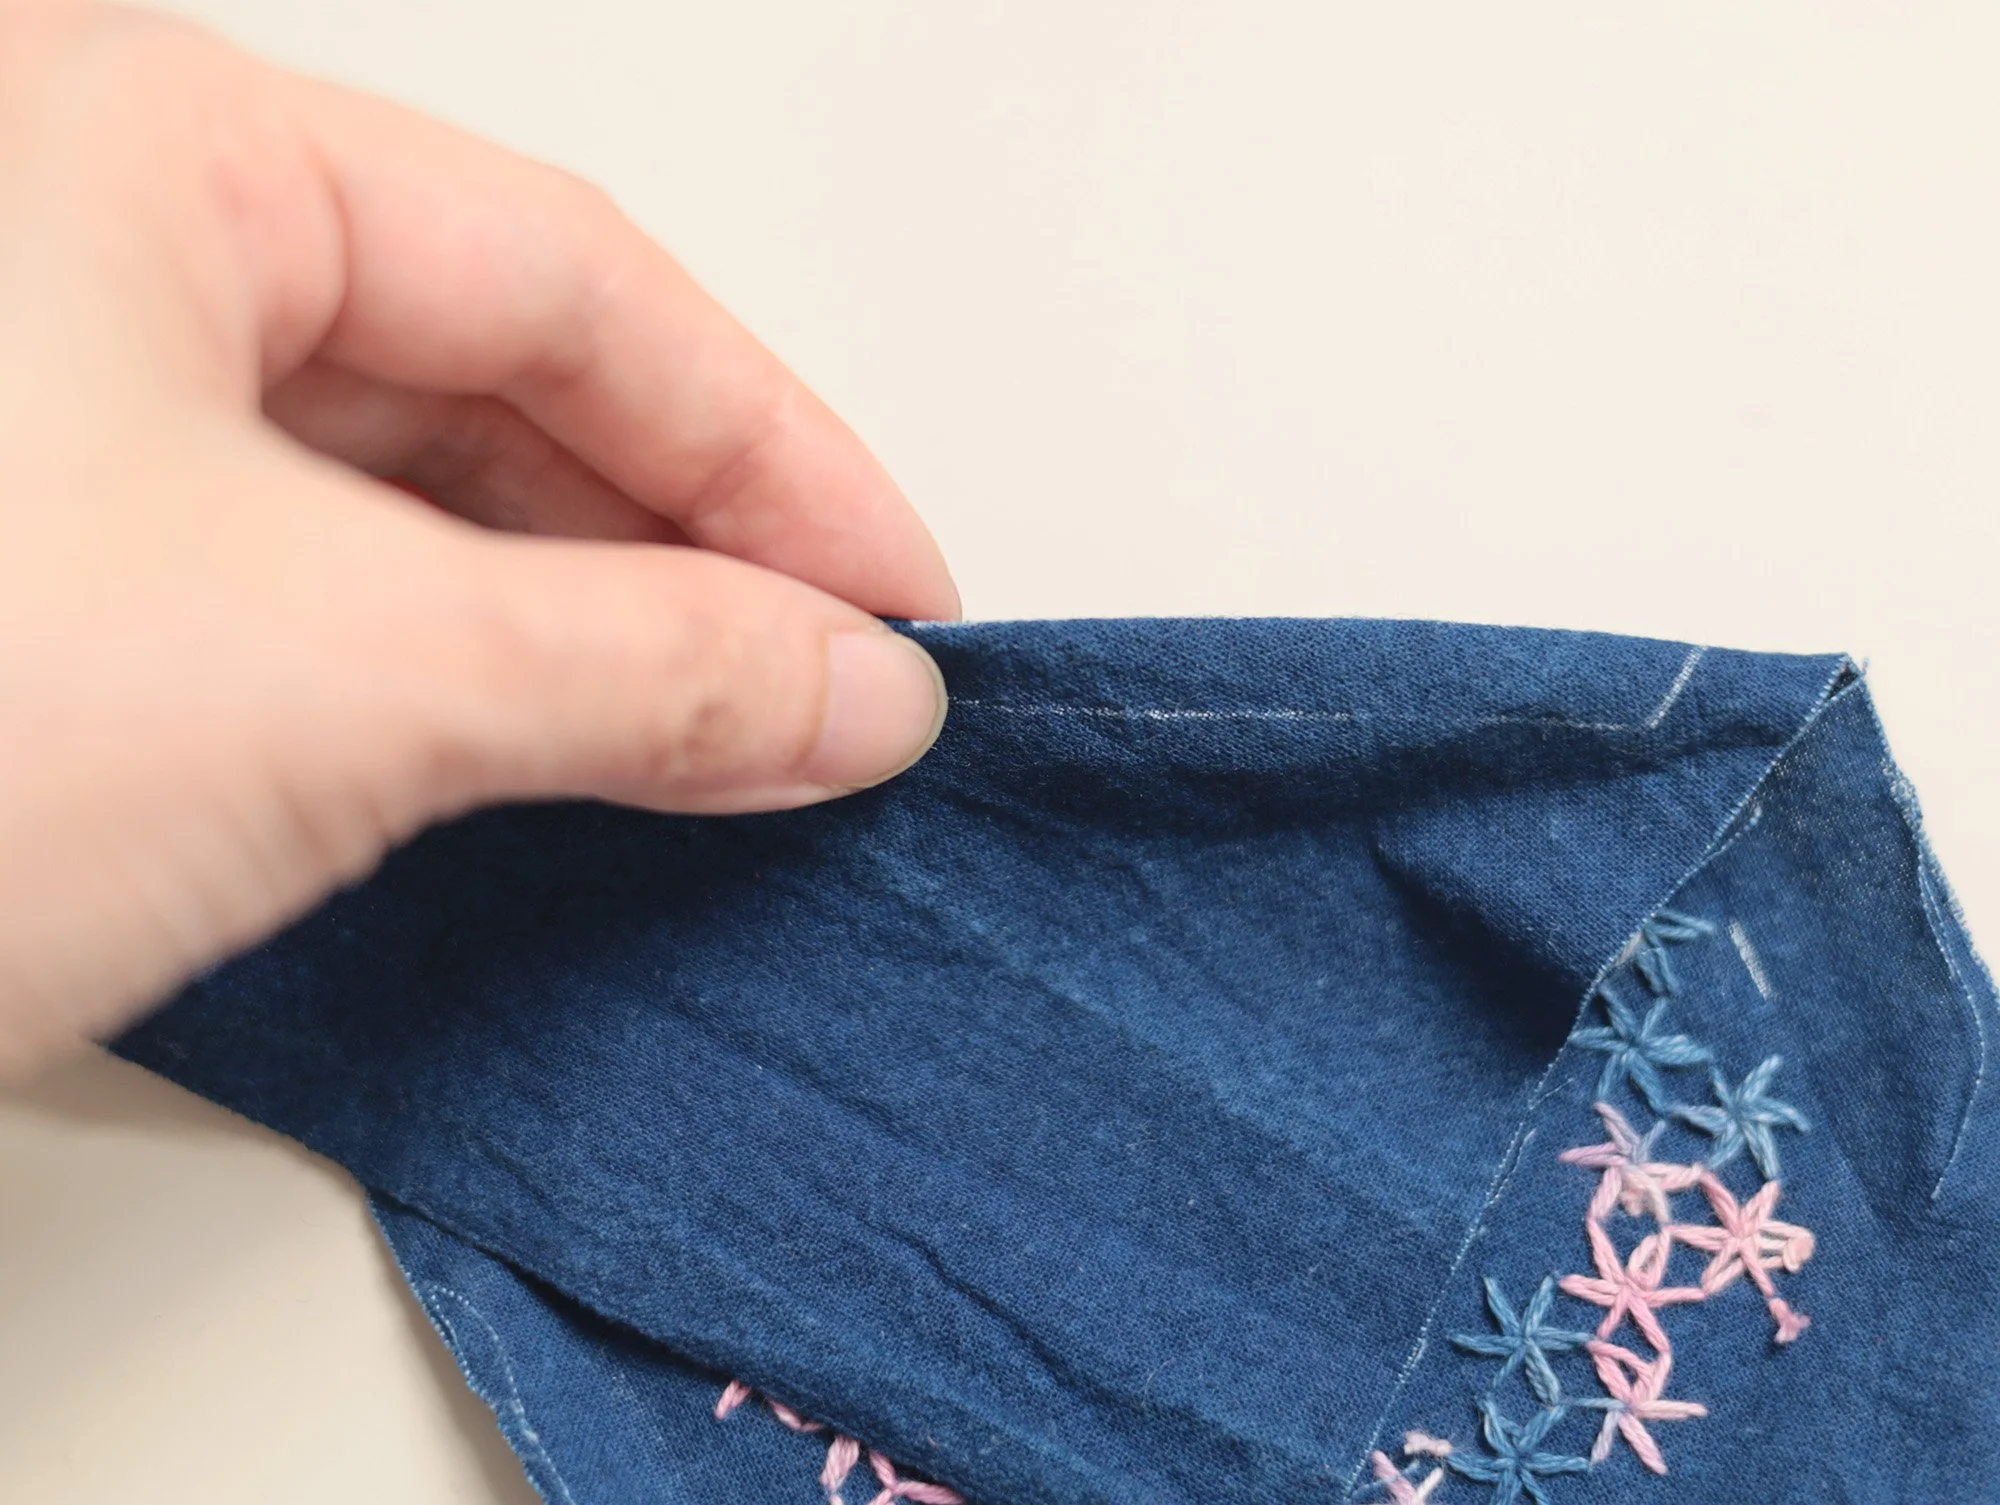
For light-coloured and thin main fabric, hold it against a light source (e.g. a window) and trace the sewing line onto the wrong side.
For thick or dark-coloured fabric, fold it along the sewing line, gently crease it with your fingernail, then trace along the crease on the wrong side. Repeat this to trace one or two short lines on each side of the hexagon, then use the stencil to complete the outline.
Place the interfacing on the wrong side of the main fabric, centered within the sewing line. Its edge should sit 1–2 mm inside the sewing line. Pin in place if preferred. Then iron from the right side of the main fabric to fuse the interfacing. (If preferred, you can also do the step below first before fusing on the fleece interfacing.)
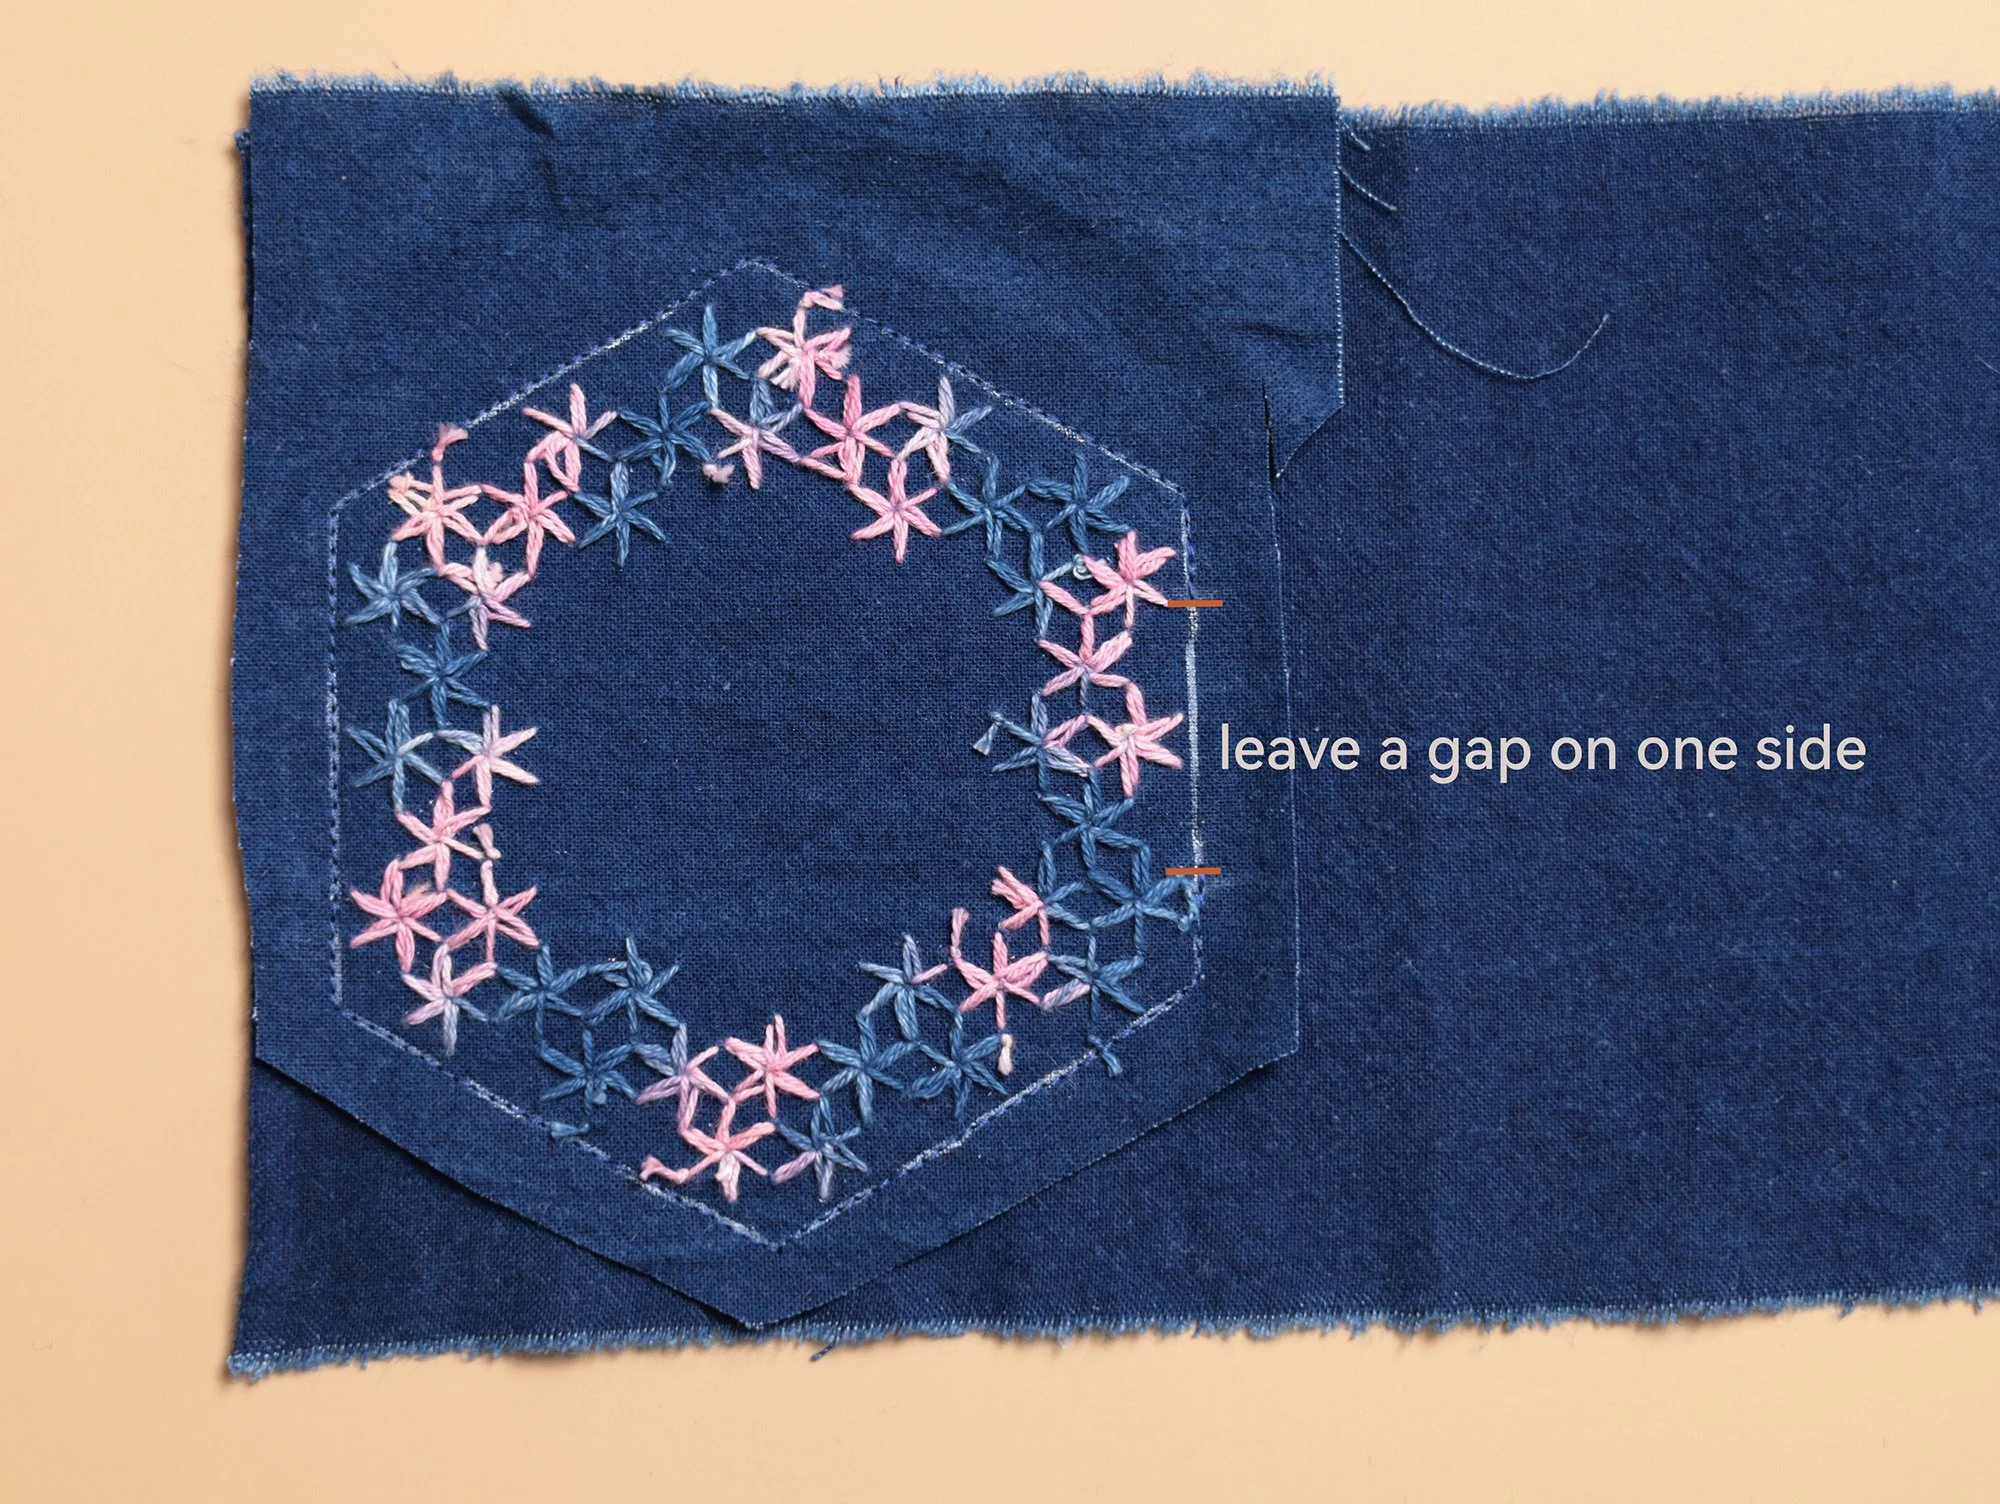
Place the main and lining fabrics right sides together. Sew along the sewing line, leaving a gap of approximately 4 cm for turning on one side.
Trim the seam allowance to 3–5 mm using pinking shears, or clip along the edge about 2 mm from the sewing line. Clip the seam allowance at the corners (also 1-2mm from the stitching lines).
Note: Leave a 5–8 mm seam allowance at the turning gap.
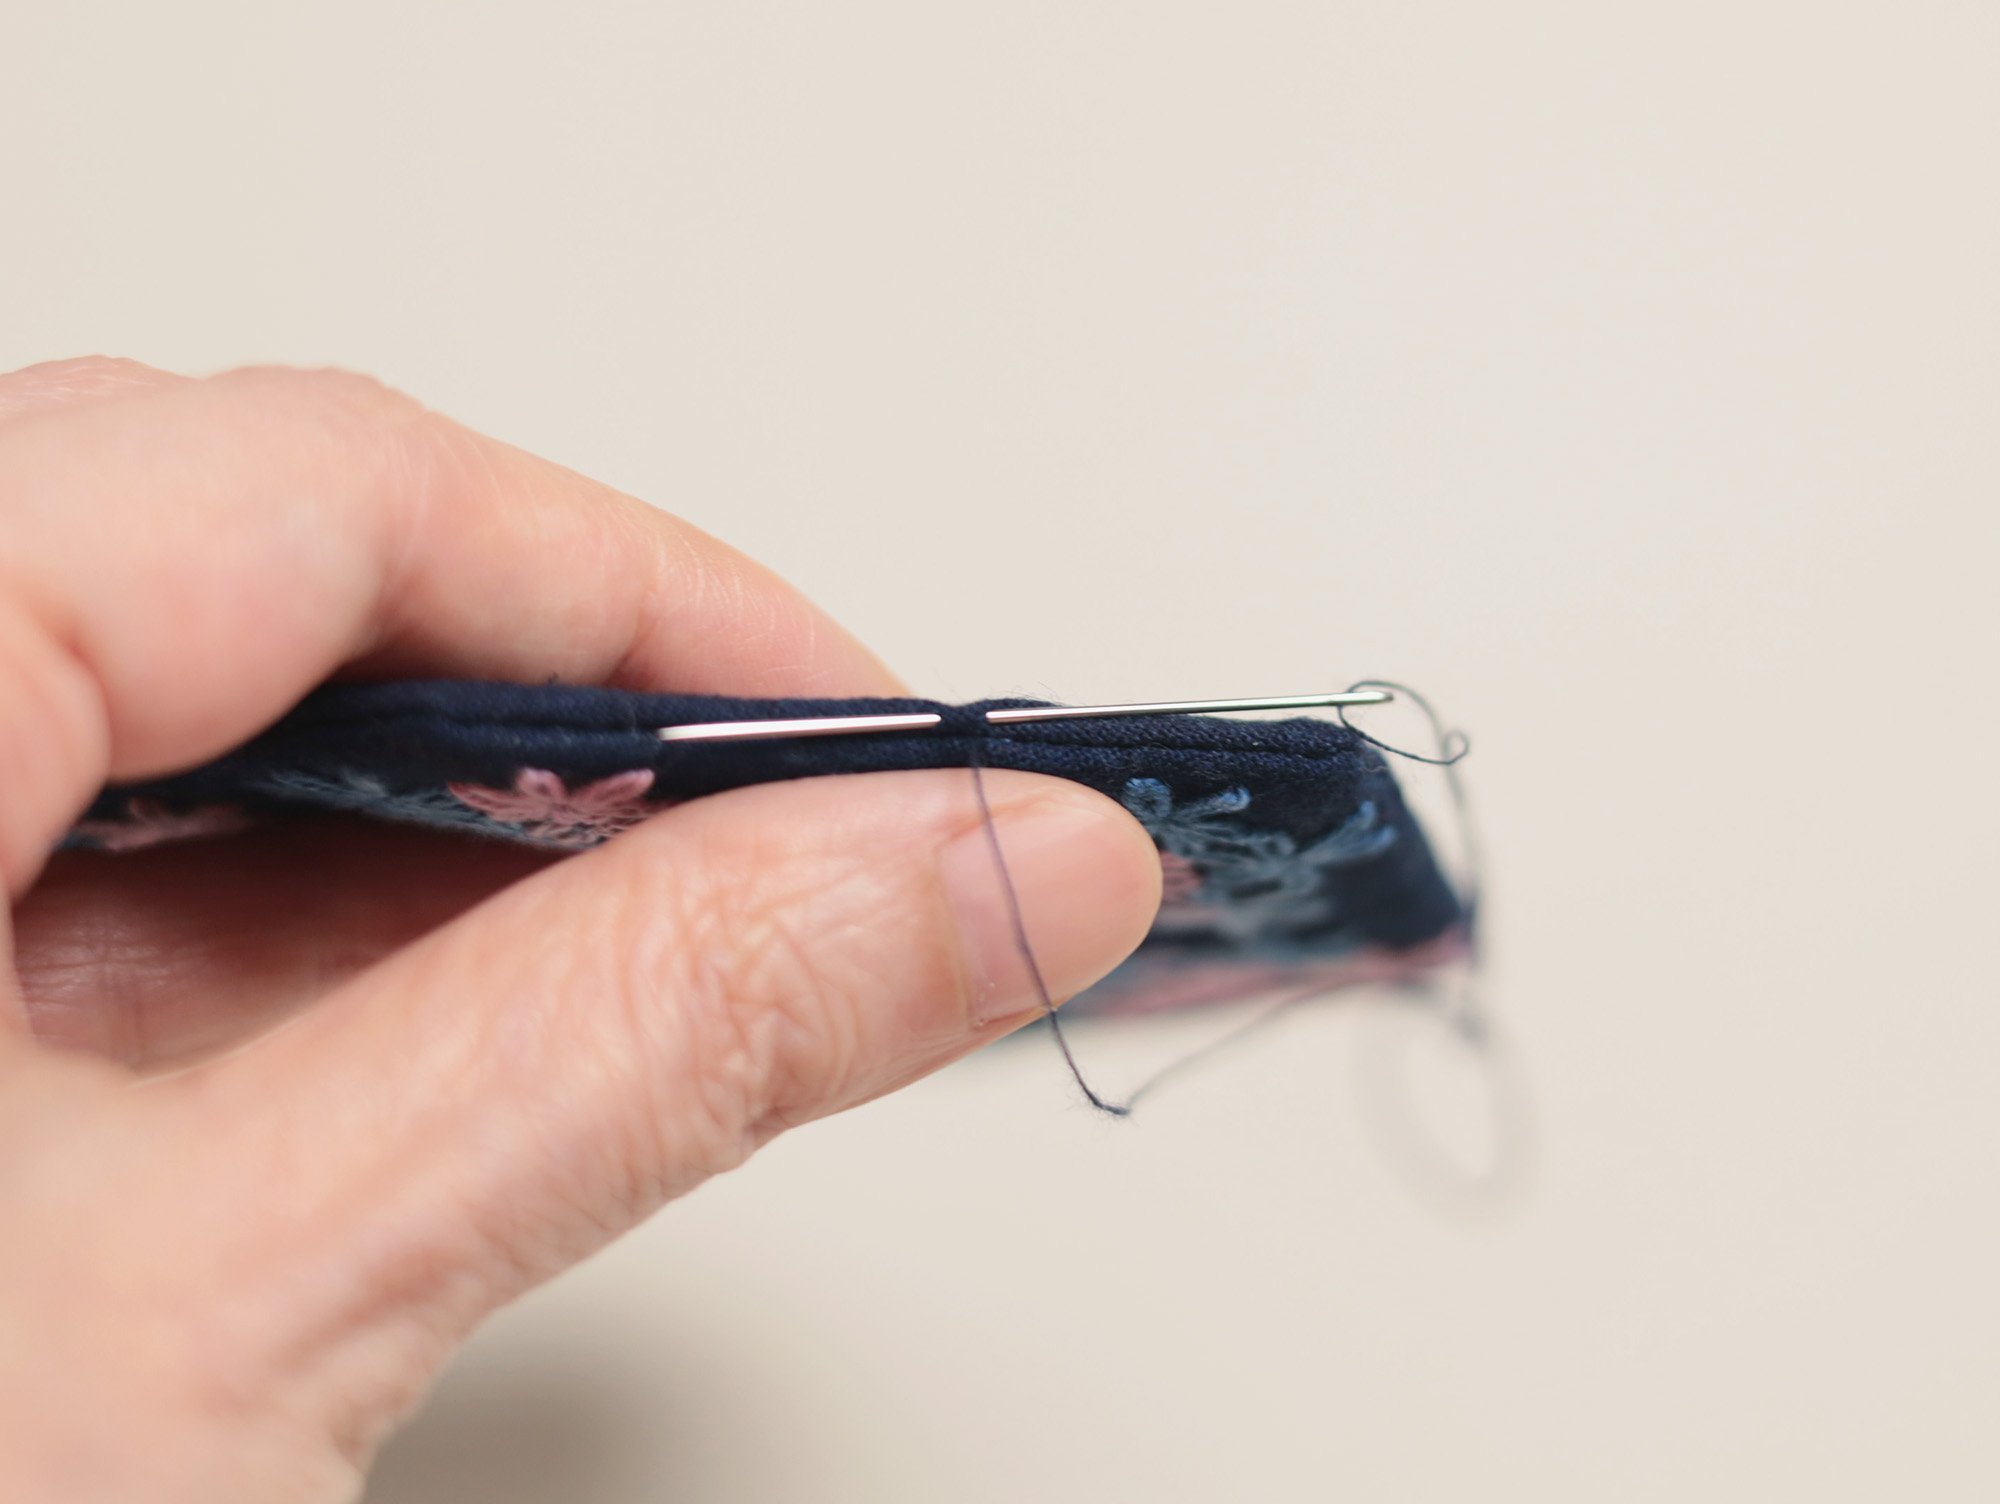
Separate the main and lining at the gap and turn the coaster right side out. Shape it, pick out the corners with a needle, close the gap with ladder stitch (hidden stitch), and press with a hot iron.
Congratulations! Your coaster is now completed!